
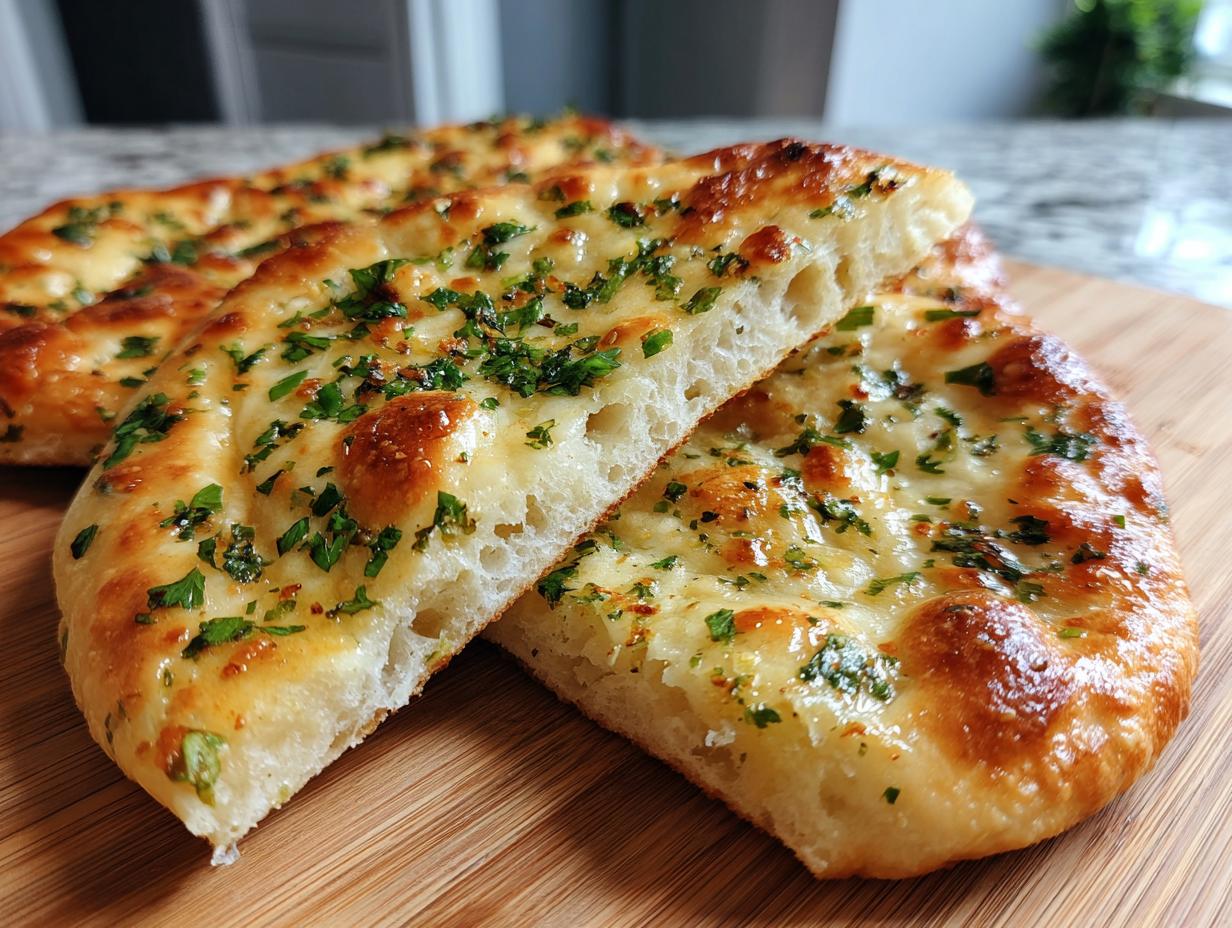
There’s just something so incredibly satisfying about pulling warm, fluffy garlic naan bread fresh off the stovetop, isn’t there? Especially when curry night rolls around – it’s the perfect chewy, garlicky hug for all those amazing spices. You know, I’ve always loved how Kate Reilly talks about the magic that happens in the kitchen, how understanding the ‘why’ behind a recipe, like why dough needs to rest, makes all the difference. Well, this easy naan recipe totally embodies that! We’re talking simple ingredients transforming into incredible homemade garlic naan bread that’s ridiculously easy to make right in your own kitchen. No fancy equipment, just pure, delicious comfort.
- Why You'll Love This Easy Naan Recipe
- Gather Your Ingredients for Garlic Naan Bread
- Step-by-Step Guide to Making Stovetop Naan
- Tips for Perfect Garlic Naan Bread
- Ingredient Notes and Substitutions for Indian Bread
- Serving Suggestions for Your Garlic Butter Naan
- Storage and Reheating Instructions
- Frequently Asked Questions About Garlic Naan Bread
- Estimated Nutritional Information
- Share Your Homemade Garlic Naan Bread Creations!
Why You’ll Love This Easy Naan Recipe
Listen, I know you want to make amazing Indian bread at home, and this recipe is your new best friend. Here’s why you’ll be hooked:
- Seriously Easy: It’s a total breeze to whip up this homemade garlic naan, even if you’re new to bread making.
- Incredible Flavor: That garlic butter? Pure magic. It makes this soft naan bread absolutely irresistible.
- Perfect for Everything: It’s the ultimate side for curry night, but honestly, it’s great with almost anything!
- Stovetop Wonder: No oven needed! You get that beautiful, puffy texture right on your skillet.
Gather Your Ingredients for Garlic Naan Bread
Alright, let’s get our ingredients ready to make this amazing homemade garlic naan! It’s really just a handful of everyday things you probably already have. The trick to getting that perfect texture and delicious flavor is in the fresh ingredients. Remember how Kate Reilly loves focusing on simple, accessible stuff? That’s exactly what we’re doing here. You’ll need some active dry yeast – that’s what makes our naan nice and fluffy. Sugar for the yeast, of course, and warm water to get it going. For the dough, we’ve got all-purpose flour, a little salt, some plain yogurt that makes it super tender, and just a splash of vegetable oil. Oh, and for that irresistible garlic butter topping? That’s just melted butter, a couple of cloves of fresh garlic (minced super fine!), and some chopped cilantro for a pop of freshness. Easy peasy!
Step-by-Step Guide to Making Stovetop Naan
Okay, time to get your hands doughy! Making this stovetop naan is honestly the best part. It’s like magic happening right in your kitchen, I promise. We’re going to take it slow and steady, just like Kate Reilly learned from her grandma, so you get that perfect, fluffy outcome every single time. Trust me, you’ll be making this homemade garlic naan way more often than you think!
Activating the Yeast for Your Yeast Naan
First things first, let’s wake up our yeast! This is super important for that lovely airy texture in our yeast naan. Grab a little bowl, toss in your yeast, a pinch of sugar (that’s its food!), and the warm water. Give it a gentle stir and just let it hang out for about 5 to 10 minutes. You’ll know it’s ready when it gets foamy and bubbly – like a tiny, happy yeast party!
Mixing and Kneading the Dough for Soft Naan Bread
Now, in a big bowl, whisk together your flour and salt. Then, add in that bloomed yeast mixture, the plain yogurt – which is my secret for making it SO soft! – and that splash of vegetable oil. Mix it all up until it looks like a shaggy mess. Don’t worry, that’s what it’s supposed to do! Turn it out onto a counter that’s dusted with a little flour. Now, the fun part: kneading! Push, fold, and turn that dough for about 5 to 7 minutes. You want it to feel smooth and elastic, sort of like play-doh. This is where the gluten develops, giving our soft naan bread that wonderful chewy texture.
Proofing the Dough for the Perfect Rise
Grab a clean bowl and just give it a light coating of oil. Pop your kneaded dough in there and turn it around so it’s coated too. Cover the bowl with plastic wrap, find a nice warm spot (like near a sunny window or over a very gently warmed oven – *not hot*!), and let it do its thing. It needs about 1 to 1.5 hours to get nice and doubled in size. This resting time is pure gold for flavor and texture, just like Kate learned from her analytical approach to baking!

Shaping and Cooking Your Homemade Garlic Naan
Once your dough has puffed up like a happy cloud, punch it down gently to release the air. Divide it into four equal pieces and roll these into little balls. Now, on your flour-dusted surface, roll each ball out into an oval shape, about a quarter-inch thick. Get your skillet – cast iron is awesome here – nice and hot over medium-high heat. You want it DRY, no oil! Carefully lay one naan onto the hot skillet. It’ll start to puff up in about 1-2 minutes. Flip it, cook the other side for another minute or two until you see pretty brown spots. Repeat with the rest of your dough!
Preparing and Applying the Garlic Butter
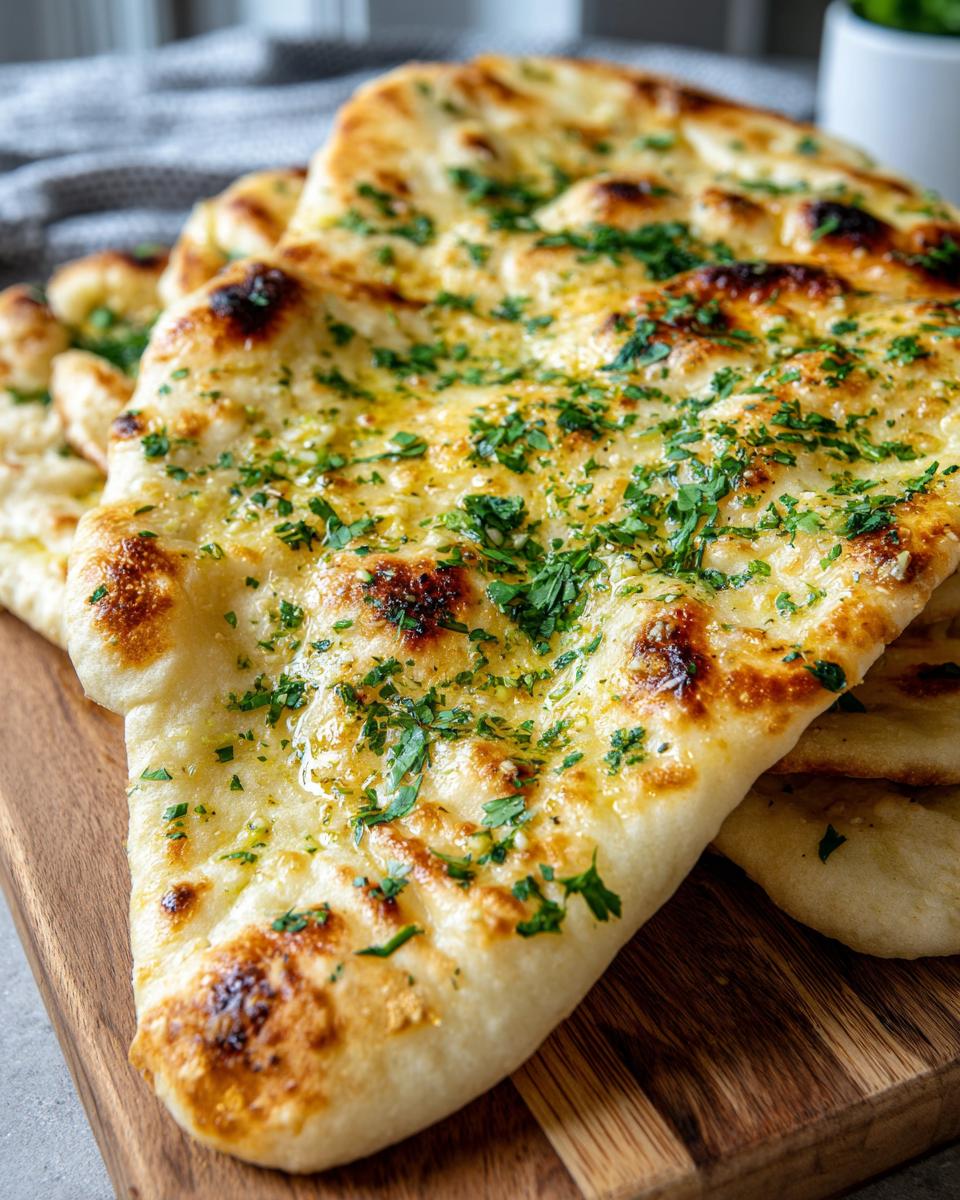
While your naan is doing its thing on the skillet, quickly mix up that glorious garlic butter. Just combine the melted butter, your minced garlic, and the chopped fresh cilantro in a little bowl. As SOON as each piece of naan comes off the hot pan, brush it generously with this amazing garlic butter. It melts right in, making every bite incredibly flavorful and fragrant. Pure deliciousness!

Tips for Perfect Garlic Naan Bread
Making absolutely perfect garlic naan bread at home is totally achievable, and I’ve picked up a few tricks along the way that really make a difference. It’s all about those little details, you know? Kate Reilly always says it’s about trusting the process, and with this easy naan recipe, it’s super important to pay attention to a few key things. Make sure your water is just warm enough for the yeast – not too hot, not too cold! When you’re kneading, really work that dough until it’s nice and smooth; it makes all the difference for that soft texture. And listen, your skillet needs to be GOOD and hot before that dough hits it – that’s the secret to getting those awesome puffs! For more tips, check out this guide too!
Ingredient Notes and Substitutions for Indian Bread
Let’s chat about a few of these ingredients for our Indian bread because they really make a difference! That plain yogurt? It’s a total game-changer for making the naan super soft and tender. If you don’t have yogurt, no worries, you can totally use an equal amount of milk instead, it’ll still be delicious! And for the water to activate the yeast, just make sure it’s warm – think comfy bath water temperature, not scalding. It helps get the yeast happy! Beyond that, just your standard all-purpose flour and salt are perfect.
Serving Suggestions for Your Garlic Butter Naan
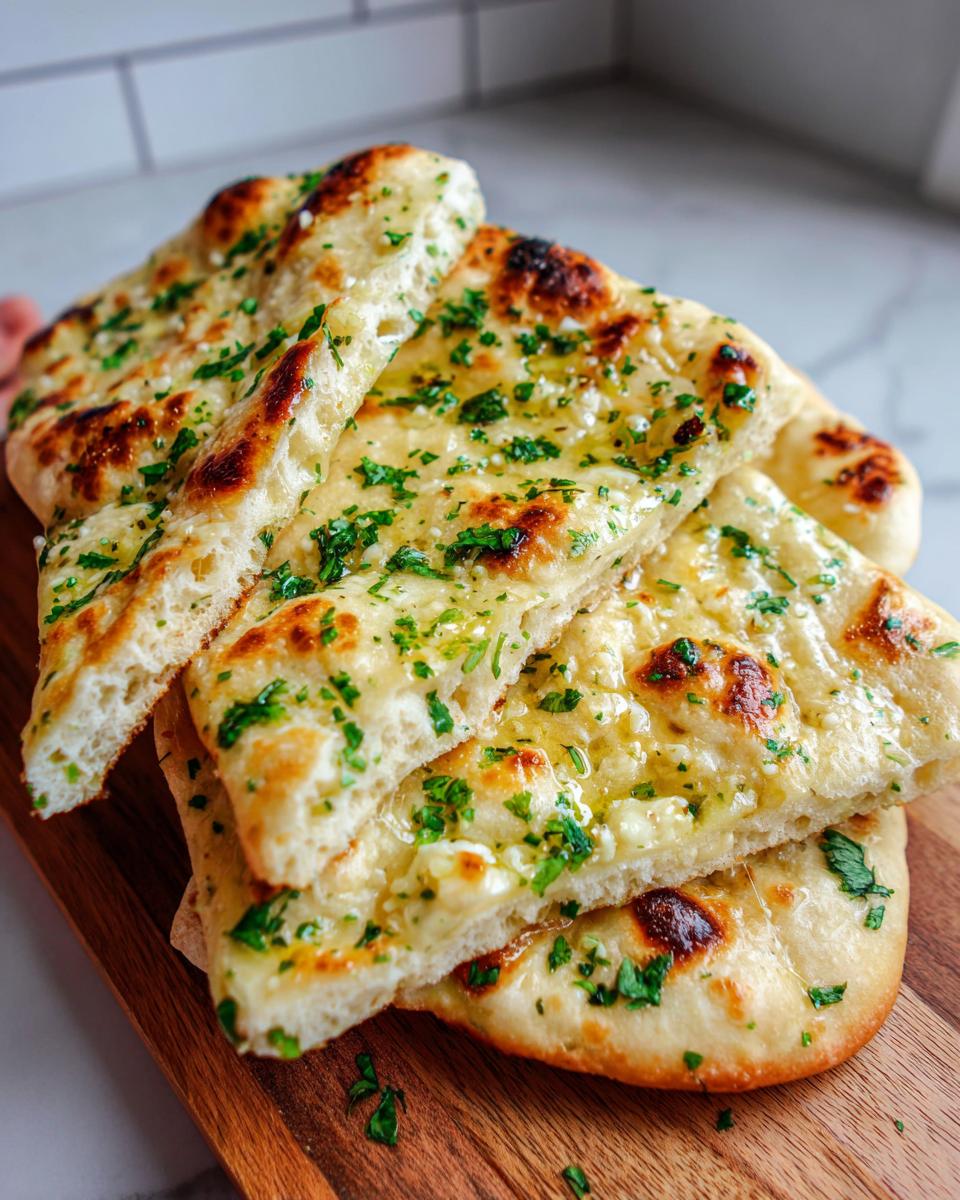
Honestly, this garlic butter naan is like the perfect dance partner for any curry! It’s absolute heaven alongside a rich Chicken Tikka Masala or a creamy lentil dal. But don’t stop there! It’s also amazing served with some flavorful dips and appetizers, or even just on its own when you’re craving something warm and garlicky. It makes any meal feel extra special!
Storage and Reheating Instructions
Got leftover garlic naan bread? Lucky you! To keep it tasting amazing, store it wrapped up tightly in plastic wrap or in an airtight container. At room temperature, it’ll be good for a day or two. If you need longer, pop it in the fridge for up to 4 days. When you’re ready to reheat, just wrap it in a damp paper towel and microwave it for about 20-30 seconds until it’s warm and soft again. You can even freeze it for longer storage – just reheat as usual!
Frequently Asked Questions About Garlic Naan Bread
Got some burning questions about making your own homemade garlic naan? I totally get it! Making Indian bread from scratch can feel a little mysterious, but it’s really quite doable. Here are some common things people ask about this easy naan recipe:
Can I make garlic naan without yeast?
While traditional yeast naan gets that amazing lift and chew from yeast, you *can* make a quick bread version without it. It won’t have quite the same texture, though! For the best, softest naan bread, I really recommend using the yeast.
Why isn’t my naan puffing up?
Oh, the dreaded flat naan! Usually, it comes down to a few things. Make sure your skillet is super hot before the dough hits it – that burst of heat is key for puffing. Also, check if your dough is rolled too thin or too thick, and make sure you kneaded it well enough for good gluten development.
How long does the dough need to rise?
Your dough needs about 1 to 1.5 hours to rise, or until it’s nicely doubled in size. This can change a bit depending on how warm your kitchen is. If it’s chilly, it might take a little longer! Just look for that doubled size, that’s your best indicator!
Estimated Nutritional Information
Just a heads-up, these are estimated nutritional values for each delicious piece of garlic naan bread. Since we’re all baking in our own kitchens with slightly different ingredients, these numbers can vary a bit, but it gives you a good idea! You’re looking at roughly 250 calories, about 8g of fat, 7g of protein, and 40g of carbs, with a couple of grams of fiber per serving. Pretty great for such an amazing side dish, right?
Share Your Homemade Garlic Naan Bread Creations!
I absolutely LOVE seeing your creations! If you make this homemade garlic naan bread, or even just whip up a batch for your next curry night, please share it with me! Leave a comment below, rate the recipe if you can, and tell me how it turned out. It really makes my day to know you’re enjoying these recipes!
PrintEasy Garlic Naan Bread

Make soft, fluffy garlic naan at home on your stovetop. This easy recipe is perfect as a side for curry night.
- Prep Time: 20 min
- Cook Time: 15 min
- Total Time: 35 min
- Yield: 4 servings 1x
- Category: Side Dish
- Method: Stovetop
- Cuisine: Indian
- Diet: Vegetarian
Ingredients
- 1 teaspoon active dry yeast
- 1 teaspoon granulated sugar
- 1/2 cup warm water (105-115°F)
- 2 cups all-purpose flour, plus more for dusting
- 1/2 teaspoon salt
- 1/4 cup plain yogurt
- 1 tablespoon vegetable oil, plus more for greasing
- 2 tablespoons unsalted butter, melted
- 2 cloves garlic, minced
- 1 tablespoon fresh cilantro, chopped
Instructions
- In a small bowl, combine the yeast, sugar, and warm water. Let stand for 5-10 minutes, until foamy.
- In a large bowl, whisk together the flour and salt.
- Add the yogurt, vegetable oil, and yeast mixture to the flour. Mix until a shaggy dough forms.
- Turn the dough out onto a lightly floured surface and knead for 5-7 minutes, until smooth and elastic.
- Lightly grease a clean bowl with vegetable oil. Place the dough in the bowl, turning to coat. Cover with plastic wrap and let rise in a warm place for 1-1.5 hours, or until doubled in size.
- Punch down the dough and divide it into 4 equal portions. Roll each portion into a ball.
- On a lightly floured surface, roll out each ball into a thin oval shape, about 1/4 inch thick.
- Heat a dry skillet or cast-iron pan over medium-high heat.
- Cook each naan for 1-2 minutes per side, until puffed and lightly browned in spots. You may see some bubbles form.
- While the naan is cooking, combine the melted butter, minced garlic, and chopped cilantro in a small bowl.
- Brush the cooked naan with the garlic butter mixture immediately after removing it from the pan.
- Serve warm.
Notes
- For a richer flavor, you can use milk instead of water for the yeast mixture.
- If you don’t have yogurt, you can substitute it with an equal amount of milk.
- Ensure your skillet is hot before adding the naan for the best puff.
Nutrition
- Serving Size: 1 naan
- Calories: 250
- Sugar: 3g
- Sodium: 300mg
- Fat: 8g
- Saturated Fat: 3g
- Unsaturated Fat: 5g
- Trans Fat: 0g
- Carbohydrates: 40g
- Fiber: 2g
- Protein: 7g
- Cholesterol: 10mg