
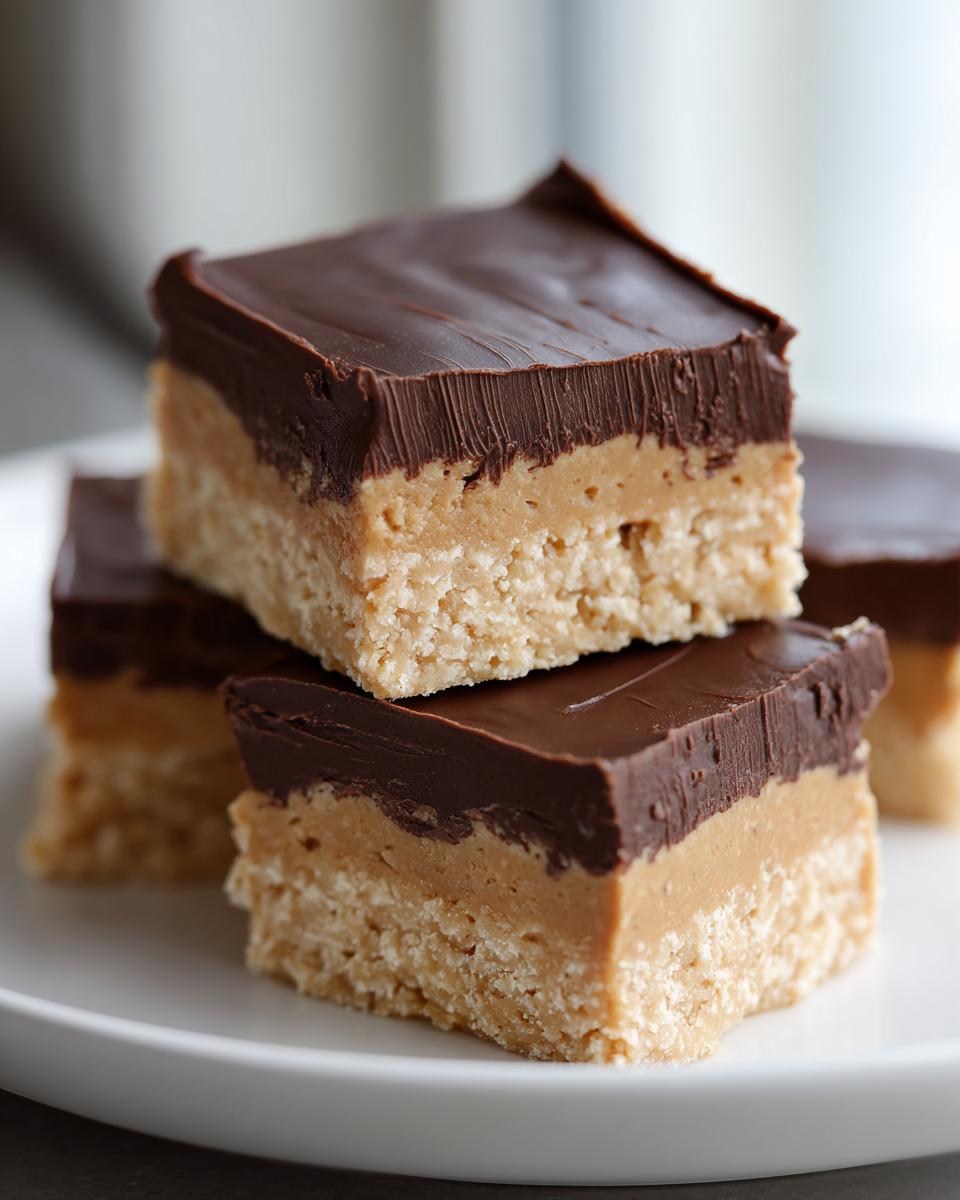
Does anything in the world beat that salty, sweet combo of creamy peanut butter and rich, fudgy chocolate? I seriously doubt it. When those cravings hit, you don’t want to wait for an oven to warm up! That’s why I’m sharing my absolute favorite, can’t-mess-it-up recipe for peanut butter bars. These are totally no-bake, which means pure joy in minutes. Here at Taste This Plate, we believe in simple recipes you just *have* to trust, just like Kate emphasizes over on the About Us page. I’ve tested this until it was flawless, so you get an easy, crowd-pleasing dessert with zero stress every single time.
- Why This No Bake Peanut Butter Bars Recipe Works Every Time
- Ingredients Needed for Perfect Peanut Butter Bars
- Step-by-Step Instructions for Easy Peanut Butter Bars
- Tips for Making the Best Peanut Butter Bars
- Storage and Make Ahead Peanut Butter Dessert Tips
- Variations on Classic Peanut Butter Bars
- Frequently Asked Questions About Peanut Butter Bars
- Estimated Nutritional Information for These Simple Dessert Bars
- Share Your Quick Peanut Butter Treats Experience
Why This No Bake Peanut Butter Bars Recipe Works Every Time
I know you’re looking for something fast, delicious, and guaranteed to impress, and that’s exactly what these bars are! The best part? You don’t even need to turn the oven on. Seriously, forget preheating; we’re making a no oven dessert here.
- They come together in about 15 minutes of active work.
- The texture is unreal—super creamy on the bottom, perfectly fudgy on top.
- They are the ultimate crowd-pleaser, especially when you need something quick for a party.
The Secret to Creamy Peanut Butter Bars
The base is everything when it comes to these creamy peanut butter dessert bars, trust me. People often wonder why theirs turn out crumbly, but it all comes down to one simple thing: technique. You need the butter to be perfectly softened—not melted, mind you—and you have to beat it with the peanut butter and sugar until it’s light and fluffy.
When it looks smooth and airy, you’ve incorporated enough air to keep those bars from breaking apart when you cut them. That’s how we guarantee a perfect layer every single time!
Ingredients Needed for Perfect Peanut Butter Bars
Okay, let’s talk about what you need. The best part about these easy peanut butter bars is that they use such straightforward stuff you likely already have waiting in the pantry. No specialty shopping trips for me, ever! Every ingredient plays a specific role in keeping this dessert rich without having to bake it.
Base Layer Ingredients for Your Peanut Butter Bars
This creamy foundation is what sets the whole bar up—literally! Remember, make sure that butter isn’t melted, or it won’t whip up right.
- 1 cup unsalted butter, softened
- 2 cups creamy peanut butter
- 4 cups powdered sugar
- 1 teaspoon vanilla extract
Chocolate Topping Ingredients for Fudgy Peanut Butter Bars
This mixture comes together fast in the microwave and turns into that gorgeous, firm chocolate layer we all obsess over in fudgy peanut butter bars.
- 1 1/2 cups semi-sweet chocolate chips
- 1/2 cup creamy peanut butter (for topping)
- 2 tablespoons butter (for topping)
Step-by-Step Instructions for Easy Peanut Butter Bars
Okay, listen up, because this is where we turn ingredients into magic candy bars. Remember, this is all about efficiency since we aren’t fussing with an oven! These instructions are super quick, and since we’re making a big batch—24 perfect squares are what you get—we need to be organized. If you need other quick bites, swing by my Appetizers and Snacks page for inspiration!
Preparing the Pan and Peanut Butter Base
First thing’s first: grab your 9×13 inch pan. You absolutely *must* line it with parchment paper first, making sure there’s some paper hanging over the sides. I cannot stress this enough! This overhang is your lifeline later when you need to lift these beauties out in one piece. Once that’s prepped, you’ll mix up the base ingredients—that’s your softened butter, 2 cups of peanut butter, powdered sugar, and vanilla—until it’s beautifully smooth and creamy. Don’t rush this mixing part!
Creating the Two Layer Peanut Butter Dessert
Next, press that creamy base evenly into your prepared pan. It needs to go into the freezer while you tackle the chocolate part. For the topping, combine the chocolate chips, the last 1/2 cup of peanut butter, and 2 tablespoons of butter in a microwave-safe bowl. Heat it in 30-second bursts, stirring well in between each round. If you just melt it all at once, you risk scorching that chocolate, and nobody wants that bitter flavor! Once it’s silky smooth, pour it right over your now-chilled peanut butter layer and spread it out fast.
Chilling and Cutting Your Peanut Butter Bars
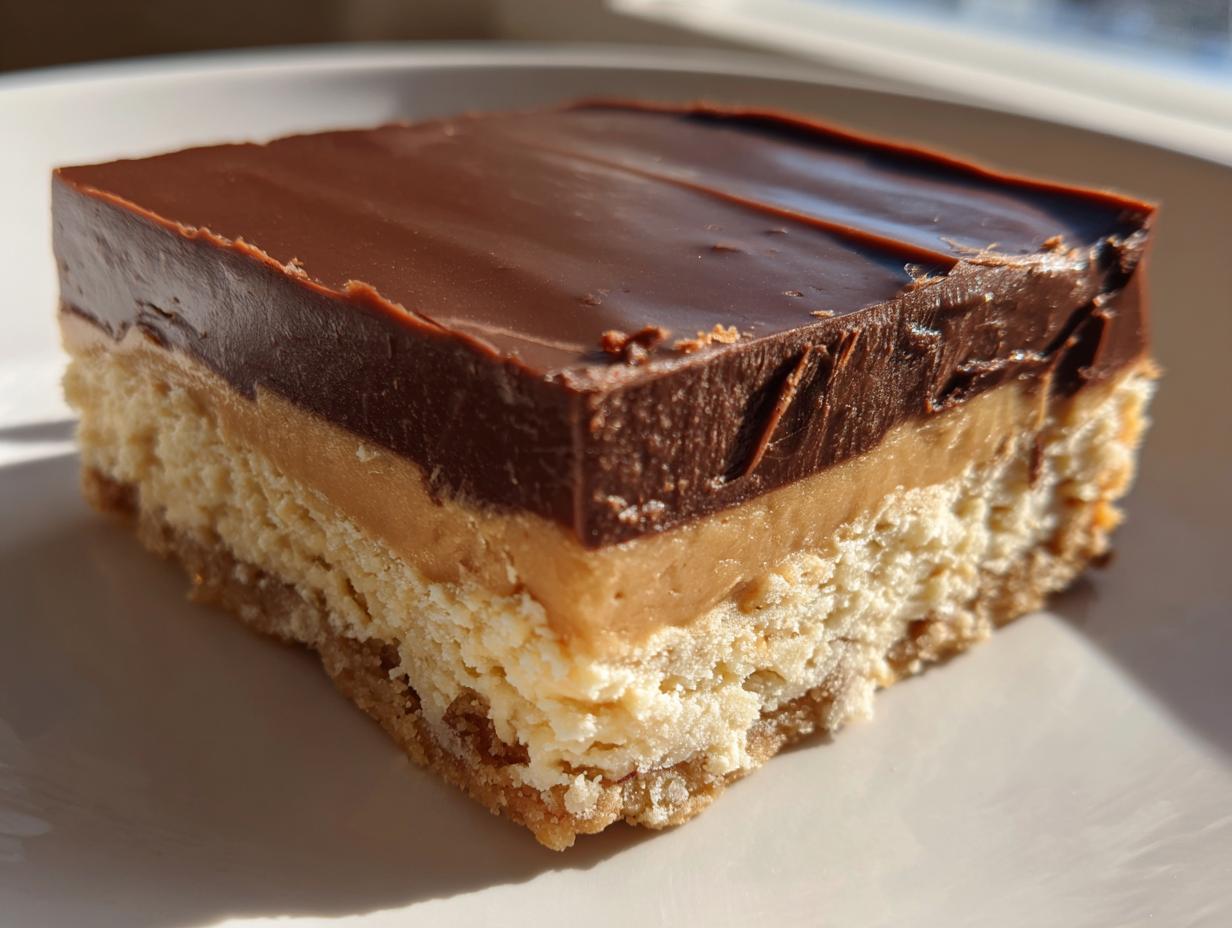
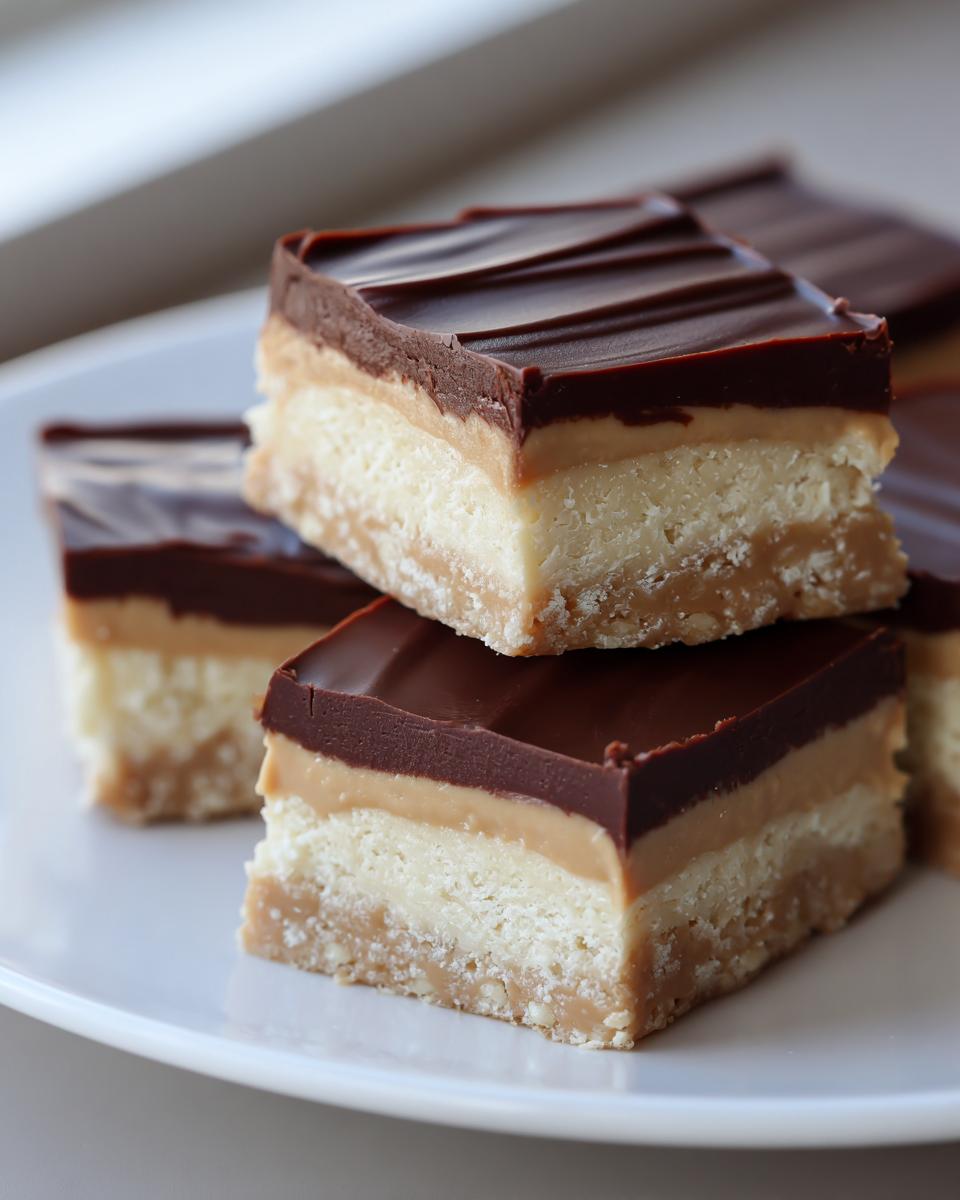
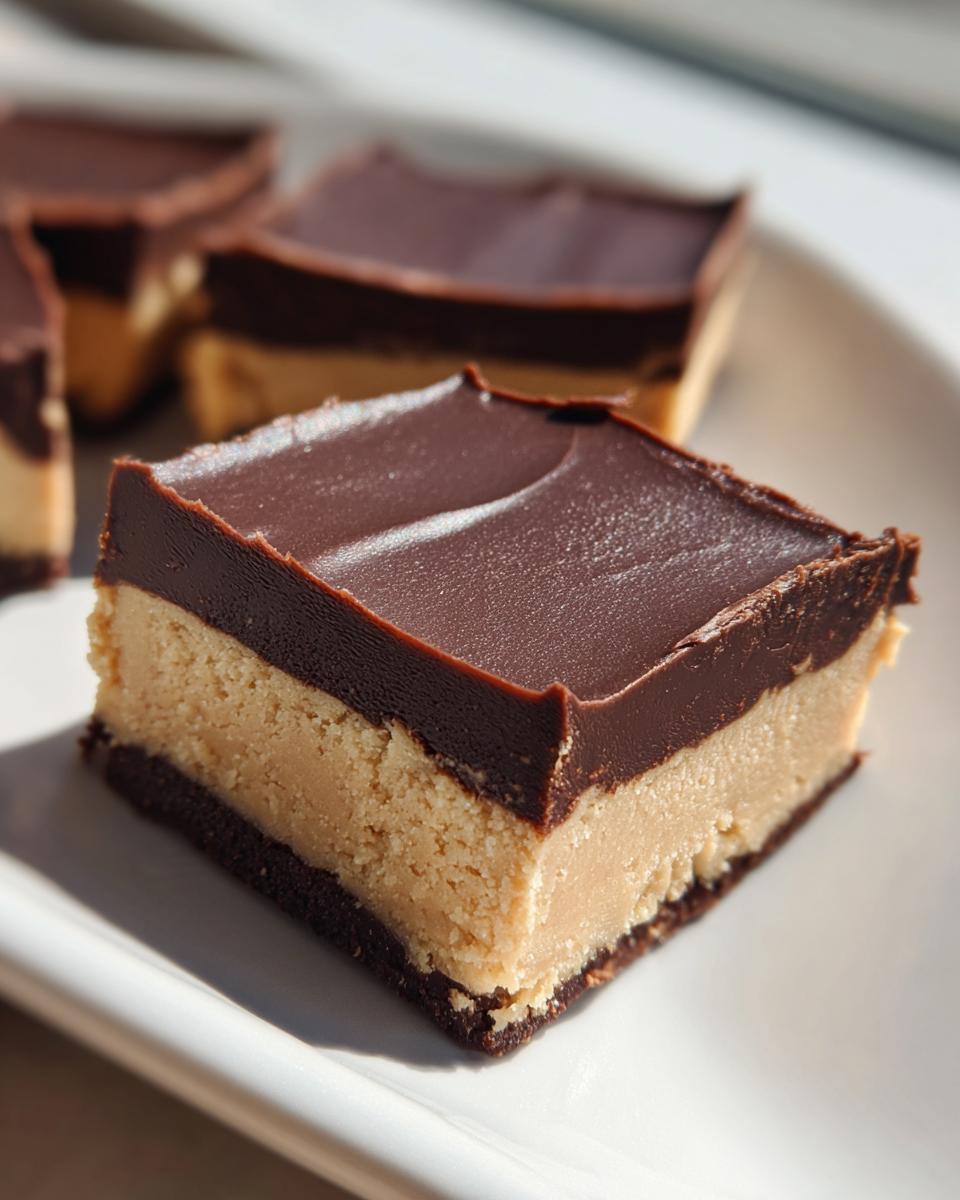
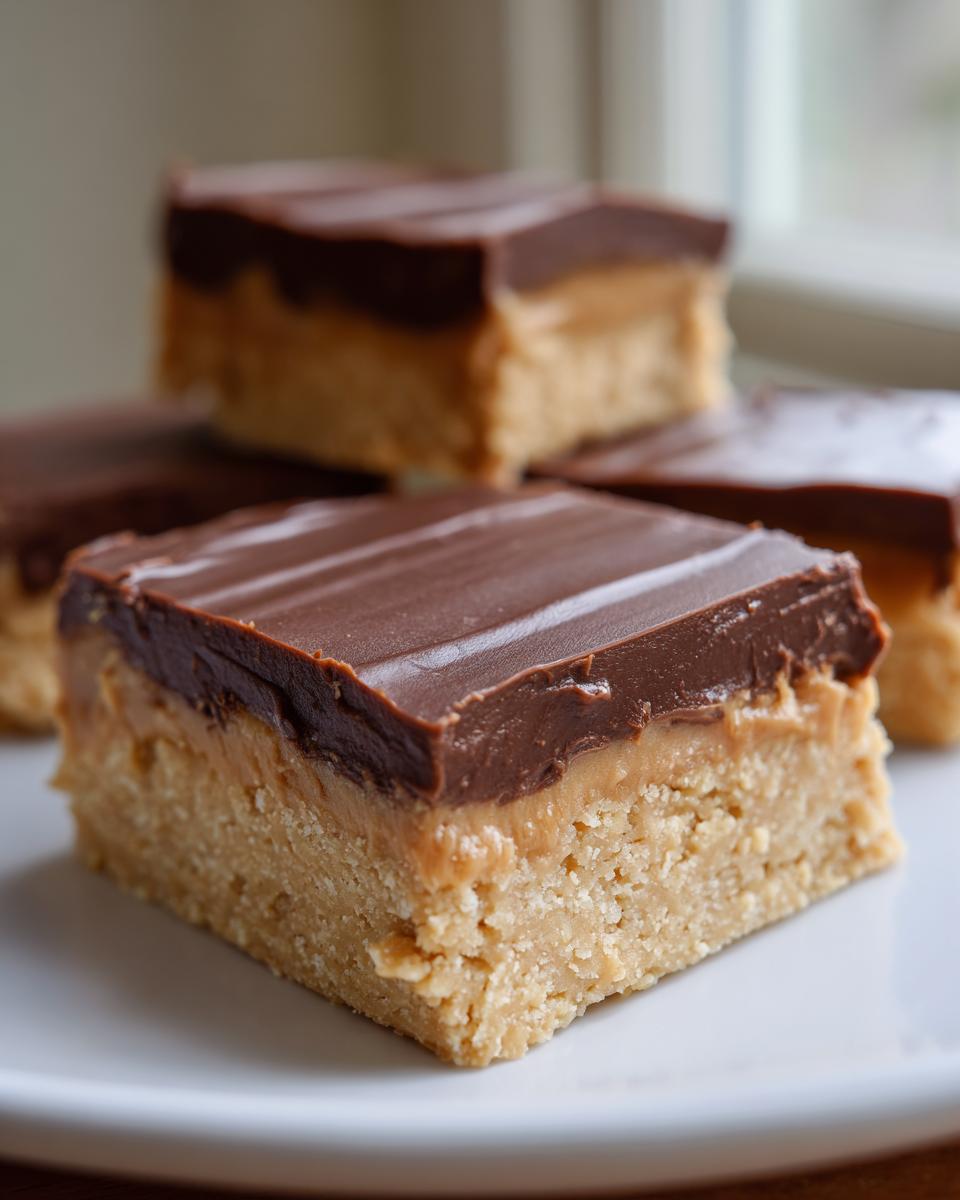
The hardest part is waiting for this two layer peanut butter dessert to set. Pop the entire pan back into the refrigerator—not the freezer now—and let it chill for at least two full hours. This gives that chocolate topping time to get firm enough to slice cleanly. When it’s ready, use those parchment paper handles to lift the whole block out, and then slice it into those neat squares. Enjoy those incredible no bake peanut butter bars!
Tips for Making the Best Peanut Butter Bars
Listen, even though these are super simple, a few little tricks take them from good to absolutely the best peanut butter bars you’ve ever made. I learned these tweaks when trying to make them last longer, or when I wanted a little extra crunch, because we all want that perfect handheld treat, right?
If you ever need a suggestion for another tried-and-true classic that holds up perfectly, you should check out my recipe for classic chocolate chip cookies! These little pointers here, though, are what turn *this* recipe into your go-to favorite!
Achieving Reese’s Peanut Butter Bars Flavor
If you’re chasing that famous flavor profile, I highly recommend taking a little trip away from only creamy peanut butter in the base. My favorite trick to get those amazing Reese’s peanut butter bars vibes is to use 1 1/2 cups of your smooth peanut butter and then mix in a half cup of crunchy peanut butter for the base. That little bit of texture makes everything so much more interesting!
Adjusting the Chocolate Topping Firmness
So, about that topping—sometimes, especially if your kitchen is warm, the chocolate layer stays a little too soft, making slicing messy. If you want a really firm, satisfying snap, try this! Add about one teaspoon of coconut oil into your chocolate, peanut butter, and butter mix before you melt it. It sounds weird, I know, but that coconut oil helps the chocolate set up beautifully firm. It’s an absolute sanity saver when you need flawless cuts.
Storage and Make Ahead Peanut Butter Dessert Tips
Because these are no-bake bars, they are fantastic for planning ahead. You can whip up a batch of these quick peanut butter treats early in the week, and they just get better! Seriously, don’t even think about serving them right away—you need that chill time.
I usually make them on Sunday evening, and by Tuesday, they are perfect. They store beautifully in an airtight container right in the refrigerator. My note says they last up to a week, which is great because they rarely make it past day three in my house! As that other blogger mentioned, this is a lifesaver when company shows up unexpectedly.
Just stack them with parchment paper between the layers so that fudgy chocolate topping doesn’t stick to the layer above it. Super simple make-ahead dessert perfection!
Variations on Classic Peanut Butter Bars
I love that this recipe is so foolproof, it actually encourages you to play around with it! While these might be the best simple dessert bars straight up, it’s fun to mix things up for different moods or seasons. As long as you keep that base ratio of butter/PB/sugar similar, you should be just fine with keeping them no-bake and structurally sound.
We all have those days where we look in the pantry and want to add just a little something extra, right? If you’re like me and enjoy experimenting, be sure to check out my Cinnamon Crunch Banana Bread recipe for a wildly different kind of comfort treat!
Adding Oatmeal Peanut Butter Bars Texture
If you’re looking to turn these into oatmeal peanut butter bars—which gives them a little chew and makes them feel slightly more substantial—you can absolutely toss in some oats to the base mixture. I wouldn’t go overboard, because we want it to still press into that solid layer, but adding about 1 cup of old-fashioned rolled oats works wonders.
Just fold them in after you whip the butter and sugar mixture until it’s light. Fair warning: they won’t be quite as smooth and creamy as the original since the oats absorb a little moisture, but that textural difference can be really fantastic!
Frequently Asked Questions About Peanut Butter Bars
I get so many messages about these bars, which tells me everyone loves a good, easy treat! Since these are so popular, I wanted to tackle a few of the most common questions I hear about getting these simple dessert bars perfect in your own kitchen.
Why did my peanut butter base turn out crumbly instead of creamy?
Oh, that’s frustrating! If your base is crumbly, it almost always means your butter wasn’t soft enough, or you didn’t beat it long enough with the sugar and peanut butter. You need that mixture to become fluffy so it binds everything together. If you try using softened butter that’s too cold, it won’t incorporate the air you need to make those perfect creamy peanut butter dessert bars. Try whipping it for a full extra minute next time!
Can I use crunchy peanut butter in this no bake peanut butter bars recipe?
You totally can! If you want to replicate those popular Reese’s peanut butter bars, I suggest mixing it up like I mentioned earlier—use mostly creamy, but swap out maybe half a cup for crunchy. If you use only crunchy peanut butter for the entire base, remember that the texture will be chunkier and less smooth. That’s not wrong, but it changes the signature creamy feel!
How long do these quick peanut butter treats actually last?
They store really well, which is why they’re an ideal make ahead peanut butter dessert! Keep them in an airtight container in the fridge. I noted they’re good for up to a week, but honestly, they’re the tastiest when they’ve had a good 24 hours in the fridge to fully set up. They are also fine sitting on the counter for a day if you’re serving them, but I always put leftovers back in the cold.
Is it okay if I use low-fat creamy peanut butter for these?
Stick to the full-fat stuff if you can! These bars rely heavily on the fat content from both the peanut butter and the butter to hold their shape since we aren’t baking them. Low-fat versions often have more sugar or stabilizers, and they just don’t set up the same way. For the best no bake peanut butter bars layer, regular creamy peanut butter is the way to go. If you need more dessert inspiration, check out my main Desserts category!
Estimated Nutritional Information for These Simple Dessert Bars
I always like to be upfront about what goes into these treats, even though they’re basically candy disguised as a dessert! Since these simple dessert bars are made with butter and peanut butter, they are certainly rich, but oh my goodness, they are worth it.
Please keep in mind these numbers are just an estimate based on the general ingredients listed above and how many bars we cut (24 servings). If you use different brands or add extra things, your numbers will shift a bit!
- Serving Size: 1 bar
- Calories: 250
- Total Fat: 16g (Remember, this includes healthy fats from the peanuts!)
- Saturated Fat: 6g
- Carbohydrates: 25g
- Sugar: 22g (Because chocolate!)
- Protein: 6g
See? A little indulgence is totally fine when you need one of those amazing quick peanut butter treats!
Share Your Quick Peanut Butter Treats Experience
Alright, you’ve got the recipe, you’ve got the chocolate craving cure, now it’s your turn to shine!
I truly want to know how these amazing peanut butter bars turned out in *your* kitchen. Did you try mixing crunchy and creamy like I suggested? Did your chocolate topping set up perfectly firm? Don’t be shy—head down to the comments below and give this recipe a rating! Five stars if they disappeared instantly, naturally.
If you tried any fun little variations or if you just need to bounce a question off me, I’m here for it. Drop a comment, and let’s talk snacks! And while you’re at it, if you loved how easy this made your week, feel free to share it on social media—it really helps me keep testing and perfecting these simple meals for everyone. You can always shoot me a direct message over on the Contact page too!
Happy snacking!
PrintEasy No-Bake Chocolate Peanut Butter Bars
Make these simple, two-layer no-bake peanut butter bars with a creamy base and a rich chocolate topping. This quick dessert requires no oven and uses common pantry ingredients.
- Prep Time: 15 min
- Cook Time: 0 min
- Total Time: 2 hr 15 min
- Yield: 24 bars 1x
- Category: Dessert
- Method: No-Bake
- Cuisine: American
- Diet: Vegetarian
Ingredients
- 1 cup unsalted butter, softened
- 2 cups creamy peanut butter
- 4 cups powdered sugar
- 1 teaspoon vanilla extract
- 1 1/2 cups semi-sweet chocolate chips
- 1/2 cup creamy peanut butter (for topping)
- 2 tablespoons butter (for topping)
Instructions
- Line an 9×13 inch baking pan with parchment paper, leaving an overhang on the sides for easy removal.
- In a large bowl, beat the softened butter, 2 cups of peanut butter, powdered sugar, and vanilla extract until the mixture is smooth and creamy.
- Press this peanut butter mixture evenly into the bottom of the prepared pan. Place the pan in the freezer while you prepare the topping.
- In a microwave-safe bowl, combine the chocolate chips, 1/2 cup of peanut butter, and 2 tablespoons of butter. Microwave in 30-second intervals, stirring well after each, until the mixture is completely smooth.
- Pour the melted chocolate mixture over the chilled peanut butter layer. Spread it quickly and evenly to cover the entire surface.
- Return the pan to the refrigerator and chill for at least 2 hours, or until the chocolate layer is firm.
- Use the parchment paper overhang to lift the bars from the pan. Cut into squares before serving.
Notes
- For a Reese’s inspired flavor, use a mix of creamy and crunchy peanut butter in the base layer.
- If you prefer a firmer chocolate topping, add 1 teaspoon of coconut oil to the chocolate mixture before melting.
- These bars store well in an airtight container in the refrigerator for up to one week.
Nutrition
- Serving Size: 1 bar
- Calories: 250
- Sugar: 22
- Sodium: 150
- Fat: 16
- Saturated Fat: 6
- Unsaturated Fat: 10
- Trans Fat: 0
- Carbohydrates: 25
- Fiber: 1
- Protein: 6
- Cholesterol: 15