

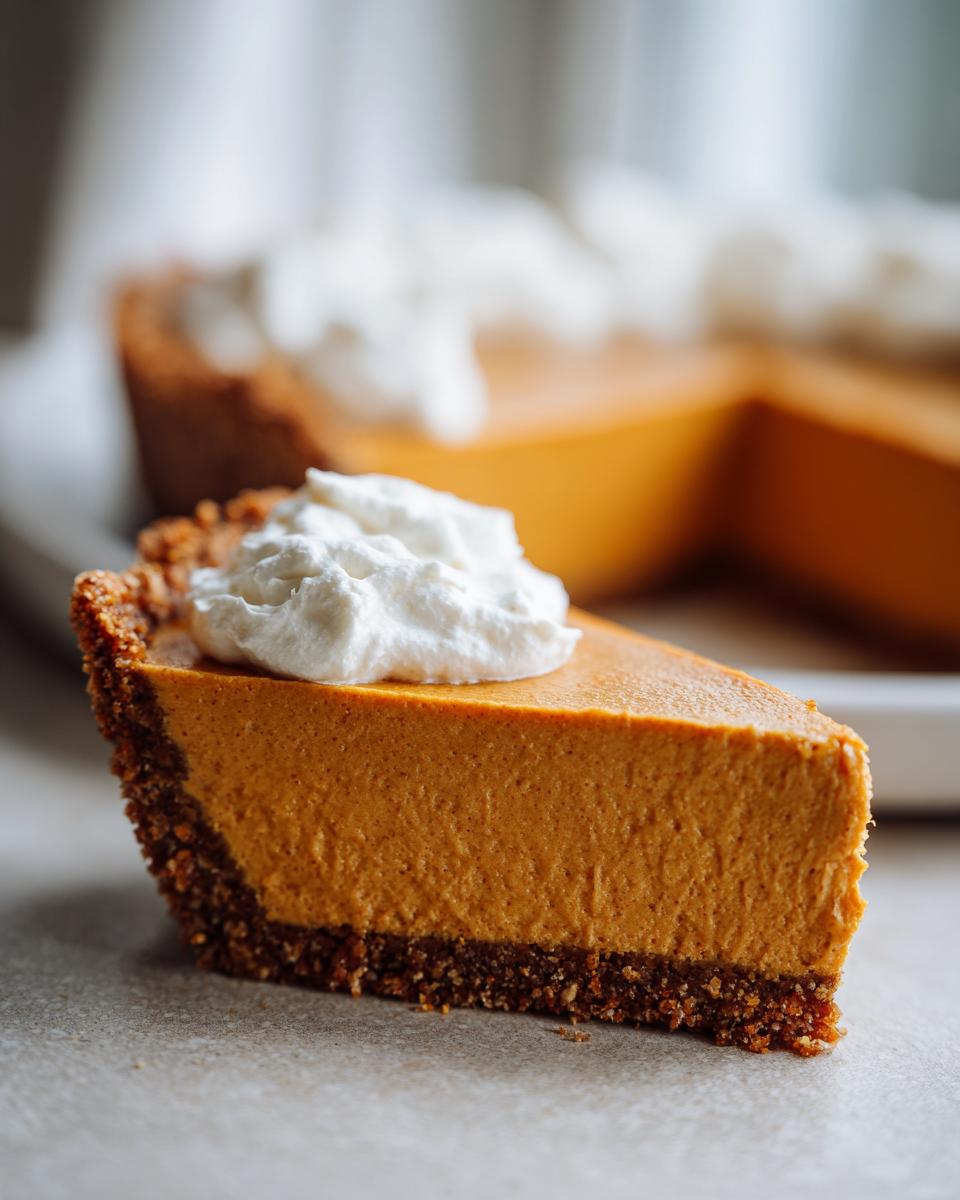
Listen, when the holidays roll around—especially Thanksgiving—my oven is usually dedicated to the turkey or a massive main dish. Who wants to fire it up again just for dessert? That’s why I became obsessed with finding the truly *best* way to make a no bake pumpkin pie. Forget those watery, sad attempts you might have had years ago. This version? It’s the ultimate creamy dream because it sets up perfectly sturdy thanks to Kate’s philosophy of stripping away the stress while keeping all that deep, autumnal flavor intact. If you’re looking for stress-free, delicious desserts that save you oven space, you’ve found it here. I promise, this is the simple, make-ahead recipe that tastes like you fussed over it for hours.
- Why This Creamy No Bake Pumpkin Pie is Your New Fall Favorite
- Gathering Ingredients for Your No Bake Pumpkin Pie
- Step-by-Step Instructions for the Best No Bake Pumpkin Pie
- Expert Tips for a Perfect No Bake Pumpkin Pie
- Making This No Bake Holiday Pies Alternative Ahead of Time
- Serving Suggestions for Your Simple Pumpkin Dessert
- Frequently Asked Questions About the No Bake Pumpkin Pie
- Estimated Nutritional Data for This Quick Pumpkin Treat
- Share Your Experience Making This Easy Pumpkin Pie Recipe
- Estimated Nutritional Data for This Quick Pumpkin Treat
- Share Your Experience Making This Easy Pumpkin Pie Recipe
Why This Creamy No Bake Pumpkin Pie is Your New Fall Favorite
I’ve tested so many quick recipes over the years, and this one—this no bake pumpkin pie—always wins. I designed it specifically to fit my philosophy: simple ingredients, extraordinary results. You don’t have to worry about cracked tops or soggy bottoms here! It’s pure, unadulterated fall comfort without the oven heat.
- No Oven Required, Ever! Seriously, this is the ultimate fall baking alternative. The whole thing comes together on the stovetop and in the fridge. This is a lifesaver when your oven is packed full of roasting pans.
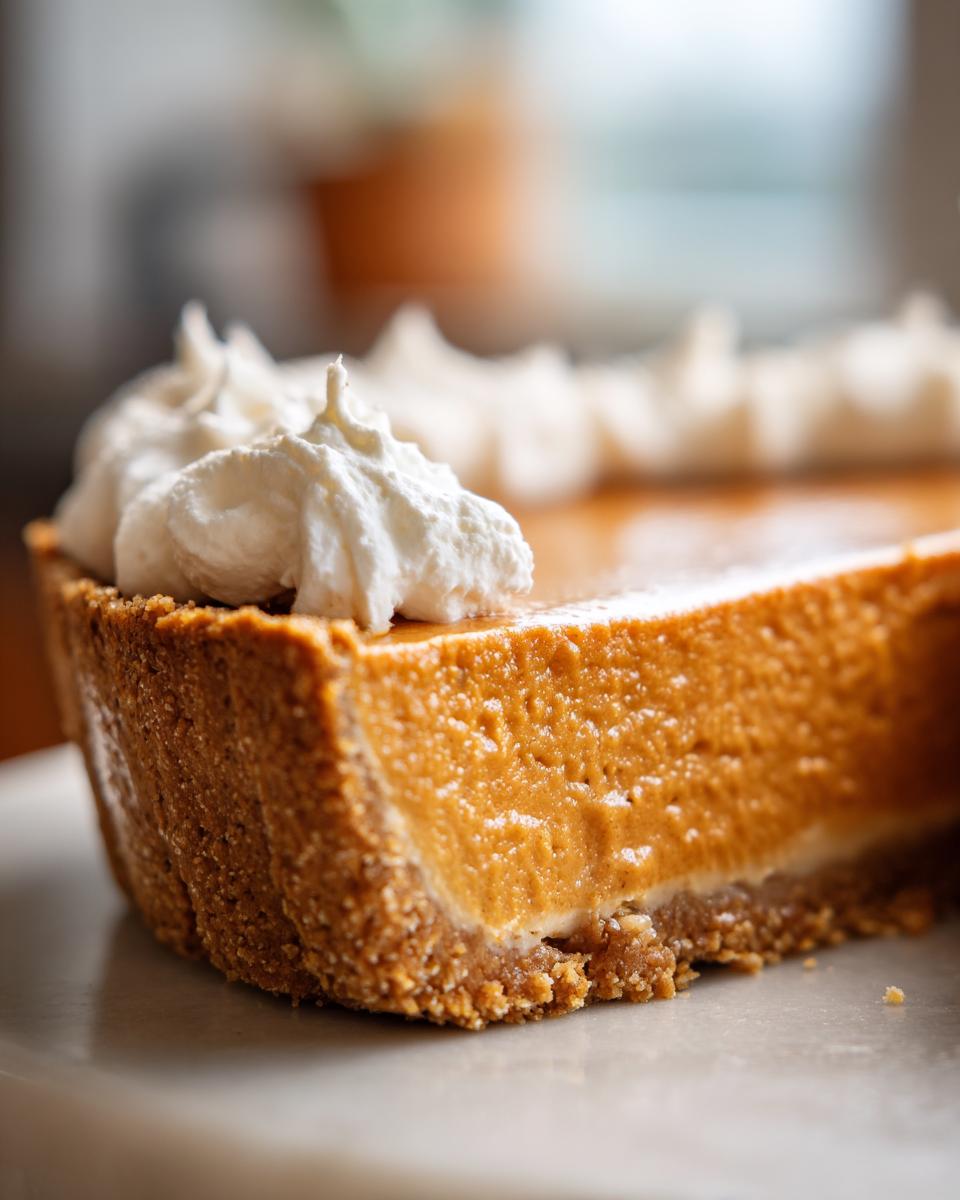
- It is the definition of a creamy no bake dessert. We aren’t skimping on texture; the combination of sweetened condensed milk and softened cream cheese makes the filling absolutely luscious and light.
- This is the original make ahead fall dessert. You make it the day before Thanksgiving, stick it in the fridge, and forget about it until dessert time. That peace of mind is priceless!
- It’s deceptively simple! Even if you’ve never touched a pie crust before, pressing buttery graham crackers into a pan is easy work. You get that classic flavor profile with zero fuss. You might even want to check out my Apple Snickerdoodle Dump Cake if you love easy sweets!
Gathering Ingredients for Your No Bake Pumpkin Pie
One of the reasons this is such a reliable no bake pumpkin pie is that nearly everything you need is already stocked in my pantry or fridge. We aren’t seeking out specialty items here! I trust this recipe because the ingredients are standard, and when you measure them out, you know exactly what you are getting. It’s all about that perfect combination of stability and flavor without any eggs or baking!
For the Graham Cracker Crust Pie
This is foundational, honestly, and using a graham cracker crust pie means we skip the entire mess of making pastry dough. Trust me when I say: press it down firmly!
- 1 1/2 cups graham cracker crumbs
- 1/4 cup granulated sugar
- 6 tablespoons unsalted butter, melted
For the Fluffy No Bake Pumpkin Pie Filling
These six ingredients are magic together. They create that vibrant orange color and the perfect spicy-sweet balance that screams fall. This is where the signature creamy texture comes from, so make sure that cream cheese is truly softened before you start!
- 1 (15 ounce) can pure pumpkin puree
- 1 (14 ounce) can sweetened condensed milk
- 1 teaspoon pumpkin pie spice
- 1 teaspoon vanilla extract
- 8 ounces cream cheese, softened
- 1/2 cup powdered sugar
For the Whipped Topping of the No Bake Pumpkin Pie
Keep these two items cold! This step ensures you get the light, airy finish that makes this a wonderfully light pumpkin pie alternative. Don’t be tempted to use the room temperature cream.
- 1 cup heavy whipping cream, cold
- 1/4 cup powdered sugar (for topping)
Step-by-Step Instructions for the Best No Bake Pumpkin Pie
Okay, this is the fun part! Since we aren’t dealing with an oven, our real focus here is texture—we have to ensure everything is mixed just right so that this no bake pumpkin pie sets up beautifully firm later. I’m going to walk you through exactly how to layer these components. We want that fluffy texture we talked about, and that means gentle hands during the whipping and folding!
Preparing the Graham Cracker Crust for Your No Bake Pumpkin Pie
First things first, we tackle the base for your graham cracker crust pie. Grab a standard 9-inch pie plate. In a nice medium bowl, just combine those crumbs, the quarter cup of sugar, and the melted butter. You want to mush it together with a fork until it looks like wet sand—that means it’ll hold its shape.
Now, press that mixture firmly! I always use the bottom of a flat measuring cup to really compact it into the bottom and up the sides. This step is vital so your slice holds together! Pop that plate into the fridge for 20 minutes while you handle the filling. That chill time really helps solidify it before the creamy filling goes in.
Creating the Creamy No Bake Dessert Filling Layers
We need two separate bowls for this, don’t skip that! Bowl one handles the richness. You’re going to grab that softened cream cheese—make sure it’s soft, or you’ll get lumps—and beat it slowly with the first half cup of powdered sugar until it’s totally smooth and dreamy as can be.
In bowl two, whisk together the pumpkin, the sweetened condensed milk, that warm pumpkin pie spice, and the vanilla. Whisk it until everything is just uniform. Now—and this is important for keeping it light—you gently fold the pumpkin mix into the cream cheese base. Don’t beat it! Just fold until there are no more large streaks of white left.
Next, move to that cold bowl where you’ve whipped your heavy cream (it should have created soft peaks). Take a big dollop of that whipped cream and fold it into your pumpkin-cream cheese mixture to lighten it up. Then, gently fold in the rest. When totally combined, you have a gorgeous, fluffy pumpkin pie filling, which is exactly what we want in this creamy no bake dessert.
Chilling and Finishing Your No Bake Pumpkin Pie Recipe
Once all that beautiful, light filling is done, gently pour it into your chilled crust and spread the top flat with an offset spatula. Now comes the hardest part: waiting! You need this to chill in the refrigerator for a minimum of six hours, but honestly, if you can wait overnight, the texture will be spectacular. This is easily the best part of any easy pumpkin pie recipe—it just waits patiently for you!
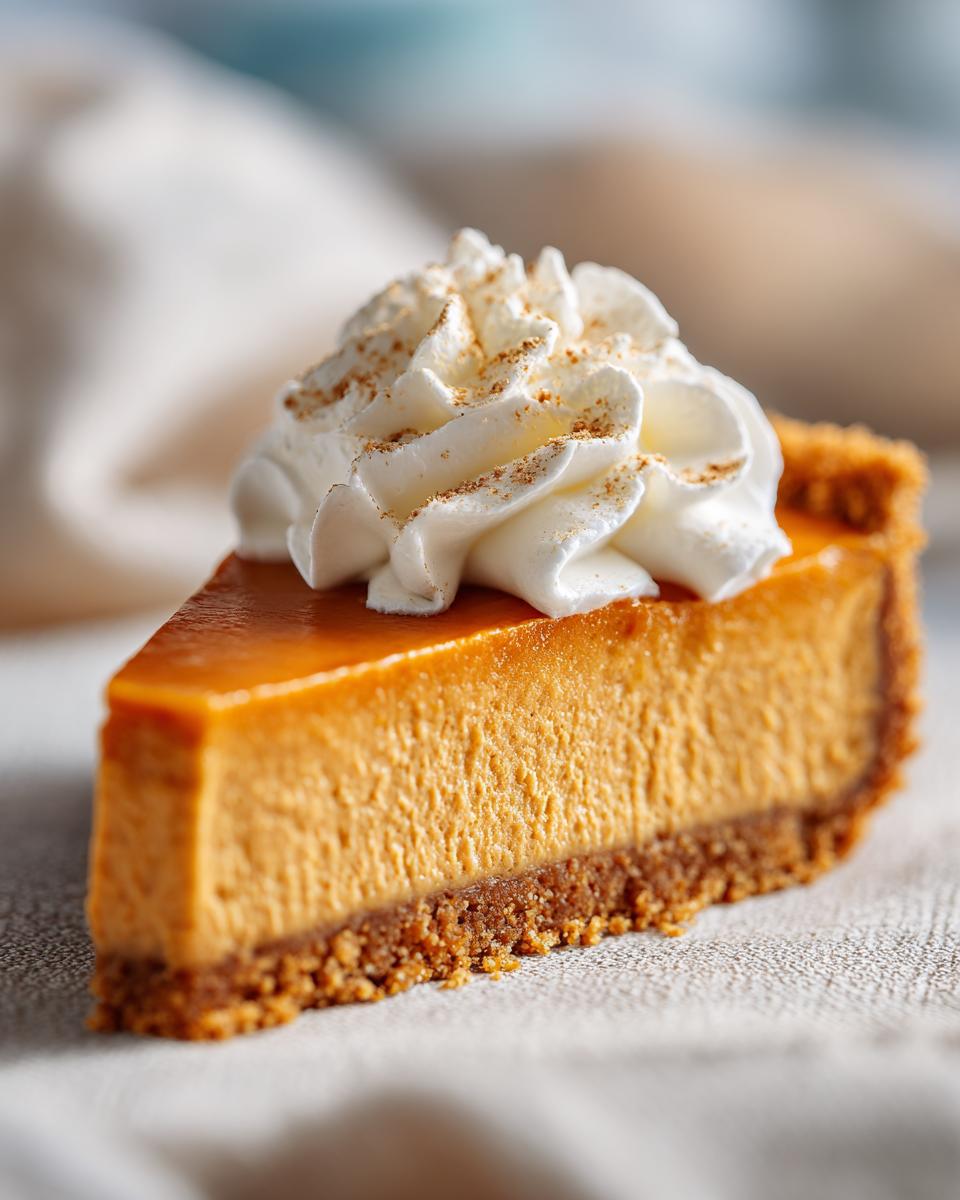
When you are ready to serve, take out that remaining powdered sugar and whip it up into any leftover cream, or just use some tubed topping if you’re in a massive rush. Spread it cheerfully over the top. Slide your knife in, and enjoy that perfectly set, no-oven goodness. If you want great tips on layering flavors, I shared some thoughts on how I make my easy apple crumble recipe, too!
Expert Tips for a Perfect No Bake Pumpkin Pie
Getting this no bake pumpkin pie right comes down to two things: keeping things cold and giving it time to set. I wish I had known this trick years ago! I remember making a similar dessert once the night before a big brunch, and I figured two hours in the fridge would be enough. Nope! It was like soup when I tried to slice it. Total flop. That’s why I preach technique here—we want that satisfying, crisp slice, not a puddle.
The single best thing you can do for this fluffy pumpkin pie is to use heavy whipping cream that has been chilled significantly—I mean, make sure the bowl and the whisk attachments have been chilling in the freezer for about ten minutes before you start whipping. That’s how you get those stiff, beautiful peaks that hold the pumpkin filling up high.
If you’re making this the day before, that’s great, but if you absolutely *must* serve it sooner, here’s my safety valve: the gelatin trick. The recipe notes mention adding one packet of unflavored gelatin dissolved in hot water to the pumpkin mixture. I always keep a packet handy just for emergencies! Dissolve it, stir it well into the pumpkin base before you fold in the whipped cream, and it guarantees a firm set in just four hours instead of six or overnight. It leans slightly more toward a ‘silk pie’ in texture, but hey, no one complains about firm pie!
Also, don’t forget to check out my recipe for Cinnamon Crunch Banana Bread while you wait for your pie to firm up; though that requires an oven, it smells just as amazing!
For those of you who like to look at other fun, no-bake options, I saw a great No Bake Marshmallow Pumpkin Pie recipe pop up recently that looked really decadent if you want a little extra fluff!
Making This No Bake Holiday Pies Alternative Ahead of Time
This is truly the greatest asset of any no bake pumpkin pie: it thrives on planning! You want a dessert that works for you, not the other way around, right? Because there is no fragile baked egg custard in this recipe, it is incredibly resilient in the fridge. In fact, I think it actually gets slightly better after the first 12 hours chilling.
The official rule in my kitchen is that this pie can hang out nicely in the refrigerator for up to three full days. That’s fantastic news if you are trying to juggle a huge menu for your thanksgiving desserts no bake spread! It means you can tackle this pie when you have a free moment on Wednesday and let it chill peacefully until Thursday dinner.
The key to keeping it perfect is protecting that wonderful whipped topping. If you skip this step, the topping—which is mostly air and dairy—will start to weep or dry out. Always make sure to cover the pie loosely. Plastic wrap is fine, but I prefer placing it gently over the pie so it doesn’t press directly into the frosting. If you want to keep it super fresh for those three days, you can even freeze the pie un-topped for up to a month, then just top and chill the day you plan to serve it! It’s just so flexible.
If you’re looking for other great make-ahead ideas that don’t need the oven, check out my tips on making Cranberry Sugar Cookies and Rolls the day before so your morning is less rushed!
Serving Suggestions for Your Simple Pumpkin Dessert
This simple pumpkin dessert is so gorgeous on its own, but honestly, I love pairing it with something cold and bright! Since the pie is rich and spiced, a clean, refreshing drink cuts through that sweetness perfectly. I often make a big pitcher of my Sparkling Honey Lemonade Soda to keep everyone refreshed.
If it’s a chilly evening, though, serve it alongside a steaming mug of hot apple cider or some strong, black coffee. The contrast between the cold, creamy pie and the hot, spiced drink? Perfection. Everyone always asks how I manage to serve such fancy-tasting desserts with so little fuss!

Frequently Asked Questions About the No Bake Pumpkin Pie
Whenever I share this no bake pumpkin pie recipe, people always have the best questions! It shows how much everyone wants to nail that creamy texture without turning on the heat. I’ve gathered the most common things I get asked about so you can feel 100% confident serving this dessert.
Can I substitute the graham cracker crust for a different base?
Absolutely! That’s the beauty of any good no oven pie recipe—the crust is wonderfully flexible. If you hate graham crackers, go for the gold with vanilla wafers or even Nilla Wafers; they press down beautifully and give a slightly sweeter, buttery base. Gingersnaps are amazing too if you really want to amp up that spice factor underneath the creamy filling. Just remember, since we aren’t baking anything, you must press that substitute crumb mixture firmly into the pan so it doesn’t crumble when you slice it!
How do I ensure my filling sets firmly without baking?
This is the million-dollar question for any creamy no bake dessert! The structure relies on three things working together: full-fat cream cheese, whipping the heavy cream cold until stiff peaks form, and *time*. Seriously, I can’t stress the chilling enough. Six hours is the *minimum* requirement, but overnight is where the magic happens and you get that satisfying slice.
If you are worried—like I was that one time I needed it fast—you can use that trick from the notes: bloom one packet of unflavored gelatin in quick hot water and fold it into the pumpkin mixture right before you fold in the whipped cream. That virtually guarantees firmness! For more ideas on other creamy bases, you might want to peek at my No Bake Pumpkin Cheesecake recipe; it uses gelatin too!
If you really want to see how other cooks tackle this, I saw a really straightforward approach on The Frugal Girls site that focuses on making sure the base totally stabilizes.
I want this to be a lighter dessert—can I reduce the fat?
I understand wanting a light pumpkin pie! We already use whipped cream to keep the filling airy, but if you want to cut down on the richness a bit, you have two spots you can adjust. First, you can use low-fat cream cheese, but I’m warning you, the set won’t be *quite* as firm; you might need that gelatin trick if you go that route. Second, instead of using all heavy whipping cream for the topping, you can substitute half of it with a drained tub of cool whip. This keeps it super fluffy while dropping the overall fat content a little. It won’t taste exactly the same, but it’s a great way to adjust the richness in this quick pumpkin treat!
Is this recipe suitable for a crowd, or will it fall apart?
This is absolutely a no bake dessert for a crowd! Because the filling is stabilized by the cream cheese, it holds up so much better than a traditional baked custard pie. As long as you respect that chill time—ideally overnight—it slices beautifully! You can stack slices on a plate, and they hold their shape. It’s fantastic for big holiday tables where you need easy grab-and-go desserts.
Estimated Nutritional Data for This Quick Pumpkin Treat
Since everyone’s curious about ingredients, I wanted to include a rough estimate on the nutrition for one slice of this delicious quick pumpkin treat. Remember, this is just an estimate based on standard brand products, and if you use different topping swaps or crust materials, these numbers will change slightly, of course!
- Serving Size: 1 slice
- Calories: 410
- Sugar: 45g
- Sodium: 280mg
- Fat: 22g
- Saturated Fat: 12g
- Carbohydrates: 50g
- Protein: 7g
It’s a dessert, so sugar and fat are naturally present, but we balance it out with all that pumpkin goodness! Consider the fat content the price we pay for that unbelievably creamy no bake dessert texture.
Share Your Experience Making This Easy Pumpkin Pie Recipe
Honestly, when you take that first bite of this perfectly chilled, no-fuss pie, I want to know about it! Did you make it the day before your big gathering? Did you add a pinch more nutmeg because you love spice? Don’t be shy! Drop a rating using the star system below or leave me a comment telling me how this easy pumpkin pie recipe saved your holiday dessert schedule.
I love hearing from you and seeing how my recipes work out in your kitchens. If you ever have questions or need help troubleshooting, feel free to reach out via my contact page. Happy enjoying!
PrintCreamy No Bake Pumpkin Pie with Graham Cracker Crust
Make a simple, creamy, and delicious no bake pumpkin pie using a graham cracker crust. This make-ahead dessert requires no oven and is perfect for fall gatherings.
- Prep Time: 25 min
- Cook Time: 0 min
- Total Time: 6 hr 25 min
- Yield: 8 servings 1x
- Category: Dessert
- Method: Chilling
- Cuisine: American
- Diet: Vegetarian
Ingredients
- 1 1/2 cups graham cracker crumbs
- 1/4 cup granulated sugar
- 6 tablespoons unsalted butter, melted
- 1 (15 ounce) can pure pumpkin puree
- 1 (14 ounce) can sweetened condensed milk
- 1 teaspoon pumpkin pie spice
- 1 teaspoon vanilla extract
- 8 ounces cream cheese, softened
- 1/2 cup powdered sugar
- 1 cup heavy whipping cream, cold
- 1/4 cup powdered sugar (for topping)
Instructions
- Combine graham cracker crumbs, 1/4 cup granulated sugar, and melted butter in a bowl. Press the mixture firmly into the bottom and up the sides of a 9-inch pie plate. Chill the crust for 20 minutes.
- In a large bowl, beat the softened cream cheese and 1/2 cup powdered sugar until smooth. Set aside.
- In a separate bowl, whisk together the pumpkin puree, sweetened condensed milk, pumpkin pie spice, and vanilla extract until fully combined.
- Gently fold the pumpkin mixture into the cream cheese mixture until just blended. Do not overmix.
- In a clean, cold bowl, whip the heavy whipping cream until soft peaks form. Gently fold the whipped cream into the pumpkin mixture until no streaks remain, creating a fluffy filling.
- Pour the filling into the chilled graham cracker crust and spread evenly.
- Cover the pie loosely with plastic wrap and refrigerate for at least 6 hours, or preferably overnight, until the filling is firm.
- Before serving, beat the remaining 1/4 cup powdered sugar into any remaining whipped cream or use store-bought whipped topping. Spread or pipe over the chilled pie.
- Slice and serve this easy pumpkin pie recipe cold.
Notes
- For a quicker crust, press the mixture firmly into the plate and chill for 15 minutes instead of 20.
- If you want a slightly firmer filling, you can add one packet of unflavored gelatin dissolved in 1/4 cup hot water to the pumpkin mixture before folding in the whipped cream.
- This is a great make ahead fall dessert; it holds well in the refrigerator for up to three days.
Nutrition
- Serving Size: 1 slice
- Calories: 410
- Sugar: 45g
- Sodium: 280mg
- Fat: 22g
- Saturated Fat: 12g
- Unsaturated Fat: 10g
- Trans Fat: 0.5g
- Carbohydrates: 50g
- Fiber: 2g
- Protein: 7g
- Cholesterol: 60mg