
Oh, happy holidays! Are you ready for the best part of Christmas baking, or are you already dreading the inevitable gingerbread house collapse? Trust me, I’ve been there. I spent years in my grandmother’s kitchen learning the science behind why some frostings hold up and others weep onto your countertop. That’s why I developed this recipe for rock-solid gingerbread house icing. This isn’t some runny glaze that melts the second the heat turns on. This is your edible glue, your structural support, and your decorative piping magic, all rolled into one incredibly reliable mixture. We’re going to make sure your holiday centerpiece stands proud!
- Why This Gingerbread House Icing is the Ultimate Edible Glue
- Ingredients for Strong Gingerbread Icing
- Step-by-Step Instructions for Perfect Gingerbread House Icing
- Assembling Your Structure with Sturdy Gingerbread Icing
- Tips for Success with Your Gingerbread House Icing
- Troubleshooting Common Gingerbread House Icing Issues
- Frequently Asked Questions About Royal Icing
- Estimated Nutrition for This Pipeable Holiday Frosting
- Share Your Christmas Edible Crafts Success
Why This Gingerbread House Icing is the Ultimate Edible Glue
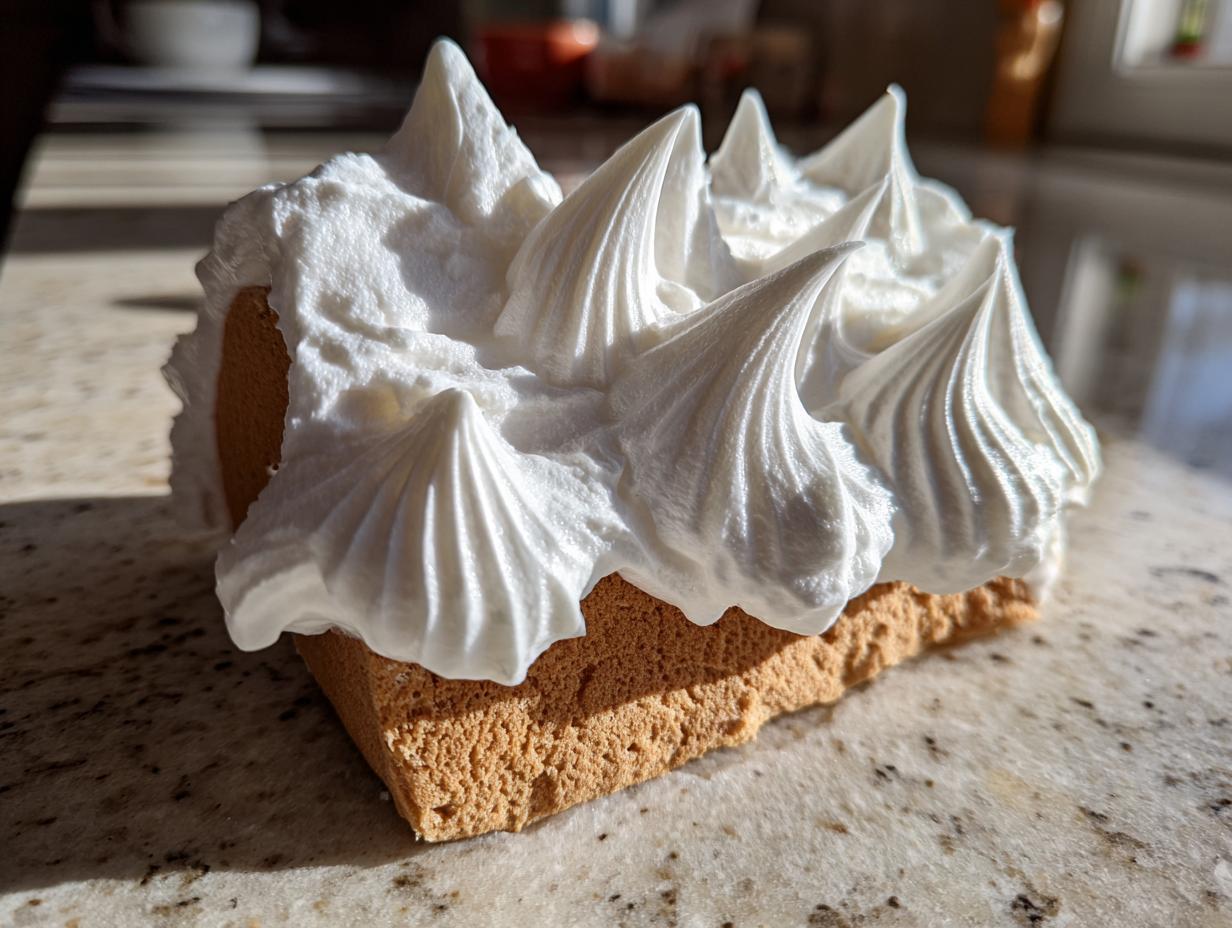
You need icing that is tough, not fluffy! Standard buttercream? Forget about it; your walls will slide right off before the caramel scent even hits the room. What makes this royal icing tough is that it dries rock-hard, curing like cement once it sets up. It’s the secret weapon for making sure your roof doesn’t cave in five minutes before company arrives. I spent ages testing formulas to make sure this recipe delivered the strength you need for building sturdy gingerbread structures.
When you use this mixture correctly, it dries clean and bright white, too. If you’re looking to build something intricate, you need that absolute certainty that your walls will stay put while you work on the finer details.
Achieving Perfect Pipeable Holiday Frosting Consistency
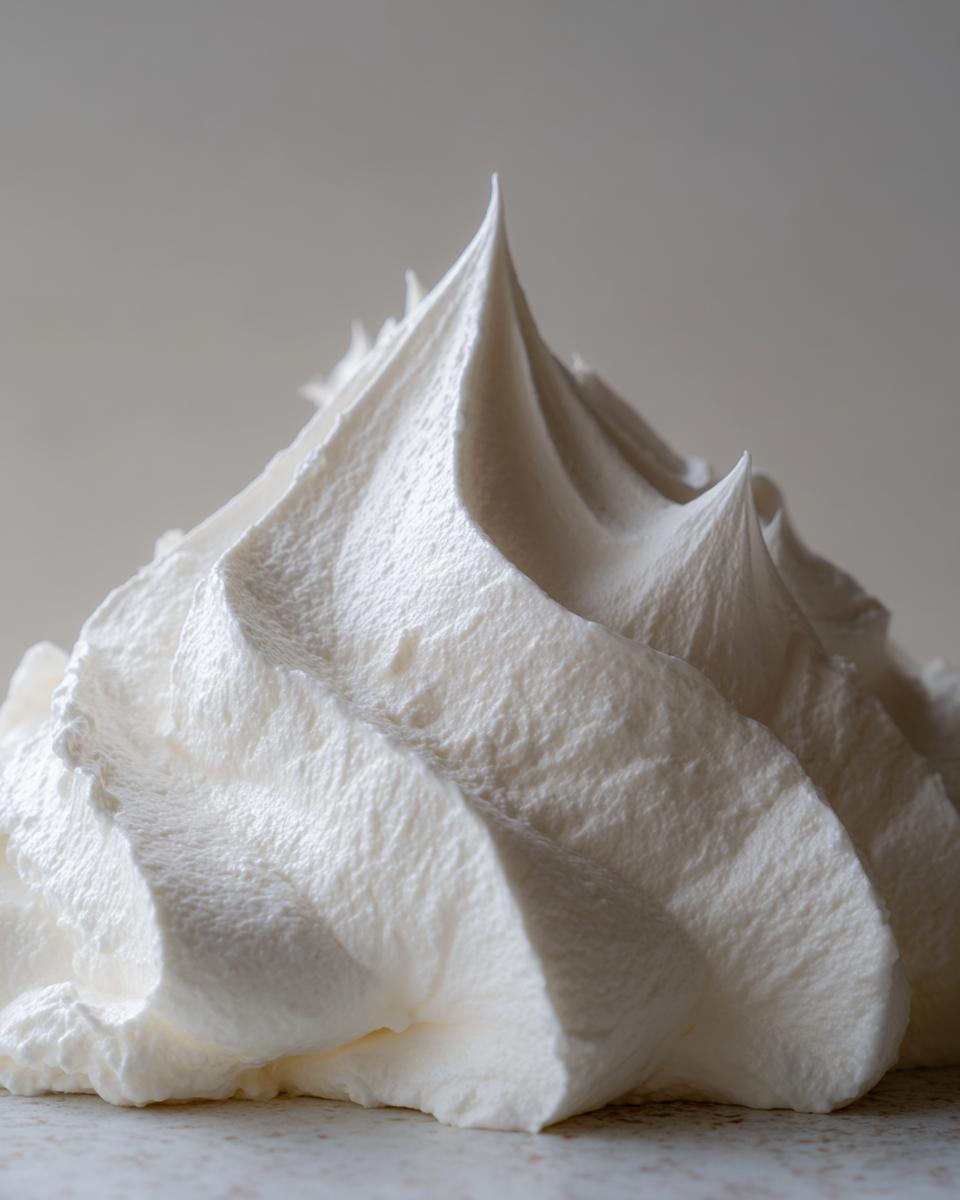
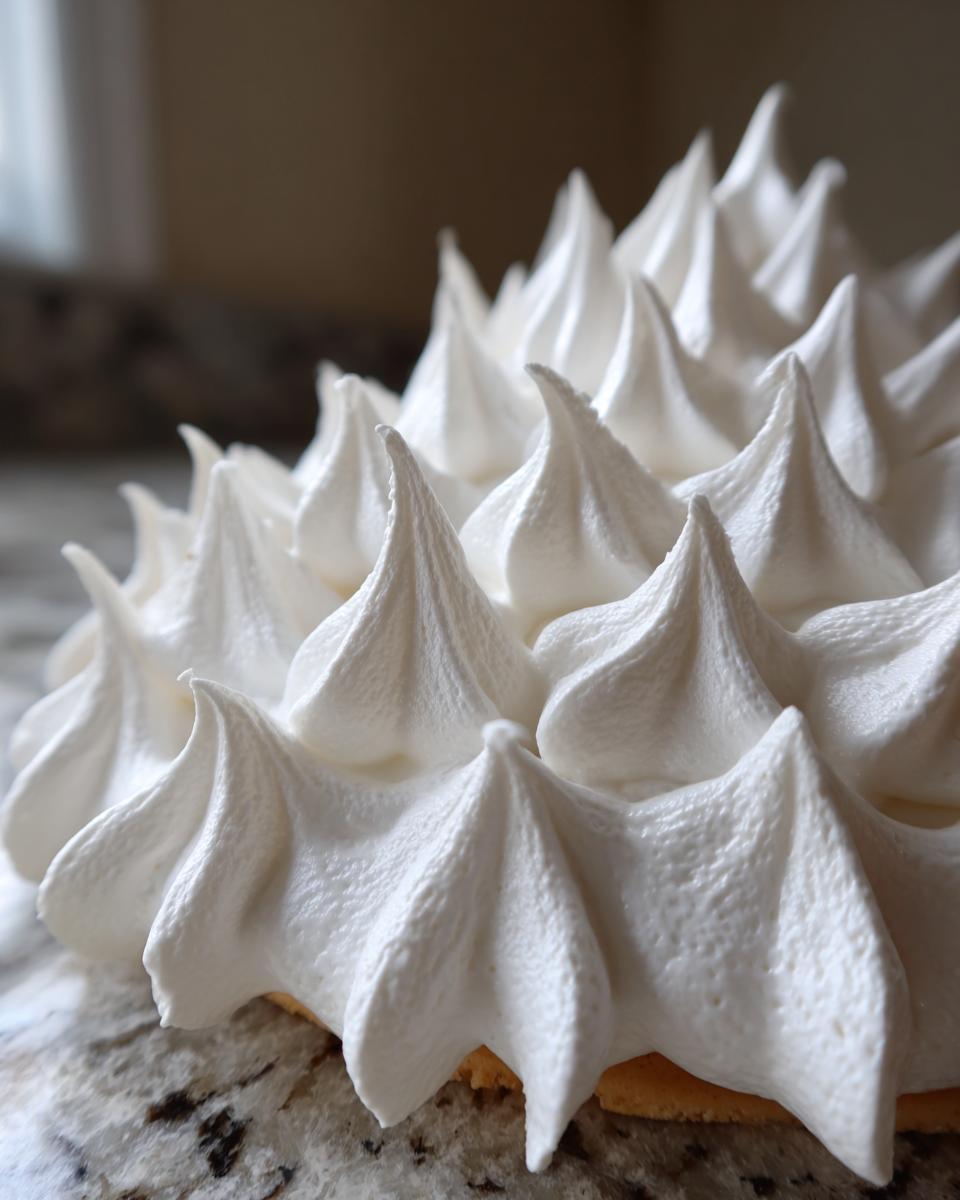
The beauty of royal icing is its incredible versatility. Straight out of the mixer, that stiff consistency it develops when you beat it for seven minutes? That’s your super-strong edible glue for assembling the walls and roof pieces. It holds peaks perfectly!
But once the structure is solid, you thin it just slightly, and suddenly, you have the perfect pipeable holiday frosting for snow drifts, window frames, and those tiny, adorable candy borders. It keeps its shape beautifully, which means your decorations look crisp, not slumped.
For anyone looking to build something that lasts past Christmas Eve, trust me on this royal icing recipe, just like others who rely on it for that sturdy hold when creating their gingerbread house glue.
Ingredients for Strong Gingerbread Icing
Precision is everything here. When you’re building structures, you can’t eyeball your measurements—we need the science to work! Making the best gingerbread house icing depends on getting these core three ingredients exactly right. Use good quality confectioners’ sugar, and please, make sure you sift it first! The resulting yield is enough to glue together one standard house.
Ingredient Notes and Substitutions for Gingerbread House Icing
The star here is the meringue powder. It’s what gives you that fast-drying, strong structure we absolutely need. If you don’t have that on hand, you *can* swap it out for three large egg whites, but here’s the catch: the egg white version takes much longer to dry firm. I would honestly stick to the powder if you are in a rush to assemble your house—it’s just more reliable for making that great Meringue Powder Icing Recipe.
Remember to sift that sugar! If you don’t, you’ll spend half your time picking little lumps out of your icing when you should be sticking walls together. Sifting ensures a super smooth base for whatever consistency you’re aiming for.
Step-by-Step Instructions for Perfect Gingerbread House Icing
Okay, you have your ingredients ready, everything is measured perfectly—now for the fun (and slightly loud!) part. It only takes about 10 minutes of active mixing, and your Total Time is wonderfully quick, which is fantastic when you’re trying to get a whole gingerbread village up before Christmas Eve. Don’t rush the mixing time, though; that low-speed start followed by the high-power beat is critical for this recipe.
Mixing to Achieve Structural Integrity
First things first: get that sifted sugar and that meringue powder into your mixing bowl. Then, pour in your warm water. Start slow! You don’t want a sugar cloud explosion right away. Mix on low speed just until everything looks like wet sand. Then, crank it up! Use your electric mixer on medium-high speed for a full 5 to 7 minutes. I know, it feels long, but beating it this long incorporates tons of air and forces the mixture to become super bright white and stiff. This is what gives you the Best Icing for Building Gingerbread Structures!
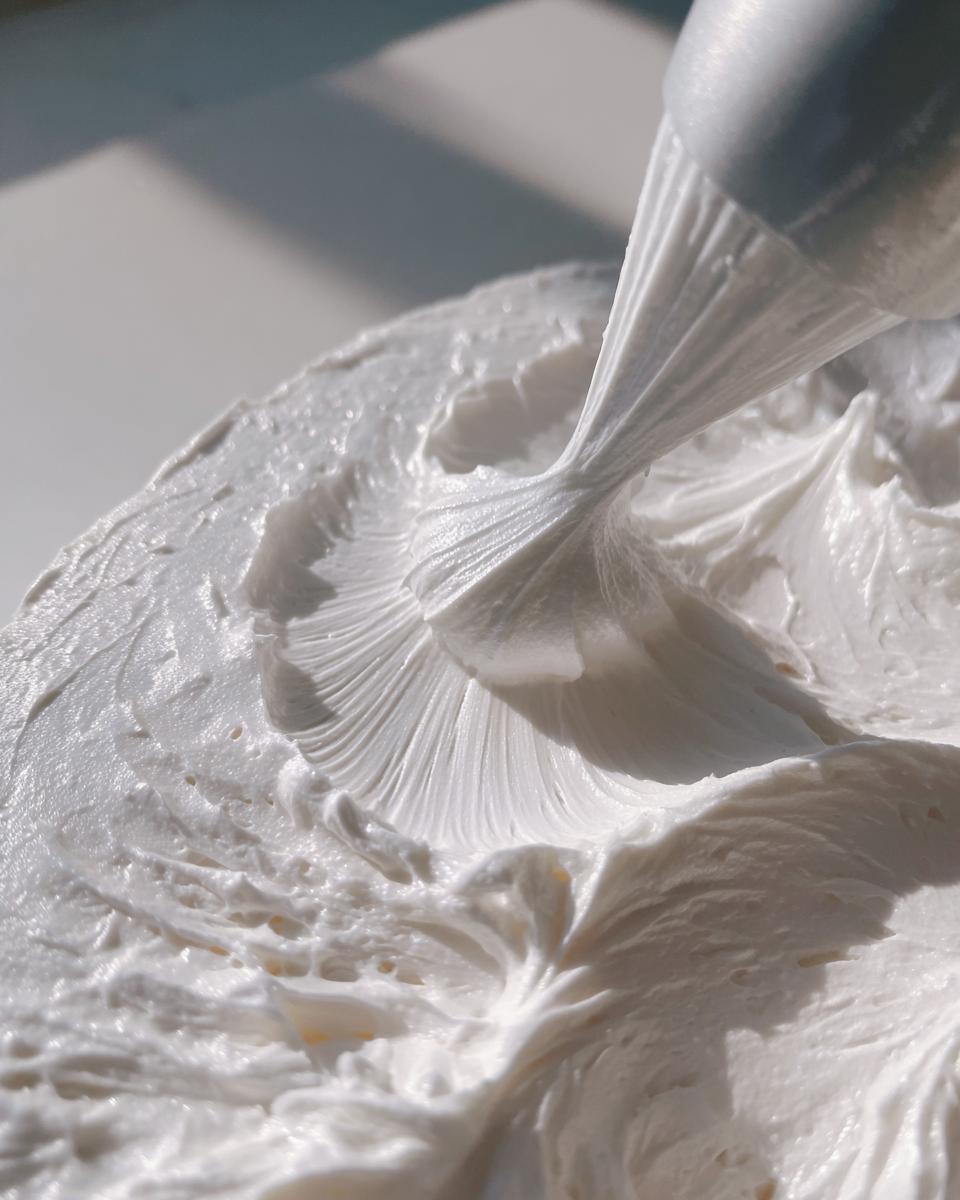
Adjusting Consistency for Decorating
When it comes out of the mixer, the stiff consistency is ready to hold your walls up like a champ. But for decorating those cute shutters or snow on the roof? We need to thin it out just a bit to get that beautiful Perfect White Icing Consistency for piping.
Take some out and add water just one teaspoon at a time. You want icing that flows slowly off your spoon, standing up in a soft peak for a second or two before settling back down. It should still hold a sharp line when piped, unlike a runny glaze. You can see how the experts manage this consistency for structures that last over at Emma’s Cake Studio!
Assembling Your Structure with Sturdy Gingerbread Icing
Alright, the icing is mixed, and you hopefully have at least two batches ready: one ultra-stiff pile for glue and a slightly softer pile for decorating later. When you start assembling your walls and roof panels, work quickly because this gingerbread house icing starts setting up almost immediately. Apply a generous bead of the stiff icing where two pieces meet—think of it like mortaring bricks!
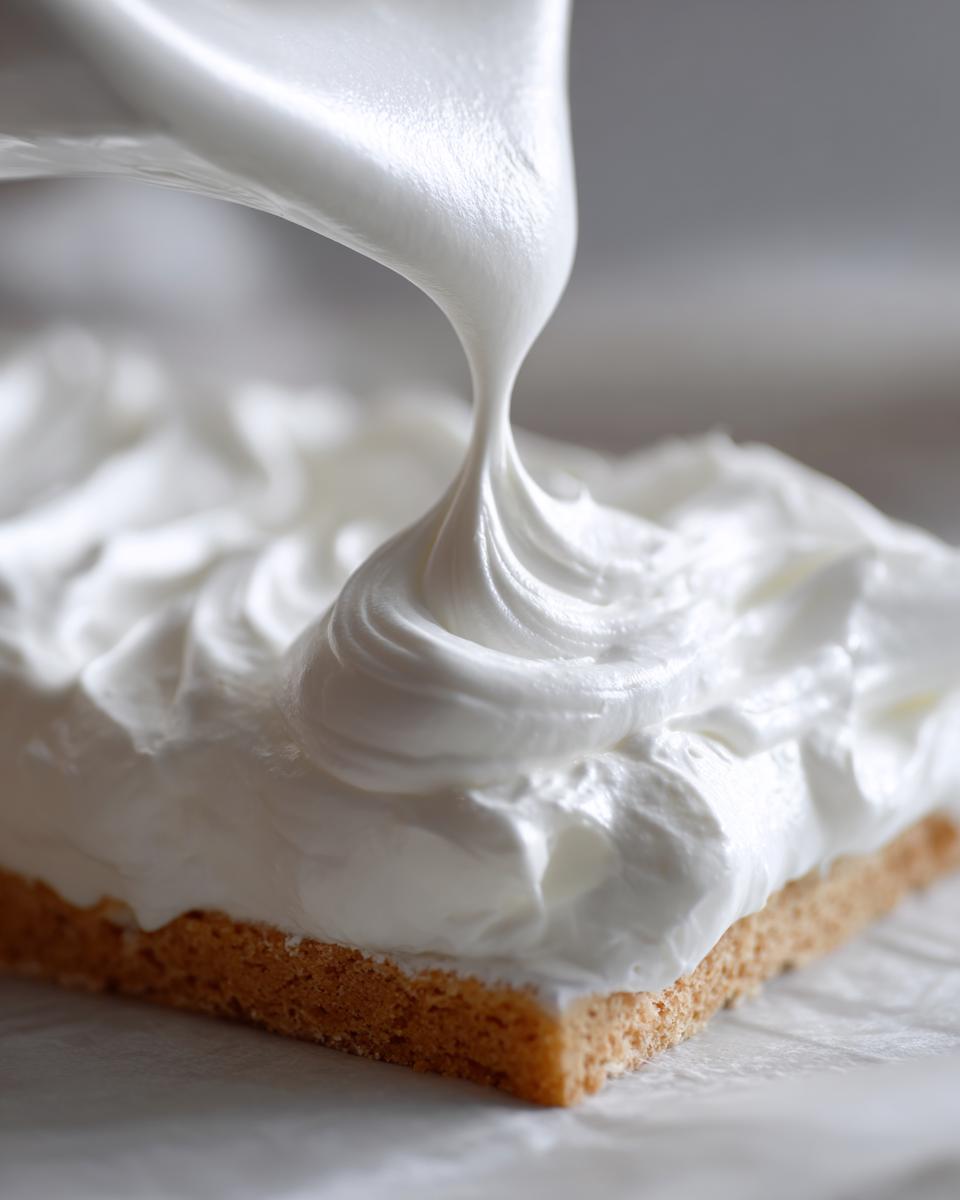
Use cans or small jars to prop up the walls while they cure. Don’t be tempted to decorate right away! The single most important thing you can do to guarantee structural integrity is letting it dry completely. I always tell people to assemble everything one evening and let it sit undisturbed overnight. Seriously, wait until the next day to start adding candy trim. This patience pays off when your whole house doesn’t slide into a sugar mess!
For assembly tips and ideas on keeping your structure straight while it dries, check out some great advice on getting that perfect structure at Simple Joy.
Tips for Success with Your Gingerbread House Icing
If you follow the recipe exactly, you shouldn’t run into major issues, but since we are building something structural here, I want to give you a few quick pointers to avoid heartbreak. The biggest issue I see people face is weeping or cracking once everything dries. This usually means the icing wasn’t beaten long enough to incorporate enough air for stability, or the pieces were disturbed while setting up!
Keep the humidity low if you can, too! High humidity makes royal icing slow down its cure time, which makes it feel softer for longer. Be patient, give it that overnight rest, and you’ll find this gingerbread house icing holds up beautifully. When you are done with your main build, you want to make sure you store any leftovers correctly so you can use them for those final decorations later on.
Storage and Shelf Life of Gingerbread House Icing
Listen, royal icing doesn’t like the fridge at all. If you put it in the refrigerator, it gets all sweaty and weepy when it warms up, which you absolutely do not want near your pristine gingerbread walls. My rule is simple: keep it airtight at room temperature for up to two weeks.
Put it into a zip-top bag, press out all the air, and seal it tight. If you see it getting a little stiff while it’s waiting to be used for extra details—like if you are making a fluffy Holiday Decorating Glaze for the roofline later—just knead in a half-teaspoon of warm water until it loosens up again. Never use the fridge, and it will stay ready for any touch-ups!
If you want some more inspiration on achieving that flawless look for your final decorative piping, check out the amazing tips others share regarding their gingerbread house icing techniques over at Pizzazzerie.
Troubleshooting Common Gingerbread House Icing Issues
Sometimes, even with the best recipe, things don’t dry exactly right. Don’t panic if you run into a snag while building your holiday masterpiece. The most common issue I hear about is the icing just… not hardening. If your walls are leaning or the roof is sliding, it generally means you didn’t beat the icing long enough initially for that structural batch, or maybe your humidity is way too high!
If your gingerbread house icing is too thin and runny, and you are trying to stick walls together, you are going to be waiting forever! The fix is easy: just mix up another small batch of dry ingredients—sifted sugar and meringue powder—and slowly beat that dry mix into your runny batch until it starts getting stiff again. Always add dry to thin, never thin to thicken structural icing. That’s my main rule for keeping this edible glue reliable!
Frequently Asked Questions About Royal Icing
I know building gingerbread houses can bring up a ton of questions, especially when you need your frosting to work as seriously strong glue! Here are the things people ask me most often about this gingerbread house icing recipe. I want you to feel totally confident before you start sticking those walls together!
Can I use this Royal Icing Recipe for Cookies?
Absolutely, yes! This is a fantastic base for everything holiday baking related. However, the main batch we mix up for building houses—the one that whips up stiff and holds its shape perfectly—is going to be *very* firm when you use it for cookies. It’s great for outlining or for creating those hard, sturdy details, but if you want to flood a whole sugar cookie surface, you’ll need to take a small portion out and thin it down quite a bit with water, just like we discussed for decorating.
What is the best alternative for Edible Glue for Gingerbread House?
Honestly, I’m sticking to my guns here: this recipe, made in its stiff consistency, *is* the best alternative because it dries perfectly hard. There isn’t another mix I trust as much for holding heavy gingerbread up against gravity. If you lost your meringue powder and *had* to use egg whites, that would be your *alternative* method, but it won’t be as fast-acting.
Just make sure that batch of gingerbread house icing you use for assembly is beat super stiff! It provides the ultimate Edible Glue for Gingerbread House that holds everything together until New Year’s. If you want to see other dessert ideas using this base, check out my list of favorites over at my desserts page!
Estimated Nutrition for This Pipeable Holiday Frosting
We’ve talked all about how strong this icing is and how perfectly it pipes, but I know some of you home bakers are curious about the nutritional breakdown, just like I was when I started analyzing recipes years ago! Food isn’t just about taste; knowing what goes into your holiday centerpiece matters.
Here is the estimated nutrition based on the ingredients used for this stiff royal icing. Remember, these are standard industry approximations, especially since ingredients like confectioners’ sugar can vary slightly by brand. We’re aiming for transparency here, so here’s what you can expect for roughly a 1/4 cup serving size:
Yields about 1 cup of icing, serving 4 people.
- Calories: 180
- Sugar: 45g
- Sodium: 5mg
- Fat: 0g
- Protein: 1g
- Carbohydrates: 45g
Since this icing is mostly pure sugar and dries rock-hard, there’s virtually no fat or cholesterol, which is something, I guess? The most important takeaway is that like most beautiful holiday confections, this delicious, sturdy pipeable holiday frosting is certainly a treat to be enjoyed in moderation alongside that gorgeous gingerbread house structure you built!
Share Your Christmas Edible Crafts Success
Now that you have the formula for the ultimate, rock-solid gingerbread house icing, I can’t wait to see what you build! Seriously, there is nothing better than seeing these sturdy little houses standing tall, covered in gorgeous snow drifts and candy details. Did you have success building a massive structure? Did you use this recipe for other Christmas edible crafts, maybe making little candy fence posts or gingerbread ornaments?
I always love seeing your creations! If you tried this royal icing and it held up perfectly for your walls and roof—which I know it did because we nailed the science—please come back and leave a star rating right here on the recipe card. That feedback means the world to me because it helps others feel confident stepping into their own building projects!
And if you managed to make a masterpiece last through the holiday season, please snap a picture and tag me on social media! I want to see the fruits of your labor. Nothing makes me happier than knowing my troubleshooting and testing helped your family create beautiful, stress-free holiday memories this year. Knowing my grandmother’s dedication to reliable recipes lives on in your perfect little edible creations is why I started this whole site. If you want to know more about my mission to bring reliable, simple cooking to every kitchen, you can read all about it on my About Me page. Happy decorating!
PrintStrong Royal Icing Recipe for Gingerbread House Construction

Make sturdy gingerbread houses using this reliable royal icing recipe. It acts as strong edible glue for assembly and pipes well for detailed holiday decorating.
- Prep Time: 10 min
- Cook Time: 0 min
- Total Time: 10 min
- Yield: Enough for one standard house 1x
- Category: Dessert
- Method: Mixing
- Cuisine: American
- Diet: Vegetarian
Ingredients
- 4 cups confectioners’ sugar, sifted
- 3 tablespoons meringue powder
- 6 tablespoons warm water
Instructions
- In a large bowl, combine the sifted confectioners’ sugar and meringue powder.
- Add the warm water to the dry ingredients.
- Beat with an electric mixer on low speed until the sugar is incorporated.
- Increase the speed to medium-high and beat for 5 to 7 minutes until the icing is stiff, bright white, and holds firm peaks. This is your structural glue consistency.
- For decorating consistency, add water one teaspoon at a time until the icing flows slowly from a spoon.
- For piping details, use the stiff consistency directly from the mixer.
- Use the icing immediately to assemble your gingerbread house pieces.
- Allow the structure to dry completely, often overnight, before adding decorative elements.
Notes
- If you do not have meringue powder, you can substitute it with 3 large egg whites, but the drying time may be longer.
- Store unused icing in an airtight container at room temperature for up to two weeks; do not refrigerate.
- To thin the icing for flooding or fine lines, add water very slowly, mixing well after each addition.
Nutrition
- Serving Size: 1/4 cup
- Calories: 180
- Sugar: 45
- Sodium: 5
- Fat: 0
- Saturated Fat: 0
- Unsaturated Fat: 0
- Trans Fat: 0
- Carbohydrates: 45
- Fiber: 0
- Protein: 1
- Cholesterol: 0