
Summer is just too short, isn’t it? All those perfectly ripe strawberries just begging to be turned into something incredible that lasts beyond August! That’s exactly why I’m sharing my absolute favorite method for making **freezer jam**. Forget the hot, fussy process of traditional water bath canning; this recipe is completely no-cook, super easy, and it captures that fresh-picked flavor perfectly. Here at Taste This Plate, we focus on simple, trustworthy recipes you can count on, just like my friend Kate always emphasizes in her kitchen philosophy over at our ‘About’ page. So grab your berries, because in under 30 minutes, you can have a batch of vibrant fruit preserves ready to pop into the freezer!
- Why This Strawberry Freezer Jam Recipe is Perfect for Beginners
- Gathering Ingredients for Your Best Strawberry Freezer Jam
- Step-by-Step Guide to Making No Cook Freezer Jam
- Expert Tips for Perfect Strawberry Freezer Jam Every Time
- Storage and Thawing: Keeping Your Freezer Jam Fresh
- Creative Ways to Use Your Freezer Jam
- Frequently Asked Questions About Freezer Jam
- Understanding Estimated Nutritional Information for Freezer Jam
- Share Your Homemade Fruit Preserves
Why This Strawberry Freezer Jam Recipe is Perfect for Beginners
I want you to stop worrying about the whole canning process, seriously! This recipe is proof that anyone, even if you’ve never touched a jar, can make incredible Easy Freezer Jam Recipes. It’s genuinely designed for people who want amazing flavor without all the sterile equipment.
Here’s why this method is your new best friend:
- You get the taste of summer fruit preserved right now, not next season.
- It’s hands-down a fantastic No Cook Jam Recipe.
- The cleanup is so much faster—no sticky stovetops!
Zero Canning Required: Embrace No Canning Jam Making
When I say no canning, I mean it! You skip the whole water bath, the specialized jars, and the worrying about whether the seal is perfect. We rely on the sugar and acid interaction, plus the deep cold of your freezer, to keep this jam perfectly safe and delicious. It’s the easiest way to make No Canning Jam at home, period.
Ready Fast: Quick Breakfast Toppings
If you have 25 minutes of active hands-on time, you have time for jam. That’s it! This speed makes it perfect for whipping up a batch specifically for your weekly Quick Breakfast Toppings. Imagine running low on Sunday, then having a fresh jar (well, frozen jar!) ready to thaw before Monday breakfast rolls around.
Gathering Ingredients for Your Best Strawberry Freezer Jam
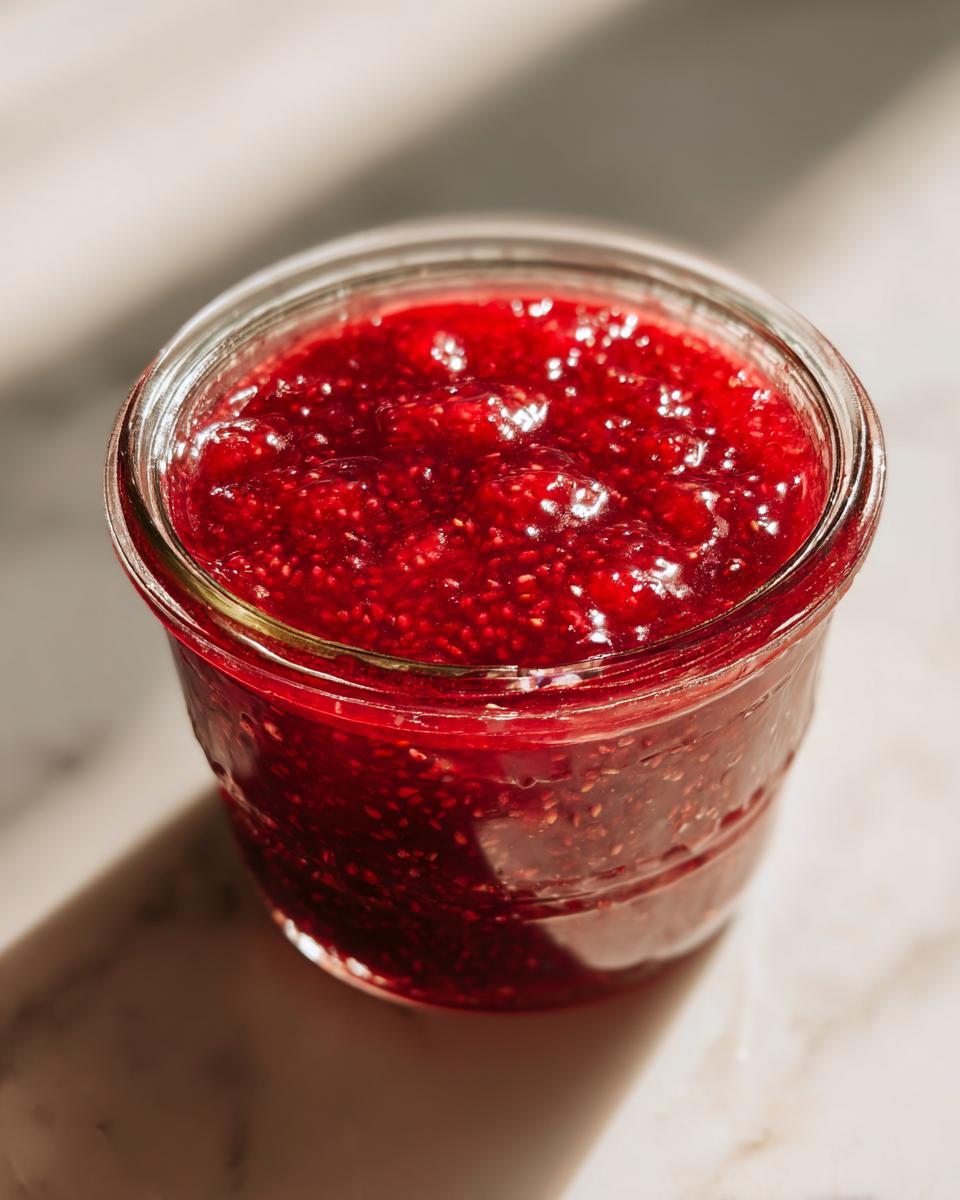
Okay, let’s talk about what you need for this beautiful, simple **freezer jam**. Because this recipe captures the fruit raw, the quality of your strawberries matters! I always look for berries that smell like actual sunshine—deep red all the way through, not pale near the top. That intensity is what you’re freezing for later!
Here is what you need to assemble your batch:
- 4 cups fresh strawberries, hulled and crushed
- 3 cups granulated sugar
- 1 tablespoon lemon juice
Remember, we are skipping pectin here, which is what keeps this recipe so straightforward. I found this fantastic no-cook strawberry freezer jam recipe guide that really hammers home the simplicity. We rely on the sugar to help pull out the juices from the berries, which gives us our set!
Ingredient Notes and Substitutions for Freezer Jam
Since this is a **no cook jam recipe**, the sugar isn’t just for sweetness; it’s crucial for texture! The combination of the strawberries and that amount of sugar creates a slight thickening action on its own. If, down the line, you find you really prefer a super thick result, you *could* look up adding a commercial pectin later, but trust me, for your first batch of **homemade fruit preserves**, stick to the basics.
If you absolutely had to, you could swap out maybe half the granulated sugar for superfine sugar, but don’t mess with the lemon juice—that acid is important for brightening the flavor profile and helping everything meld together beautifully. Keep it simple for now!
Step-by-Step Guide to Making No Cook Freezer Jam
Okay, deep breath! This is the fun part where your fruit turns into something truly amazing. Since we aren’t turning on the stove, the process is incredibly quick. Just make sure you have your containers ready to go before you start mixing, because once the sugar hits the fruit, we want to keep things moving toward the freezer!
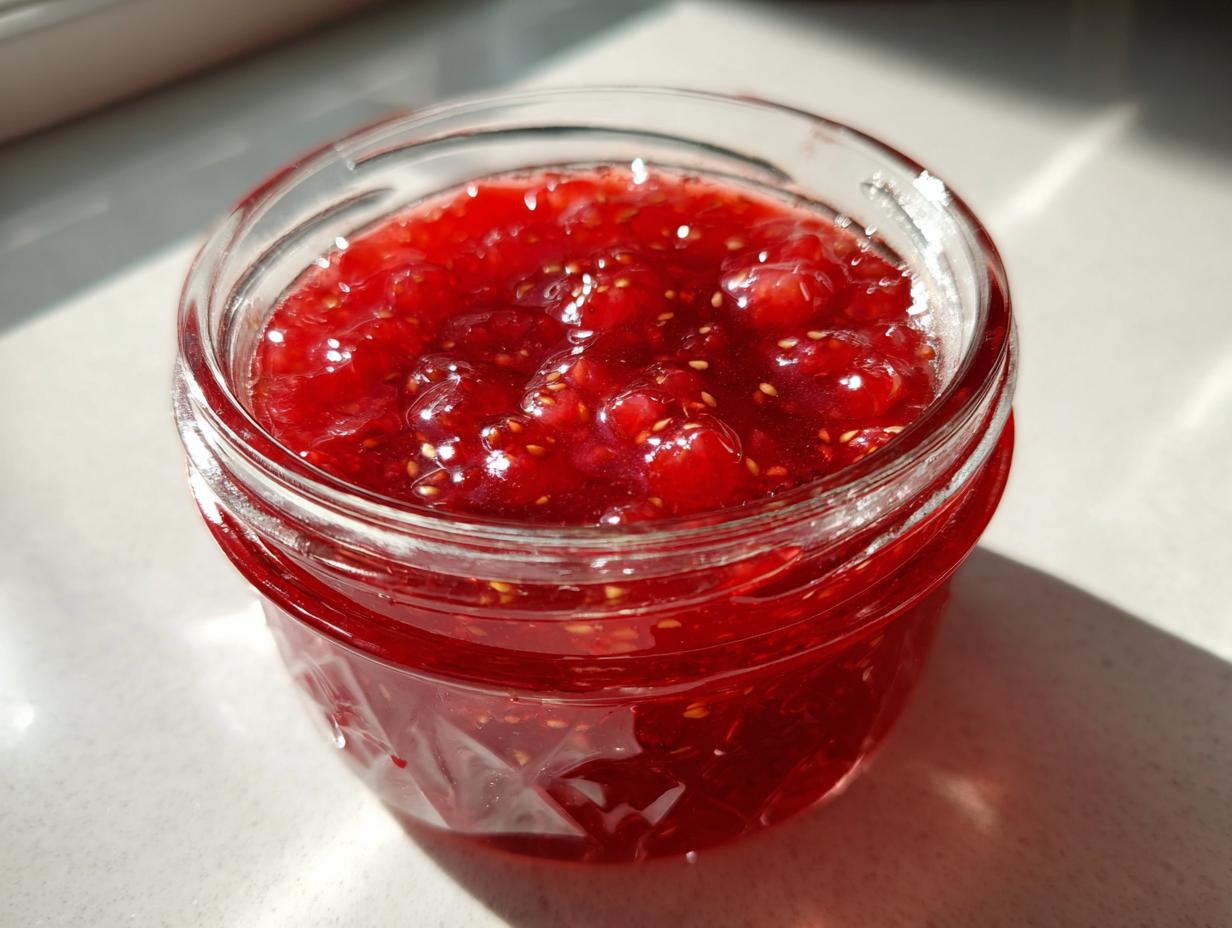
First things first: get your **freezer jam** containers ready. You can use small glass jars or even sturdy, freezer-safe plastic tubs. Just make sure they are clean and dry before you start scooping that beautiful mixture in there. If you’re using jars, make sure to wipe the rims down completely before sealing. Nobody likes sticky jars, right? It’s all about making the clean-up easy for yourself later!
Preparing Containers for Your Homemade Fruit Preserves
Because this jam is going right into the freezer—and fruit expands a little when it freezes—you absolutely must leave a little wiggle room at the top. I always aim for about a half-inch of empty space, what we call headspace. If you overfill them, the lids might pop off or the jar could crack when it freezes solid. Trust me, you don’t want to clean up jam explosions when you open the freezer door next month! Keeping your homemade fruit preserves safe is step number one.
The Setting Process for Delicious Freezer Spreads
Now for the magic moment! Combine your crushed strawberries and the sugar in a big bowl. Stir it up really well until everything is combined. Then, and this is the most important non-cooking step for this **no cook jam recipe**: you need to let it sit for 20 minutes. I know, waiting is hard, but during this time, the sugar is drawing out all that gorgeous juice from the berries and starting to dissolve. Give it a stir maybe halfway through! Once that time is up, stir in your lemon juice. That sweet and tart mixture is what forms the setting structure for these delicious freezer spreads—no boiling necessary! Now rapidly spoon it into your containers and seal them up tight before they head out for their long nap in the cold.
Expert Tips for Perfect Strawberry Freezer Jam Every Time
I’ve made so many batches of this **freezer jam** that I feel like I could do it with my eyes closed! Since we aren’t cooking this down, texture is all about that initial gentle management of the fruit and sugar. Don’t rush that resting phase we talked about; it’s the secret sauce for making these Simple Jams for Beginners really shine. Trust me, if that sugar isn’t dissolved when you freeze it, you’ll end up with gritty sweetness instead of smooth jam!
A couple of my personal hacks—things I picked up watching folks like Kate make good food look effortless—really help here. When you crush those strawberries, aim for a nice mix. You want some smaller bits for texture, but don’t pulverize them into total mush. A little chunkiness makes it feel homemade!
Also, for clean jars that look professional (and make great homemade gifts from the kitchen), I always wipe the jar rims with a clean, slightly damp paper towel just before sealing. It seems small, but it prevents any stray sugar crystals from preventing a nice tight seal before they head to the freezer. Check out this guide for great tips on presentation; I love how they keep the process feeling approachable!
Storage and Thawing: Keeping Your Freezer Jam Fresh
Now that you’ve made this wonderful, bright **freezer jam**, the final hurdle is making sure it lasts so you can enjoy that taste of summer all year long! The beauty of this no-cook method is that storage is super straightforward—no complex sterilization needed for shelf stability, we just rely on that deep freeze.
Once your little jars have completely cooled on the counter (don’t skip that! Freezing warm jam is bad news), they are ready for their winter nap. Pop them straight into the freezer. Because this isn’t processed with heat like traditional canning, the flavor stays incredibly vibrant and fresh.
Shelf Life of Homemade Freezer Jam
I’ve honestly never had a batch last long enough to test the limits, because my family gets into it way too fast! But based on how fresh the berries stay, you can safely keep this **freezer jam** tucked away for up to a full year. Seriously, an entire year! That means you can save up those summer strawberries in July and still have jam that tastes summery on your toast in June.
When you finally pull a jar out because you just can’t wait any longer, make sure you move it to the refrigerator overnight to thaw gently. It usually takes about 12 hours until it’s soft and spreadable. Once thawed, it’s best to use it within three or four weeks. If you just eat it straight from the fridge, it’s not going to freeze up on you, which is handy!
Creative Ways to Use Your Freezer Jam
Once you realize how incredibly fresh this **freezer jam** tastes, you’re going to want to put it on everything! It’s not just for toast, although it’s certainly fantastic slathered thickly on a slice of my Cinnamon Crunch Banana Bread. You know how sometimes store-bought jam tastes a little… cooked? This doesn’t! That means it shines when used uncooked.
Think about freezing fruit when it’s at its absolute peak—that means you’re preserving the ultimate flavor for the whole year! This lets you enjoy that vibrant taste of summer even in the dead of winter. It’s truly the best way to enjoy Year Round Berry Jam without waiting for the next growing season.
Honestly, the best part about having a good **easy freezer jam recipe** stocked is how versatile it is. Here are some of my favorite ways we use up our jars before they are officially “expired”:
- Stir a spoonful into plain Greek yogurt or vanilla ice cream. It makes the yogurt taste instantly special!
- Use it as a delightful filling between layers of a simple white cake for an extra burst of fruit flavor.
- Top your pancakes or waffles instead of relying on boring maple syrup sometimes.
- It makes the most thoughtful **Homemade Gifts from the Kitchen**! Tie a little ribbon around a clean jar, and you have an instant present for neighbors or teachers. Everyone loves homemade gifts that they can actually eat and use!
Don’t hesitate to test it out on different things. That bright, fresh strawberry flavor pairs really well with savory things too, like a glaze on a pork tenderloin if you happen to have some leftovers!
Frequently Asked Questions About Freezer Jam
I totally get it—when you’re making something new, you always have a few lingering questions bouncing around! That’s totally normal, especially when you’re moving away from the canning methods you might have seen your parents or grandparents use. We want this whole experience to be fun and stress-free so you can focus on enjoying fresh fruit spreads!
I pulled together the questions I always get when I bring a fresh batch of berries to a potluck. You can find more general breakfast ideas on our brunch page, but here are the specifics on our easy jam!
How to Make Freezer Jam Without Pectin
This is the big one, right? For this particular recipe, we are skipping commercial pectin entirely! The fruit releases pectin naturally when crushed, and the high amount of sugar, combined with that tablespoon of lemon juice (the acid), is enough to help the mixture set up nicely when chilled in the freezer. It won’t be quite as firm as a store-bought jar that uses gelatinous pectin, but it will be beautifully spreadable—perfect for slathering on toast!
Can I substitute strawberries with other fruit for this freezer jam?
Oh, absolutely! That’s the beauty of recipes designed around Seasonal Fruit Freezer Spreads. Strawberries are wonderful because they work so well with this simple ratio, but you can totally try this technique with other fruit that doesn’t have high levels of natural pectin, like raspberries or even peaches. Just make sure you crush the fruit slightly smaller than you might for a cooked jam, and keep that balance of sugar and acid the same. It usually works out perfectly!
How long does freezer jam last versus regular canned jam?
This is where the name comes in! Traditional canned jam is heat-processed to stay shelf-stable on your counter for years. Our **freezer jam** relies on being kept below freezing. It stays excellent quality in the freezer for up to a year, but once you thaw it out and keep it in the fridge, you need to eat it within about three to four weeks. It’s designed for enjoying soon, not for long-term pantry storage.
Is the texture different if I don’t cook it?
Yes, but it’s a good different! Because we don’t boil everything down, the texture is softer, fresher, and less translucent than a cooked jam. You still get that wonderful, fruity set from the sugar doing its work during chilling, but it’s less “jelly-like” and more like a luscious, slightly looser fruit spread. It tastes exactly like fresh berries, just perfectly thickened for spreading!
Understanding Estimated Nutritional Information for Freezer Jam
I always believe in being totally upfront about what we are eating, even when it comes to the sweet stuff! Since this is a very simple recipe, the nutrition breakdown is pretty straightforward, but I always want to put in a disclaimer that these numbers are estimates, as the exact content changes depending on the size of your fresh strawberries!
This information is based on a standard serving size, which for a nice thick spoonful would typically be about two tablespoons. Remember, this **freezer jam** is primarily made of fruit and sugar, so enjoy it as a wonderful topping or occasional treat rather than your main source of nutrition!
Here is a quick look at what you can expect per serving:
- Serving Size: 2 tablespoons
- Calories: About 100
- Sugar: Approximately 26g (This is why it tastes so delicious!)
- Fat: 0g
- Protein: 0g
- Sodium: 1mg
See? Nothing scary hiding in there, just fruit and sugar doing their sweet job! Because we aren’t canning or cooking it down, we’re keeping everything wonderfully natural. Knowing what’s in your food is part of that whole confident cooking journey Kate talks about. It’s simple, homemade goodness in a jar!
Share Your Homemade Fruit Preserves
Well, friend, that’s it! You’ve conquered the world of no-cook **freezer jam**, and I’m so excited for you to try this. Making a batch of **easy freezer jam recipes** is one of the most satisfying little kitchen victories because the payoff—that bright, fresh strawberry flavor—is huge for such little effort.
Honestly, when you taste this, nothing else will compare to these simple, homemade fruit preserves. I truly hope you give this recipe a go this season; it’s perfect for beginners and delivers that summer zing straight from your freezer!
After you make your batch, please come back and tell me how it went! A quick rating or even just letting me know you tried it means the world to me. If you snapped a picture of your beautifully filled jars, I’d absolutely love to see them! You can always reach out through our contact page. Happy spreading!
PrintEasy Strawberry Freezer Jam (No-Cook, No Pectin Option)
Make homemade strawberry jam in under 30 minutes. This no-cook freezer jam recipe captures fresh berry flavor and requires simple ingredients.
- Prep Time: 25 min
- Cook Time: 0 min
- Total Time: 25 min
- Yield: About 4 half-pint jars 1x
- Category: Breakfast Spread
- Method: No-Cook
- Cuisine: American
- Diet: Vegetarian
Ingredients
- 4 cups fresh strawberries, hulled and crushed
- 3 cups granulated sugar
- 1 tablespoon lemon juice
Instructions
- Prepare your freezer containers by ensuring they are clean and ready to fill.
- In a large bowl, combine the crushed strawberries and sugar. Stir well until the sugar begins to dissolve.
- Let the mixture sit at room temperature for 20 minutes, stirring occasionally. This allows the sugar to fully dissolve and the fruit to release juices.
- Stir in the lemon juice.
- Spoon the jam mixture into the prepared freezer containers, leaving about 1/2 inch of headspace at the top for expansion.
- Wipe the rims clean and seal the containers tightly.
- Let the jam cool completely on the counter, then transfer to the freezer.
- The jam will be ready to eat once frozen solid, usually within 24 hours.
Notes
- This recipe makes a small batch perfect for beginners.
- For a thicker set without commercial pectin, you can increase the sugar slightly or let the mixture sit longer before jarring.
- Freezer jam keeps well for up to one year in the freezer.
- Thaw overnight in the refrigerator before serving.
Nutrition
- Serving Size: 2 tablespoons
- Calories: 100
- Sugar: 26g
- Sodium: 1mg
- Fat: 0g
- Saturated Fat: 0g
- Unsaturated Fat: 0g
- Trans Fat: 0g
- Carbohydrates: 26g
- Fiber: 1g
- Protein: 0g
- Cholesterol: 0mg