
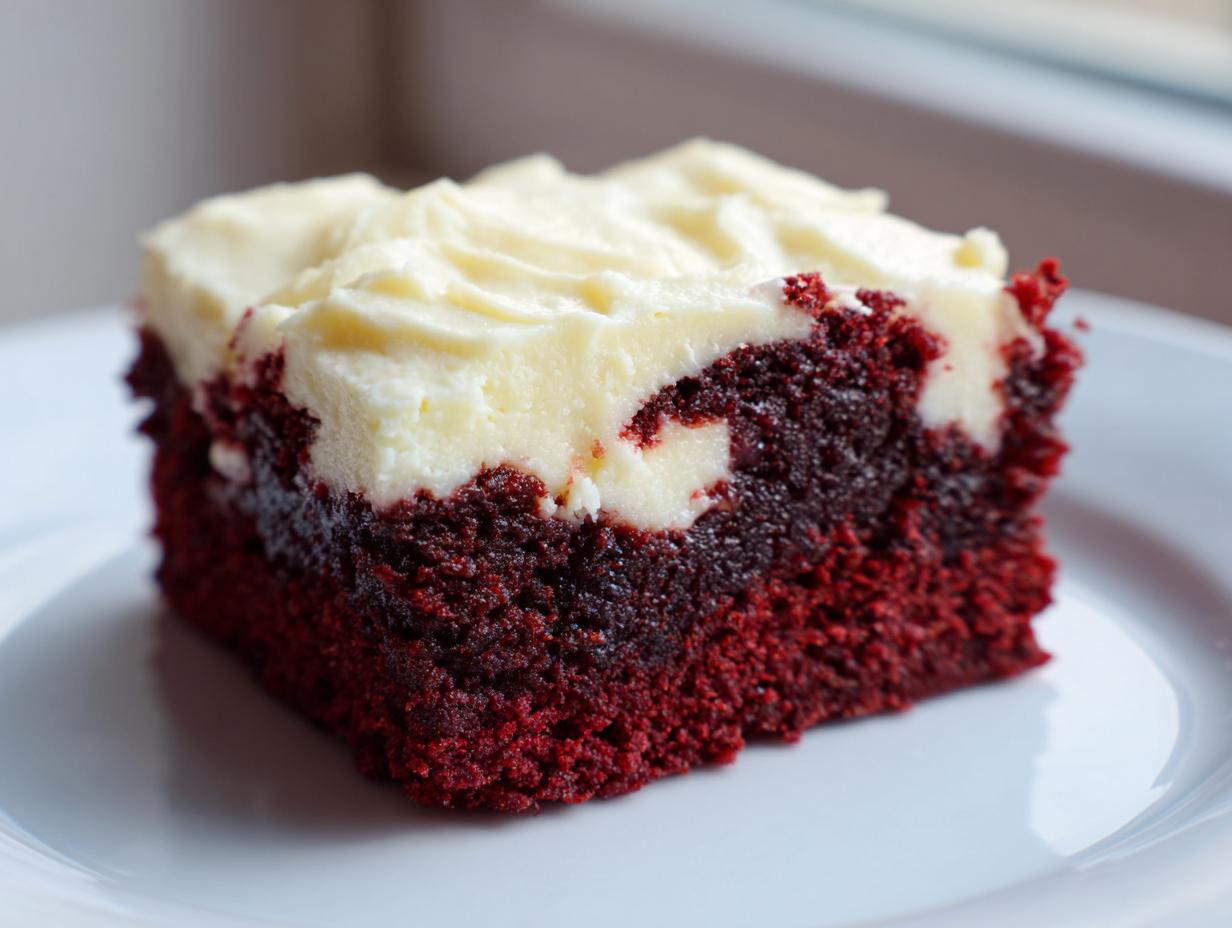
You know how sometimes you can’t decide if you want a rich, decadent brownie or a slice of classic, tangy red velvet cake? Well, friends, you don’t have to choose anymore! I spent ages perfecting this recipe because I truly believe the best desserts blend two amazing worlds. I’m thrilled to share my **Ultimate Fudgy Red Velvet Brownies with Tangy Cream Cheese Frosting** with you today. As I always say on my About Me page, making delicious, memorable things shouldn’t be complicated.
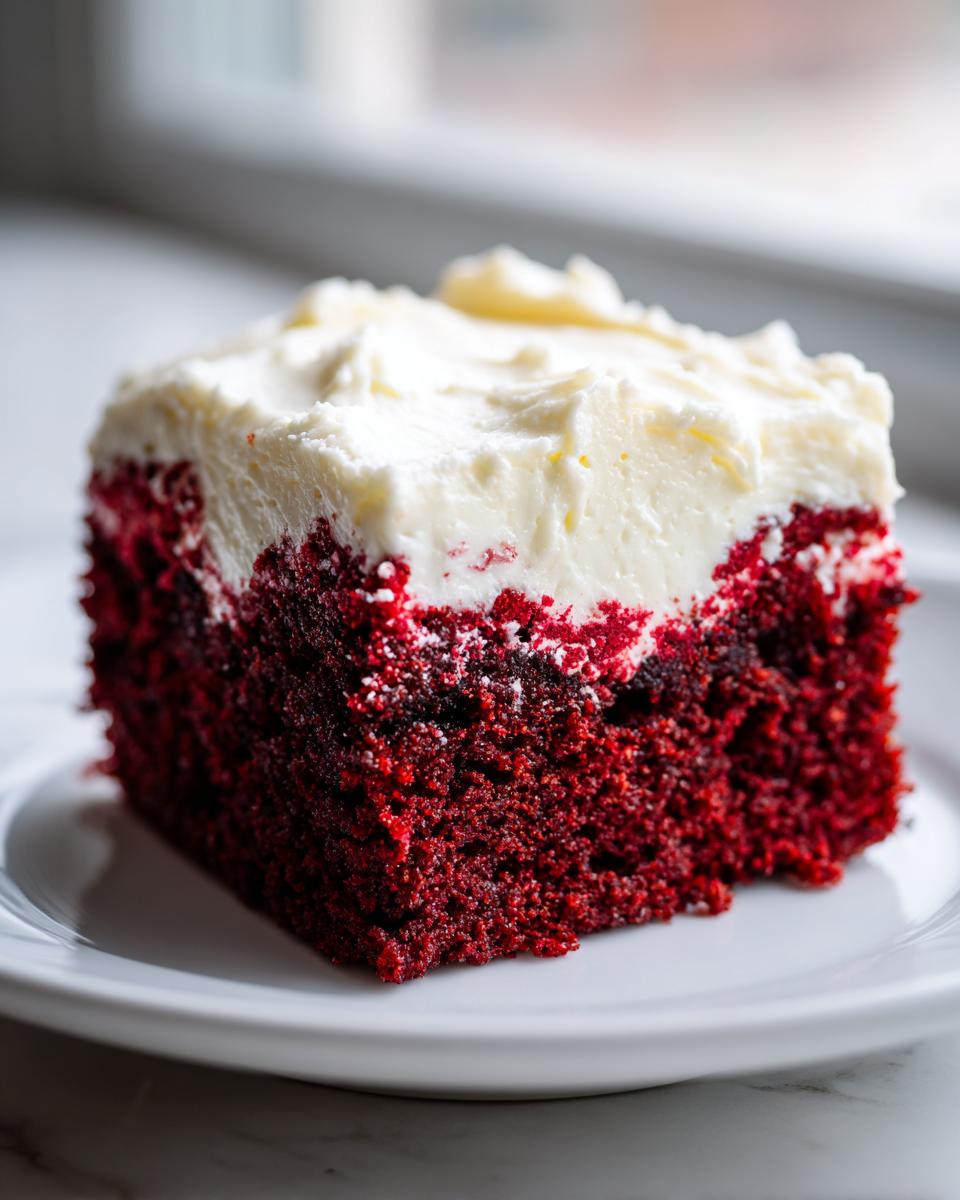
This recipe nails that deep, satisfying chocolate base with the signature velvet texture you crave, all topped by a bright, creamy frosting. Believe me, these red velvet brownies look like they came from a fancy bakery, but they come together so easily in your own kitchen. They are just pure joy baked into a square!
- Why You Will Love These Ultimate Fudgy Red Velvet Brownies
- Ingredients for the Best Red Velvet Brownies
- Step-by-Step Instructions for Perfect Red Velvet Brownies
- Tips for Baking the Best Red Velvet Brownies
- Ingredient Notes and Substitutions for Red Velvet Brownies
- Storage and Reheating Instructions for Homemade Brownies
- Serving Suggestions for Your Red Velvet Dessert
- Frequently Asked Questions About Red Velvet Brownies
- Recipe Details and Estimated Nutrition for Red Velvet Brownies
- Share Your Ultimate Red Velvet Brownies Experience
Why You Will Love These Ultimate Fudgy Red Velvet Brownies
Honestly, I think this turned out to be my favorite dessert recipe lately because it ticks every single box! If you’re looking for something impressive that still feels totally doable on a busy weeknight, stick right here. You won’t regret making these red velvet brownies.
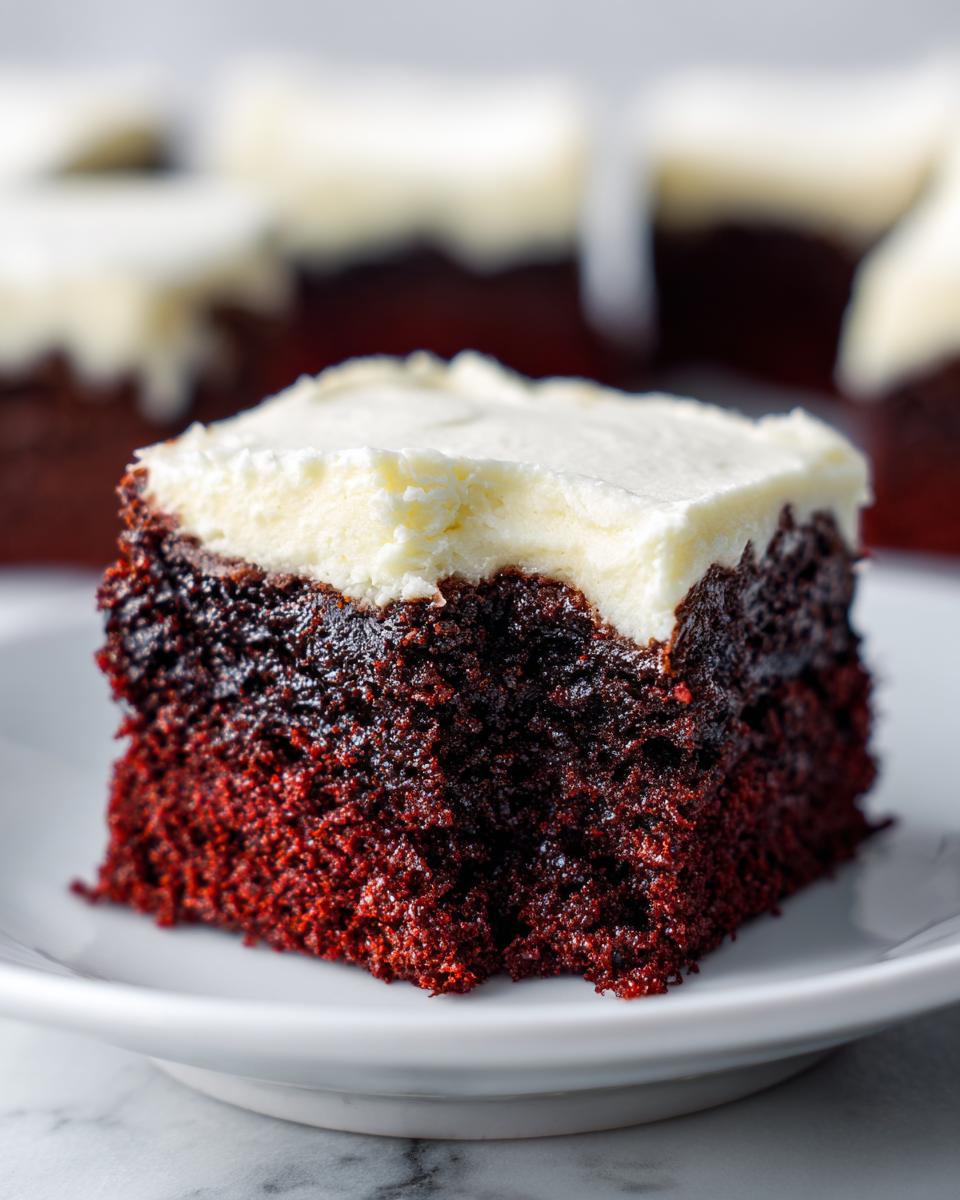
- The Texture is Pure Perfection: We are talking seriously fudgy brownies here—dense, moist, and chewy in the absolute best way possible. They practically melt in your mouth!
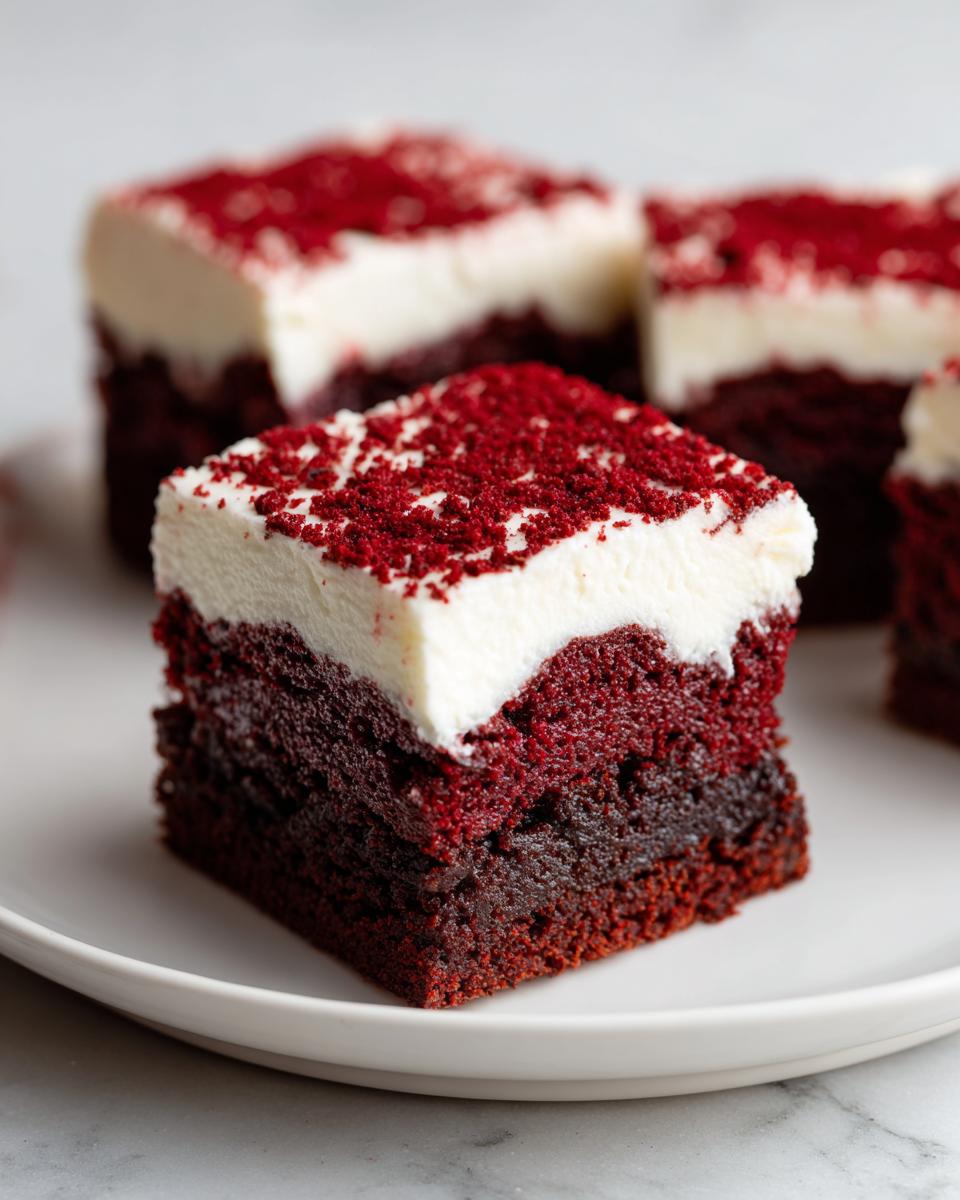
- Color That Pops: We use a little trick to get that unmistakable, deeply vibrant red dessert color that looks incredible, especially when paired with the white frosting.
- Super Simple Process: Despite how fancy they look, this is actually an easy brownie recipe. Everything gets mixed in one bowl for the base, which cuts down wildly on cleanup!
- Tangy Cream Cheese Heaven: The topping isn’t optional in my book! That smooth, tangy cream cheese frosting cuts through the richness perfectly. They are truly cream cheese frosted brownies at their best.
- Holiday Ready: These look stunning on any platter, meaning they jump straight to the top of my list for Valentines Day desserts or gorgeous additions to my Christmas baking ideas.
- Bakery Style at Home: Forget those dry, cakey versions you sometimes find. These are rich, decadent, copy-cat quality homemade brownies that taste better than anything store-bought.
Ingredients for the Best Red Velvet Brownies
Okay, let’s get down to business! A truly amazing red velvet brownies experience starts right here with the right components. You’ll notice we’re using both white and brown sugar—this combination is really important for achieving that signature moist and chewy brownies texture, trust me. We are also going straight for the richest color, so I highly recommend you grab the gel food coloring if you can!
Gathering everything first makes this one of the most satisfying easy dessert ideas because you aren’t scrambling mid-mix. Make sure your frosting ingredients are at room temperature before you start that part later!
For the Fudgy Red Velvet Brownies Base
- 1 cup (2 sticks) unsalted butter, melted
- 1 3/4 cups granulated sugar
- 1 cup packed light brown sugar
- 4 large eggs
- 1 tablespoon vanilla extract
- 1 teaspoon white vinegar (This is key for that red velvet tang!)
- 1 tablespoon unsweetened cocoa powder
- 2 1/4 cups all-purpose flour
- 1 teaspoon salt
- 1 teaspoon baking powder
- 2 tablespoons red food coloring (Gel is strongly preferred for that intense, vibrant red desserts look without thinning the batter.)
- 1/2 cup buttermilk
For the Tangy Cream Cheese Frosting
This frosting is what turns these into true cream cheese frosted brownies. Remember, the cream cheese and butter must be properly softened!
- 1/2 cup cream cheese, softened
- 1/4 cup (1/2 stick) unsalted butter, softened
- 2 cups powdered sugar
- 1/2 teaspoon vanilla extract
- 1 tablespoon milk or heavy cream (use a splash more if needed for spreading)
Step-by-Step Instructions for Perfect Red Velvet Brownies
These instructions are laid out so you can whip up the absolute best red velvet brownies with minimal fuss. I’ve broken down the process into manageable chunks. Just follow along, don’t rush the cooling part (I know, it’s hard!), and you’re on your way to decadent chocolate brownies bliss. If you check out sites like Bonnies site, you’ll see everyone strives for that perfect texture, and this method gets you there!
Preparing the Pan and Wet Ingredients for Red Velvet Brownies
First things first: get your oven warmed up to 350°F (175°C). Now for my favorite pro tip for any homemade brownies: line your 9×13 inch pan with parchment paper! Make sure you leave a good overhang on the sides—this creates a sling so you can easily lift the whole thing out when it’s done. That saves your perfect squares!
Grab a big bowl. Whisk together your melted butter with both sugars until they look happy together. Then, whisk in the eggs one by one so they incorporate nicely. Finish this wet stage by stirring in the vanilla and that crucial teaspoon of white vinegar. We are building the base for this easy brownie recipe right now!
Combining Dry Ingredients and Achieving Vibrant Red Velvet Brownies Color
In a separate, smaller bowl, whisk your dry items: flour, cocoa powder, salt, and baking powder. You want these well-mixed so you don’t get weird pockets of baking powder later. Now, for the drama! In another little dish, mix your buttermilk with those 2 tablespoons of red food coloring until you get that deep, stunning, signature red.
When you bring the two main mixtures together, go slow. Gradually add the dry ingredients to the wet, mixing on low speed just until they disappear. Seriously, stop mixing if you see flour streaks—we don’t want tough brownies. Finally, gently fold in that beautiful red buttermilk until the batter is uniform. Don’t overdo it!
Baking Time and Achieving Fudgy Brownies Texture
Pour that gorgeously colored batter into your prepared pan and smooth it out evenly. Pop it into the preheated oven for about 25 to 30 minutes. For these truly fudgy brownies, you are looking for a specific finish when you test them. Insert a toothpick near the middle—you want it to come out with moist crumbs clinging to it. If it’s wet, give it three more minutes. If it comes out totally clean, oops, you might be leaning cakey!
Making and Applying the Cream Cheese Frosted Brownies Topping
Once you’ve pulled them out, they need to cool down completely. I mean it—totally cool! If you frost warm brownies, you’re just making soup. While they chill out, whip up the topping. Beat your softened cream cheese and butter until they are super light and fluffy. Then, slowly mix in the powdered sugar, vanilla, and milk until it’s smooth and spreadable, perfect for making beautiful cream cheese frosted brownies.
When the brownies are completely cooled off, you can spread that lovely, tangy frosting evenly over the top, ready for slicing. Remember, leftover brownies are fantastic, but I’m always talking about how much I love sharing them straight from the pan when gathering for desserts with friends!
Tips for Baking the Best Red Velvet Brownies
You want these to be the best red velvet brownies anyone has ever tasted, right? It comes down to tiny details! First and foremost, when focusing on that super fudgy texture, your biggest enemy is overbaking. Seriously, pull them out a minute or two early based on that toothpick test—moist crumbs clinging on means perfect, gooey results inside. Don’t be afraid to check early!
Next up, color intensity. If you want those truly stunning, vibrant red desserts, you absolutely must opt for gel food coloring. Liquid food coloring thins out the batter way too much, which messes with the fudgy structure we worked so hard to create. A little goes a long way!
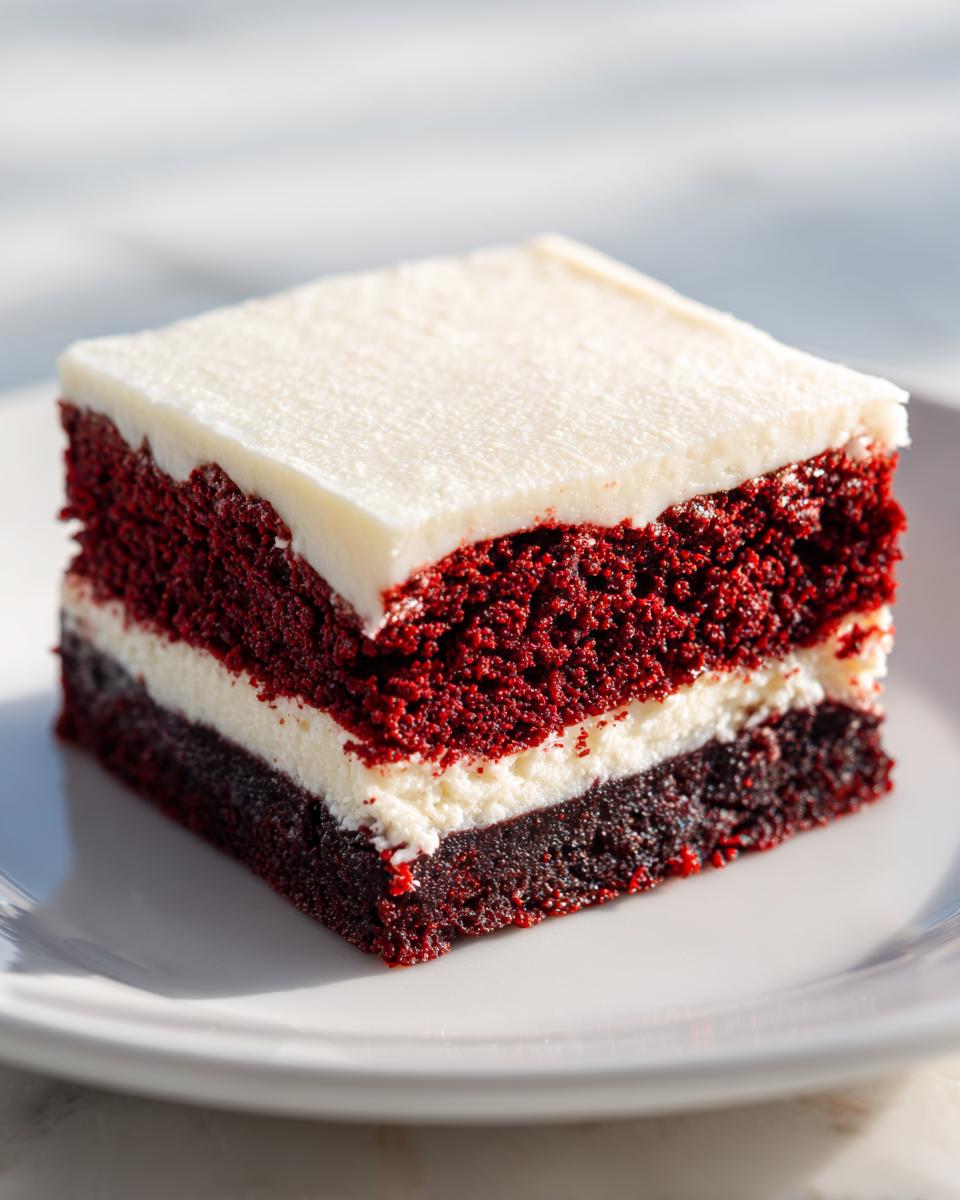
Now, if you’re feeling adventurous, I highly suggest trying that swirl variation mentioned in my notes. I love reserving half the batter, swirling the cream cheese mix into the bottom layer, and then topping it with the rest of the batter. It gives you a two-for-one amazing bite! Find more baking secrets when you check out my post on classic chocolate chip cookies, too, because mixing knowledge helps everywhere. If you want even more tips focused purely on fudginess, this guide on achieving fudgy red velvet brownies has great insights!
Ingredient Notes and Substitutions for Red Velvet Brownies
I know sometimes you dig through the pantry and realize you are missing that one tiny thing, like buttermilk. Don’t panic! While I specified exactly what worked best to create these rich cocoa brownies, a good cook always knows a few quick swaps. I write these notes so you can feel confident even if you have to pivot from the list!
The buttermilk is non-negotiable for the *flavor* profile, but you can definitely make a substitute if you’re in a pinch. Just mix one cup of whole milk with one tablespoon of white vinegar or lemon juice—let it sit on the counter for about five minutes until it curdles a tiny bit. That’s your instant buttermilk substitute right there for making these from scratch brownies!
And let’s talk color again. You need that intense red, right? Liquid food coloring is watery, and too much of it messes with the delicate balance of our flour and fat, sometimes making moist and chewy brownies turn slightly cakey. Gel coloring is super concentrated, so you use less liquid, keeping that structure perfect. It’s worth grabbing a bottle of gel if you plan to make any vibrant red desserts in the future!
Finally, while the combo of white and brown sugar is what gives us that crackly top and deep molasses flavor, if you absolutely had to use white sugar only, I’d suggest adding just a tiny splash of extra molasses to compensate. But seriously, stick to the recipe for the ultimate brownie recipe experience!
Storage and Reheating Instructions for Homemade Brownies
Now for the hard part: saving some for later! Honestly, these red velvet brownies are so incredibly good that I often have trouble having any leftovers, but saving them is simple enough if you plan ahead.
Since we have that luxurious cream cheese frosting on top, storage is really important for maintaining that beautifully smooth texture and preventing any spoilage. You absolutely must keep these brownies refrigerated if you plan on saving them for more than a day. Pop your cooled, frosted squares into an airtight container first. I actually like putting a small sheet of parchment paper between the layers so the frosting doesn’t get messy when you stack them.
They stay great in the fridge for up to five days. The texture might firm up slightly because of the cold, but that’s fine for keeping them fresh! If you want to bring them back to that just-baked, slightly gooey state, just let them sit out on the counter for about 30 minutes before serving. That little bit of time takes the chill off beautifully. I wouldn’t recommend microwaving these, as that tends to make the brownie part a little too soft or unevenly heated.
Seriously, try to keep them away from strong-smelling foods in the fridge because the butter in the frosting can pick up nearby odors. Keep ’em covered, keep ’em cool, and you have perfect moist and chewy brownies ready whenever that chocolate craving hits!
Serving Suggestions for Your Red Velvet Dessert
You’ve baked the most stunning, vibrant batch of red velvet brownies—now what? The presentation is half the fun, right? These aren’t just brownies; they are showstoppers, perfect for any gathering, especially when you are putting together your spread of Christmas baking ideas.
First off, make sure the frosting is set, and slice them neatly with a large, hot knife for crisp edges. When you serve these, think about presentation! Instead of just piling them on a plate, try arranging them one by one on a white platter to let that gorgeous red color really pop. This is how you make those impressive, decadent chocolate brownies shine!
What goes well with such a rich treat? I always lean toward something clean or slightly tart to cut through that cocoa and cream cheese richness. If you’re hosting adults one evening, a tart raspberry sauce drizzled artfully around the plate is heavenly. Also, don’t forget the drinks! I always check out my list of favorite drinks and cocktails to pair perfectly—maybe a simple black coffee or a creamy white Russian would be amazing alongside these.
For a simple everyday treat, just serve them chilled right out of the fridge. But if you’re taking them to a party, dusting the plate lightly with powdered sugar just before serving adds a beautiful, wintry touch that really elevates the whole dessert. Seriously, these red velvet dessert squares disappear faster than anything else on holiday trays!
Frequently Asked Questions About Red Velvet Brownies
I totally get it—baking can sometimes feel like chemistry class, especially when you’re aiming for a specific texture like super fudgy! But don’t worry, these questions pop up all the time. If you’ve got concerns about your texture, color, or just want to make sure this easy brownie recipe works for you, I’ve got the answers. We want your batch of red velvet brownies to be your new favorite!
How do I ensure my red velvet brownies are fudgy and not cakey?
This is the million-dollar question for any brownie maker! You nail the fudgy texture by keeping the fat-to-flour ratio high—which we definitely did here with all that butter and those eggs. Forcing yourself to pull the pan out when the toothpick shows *moist crumbs* (not wet batter, but definitely not totally dry) is key. Keep an eye on them a few minutes before the timer goes off. A couple of extra minutes baking can instantly shift you into cakey territory, and we want serious fudgy brownies!
Can I make these red velvet brownies without buttermilk?
Oh yes, you can! Buttermilk adds that wonderful soft tang and helps keep the moist and chewy brownies texture balanced with the cocoa. If you don’t have it, no sweat. Just take a standard cup of regular milk—even skim works fine—and stir in one tablespoon of white vinegar or lemon juice. Let that mixture sit on the counter for five minutes. It’ll look a little curdled, which is exactly what you want for a homemade buttermilk substitute to keep that essential tang!
What is the best way to get a vibrant red color in my brownies?
If you want that deep, true red velvet look that really pops, ditch the liquid food coloring and invest in the gel kind. Gel food coloring is highly concentrated, which means you use way less volume to get an intense hue. Too much liquid coloring messes with the moisture balance in the batter, and as we just talked about, that can secretly make your beautiful brownies less fudgy! A little bit of the gel goes a super long way toward achieving that beautiful, vibrant red desserts look. You can find some great tips for foolproof results over at Cook Trove!
Whenever you grab a snack later, make sure to check out my favorite appetizers and snacks list for a savory balance to these sweet squares!
Recipe Details and Estimated Nutrition for Red Velvet Brownies
Here’s the quick-glance guide to these red velvet brownies. I always keep this list handy just in case someone asks how long they take or how many squares I cut! Honestly, knowing the timing helps everything run smoothly, especially when I’m juggling dinner prep and baking these for dessert.
We are aiming for 16 nice squares here, which keeps them decadently thick instead of thin little squares. If you’re planning large parties, you might want to bump up the recipe! While you’re checking out the times, maybe take a peek at my favorite main dishes for ideas on what to serve before these glorious treats!
Remember that the nutrition info below is a rough estimate, calculated based on the ingredients listed. Since we are talking about glorious, buttery, cream cheese-topped homemade brownies, they are definitely a treat, not an everyday health food!
- Prep Time: 20 min
- Cook Time: 30 min
- Total Time: 50 min (Plus cooling, which is the hardest part!)
- Yield: 16 glorious squares
Approximate Nutritional Information (Per Serving)
This is just an estimate based on the mix provided, so your mileage might vary slightly depending on exact brands, but it gives you a good idea! These are rich, as expected for such decadent chocolate brownies!
- Calories: 350
- Sugar: 35g
- Fat: 20g (with about 12g saturated)
- Carbohydrates: 42g
- Protein: 4g
Share Your Ultimate Red Velvet Brownies Experience
And there you have it! The absolute blueprint for the best red velvet brownies you’ll ever bake. Now that you have these foolproof instructions for achieving that perfect, gooey, fudgy center topped with that bright, tangy frosting, I really, really want to hear about it!
If you made these—especially if you were chasing that perfectly moist and chewy brownies texture—please come on back and leave a rating! Five stars if they managed to survive the cooling period un-eaten! I live for your comments, so let me know how the color turned out and if everyone loved them (which they will, trust me).
Don’t forget to snap a picture! If you share your results on social media, please tag me so I can see your gorgeous red velvet dessert creations. Seriously, when you’re organizing your next batch of holiday dessert recipes, make sure these are front and center. They are so impressive, but so simple!
Baking is always better together! If you ever run into a snag while trying to perfect your easy brownie recipe, or if you just want to share a substitution that worked wonders for you, don’t hesitate to reach out via my contact page. Happy baking, friends. I hope these become a cherished part of your kitchen traditions!
PrintUltimate Fudgy Red Velvet Brownies with Tangy Cream Cheese Frosting
Make the best homemade red velvet brownies that combine rich, fudgy texture with the classic tang of red velvet cake, topped with a simple cream cheese frosting.
- Prep Time: 20 min
- Cook Time: 30 min
- Total Time: 50 min
- Yield: 16 brownies 1x
- Category: Dessert
- Method: Baking
- Cuisine: American
- Diet: Vegetarian
Ingredients
- 1 cup (2 sticks) unsalted butter, melted
- 1 3/4 cups granulated sugar
- 1 cup packed light brown sugar
- 4 large eggs
- 1 tablespoon vanilla extract
- 1 teaspoon white vinegar
- 1 tablespoon unsweetened cocoa powder
- 2 1/4 cups all-purpose flour
- 1 teaspoon salt
- 1 teaspoon baking powder
- 2 tablespoons red food coloring (gel preferred)
- 1/2 cup buttermilk
- 1/2 cup cream cheese, softened (for frosting)
- 1/4 cup (1/2 stick) unsalted butter, softened (for frosting)
- 2 cups powdered sugar (for frosting)
- 1/2 teaspoon vanilla extract (for frosting)
- 1 tablespoon milk or heavy cream (for frosting)
Instructions
- Preheat your oven to 350°F (175°C). Line a 9×13 inch baking pan with parchment paper, leaving an overhang on the sides for easy removal. Lightly grease the paper.
- In a large bowl, whisk together the melted butter, granulated sugar, and brown sugar until combined.
- Whisk in the eggs one at a time until fully incorporated. Add the vanilla extract and white vinegar.
- In a separate small bowl, whisk together the cocoa powder, flour, salt, and baking powder.
- In a small bowl, mix the buttermilk and red food coloring until you achieve a deep, vibrant red color.
- Gradually add the dry ingredients to the wet ingredients, mixing on low speed until just combined. Do not overmix.
- Slowly pour in the red buttermilk mixture, mixing until the batter is uniform in color and smooth.
- Pour the batter into the prepared baking pan and spread evenly.
- Bake for 25 to 30 minutes. A toothpick inserted near the center should come out with moist crumbs attached, not wet batter, for a fudgy result.
- While the brownies cool completely, prepare the frosting: Beat the softened cream cheese and butter together until smooth. Gradually add the powdered sugar, vanilla extract, and milk until the frosting is creamy and spreadable.
- Once the brownies are completely cool, spread the cream cheese frosting evenly over the top.
- Cut into squares and serve.
Notes
- For the fudgiest texture, avoid overbaking. Check the brownies a few minutes before the suggested time.
- Use gel food coloring for the most intense, vibrant red color without thinning the batter too much.
- If you prefer a cream cheese swirl instead of a full frosting layer, reserve half the batter, swirl the cream cheese mixture into the bottom layer, then top with the remaining batter before baking.
Nutrition
- Serving Size: 1 brownie
- Calories: 350
- Sugar: 35
- Sodium: 200
- Fat: 20
- Saturated Fat: 12
- Unsaturated Fat: 8
- Trans Fat: 0.5
- Carbohydrates: 42
- Fiber: 1
- Protein: 4
- Cholesterol: 75