

Let’s be honest, sometimes you want that wonderful, fluffy texture of homemade bread, but you just don’t have the time—or patience—for dealing with yeast and long rising periods. If you thought making a satisfying loaf required hours and advanced skills, I’m here to change your mind! This **beer bread** recipe is proof that incredible comfort food side dishes can come together ridiculously fast. It’s the simplest **no yeast bread** you will ever meet, requiring just five minutes of hands-on prep time. It reminds me of the satisfying, straightforward cooking philosophy Kate Reilly picked up from her grandmother—taking something classic, like a Midwestern loaf, and stripping away all the fuss so everyone feels confident baking it. You end up with that perfect balance: a wonderfully moist interior wrapped in a crisp, buttery crust. Seriously, you are going to love this! You can read more about our mission to simplify classic meals over on our About page.
- Why This No Yeast Beer Bread Recipe is Your New Weeknight Bread Hero
- Gathering Ingredients for Your Simple Pantry Recipes Beer Bread
- How to Prepare Easy Homemade Bread: Step-by-Step Beer Bread Instructions
- Tips for Success: Mastering Your Quick Bread Recipe
- Savory Beer Bread Variations: Beyond the 3 Ingredient Bread
- Serving Suggestions: The Perfect Bread for Chili and Stew
- Frequently Asked Questions About Yeast Free Bread
- Estimated Nutritional Data for This Beer Bread
- Share Your Homemade Loaf Experience
Why This No Yeast Beer Bread Recipe is Your New Weeknight Bread Hero
When you need a homemade loaf on the table fast, this is the one you reach for. Seriously, forget waiting for yeast to bloom—we don’t have time for that on a busy Tuesday night! This recipe delivers everything you want from **easy homemade bread** without any complicated steps, making it perfect for **baking for beginners**. It’s one of my favorite quick dinner sides because it’s just so shockingly simple.

Speed and Simplicity: The Appeal of Quick Bread Recipe
We’re talking five minutes of actual work here. That’s it. You dump the dry stuff in a bowl, pour in the beer, give it a quick stir, and boom—it’s ready for the oven. It’s the ultimate testament to how marvelous **simple baking recipes** can be when you skip steps that don’t actually change the flavor, like kneading.
Achieving a Moist Texture with Buttery Bread Recipe Crust
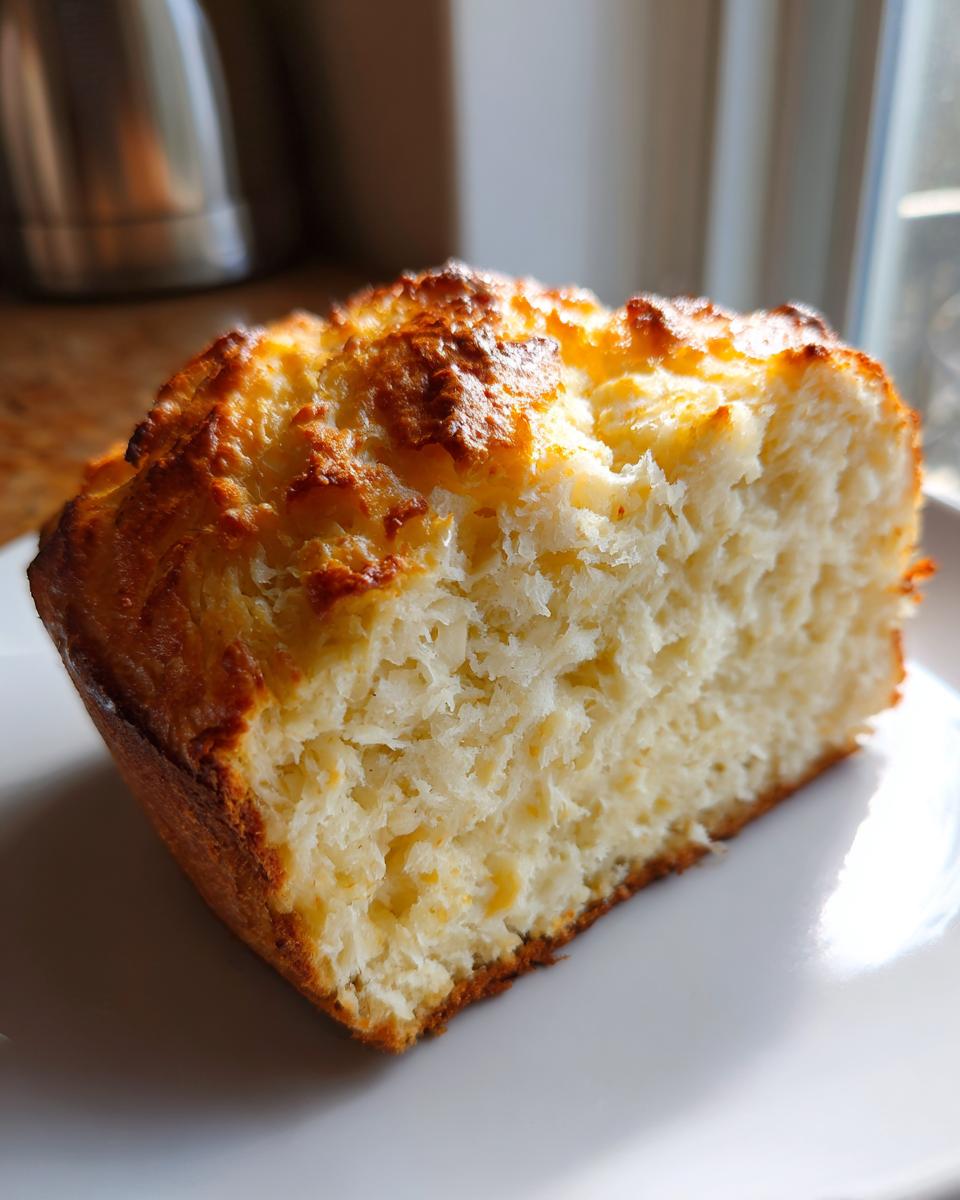
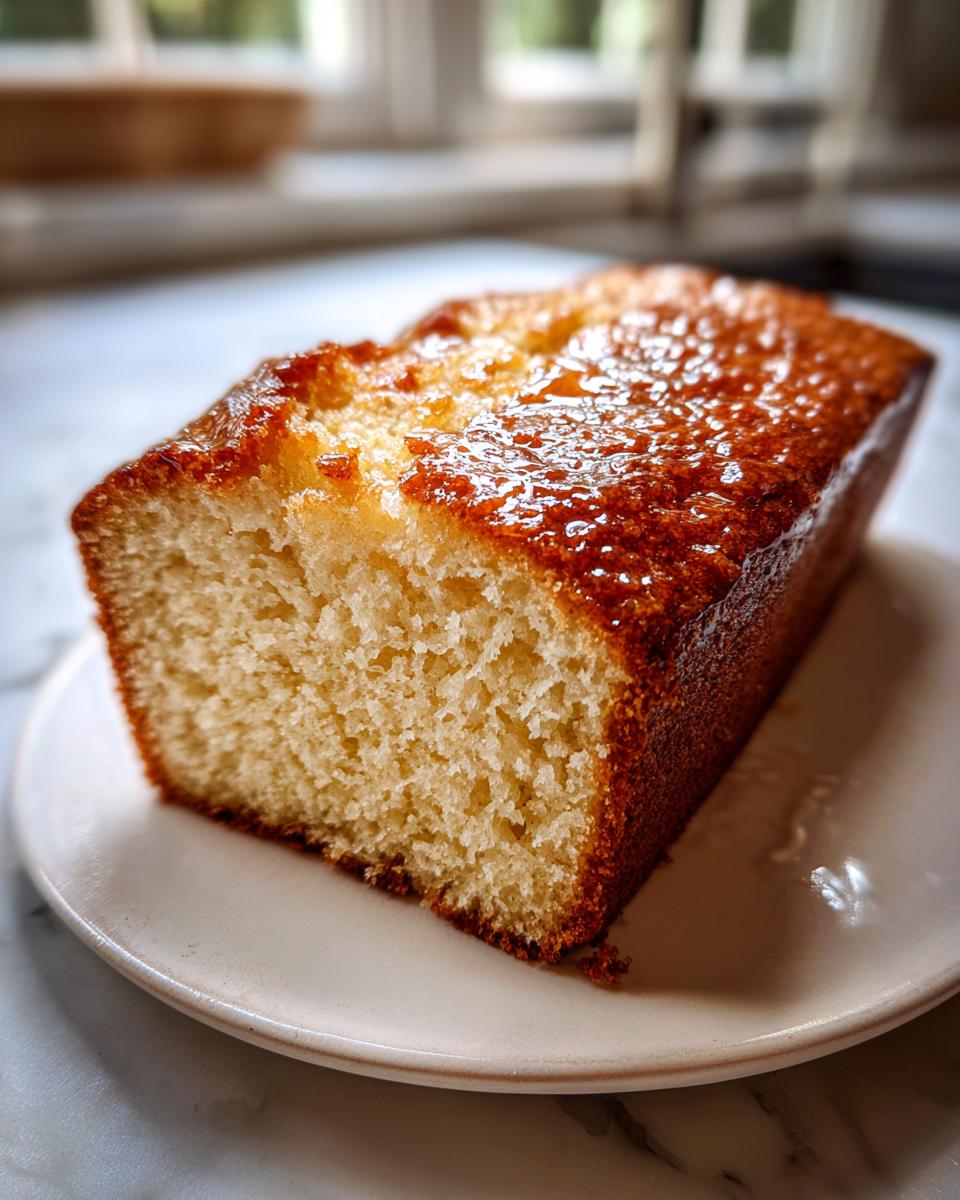
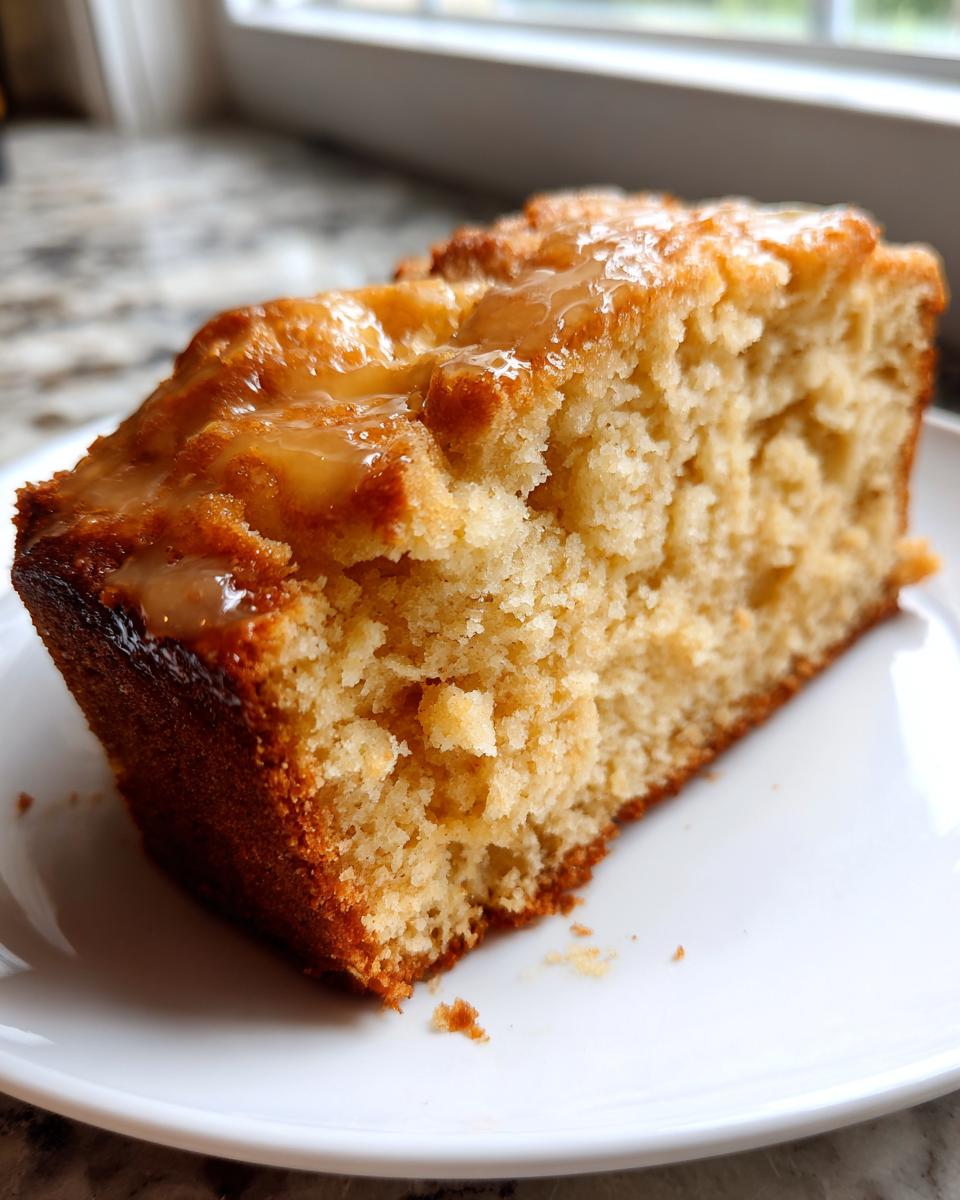
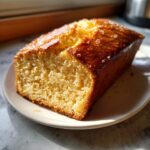
The secret to why this works without yeast is great science! The carbonation in the beer does all the heavy lifting, giving you that lovely lift for a surprisingly **fluffy bread**. Then, we cheat just a little bit by brushing melted butter right on top before it bakes. That step is vital for getting that deeply golden, crisp, **buttery bread recipe** crust everyone fights over.
Gathering Ingredients for Your Simple Pantry Recipes Beer Bread
Okay, let’s talk ingredients! This recipe is the star of the **simple pantry recipes** show because you usually have everything on hand already. The magic loaf needs just three core items, plus that glorious butter topping we talked about to give you the amazing crust. Seriously, I love how this recipe keeps things clean—no specialty items needed!
You’ll need:
- 3 cups self-rising flour
- 1 cup granulated sugar
- 1 (12 ounce) can of beer (I prefer a smooth lager for this one!)
- 4 tablespoons unsalted butter, melted (for topping)
If you want to keep things simple, you can check out more great simple pantry recipes on the blog!
Ingredient Notes and Beer Selection for Beer Bread
Listen closely here, because this is important for success: You MUST use self-rising flour. That flour already has the baking powder and salt integrated, which is why we don’t list them separately! If you only have regular all-purpose flour, you’ll have to add those leavening agents in, and that’s just extra steps we don’t need for an easy **beer bread**.
Now for the beer! Any type works, truly. A light lager or pale ale keeps the flavor pretty neutral. If you use something darker, like an amber or a stout, you’ll get a much deeper, richer background flavor in your **no yeast bread**. Just use what you have chilling in the fridge!
How to Prepare Easy Homemade Bread: Step-by-Step Beer Bread Instructions
Getting this **easy homemade bread** into the oven is honestly faster than heating up a frozen dinner. Since this is true **no yeast bread**, we skip all the waiting and go straight to mixing and baking! Just make sure you have your oven warming up, because once the beer hits that flour, the clock starts ticking!
- First things first: Get your oven warmed up to 375°F (190°C). While that heats, grab a standard 9×5 inch loaf pan. You need to grease it up really well and then dust it lightly with flour so you don’t lose the gorgeous bottom of your loaf later.
- Now for the main event! In a big bowl, just toss in your self-rising flour and the sugar. Give those two dry things a quick whisk together so they are mixed enough.
- Pour in the ENTIRE can of beer—yes, all of it! This is where you need to be careful to follow my single most important rule for soft **beer bread**!
Mixing and Pan Preparation for Your Beer Bread
When you add the beer, you only want to stir it until everything is *just* incorporated. I mean it! If you keep stirring until it looks perfectly smooth, you’ll have overworked the batter beneath the surface. Trust me, a few lumps are perfectly fine—they mean you’re on your way to a tender crumb, not a tough one. Once you see no more dry streaks of flour, stop mixing immediately! Pour that slightly lumpy batter right into your prepared loaf pan.
Before it goes in, take those melted butter tablespoons and brush them evenly across the very top surface of the batter. Don’t skip that butter; it’s our secret weapon for the crust!
Baking Times and Testing for Doneness in Your Homemade Loaf
Pop the pan into your preheated oven and set your timer for 40 minutes. Every oven is a little different, so you might need up to 50 minutes. You’ll know it’s done when a wooden skewer or toothpick stuck right into the center comes out clean—no wet batter clinging to it! Once it’s done, pull it out, but don’t rush it yet! Let your **beer bread** cool right there in the pan for about 10 minutes. Pulling it out too soon means it might collapse a bit. After 10 minutes, turn it out onto a wire rack so air can circulate and let it cool down some before slicing!
We love sharing our techniques for easy homemade bread right here on the blog!
Tips for Success: Mastering Your Quick Bread Recipe
Even though this **beer bread** is designed to be foolproof, there are just a couple of tiny things you can watch out for to make sure it turns out perfectly every single time. Since this is a **yeast free bread**, we aren’t relying on yeast structure; we’re relying on careful mixing. I learned these little tricks when I was first trying to nail down the texture for my friends, honestly!
The Importance of Not Overmixing Your Beer Bread Batter
I feel like I’ve said this a million times, but seriously, stop stirring when you see the last little bit of dry flour disappear! If you keep going, you are manually developing gluten in that self-rising flour. What does that mean? It means instead of getting that beautiful, soft, and **fluffy bread** everyone loves, you end up with something kind of tough and chewy, almost rubbery. We just don’t want that sad fate for our loaf! Lumps are your friends here; they mean you respected the batter.
Storage and Reheating Instructions for Your Homemade Loaf
This bread is definitely at its peak freshness the day you bake it, but it tastes great the next day too! The official note says it’s best eaten within two days, so try not to let it sit around too long. You need to store it wrapped up tightly—I use plastic wrap followed by putting the whole thing in an airtight container—at room temperature. Don’t put it in the fridge; it dries out faster there!
If you do have leftovers nearing Day Two, don’t throw them away! To get that amazing crust back when reheating, slice off what you need and pop it into a preheated oven at about 300°F for just 5 to 8 minutes. It warms right up, and that buttery crust gets nice and crisp again. It makes a fantastic side for dinner, or even a base for some open-faced sandwiches.
For more tips on building confidence in the kitchen, take a peek at our guides on baking for beginners!
Savory Beer Bread Variations: Beyond the 3 Ingredient Bread
If you’re like me, sometimes you want bread, but you want it yelling flavor! The beauty of this fundamental base recipe is how easily it pivots from subtly sweet to full-on savory goodness. This is where all those fabulous **cheesy beer bread ideas** start to come to life. You don’t have to stick to the sweet standard if you’re serving it with beef stew or chili!
Making Garlic Cheddar Beer Bread: A Savory Quick Breads Option
My absolute favorite savory twist is transforming it into Garlic Cheddar **beer bread**. It’s so simple, you just swap out two items from the core list. First, you completely skip adding the cup of sugar. That sweetness isn’t needed when you’re going savory!
Instead, fold in about a cup of sharp shredded cheddar cheese—the sharper the better, honestly—along with about a teaspoon of garlic powder right into your flour mixture. That’s it! You’re turning this into one of the best **savory quick breads** ever. I love grabbing that recipe from The Chunky Chef when I need specific inspiration for those cheesy add-ins, too—check out their method right here if you want to see how amazing cheddar looks baked on top!
Serving Suggestions: The Perfect Bread for Chili and Stew
Okay, the smell of fresh **beer bread** coming out of the oven is amazing, but what are you going to do with this wonderful loaf once it cools down just enough to slice? This bread truly shines as a **comfort food side dish**. It stands up beautifully next to anything hearty—it won’t disintegrate like some flimsy rolls might!
Honestly, my first choice every single time is a big, steaming bowl of chili. Nothing beats tearing off a piece of this slightly sweet, savory, buttery loaf and dunking it right into a rich, spicy bowl of stew. If you’re planning a crowd-pleaser dinner, you have to try our famous Potluck Chili—this bread is its best friend!
But don’t just think chili! This is fantastic alongside any thick, flavorful bowl of soups and stews. Think hearty beef stew, creamy tomato bisque, or maybe even some French Onion soup if you’re feeling fancy!
A crucial tip: Always serve it warm if you can! Even if it’s a day old, taking a warm slice and spreading a little butter onto it—letting that butter just melt right into the soft crumb—is pure heaven. That little extra moisture and richness make all the difference when you’re pairing it with robust main dishes.
Frequently Asked Questions About Yeast Free Bread
It’s natural to have questions when you try a new **quick bread recipe**, especially one that seems almost *too* simple! Since this recipe relies on a chemical reaction instead of traditional yeast, people always wonder about ingredient swaps. Don’t worry at all; I’ve gathered the most common questions folks have about making this delicious **yeast free bread**.
Can I use diet soda or non-alcoholic beer in this beer bread?
You absolutely *can*, but you might notice a difference! The beauty of this **beer bread** comes from the acidity and the carbonation in regular beer reacting with the flour to create lift. If you use diet soda, you lose a lot of that sweet flavor, and if you use non-alcoholic beer, you might find the rise isn’t quite as strong because it’s often flatter. For the absolute best, classic result that tastes the way it should, regular beer is what I steer everyone toward.
What happens if I use regular all-purpose flour instead of self-rising flour?
That’s a really smart question, and this shows you’re already thinking like a baker adapting a **simple baking recipes** base! If you only have AP flour, you aren’t out of the game, but you need to add back what the self-rising flour already has. For every one cup of AP flour you use, you need to mix in 1.5 teaspoons of baking powder and 1/4 teaspoon of salt. Scale that up for the full three cups, and you should be good to go!
Is this recipe truly a 3 Ingredient Bread if I use the butter topping?
This comes up all the time! When we say this is a **3 ingredient bread**, we are technically talking about the loaf itself—the flour, the sugar, and the beer. That’s the absolute minimum you need to make a baked product that qualifies as bread! However, I always tell people that brushing on that melted butter is practically mandatory, not just optional, if you want that signature crispy top. Think of the butter as your *required* flavor enhancer for the perfect **buttery bread recipe** crust!
Estimated Nutritional Data for This Beer Bread
Trying to figure out the numbers is always tricky when you’re whipping up something this quick, but I wanted to give you a general idea of what you’re looking at with this base recipe. Remember, this is based only on the 3 core ingredients plus the butter topping—no garlic or cheddar cheese added in here!
We are aiming for simplicity here, not gourmet calorie counting, but knowing the ballpark is always helpful when planning your meals. If you add savory mix-ins like cheese, those numbers are going to jump up, especially fat and sodium, so keep that in mind if you go a little wild with the cheddar!
Here is the estimated nutritional breakdown for one slice of the **beer bread**:
- Serving Size: 1 slice
- Calories: 240
- Fat: 5g
- Saturated Fat: 3g
- Carbohydrates: 42g
- Sugar: 10g
- Protein: 4g
- Sodium: 350mg
This is a pretty straightforward **quick bread recipe**, using accessible ingredients so you don’t have to worry about tracking down anything weird. Keep in mind, the type of beer you use can subtly change the final macros, so view this as a great starting point for your favorite **comfort food side dishes**!
Share Your Homemade Loaf Experience
And there you have it! Truly the easiest, fastest, most satisfying **homemade loaf** you’ll ever put together. My hope is that this recipe brings a little bit of that simple joy into your own kitchen, whether you’re serving it alongside a spicy bowl of chili or just eating it standing over the sink with a smear of butter.
Now that you’ve made it, I would absolutely love to know what you think! Did you use a specific lager or maybe a dark stout? Drop a comment below and tell me about the beer you chose for your batch! Seriously, learning which beers work best for everybody is half the fun for me, and it helps the whole community build on this great foundation.
If you snap a picture of your golden, crisp-topped **beer bread**, please share it! You can tag us or send a message over through the contact page. Seeing your successes makes all the testing and tasting worth it! Happy baking!
PrintEasiest 3-Ingredient No-Yeast Beer Bread
Make this simple, quick bread with only three pantry ingredients. It requires no yeast or kneading, resulting in a moist loaf with a crisp, buttery crust, perfect for serving with chili or stew.
- Prep Time: 5 min
- Cook Time: 45 min
- Total Time: 50 min
- Yield: 8 servings 1x
- Category: Side Dish
- Method: Baking
- Cuisine: American
- Diet: Vegetarian
Ingredients
- 3 cups self-rising flour
- 1 cup granulated sugar
- 1 (12 ounce) can of beer (lager or pale ale works well)
- 4 tablespoons unsalted butter, melted (for topping)
Instructions
- Preheat your oven to 375°F (190°C). Grease and flour a standard 9×5 inch loaf pan.
- In a large bowl, combine the self-rising flour and sugar. Mix them together briefly.
- Pour the entire can of beer into the dry ingredients. Stir the mixture just until combined. Do not overmix; a few lumps are fine.
- Pour the batter into the prepared loaf pan.
- Brush the top of the batter evenly with the melted butter.
- Bake for 40 to 50 minutes, or until a wooden skewer inserted into the center comes out clean.
- Let the bread cool in the pan for 10 minutes before turning it out onto a wire rack to cool completely.
Notes
- For a savory Garlic Cheddar Beer Bread, omit the sugar and replace it with 1 cup of shredded sharp cheddar cheese and 1 teaspoon of garlic powder mixed into the flour.
- Use any type of beer you prefer; the flavor will transfer slightly to the final bread. Darker beers result in a deeper flavor.
- This bread is best eaten within two days for optimal texture.
Nutrition
- Serving Size: 1 slice
- Calories: 240
- Sugar: 10
- Sodium: 350
- Fat: 5
- Saturated Fat: 3
- Unsaturated Fat: 2
- Trans Fat: 0
- Carbohydrates: 42
- Fiber: 1
- Protein: 4
- Cholesterol: 10