
There’s just something so incredibly satisfying about making drool-worthy Chinese food right there in your own kitchen, don’t you think? When it comes to beloved dishes, Traditional Chinese Dumplings are at the top of my list. They’re perfect for making a splash during Lunar New Year celebrations, but honestly, they’re also a lifesaver for those weeknight dinners when you want something special without a crazy amount of fuss. The real magic? It’s making them completely from scratch – yes, that includes the wrappers! It just takes a little bit of love and a dash of Kate Reilly’s philosophy of simple, trustworthy recipes, plus my own analytical approach to figuring out exactly why every step matters. Trust me, it’s totally doable!
- Why You'll Love This Recipe
- Gather Your Ingredients for Authentic Jiaozi
- Mastering Homemade Dumpling Wrappers
- Crafting the Perfect Pork Cabbage Dumplings Filling
- Assembling Your Traditional Chinese Dumplings: The Art of Pleating
- Cooking Your Boiled Chinese Dumplings to Perfection
- Tips for Freezer Friendly Dumplings
- Frequently Asked Questions about Traditional Chinese Dumplings
- Serving Your Lunar New Year Dumplings
- Estimated Nutritional Information
- Share Your Culinary Creations!
Why You’ll Love This Recipe
- Super satisfying: Making these goodies from scratch feels *so* good!
- Bursting with flavor: The pork and cabbage combo with just the right seasonings? Yum!
- So versatile: Perfect for big holiday spreads or a cozy dinner for two.
- Totally doable: We break down every step so you can’t mess it up!
- Freezer friendly: Make a big batch and save them for later meals.
Gather Your Ingredients for Authentic Jiaozi
Alright, let’s get our game plan ready! To make these truly spectacular authentic jiaozi, you’ll want to gather some good quality goodies. Fresh is always best here, trust me. You’ll need about a pound of ground pork – I usually go for something with a decent fat content, maybe 70/30, for the best flavor. Then, grab about half a pound of Napa cabbage and get it super finely chopped. Like, tiny little pieces! A quarter cup of chopped scallions, the green and white parts both, will add a lovely bite. For the seasonings, get ready with 2 tablespoons of soy sauce, 1 tablespoon of Shaoxing wine (this is key for that depth of flavor!), 1 teaspoon of sesame oil, and about 1 teaspoon of fresh grated ginger – nothing beats the zing of fresh ginger! Lastly, a half teaspoon of salt and a quarter teaspoon of white pepper to round it all out. Oh! And for the wrappers, you can totally use store-bought round dumpling wrappers (you’ll need about 50 of them), which is a great shortcut. Or, if you’re feeling ambitious, we can make them from scratch – check out the next section for that adventure! Just have some water handy for sealing, whatever you use.
Mastering Homemade Dumpling Wrappers
Okay, so you want to go all-in and make your own dumpling wrappers? That’s amazing! Trust me, the texture you get from homemade dumpling wrappers is just next-level delicious. It’s not as scary as it sounds, promise! First, grab 2 cups of all-purpose flour and about 3/4 cup of warm water. Pop the flour in a big bowl, then gradually pour in the water while you start mixing – I like to use my hands or a fork at first. You want to mix it until it just comes together into a shaggy dough.
Now for the fun part: kneading! Turn that shaggy dough out onto a lightly floured surface and just knead it for about 5-8 minutes. You’re looking for a dough that’s smooth and elastic, kind of like playdough but a little softer. The ‘why’ behind kneading and then letting it rest is super important: it develops the gluten, which makes the wrappers tender and easier to roll thinly without tearing. It’s like magic! Once it’s all smooth, wrap it up in plastic wrap or cover it with a damp cloth and let it rest for at least 30 minutes. This rest period is crucial – it lets the gluten relax, making the dough super pliable. You’ll thank yourself later, I swear!
Crafting the Perfect Pork Cabbage Dumplings Filling
Okay, now that we’ve got our dough situation handled (or decided to go the store-bought route, no judgment here!), let’s talk about the heart of our pork cabbage dumplings: the filling! This is where all that amazing flavor comes together. In a big bowl, toss in your pound of ground pork, the finely chopped Napa cabbage (make sure it’s really small!), and your chopped scallions.
Now for the flavor builders! Add in 2 tablespoons of soy sauce – that’s our savory base. Then comes 1 tablespoon of Shaoxing wine; this isn’t just for show, it adds this incredible, subtle depth that you just can’t get from anything else – serious E-E-A-T booster right there! A teaspoon of sesame oil gives it that quintessential Chinese flavor, and about a teaspoon of fresh grated ginger brings a bright, zesty kick. Don’t forget your half teaspoon of salt and quarter teaspoon of white pepper to really make everything sing. Trust me on this, after you mix it all up really well (get your hands in there and give it a good squish until it’s just blended – just like we do when we make these Chinese chicken dumplings!), let the filling hang out for about 15 minutes. It really lets those flavors meld beautifully, making your dumplings taste even better!
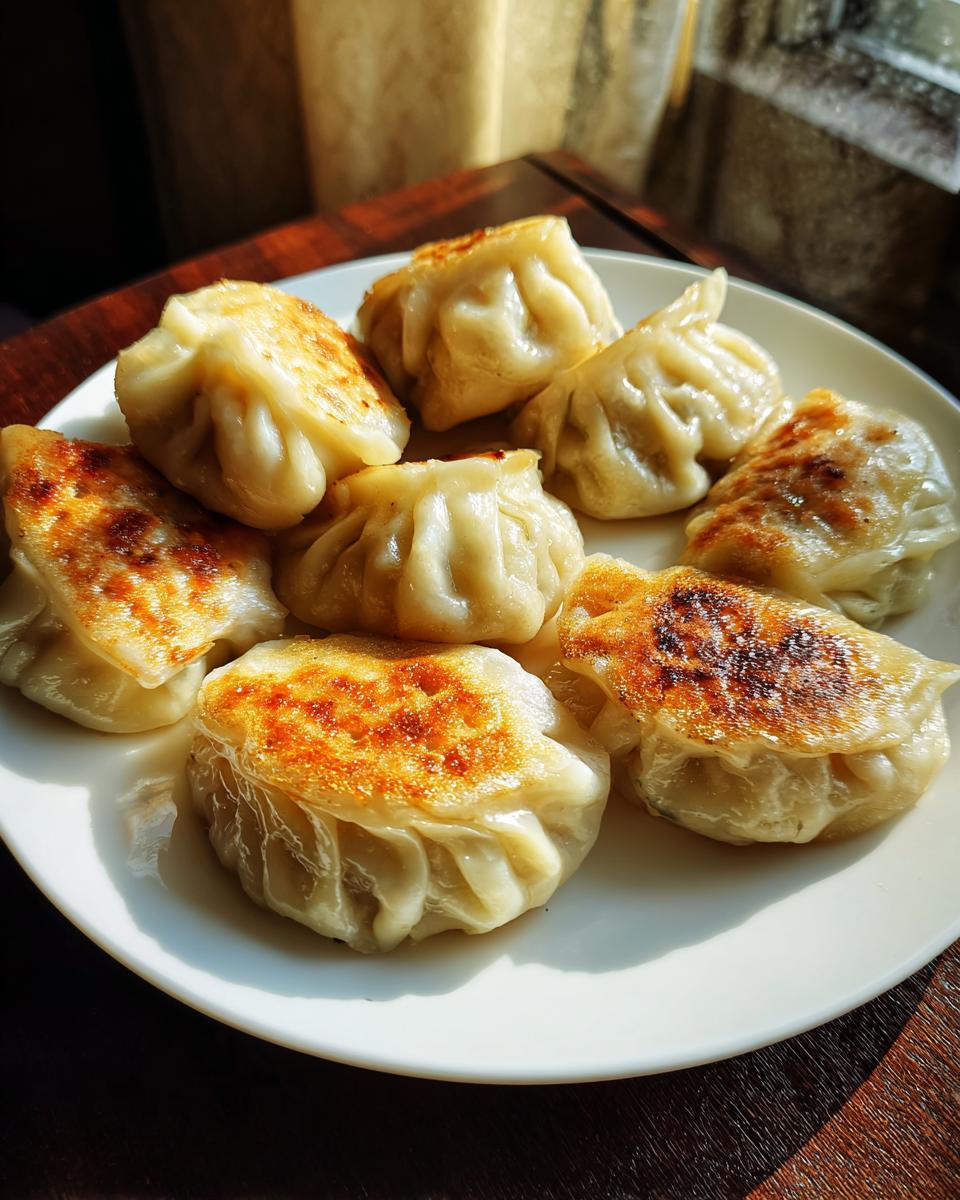
Assembling Your Traditional Chinese Dumplings: The Art of Pleating
Okay, the moment of truth! It’s time to turn all that delicious filling and those beautiful wrappers into gorgeous little parcels of joy. Assembling Traditional Chinese Dumplings is where the real fun begins, and honestly, don’t stress about perfection right away – practice really does make perfect, and even a slightly wonky dumpling tastes amazing! First things first, grab a wrapper. You’ll want to place about a tablespoon of that perfectly seasoned filling right in the center. Use your finger to lightly dab some water all around the edge of the wrapper. This is super important because it’s what helps everything stick together.
Now, fold the wrapper in half over the filling, making sure half of the edge overlaps the other. Gently press around the filling to push out any air, and then seal the straight edge to close it up. If you want to get fancy (and who doesn’t?), this is where the pleating comes in! You can create little folds, or pleats, along one side of the sealed edge, pressing each new pleat into the other side of the wrapper. It takes a little getting used to, but it gives your dumplings that beautiful, classic look. If pleating feels too fiddly right now, just a good, firm pinch along the whole edge will do the trick – they’ll still be delicious!
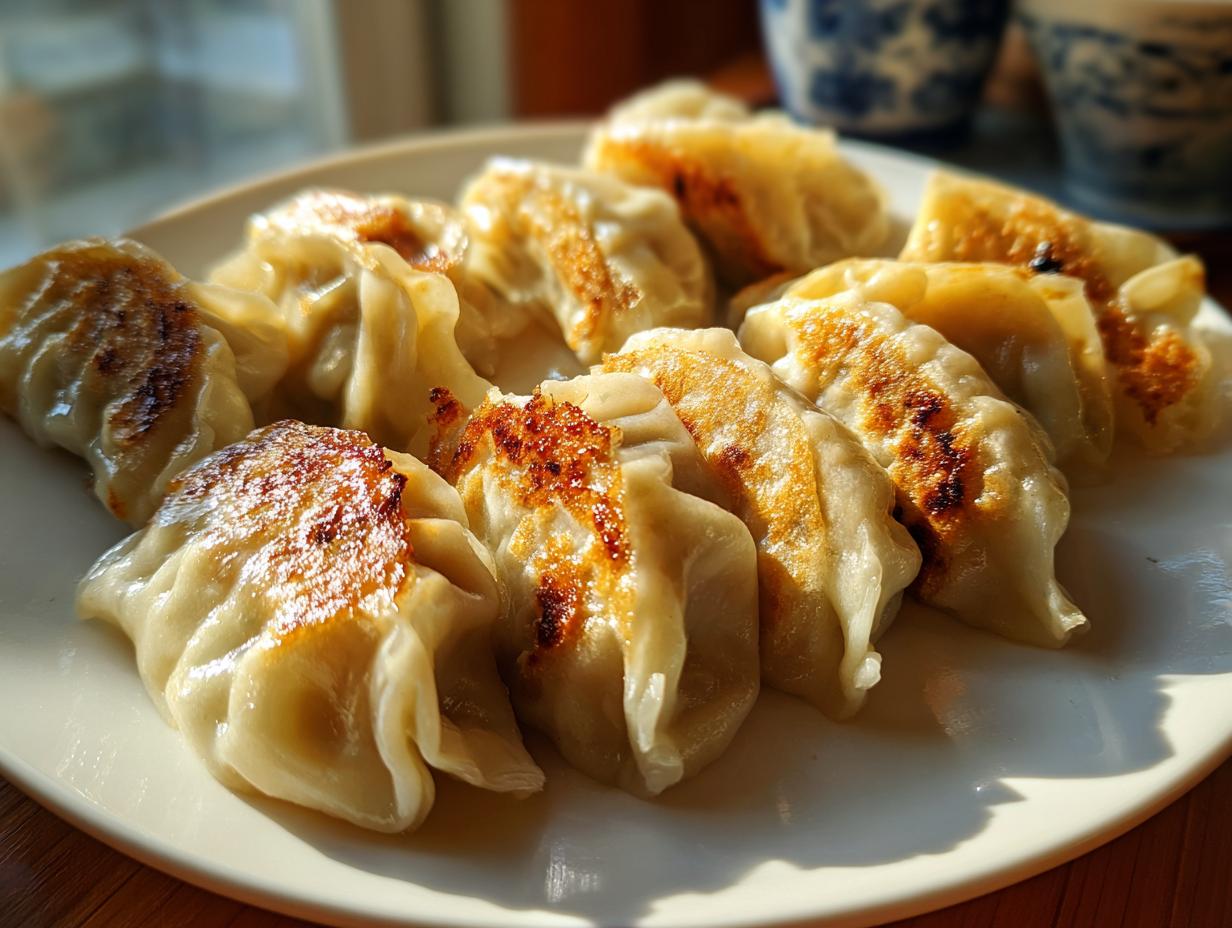
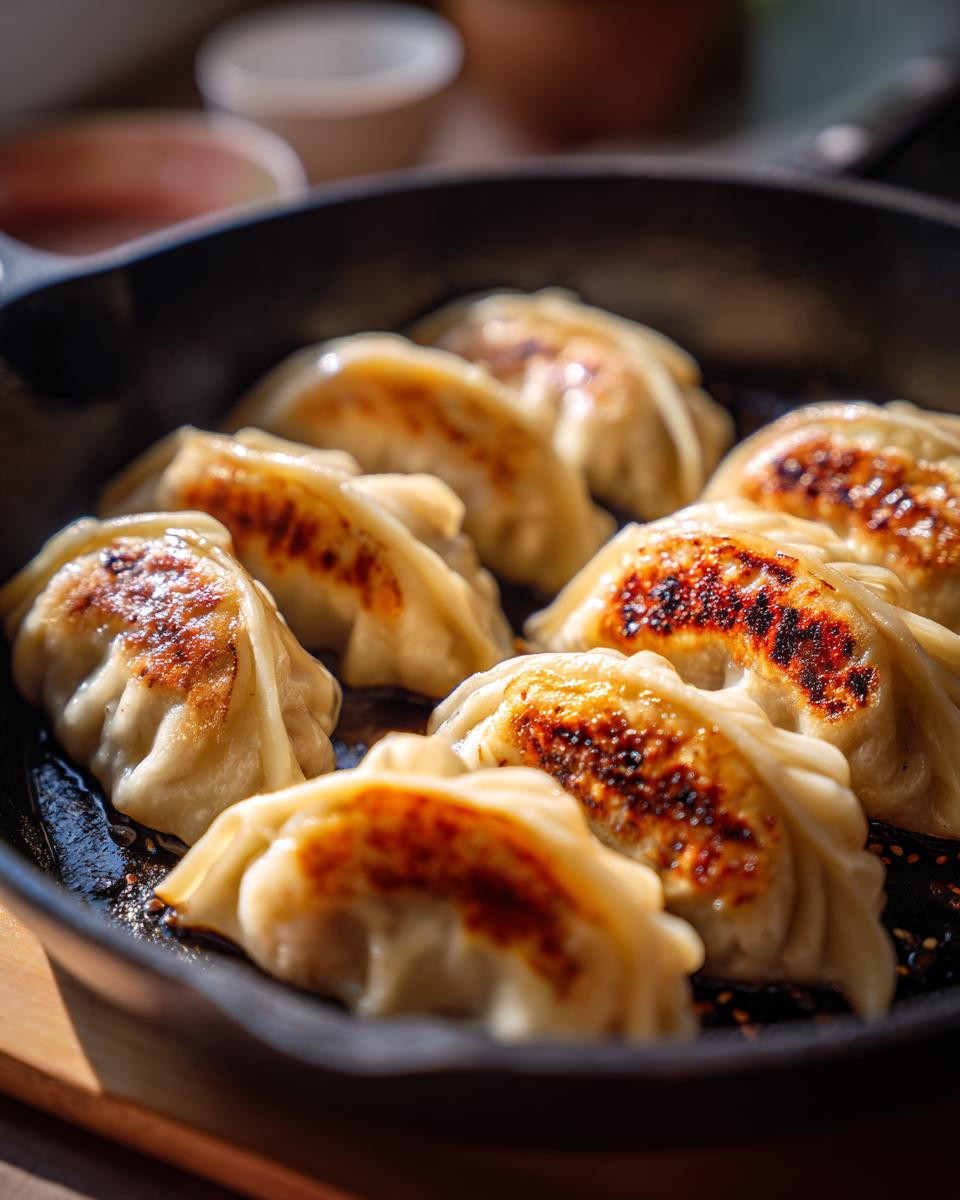
Cooking Your Boiled Chinese Dumplings to Perfection
Alright, it’s time to cook these beauties! For these boiled Chinese dumplings, we’re keeping it simple and classic. Get a big pot of water and bring it to a rolling boil – you want a good, vigorous boil so the dumplings cook evenly. Don’t overcrowd the pot; cook them in batches if you have a lot. Gently drop your dumplings into the boiling water. Give them a little stir right away to make sure they don’t stick to the bottom of the pot or to each other.
They’ll usually sink at first, then float to the top. Once they float, let them boil for about 5 to 7 minutes more, give or take, until they look plump and the filling is cooked through. A little trick I use? I lift one dumpling out and carefully cut it in half to check the filling – that’s my foolproof way to know they’re ready! Drain them well and serve them up hot with your favorite dipping sauce, maybe the one we talked about in the easy chicken dumplings recipe, or mix up your own!
Tips for Freezer Friendly Dumplings
One of my favorite things about making dumplings is that they’re totally freezer friendly dumplings! Seriously, you can have these little flavor bombs ready to go whenever a craving strikes. Once you’ve assembled your uncooked dumplings, the trick is to freeze them flat first. Lay them out in a single layer on a baking sheet lined with parchment paper – make sure they aren’t touching! Pop that baking sheet into the freezer for about an hour, or until they’re pretty firm. This stops them from sticking together in a giant clump. Then, just transfer those frozen little guys into a freezer-safe bag or container. When you’re ready to cook them, don’t thaw them out! Just toss them straight into that boiling water, but remember to add a couple of extra minutes to the cooking time since they’re starting out frozen. Easy peasy!
Frequently Asked Questions about Traditional Chinese Dumplings
Got questions about these amazing Traditional Chinese Dumplings? I totally get it! Making them from scratch is super rewarding, but you might wonder about a few things. Don’t worry, I’ve got you covered!
Can I substitute the pork in this Chinese dumplings recipe?
Absolutely! While pork is classic, you can swap it out. Ground chicken or turkey works great, just adjust seasoning a bit. For a vegetarian vibe, try finely chopped firm tofu mixed with mushrooms and finely minced veggies. That’s the beauty of jiaozi – they’re super adaptable!
What is the best dipping sauce for authentic jiaozi?
Oh, the dipping sauce! The ultimate combo is usually a mix of soy sauce and Chinese black vinegar, maybe with a splash of sesame oil and some chili flakes or chili oil for a little heat. Some folks also love a touch of grated garlic or ginger in there. It’s all about balancing that salty, sour, and sometimes spicy!
How do I prevent my dumplings from bursting when cooking?
Bursting usually happens if they’re overstuffed or not sealed properly. Make sure you don’t pack too much filling in, and really press those edges together firmly. Water is your friend for sealing! Also, don’t boil them too aggressively; a steady simmer after they float is usually best.
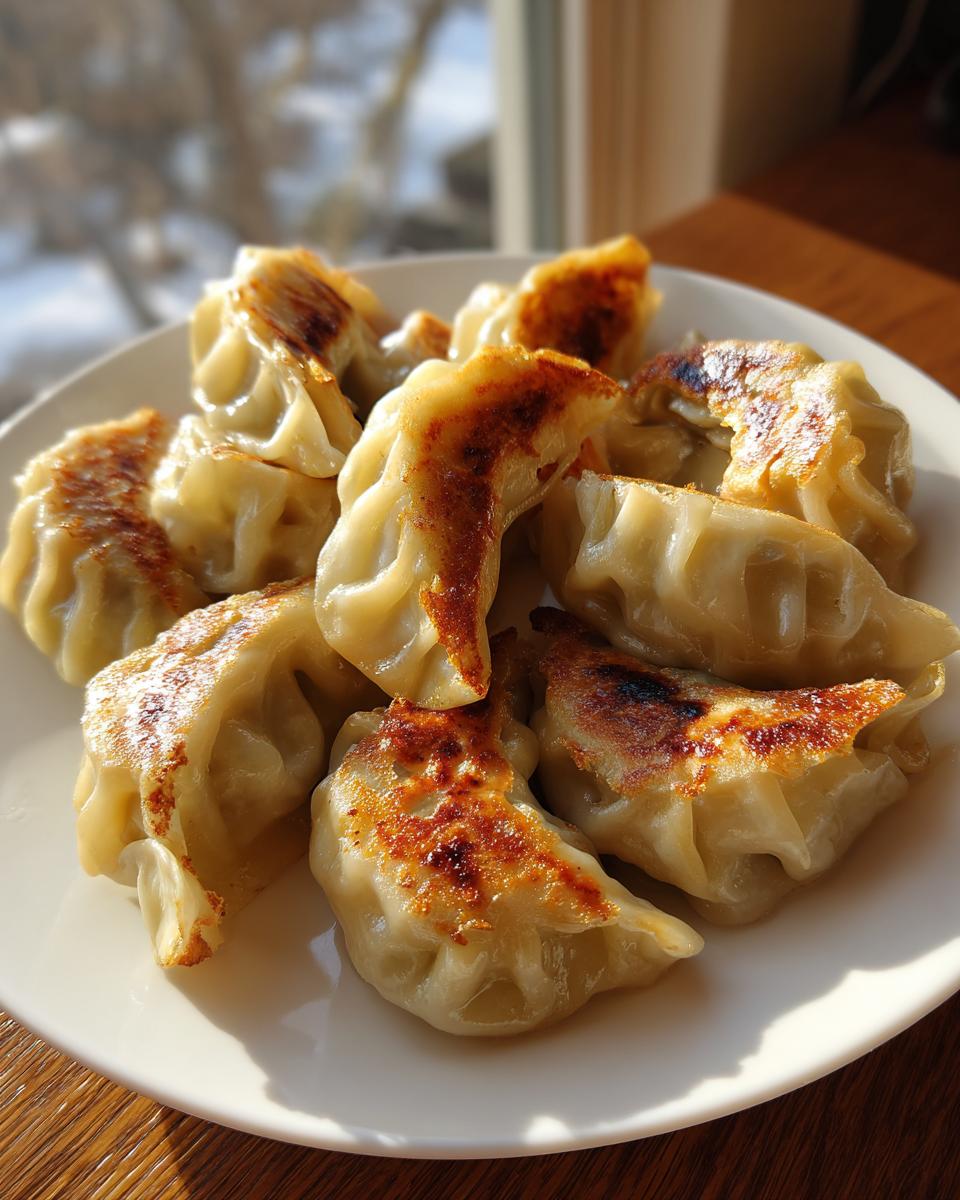
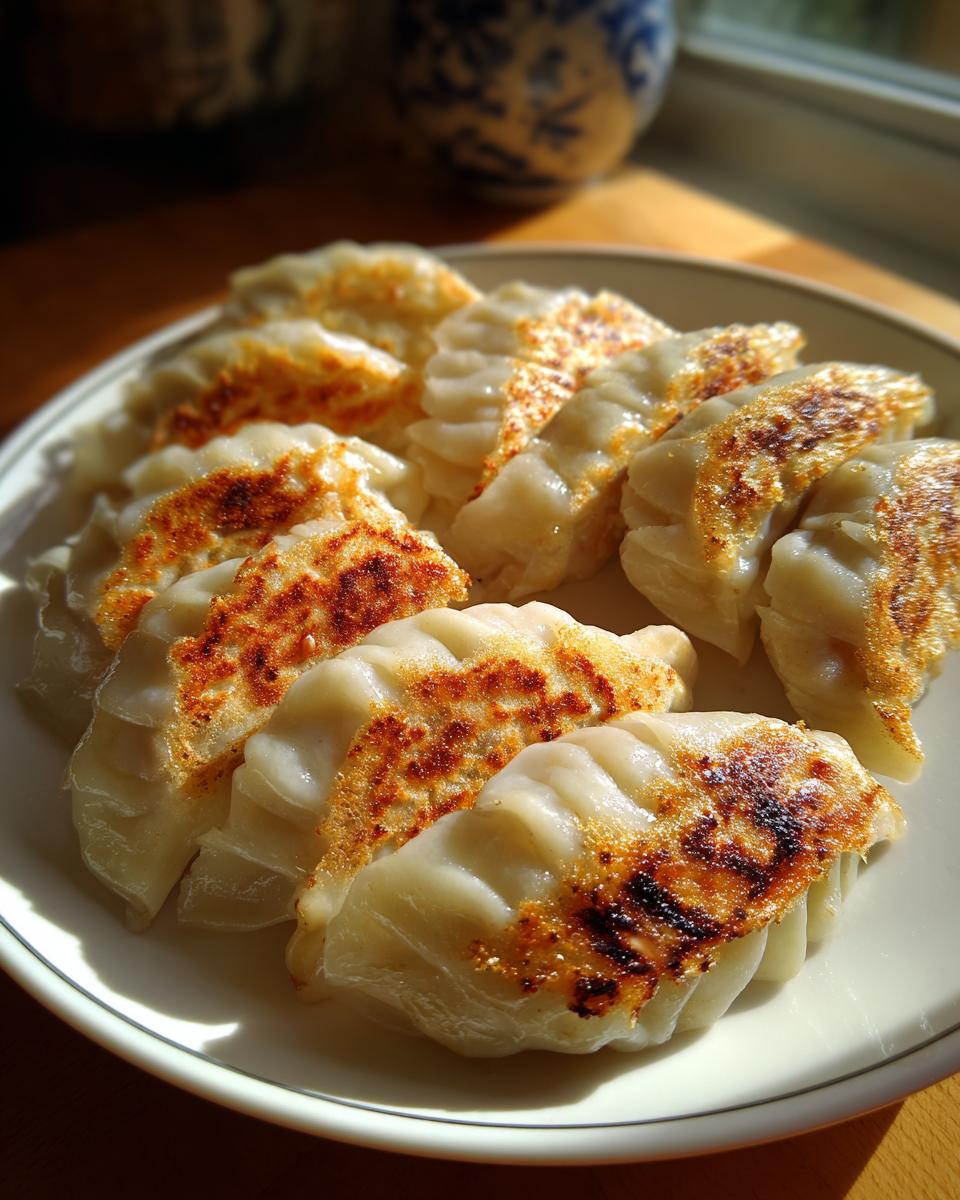
Serving Your Lunar New Year Dumplings
Now for the best part: enjoying your amazing lunar new year dumplings! These little flavor bombs are fantastic on their own, but they really shine when served with a simple, classic dipping sauce. Remember that mix of soy sauce, black vinegar, and maybe a little chili oil we talked about? That’s perfect! If you’re making a full meal, these dumplings pair wonderfully with a light, fresh stir-fried green vegetable, like bok choy or gai lan, and maybe a simple hot and sour soup. It’s a feast fit for any celebration!
Estimated Nutritional Information
Just a heads-up, this is just an estimate, folks! The actual nutrition can change depending on exactly what you use and how much you pile on your plate. But generally, if you’re having about 5 of these delicious dumplings, you’re looking at roughly 250 calories, just a little bit of sugar, and around 450mg of sodium. You’ll also get some good fats, protein, and carbs to keep you going!
Share Your Culinary Creations!
Okay, now it’s your turn! I would absolutely LOVE to hear all about your dumpling-making adventures. Did you try making the wrappers from scratch? How did they turn out? Did you discover a new favorite herb to add to the filling? Let me know in the comments below – honest opinions, your little tweaks, everything! And if you snap some gorgeous photos of your dumplings (because I know they’ll be stunning!), tag us on social media. Seeing your creations makes my day and inspires everyone else!
PrintTraditional Chinese Pork and Cabbage Dumplings
Learn to make authentic Chinese pork and cabbage dumplings from scratch, including homemade wrappers and pleating techniques. These freezer-friendly dumplings are perfect for Lunar New Year or any weeknight meal.
- Prep Time: 45 min
- Cook Time: 10 min
- Total Time: 55 min
- Yield: 40-50 dumplings 1x
- Category: Main Course
- Method: Boiling
- Cuisine: Chinese
- Diet: Vegetarian
Ingredients
- 1 pound ground pork
- 1/2 pound Napa cabbage, finely chopped
- 1/4 cup chopped scallions
- 2 tablespoons soy sauce
- 1 tablespoon Shaoxing wine
- 1 teaspoon sesame oil
- 1 teaspoon grated fresh ginger
- 1/2 teaspoon salt
- 1/4 teaspoon white pepper
- 1 package round dumpling wrappers (about 50 wrappers)
- Water, for sealing
Instructions
- In a large bowl, combine the ground pork, chopped Napa cabbage, scallions, soy sauce, Shaoxing wine, sesame oil, ginger, salt, and white pepper. Mix well until thoroughly combined.
- To make the wrappers (optional): Combine 2 cups all-purpose flour and 3/4 cup warm water. Knead until a smooth dough forms. Let rest for 30 minutes. Roll out thinly and cut into 3-inch circles.
- Place about 1 tablespoon of filling in the center of a dumpling wrapper.
- Moisten the edge of the wrapper with water.
- Fold the wrapper in half, pressing to seal the edges. You can create pleats along the sealed edge for a decorative finish.
- Repeat with the remaining filling and wrappers.
- To cook: Bring a large pot of water to a boil. Add the dumplings and cook for 5-7 minutes, or until they float and the filling is cooked through.
- Drain the dumplings and serve immediately with your favorite dipping sauce.
Notes
- For best results, let the filling rest for 15 minutes before assembling the dumplings.
- You can freeze uncooked dumplings on a baking sheet until firm, then transfer them to a freezer bag for later use. Cook from frozen, adding a few extra minutes to the cooking time.
- Serve with a dipping sauce made from soy sauce, black vinegar, and chili oil.
Nutrition
- Serving Size: 5 dumplings
- Calories: 250
- Sugar: 3g
- Sodium: 450mg
- Fat: 12g
- Saturated Fat: 4g
- Unsaturated Fat: 8g
- Trans Fat: 0g
- Carbohydrates: 25g
- Fiber: 2g
- Protein: 15g
- Cholesterol: 50mg