
There’s just something about a classic, old-fashioned dessert that hits the spot, isn’t there? If you’ve ever been burned by a cracked top or gritty texture when making baked goods, you know the dread! But I promise you, we are ending that struggle right here, right now. This recipe for Fail-Proof Classic Baked Egg Custard is the one that works every single time, guaranteeing that creamy, silky-smooth texture you crave. Here at Taste This Plate, Kate Reilly insists that every recipe we share—like this simple egg custard—has been tested until it’s absolutely flawless, giving you results you can trust, always.
- Why This is Your Go-To Fail-Proof Classic Egg Custard Recipe
- Ingredients for Your Homemade Vanilla Egg Custard
- Step-by-Step Instructions: How to Make Perfect Egg Custard
- Baking and Cooling Your Classic Egg Custard Recipe
- Tips for an Old Fashioned Dessert Success
- Serving Suggestions for Your Nutmeg Custard Dessert
- Storage and Reheating Instructions for Egg Custard
- Frequently Asked Questions About Making Egg Custard
- Estimated Nutritional Data for This Egg Custard
- Share Your Perfect Egg Custard Results
Why This is Your Go-To Fail-Proof Classic Egg Custard Recipe
Look, I’m Kate, and if you’ve been around here long enough, you know I don’t do complicated. But I *do* demand perfection when it comes to classic desserts, and traditional egg custard can be so temperamental! I spent weeks tweaking this until I could guarantee a Creamy Smooth Custard. You aren’t just getting steps; you’re getting the science that ensures this is truly a No-Fail Custard Baking method.
When I first started testing this, I had a sunken, weeping mess more often than I care to admit! But once I locked in the temperature control and the mixing technique, wow. Now, every time I pull it out, it’s that buttery, comforting dessert everyone remembers from childhood.
Achieving Silky Smooth Custard Texture
The secret weapon here, friends, is the water bath—we call it a bain-marie in fancier circles, but it’s just a warm bath for your custard! It keeps the temperature totally even around the dish. This gentle, indirect heat is what stops those egg proteins from seizing up, which is what causes curdling. You want that perfect wobbly center, right? That’s what signals a Silky Egg Pudding, not a scramble.
Also, please hear me on this: don’t whip the eggs like they owe you money! Over-beating incorporates air, and that air turns into those annoying little bubbles when it bakes. We want smooth, not airy!
Ingredients for Your Homemade Vanilla Egg Custard
This is the best part about this **Classic Egg Custard Recipe**: we aren’t hunting down specialty items! We’re using the basics that I always keep stocked in my pantry, which keeps things easy and affordable, just how I like it. You only need a handful of things to create this **Old Fashioned Dessert**. Remember, every ingredient counts here, so trust the measurements!
- 4 large eggs
- 1/2 cup granulated sugar
- 1/4 teaspoon salt
- 1 teaspoon pure vanilla extract
- 1/4 teaspoon ground nutmeg
- 2 cups whole milk
- 1 unbaked 9-inch pie crust (optional, for pie version)
Ingredient Notes and Substitutions
Since this is a short list, we need to make sure we are treating each item right. For richness, you absolutely have to use **whole milk**. Don’t try cutting the fat here; that’s where the creamy flavor lives! Also, please avoid imitation vanilla—it just doesn’t have that deep, warm note that pure vanilla extract brings out in the **Homemade Vanilla Custard**.
Now, about that crust. If you skip the crust entirely (which you totally can!), you’ve made a wonderful **crustless egg custard** pudding. Just make sure when you bake it, you use ramekins, which helps it set up perfectly. It’s a great way to enjoy this without any extra fuss!
Step-by-Step Instructions: How to Make Perfect Egg Custard
Now we get to the fun part—putting it all together! Follow these steps closely when you’re figuring out How to Make Perfect Egg Custard. Remember, patience in the prep work is what saves us from a ruined batch later on. We’re aiming for reliability, so hang tight through the little details. Remember to start your oven preheating right away, and get that kettle on the stove, too!
Preparing the Water Bath for Your Egg Custard
Before you even look at the eggs, go ahead and get that oven heated up to 325°F—we need steady, moderate heat for this. Simultaneously, bring a kettle of water to a full, rolling boil. Don’t skimp on this, because when you add it to the larger baking pan later (Step 7), you need that boiling water. Using cold or even warm water will stall your oven’s temperature and mess with the gentle cooking time we need. That hot water starts the process immediately and keeps that temperature super stable.
If you are using your unbaked pie crust, get that nestled perfectly into the pie plate now. If you aren’t using a crust, you just get to set your custard dishes aside for later!
Mixing the Simple Milk Custard Base
When it comes to mixing, slow and gentle wins the race! Grab your bowl for the base. The absolute most vital thing here is how you treat those eggs (Step 3). Lightly whisk them just until the yolks and whites look acquainted. If you start whipping them vigorously, you’re adding air, and that air creates bubbles, which turns into foam, which becomes grainy texture. We are aiming for silky, remember?
Once they are just combined, whisk in your sugar, salt, vanilla, and nutmeg until that sugar feels mostly dissolved. Then, *gently* drizzle in the 2 cups of whole milk while continuing that easy whisking motion. I like to stop, wait a second, and use a spoon to skim off any tiny layer of foam that decides to peek up on top. We want a flat, uniform liquid ready for that bath. If you want delicious, Creamy Smooth Custard, no bubbles allowed!
Baking and Cooling Your Classic Egg Custard Recipe
Okay, your liquid gold is nestled safely in its hot water spa! Now we need to bake it just right. Trust me, this baking time is non-negotiable if you want that perfect texture everyone raves about in a **Classic Egg Custard Recipe**. We are aiming for set edges and a barely there wobble in the center. Don’t panic when you see it jiggle; that jiggle is your friend and proof that you are about to have a deliciously creamy treat.
Set your timer for 45 minutes, and then we check. The official baking time falls between 45 to 55 minutes, depending on your oven being perfectly calibrated. You can’t just rely on sight alone, though. If you gently nudge the big baking pan—not the custard dish itself, but the outer pan holding the water—the custard should jiggle just a little bit in the center. Think of it like very thick Jell-O, not liquid soup.
My favorite trick for checking doneness without guessing is the little knife test (Step 8 in the instructions). Slide a thin knife or a clean toothpick right near the center. If it comes out mostly clean, maybe with a tiny bit of moist crumb clinging to it, take it out immediately! If it’s coming out dripping wet, give it five more minutes and test again. This little window is critical for avoiding that dry, cracked top.
Once you pull that beautiful thing out—and be careful now!—you have to immediately break the cooking process. Carefully lift the pie plate or ramekins out of that hot water bath. I use tongs or slide the whole outer pan onto a heat-safe rack. Let it sit on the counter, still nestled in its cooling rack, for a full hour. This slow cool-down prevents residual heat from overcooking those delicate eggs.
After it’s cooled to room temperature, cover it gently and move it to the refrigerator. It needs at least four hours, but honestly, chilling overnight totally deepens those vanilla and nutmeg flavors. You simply can’t rush the chilling phase if you’re aiming for that truly flawless, rich, chilled final dessert.
Tips for an Old Fashioned Dessert Success
So you’ve mastered the baking part, but let’s talk about making sure this **Old Fashioned Dessert** is absolutely museum-quality. Remember the note I mentioned about not over-whisking the eggs? That is my number one rule for achieving that luxurious, **Creamy Smooth Custard**. Don’t let the blender near this mixture, ever! You can find more baking wisdom when you look at my post detailing bacon, gruyère, and egg bites, because careful egg handling is key in both!
If you skipped the water bath because you were feeling brave—don’t worry, we’ve all been there—the best tip I can offer for a slightly less-than-perfect custard, according to my notes from Fail-Proof Egg Custard research, is to strain it multiple times *before* it goes into the oven. Strain it once, strain it twice! It helps catch those tiny cooked bits.
If you’re making that **Southern Egg Custard Pie**, the top should be smooth and glossy when it comes out. If you notice the crust edges getting too dark before the center is set, just take a strip of foil and carefully drape it over the rim. That keeps the crust from burning while the center finishes its gentle bake. Easy fix for a beautiful finish!
Serving Suggestions for Your Nutmeg Custard Dessert
Now that you’ve made the most perfect, wobbly, **silky egg pudding**, you might be wondering how to serve this beautiful **Comfort Food Dessert**! Honestly, sometimes I just grab a spoon and eat it straight out of the baking dish while it’s still slightly warm—don’t judge! But if you’re serving this **Nutmeg Custard Dessert** to company, you’ve got some lovely, simple options.
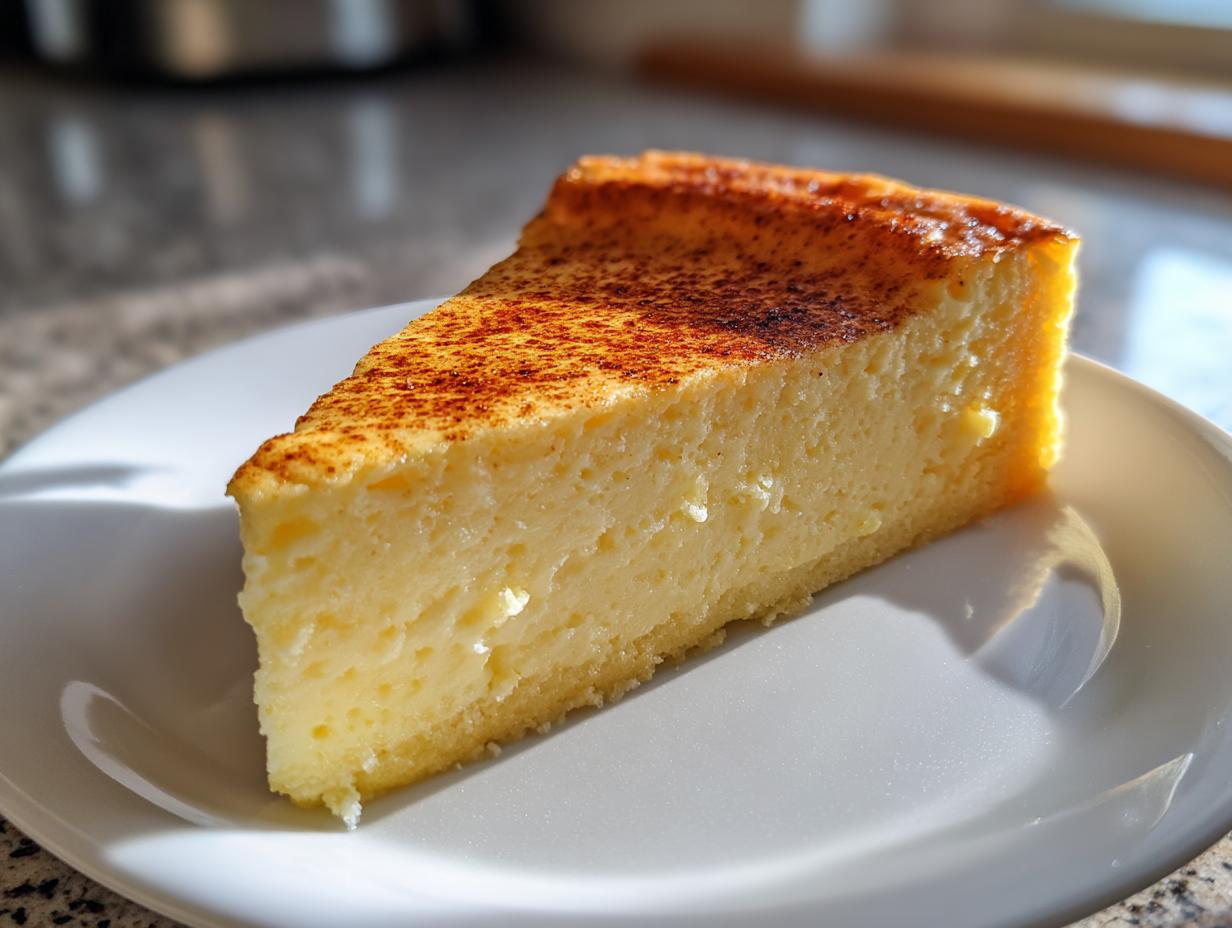
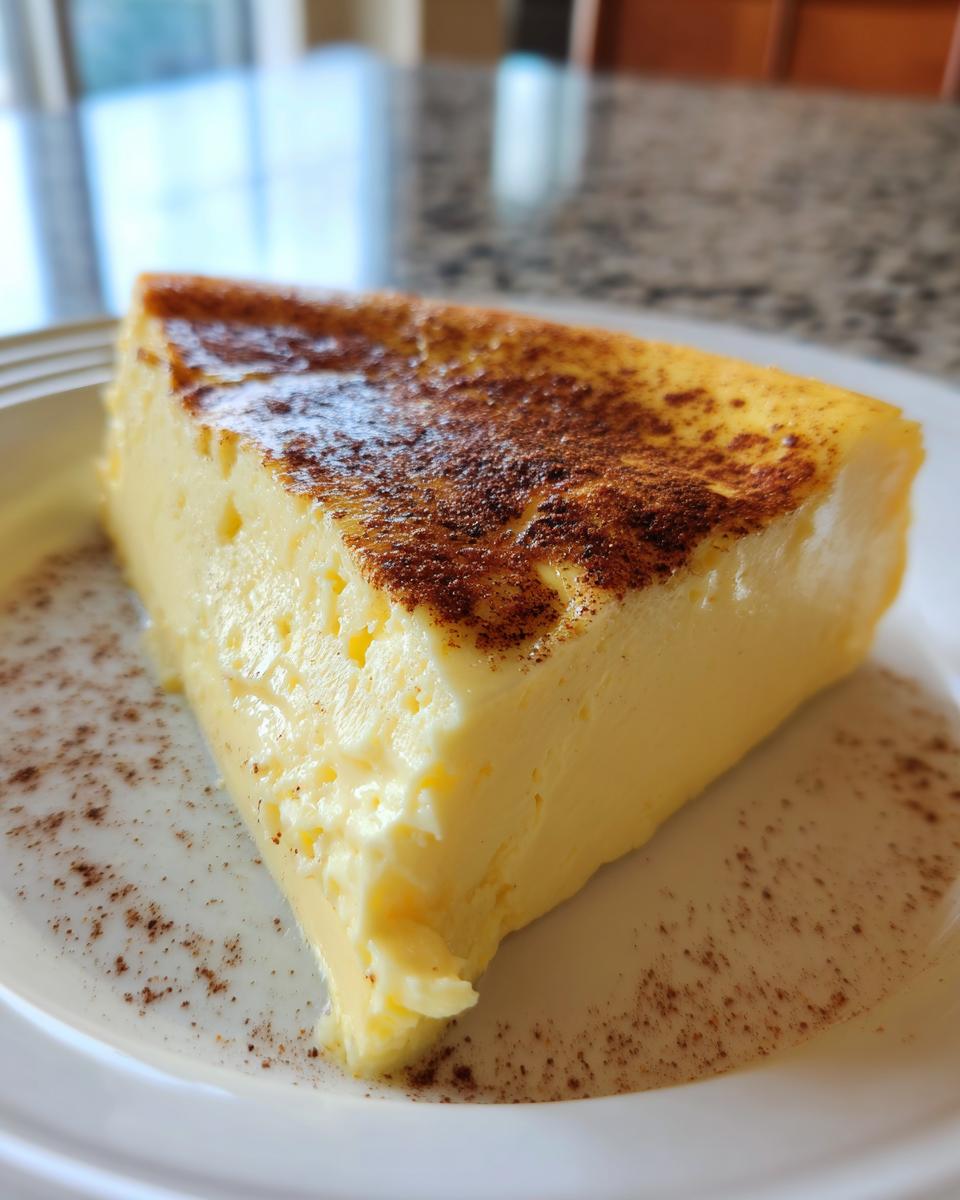
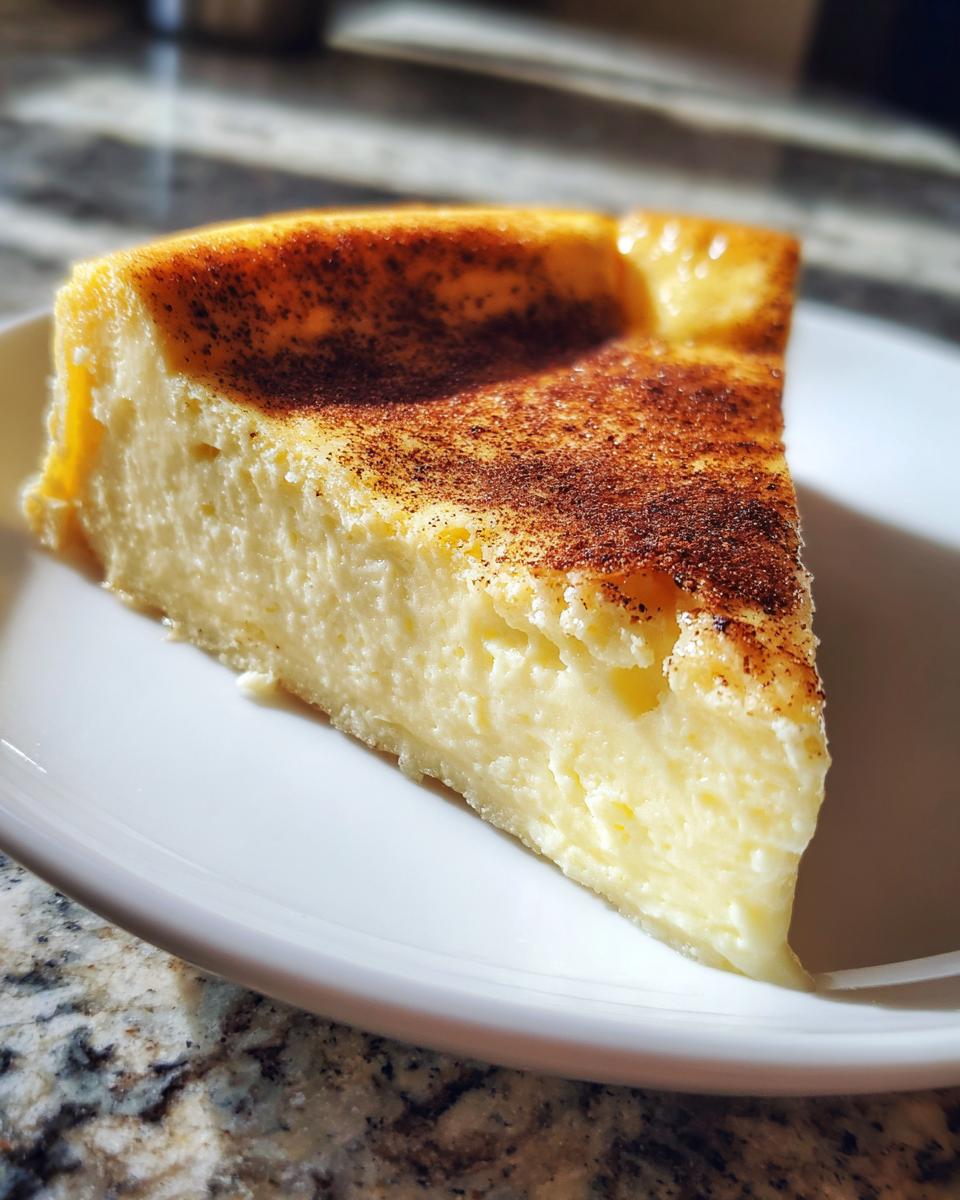
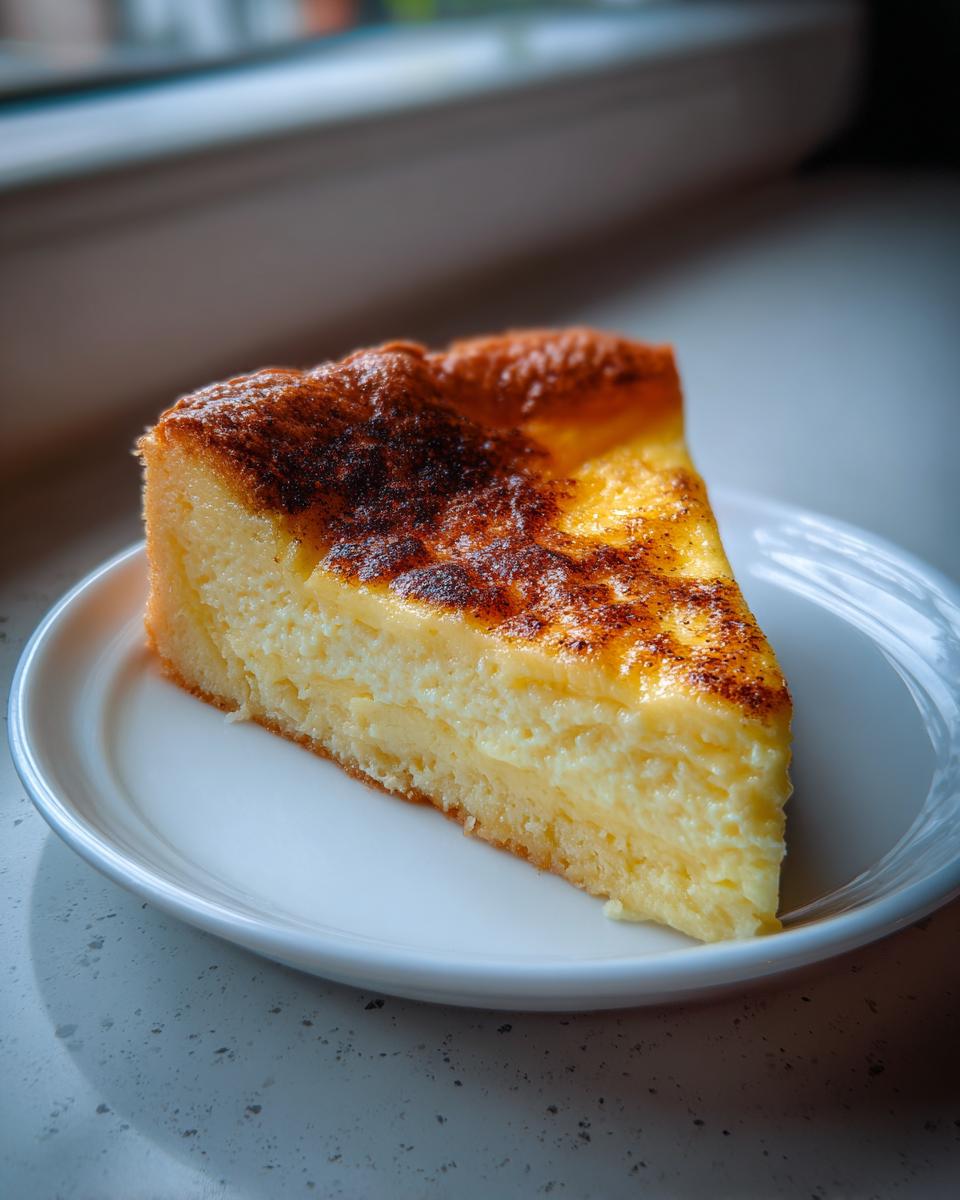
The traditional finish, as I mentioned, is just a final, light dusting of fresh ground nutmeg right before it hits the table. That scent is just heavenly alongside the vanilla. It really signals that this is an **Old Fashioned Dessert** made with care.
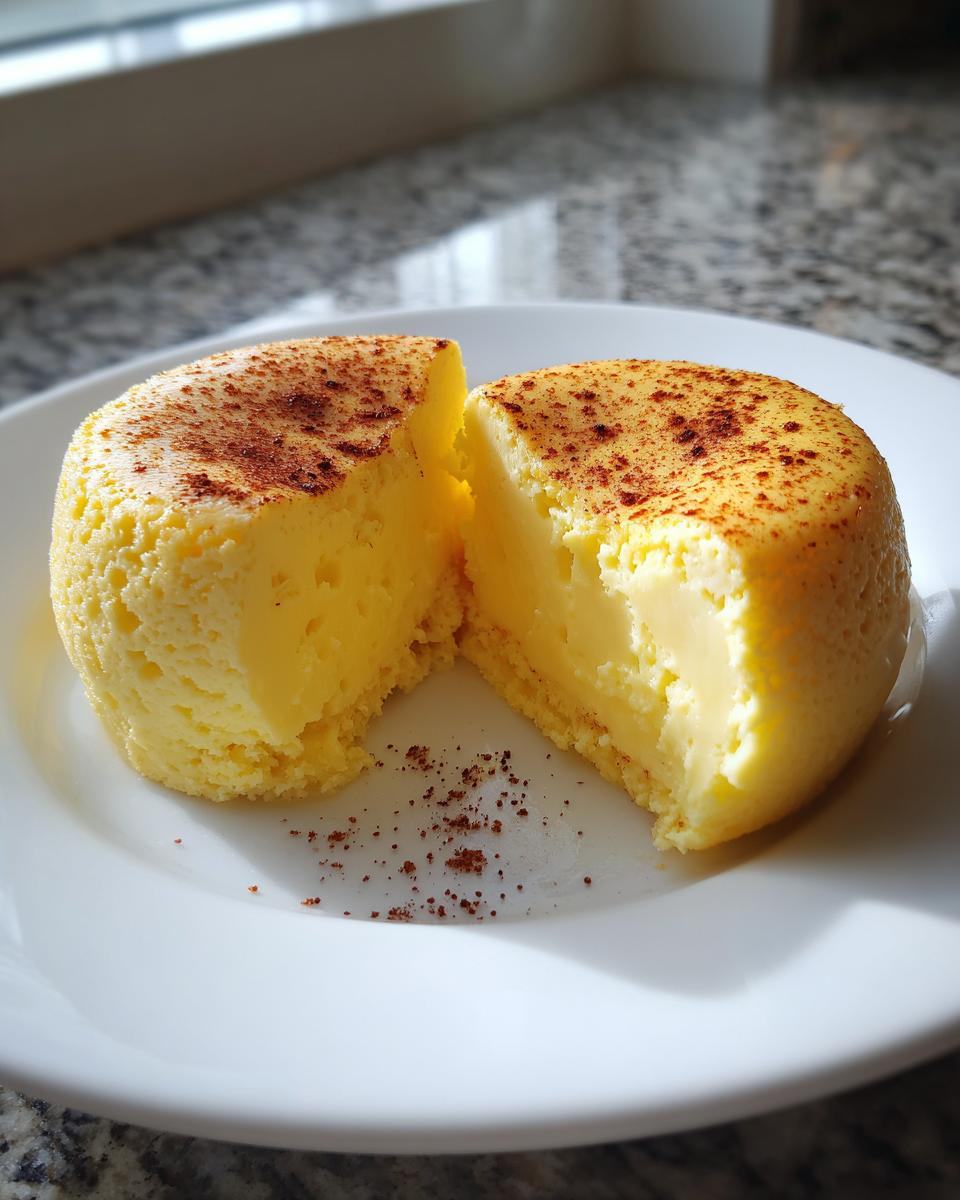
If you chilled it overnight, which I highly recommend, the texture is wonderfully firm, almost like a very delicate cheesecake that melts in your mouth. It plays so well with other textures. Think about serving a slice alongside some fresh, slightly tart berries—raspberries or sliced strawberries cut through the rich sweetness beautifully! I often make a pitcher of my Sparkling Honey Lemonade Soda to serve alongside it when we have it after dinner; the bubbles are a nice contrast to the dense custard.
And of course, since this is such a reliable, creamy treat, it pairs perfectly with a strong cup of coffee or a nice hot black tea. It’s a beautiful, simple way to end any meal, proving once again that you don’t need fussy ingredients to create something truly memorable!
Storage and Reheating Instructions for Egg Custard
You’ve done the hard work, you’ve mastered the water bath, and now you have this gorgeous, wobble-free **egg custard**! Please don’t ruin it by eating it warm right out of the oven—I know it’s tempting, but you really mustn’t.
This dessert *needs* its chill time. My instructions emphasize chilling it for a minimum of four hours, but honestly, if you can manage to wait overnight, you’ll thank me later. That cold time allows the custard structure to firm up completely. When it’s chilled, you get that signature, almost impossibly smooth texture that makes this **Classic Egg Custard Recipe** so special. It feels more decadent than when it’s slightly warm.
Storing leftovers is simple, thank goodness. If you made the pie version, cover the pie plate loosely with plastic wrap or aluminum foil. If you used ramekins, pop lids on them or cover the tops tightly. You want to keep the surface protected from absorbing any fridge odors, which can sometimes happen with milk-based desserts. Store the covered custard dishes in the main body of the refrigerator, not the door, where temperatures fluctuate too much.
Now, here’s the reheating question I get all the time: Do you reheat **Homemade Vanilla Custard**? My answer is usually no, or at least, tread lightly. This dish is designed to be eaten cold. If you absolutely must serve a slice warm—maybe you have guests who insist—the best way is to let a slice sit on the counter for about 20 minutes, just to take the deep chill off. Microwaving it will absolutely ruin that beautiful, **Creamy Smooth Custard** texture; it’ll melt and potentially curdle, so skip it!
If you are looking for other classic baking ideas, you might enjoy checking out the tips for creating a beautiful buttery flaky crust pie filling if you decide to make a batch that uses the full pie shell! Keep it chilled, keep it covered, and enjoy those perfect slices!
Frequently Asked Questions About Making Egg Custard
I know you have questions! When you’re dealing with an old-fashioned recipe like this, especially one that needs gentle cooking, it’s smart to ask before you start mixing. We worked hard in the kitchen to make this the most reliable **Easy Baked Custard** you’ll ever try, so let’s clear up any final doubts about achieving that perfect **Homemade Vanilla Custard**!
Can I make this egg custard recipe without a pie crust?
Oh, absolutely you can! That’s one of the things I love about this recipe—it’s flexible. If you skip the pie crust and instead pour your mixture into individual ramekins (about 6-ounce size works great), what you end up with is a beautiful, crustless baked custard pudding. It’s basically the ultimate Silky Egg Pudding when served cold! Just make sure you still place those ramekins into the water bath for that gentle cooking action. It’s the best way to enjoy it if you’re watching carbs or just prefer the pure custard experience.
Why did my egg custard curdle or crack?
This is the burning question! If you’ve been frustrated by a grainy custard that looks a bit scrambled, it almost always comes down to one of two super common slip-ups. First, you cooked it too hot or too fast. That’s why the 325°F oven combined with the **water bath** is your best friend—it creates a slow, steamy environment. If you skip the water bath even once, you risk that direct heat hitting the bottom and scrambling those eggs near the edges.
Second, and this is huge: over-whisking the eggs in the beginning! Remember how I told you to whisk gently? If you whip too much air into the mixture, those bubbles bake quickly and erupt on the surface, causing cracks. Keep it simple, keep it gentle, and your custard won’t crack. That’s the gold standard for our fail-proof temperature control!
Estimated Nutritional Data for This Egg Custard
I always like to give you a rough idea of what you’re eating when you whip up one of these **Old Fashioned Dessert** classics. Keep in mind, because we are dealing with a recipe that can be made with or without a crust, these numbers are *estimates* for one slice of the standard recipe (which uses the crust, as that’s the classic pie style). If you opt for the crustless **Simple Milk Custard** pudding, your fat and carbohydrate count will look a little different!
These figures are based on using standard grocery store ingredients and represent one slice based on an 8-serving yield. If you use a heavy-duty, super rich crust, or you happen to use a different brand of milk, these numbers will shift a bit. We put in the effort to test and re-test the recipe, and this nutritional guess is based on those controlled tests, keeping our promise of accuracy to you!
- Serving Size: 1 slice
- Calories: 220
- Sugar: 22g
- Sodium: 150mg
- Fat: 10g
- Saturated Fat: 5g
- Unsaturated Fat: 5g
- Trans Fat: 0g
- Carbohydrates: 25g
- Fiber: 0g
- Protein: 8g
- Cholesterol: 120mg
See? It comes out to a wonderfully balanced, comforting slice of pure happiness. It’s proof that simple ingredients baked with care always make the best treats!
Share Your Perfect Egg Custard Results
Well, friend, that’s it! You now have the exact blueprint to conquer the world of baked desserts with this egg custard. I truly hope you feel empowered to try this recipe—it’s one of the easiest, most historically delicious things you can bake, and now you know all my little secrets for keeping it silky smooth.
I cannot wait to hear how it turned out for you! Please, if you try this, scroll down below and leave me a rating. Did you manage to avoid the curdling? Did the water bath work its magic? Tell me everything! We love seeing your successes in the kitchen, so feel free to share photos of your beautiful, creamy creations. If you need to reach out with any specific questions that the FAQ didn’t cover, you can always use the handy contact form over at our contact page!
If you loved learning the “why” behind not over-whisking the eggs and mastering that gentle bake, I hope you’ll stick around Taste This Plate. We have so many more simple, field-tested recipes waiting for you—from breakfast bakes to savory dinners. Don’t hesitate to reach out if you ever have questions about this recipe or any others; my heart, and my inbox, are always open for my fellow home cooks!
Thank you so much for baking with me today. Go enjoy that perfectly chilled, nutmeg-dusted slice! Happy Cooking!
PrintFail-Proof Classic Baked Egg Custard

Make a creamy, silky-smooth classic egg custard dessert using simple ingredients and a water bath method to prevent curdling. This old-fashioned recipe guarantees perfect results every time.
- Prep Time: 15 min
- Cook Time: 55 min
- Total Time: 70 min
- Yield: 8 servings 1x
- Category: Dessert
- Method: Baking
- Cuisine: American
- Diet: Vegetarian
Ingredients
- 4 large eggs
- 1/2 cup granulated sugar
- 1/4 teaspoon salt
- 1 teaspoon pure vanilla extract
- 1/4 teaspoon ground nutmeg
- 2 cups whole milk
- 1 unbaked 9-inch pie crust (optional, for pie version)
Instructions
- Preheat your oven to 325 degrees Fahrenheit. Bring a kettle of water to a boil for the water bath.
- If using a crust, gently place the unbaked pie crust into a 9-inch pie plate. Set aside.
- In a medium bowl, lightly whisk the eggs just until the yolks and whites combine. Do not over-beat, as this incorporates too much air and can cause curdling.
- Whisk in the sugar, salt, vanilla extract, and nutmeg until the sugar begins to dissolve.
- Slowly pour in the whole milk while gently whisking until everything is just combined. Skim off any surface bubbles with a spoon.
- Pour the custard mixture into the prepared pie plate (or into four 6-ounce ramekins if making crustless custard).
- Place the pie plate or ramekins into a larger baking pan. Carefully pour the boiling water into the larger pan until the water reaches halfway up the sides of the custard dish or ramekins. This water bath is key for a creamy smooth custard.
- Carefully transfer the baking pan to the preheated oven.
- Bake for 45 to 55 minutes. The custard is done when the edges are set but the center still jiggles slightly when gently nudged. A knife inserted near the center should come out mostly clean.
- Carefully remove the custard from the water bath using tongs or by sliding the pan onto a heat-safe surface. Let it cool on a wire rack for one hour.
- Chill the egg custard completely in the refrigerator for at least 4 hours, or preferably overnight, before serving. Sprinkle with extra nutmeg just before serving.
Notes
- For a truly fail-proof result, avoid over-whisking the eggs; you want to mix them, not whip them into a froth.
- If you skip the water bath, your custard is much more likely to curdle or crack.
- This recipe works well for a crustless baked custard pudding if you omit the pie crust and use ramekins.
Nutrition
- Serving Size: 1 slice
- Calories: 220
- Sugar: 22
- Sodium: 150
- Fat: 10
- Saturated Fat: 5
- Unsaturated Fat: 5
- Trans Fat: 0
- Carbohydrates: 25
- Fiber: 0
- Protein: 8
- Cholesterol: 120