

If you’re anything like me, there’s just something about that slow-simmered aroma drifting from the stovetop that feels like home. My grandmother used to make rich, nearly soup-like dishes that comforted our whole Midwestern table, and that deep flavor background really guides me when I look at Southern comfort food today. That’s exactly what we are unlocking here with the absolute best way to cook dried black eyed peas. Forget those bland, watery versions you might have had. This recipe gives you tender, smoky, savory peas that whisper of tradition but actually come together quite simply on the stove. Trust me, you need this version in your regular rotation!
- Why You Will Love These Classic Black Eyed Peas
- Essential Ingredients for Smoky Black Eyed Peas
- How To Cook Black Eyed Peas: Step-by-Step Stovetop Instructions
- Tips for Achieving Creamy Black Eyed Peas
- Making Black Eyed Peas for Good Luck Traditions
- Serving Suggestions for Your Black Eyed Peas Side Dish
- Storing and Reheating Leftover Black Eyed Peas
- Frequently Asked Questions About Black Eyed Peas
- Sharing Your Experience with This Southern Black Eyed Peas Recipe
Why You Will Love These Classic Black Eyed Peas
Honestly, this recipe checks every single box when you’re craving real Southern cooking. I didn’t set out to make this the most complicated thing ever; I just wanted flavor that felt like it had been stewing all day. If you are looking for a go-to side, this is it!
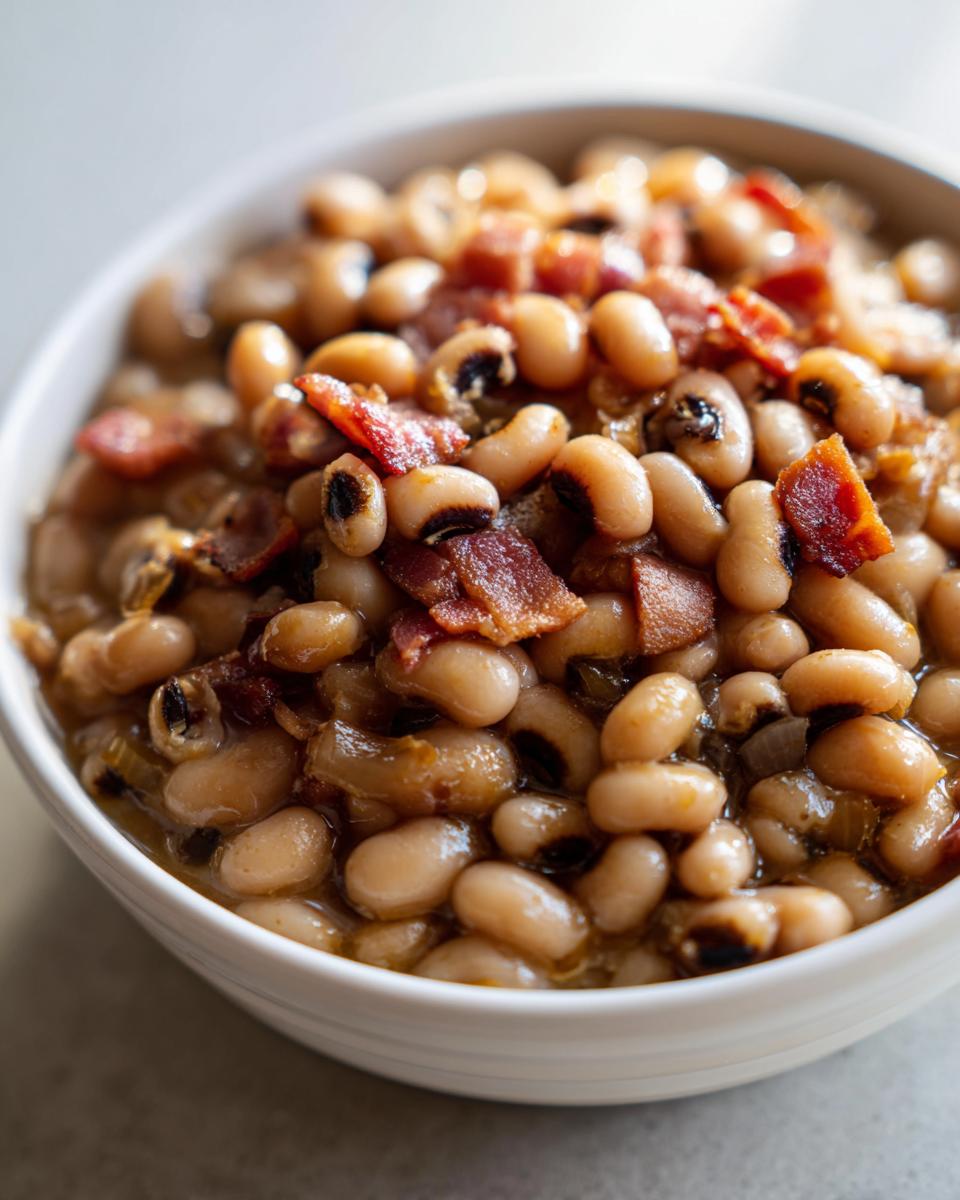
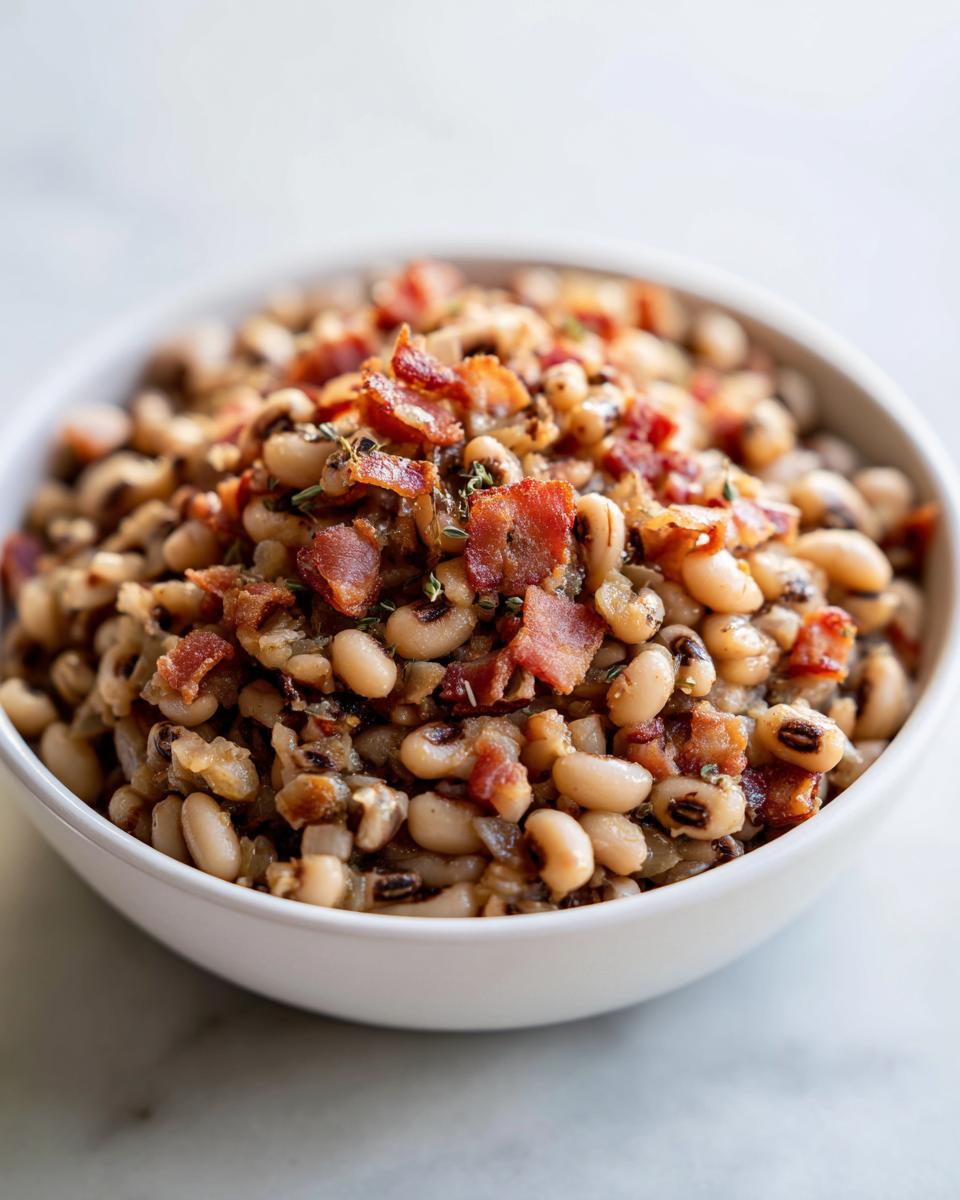
- Deeply Smoky Flavor: We use quality bacon to render out all that gorgeous fat, which perfumes the entire pot. It’s rich without being overly heavy.
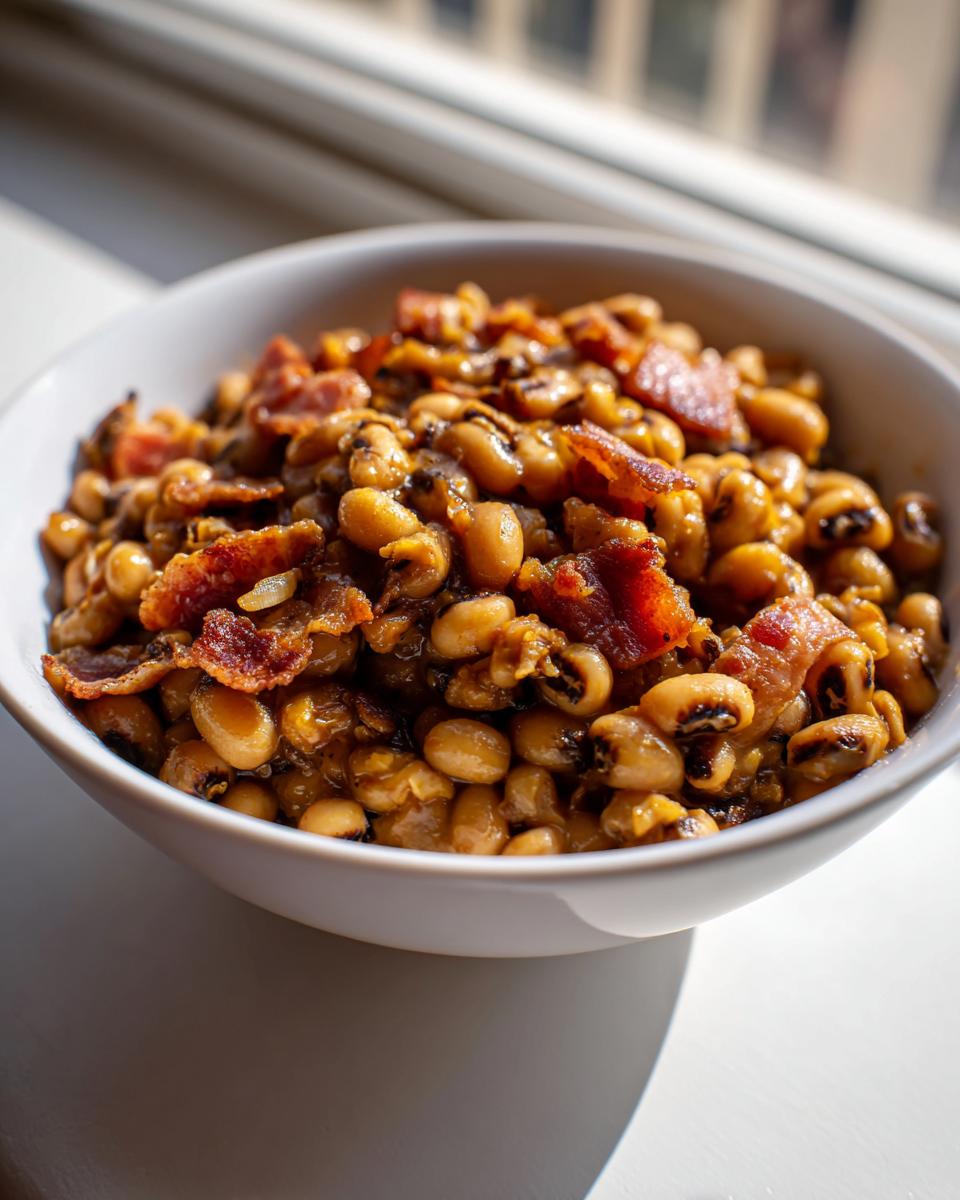
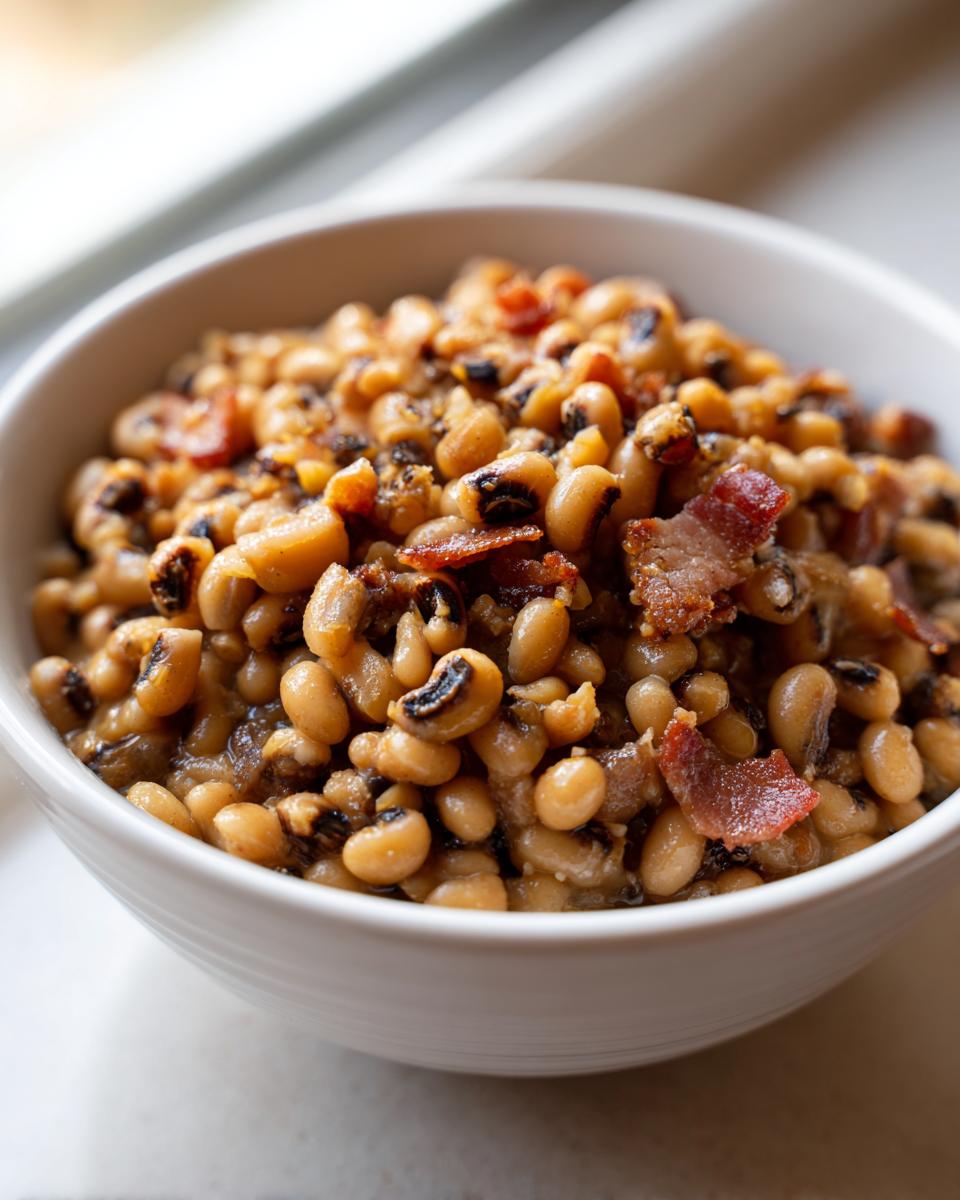
- Incredibly Tender Texture: There’s no chalkiness here! When you give these peas the time they need on the simmer, they break open just right.
- Perfect for Any Occasion: Whether it’s a big holiday spread—you know, tradition!—or just a Tuesday night dinner, these are the ideal Southern Comfort Food Beans.
- Easy Stovetop Method: No fancy equipment needed! We’re relying on simple simmering in a Dutch oven for authentic results. You can see more of my favorite side dish ideas right here.
- Builds Flavor Over Time: The second simmer where everything melds together is magical. The longer they gently cook, the better they taste.
- They Aren’t Soupy: This recipe is designed to be a hearty side dish, not a thin soup! You control the liquid level the second time around.
Essential Ingredients for Smoky Black Eyed Peas
Okay, let’s talk about what hits the pot. When you’re making something as traditional as black eyed peas, the quality of what you put in really matters. I’ve kept this list short because I don’t believe in cluttering up perfectly good beans with ten different items. We are going for deep, savory goodness, and it starts here:
- 1 pound dried black eyed peas (Don’t skip rinsing them!)
- 6 cups of water or chicken broth (Broth just gives you a nice head start on flavor.)
- 4 ounces of bacon, chopped (This is our primary flavor builder—use good quality here!)
- 1 medium yellow onion, chopped fine
- 2 cloves of garlic, minced (Don’t start measuring garlic, just mince and add it.)
- 1 teaspoon salt (We add this later because the beans cook slower when salted early.)
- 1/2 teaspoon black pepper
- 1/4 teaspoon cayenne pepper (Just a tiny bit for warmth, I promise!)
- 1 bay leaf
See? Simple stuff! But those first few ingredients are where the magic happens. If your bacon tastes sad, your beans are going to taste sad. It’s just science, folks.
Ingredient Notes and Substitution Tips
Now, while the bacon is my go-to because it renders beautifully and crisps up nicely for topping, I know lots of folks stick strictly to tradition, especially around the New Year. If you want that deep, old-school flavor that sinks into every single bean, you absolutely have to consider using a smoked meat product instead of bacon.
If you have a smoked ham hock lying around, grab that! It’s a fantastic replacement for the bacon listed above, though you’ll skip Step 2 (crisping the meat) and cook the onion/garlic in a little bit of oil or simply the rendered fat from slicing up the hock. Or, if you’re using leftover roasted black eyed peas with turkey, toss the carcass in with the initial simmer liquid for an amazing flavor boost. That’s true Southern Black Eyed Peas Recipe hacking right there!
And one final quick note: Dried black eyed peas need a little love before they hit the heat. You must rinse them well under cold water and spend a minute picking through them. You’re looking for any tiny pebbles or shriveled-up peas that snuck in during packaging. Trust me, you do not want to accidentally chew on a rock!
How To Cook Black Eyed Peas: Step-by-Step Stovetop Instructions
This is where the real cooking happens! Since we’re using dried beans, we need a two-stage process. Step one gets the peas started so they soften up nicely. Don’t worry if this first hour seems long; it’s hands-off time, which I love! Grab your biggest, heaviest pot—a Dutch oven is perfect here.
- First, put your rinsed peas right into that heavy pot with about 6 cups of water or the chicken broth I mentioned. Bring that up to a rolling boil over high heat. As soon as it boils, drop the heat right down so it’s just bubbling gently, cover it up, and let it go for a full 1 hour.
- After that first hour, most recipes tell you to drain the cloudy water, and that’s what we’re doing—drain off most of that liquid, leaving maybe 2 cups behind. This step helps refine the flavor and prevents a thin final product, especially if you want an easy side dish.
Now that the peas are softened, it’s time to build that smoky depth we talked about! This is absolutely essential for great black eyed peas.
Building Flavor: Cooking Aromatics for Your Black Eyed Peas
While your peas were simmering away, you should have taken care of the bacon! Get that chopped bacon cooking in a separate skillet over medium heat until it stops sizzling and gets perfectly crispy. Use a slotted spoon to pull out those salty little bits and set them on a paper towel—that’s our topping! We want that rendered fat left right there in the skillet. Now, toss in your chopped onion and let it soften up in that bacon grease for about 5 minutes. You want it translucent, not brown. Once the onions are soft, drop in your minced garlic. Be careful—garlic burns fast! Cook it only until you can really smell it—maybe 60 seconds max. That fragrant mix is the secret sauce foundation!
Simmering to Perfection: Achieving Tender Black Eyed Peas
Once your aromatics are ready, scrape that whole skillet mixture—onions, garlic, and all that yummy fat—right into the pot with your partially cooked peas. Add the cooked bacon bits back in, throw in your salt, pepper, cayenne if you’re using it, and don’t forget that bay leaf!
Stir everything up really well, cover the pot again (but leave the lid slightly askew so the steam can escape a bit), and let it simmer *low and slow* for another 30 to 60 minutes. If you’re aiming for a thick side dish, watch the liquid closely. If it gets too dry before the peas are totally creamy, just add a half cup of warm water or broth at a time. Once they are meltingly tender, pull out that bay leaf. Done!
Tips for Achieving Creamy Black Eyed Peas
This recipe is fantastic because it naturally leans towards being tender, but if you want that ultra-rich, melt-in-your-mouth texture—the kind that begs to be scooped onto a pile of hot rice—you need one little trick up your sleeve. This is how you nail the Creamy Black Eyed Peas look without using tons of extra starch or flour!
The key is something I learned from watching my neighbor make her famous stew years ago. It’s so simple, but it completely changes the final consistency. You are essentially making your own quick-thickener right in the pot!
When the peas have finished simmering and are perfectly tender (test one! If it squishes easily between your fingers, you’re ready), take your ladle and scoop out about a quarter cup of the pea mixture. Make sure you get a good mix of beans and that savory liquid.
Now, here’s where you work your magic. Place that small scoop into a separate bowl. Using the back of a fork, or even a handy immersion blender if you’re feeling fancy, mash those peas vigorously until they form a thick, chunky paste. That paste is pure, concentrated flavor and starch!
Scrape that mashed goodness right back into the main pot. Stir it in really well. As the whole pot heats back up for just five more minutes on low, those mashed peas will dissolve slightly and thicken up all the surrounding liquid. Suddenly, your whole batch of black eyed peas will look richer and creamier without tasting gloppy or heavy. It’s just concentrated goodness!
If you want even more ideas on how people achieve creaminess in different ways, sometimes it helps to see what others are doing. Check out this other great recipe idea for inspiration over here!
Remember, the goal is authentic homestyle cooking. This mashing technique ensures you get that beautiful richness while keeping all the flavor we built with the bacon and onion intact. It’s the best way to ensure every scoop is perfectly savory and satisfying.
Making Black Eyed Peas for Good Luck Traditions
You absolutely cannot talk about black eyed peas without mentioning New Year’s Day! It’s such a wonderful tradition, and frankly, it’s the perfect excuse to make these because they are so incredibly cozy and comforting when the winter weather hits. Back home, we always piled these onto our plates right at midnight, hoping for prosperity in the coming year. The idea behind this tradition is that the round shape of the peas represents coins, so you eat them for good luck!
If you are making these specifically for a New Year’s celebration, you might want to lean even harder into that authenticity, which means swapping out the bacon for something with a deeper, more profound savory note. This is where the good old ham bone comes in. In the South, people often cook their peas with a leftover smoked ham hock or bone right from Christmas dinner.
If you are going to use a ham hock—which is the most traditional way to get these New Year’s Black Eyed Peas tasting truly authentic—you’ll skip the bacon rendering step entirely! Just toss that ham hock into the pot during that first hour of simmering with the dried peas and the water. It will release amazing smoky flavors as it cooks down, making the final bean incredibly rich. You get your liquid, your smoke, and your meat all in one go. You can look up fantastic traditional ways to use up those winter leftovers, or check out how others handle smoky flavors in their chili right here.
When you’re finished simmering, just pull that big bone out! It’s usually too tough to eat, but it has done its job flavoring the entire pot. Once the bone is out, your peas are ready for seasoning adjustments as we discussed earlier. These traditional pairings just deepen that Southern heartiness. For more inspiration on classic Southern takes, I love seeing what other cooks are doing when they tackle this recipe!
Serving Suggestions for Your Black Eyed Peas Side Dish
So, you’ve got this perfectly tender, smoky pot of black eyed peas—now what? They are so wonderfully versatile! While they are absolutely famous as a side dish, especially when ringing in the New Year, they can easily be the star of the plate if you pair them right. I try to keep the pairings simple because I want those amazing smoky flavors we worked so hard to build to shine through, not get buried!
Here are my favorite ways to finish the meal when these peas come off the stove:
- Over Steamed White Rice: This is the most classic presentation, especially if you’re looking for a very hearty dinner. Spoon a generous amount of creamy peas right over a mound of plain, fluffy white rice. The rice soaks up all that delicious broth! If you’re planning a whole big meal, you might want to check out my recipe for chicken and rice casserole for another great pairing idea.
- The Classic Greens Combo: You simply can’t have Southern Comfort Food Beans without a little green on the side. These peas are fantastic alongside some slow-simmered collard greens or mustard greens. The slight bitterness of the greens is the perfect counterpoint to the salty, savory richness of the bacon in the peas. If you love that combo, I highly recommend seeing how this recipe does the greens!
- With Cornbread: Obviously, you need something to sop up any extra liquid left in the bowl. A slice of warm, slightly sweet cornbread is non-negotiable here at my table. Keep it simple—no fancy additions necessary.
- As a Thicker Stew: If you used a ham hock and let the liquid reduce significantly, you don’t even need anything else! These are hearty enough to be a fantastic stew on their own for a Meatless Monday (if you skipped the bacon/hock, of course).
See? We took simple dried peas and turned them into a centerpiece with just a few intentional additions and great pairing choices!
Storing and Reheating Leftover Black Eyed Peas
If you are lucky enough to have any of these smokey black eyed peas left over (which really, they taste even better the next day!), storage is super easy. These are hearty beans, and they hold up really well!
The most important thing is containment. Once the peas have cooled down a bit—don’t seal them while they are piping hot, as that can create sweat and condensation—transfer them into an airtight container. They do great in the fridge for about three or four days. I usually just use one of my glass Pyrex containers because they stack nicely and I can see exactly how much I have left for lunch the next day!
Reheating Your Smoky Peas
Here’s a little heads-up: leftover beans thicken up a *lot* overnight. Seriously, if you left them in a jar in the fridge, they might look more like chili than a side dish! That’s completely normal, and it shows just how much flavor they packed in there.
When it comes to reheating, you have two options, and the stovetop is always my preferred way to refresh that smoky flavor:
Stovetop Method (Best for Texture):
- Scoop the amount you want into a small saucepan.
- Add just a splash or two of water or low-sodium broth—just enough to loosen them up to your desired consistency.
- Heat gently over medium-low heat, stirring often, until they are steaming hot all the way through. This gentle heat brings the flavor right back to life.
Microwave Method (Fastest Way):
- If you are in a hurry, put a portion in a microwave-safe bowl.
- Add that splash of liquid here too! Moisture is key when microwaving beans, or they get tough spots.
- Heat in short bursts (like 45 seconds), stirring well in between each burst until they reach serving temperature.
No matter how you reheat them, taste them before serving! Because the broth concentrates when they cool, you will likely need to add just a tiny pinch more salt or pepper to brighten everything up again. Enjoy those second-day leftovers—they’re fantastic served over rice or just scooped up with a cracker!
Frequently Asked Questions About Black Eyed Peas
I know you might still have a few questions floating around, because when you are learning how to cook black eyed peas, you want to get it right—especially if you are cooking them for good luck! Here are some of the things I get asked most often about this recipe. I hope this helps you tackle that bag of dried beans with total confidence!
Do I actually need to soak dried black eyed peas before cooking?
That is the million-dollar question, isn’t it? When I developed this recipe, I actually tested it both ways! For these stovetop black eyed peas, you technically *don’t* have to soak them if you are willing to give them that full hour boil upfront, followed by the long simmer. They will get tender. BUT, if you want to speed things up dramatically or are specifically looking for Instant Pot Black Eyed Peas, I highly recommend a quick soak. Soaking (about 4 hours minimum, or overnight) significantly cuts down on the cooking time, so you get that wonderful tenderness much faster.
Can I easily make this a vegan or vegetarian side dish?
Absolutely! This recipe lends itself beautifully to being made meatless—it just requires a small shift in how you build that flavor base. If you want a fantastic Vegan Black Eyed Peas Recipe: simply skip the bacon entirely. Instead of using the bacon fat, start your onions and garlic by sautéing them in about 2 tablespoons of good olive oil. You’ll need to up your savory factor elsewhere, so don’t be shy with smoked paprika, a dash of soy sauce or tamari, or maybe a splash of vegetarian Worcestershire sauce when you add your seasonings later in Step 5.
How can I make these creamy black eyed peas truly creamy?
We covered this magic trick up above, but it bears repeating because everyone loves that velvety texture! If you want genuinely Creamy Black Eyed Peas, the secret is the mashing technique I detailed in the previous section. You mash about a quarter cup of the cooked beans against the side of the pot and stir that paste back in. It thickens the broth beautifully without getting gummy. If you are looking for more super Quick Bean Recipes that use pressure cooking to achieve creaminess fast, I found a great resource focused on the Instant Pot method that you might want to bookmark!
What if I don’t have a heavy Dutch oven for simmering?
No huge heavy pot? No problem! You can definitely make these work on the stovetop in any large, heavy-bottomed pot you own. The key isn’t the specific pot shape, but rather the *heat distribution*. Heavy pots hold heat steady, preventing scorching on the bottom, which is why we aim for that gentle simmer. If you use a thinner pot, keep the heat on your lowest setting possible during the long second simmer stage (Instruction Step 6). You might need to stir a little more frequently to avoid sticking. For more general tips on using different pots, check out my guide to quick bean recipes which sometimes relies on different vessel sizes!
