
You just cannot beat the feeling of holiday nostalgia hitting you right in the kitchen, can you? That’s exactly what inspired this show-stopper: the Ultimate Nostalgic Little Debbie Christmas Tree Cheesecake. Seriously, forget everything you thought about boring holiday desserts—this creamy christmas tree cheesecake is about to change your whole season. Here at Taste This Plate, Kate Reilly spends hours testing and tweaking those classic comfort recipes until they are absolutely foolproof in a regular home kitchen. Trust me, we did the homework so your cheesecake comes out perfectly rich and creamy every single time you make it.
- Why This Ultimate Nostalgic Little Debbie Christmas Tree Cheesecake is a Must-Make
- Gathering Ingredients for Your Christmas Tree Cheesecake
- Expert Tips for the Perfect Christmas Tree Cheesecake Baking Process
- Step-by-Step Instructions for the Layered Cheesecake
- Ingredient Notes and Substitutions for Your Christmas Tree Cheesecake
- Serving and Storing Your Festive Christmas Tree Cheesecake
- Frequently Asked Questions About This Holiday Cheesecake Recipe
- Estimated Nutritional Snapshot for Your Christmas Tree Cheesecake
- Share Your Nostalgic Holiday Baking Inspiration
Why This Ultimate Nostalgic Little Debbie Christmas Tree Cheesecake is a Must-Make
When the holidays roll around, I want food that tastes like happy memories, not something that stresses me out. This dessert delivers both peace and party flair. Honestly, nothing says festive quite like pulling out a stunning dessert that brings back childhood afternoons. This christmas tree cheesecake is really more of an event than just a simple sweet.
- It tastes exactly like a cozy Christmas memory—you get that familiar, slightly sweet sponge cake flavor wrapped up in the richest cream cheese layer you’ve ever had. Wow!
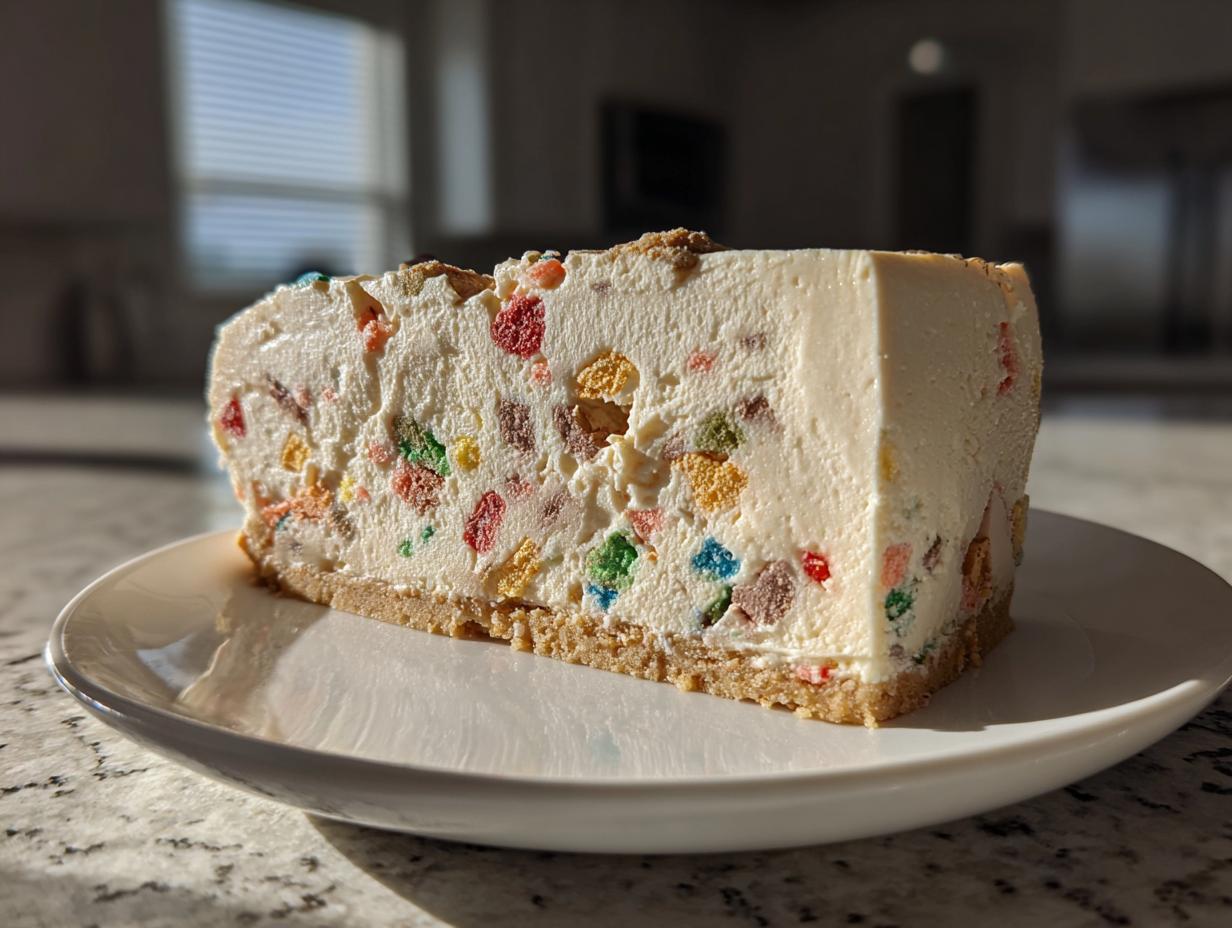
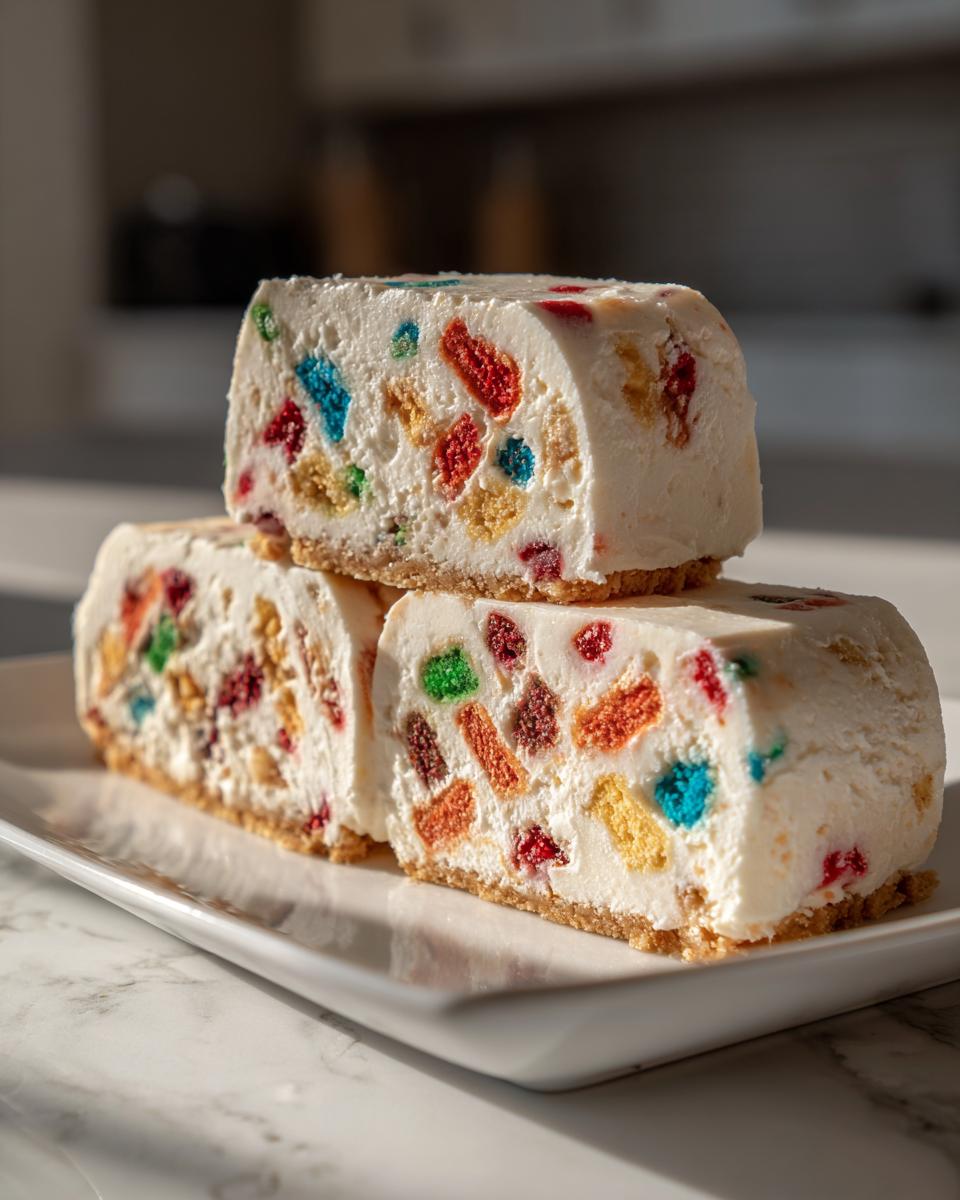
- It looks incredible! It’s tall, it’s decadent, and the colorful little cakes baked right inside are a fantastic surprise when you cut into it.

- We’ve cut the fuss. While it looks fancy, the process is surprisingly straightforward, especially since we aren’t spending hours rolling dough or making complicated frosting swirls.
- It holds up beautifully. Unlike delicate layered cakes, this cheesecake stays perfect in the fridge, making it perfect for making ahead of time.
Nostalgic Flavor Meets Creamy Texture
The best part about embedding the Little Debbie cakes is how they bake slightly within the filling. They soften just enough, releasing a hint of that unique vanilla fluffiness into the surrounding cream cheese. It’s a flavor combination you simply cannot replicate with plain vanilla cake pieces. It’s pure, innocent, childhood joy in every single bite.
Impressive Christmas Party Centerpiece Dessert
Forget your plain New York style cheesecake, folks. This recipe has presence! When you set this on the dessert table, people stop and stare. It’s one of those Christmas party centerpiece desserts that everyone assumes took you all day. We love surprising guests when they see the festive cross-section after the first slice is served. It just screams holiday fun!
Gathering Ingredients for Your Christmas Tree Cheesecake
Okay, so gathering supplies for this christmas tree cheesecake is ridiculously easy, which is another reason I love it so much. Seriously, you can grab almost everything at your regular local market—no specialty store runs needed! When I tested this recipe, I made sure every component was accessible so no one missed out on this nostalgic treat.
We need just three main groups of things: the buttery base, the creamy filling, and the star of the show (the Little Debbie cakes!). Having your cream cheese nice and soft, sitting out on the counter for just an hour or so, is key to a velvety smooth filling, so remember that tip!
Crust Components
For that firm, buttery foundation that holds everything together, you just need:
- 1 1/2 cups graham cracker crumbs (I use the standard ones, no fancy flavor needed!)
- 1/4 cup granulated sugar
- 6 tablespoons unsalted butter, melted (make sure it’s melted, not just warm!)
Creamy Cheesecake Filling and Cakes
This is where the real magic happens. Make sure you have these checked off your list:
- 3 (8 ounce) packages cream cheese, softened (this is crucial, so don’t try to rush it!)
- 1 1/2 cups granulated sugar
- 1 teaspoon vanilla extract
- 1/4 cup sour cream (this gives it that perfect tiny tang)
- 3 large eggs
- 2 packages (5.5 oz each) Little Debbie Christmas Tree Cakes, unwrapped (you need every last one!)
- Green food coloring (optional, just for a festive swirl on top)
- Red and green sprinkles (oh yeah, optional but highly recommended for sparkle!)
Expert Tips for the Perfect Christmas Tree Cheesecake Baking Process
Listen, I know baking a cheesecake can look scary, especially with that reputation they have for cracking and weeping. But that’s usually down to fast temperature changes, not your mixing skills! My job here, like Kate’s philosophy at Taste This Plate, is to explain the *why* so you feel confident. Keeping things steady is the secret weapon for this christmas tree cheesecake.
Achieving a Smooth, Crack-Free Cheesecake
First thing’s first: you absolutely want to use a water bath, or *bain-marie*. It creates steam in the oven, mimicking a gentler heat source. To do this properly, you need to wrap your springform pan in about two layers of heavy-duty foil—make sure it goes up the sides so no water sneaks in! Trust me, a little soggy foil isn’t worth having a wet crust. Also, when mixing in those eggs, just go slow. Mix them one at a time only until you see the yolk disappear. Over-beating eggs traps too much air, and that expanded air collapses later, leading straight to cracks. We want smooth sailing here!
The Critical Cooling Phase for Your Christmas Tree Cheesecake
Here’s the step I promise you’ll never skip again after trying it once. Once the baking time is up—when the middle still jiggles a bit, remember?—you turn the oven OFF. Then, you prop the oven door open just a crack with a wooden spoon. You leave that beautiful christmas tree cheesecake sitting inside that slowly cooling environment for a full hour. This gradual cool-down process is just as important as the water bath itself. It teaches the cheesecake gently that the heat source is gone. If you shock it by pulling it straight out, you’ll get a giant crack right down the middle, and nobody wants that on Christmas morning!
If you want to read more about getting batter mixes right for things like savory bakes, the principle of gentle mixing still totally applies!
Step-by-Step Instructions for the Layered Cheesecake
Okay, let’s get baking! This whole process sounds long because of the cooling time, but the actual hands-on time for this christmas tree cheesecake is pretty quick. Since this is a true baked cheesecake, we need to follow the steps exactly to make sure those Little Debbie treats stay nestled perfectly inside that creamy filling. Pay close attention to the layering—that’s where the fun surprise is!
Preparing the Base and Batter
First thing: get your environment ready. Preheat that oven to 325 degrees Fahrenheit. While it warms up, grab your 9-inch springform pan and wrap the outside bottom and sides really well with heavy-duty aluminum foil. I usually do two thick layers because you don’t want any water seeping in when we use the water bath later on. Seriously, go high up the sides with that foil!
Next up is the crust. In a simple bowl, just mix up your graham cracker crumbs, that 1/4 cup of sugar, and the 6 tablespoons of melted butter until you have something that looks like slightly damp sand. Press it firmly and evenly into the bottom of your prepared pan. Pop that crust into the oven for just 10 minutes to set it. Once it’s done, take it out and let it cool down completely while you make the filling. Don’t rush this cooling; a hot crust makes for a gummy bottom!
For the creamy part, you’re going to start mixing your softened cream cheese until it’s totally smooth. Then, slowly add the 1 1/2 cups of sugar and mix until it blends. Add your vanilla and sour cream. Finally, introduce the eggs, one by one, mixing just barely until you can’t see the yolk anymore. If you mix too long here, we end up with that dreaded air bubble issue!
Embedding the Cakes and Baking
This is the exciting part where we turn it into a real christmas tree cheesecake! Take half of your cheesecake batter and pour it gently over that cooled crust. Smooth it out a little bit.
Now, unwrap those two packages of Little Debbie Christmas Tree Cakes. Try to keep them whole! Gently arrange them in one even layer on top of the batter. Don’t let them touch the edges of the springform pan too much. Once your cakes are laid out, very carefully pour the remaining cheesecake batter over the top. Try to pour slowly onto a spoon first, spreading it out gently so you don’t float or shift the cakes underneath.

Time for the water bath! Place your foil-wrapped springform pan inside a larger roasting pan. Carefully pour hot (almost boiling) water into that larger roasting pan until the water comes halfway up the sides of your cheesecake pan. That steam does all the magic work!
Bake this beauty for about 55 to 65 minutes. You’ll know it’s ready when the edges look set, but the very center still moves slightly, like soft Jell-O, when you nudge the pan. Remember those cooling instructions for preventing cracks? I know I keep repeating it, but it’s important! You’ll want to look at the slower cool down methods we covered before you move on, just like preparing a good dump cake.
Ingredient Notes and Substitutions for Your Christmas Tree Cheesecake
One of the best parts about creating these Holiday cheesecake recipes is knowing you can tweak them just a tiny bit if you’re missing something or if you just prefer an easier route. I always try to give you options because I know life gets busy, especially around the holidays! We’ve got instructions for the baked version, which is super rich, but I totally understand if you need a faster option for your party schedule. This is where exploring other no bake Christmas desserts comes in handy.
Making a No Bake Christmas Tree Cheesecake Variation
If you are serving a huge crowd or if the idea of a water bath makes you break into a cold sweat, you can absolutely convert this into a fantastic no-bake dessert! The main switch is in the filling. Since we ditch the eggs, we need something sturdy to hold everything together and keep it nice and creamy. Instead of the baked filling, you’ll make a stabilized topping. You typically whip up a mixture of cool whip or heavy cream stabilized with a little gelatin or powdered sugar, and mix that with your cream cheese. You still layer it the exact same way—batter, cakes, batter—but instead of baking, you just chill it until firm, usually about 6 to 8 hours.
Also, don’t forget the crust swap! For a fun twist on the base, try crushing up some Golden Oreos instead of graham crackers. They bring a lovely buttery flavor that pairs beautifully with the vanilla in the Little Debbie cakes. That’s one of my favorite festive baking projects—it adds just a little something extra!
Cream Cheese Consistency Tips
If you take away only one piece of advice from this section, please let it be this: your cream cheese needs to be properly softened! I cannot stress this enough for any cheesecake, baked or not. If the cream cheese is even slightly cold when you start beating it, you end up with little stubborn lumps that microwave heat or oven heat just can’t fix nicely. They stay lumpy in the final product, and that ruins that silky mouthfeel we are aiming for in these creamy holiday desserts.
When I soften mine, I sometimes pull them out the morning before I plan to bake. And if you’re really in a pinch? Cut the blocks into small cubes. That increases the surface area, and they soften up much faster sitting on the counter. Warm cream cheese is the gateway to a smooth, gorgeous christmas tree cheesecake!
Serving and Storing Your Festive Christmas Tree Cheesecake
Okay, the hardest part is over—it’s baked and it’s cooled slowly in the oven—but we aren’t quite ready to slice into this beauty yet! Getting the chilling time right is non-negotiable here. If you cut into a cheesecake that hasn’t fully set, it’s just going to smoosh out everywhere, and we want those neat, beautiful layers to show off our hard work.
You absolutely must chill this for a minimum of six hours. I always insist on chilling it overnight, though. That extra few hours in the cold refrigerator really firms up that custard and lets those flavors—especially the vanilla and the hint of Little Debbie fluffiness—meld together perfectly. This guarantees you get those picture-perfect slices when you serve up this creamy holiday dessert.

Once it’s totally chilled and firm, run a very thin, sharp knife around the inside edge of the springform pan before you release the sides. This little trick prevents the cheesecake from sticking to the metal edge as it releases, keeping those sides smooth and intact. Do this slowly!
Now for the fun, festive part: decorating! Since the cake is already chilled, feel free to go wild with the toppings. If you are going for that green swirl look, I recommend making a small batch of simple piping frosting, adding a touch of green dye, and using a zip-top bag with a corner snipped off to create some swirls or a simple border. Don’t forget those red and green sprinkles! A little bit of sparkle really makes this christmas tree cheesecake feel special.
When it comes to storing leftovers (if you even have any!), just cover the cheesecake loosely—you don’t want plastic touching the top if you used frosting. Store it in the fridge. Because it’s so rich thanks to all that butter and cream cheese, it stays fresh and delicious for about four to five days. If you want to serve a slice later in the week that just came out of the fridge, let it sit on the counter cover-free for about 20 minutes. That little bit of time brings the temperature up just enough to soften the texture back to that perfect, velvety experience, just like you would do for a few leftover sugar cookies.
Frequently Asked Questions About This Holiday Cheesecake Recipe
I always get tons of questions when I post a fun holiday recipe like this christmas tree cheesecake! It’s natural, right? You want to make sure it fits your schedule and looks amazing. Here are the things I hear most often from folks getting ready for Christmas baking.
How far ahead can I make this Christmas Tree Cheesecake?
Honestly, this is one of the best things about it being a cheesecake! It really needs that minimum chilling time to set up beautifully—remember, we need those layers to be firm for slicing. So, while you *could* technically make it two days ahead, I find it hits its peak flavor and texture if you bake it on Thursday if you plan to serve it on Christmas Eve or Christmas Day. Letting it rest overnight really lets those subtle vanilla notes from the Little Debbie cakes sink into the cream cheese. It’s the ultimate make-ahead wonder!
Can I shape this into individual tree shaped food ideas?
That’s a fantastic question if you are serving a crowd and want individual portions! The recipe as written is for a standard 9-inch round cake, but you can absolutely adapt it. If you have mini muffin tins or even 4-inch springform pans, you can pour the batter into those. Just watch the time—the baking time will shrink considerably, probably down to about 20 minutes, since the cake layers will be thinner. Or, for a simpler approach to other tree shaped food ideas, you can bake this full cheesecake, chill it rock solid, and then use a sturdy Christmas tree cookie cutter to cut shapes out of the chilled cake! Isn’t creativity fun?
What are the best Christmas dessert ideas to serve alongside this?
Since this christmas tree cheesecake is incredibly rich, creamy, and decadent, you don’t need much else! If you want something truly light to balance it out, a simple fruit platter is always nice. But if you’re looking for something else baked that pairs well, keep the flavors complementary. Think crisp cookies rather than more dense desserts. You might love checking out our ideas for cranberry sugar cookies—they offer a nice sweet-tart crunch that contrasts the creaminess. And if you need a great non-alcoholic pairing to keep the serving line moving, our recipe for Cranberry Orange Punch is always a huge hit at parties!
Estimated Nutritional Snapshot for Your Christmas Tree Cheesecake
Because this is such a rich and glorious holiday treat, I always feel like I should attach a little note here about the nutrition facts. I want you to enjoy this christmas tree cheesecake completely guilt-free, knowing exactly what you’re getting into! Just remember that these numbers are all based on standard measurements and the specific ingredient brands I used during testing for this holiday cheesecake recipe. Your exact figures might shift a smidge depending on your cream cheese or the size of your Little Debbie cakes.
We estimate this recipe yields 12 generous slices. Remember, these are estimates based on the standard ingredients shared above:
- Serving Size: 1 slice
- Calories: 450
- Sugar: 45g (Yes, it’s a treat!)
- Sodium: 350mg
- Fat: 28g
- Saturated Fat: 17g
- Unsaturated Fat: 11g
- Trans Fat: 0.5g
- Carbohydrates: 48g
- Fiber: 1g
- Protein: 7g
- Cholesterol: 110mg
See? It’s totally worth it for the sheer amount of joy this dessert brings to the table! If you are looking for lighter winter dessert ideas, maybe save this one for the big holiday party and check out some of our lighter fruit bakes for the week.
Share Your Nostalgic Holiday Baking Inspiration
Whew! We did it! We took a wonderfully nostalgic childhood snack and turned it into the most show-stopping christmas tree cheesecake you can imagine. I know this one takes a little bit of time, especially with that slow cooling, but doesn’t that make the result even sweeter?
Now, I really want to see your creations! This is what Kate Reilly loves most about sharing these classic, tested recipes—connecting with you and seeing how you bring these dishes to your own family tables for your own unique celebrations. Did your Little Debbie Cakes sink perfectly? Did the green sprinkles shine just right?
Please, please leave a rating below. Five stars if you loved the creamy texture and the blast of holiday happiness this dessert provided! And if you snap a picture of your finished cheesecake—especially if you cut that first amazing slice—tag us on social media! It truly makes my day to see these recipes in action.
If you ever have any questions about the ratios—maybe you tried making a non-traditional crust or used a different size springform pan—don’t hesitate to reach out through our contact page. Let’s keep making simple, wonderful memories together! Happy Holidays, everyone!
PrintUltimate Nostalgic Little Debbie Christmas Tree Cheesecake
Create a creamy, baked cheesecake featuring a layer of iconic Little Debbie Christmas Tree Cakes embedded in a vanilla cream cheese filling, set on a buttery crust. This dessert brings holiday nostalgia to your table.
- Prep Time: 25 min
- Cook Time: 65 min
- Total Time: 7 hours 30 min
- Yield: 12 servings 1x
- Category: Dessert
- Method: Baking
- Cuisine: American
- Diet: Vegetarian
Ingredients
- 1 1/2 cups graham cracker crumbs
- 1/4 cup granulated sugar
- 6 tablespoons unsalted butter, melted
- 2 packages (5.5 oz each) Little Debbie Christmas Tree Cakes, unwrapped
- 3 (8 ounce) packages cream cheese, softened
- 1 1/2 cups granulated sugar
- 1 teaspoon vanilla extract
- 1/4 cup sour cream
- 3 large eggs
- Green food coloring (optional, for decoration)
- Red and green sprinkles (optional, for decoration)
Instructions
- Preheat your oven to 325 degrees Fahrenheit. Wrap the outside of a 9-inch springform pan with heavy-duty aluminum foil.
- Prepare the crust: Mix graham cracker crumbs, 1/4 cup sugar, and melted butter in a bowl until combined. Press the mixture firmly into the bottom of the prepared springform pan. Bake for 10 minutes. Let the crust cool completely.
- Prepare the filling: In a large bowl, beat the softened cream cheese with an electric mixer until smooth. Gradually beat in 1 1/2 cups sugar until fully incorporated. Mix in the vanilla extract and sour cream. Beat in the eggs one at a time, mixing just until combined after each addition. Do not overmix.
- Assemble the cheesecake: Pour half of the cheesecake batter over the cooled crust. Arrange the unwrapped Little Debbie Christmas Tree Cakes in a single layer over the batter. Gently pour the remaining cheesecake batter over the cakes, spreading carefully to cover them.
- Bake the cheesecake in a water bath: Place the foil-wrapped springform pan into a larger roasting pan. Carefully pour hot water into the roasting pan until it reaches halfway up the sides of the springform pan.
- Bake for 55 to 65 minutes, or until the edges are set and the center has a slight jiggle.
- Turn off the oven, crack the door open slightly, and let the cheesecake cool inside the oven for 1 hour. This prevents cracking.
- Remove the cheesecake from the water bath and foil. Cool completely on a wire rack, then chill in the refrigerator for at least 6 hours, or preferably overnight.
- Before serving, remove the sides of the springform pan. Decorate the top with green food coloring swirls or green frosting, and top with red and green sprinkles for a festive look.
Notes
- For a no-bake option, substitute the baked crust with a chilled crust made from crushed Golden Oreos and butter. Use a stabilized whipped cream or cool whip topping instead of baking the filling.
- If you do not want to use a water bath, bake the cheesecake without one, but watch carefully to prevent cracking. Cooling slowly in the turned-off oven is still important.
- This recipe makes an excellent Christmas party centerpiece dessert.
Nutrition
- Serving Size: 1 slice
- Calories: 450
- Sugar: 45g
- Sodium: 350mg
- Fat: 28g
- Saturated Fat: 17g
- Unsaturated Fat: 11g
- Trans Fat: 0.5g
- Carbohydrates: 48g
- Fiber: 1g
- Protein: 7g
- Cholesterol: 110mg