
Oh, I know that craving! You’re sitting there, maybe having soup or pasta, and you just desperately wish you had those warm, fluffy, slightly salty breadsticks that taste like pure comfort. Well, stop wishing! My mission here at Taste This Plate is to bring restaurant favorites right into your weekly rotation without any stress, and these are the ultimate simple recipes for everyday meals. Trust me when I say you don’t need to be a professional chef to nail this. We’re making the best homemade breadsticks—a perfect Olive Garden Breadsticks Copycat that results in the softest, most delightfully buttery breadsticks you’ve ever pulled apart at home.
- Why This Homemade Breadsticks Recipe Is Better Than Restaurant Style
- Ingredients for Soft and Buttery Breadsticks
- Step-by-Step Instructions for Perfect Breadsticks
- Tips for Success Making Copycat Olive Garden Breadsticks
- Serving Suggestions for Your Dinner Side Dish Breadsticks
- Storing and Reheating Buttery Breadsticks
- Frequently Asked Questions About Making Breadsticks
- Nutritional Estimate for These Homemade Breadsticks
- Share Your Experience Making These Garlic Breadsticks
Why This Homemade Breadsticks Recipe Is Better Than Restaurant Style
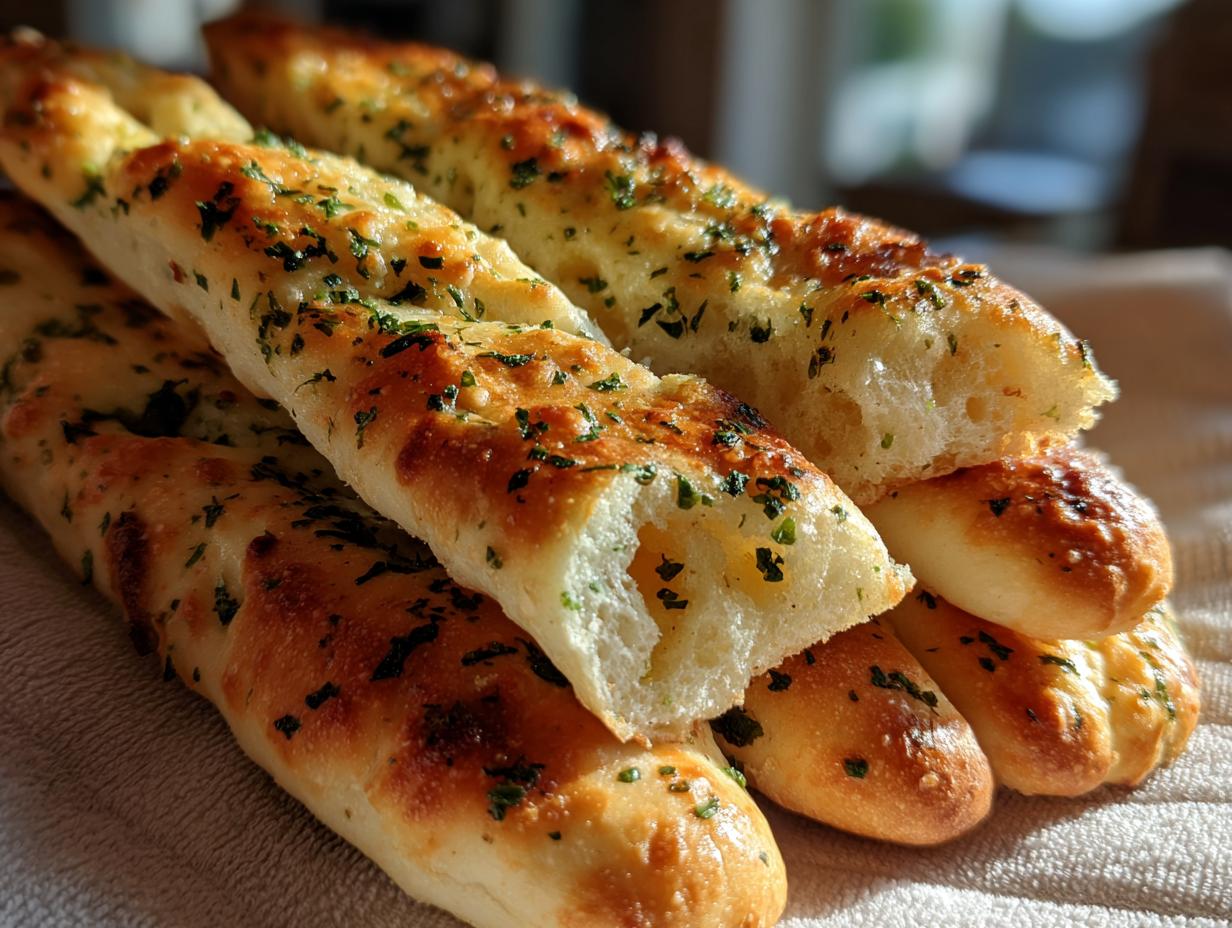
The magic of these Soft and Fluffy Breadsticks is that you get total control over the flavor, and honestly, they end up being so much better than takeout! When you make them yourself, you use real, quality ingredients, especially that gorgeous garlic butter wash. I promise these are Better Than Restaurant Breadsticks. They have that perfect pull-apart tenderness that makes you grab three before the main course even hits the table!
- You choose the amount of salt and garlic—no guessing games!
- The texture is guaranteed soft, never dried out.
- They are designed for fast cooking times!
Quick Breadstick Recipe Highlights
Don’t let the yeast scare you off; this is truly an Easy Breadsticks Recipe. While the total time including the rise is about an hour and a half, your actual hands-on time is minimal—maybe 20 minutes max. That means you can have these warm appetizers or dinner sides ready way faster than waiting for delivery. It practically qualifies as a Quick Breadstick Recipe!
Ingredients for Soft and Buttery Breadsticks
Okay, this is where we build the foundation for those incredible, fluffy sticks. The key is using simple, standard ingredients you probably already have. Don’t stress about finding anything fancy here; we rely on technique, not exotic stuff! I’ve broken them down into two groups so you don’t mix up your sweet dough needs with your savory, herby topping needs.
Dough Ingredients for Yeast Breadsticks Homemade
This mixture gives you the perfect structure for homemade breadsticks that are soft but sturdy enough to hold their shape. Remember that water temperature for the yeast—it’s everything!
- 1 1/2 cups warm water (You MUST get this to 110°F! Too cold and the yeast sleeps; too hot and you kill it.)
- 2 1/4 teaspoons active dry yeast
- 2 tablespoons granulated sugar (Just a little food for the yeast to wake up!)
- 4 cups all-purpose flour, plus more for dusting
- 1 teaspoon salt
- 2 tablespoons vegetable oil
Garlic Herb Butter Topping for Breadsticks
This topping is non-negotiable. If you want those amazing Garlic Breadsticks that just sing when they come out of the oven, you need the full dose of butter and herbs here. Brush this on while they are piping hot!
- 1/2 cup (1 stick) unsalted butter, melted
- 1 teaspoon garlic powder
- 1/2 teaspoon dried parsley
- 1/4 teaspoon salt (for topping)
Step-by-Step Instructions for Perfect Breadsticks
Okay, now for the fun part! We take those ingredients and turn them into what everyone dreams about when they think of restaurant breadsticks. The process is straightforward, but don’t rush the rising steps—that’s what makes them soft! Following these instructions closely means you’ll end up with incredible Homemade Breadsticks every single time.
Activating the Yeast and Mixing the Dough for Breadsticks
First things first: proving the yeast! You need to combine your warm water, yeast, and sugar in a big bowl. We do this because you need to see the foam; it’s the yeast giving you a wave hello, letting you know it’s alive and ready to work its magic. Let it hang out for about five to ten minutes until it looks foamy on top. If it doesn’t foam, your water was too hot or the yeast is old, and you need to start over!
Once you have that beautiful foam, stir in the oil and the teaspoon of salt. Then, slow your roll and add the flour gradually. It’s going to look messy and shaggy at first. That’s fine! Dump that shaggy mess onto a lightly floured counter. Now, knead it, knead it, knead it! You need a good five to seven minutes of steady work until the dough feels smooth and elastic under your hands. It shouldn’t stick all over the place anymore.
The Rise Period for Soft and Fluffy Breadsticks
Time for a nap! Put your smooth dough into a lightly oiled bowl, spinning it around so it gets a little coat of oil everywhere. Cover that entire bowl up—I use plastic wrap—and find a warm spot in your kitchen. This dough needs 1 to 1.5 hours to chill out and double in size. Seriously, don’t poke it too much! This rise is what gives you those signature Soft and Fluffy Breadsticks.

Quick tip: If you happen to grab instant yeast instead of active dry? You can skip that initial 10-minute foaming step and add the instant yeast right in with the flour mixture in the previous step. It saves a tiny bit of time but the final rise is still key for that soft texture!
Shaping and Baking Your Homemade Breadsticks
Preheat your oven to 400°F (200°C) while the dough finishes resting. Line up a big baking sheet with parchment paper—I learned the hard way that these can stick, so good paper is worth it! Gently punch the air out of your dough. Take the dough and divide it evenly into 12 portions. Now, roll each piece out into that classic long, skinny shape, aiming for about 8 to 10 inches long. They shouldn’t be too thick, or they’ll turn into loaves! You can even try shaping them into fancy knots if you’re feeling adventurous, though I usually stick to the simple sticks myself.
Place them on your prepared sheet leaving just a little space between them. They need a final little rest—just 10 minutes should do it. Then, slide them into that hot oven for about 10 to 12 minutes. You’re looking for a beautiful, light golden brown color.
Applying the Signature Garlic Herb Butter Breadsticks Topping
While the oven is doing its thing, whip up that glorious topping! Just whisk together your melted butter, garlic powder, parsley, and that final little pinch of salt in a small bowl. If you’re looking for something extra zesty to go alongside these, you could even try mixing in a little bit of homemade garlic aioli here if you want an extra punch of garlic flavor, although the classic recipe is perfect on its own. Remember to keep that butter mixture ready!
The second those breadsticks come out of the oven, you grab a pastry brush and paint every single one with the garlic butter mixture. Getting that butter liquid-hot onto the still-hot dough is what makes the herbs adhere and results in those incredibly Buttery Breadsticks flavor you’re chasing. Don’t be shy with the brushing!
Tips for Success Making Copycat Olive Garden Breadsticks
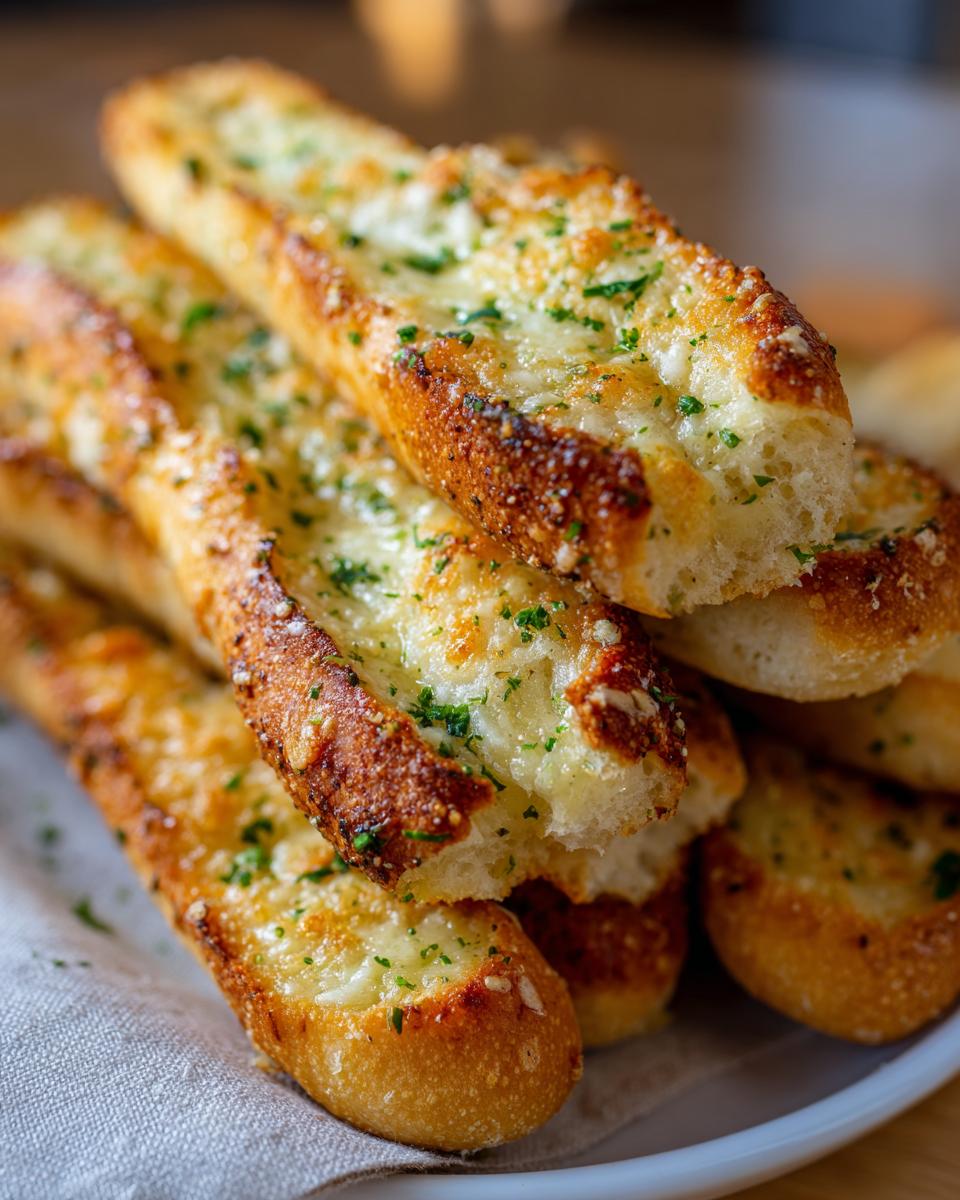
I’ve made these so many times that I have a few tricks up my sleeve to make sure they nail that restaurant-quality texture every time. For instance, if you really want to elevate these for a party, try turning them into Cheesy Breadsticks Recipe! It’s super easy: just sprinkle some grated Parmesan cheese over the garlic butter topping right when they come out of the oven. The heat melts it perfectly!
Also, remember that yeast troubleshooting I mentioned? If your dough seems sluggish or isn’t rising, make sure your kitchen isn’t too cold. Yeast hates the cold. A quick fix is turning your oven on to its lowest possible setting for just two minutes, turning it OFF, and putting the dough bowl inside the warming (but turned *off*) oven. That little protected heat pocket works wonders!
These are such a great addition to any meal, whether you’re having lasagna or pairing them with another Italian side dish like these sliders.
Serving Suggestions for Your Dinner Side Dish Breadsticks
These buttery sticks are designed to be the star of the supporting cast! They are the ultimate Dinner Side Dish Breadsticks because they satisfy that need for something warm, doughy, and flavorful to mop up sauces. My absolute favorite way to serve them is right alongside a big bowl of spaghetti or baked ziti. Seriously, you need something sturdy to scoop up leftover marinara, and nothing beats these garlic pieces for that job. They pair absolutely perfectly with pasta dishes, like my beef garlic butter linguine.
But don’t just think dinner plates! They make fantastic, easy Appetizer Breadsticks when you’re waiting for guests or need something quick for a potluck. They are wonderful dipped into creamy tomato soup or even just served with a side of rich olive oil and balsamic vinegar for dipping (though that garlic butter topping usually keeps them flavorful enough on their own!). They disappear so fast, you’ll definitely want to double the batch if you’re expecting company!
Storing and Reheating Buttery Breadsticks
You’ll be lucky if you have any leftovers, because these seem to vanish instantly! But, if you do manage to squirrel a few away for lunch the next day, you need to treat them right so they stay just as soft as when they came out of the oven. These aren’t the kind of breadsticks that sit out uncovered for hours—they dry out faster than you can say “garlic butter.”
The best way to store your leftover Buttery Breadsticks is in an airtight container at room temperature. Don’t put them in the fridge! The cold air turns them hard and stale way too quickly. They should keep perfectly fine on the counter for two to three days if they are well sealed.
Now, how to bring them back to life? We want to get back that melt-in-your-mouth, buttery softness. The microwave can work in a total pinch, but honestly, it often results in chewy breadsticks—the texture just isn’t the same. If you have a microwave, use it sparingly, maybe just for 10 seconds to warm them up a little.
Take my advice: the oven is your friend for true restoration. Preheat your oven to about 325°F (160°C). Lay the sticks directly on a baking sheet. Pop them in for just about five minutes. This gently warms the butter back to liquid perfection and brings back that amazing aroma. You want that little hint of heat so they feel freshly baked again. This method guarantees you get back those wonderful Soft and Fluffy Breadsticks!
Frequently Asked Questions About Making Breadsticks
It happens to all of us—we follow the recipe, but something isn’t quite the same as we hoped! Don’t worry for a second, that’s what this section is for. We’re going to dive into a few common sticking points so you can feel confident making these wonderful appetizers and snacks!
Can I make these breadsticks ahead of time?
Yes, you absolutely can! I often let the dough rise overnight in the fridge if I want to bake them fresh for dinner Sunday. If you refrigerate the dough after the first rise, it will slow things down dramatically. Just let it sit on the counter for about 30 to 45 minutes to warm up slightly before you punch it down and roll out your homemade breadsticks. As for baked sticks, remember how I talked about reheating? Store the baked ones airtight, and they are great the next day!
What is the best flour for soft breadsticks?
Stick to what we used: regular, good old-fashioned all-purpose flour. That’s part of my core philosophy—we focus on simple ingredients that work beautifully! You don’t need specialty bread flour for this recipe. The structure we get comes from the kneading and the yeast doing their job correctly, not from a fancy flour brand. All-purpose flour gives us exactly the right amount of chewiness needed for these buttery breadsticks.
How can I make these into Garlic Cheese Breadsticks?
Oh, this is my kids’ favorite variation! It requires zero changes to the dough recipe itself. You just wait until the breadsticks come out of the oven, already swimming in the delicious garlic butter topping we brushed on. Now, grab some finely grated Parmesan cheese—the fluffy kind works better than the hard pre-grated shaker stuff, if you can manage it. Sprinkle that cheese generously over the hot, buttery surface immediately. The residual heat melts the cheese just enough so it sticks perfectly to every single one of your Garlic Breadsticks.
Nutritional Estimate for These Homemade Breadsticks
Look, I’m a cook, not a nutritionist, but I know that sometimes you just want a little ballpark figure so you know what you’re dealing with when you are pulling these golden beauties off the sheet pan. Since we are relying on good ingredients like butter and simple flour, these are certainly a rich little treat!
Please remember, this is just an estimate based on the recipe as written, divided into 12 servings. If you eat two, or if you decided to go wild and make those cheesy breadsticks recipe variations we talked about, the numbers will change, so take this table as a helpful guideline for one single breadstick.
- Serving Size: 1 breadstick
- Calories: About 180
- Fat: Roughly 6 grams (That’s the lovely butter working its magic!)
- Saturated Fat: About 3 grams
- Carbohydrates: 29 grams
- Protein: 5 grams
- Sugar: Just 2 grams (mostly from the tiny bit we added for the yeast)
Enjoy them! These are totally worth it as an occasional treat or a fantastic addition to a family dinner. Food is about joy, and these super soft, garlicky sticks definitely bring joy to my table.
Share Your Experience Making These Garlic Breadsticks
So, there you have it! You’ve made your own batch of soft, garlicky, restaurant-worthy Garlic Breadsticks! That’s such a huge win for your weeknight menu, isn’t it? I’m so excited for you to try these, and I really, truly want to know how they turned out for you and your family.
Did you manage to keep your hands off them until dinner started, or did you sneak a bunch while the garlic butter was still warm? Be honest!
If you loved slicing into those fluffy, buttery pieces, please take a moment to leave a quick rating below the recipe card. Five stars mean the world to me and help other home cooks find this simple recipe!
Show Off Your Homemade Dough!
And seriously, if you made these, you have to send a picture! I absolutely love seeing your finished products—the way the butter pools, or maybe you tried the cheesy variation we talked about. Tag me on social media or send a note through the contact page. I want to see if you managed to recreate that perfect, iconic bread shape!
Tell Me: Did We Beat the Restaurant?
That’s the real test, right? When you took that first bite of these tender, warm Homemade Breadsticks, did you feel like you were sitting in that cozy Italian chain restaurant? Maybe they were even better because you made them right here in your own kitchen! Let me know your final verdict in the comments below. Happy cooking, friends!
PrintSoft & Buttery Copycat Olive Garden Breadsticks with Garlic Butter Topping

Make soft, fluffy breadsticks at home that taste just like the restaurant favorite. This easy recipe uses simple ingredients and results in buttery, garlicky breadsticks perfect for any meal.
- Prep Time: 20 min
- Cook Time: 12 min
- Total Time: 1 hour 32 min
- Yield: 12 breadsticks 1x
- Category: Side Dish
- Method: Baking
- Cuisine: American
- Diet: Vegetarian
Ingredients
- 1 1/2 cups warm water (110°F)
- 2 1/4 teaspoons active dry yeast
- 2 tablespoons granulated sugar
- 4 cups all-purpose flour, plus more for dusting
- 1 teaspoon salt
- 2 tablespoons vegetable oil
- 1/2 cup (1 stick) unsalted butter, melted
- 1 teaspoon garlic powder
- 1/2 teaspoon dried parsley
- 1/4 teaspoon salt (for topping)
Instructions
- Combine the warm water, yeast, and sugar in a large bowl. Let this mixture sit for 5 to 10 minutes until it becomes foamy. This shows the yeast is active.
- Stir in the vegetable oil and 1 teaspoon of salt into the yeast mixture.
- Gradually add the flour, mixing until a shaggy dough forms. Turn the dough out onto a lightly floured surface.
- Knead the dough for 5 to 7 minutes until it becomes smooth and elastic.
- Place the dough in a lightly oiled bowl, turning once to coat. Cover the bowl with plastic wrap or a clean towel and let it rise in a warm place for 1 to 1.5 hours, or until doubled in size.
- Preheat your oven to 400°F (200°C). Line a large baking sheet with parchment paper.
- Punch down the risen dough gently. Divide the dough into 12 equal pieces. Roll each piece into a long, thin breadstick shape, about 8 to 10 inches long.
- Place the shaped breadsticks on the prepared baking sheet, leaving a small space between them. Let them rest for 10 minutes.
- Bake for 10 to 12 minutes, or until the breadsticks are lightly golden brown.
- While the breadsticks bake, prepare the topping: In a small bowl, whisk together the melted butter, garlic powder, dried parsley, and 1/4 teaspoon of salt.
- Immediately after removing the breadsticks from the oven, brush the garlic butter mixture generously over the tops of the hot breadsticks.
- Serve warm as a dinner side dish or appetizer.
Notes
- For cheesy breadsticks, sprinkle grated Parmesan cheese over the garlic butter topping immediately after brushing it on while the breadsticks are still hot.
- If you need quick breadsticks, ensure your water temperature is correct to activate the yeast fast.
- You can use instant yeast if you skip the 10-minute proofing step for the yeast mixture, adding it directly with the flour.
Nutrition
- Serving Size: 1 breadstick
- Calories: 180
- Sugar: 2
- Sodium: 250
- Fat: 6
- Saturated Fat: 3
- Unsaturated Fat: 3
- Trans Fat: 0
- Carbohydrates: 29
- Fiber: 1
- Protein: 5
- Cholesterol: 15