

If you close your eyes and think of true Southern comfort food baked from scratch, what comes to mind? For me, it’s the smell of warm, buttery goodness erupting from the oven. We all want those dreamy, tall, flaky layers, but often the classic methods feel fussy. Well, forget that stress! I spent ages simplifying the techniques so you can easily master the very best traditional buttermilk biscuits right in your own kitchen. We’re cutting out the complexity and keeping all the flavor, making this the most reliable recipe for tender, fluffy breakfast bread you’ll ever try. Get ready for biscuits that actually climb the pan!
- Why These Are The Best Tall and Flaky Buttermilk Biscuits Ever
- Ingredients for Perfect Buttermilk Biscuits
- Essential Equipment for Making Homemade Buttermilk Biscuits
- Step-by-Step Instructions for Fluffy Buttermilk Biscuits
- Tips for Success When Baking Scratch Biscuit Recipe
- Serving Suggestions for Your Buttermilk Biscuits
- Storage and Reheating Instructions for Buttermilk Biscuits
- Frequently Asked Questions About Buttermilk Biscuits
- Estimated Nutritional Data for Tender Biscuits
Why These Are The Best Tall and Flaky Buttermilk Biscuits Ever
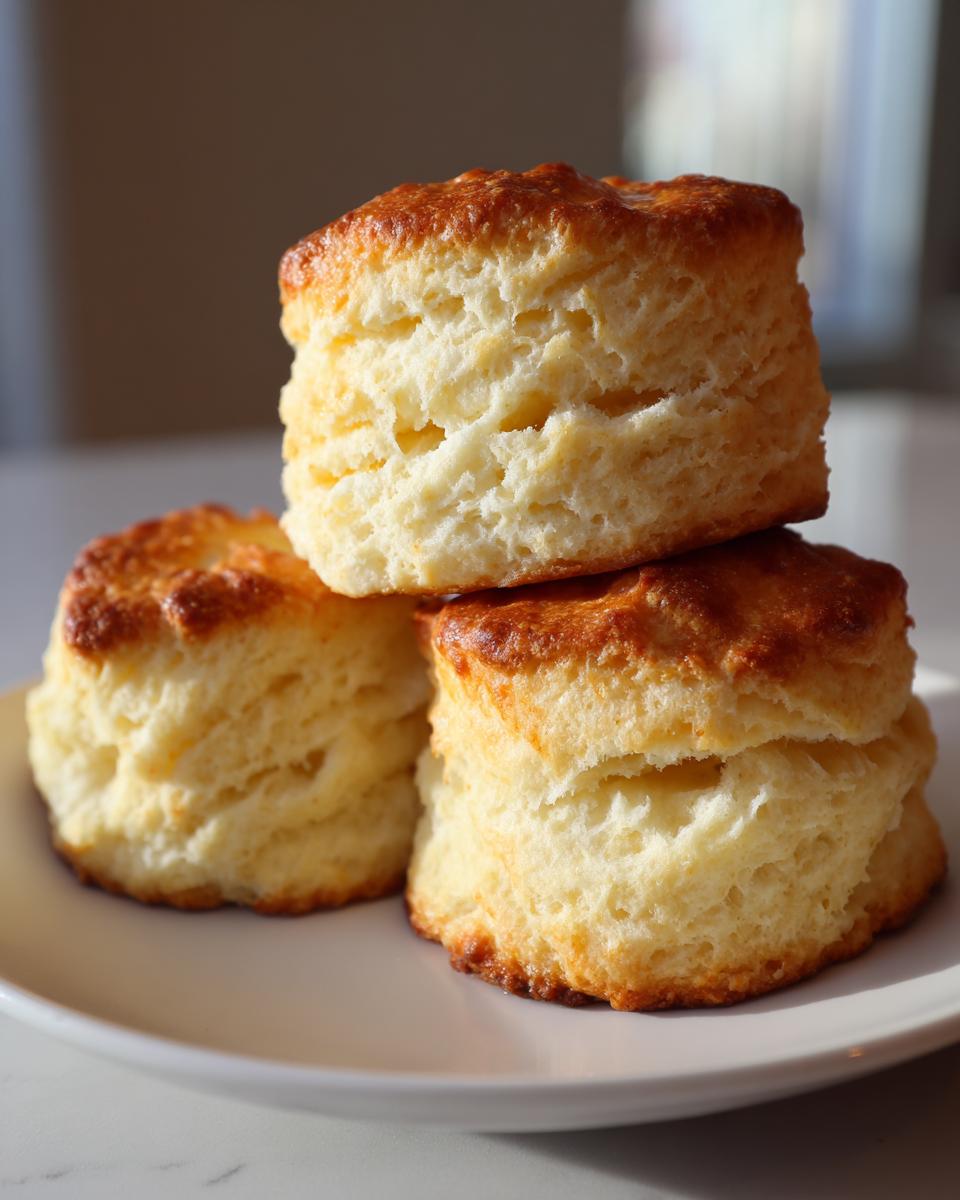
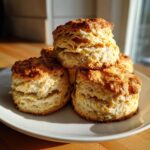
I promise you, these aren’t the flat, sad little discs that sometimes come from a can or a quick mix. We are aiming high here—literally! These yield truly Fluffy Buttermilk Biscuits that have distinct layers you can pull apart. That golden, rich color comes from the generous amount of butter we use, resulting in beautifully Tender Biscuits that practically melt when you bite into them. Forget chasing complicated recipes; this method just focuses on the few steps that actually matter for height and texture.
Achieving Authentic Southern Style Biscuits
What sets a true Southern Style Biscuit apart is that pull-apart flakiness. It’s not about using fancy ingredients or sourcing rare flour; it’s all in how you treat the dough. I learned that the secret weapon here is cold fat and gentle handling. We aren’t making pastry, but we are using similar principles to trap pockets of steam. That steam pushes the layers up, giving you that impressive height that makes everyone ask, “Did you really make these from scratch?” Yes, you did!
Ingredients for Perfect Buttermilk Biscuits
When we talk about making excellent homemade biscuits recipe, the ingredient list is short, which means quality absolutely matters. You only need a handful of standard pantry items to make these buttermilk biscuits shine! Keep everything cold—I mean arctic cold—and you are halfway to success. Here is exactly what you need for a batch that yields about eight perfectly fluffy rounds.
- 2 cups all-purpose flour
- 1 tablespoon baking powder
- 1 teaspoon salt
- 1 teaspoon sugar
- 6 tablespoons cold unsalted butter, cut into small pieces
- 3/4 cup cold buttermilk
- 2 tablespoons melted butter, for brushing
Ingredient Notes and Substitutions for Your Buttermilk Biscuits
Don’t gloss over the ‘cold’ instructions for the butter and buttermilk! This is the single most important thing for those signature flaky layers we talked about. Cold fat hitting the hot oven creates instant steam, which lifts the dough dramatically. If your butter is even slightly soft, they won’t climb as high. Use a good quality all-purpose flour; heavy bread flour tends to make them too tough for the tender biscuit texture we aim for.
Now, what if you don’t have buttermilk? You can make a quick substitute! Mix 3/4 cup of regular milk with 3/4 teaspoon of white vinegar or lemon juice. Let it sit on the counter for about five minutes until it curdles slightly. That acidic bite is what reacts with the baking powder, so having that acidity is key for a successful buttermilk biscuits rise.
Essential Equipment for Making Homemade Buttermilk Biscuits
You don’t need a million fancy gadgets to make incredible buttermilk biscuits, but having the right tools makes the job so much easier and helps us guarantee those tall layers. I always pull out my standard metal baking sheet—no fancy dark pans for me, as they brown too fast! Make sure you have a whisk for the dry stuff, but the real MVP here is your cutting tool.
You absolutely need either a pastry blender or just really cold, clean hands to cut that butter into the flour. And please, use a sharp biscuit cutter! If it’s dull, it rips the dough instead of cleanly punching through, sealing the edges and stopping your biscuits from climbing high. That’s the biggest equipment mistake people make!
Step-by-Step Instructions for Fluffy Buttermilk Biscuits
Alright, let’s transform these shaggy ingredients into beautiful buttermilk biscuits! First thing’s first: get that oven hot! We need 425 degrees Fahrenheit ready to go, lining a baking sheet with parchment paper while we work. After you’ve cut in your cold butter and mixed in your liquid buttermilk, resist the urge to knead this dough. Seriously, stop messing with it! We want minimal handling to keep those fat pockets intact.
In the bowl, you’ll stir until it just barely comes together into a messy clump. That shagginess is your friend. Gently turn the dough out onto your lightly floured surface. We are not rolling the dough out thinly like pie crust; we are building height using folds. It’s like magic, but it’s just science!
If you’re looking for an amazing weeknight dessert after these, I highly recommend checking out my recipe for easy apple crumble—it’s pure comfort!
The Secret to Tall and Flaky Biscuits: Folding Technique
This folding part is what separates those sad, flat biscuits from the sky-high, Tall and Flaky Biscuits. Gently pat your dough into a rough rectangle—don’t worry about perfection. Now, fold it into thirds, like you’re folding a business letter. Turn that folded slab 90 degrees, pat it down to about ¾ inch thick again, and repeat the letter fold once more. This laminating process creates dozens of tiny layers which steam separates during baking, ensuring maximum fluffiness in your buttermilk biscuits.
Baking and Finishing Your Buttermilk Biscuits
Once you use your sharp cutter and press straight down (remember, no twisting!), place those raw biscuits close together on the pan. This encourages them to push up against each other, resulting in soft sides and loftier height. Bake them for 12 to 15 minutes, watching until they are golden brown on top. The second they come out, brush them immediately with that reserved melted butter for that gorgeous, irresistible Buttery Baking finish. Serve them piping hot!
Tips for Success When Baking Scratch Biscuit Recipe
Baking the perfect buttermilk biscuits from scratch is totally achievable if you remember a few non-negotiables. My biggest piece of advice—and this is straight from my time figuring out why my first batches fell flat—is to respect the cold! Keep your butter and buttermilk straight from the fridge. When that fat hits the heat, it turns into steam that lifts every single layer you worked to create. It’s truly the key to those Tall and Flaky Biscuits.
My next pro tip is something I learned from watching professional bakers: Do not twist that cutter! Please, for the love of fluffy clouds, press straight down and lift. Twisting seals the edges together, preventing the biscuit from climbing up. Also, think about thickness. If you want truly impressive height in your Homemade Biscuits Recipe, push that dough up to a full inch or even slightly more before you cut. Thicker dough equals taller biscuits, it’s that simple!
If you’re looking for a great starting point for all your baking adventures, I have a whole guide on baking from scratch that might help build your confidence. And if you want to see how another wonderful baker tackles this, check out this recipe for fluffy buttermilk biscuits too!
Serving Suggestions for Your Buttermilk Biscuits
Now that you have a beautiful stack of hot, steamy buttermilk biscuits, the real fun begins: what do we slather on them? These aren’t just for holidays; they are perfect for topping off dinner or kicking off the weekend. In the South, they practically demand a dollop of rich sausage gravy, but honestly, anything warm and melting works perfectly. These Homemade Biscuits Recipe creations are wonderful vehicles for anything savory or sweet.
Best Biscuit Toppings Ideas
The simplicity of a great biscuit means it pairs well with almost anything! If you’re looking for some inspiration, here are my favorite tried-and-true Biscuit Toppings Ideas:
- A generous layer of salted butter, letting it pool in those flaky layers.
- Homemade jam—I’m particularly fond of using my pear preserves when they’re in season!
- Sausage or sawmill gravy (a must for Sunday mornings).
- A quick drizzle of hot honey for just a touch of sweet heat.
Storage and Reheating Instructions for Buttermilk Biscuits
Even the best buttermilk biscuits usually result in a few leftovers—if you’re lucky! I always store mine at room temperature in a loosely sealed container or loosely wrapped in foil for about two days. Putting them in an airtight container seals in moisture, which usually turns them soggy fast. If you need them to last longer than that, go ahead and pop them into the freezer; they freeze beautifully.
The absolute key to reviving these Fluffy Buttermilk Biscuits is avoiding the microwave. The microwave makes them tough, trust me on this one! To get that ‘just baked’ melt-in-your-mouth softness back, I wrap them tightly in foil and heat them in a 350-degree oven for about 8 to 10 minutes. They come out steaming hot and flaky again! For alternative tips on achieving perfect texture, you can look at this great flaky homemade buttermilk biscuits recipe overview.
Frequently Asked Questions About Buttermilk Biscuits
I know you might have a few lingering questions even after getting the full rundown on making these incredible buttermilk biscuits. Baking from scratch can sometimes feel like guesswork, but that’s why I test everything here! Let’s tackle the common sticking points so your next batch is absolutely flawless.
Why didn’t my beautiful buttermilk biscuits rise as high as yours?
Oh, that’s frustrating! Usually, this comes down to two things: either your butter wasn’t cold enough, or you twisted your cutter when punching them out. If the butter melts before it hits the oven, you lose the steam pockets that create height. And if you twist the cutter, you effectively seal the sides, preventing the dough from climbing upward. Next time, make triple-sure your ingredients are ice-cold, and press straight down!
Can I use regular milk instead of buttermilk in this scratch biscuit recipe?
You certainly can make an emergency swap, as I mentioned before! Buttermilk provides the acidity that reacts perfectly with the baking powder, which is what gives you those Fluffy Buttermilk Biscuits. If you use regular milk without adding that acid (vinegar or lemon juice), you’ll find your biscuits are a bit denser and don’t get that nice light texture. You can always whip up a quick batch of biscuit mix using regular flour, but the flavor profile definitely changes without the tang of the curdled milk.
How can I ensure my biscuits stay tender and don’t get tough?
Toughness is the enemy of a good Homemade Biscuits Recipe! The moment you add the buttermilk, you must stop mixing almost immediately. Mix only until the shaggy dough *just* comes together. Overmixing develops the gluten in the flour, and gluten means chewiness, not tenderness. Remember, a lumpy, slightly messy dough is always better than a smooth, over-worked one when making tender biscuits.
Is it okay if I use melted butter instead of cold, cubed butter?
Please stick to the cold, cubed butter for the main dough ingredients! Melted butter guarantees you will end up with a pastry rather than tall, flaky layers because it incorporates fully into the flour, leaving no distinct pockets of fat to create steam. Melted butter is only great for brushing on top *after* they bake for that beautiful finish!
Estimated Nutritional Data for Tender Biscuits
Now, I’m not a nutritionist, so take this with a grain of salt—or maybe a whole scoop of jam! But based on the recipe ingredients, here is a snapshot of what you can expect from one of these Tender Biscuits. Remember, these estimates focus on the biscuit itself before you drown it in gravy or load it up with toppings.
- Calories: Around 220 per biscuit
- Fat: About 12 grams total
- Carbohydrates: Approximately 25 grams
- Protein: Roughly 4 grams
Since we are baking from scratch, these numbers can sway slightly depending on the brand of butter or the exact size of your buttermilk measurement. But overall, you’re looking at a wonderfully comforting breakfast bread option!
PrintThe Best Tall and Flaky Southern Buttermilk Biscuits
Make tender, buttery buttermilk biscuits from scratch that rise tall and have distinct flaky layers. This simple method guarantees success for a classic Southern comfort food.
- Prep Time: 15 min
- Cook Time: 15 min
- Total Time: 30 min
- Yield: 8 servings 1x
- Category: Breakfast Bread Recipes
- Method: Baking
- Cuisine: American
- Diet: Vegetarian
Ingredients
- 2 cups all-purpose flour
- 1 tablespoon baking powder
- 1 teaspoon salt
- 1 teaspoon sugar
- 6 tablespoons cold unsalted butter, cut into small pieces
- 3/4 cup cold buttermilk
- 2 tablespoons melted butter, for brushing
Instructions
- Preheat your oven to 425 degrees Fahrenheit. Line a baking sheet with parchment paper or lightly grease it.
- In a large bowl, whisk together the flour, baking powder, salt, and sugar. These dry ingredients must be fully combined for even rising.
- Add the cold butter pieces to the flour mixture. Use a pastry blender or your fingertips to cut the butter into the flour until the mixture resembles coarse crumbs with some pea-sized pieces of butter remaining. These butter pieces create the flaky layers.
- Make a well in the center of the dry ingredients and pour in the cold buttermilk all at once. Use a fork to gently mix until just combined. Do not overmix the dough; a shaggy mass is what you want.
- Turn the dough out onto a lightly floured surface. Gently pat the dough into a rough rectangle about 3/4 inch thick.
- Fold the dough into thirds, like a letter. Turn the dough 90 degrees and gently pat it down again to about 3/4 inch thickness. This folding process builds the layers for tall, flaky biscuits. Repeat this fold and pat process one more time.
- Pat or roll the dough to a final thickness of about 1 inch. Use a sharp biscuit cutter (about 2.5 inches) to cut straight down without twisting the cutter. Twisting seals the edges and prevents the biscuits from rising tall.
- Place the cut biscuits close together on the prepared baking sheet for softer sides, or slightly apart for crispier sides.
- Bake for 12 to 15 minutes, or until the tops are golden brown.
- Immediately brush the tops of the hot biscuits with the melted butter. Serve warm.
Notes
- Keep your butter and buttermilk as cold as possible. Cold fat hitting the hot oven creates steam, which separates the layers and makes the biscuits flaky.
- Do not twist the biscuit cutter when cutting the dough. Press straight down to keep the edges clean so the biscuits can climb upward while baking.
- For extra height, you can stack the dough pieces on top of each other before the final cut, rather than placing them side by side on the sheet.
Nutrition
- Serving Size: 1 biscuit
- Calories: 220
- Sugar: 1
- Sodium: 350
- Fat: 12
- Saturated Fat: 7
- Unsaturated Fat: 5
- Trans Fat: 0
- Carbohydrates: 25
- Fiber: 1
- Protein: 4
- Cholesterol: 25