

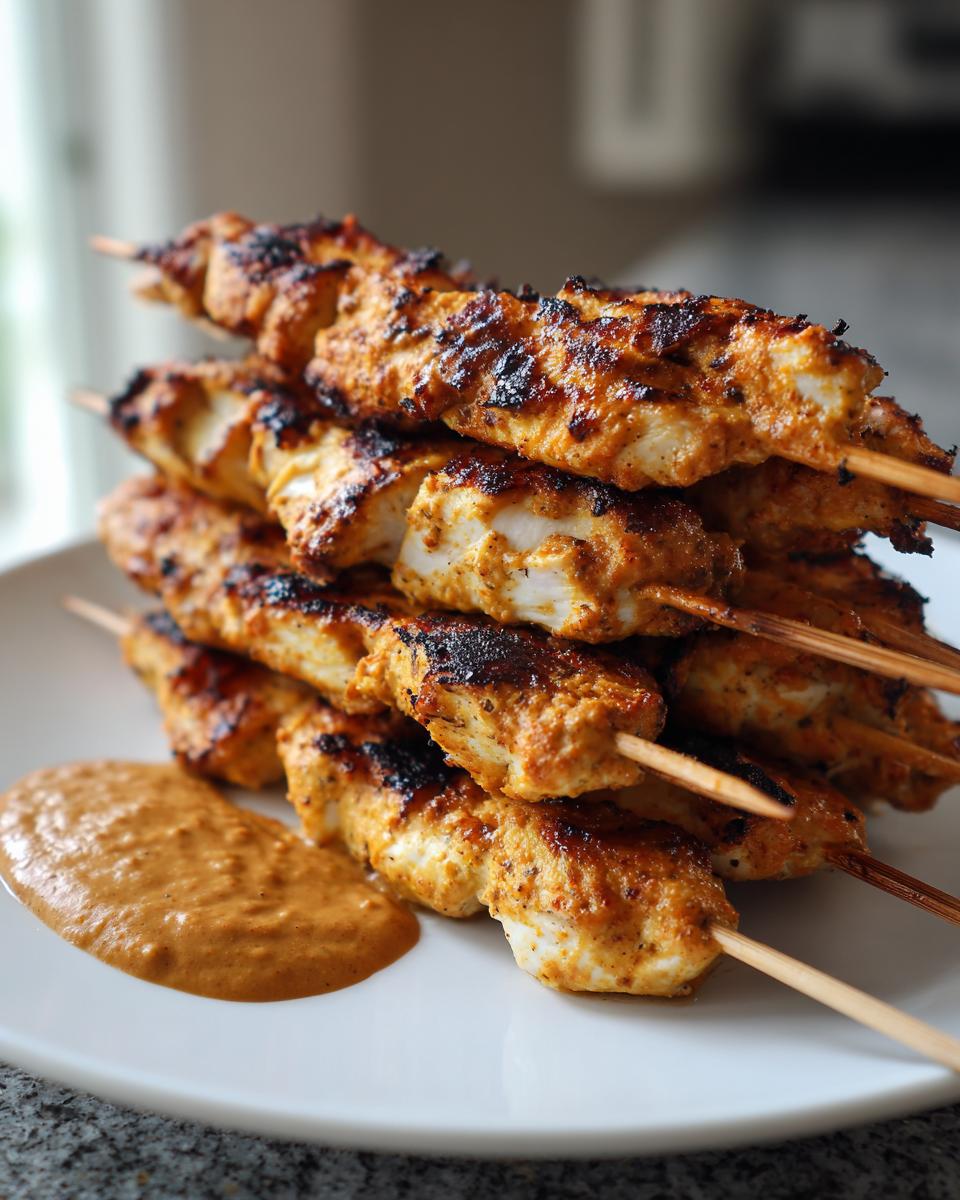
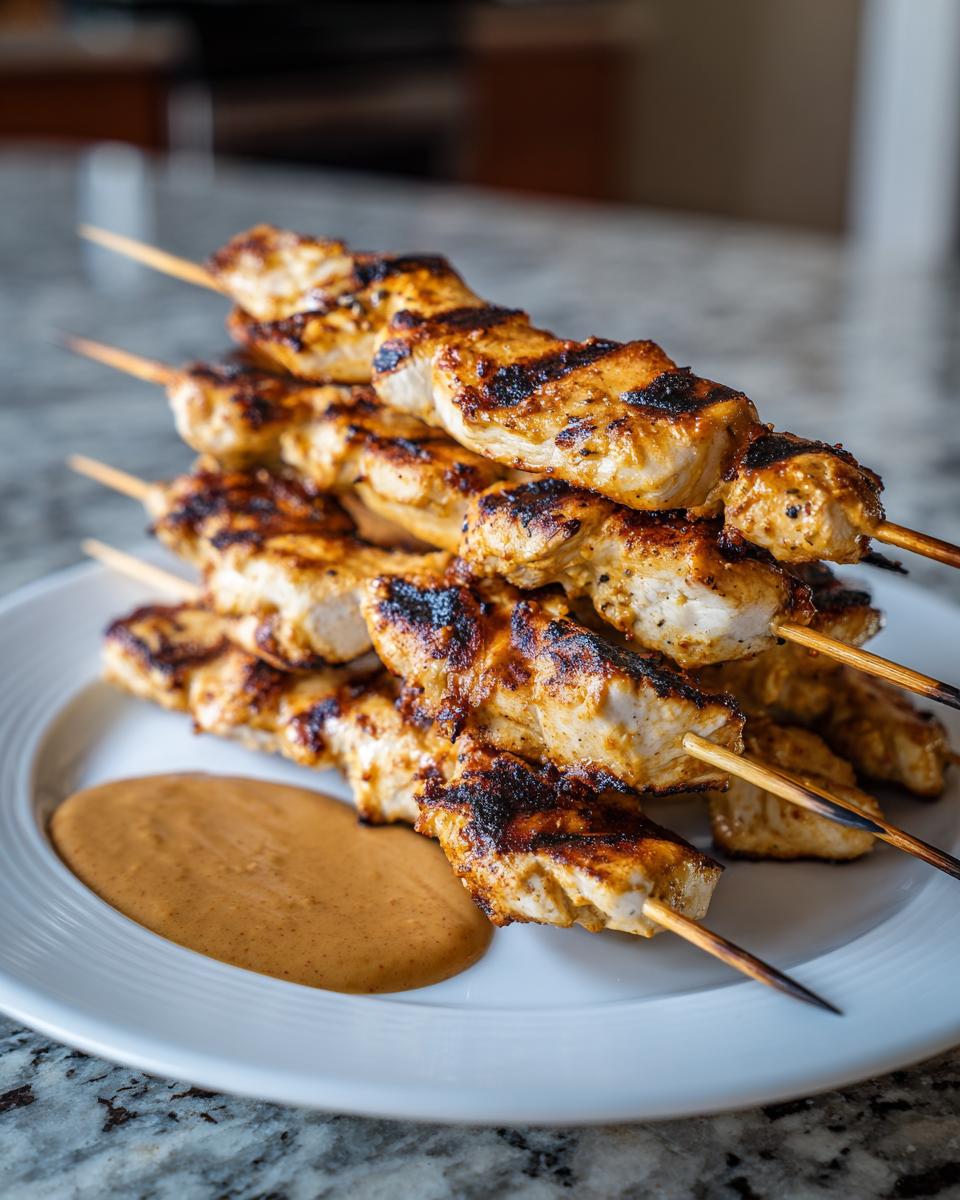
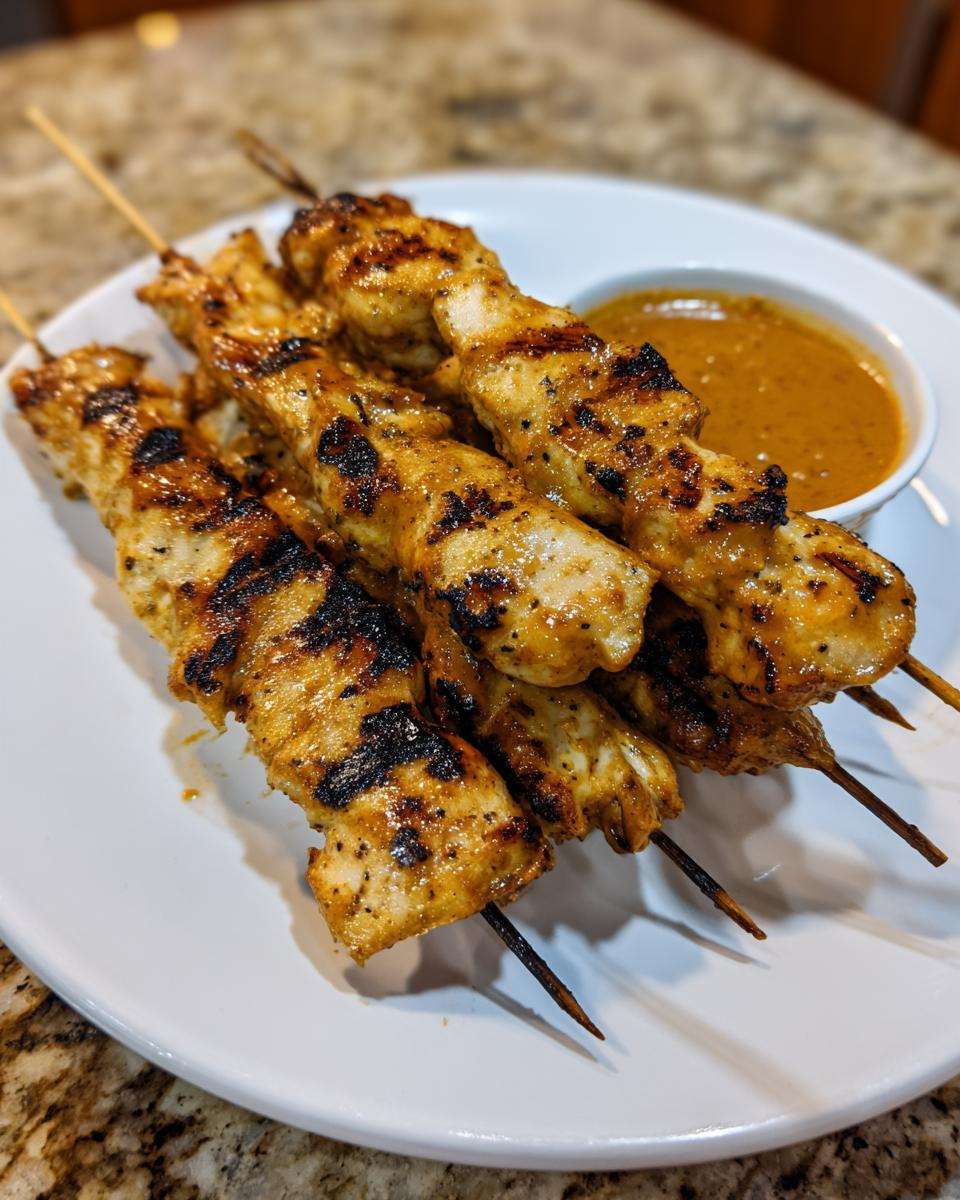
Oh, haven’t you ever just craved that incredible smoky flavor from a real street cart, but you didn’t want to deal with complicated ingredients? I totally get it! That’s why I spent ages refining this Ultimate Easy Chicken Satay with Restaurant-Style Creamy Thai Peanut Sauce. Here at Taste This Plate, my whole mission—just like I talk about on our About Page—is to break down those intimidating world-class flavors into something simple and dependable for your weeknight table. This recipe delivers intensely flavorful, juicy skewers that taste like they took hours, even though they are surprisingly quick. Trust me, you can absolutely nail this chicken satay!
- Why This Easy Chicken Satay Recipe Works Every Time
- Gathering Ingredients for Your Chicken Satay
- How To Make Chicken Satay: Step-by-Step Instructions
- Making the Best Peanut Sauce for Skewers
- Variations: Beyond Classic Chicken Satay
- Tips for Success with Your Homemade Satay
- Serving Suggestions for Your Chicken Satay
- Storage and Reheating Instructions for Leftover Chicken Satay
- Frequently Asked Questions About Chicken Satay
- Sharing Your Homemade Chicken Satay
Why This Easy Chicken Satay Recipe Works Every Time
When you’re aiming for that authentic street food taste but need it ready before the family gets grumpy, this chicken satay recipe is your secret weapon. We cut out the fuss but kept all the flavor boosters that make Southeast Asian grilling so good. This isn’t just another skewered chicken recipe; it’s designed for maximum flavor payoff with minimal effort, which is exactly what we aim for here at the blog.
- Zero stress, maximum flavor—perfect for my appetizer and snacks collection!
- We nail the texture every time, giving you guaranteed Juicy Grilled Chicken.
- Forget complicated steps; we keep the ingredient list approachable for any weeknight.
Authentic Satay Marinade Secrets for Juicy Grilled Chicken
The magic, honestly, is in the marinade. A little bit of full-fat coconut milk doesn’t just add richness; it helps tenderize the chicken beautifully, ensuring you get that incredible Juicy Grilled Chicken texture. Then we layer in that gorgeous color and earthiness from turmeric and coriander. Don’t rush this part! Even an hour of marinating time makes a huge difference in your final chicken satay.

Tips for Perfect Grilled Chicken Skewers
Here are the two things I never skip when making skewers. First, you have to soak those wooden skewers for at least half an hour. Trust me, charred wood tasting almost ruins the beautiful marinade! Second, make sure your grill grates are clean and lightly oiled *before* you put the chicken down. That prevents sticking and lets you get those gorgeous, deeply browned edges without tearing up your beautiful cuts of meat.
Gathering Ingredients for Your Chicken Satay
Okay, Kate always says that good cooking starts with good ingredients, and this is definitely true for chicken satay! Getting your materials ready first is half the battle. We’ve split this up so you know exactly what goes on the skewers and what goes into that glorious dipping sauce. Don’t stress if you can’t find everything; we stick to things easily found at your local grocery store!
For the Chicken Satay Marinade and Skewers
You’ll need about one and a half pounds of chicken, either breasts or thighs—I like thighs for extra juiciness, but either works! Make sure you cut the meat into nice, even 1-inch cubes so everything cooks evenly. For the marinade itself, grab the full-fat coconut milk—that’s important for texture—along with our spices: turmeric, coriander, cumin, some sugar, soy sauce, salt, and pepper. And don’t forget those wooden skewers; make sure they’re soaking!
- 1.5 lbs boneless, skinless chicken breasts or thighs, cut into 1-inch cubes
- 1/4 cup coconut milk (full fat)
- 2 tablespoons soy sauce
- 1 tablespoon brown sugar
- 1 teaspoon ground turmeric
- 1 teaspoon ground coriander
- 1/2 teaspoon ground cumin
- 1/2 teaspoon salt
- 1/4 teaspoon black pepper
- 1 tablespoon vegetable oil (for brushing)
- 12 wooden skewers (must be soaked in water for 30 minutes!)
For the Creamy Peanut Dipping Sauce
This part is what makes people think you ordered takeout! We’re making a truly luxurious, Creamy Peanut Dipping Sauce that rivals any restaurant. The key textural elements here are creamy peanut butter and, surprisingly, hot water—it helps everything melt together beautifully when heated. You’ll also need a bit more coconut milk, lime juice for that necessary tang, brown sugar for balance, plus ginger and garlic for that fresh kick.
- 1 cup creamy peanut butter
- 1/2 cup hot water
- 1/4 cup coconut milk (full fat)
- 3 tablespoons soy sauce
- 2 tablespoons brown sugar
- 1 tablespoon lime juice
- 1 tablespoon rice vinegar
- 1 teaspoon grated fresh ginger
- 1 clove garlic, minced
- 1/2 teaspoon red pepper flakes (only if you like a little warmth!)
How To Make Chicken Satay: Step-by-Step Instructions
Now that everything is prepped and waiting so patiently, let’s put this incredible chicken satay together! We’re moving fast, but we want to make sure every single step is solid so you get that amazing flavor we talked about. Follow this order, and you’ll have skewers ready for the grill faster than you think. My goal is always to give you the confidence to make these flavorful main dishes right at home, like many of the recipes over at our main dishes section!
Marinating the Chicken for the Best Chicken Satay Flavor
First up, the marinade! Get a medium bowl and whisk together all your marinade helpers: the coconut milk, soy sauce, turmeric, cumin, and brown sugar until it’s totally combined. Then, toss in your cubed chicken. Make sure every single piece is coated in that gorgeous yellow spice mixture. Cover that bowl tightly—I mean, really tightly—and stick it in the fridge. You should let it hang out for at least one hour, but truthfully, if you can let it go for four hours while you work or run errands, the flavor infusion will be far better!
Creating the Easy Peanut Sauce Recipe
While the chicken is chilling out, we tackle the star accompaniment: the sauce! Grab a small saucepan. You’re going to gently mix the peanut butter, hot water, coconut milk, sugar, lime juice, and all those aromatics like ginger and garlic in there. Heat this over medium-low heat—and I mean medium-low! Whisk constantly until that peanut butter melts down and the whole thing turns into a silky dream. That’s your Easy Peanut Sauce Recipe done! Just remember, it looks a little thin right now, but it sets up perfectly as it cools down.
Cooking Your Marinated Chicken for Grilling
Time to cook! Preheat your grill to medium-high heat. Thread your marinated chicken onto those soaked skewers, leaving just a tiny bit of room between pieces, and brush them lightly with oil. Lay them on the hot, cleaned grates. Grill them for just about 4 to 6 minutes on each side. You want crispy, browned edges, but they need to be cooked through. If grilling isn’t your thing, no sweat! You can bake these at 400°F for about 18 minutes, or even better, try them in your air fryer on high for about 11 minutes total to get amazing Air Fryer Chicken Satay results!
Making the Best Peanut Sauce for Skewers
I know, I know, the chicken part can feel like the main event, but hear me out—you absolutely cannot have awesome chicken satay without a killer sauce. Making this Creamy Peanut Dipping Sauce feel like it came straight out of a busy Bangkok kitchen is simple, but you have to trust the low heat. When you gently heat everything together, you’re actually emulsifying the fats in the peanut butter, creating that smooth, velvety texture instead of something grainy or oily. It’s truly the key to making this dish unforgettable, and it pairs perfectly with the savory, marinated skewers.
Troubleshooting Common Peanut Sauce Issues
Even though this recipe is nearly foolproof, sometimes things look a little strange right off the stove. If you find your sauce is way too thick after it cools down—maybe it looks more like solid peanut butter than dip—don’t panic and don’t reach for more peanut butter! Just whisk in a tablespoon or two of warm water until it loosens up to that perfect drizzly consistency. If, heaven forbid, you accidentally crank the heat up too high and it starts to look oily or separated, take it off the burner immediately. Remove it from the heat and vigorously whisk in a splash of cold water. That sudden temperature change often miraculously brings the emulsion back together. You can find more tips on perfecting dips like this over at my dumpling sauce recipe!
Variations: Beyond Classic Chicken Satay
While I am fiercely loyal to the classic grilled chicken satay, I think cooking should always be fun and adaptable! Life gets busy, and sometimes you just need to change things up to keep things interesting on the dinner rotation. The beauty of this intense marinade and that incredible peanut sauce is that they work wonderfully with more than just chicken breast cubes. You can definitely switch up the protein if you want to mix things up for the week.
Think about using pork tenderloin instead of chicken—cut it into slightly thinner pieces, and it cooks super fast. Shrimp also takes the marinade brilliantly, but you have to watch it closely on the grill because shrimp cook so quickly! If you ever want to try a different take on poultry, check out my recipe for Lemon Pepper Chicken Thighs, which is a completely different flavor profile but uses the same ease of preparation.
Turning Chicken Satay into a Weeknight Chicken Dinner Bowl
Sometimes you don’t want skewers; you want a hearty bowl situation! This is where we turn our fantastic chicken satay protein into a complete, satisfying meal. Instead of serving them right off the stick, shred the grilled chicken (or dice it up) and either serve it over a bed of fluffy jasmine rice or even brown rice if you’re feeling extra healthy. It’s a perfect candidate for a Weeknight Chicken Dinner because it comes together so fast after the marinating time is done.
To make it a bowl, I like to load it up with shredded cabbage or some quick-blanched broccoli florets, maybe some slivered carrots for crunch. Then, instead of just dipping the chicken, drizzle that luxurious leftover peanut sauce right over the whole bowl. It’s vibrant, healthy, and honestly tastes like something you’d pay way too much for at a trendy lunch spot!
Tips for Success with Your Homemade Satay
Making chicken satay that truly tastes authentic—like you just pulled it off a curbside grill in some amazing Southeast Asian city—comes down to a few small but mighty details. We’ve covered the ingredients, but technique is where we really separate a good skewer from a legendary one. I’ve included these tips because they made the biggest difference when I was trying to nail the flavor profile described in this recipe.
First, about that meat selection: while breasts are fine, if you want true street food richness, you simply must use chicken thighs. They have just a little more fat, meaning they stay incredibly tender and flavorful even under high heat. Since the marinade has coconut milk, the thighs absorb that spice mixture even deeper than leaner cuts.
Second, let’s talk sugar and char. The marinade calls for brown sugar, yes? That sugar is essential because it caramelizes beautifully over the flame. A tiny bit of charring is not a mistake here; it’s the sign of success! You want those dark edges which bring out the sweetness and contrast sharply with the creamy, cooling peanut sauce. If you’re worried your grill isn’t hot enough, try giving the chicken an extra minute or two on the high spots.
Third, don’t toss out the marinade! After the chicken has marinated for a few hours, take the remaining liquid from the bowl—the stuff that hasn’t touched the raw meat—and set it aside. Right before serving the cooked skewers, pour that *reserved* marinade into a small saucepan and boil it rapidly for at least three full minutes. This cooks out any raw chicken traces, and you can use this thickened, super-flavorful liquid as a fresh glaze right when the skewers come off the heat! It’s a trick I learned from studying countless recipes, like those complex carne asada marinades that rely on that final deglazing.
Finally, think about serving temperature. For the best experience, serve the chicken skewers piping hot right off the grill, but make sure your peanut sauce is served just slightly warm or even at room temperature. That contrast between the hot, smoky meat and the cool, rich sauce is honestly what makes everything taste so fantastic together.
Serving Suggestions for Your Chicken Satay
Once those beautiful chicken satay skewers come off the grill—smoky, tender, and smelling absolutely incredible—the next thought is always, “What goes with this?” You definitely don’t want to eat them plain! While they are fantastic as standalone Asian Appetizer Ideas, making them part of a bigger meal is where they really shine. I like to keep the accompaniments fresh and light so they don’t weigh down that amazing peanut flavor we worked so hard to achieve.
My go-to pairing is always a simple mound of fluffy white rice, usually a good jasmine rice because the fragrance works so well with the turmeric in the marinade. You can find some of my favorite easy ways to make perfect rice over at our side dishes section. But even more important than the rice is the refreshing crunch factor!
You absolutely need a quick, zesty relish. Seriously, don’t skip this! I grab a cucumber, thinly slice it, and toss it with a splash of rice vinegar, a tiny pinch of sugar, and some finely minced red onion. That bright, acidic flavor cuts right through the richness of the peanut sauce, waking up your palate for the next bite of chicken satay. It’s the perfect balance! For a heartier meal, throw some shredded romaine or crisp iceberg lettuce underneath the skewers and load it up with those fresh veggies.
Storage and Reheating Instructions for Leftover Chicken Satay
Nobody wants to see leftover Grilled Chicken Skewers go to waste, especially when they taste this good! The trick to keeping them perfect is treating the chicken and the peanut sauce like two separate entities in storage. They just don’t get along inside the same airtight container overnight—the sauce can sometimes make the chicken a little soggy if they touch too much.
For the leftover cooked skewers, you want to get them into an airtight container as soon as they’ve cooled down to room temperature. They should last beautifully in the fridge for three or maybe four days. You really want to aim to eat them within that window to enjoy the best texture.
The Creamy Peanut Dipping Sauce keeps even longer! Because it’s packed with fat and sugar, it holds up really well in the fridge, often for up to a week. Just make sure that container is sealed up tight. You might notice it solidifies quite a bit once it gets cold; that’s totally normal because of the peanut butter!
How to Reheat Your Chicken Skewers Gently
Whatever you do, avoid nuking the skewers in the microwave if you can help it. Microwaves are the enemy of juicy grilled food—they make the meat tough fast! If you only have a few skewers left, the absolute best method is the oven or the air fryer again.
- For the Oven: Set your oven to a low temperature, maybe 300°F (about 150°C). Lay the skewers out on a baking sheet lined with foil so cleanup is simple. Heat them for about 8 to 10 minutes, just until they are warmed through. This gentle heat warms the inside without drying out the edges.
- For the Air Fryer: If you just need one or two skewers refreshed, the air fryer is fantastic. Pop them in at 320°F (160°C) for just 3 to 4 minutes. Watch them closely so they don’t crisp up too much!
Refreshing Your Peanut Dipping Sauce
When you pull that gorgeous sauce out of the fridge, it’s going to be stiff. Warm it gently! You can put a few spoonfuls in a microwave-safe bowl and hit it for 15-second intervals, whisking between each one, until it’s loose again. Or, if you’re feeling fancy, you can warm it gently in a tiny saucepan over the very lowest heat setting, stirring only until it’s pourable. If it seems a little too thick after warming, just whisk in a teaspoon of warm water until it flows exactly how you like it for dipping.
Frequently Asked Questions About Chicken Satay
I know you might still have a few little things floating around in your head about making this happen on a busy night. Believe me, I asked my own family members these same questions when I first developed this recipe! That’s why I put this quick FAQ section here to clear everything up so you can just focus on the fun part: eating delicious food. We cover everything from the best cuts of meat to timing your sauce!
Can I prepare the chicken satay marinade a day ahead?
Oh yes, please do! That is one of the best time-saving tricks you can pull. For the absolute best results with your chicken satay, let that chicken soak up the marinade for a full twenty-four hours if you can manage it. The longer it sits, the deeper those beautiful turmeric and coriander flavors penetrate, giving you that ultra-tender bite that tastes like it took all day to achieve. Just make sure it’s sealed really well in the fridge!
What is the best way to serve this Asian Appetizer Ideas?
This dish is definitely a superstar when it comes to Asian Appetizer Ideas! The classic way, of course, is serving the wooden skewers alongside a big bowl of that warm peanut sauce for dipping. If you are doing a bigger spread, they look stunning arranged on a platter interspersed with lime wedges and maybe some fresh cilantro leaves. They also pair well with small bowls of quick-pickled cucumbers on the side, which gives a nice little sharp bite against the richness of the sauce.
Is this recipe best with chicken breasts or thighs?
Honestly, I think chicken thighs are the winner here if you want truly foolproof, juicy results, especially if you are grilling them! Thigh meat has a little more fat, which keeps it from drying out, even if your grill runs a little hotter than you expected. Breasts are leaner and will still work great, but just keep a closer eye on them while they cook!
Can I make the peanut sauce entirely ahead of time?
Absolutely! I often make a double batch of the Creamy Peanut Dipping Sauce because we use it on everything. You can safely make the sauce up to three days ahead of time. Just store it in an airtight container in the fridge. Remember what I said earlier, though—it will get very firm when cold, so just give it a gentle reheat on the stove or in short bursts in the microwave before serving with your chicken satay!
What if I want to serve chicken satay for a brunch gathering?
While this is usually a dinner or appetizer situation, I love thinking outside the box! If you want to incorporate this into a larger spread, I’d tie the dipping sauce into the meal. Maybe serve the skewers alongside some fresh fruit or even alongside some frittatas instead of rice. For more ideas on how I incorporate globally inspired flavors into morning meals, check out my breakfast and brunch archive!
Sharing Your Homemade Chicken Satay
Well, you did it! You’ve made these gorgeous, flavorful skewers, and I hope your kitchen smells wonderfully of turmeric and cumin right now. For me, the absolute best part of creating these recipes isn’t just the cooking—it’s the gathering that happens after. I really hope you’re sitting down with your family or friends right now, dipping those perfectly grilled pieces into that incredible peanut sauce.
If you loved how simple this was, or maybe you discovered a trick that worked perfectly for your grill, please do me a huge favor and come back to rate this recipe! A star rating lets me know that this recipe is holding up to the promise of being simple yet delicious for other home cooks, too. It really helps me keep focusing on building out recipes just like this one.
Also, I absolutely love seeing your creations! If you post a picture of your feast on Instagram or Facebook, tag me! It makes my day to see the food we create together ending up on your tables. If you ever have a question that didn’t get answered here, or you just want to share a success story, feel free to reach out through the Contact Page. Now go enjoy that incredible meal!
PrintEasy Chicken Satay with Restaurant-Style Creamy Thai Peanut Sauce

Make tender, juicy Chicken Satay skewers at home. This recipe uses a simple marinade for deep flavor and includes instructions for grilling, plus a foolproof recipe for the best creamy Thai peanut dipping sauce.
- Prep Time: 20 min
- Cook Time: 15 min
- Total Time: 35 min
- Yield: 4 servings 1x
- Category: Dinner
- Method: Grilling
- Cuisine: Thai
- Diet: Non-Vegetarian
Ingredients
- 1.5 lbs boneless, skinless chicken breasts or thighs, cut into 1-inch cubes
- 1/4 cup coconut milk (full fat)
- 2 tablespoons soy sauce
- 1 tablespoon brown sugar
- 1 teaspoon ground turmeric
- 1 teaspoon ground coriander
- 1/2 teaspoon ground cumin
- 1/2 teaspoon salt
- 1/4 teaspoon black pepper
- 1 tablespoon vegetable oil
- 12 wooden skewers (soaked in water for 30 minutes)
- For the Peanut Sauce:
- 1 cup creamy peanut butter
- 1/2 cup hot water
- 1/4 cup coconut milk (full fat)
- 3 tablespoons soy sauce
- 2 tablespoons brown sugar
- 1 tablespoon lime juice
- 1 tablespoon rice vinegar
- 1 teaspoon grated fresh ginger
- 1 clove garlic, minced
- 1/2 teaspoon red pepper flakes (optional)
Instructions
- Prepare the Chicken Marinade: In a medium bowl, whisk together the coconut milk, soy sauce, brown sugar, turmeric, coriander, cumin, salt, and pepper. Add the cubed chicken and toss to coat completely. Cover the bowl and refrigerate for at least 1 hour, or up to 4 hours, to infuse the flavor.
- Prepare the Peanut Sauce: While the chicken marinates, make the sauce. In a small saucepan, combine the peanut butter, hot water, coconut milk, soy sauce, brown sugar, lime juice, rice vinegar, ginger, garlic, and red pepper flakes (if using).
- Heat the sauce mixture over medium-low heat, whisking constantly until the peanut butter melts and the sauce is smooth and creamy. Remove from heat and set aside. The sauce will thicken as it cools.
- Assemble the Skewers: Thread the marinated chicken pieces onto the soaked wooden skewers, leaving a small space between each piece. Brush the chicken lightly with vegetable oil.
- Cook the Chicken: Preheat your grill to medium-high heat. Place the skewers on the oiled grates. Grill for 4 to 6 minutes per side, turning occasionally, until the chicken is cooked through and has nice grill marks. (Alternatively, bake at 400°F (200°C) for 15-20 minutes, or air fry at 375°F (190°C) for 10-12 minutes, flipping halfway.)
- Serve immediately with the warm or room-temperature creamy peanut dipping sauce.
Notes
- Soaking the wooden skewers prevents them from burning on the grill.
- For an extra authentic taste, you can substitute 1 tablespoon of the soy sauce in the marinade with fish sauce.
- If your peanut sauce becomes too thick upon cooling, whisk in a tablespoon of warm water until you reach your desired dipping consistency.
Nutrition
- Serving Size: 4 skewers
- Calories: 450
- Sugar: 12
- Sodium: 580
- Fat: 28
- Saturated Fat: 10
- Unsaturated Fat: 18
- Trans Fat: 0
- Carbohydrates: 18
- Fiber: 3
- Protein: 30
- Cholesterol: 85