
There is such a profound joy in baking something simple that tastes absolutely incredible, isn’t there? We all cherish those classic recipes that never need fussing over—the ones that deliver that pure, nostalgic flavor every single time. That’s exactly what we have here today with what I call the ultimate, reliable russian tea cakes recipe.
These aren’t fussy, complicated creations. What they are is pure, buttery magic that truly melts in your mouth thanks to that snowy coating we give them. You might know them by a few other familiar names—perhaps you grew up calling them Snowball Cookies or Mexican Wedding Cookies—but whatever you call them, this version works, period. It’s the bedrock of simple baking: good ingredients treated right.
As the founder of Taste This Plate, Kate Reilly, I can tell you that this recipe has been tried and tested in my kitchen countless times. We focus on accessible ingredients to create extraordinary meals and desserts. If you are looking for that perfect, crumbly cookie for your holiday platter or just a delightful tea time treat year-round, you’re in the right place.
If you want to browse more simple desserts once you’re done here, feel free to check out the rest of our collection!
- Why This is the Best Russian Tea Cakes Recipe You Will Ever Make
- Gathering Ingredients for Perfect Russian Tea Cakes
- Expert Tips for Preparing Your Russian Tea Cakes Dough
- Step-by-Step Instructions for Baking Russian Tea Cakes
- Achieving the Signature Double-Coated Finish on Your Russian Tea Cakes
- Variations on Traditional Tea Cakes
- Storage and Make-Ahead Tips for Your Holiday Baking Classics
- Frequently Asked Questions About Russian Tea Cakes Recipe
- Nutritional Estimates for These Buttery Nut Cookies
- Share Your Homemade Russian Tea Cakes Creations
Why This is the Best Russian Tea Cakes Recipe You Will Ever Make
I get it—when you’re looking for a holiday cookie recipe, you don’t want drama. You want reliability. That’s exactly why this russian tea cakes recipe has become my go-to. It’s not some fancy new trend; it is a beautifully classic, tested formula that I’m proud to share with you from Taste This Plate.
We do all the tedious testing here so you get a flawless result right out of the oven. My kitchen is where the flops happen so yours don’t have to! This recipe focuses on simple techniques to achieve peak buttery flavor, which is why it’s truly the best. If you love that rich, buttery texture, you have to check out my recipe for gooey butter pecan cake too!
Understanding the Signature Texture of Russian Tea Cakes
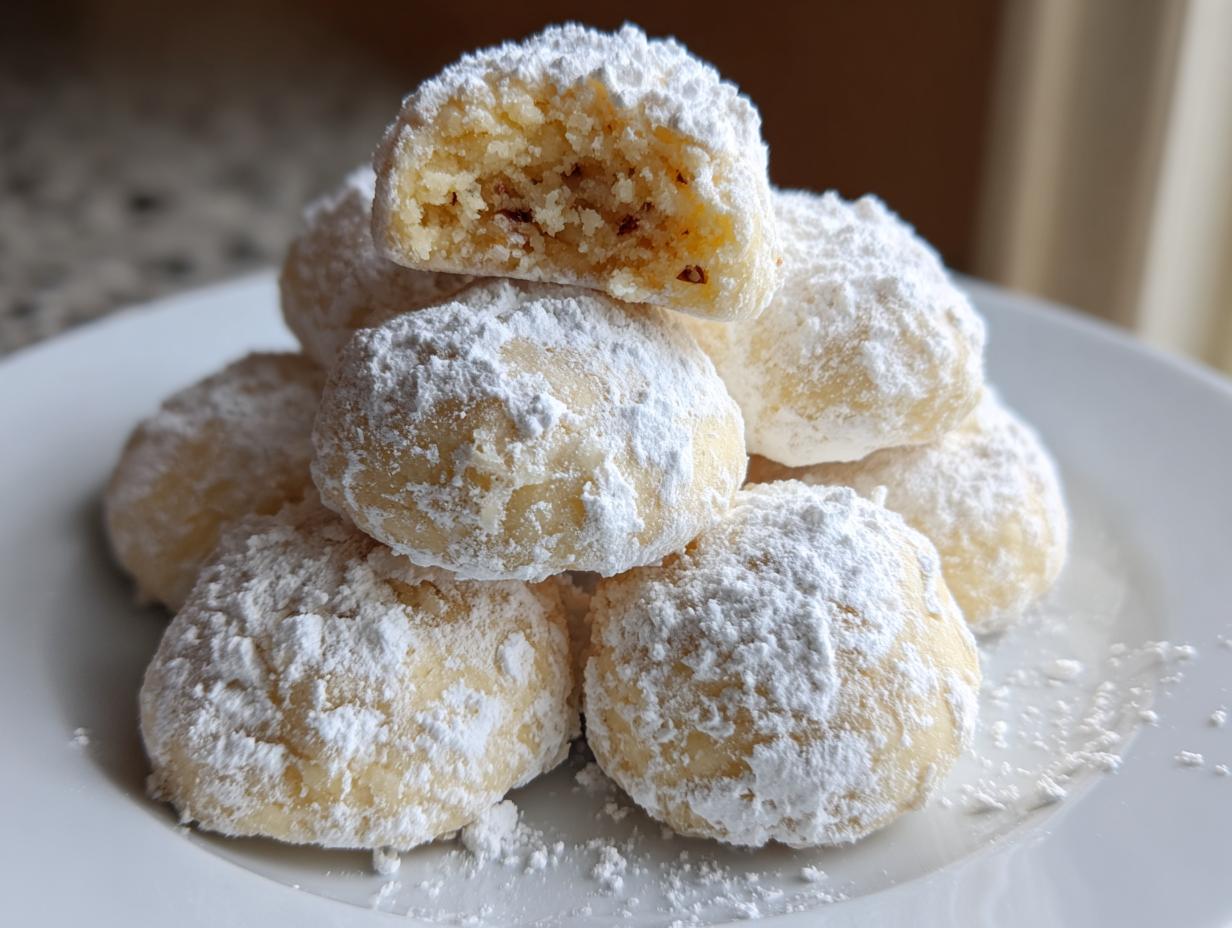
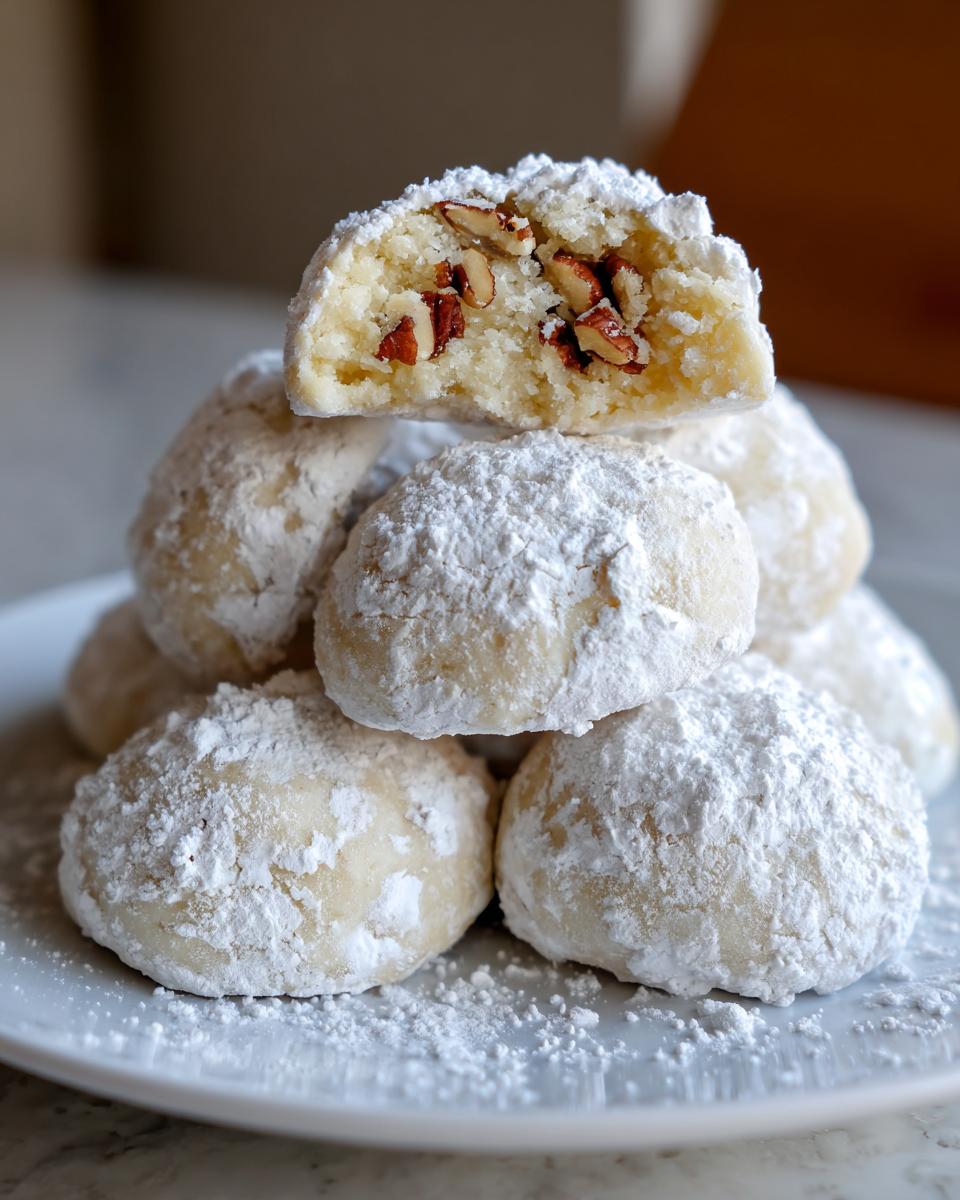
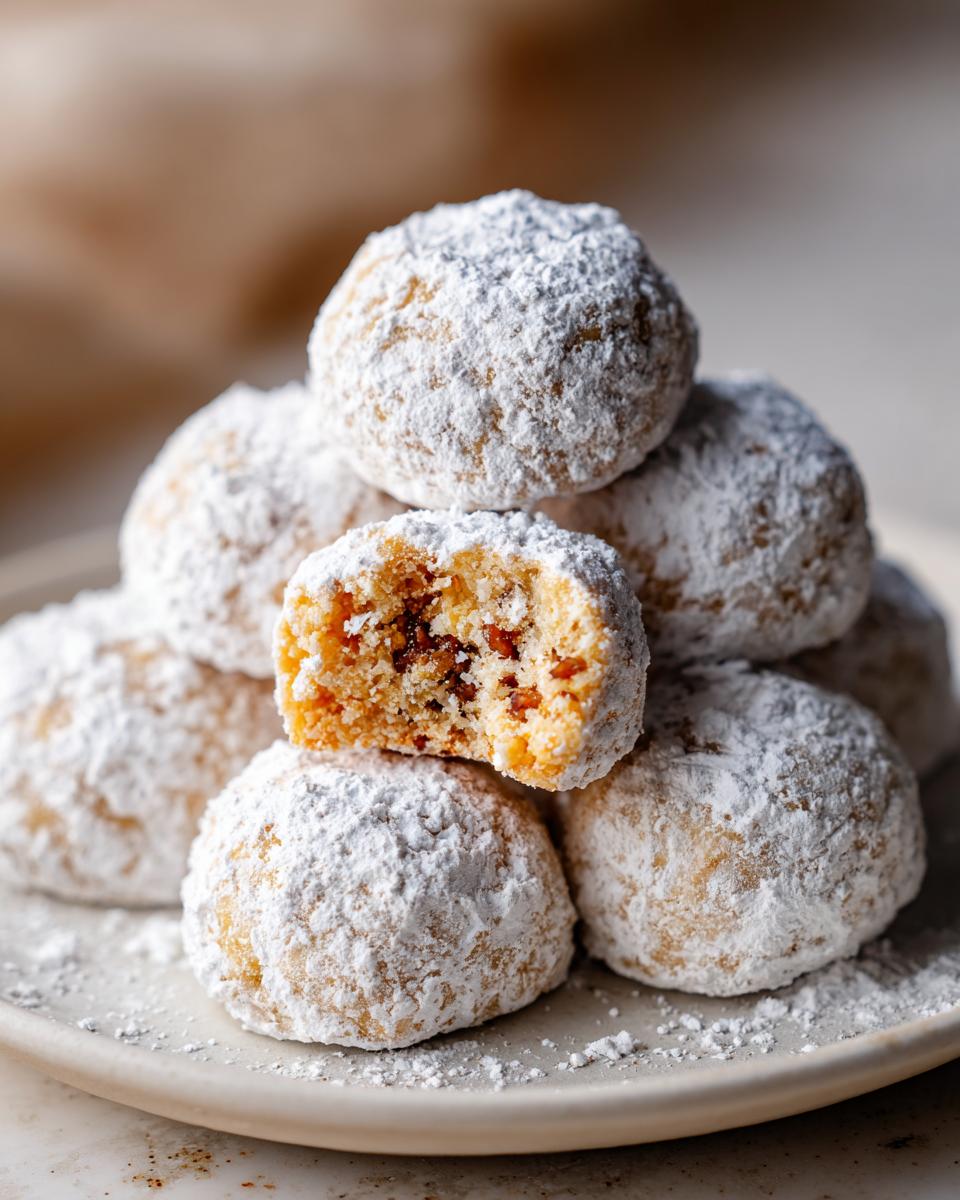
What makes these cookies legendary? It’s all about that texture. These are meant to be incredibly tender—they should practically dissolve the second they hit your tongue. That melt-in-your-mouth quality comes from two things: using lots of softened butter and, of course, that generous, snowy dusting of powdered sugar we apply after they cool.
Alternative Names for Our Delicious Russian Tea Cakes
Seriously, people call these cookies everything! Sometimes you’ll see them listed as Mexican Wedding Cookies or maybe Snowball Cookies. No matter the name on the recipe card, if it relies on butter, flour, and finely chopped nuts to create a delicate, crumbly little ball, it’s probably the same wonderful cookie. It speaks to how essential these buttery nut cookies are to baking traditions everywhere! If you want to see how others describe their favorites, check out this great recipe reference.
Gathering Ingredients for Perfect Russian Tea Cakes
One of the best parts about baking these traditional tea cakes is getting to see the ingredient list. It’s short, sweet, and uses things you probably already have sitting in your pantry! This holds so true to my mission here at Taste This Plate: Simple Ingredients, Extraordinary Meals. We aren’t diving into specialty stores for this russian tea cakes recipe; this is real home baking.
Because we are relying on just a few core components to achieve that famous melt-in-your-mouth texture, making sure those ingredients are fresh and treated properly is really important. Let’s look at exactly what you need to pull these off perfectly.
Ingredient List for Classic Russian Tea Cakes
- 1 cup (2 sticks) unsalted butter, softened
- 1/2 cup powdered sugar, plus 2 cups for coating
- 1 teaspoon vanilla extract
- 2 cups all-purpose flour
- 1/2 cup finely chopped pecans or walnuts
- 1/4 teaspoon salt
Expert Tips for Preparing Your Russian Tea Cakes Dough
Okay, listen up, because while this recipe for russian tea cakes looks simple—and trust me, it is—the little steps are what separate a good cookie from one that makes people stop talking mid-sentence. My whole philosophy here at Taste This Plate is that if I explain the *why*, you’ll bake with more confidence. And in the cookie world, knowing the ‘why’ ensures that gorgeous crumbly finish.
If you want to see another amazing recipe where technique really matters when it comes to texture, you should check out my carrot banana muffins recipe!
The Importance of Softened Butter for Easy Butter Cookies
This is non-negotiable, friend. You need butter that is truly softened. I’m not talking about butter you forgot on the counter for ten minutes while you’re rushing. It needs to be pliable—soft enough that you can press a finger into it without resistance, but definitely not oily or melty. Why? Because when you cream softened butter and sugar, you are literally whipping air into the fat. That trapped air creates those tiny pockets that collapse during baking, giving us those beautiful, delicate air pockets that spell “melt-in-your-mouth.” That’s the secret to perfect easy butter cookies!
Flavor Boost: Toasting Nuts for Your Walnut Tea Cakes
Don’t just throw those pecans or walnuts right into the dough! Big mistake. The recipe notes mentioned toasting, and you absolutely should! Just toss them on a dry pan over medium heat for about five to seven minutes, stirring them constantly so they don’t burn. You’ll know they are ready when your kitchen smells gloriously nutty. Toasting wakes up the oils in the nuts and makes them so much more flavorful. This simple change truly elevates these walnut tea cakes from good to unforgettable. For more trusted cookie tips, take a peek at this great article on cookie techniques.
Step-by-Step Instructions for Baking Russian Tea Cakes
Now we get to the fun part—turning that beautifully mixed dough into little orbs of cookie perfection! We’re following the recipe exactly here, and I promise, these steps are straightforward. Just remember, for these russian tea cakes, gentle handling is key from start to finish to keep that delicate structure intact.
First things first, get your oven warmed up to 350°F (175°C) and line those baking sheets with parchment paper. Honestly, never skip the parchment; it saves so much clean-up fuss!
Mixing and Shaping the Crumbly Cookies
We mix the wet ingredients first, beating that softened butter with the half-cup of powdered sugar until it’s light and fluffy—that’s where our promise of melt-in-your-mouth quality starts! Then, beat in that vanilla. Next, slowly incorporate your flour and salt mixture. This is crucial: only mix until the dry ingredients are *just combined*. Stop the mixer! If you mix past this point, you develop gluten, and suddenly your tea cakes turn tough instead of wonderfully crumbly.
Now, fold in those toasted, chopped nuts by hand. The dough will feel soft, which is normal. Take about a tablespoon of dough at a time and roll it gently between your palms into a small ball, about 1 inch across. Place them about an inch apart on your prepared sheets. Don’t worry if they look a little rustic; that’s part of their old-world charm!
Baking and Cooling for Perfect Powdered Sugar Cookies
Bake these beauties for only 12 to 15 minutes. You are looking for the *bottoms* to just barely start turning golden brown. I stress this: the tops should actually remain quite pale—that’s how you know you haven’t baked them too long and dried out that buttery crumb!
Once they come out, let them sit right there on the hot baking sheet for exactly five minutes. This short rest lets the delicate structure set up slightly. After that, gently move them using a thin spatula over to a wire rack to cool completely. We must wait until they are completely cool before we attempt the sugar coating, or we’ll end up with sticky messes instead of perfect powdered sugar cookies!
Achieving the Signature Double-Coated Finish on Your Russian Tea Cakes
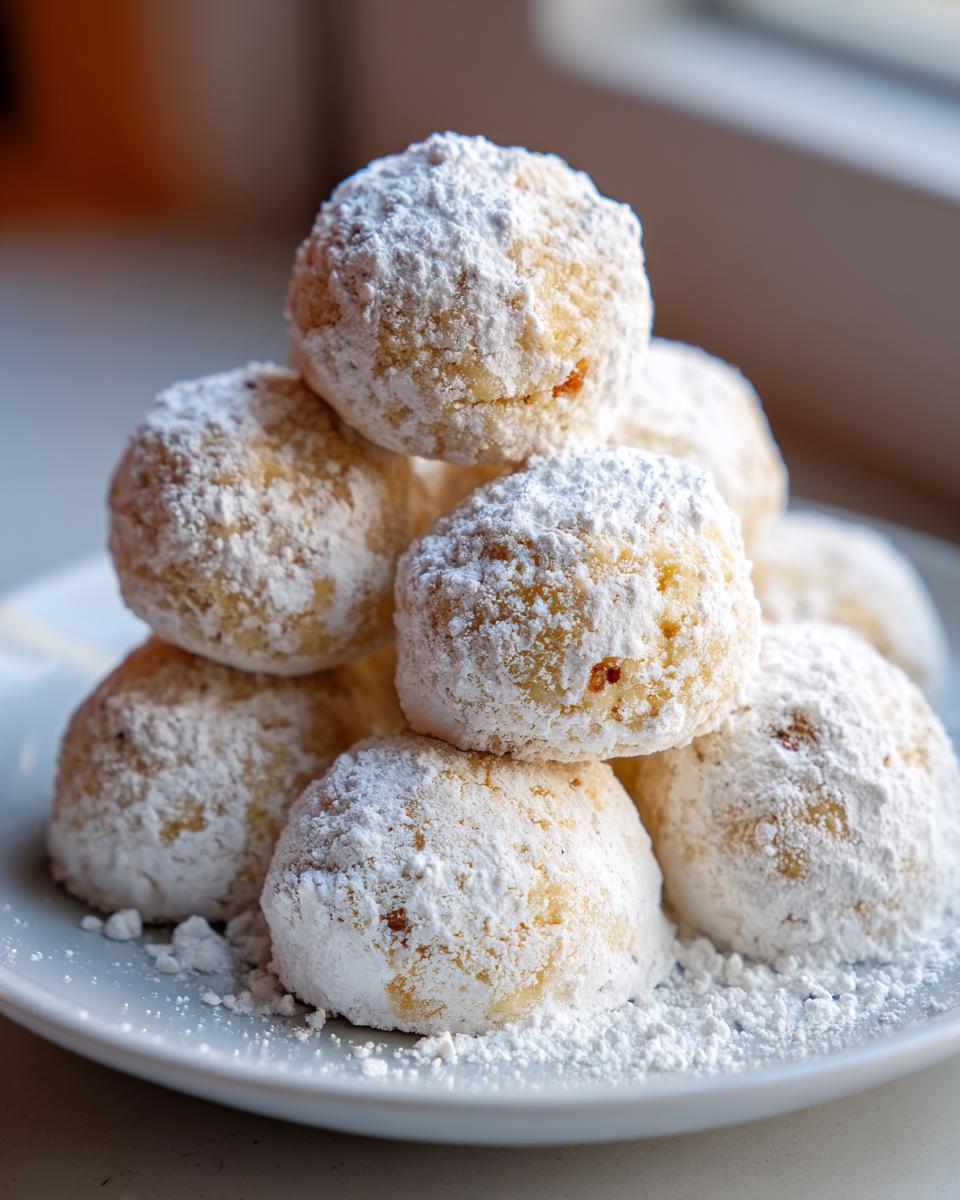
You’ve baked them perfectly, and now for the grand finale! This coating process is honestly what turns a good buttery nut cookie into a true spectacular russian tea cakes experience. Remember, we need those cookies to be completely cool before we start, otherwise, that gorgeous powdered sugar is just going to melt into a clear glaze, and we want a snowy blanket!
Pour those two cups of extra powdered sugar into a shallow dish—make sure you use a wide enough dish so you can easily roll the balls around. Gently roll one cooled cookie in the sugar until it’s totally whiteed out. Shake off the excess, and just admire it! If you really want those show-stopping, thick-coated melt in your mouth cookies that look incredible on a platter, wait about ten minutes for that first coat to settle, then roll them again. That double-dip really seals the deal. You can see some stunning finished examples over at this amazing inspiration link. Once they are sugared, pop them over to our favorite tea time treats collection for the perfect pairing!
Variations on Traditional Tea Cakes
I truly believe in honoring tradition when it comes to baking classics like these, but I also know that sometimes, we need to tweak things based on what we have on hand or what flavor we’re dreaming about! If you’ve made a batch of these buttery cookies and now you’re thinking, “What else can I do?” I have a few simple, easy swaps that keep the melt-in-your-mouth magic alive.
Don’t feel locked into just pecans! While pecans are my absolute favorite addition, we can easily switch things up. And hey, if you’re into the sourdough craze, there are even ways to incorporate that tangy flavor, although those take a little more finesse!
Simple Cookie Swaps for Different Flavors
When we talk about swaps, we usually focus on making the baking process easier or just adjusting the flavor profile slightly. Keep the butter and sugar ratio the same, and you are golden. Here are a couple of things I’ve tried when I was missing an ingredient:
- For the nuts: If you aren’t a fan of pecans, simply substitute the same amount of finely chopped walnuts or even sliced almonds. They both bake up beautifully and give you that delightful crunch, although almond provides a sweeter profile.
- For the extract: If you have almond extract kicking around, try using half a teaspoon of almond extract instead of the vanilla. It blends so beautifully with the butter base. A tiny hint of lemon zest mixed into the dough before baking is also really wonderful, giving it a bright lift.
- Curious about tang? For those of you who love experimenting, I saw a fascinating recipe that incorporates sourdough starter! If you want to dive into that world, you might want to check out this sourdough variation guide. It’s a bit more advanced, but it shows you how adaptable these cookies really are.
Remember, if you’re experimenting with nuts or additions, make sure you visit my post on simple cookie swaps for more ideas on how to adapt your favorite recipes without ruining the texture!
Storage and Make-Ahead Tips for Your Holiday Baking Classics
Since these are such fantastic Holiday Baking Classics, you’ll definitely want to make a big batch! The good news is that these delicate russian tea cakes store and even freeze like champs, which means you can bake them ahead of time and take the pressure off on busy days.
Once your cookies have that lovely, thick sugar coating, you store them in a single layer or separated by parchment paper in an airtight container at room temperature. Honestly, they often taste even better on day two once the buttery flavors have settled into that sugary shell. We find they stay wonderful for at least a week this way!
If you need to stash them for longer, freezing is the way to go. My best advice for freezing is to skip the final sugar bath! Roll your baked, cooled cookie balls in the sugar *after* they have completely thawed out. This keeps the coating looking fresh and snowy, rather than looking damp or uneven. You can pop these into the freezer for up to three months. For more great tips on planning your holiday baking schedule, check out my post on Christmas cookie ideas!
Frequently Asked Questions About Russian Tea Cakes Recipe
It’s natural to have a few little lingering questions when tackling a classic recipe—especially one that relies on a specific, delicate texture! Don’t worry about a thing. I want you to feel completely confident when you make these, so I’ve gathered the questions I get asked most often about this Russian Tea Cakes Recipe. We’re going to make sure you nail that buttery goodness!
Can I make these Snowball Cookies Recipe without nuts?
That’s a great question! Traditionally, these cookies rely on the chopped nuts—pecans or walnuts—to give them that lovely little bit of texture that pops against the soft dough. So, yes, you *can* make the Snowball Cookies Recipe without nuts if you have an allergy or just aren’t a fan, but I have to warn you: the cookie will be significantly softer and perhaps a bit more fragile.
If you decide to skip them, I suggest adding just one extra tablespoon of flour when you mix in the dry ingredients. This helps compensate for the missing bulk and keeps your dough from getting too soft to roll into little balls. It won’t be exactly the same, but it will still be delicious and buttery!
How long do these Melt In Your Mouth Cookies last?
Oh goodness, if you manage to have any leftovers, count yourself lucky! These Melt In Your Mouth Cookies are best stored in an airtight container at room temperature, and they stay wonderfully fresh for about a week. Honestly, I find they often taste even better on the second day once the butter and sugar have really settled together.
If you do store them longer, refer to the make-ahead tips above about freezing them un-coated. But for cookies that are already sugared, stick to that one-week window for the absolute best texture.
What is the secret to getting the thickest coating on my Russian Tea Cakes?
Ah, the snowy look! That second layer of powdered sugar is key to making them look professional and ensuring that true, powdery, melt-in-your-mouth coating we love so much in our Russian Tea Cakes. The secret is temperature and rest time.
First, the cookies must be *completely* cool before they even see the sugar bowl. If they are even slightly warm, the sugar melts. Once they’re cool, roll them once, shake gently, and then let them sit on the serving plate or rack for about 8 to 10 minutes. This allows that first thin layer to kind of “set.” Then, roll them aggressively through the sugar bowl a second time. That second roll grabs hold of the first sticky layer and creates a gorgeous, thick blanket of sweetness that looks just perfect!
Nutritional Estimates for These Buttery Nut Cookies
I always like to share the basics on what you’re putting into your body when you’re enjoying a treat like this. Remember, these are just estimates because we’re using real ingredients in a real home kitchen, so measurements can shift slightly batch-to-batch. I never worry too much about exact calories when I’m eating something this wonderful, but knowing the general breakdown is helpful!
This information is based on the recipe yielding about 3 dozen cookies. If you happen to make them slightly larger or smaller, these numbers will change, of course.
- Serving Size: 1 cookie
- Calories: 120
- Sugar: 6g
- Sodium: 35mg
- Fat: 8g
- Saturated Fat: 4g
- Unsaturated Fat: 4g
- Trans Fat: 0g
- Carbohydrates: 11g
- Fiber: 0g
- Protein: 2g
- Cholesterol: 15mg
Please keep in mind that these figures are just baseline estimates we’ve calculated based on standard supermarket ingredients. Brands vary, and if you use salted butter instead of unsalted, your sodium content, for example, will be higher! Think of these numbers as a helpful guide rather than a strict guarantee. Enjoy responsibly!
Share Your Homemade Russian Tea Cakes Creations
Well, we made it! We took simple ingredients—butter, sugar, and nuts—and turned them into those perfectly crumbly, cloud-like russian tea cakes that truly melt in your mouth. I really believe that baking should be a conversation, not a lecture, and now I’d love to hear all about *your* experience!
Did you stick to the classic recipe? Or did you decide to go old-school and call them Mexican Wedding Cookies? Maybe you went with the festive Snowball Cookies name? Drop it all in the comments below! I love seeing your creations, and your feedback helps so many other home bakers gain the confidence to try this recipe next.
Please take a moment to leave us a star rating right near the recipe card if this batch turned out to be exactly what you needed for your tea time or holiday platter. Your input helps us keep testing and sharing only the most dependable recipes here at Taste This Plate. If you have any final questions or just want to say hello, don’t hesitate to reach out through our contact page. Happy baking, friend—I can’t wait to hear how they tasted!
PrintClassic Melt-in-Your-Mouth Russian Tea Cakes (Snowball Cookies)

Make these classic, buttery Russian Tea Cakes, also known as Mexican Wedding Cookies or Snowball Cookies. They feature toasted pecans and a delicate, crumbly texture coated in powdered sugar for a melt-in-your-mouth holiday favorite.
- Prep Time: 20 min
- Cook Time: 15 min
- Total Time: 35 min
- Yield: About 3 dozen cookies 1x
- Category: Dessert
- Method: Baking
- Cuisine: American/Traditional
- Diet: Vegetarian
Ingredients
- 1 cup (2 sticks) unsalted butter, softened
- 1/2 cup powdered sugar, plus 2 cups for coating
- 1 teaspoon vanilla extract
- 2 cups all-purpose flour
- 1/2 cup finely chopped pecans or walnuts
- 1/4 teaspoon salt
Instructions
- Preheat your oven to 350°F (175°C). Line baking sheets with parchment paper.
- In a large bowl, beat the softened butter and 1/2 cup powdered sugar together until light and fluffy. You can use a stand mixer or a hand mixer for this step.
- Beat in the vanilla extract.
- In a separate bowl, whisk together the flour and salt. Gradually add the dry ingredients to the wet ingredients, mixing on low speed until just combined.
- Stir in the chopped nuts by hand. The dough will be soft.
- Roll the dough into small balls, about 1 inch in diameter. Place them 1 inch apart on the prepared baking sheets.
- Bake for 12 to 15 minutes, or until the bottoms are lightly golden. The tops should remain pale.
- Let the cookies cool on the baking sheet for 5 minutes before transferring them to a wire rack to cool completely.
- Once the cookies are completely cool, place the remaining 2 cups of powdered sugar in a shallow dish.
- Roll each cooled cookie thoroughly in the powdered sugar until completely coated. For a thicker coating, you can roll them a second time after the first coating sets for a few minutes.
- Store these melt-in-your-mouth cookies in an airtight container.
Notes
- For the best texture, make sure your butter is truly softened, not melted. This helps create the crumbly structure.
- Toasting your nuts before chopping them deepens their flavor significantly. Spread them on a dry pan over medium heat for 5-7 minutes, stirring often, then let them cool before using.
- If you want a very thick coating, wait 10 minutes after the first sugar roll, then roll them in the powdered sugar again.
- These cookies freeze well before the final sugar coating. Roll them in sugar after thawing.
Nutrition
- Serving Size: 1 cookie
- Calories: 120
- Sugar: 6
- Sodium: 35
- Fat: 8
- Saturated Fat: 4
- Unsaturated Fat: 4
- Trans Fat: 0
- Carbohydrates: 11
- Fiber: 0
- Protein: 2
- Cholesterol: 15