
When you want a dessert that truly stops people in their tracks—something that looks like it took three days of professional work but was actually made by you on a Tuesday—you need a showstopper. And honestly, I don’t think anything beats the visual drama of a deep, velvety red cake swirling out of a bundt pan. Forget those fussy layer cakes; we’re making a stunning, red velvet bundt cake completely from scratch. I remember bringing a similar dessert to a summer barbecue years ago, and people asked if I’d smuggled it out of a fancy bakery! Trust me, achieving that bakery-worthy look and that incredible, moist center is easier than you think. We’re going to walk through this step-by-step so you can impress everyone!
- Why This Moist Red Velvet Bundt Cake Recipe Works (Expert Tips)
- Ingredients for the Best Red Velvet Bundt Cake
- How to Prepare Your From Scratch Red Velvet Bundt
- Creating the Cream Cheese Glaze for Bundt Cake
- Decorating Your Stunning Red Velvet Cake Dessert
- Tips for a Bakery Style Red Velvet Bundt
- Storage and Reheating Instructions for Red Velvet Bundt Cake
- Frequently Asked Questions About Red Velvet Bundt Cake
- Estimated Nutritional Data for Red Velvet Bundt Cake
Why This Moist Red Velvet Bundt Cake Recipe Works (Expert Tips)
There are so many box mixes out there, but they just can’t give you the true deep flavor and texture of a really great cake. If you want the moist red velvet bundt cake recipe that people talk about for weeks, you need to understand a couple of little secrets right up front. It’s all about chemistry, really! We rely on oil instead of all butter in the cake batter. Oil stays liquid at room temperature, which is exactly what makes the cake feel so incredibly tender and light when you bite into it—that’s key for a tender red velvet bundt.
Also, you’ll notice we bring in boiling water at the end. That hot liquid blooms the cocoa powder we’re using, waking up that rich chocolate flavor and deepening that classic red hue. It’s a game-changer, trust me.
Achieving That Perfect Tender Red Velvet Bundt Crumb
For the best texture, you cannot skimp on the buttermilk. It’s non-negotiable in my book! The acidity in the buttermilk reacts beautifully with the baking soda, giving us lift without making the cake too light and airy; we want that satisfying crumb. The oil keeps it soft, and the warm water deepens the flavor. Keep your mixing low and slow, especially once the flour goes in, and you’ll have a masterpiece that rivals any bakery.
Ingredients for the Best Red Velvet Bundt Cake
When it comes to baking something incredible like this, knowing exactly what you need before you start mixing is half the battle won. I’ve broken this down into two easy parts: what goes into the beautiful red cake batter, and what we need for that dreamy topping. Don’t look for any specialty flours or extracts here; these are all accessible ingredients you can grab on your next regular grocery run. Trust me, keeping these measured out makes the whole process so much smoother. If you want the full rundown on why these pairings create the ultimate cake, check out this great guide to making the perfect red velvet bundt cake!
For the Tender Red Velvet Bundt Cake Batter
- 1 3/4 cups all-purpose flour
- 1 3/4 cups granulated sugar
- 1 teaspoon baking soda
- 1 teaspoon salt
- 1 tablespoon unsweetened cocoa powder
- 2 large eggs
- 1 cup buttermilk
- 1 cup vegetable oil
- 1 teaspoon white vinegar
- 1 teaspoon vanilla extract
- 2 tablespoons red food coloring (liquid or gel)
- 1 cup boiling water
For the Tangy Cream Cheese Glaze for Bundt Cake
- 1/2 cup (1 stick) unsalted butter, softened
- 8 ounces cream cheese, softened
- 3 cups powdered sugar, sifted
- 1 teaspoon vanilla extract
- 1-2 tablespoons milk or heavy cream
How to Prepare Your From Scratch Red Velvet Bundt
Okay, now that we have our beautiful ingredients lined up, let’s bake this! Baking a grand cake like this in a bundt pan means preparation is everything. If you skip the greasing, you’ll turn this stunning dessert into a crumbly mess, and we absolutely can’t have that. My first rule, which I learned the hard way bringing home a failed prediction for a dessert one time, is to be overly generous with the pan prep. If you want that gorgeous, easy release that lets you show off the beautiful shape, you have to treat that pan like gold before anything goes in!
Remember, this batter is going to look very thin once we’re done mixing—that’s just the magic of the boiling water doing its job, so don’t panic! If you ever need a super fast treat to compare this amazing cake to, check out my five-minute option over at apple snickerdoodle dump cake.
Mixing the Red Velvet Bundt Cake Batter
First things first: heat the oven to 350°F (175°C) and get that 10-cup bundt pan greased and floured like your reputation depends on it. In your big bowl, whisk together all the dry stuff: the flour, sugar, baking soda, salt, and that cocoa powder. Set that aside.
In a separate bowl, mix all your wet things—eggs, buttermilk, oil, vinegar, vanilla, and all that bright red coloring—until it looks like a smooth, vibrant pool of velvet. Now, pour the wet mixture into the dry stuff. Mix this slowly, only until they just come together. I mean it: stop right there! Overmixing develops gluten, and that’s how you get a tough cake, not the tender red velvet bundt we are aiming for.
The final, most crucial step for that super-moist result is adding the cup of boiling water. Pour it in gently while mixing on low speed until it’s all smooth. Don’t whip it! The batter will be watery, but that’s exactly what it needs to be—that’s the secret making this a superior moist red velvet bundt cake recipe.
Baking and Cooling the Red Velvet Bundt Cake
Pour that lovely thin batter into your prepared pan and slide it into that 350°F oven. It usually takes between 45 and 55 minutes for this big cake to bake through. You know it’s done when a wooden skewer or toothpick you poke right into the center slides out clean, maybe with just a few moist crumbs clinging to it. Don’t let it overbake, or you’ll lose that beautiful moisture we worked so hard for!
Here’s the second big cooling tip: let it sit in the pan on a wire rack for exactly 15 minutes. This gives the outer edges time to firm up slightly so they don’t tear away when you flip it. After 15 minutes, carefully invert that pan onto the rack for the final cool-down. It has to be completely cool before we even think about that glaze!
Creating the Cream Cheese Glaze for Bundt Cake
The cake itself is rich and wonderful, but honestly, what is red velvet without that sharp, tangy counterbalance? That’s where this cream cheese glaze for bundt cake comes in. We’re not making a thick, heavy frosting here; we want a beautiful, flowing drizzle that sinks in just a little bit while still coating the top beautifully. This is so simple, but the softness of the cream cheese and butter is crucial—make sure they are truly room temperature soft, not melty!
Into your mixer go the softened butter and the cream cheese. Beat those until they look like whipped clouds; we want zero lumps before we add anything else. Then, we add the sifted powdered sugar slowly, maybe a cup at a time, making sure everything incorporates on low speed so you don’t end up with a sugar explosion all over your kitchen! If it looks too thick right away, grab your milk or cream and add it just a teaspoon at a time. You want it just thin enough to drip appealingly down the sides when you pour it.
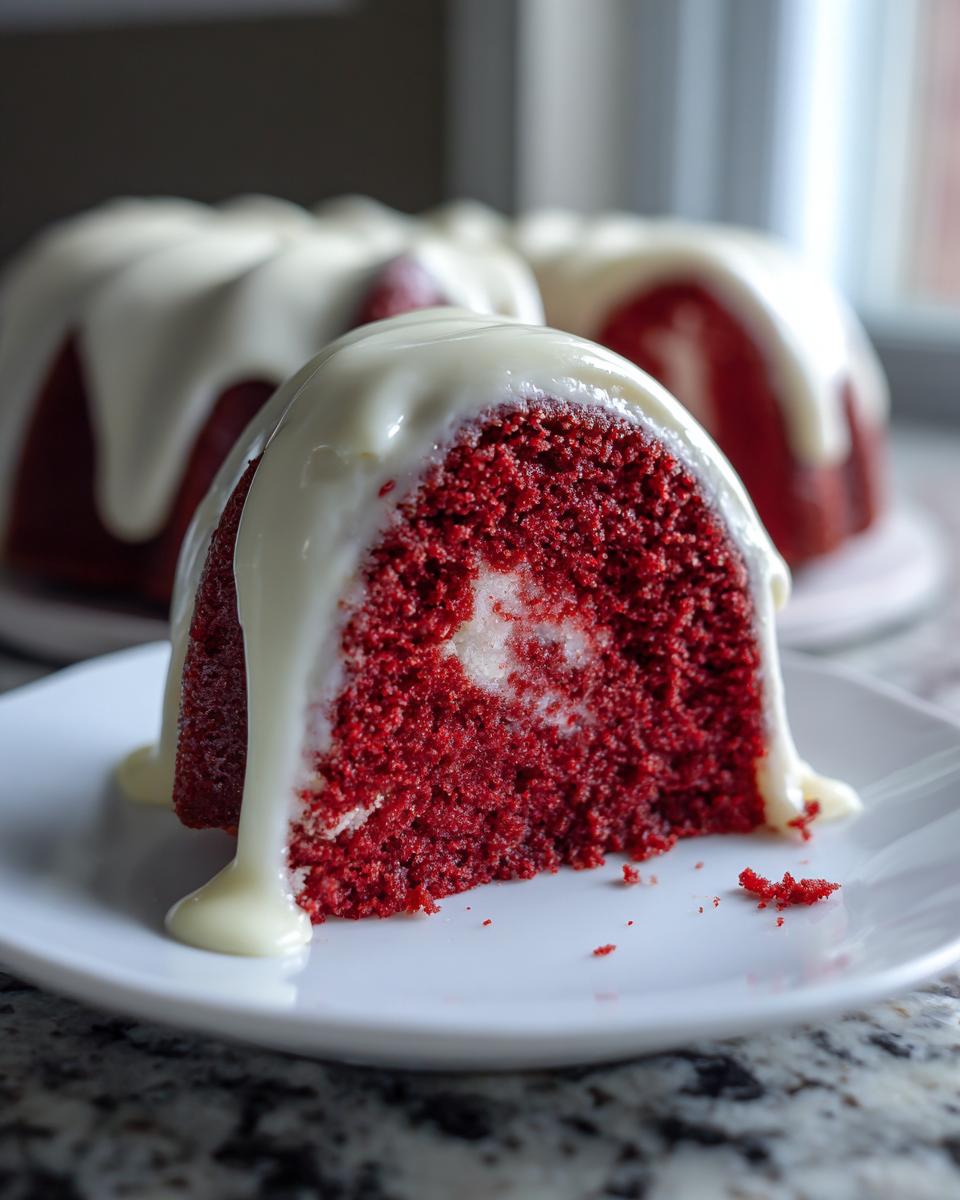
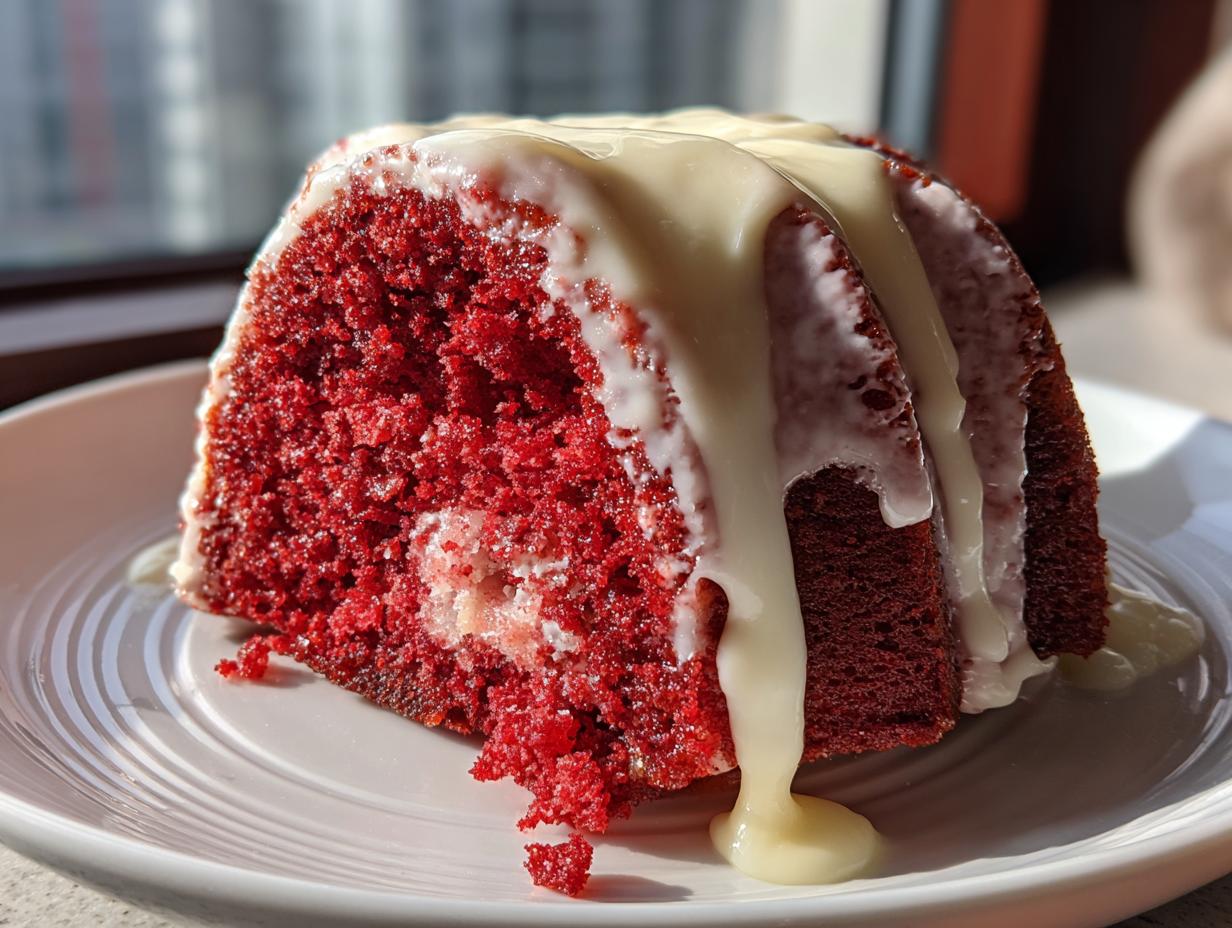
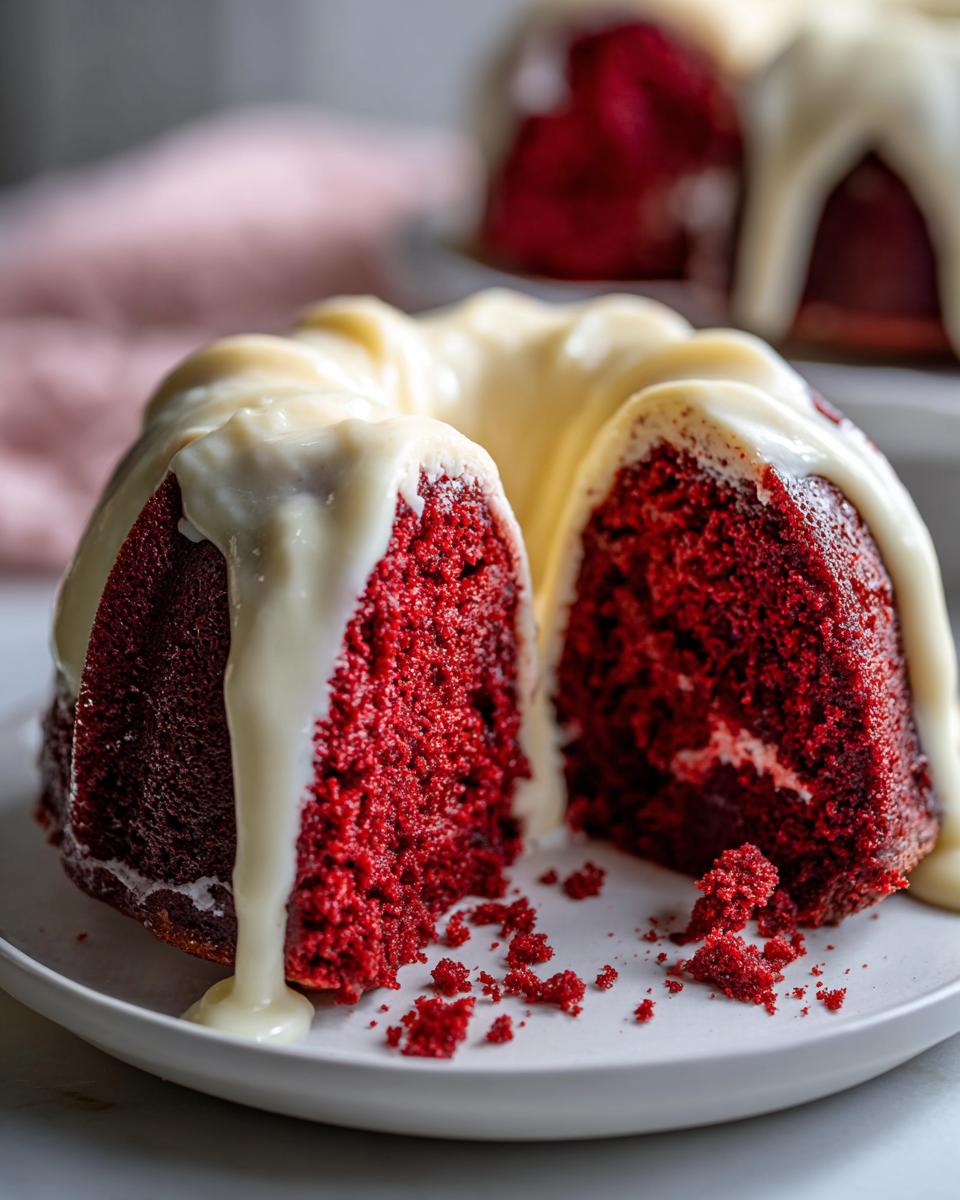
Decorating Your Stunning Red Velvet Cake Dessert
This is where all our hard work pays off! Once your red velvet bundt cake is completely, totally cool—and I mean room temperature, zero warmth left—it is time to decorate. If you try to glaze a warm cake, that beautiful cream cheese glaze will just melt right off and disappear into the cracks, which is definitely not the look we are going for. We want that gorgeous contrast!
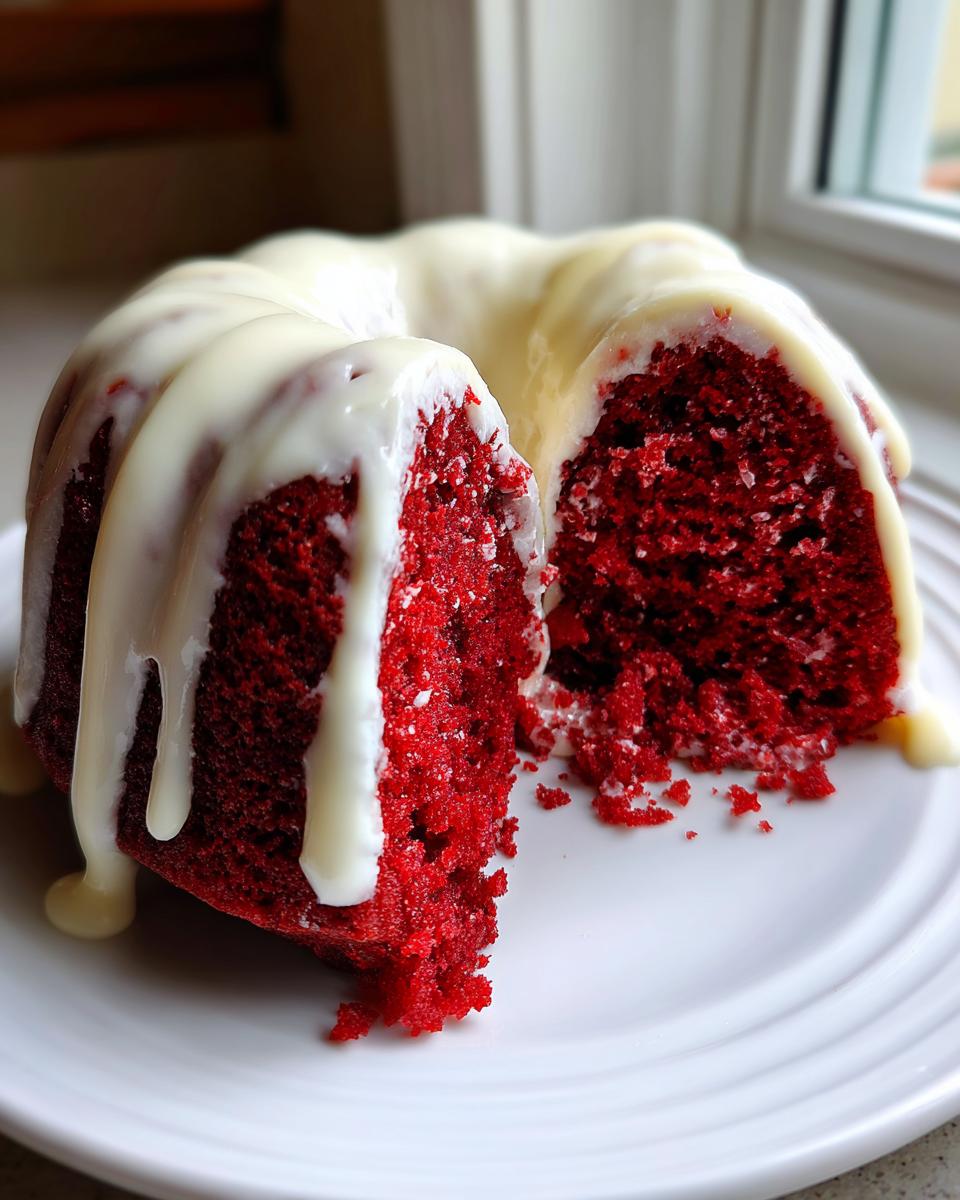
If you want the truly stunning red velvet cake dessert that everyone pins, a controlled drizzle is the way to go. You don’t need to totally flood the entire thing unless you want to—a nice, thick pour over the center that lets gravity create those appealing drips down the sides honestly looks spectacular. For inspiration on amazing finishing touches, you can always look at how others decorate their amazing cakes here: stunning and festive bundt desserts.
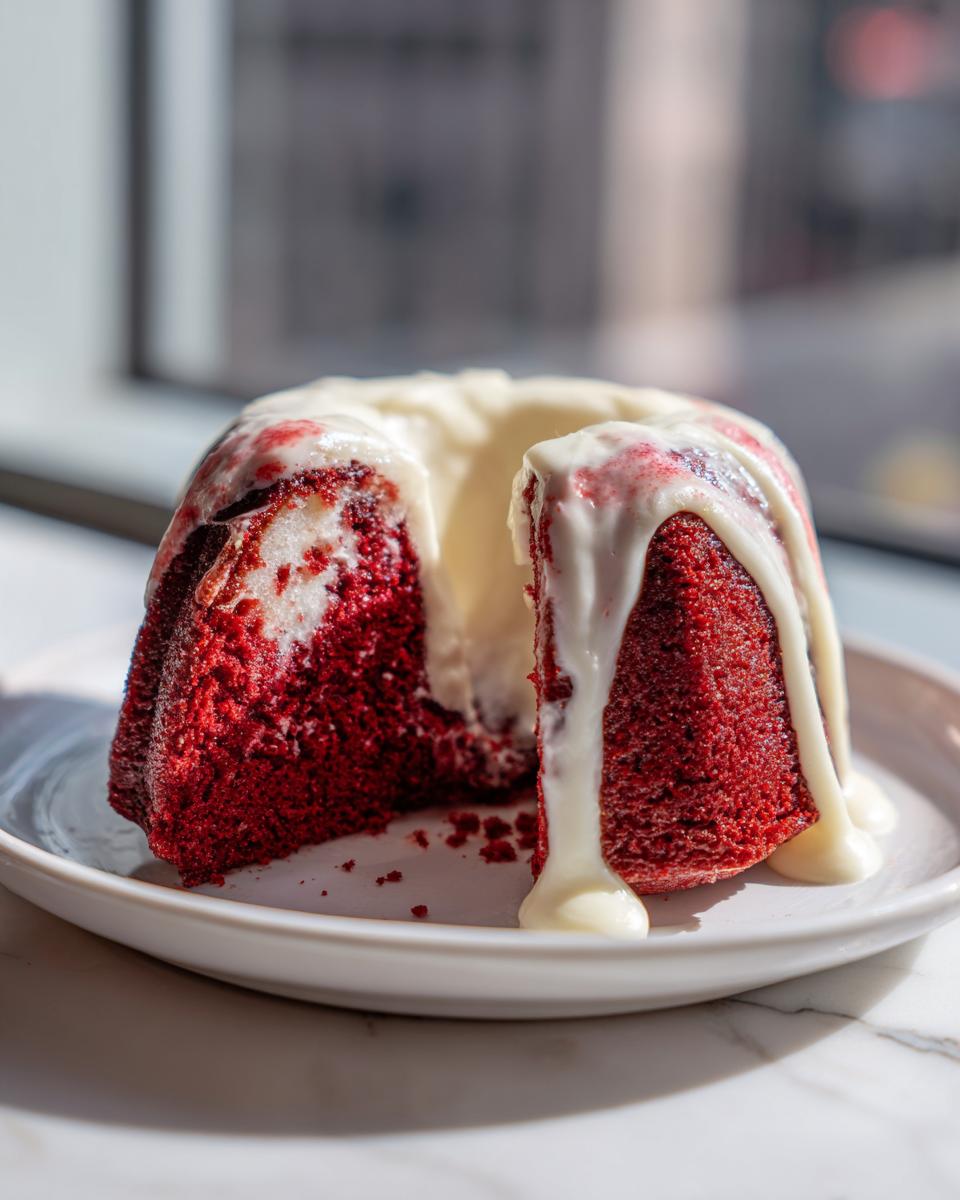
If you decide you want a full coating, just double up on the glaze recipe above and pour it slowly across the very top, using an offset spatula to nudge it toward the edges if needed. Either way, let that beautiful glaze set up for about 30 minutes before you slice into this showstopper. Enjoy the compliments coming your way!
Tips for a Bakery Style Red Velvet Bundt
If you want your cake to look like it came straight from one of those gorgeous little bakeries, it comes down to a few quick adjustments, even when using this tried-and-true recipe. To get that deep, dramatic color people expect from a true red velvet, always opt for a good quality gel food coloring over the standard liquid kind. The gel is more concentrated, so you get a richer hue without adding extra liquid to your delicate batter. This small change really helps secure that vibrant look essential for a bakery style red velvet bundt.
And remember how I stressed the buttermilk? That’s a non-negotiable for the flavor profile, but it’s also key for texture. Buttermilk keeps things reliably tender, which is another trademark of a high-end cake. Finally, the pan preparation isn’t just about preventing sticking; how well you grease and flour the nooks and crannies of that bundt pan dictates how crisp and beautiful your finished cake’s edges look when flipped out. Take your time there!
Storage and Reheating Instructions for Red Velvet Bundt Cake
Since we used real butter and cream cheese in that glorious glaze, this cake really needs to live in the fridge once it’s covered. Don’t let it sit out on the counter for more than two hours, especially if your kitchen runs warm! Pop it into an airtight container or cover it loosely with plastic wrap. When you’re ready to serve it the next day, pull out your slice about 30 minutes before you plan to eat it.
Bringing it back to room temperature lets the cake bloom again and softens that glaze just a little bit, which enhances the entire experience. If you’re in a rush, even 15 minutes sitting on the counter after refrigeration is better than eating it ice cold. It keeps beautifully for about four days this way!
Frequently Asked Questions About Red Velvet Bundt Cake
I know when you bring a gorgeous cake out of the pantry, you have questions! It’s good to be cautious, especially when you want that perfect texture and color. I’ve gathered up the things I get asked most often when people are preparing to bake this beauty for the first time. Let’s get all those little worries smoothed out before you start mixing.
Can I use milk instead of buttermilk in this red velvet bundt cake recipe?
Oh, I really wish I could say yes, but if you want true tenderness and that slight acidic tang that cuts through the sweetness, you need buttermilk. The acid in the buttermilk is what reacts chemically with the baking soda to give you the right lift and texture; regular milk just won’t do that job the same way. If you’re completely out, though, don’t stress! You can easily make your own substitute. Just take 1 cup of whole milk and stir in 1 tablespoon of white vinegar or lemon juice. Let it sit on the counter for about five to ten minutes until it curdles slightly—that’s your homemade buttermilk ready to go. You can find other handy substitutions over on my muffin recipe page that might help with other swaps!
How do I prevent my red velvet bundt cake from sticking to the pan?
This is the absolute number one fear for bundt bakers, I swear! If you don’t get this right, all that beautiful shape you worked so hard for gets stuck inside, and that’s just heartbreaking. We talked about greasing and flouring, but you have to be thorough, especially in those deep crevices. I coat the pan generously with softened butter or shortening first, making sure I get into every single groove using a pastry brush. Then, I dump in the flour and shake, shake, shake the pan until every buttered surface is coated. Tip: If you have baking spray that contains flour in it—sometimes called cake release spray—use that instead of just oil, as it creates a better barrier. That thorough preparation is what guarantees that clean, crisp reveal when you flip it!
What makes this the best red velvet bundt cake?
For me, what really sets this recipe apart and makes it the best red velvet bundt cake you’ll ever try is the combination of moisture agents and flavor boosters. We use oil, which keeps the crumb unbelievably soft long after other cakes have dried out. That little bit of cocoa combined with the boiling water ensures the chocolate flavor is rich, not muted. And finally, you can’t forget the glaze! That sharp, tangy cream cheese glaze drizzled right across the top is the perfect final act that balances all that richness. It’s the simple, tested techniques that elevate this from just ‘good’ to absolutely unforgettable.
Estimated Nutritional Data for Red Velvet Bundt Cake
I always like to include this section so you know exactly what you’re getting into when you serve up a slice of this beautiful cake. Keep in mind that baking is an art, and since we’re coming from scratch, these numbers are fantastic estimates based on the specific ingredients listed in this recipe, serving 12 people total. Things like the exact brand of food coloring or how thickly you pour that glaze can nudge these figures a little bit, but this gives you a strong baseline for what this incredible dessert contains!
- Serving Size: 1 slice
- Calories: 450
- Sugar: 55g
- Sodium: 320mg
- Fat: 24g
- Saturated Fat: 10g
- Unsaturated Fat: 14g
- Trans Fat: 0.5g
- Carbohydrates: 60g
- Fiber: 1g
- Protein: 4g
- Cholesterol: 65mg
This data is just an estimate to help you plan, of course, because the real measure of this cake is the joy it brings to the table! Don’t worry too much about the numbers when you’re making memories.
PrintMoist Red Velvet Bundt Cake with Tangy Cream Cheese Glaze
Create a stunning, moist red velvet bundt cake from scratch. This recipe delivers rich chocolate flavor and a tender crumb, finished with a simple, tangy cream cheese glaze perfect for any special occasion.
- Prep Time: 20 min
- Cook Time: 55 min
- Total Time: 1 hour 35 min
- Yield: 12 servings 1x
- Category: Dessert
- Method: Baking
- Cuisine: American
- Diet: Vegetarian
Ingredients
- 1 3/4 cups all-purpose flour
- 1 3/4 cups granulated sugar
- 1 teaspoon baking soda
- 1 teaspoon salt
- 1 tablespoon unsweetened cocoa powder
- 2 large eggs
- 1 cup buttermilk
- 1 cup vegetable oil
- 1 teaspoon white vinegar
- 1 teaspoon vanilla extract
- 2 tablespoons red food coloring (liquid or gel)
- 1 cup boiling water
- 1/2 cup (1 stick) unsalted butter, softened
- 8 ounces cream cheese, softened
- 3 cups powdered sugar, sifted
- 1 teaspoon vanilla extract
- 1–2 tablespoons milk or heavy cream
Instructions
- Preheat your oven to 350°F (175°C). Grease and flour a 10-cup bundt pan well. This step is important for easy release.
- In a large bowl, whisk together the flour, sugar, baking soda, salt, and cocoa powder. Set this dry mixture aside.
- In a separate medium bowl, whisk together the eggs, buttermilk, vegetable oil, vinegar, vanilla extract, and red food coloring until fully combined and the color is uniform.
- Pour the wet ingredients into the dry ingredients. Mix on low speed with an electric mixer until just combined. Do not overmix the batter.
- Carefully pour the boiling water into the batter and mix on low speed until smooth. The batter will be thin; this is correct and helps create a moist cake.
- Pour the batter evenly into the prepared bundt pan.
- Bake for 45 to 55 minutes, or until a wooden skewer inserted into the center comes out clean.
- Let the cake cool in the pan on a wire rack for 15 minutes. Then, invert the cake onto the wire rack to cool completely before glazing.
- Prepare the cream cheese glaze: In a medium bowl, beat the softened butter and cream cheese together until smooth and creamy.
- Gradually add the sifted powdered sugar, beating until incorporated. Add 1 teaspoon of vanilla extract and 1 to 2 tablespoons of milk or cream until you reach a thick, pourable consistency for your glaze.
- Once the cake is completely cool, drizzle the cream cheese glaze over the top, allowing it to drip down the sides. Let the glaze set before slicing and serving this beautiful bundt dessert.
Notes
- For the deepest red color, use a high-quality gel food coloring instead of liquid coloring.
- Buttermilk is essential for the classic tang and tender texture; do not substitute with regular milk if possible.
- To make a quick buttermilk substitute, add 1 tablespoon of white vinegar or lemon juice to 1 cup of whole milk and let it sit for 5 minutes before using.
- If you prefer a full coating instead of a drizzle, double the glaze recipe and pour it over the cooled cake in one smooth layer.
Nutrition
- Serving Size: 1 slice
- Calories: 450
- Sugar: 55g
- Sodium: 320mg
- Fat: 24g
- Saturated Fat: 10g
- Unsaturated Fat: 14g
- Trans Fat: 0.5g
- Carbohydrates: 60g
- Fiber: 1g
- Protein: 4g
- Cholesterol: 65mg