
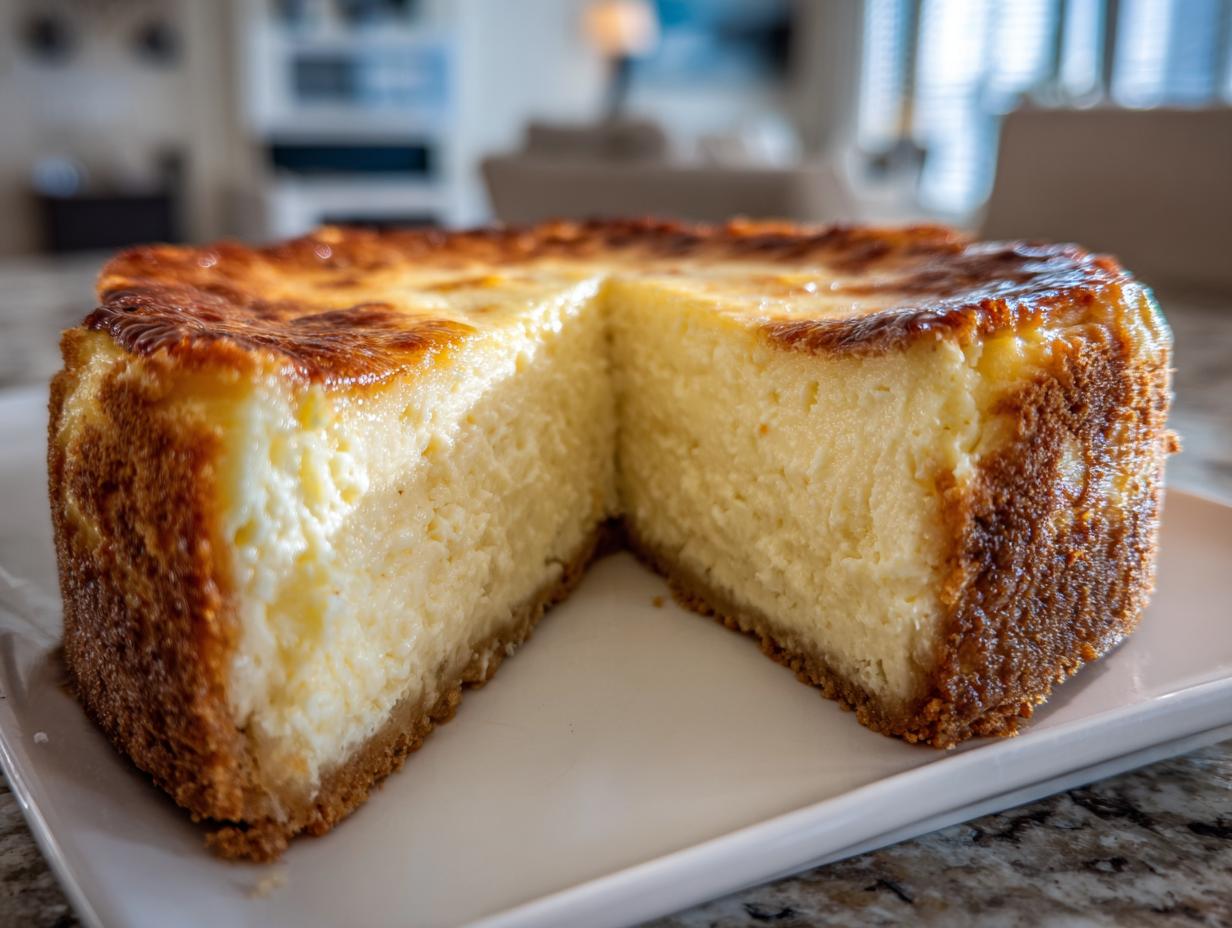
There is just something incredible about digging a spoon into a perfect dessert, isn’t there? That moment when you know you took simple ingredients and turned them into something truly luxurious—that’s what I live for in the kitchen. If you’ve ever scrolled through pictures of gorgeous, crack-free baked goods and thought, “I could never make that,” then I have wonderful news for you! Today, we are tackling the ultimate celebration bake: the cheesecake recipe.
Forget the stress! This isn’t just *any* recipe; this is my definitive guide to achieving that unbelievably creamy, dense, iconic New York style finish right in your own home. I spent countless hours in my kitchen, methodically breaking down the classic techniques—you know, that analytical mind I mentioned—to figure out exactly where things go wrong so you don’t have to worry. We’re stripping away the intimidation and focusing on the simple techniques that guarantee a flawless result. Trust me, once you master this, you’ll be making this rich dessert for every single gathering!
If you’re looking for an in-depth guide to getting that beautiful, tall, and creamy dessert every single time, stick right here. I’ll walk you through every single step, from the buttery base to the secret slow-cooling trick that keeps the top smooth. If you love classics, don’t forget to check out my guide on baking a phenomenal New York Cheesecake later on for a deeper dive into the history!
- Why This is the Ultimate Cheesecake Recipe for Creamy Results
- Gathering Ingredients for Your Classic Cheesecake Recipe
- Simple Cheesecake Instructions: Making the Graham Cracker Crust
- How to Prepare the Creamy Cheesecake Filling
- Baking Secrets for a No Crack Cheesecake Recipe
- Tips for Success with Your Homemade Cheesecake Recipe
- Storage and Reheating Instructions for the Cheesecake Recipe
- Frequently Asked Questions About This Cheesecake Recipe
- Nutritional Estimates for This Dessert
Why This is the Ultimate Cheesecake Recipe for Creamy Results
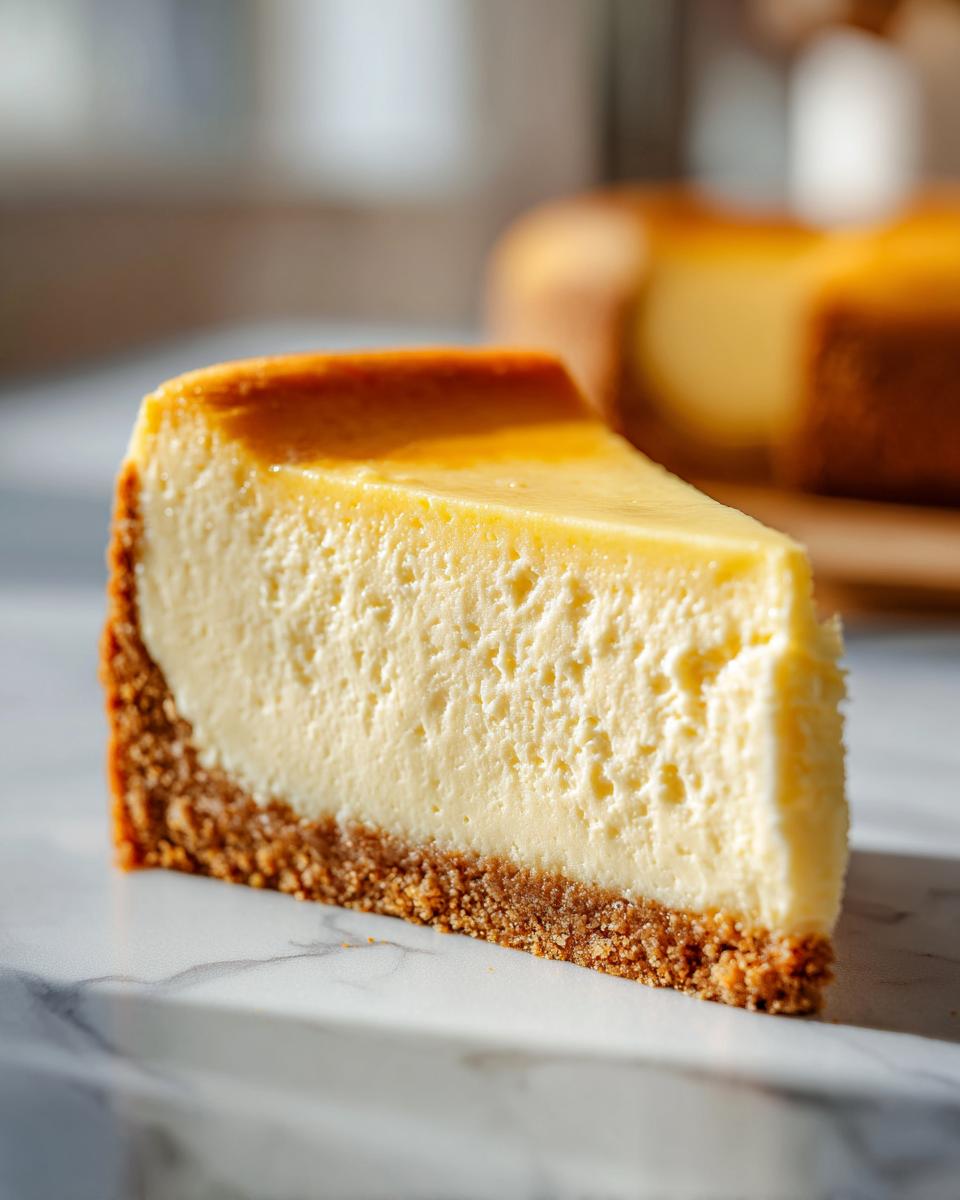
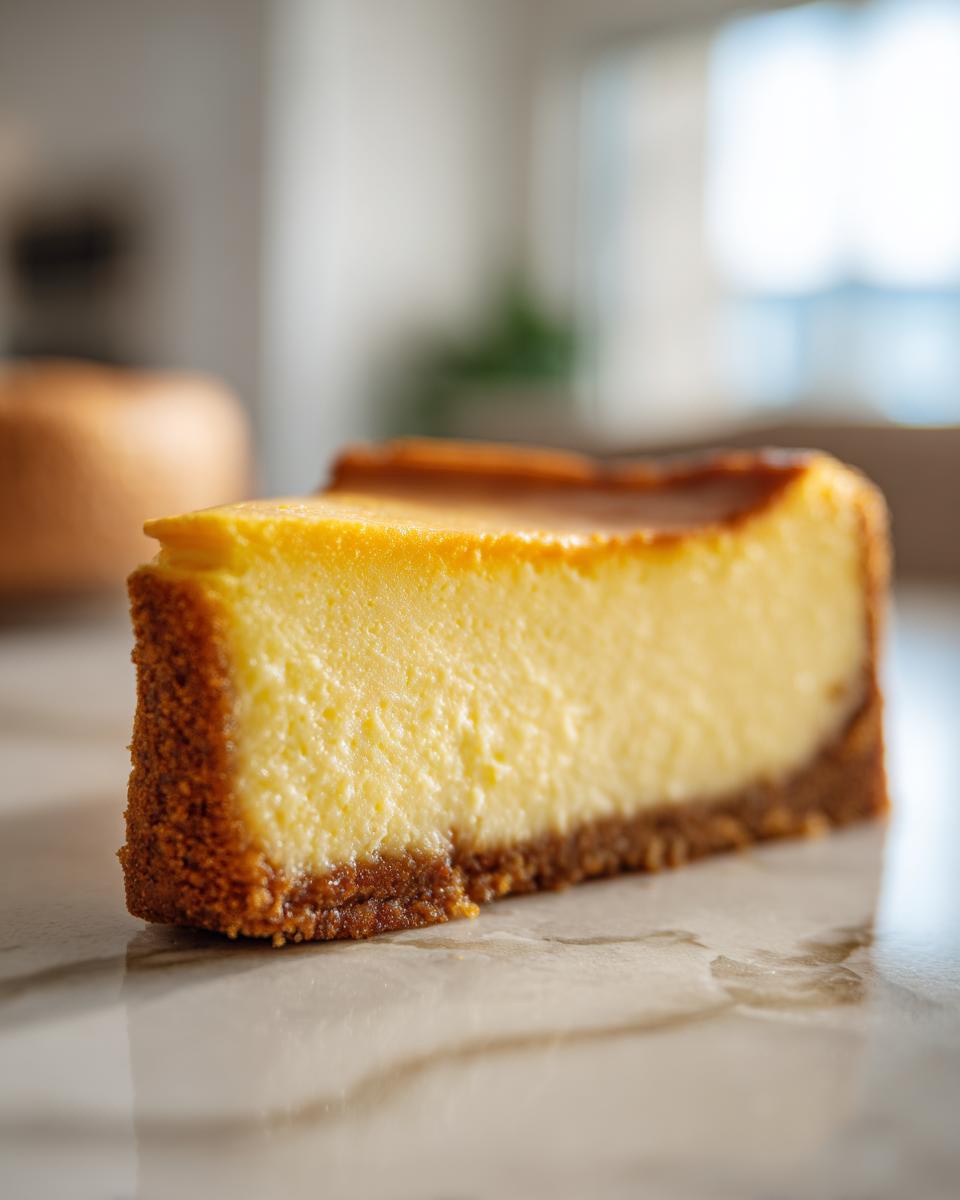
When you look at this recipe, you might wonder why it’s called the ultimate cheesecake recipe. It’s simple, really. I’ve dedicated serious time to figuring out exactly what creates that perfect, dense, and just slightly tangy filling that makes a New York cheesecake famous. Forget those grainy versions or, worse, the dreaded cracked top that sends shivers down a baker’s spine! My goal here is to deliver a consistently creamy cheesecake experience.
We aren’t just aiming for edible; we are aiming for show-stopping. This recipe is engineered to give you that perfect, smooth slice without having to cross your fingers while it bakes. If you’re worried about those common baking pitfalls, you’re in the right place. Learning the secrets to a truly flawless no crack cheesecake changes everything. We unlock that magic in the next few steps, but it starts right here with the filling prep! If you decide you want to try something totally different after this classic, be sure to check out my take on a great chocolate cheesecake recipe.
Kate’s Secret to a Velvety Texture Dessert
The absolute most important thing you can do for that velvety texture dessert is patience with your ingredients. Your cream cheese, eggs, and sour cream must be at true room temperature—I mean, fully soft! If they’re cold, they won’t combine smoothly, and you’ll have lumps. Secondly, when mixing, you need to treat that batter gently. We are not whipping up meringue here; we are just combining. Overmixing whips in air, and when that air expands in the oven, *thwack*—you get a crack! So mix low and slow!
Gathering Ingredients for Your Classic Cheesecake Recipe
Okay, the mixing technique is crucial, but you can’t mix magic out of thin air! That’s why we start with quality ingredients—accessible ones, because remember, this is real life, not a specialty food magazine shoot. Success in this classic cheesecake recipe is about having everything ready to go before your mixer even turns on. We need precision here so we don’t invite any temperature shocks into our filling later on!
You’ll need a 9-inch springform pan for this classic build. If you don’t have one, now might be the time to grab one, although you can check out butter cookie classic melt in your mouth recipe for alternative liner tricks later! For now, let’s get our list ready.
For the Graham Cracker Crust
- 1 1/2 cups graham cracker crumbs
- 1/4 cup granulated sugar (this firms up that crust!)
- 6 tablespoons unsalted butter, melted
For the Tangy Cheesecake Filling
- 4 (8 ounce) packages cream cheese, softened to true room temperature
- 1 1/2 cups granulated sugar
- 1/4 cup all-purpose flour (our secret helper for stability!)
- 1 teaspoon vanilla extract
- 1/4 teaspoon salt
- 4 large eggs (again, room temperature is non-negotiable!)
- 1/2 cup sour cream (this is what gives us that perfect tangy cheesecake finish)
Simple Cheesecake Instructions: Making the Graham Cracker Crust
Alright, let’s get our hands dirty! The foundation of any great dessert is just as important as the main event, and a crisp, buttery graham cracker crust makes all the difference here. Starting with a solid base means we avoid any sogginess later when we introduce that luscious filling. Think of this first part as setting the stage for our creamy masterpiece.
First things first: crank that oven up to 325 degrees F. While it’s warming up, you need to get that springform pan ready. I’m serious about this—wrap the outside of that 9-inch pan tightly, like you’re packing a precious gift, with heavy-duty aluminum foil. We’re aiming for leak-proof performance because the water bath comes later!
Now for the mixing. In a regular bowl—no special equipment needed, I promise!—combine those graham crumbs, the 1/4 cup of sugar for the crust, and those 6 tablespoons of melted butter. Stir it up until everything looks like wet sand. Press that mixture firmly into the bottom of your lined pan. You want it packed tight! Then, pop it into the oven to pre-bake for just 10 minutes. This small step sets the structure. If you want to see another recipe where a perfect base is key, check out my butter cookie classic melt in your mouth recipe! Once it’s baked, just pull it out and let it cool down a tiny bit while we work on the filling.
How to Prepare the Creamy Cheesecake Filling
Now for the star of the show—the filling! This step is where we lock in that smooth, rich quality that defines the best cheesecake recipe. Remember what I said about keeping things gentle? That advice rings especially true here. Grab your large bowl and an electric mixer, but get ready to use it sparingly!
First, beat that softened cream cheese until it’s completely smooth by itself. Seriously, scrape down the sides of that bowl several times. We want zero chunks right off the bat. Next, slowly beat in the 1 1/2 cups of sugar and the flour until it’s *just* combined. If you see flour streaks, that’s okay! Don’t go crazy trying to erase them.
This is the point where the magic—or the potential disaster—happens: the eggs. You must, and I mean *must*, add them one at a time. Mix just until you see the yolk disappear after each addition. If you dump them all in at once, you’re introducing too much air, and air likes to expand and crack your beautiful top surface when baking. It’s science, folks! Finish by gently stirring in the vanilla and salt, and fold in that sour cream. If you want to see how I handle delicate mixtures when making cookies, take a peek at my Italian Ricotta Cookies recipe for technique reminders!
Baking Secrets for a No Crack Cheesecake Recipe
Okay, we’ve mixed gently, we’ve wrapped our pan tight, and now we face the moment of truth: baking this beautiful New York cheesecake. I know the water bath sounds intimidating, like something only professionals do, but trust me, it’s the single most critical step for that signature creamy texture and avoiding surface disaster. Why do we do it? That hot water creates a steamy, humid environment in the oven, which means the cheesecake cooks evenly from the sides and bottom without drying out the top surface. If you’re curious about other great chefs’ takes on this dessert, you can see what Gordon Ramsay suggests!
Carefully set your foil-wrapped pan inside a larger roasting pan. Then, pour hot water into the outer roasting pan until it comes about halfway up the side of your cheesecake pan. Into the 325 degree oven it goes! Bake this beauty for 60 to 75 minutes. You aren’t looking for firm solidness; the edges should look set, but if you gently nudge the roasting pan, the very center—about a two-inch circle—should still have a little quiver, like Jell-O. That subtle jiggle means it’s perfect!
Here’s the final, non-negotiable secret to the no crack cheesecake: cooling it slowly. When the time is up, turn the oven OFF. Crack the door open just a tiny bit—a wooden spoon works great to prop it open—and just leave the cheesecake sitting in that cooling oven for a full hour. This controlled, gradual temperature drop is what prevents the sudden shrinking that causes cracks. If you’re looking for another rich dessert recipe that benefits from slow baking, definitely check out my guide for easy creamy chocolate fudge recipe! After that hour, remove it from the oven, take it out of the water bath, and let it finish cooling on a rack before chilling. It takes patience, but the result is priceless!
Tips for Success with Your Homemade Cheesecake Recipe
We’ve covered the big steps, but let’s quickly nail down the non-negotiables for achieving one of the best dessert recipes for parties—a consistently perfect cheesecake. First up: ingredient temperatures! I know I mentioned it, but I can’t stress this enough: room temperature cream cheese and eggs are your best friends for a lump-free, smooth batter.
Next, please, please use that water bath! It might seem like extra work, but it’s the insurance policy you need for a moist interior. That steam guarantees that wonderful dense, rich dessert recipes texture we’re aiming for. Finally, remember cooling isn’t just for leftovers; it’s part of the baking process. That hour inside the turned-off oven is the secret handshake that keeps the top beautiful and smooth. If you want another recipe that uses soft, spreadable ingredients beautifully, you have to try my ultimate whipped ricotta toast recipes!
Storage and Reheating Instructions for the Cheesecake Recipe
Patience is still required, even after baking! Once your beautiful cheesecake recipe is completely cool to the touch, it needs a long, undisturbed chill. I strongly recommend at least six hours of refrigerator time, but truly, overnight is where this dessert shines brightest. This allows the structure to fully set and deepens that creamy flavor.
When you’re ready to serve, run a thin, sharp knife carefully around the edge of the pan before you try to release the springform latch. This prevents sticking! If you have leftovers (if!), store them tightly covered in the fridge. It keeps wonderfully for about four days. Seriously, this is one of those rich dessert recipes that actually tastes better the next day!
Frequently Asked Questions About This Cheesecake Recipe
I know you’ve got questions before diving into a big bake like this! It’s totally normal, especially when you’re aiming for perfection on a classic like this cheesecake recipe. I’ve gathered the questions I hear most often from folks in my kitchen, and they usually boil down to fear of cracking, which we tackled in the baking section, but here are a few more common concerns!
If you’re looking for more advanced tips on perfecting creamy desserts, I really recommend checking out some techniques in my cottage cheese ice cream recipe post—it’s all about controlling texture!
Can I make this cheesecake without a water bath?
Oh, this is the million-dollar question! Look, you *can* make this cheesecake without the water bath, but I’m going to be straight with you: it significantly increases your risk of ending up with dried-out edges and some serious cracking. That water bath isn’t just for show; it’s the secret weapon for that super smooth, creamy cheesecake texture because it keeps the heat gentle and surrounding the dessert evenly. I always tell people, if you want the best result, don’t skip the water!
What is the best way to soften cream cheese for this recipe?
This is arguably as important as the water bath! You absolutely need room-temperature cream cheese. The best way? Take the four blocks out of the fridge at least an hour, maybe two, before you plan to mix. You want to be able to gently press your finger into the block and leave an indent without much effort. If you’re in a huge hurry, you can unwrap them and microwave them on 20% power for about 10 seconds total, but you have to be *so* careful not to melt the edges! Cold cheese equals lumpy filling, period.
If you want expert insights on how others achieve that perfect New York top, I found this interesting article exploring Tall and Creamy New York Cheesecake tips that might help solidify your confidence!
Nutritional Estimates for This Dessert
I always get asked about the calories in my desserts—and yes, this is absolutely a decadent treat! But remember, I’m a home cook sharing beloved recipes, not a certified nutritionist tracking every gram. So, consider this helpful information, but not gospel!
The nutritional data provided with this classic cheesecake recipe is only an estimate. Because we all use slightly different brands of cream cheese, different brands of graham crackers for the crust, and maybe you even add a little extra vanilla because you love it so much, the final tally will definitely shift a bit. Focus on the fact that this is a special occasion dessert made with love, and try not to worry too much about the numbers. Enjoy every rich, creamy bite!
PrintThe Best Classic New York Cheesecake Recipe
Create a rich, creamy, and velvety New York style cheesecake with a perfect graham cracker crust. This recipe guides you through the simple steps for a no-crack finish, making it the best dessert for any gathering.
- Prep Time: 25 min
- Cook Time: 75 min
- Total Time: 8 hours 40 min
- Yield: 12 servings 1x
- Category: Dessert
- Method: Baking
- Cuisine: American
- Diet: Vegetarian
Ingredients
- 1 1/2 cups graham cracker crumbs
- 1/4 cup granulated sugar (for crust)
- 6 tablespoons unsalted butter, melted
- 4 (8 ounce) packages cream cheese, softened
- 1 1/2 cups granulated sugar (for filling)
- 1/4 cup all-purpose flour
- 1 teaspoon vanilla extract
- 1/4 teaspoon salt
- 4 large eggs
- 1/2 cup sour cream
Instructions
- Preheat your oven to 325 degrees F. Wrap the outside of a 9-inch springform pan tightly with heavy-duty aluminum foil.
- Prepare the crust: Mix graham cracker crumbs, 1/4 cup sugar, and melted butter in a bowl until combined. Press the mixture firmly into the bottom of the prepared springform pan. Bake for 10 minutes. Remove from the oven and let it cool slightly.
- Prepare the filling: In a large bowl, beat the softened cream cheese with an electric mixer until smooth. Scrape down the sides of the bowl.
- Gradually beat in the 1 1/2 cups sugar and flour until just combined. Mix in the vanilla extract, salt, and sour cream. Do not overmix.
- Beat in the eggs one at a time, mixing only until each egg is incorporated. Overmixing adds air, which causes cracks.
- Pour the filling over the cooled crust. Place the springform pan inside a larger roasting pan.
- Create a water bath: Carefully pour hot water into the roasting pan until the water reaches halfway up the sides of the springform pan.
- Bake for 60 to 75 minutes. The edges should look set, but the center 2 inches should still jiggle slightly when gently shaken.
- Turn off the oven, crack the oven door open slightly, and let the cheesecake cool inside the oven for 1 hour. This slow cooling prevents cracking.
- Remove the cheesecake from the water bath and foil. Let it cool completely on a wire rack at room temperature.
- Chill the cheesecake in the refrigerator for at least 6 hours, or preferably overnight, before serving. Run a thin knife around the edge before releasing the springform side.
Notes
- Use room temperature ingredients for the filling to ensure a smooth, lump-free texture.
- The water bath is key to achieving a creamy, no-crack cheesecake by providing moist, even heat.
- Do not skip the slow cooling process inside the turned-off oven; this controls the temperature drop that causes the top to crack.
Nutrition
- Serving Size: 1 slice
- Calories: 450
- Sugar: 35g
- Sodium: 350mg
- Fat: 30g
- Saturated Fat: 18g
- Unsaturated Fat: 12g
- Trans Fat: 0.5g
- Carbohydrates: 40g
- Fiber: 1g
- Protein: 8g
- Cholesterol: 120mg