
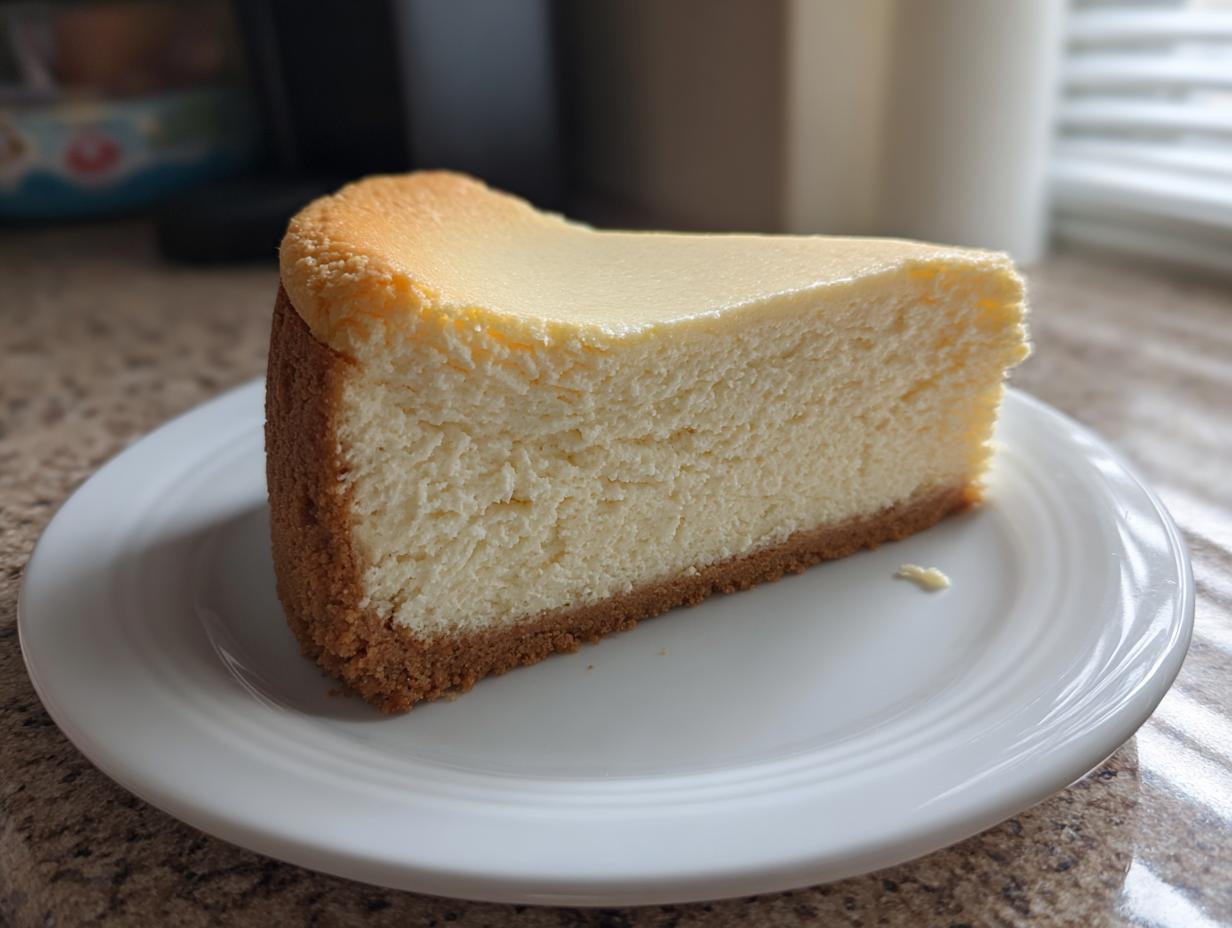
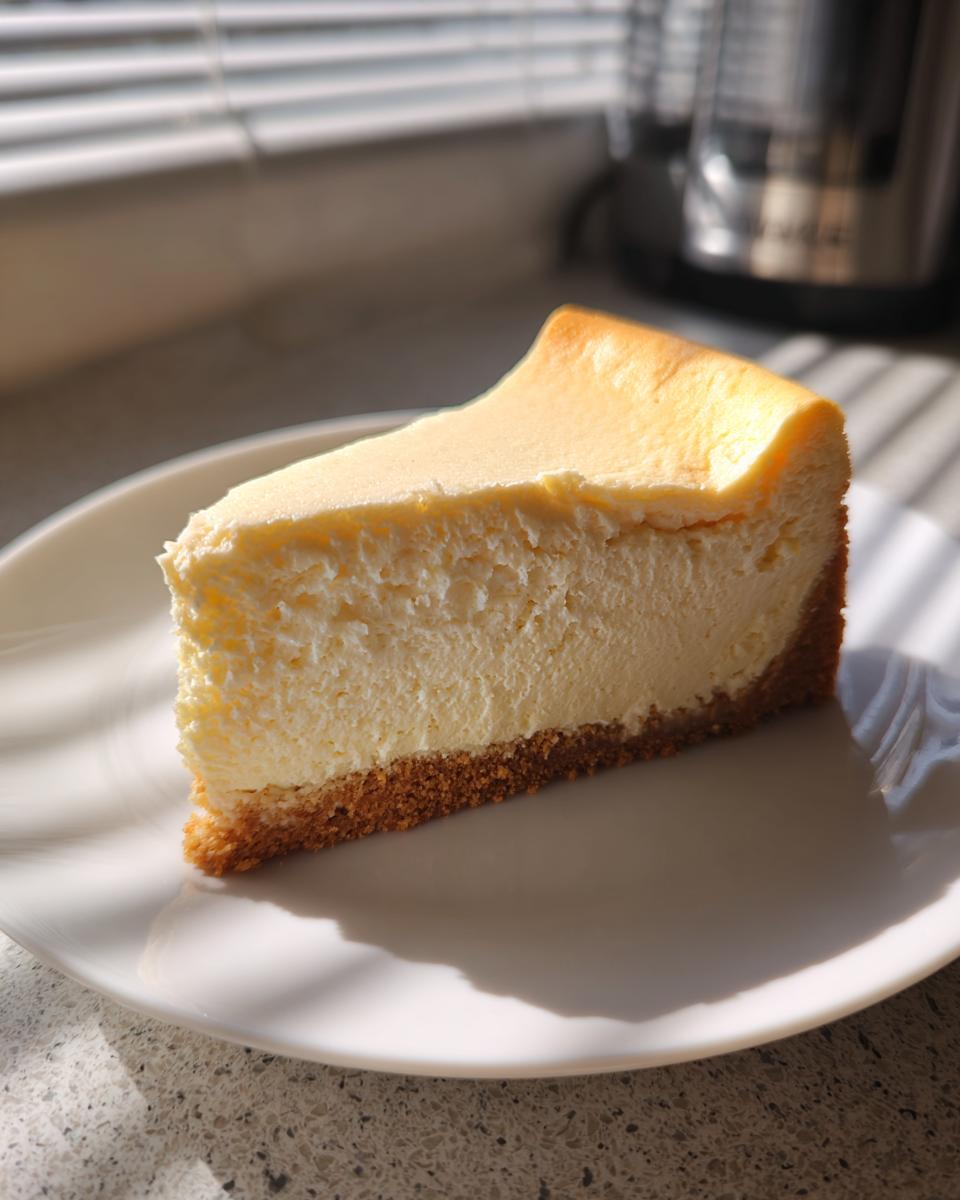
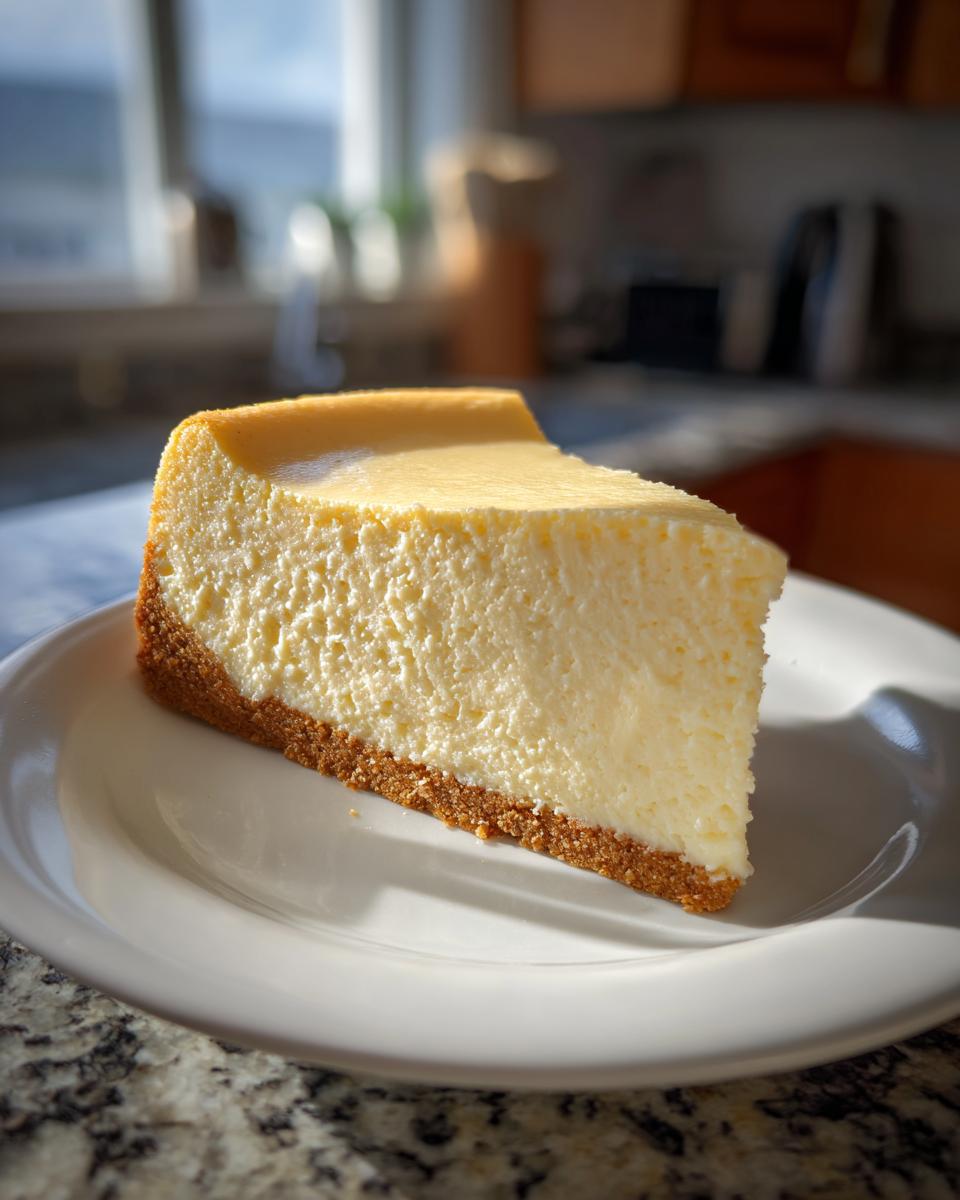
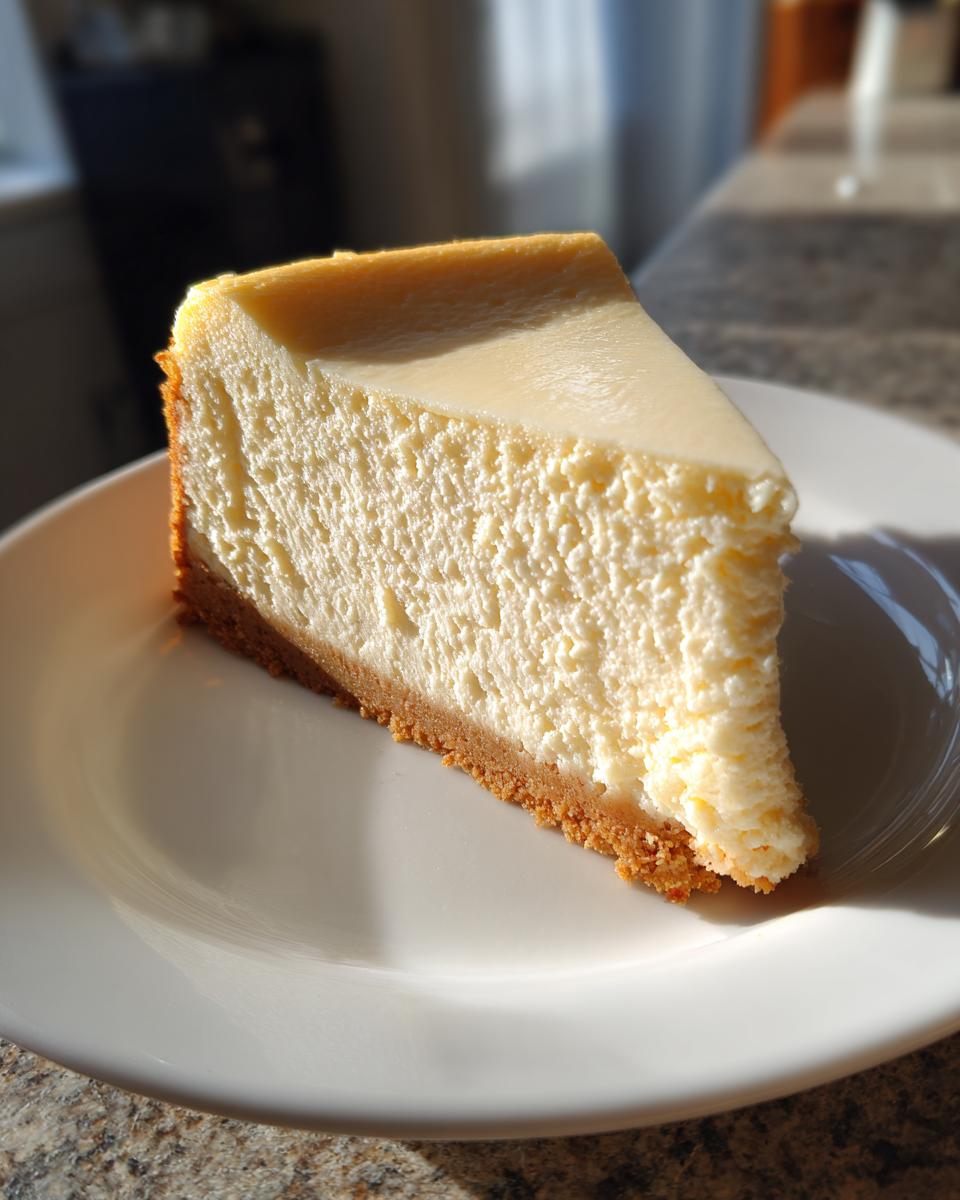
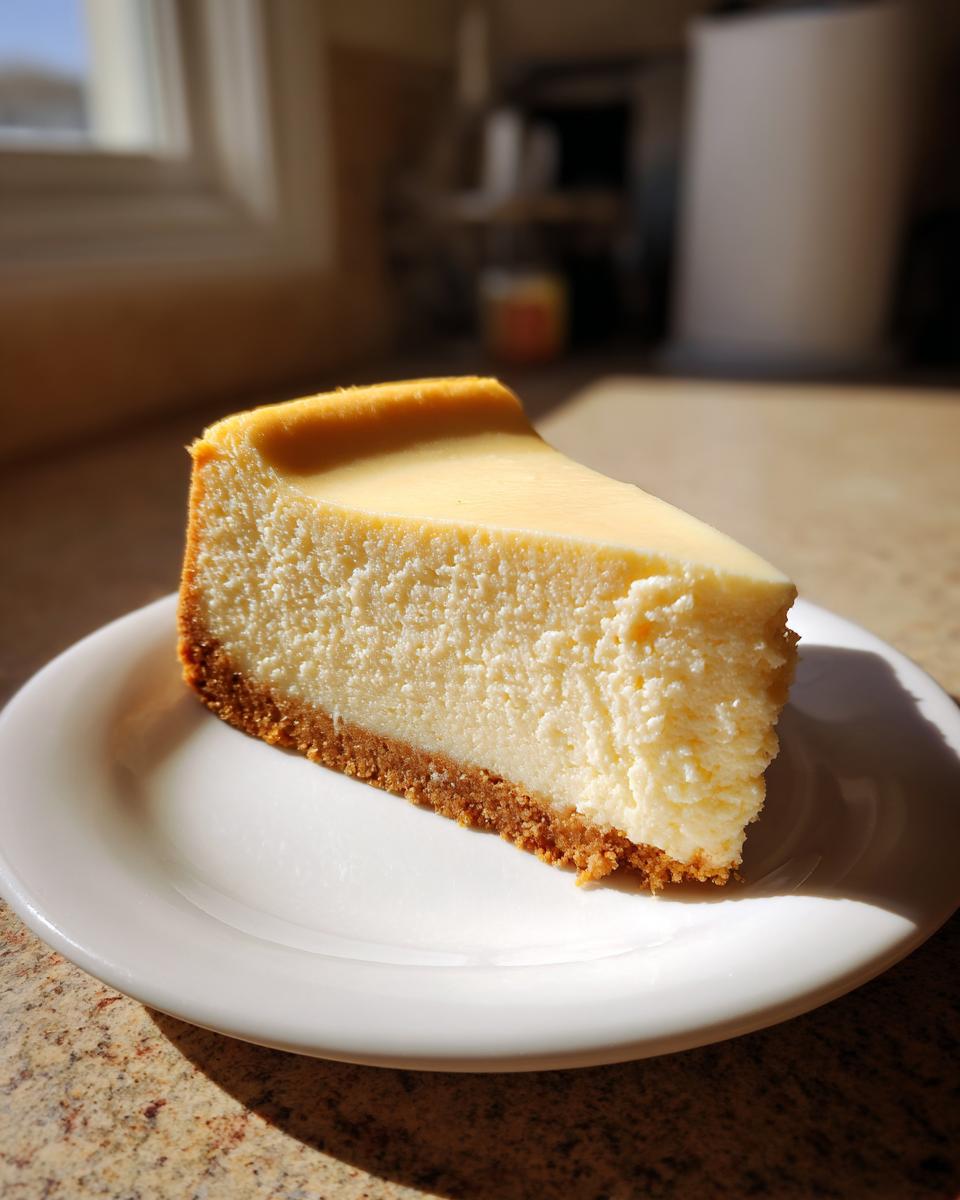
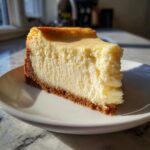
When I think about classic American desserts, nothing quite hits the spot like cheesecake. But let’s be honest: those towering, dense beauties from the city that never sleeps always felt a little intimidating back when I was just starting out in the kitchen. I spent years taking apart favorite recipes, trying to crack the code on achieving that distinctively rich, dense, and velvety texture without ending up with a giant crack down the middle. Well, friends, I’m happy to tell you that after countless batches, I’ve perfected our ultimate, foolproof new york cheesecake recipe. This is the one that delivers on every single promise, making you feel like a pastry pro! If you’re looking for something equally decadent but a bit chocolatey, check out my flourless chocolate cake recipe too.
My mission here at Taste This Plate has always been to demystify those ‘impossible’ recipes. This version? It’s solid, it’s foolproof, and it tastes absolutely decadent. Get ready for the creamiest slice you’ll ever make at home. You’ll want to bookmark this, especially if you’re planning a special occasion coming up!
- Why This Is Your Ultimate New York Cheesecake Recipe
- Gathering Ingredients for Your Homemade New York Style Cheesecake
- Step-by-Step Instructions for NYC Cheesecake From Scratch
- Expert Tips for a Flawless New York Cheesecake
- Making Ahead and Storing Your Classic New York Cheesecake Recipe
- Serving Suggestions for Your Special Occasion Cheesecake
- Frequently Asked Questions About This New York Cheesecake
- Estimating Nutrition for This Decadent Cheesecake Tutorial
- Share Your Baking Journey
Why This Is Your Ultimate New York Cheesecake Recipe
I know, I know—there are a million cheesecake recipes out there. But this one? It’s the one I bring out when the stakes are high. It’s the one that makes people ask if I bought it from that famous deli downtown. Why is it the ultimate? Because we focus not just on taste, but on technique, which is what turns good cheesecake into that signature dense cheesecake dessert.
We nail the essentials, so you don’t have to worry. If you’re looking for more impressive desserts, my mud pie is another winner!
- It guarantees that ultra-smooth, velvety texture that food critics rave about.
- We use simple techniques to ensure the crust is perfectly buttery and crisp.
- It results in a stable bake, meaning you get that impressive height without any sinking.
Honestly, if you stick to the steps, you’ll have a cheesecake that rivals any you’ve found online, like this wonderful creamy version.
Achieving the Perfect Rich Cheesecake Filling
The secret sauce for that famous New York tang and density comes down entirely to temperature and mixing order. You absolutely must use room temperature cream cheese—seriously, let it sit out for at least two hours. If it’s cold, it will create lumps, no matter how hard you beat it! We mix the cream cheese until it’s silken smooth before we even *think* about adding sugar. This builds that beautiful foundation for a truly rich cheesecake filling.
The Foolproof No Crack Cheesecake Guide
Cracks happen when the cake cools too fast and shrinks unevenly. We fight this with two crucial steps. First, the water bath! It surrounds the pan in gentle, moist heat, so the edges don’t get overdone while the center sets. Second, never pull it straight out! We leave the oven door cracked open for a full hour after turning the heat off. This slow transition is the key to making this the best creamy cheesecake recipe that stays perfectly intact. If you want to see how I approach other baked goods, check out my ultimate cheesecake guide for more tips!
Gathering Ingredients for Your Homemade New York Style Cheesecake
Okay, let’s talk about what you need to pull off this majestic dessert. When it comes to the best things in life, great ingredients matter, especially for something as pure as cheesecake. You don’t need a million fancy things; you just need the right building blocks prepared correctly. Remember what I always say? We focus on accessible, easy-to-find ingredients here. This isn’t the time to be substituting! I’ve broken down everything you need right here, split into the crust and the filling. Having this ready ahead of time makes the mixing part so much smoother. If you’re looking for other simple baking projects, my brown butter brownies are another must-try!
For the Buttery Graham Cracker Crust Cheesecake Base
This crust has to hold up to that massive, dense filling, so we don’t skimp on the butter! It needs to be firm and flavorful.
- 1 1/2 cups graham cracker crumbs (make sure they are finely ground!)
- 1/4 cup granulated sugar (just a hair to help it crisp up)
- 6 tablespoons unsalted butter, melted to smooth liquid
For the Best Creamy Cheesecake Recipe Filling
This section is where the magic—and the density—comes from. Pay close attention to the temperature notes in the next section, promise? These ingredients need to be cooperative!
- 4 (8 ounce) packages full-fat cream cheese, softened to room temperature (this is critical!)
- 1 1/2 cups granulated sugar (the main sweetener here)
- 1/4 cup all-purpose flour (this helps stabilize it beautifully)
- 1 teaspoon vanilla extract (the good stuff makes a difference!)
- 1/4 teaspoon salt (just a pinch to balance the sweetness)
- 4 large eggs, room temperature (again, temperature matters!)
- 1/2 cup sour cream, room temperature (for that signature tang)
Step-by-Step Instructions for NYC Cheesecake From Scratch
This is where we put all those perfectly tempered ingredients to work! Don’t rush this part, but also don’t overthink it. The goal here is smooth incorporation without beating in unnecessary air—that’s what causes the dreaded cracks when we try to make this NYC cheesecake from scratch. We want that signature texture, and I promise, following these steps is the secret to getting a result that rivals the best slice you might find, like the one detailed over at this amazing recipe.
Preparing the Pan and Baking the Crust
First things first, we need to protect our springform pan from the water bath. Take heavy-duty aluminum foil and wrap that 9-inch pan securely all around the bottom and up the sides—you need a good seal so no water seeps into the crust. Once wrapped, mix your crust ingredients and press them firmly into the bottom. Bake that crust at 350°F (175°C) for just 8 minutes. When it comes out, let it cool while you immediately drop your oven temperature down to 325°F (160°C). We need that lower, gentler heat for the main bake.
Mixing the Dense Cheesecake Dessert Batter
Grab your stand mixer or hand mixer, but keep the speed low! Start by beating that softened cream cheese alone until it’s absolutely velvety smooth. Scrape down the bowl—I mean *really* scrape it—so there are zero cold spots or lumps. Next, gently mix in the sugar, flour, vanilla, and salt until just blended. Now for the eggs: add them one at a time, only mixing until the yellow disappears after each addition. Finally, fold in the room-temperature sour cream last. That’s it! Stop mixing the second it looks uniform. We are aiming for a dense cheesecake dessert, not a fluffy mousse! Remember to check out my full thoughts on technique in my baking guide.
Baking and Slow Cooling Your New York Cheesecake
Carefully place your foil-wrapped pan into a larger roasting pan. Now, pour hot water into the roasting pan until it comes about one inch up the side of the cheesecake pan—that’s the water bath working its magic. Bake at 325°F (160°C) for 60 to 75 minutes. You want the edges set, but the very center should still have a slight jiggle, just like Jell-O if you nudge it gently. The cooling is vital for that no-crack finish! Turn the oven off completely, prop the door open just a smidge using a wooden spoon, and let the cheesecake sit in that warm oven for a full hour. Patience pays off tremendously here; it’s a key step in achieving that perfect creamy slice.
Expert Tips for a Flawless New York Cheesecake
Even with the best instructions, sometimes little hiccups happen in the kitchen, right? That’s okay! The difference between a good cheesecake and the best creamy cheesecake recipe you keep making forever comes down to understanding *why* we do certain things. I went through my grandmother’s old baking journals—even though she mostly made pies, her logic on temperature and texture applies—and pulled out the insider knowledge that truly makes this new york cheesecake shine.
These aren’t fancy tricks; they are the foundational techniques that stop common problems before they even start. If you’re looking for another comforting dish that’s almost impossible to mess up, try my crockpot potato soup!
Ingredient Temperature Matters for Velvety Cheesecake Dessert
I mentioned this before, but I need to hammer it home because it’s the number one reason people end up with chunky batter. Everything—the cream cheese, the eggs, the sour cream—needs to be brought to room temperature. When cold ingredients hit each other, they resist mixing evenly. We want that smooth, rich outcome, that true velvety cheesecake dessert sensation, not a strange mix of soft goo and hard lumps! If your cream cheese is too cold, it will clump up and refuse to blend properly, no matter how long you run the mixer. So, plan ahead and let those blocks sit out for at least two hours before you start.
The Secret to a Tall Creamy Cheesecake Recipe Finish
This applies to almost any batter you’re trying to keep smooth, but it’s crucial for the height of your cheesecake. Once you add the eggs, you need to switch into low gear, mentally and literally! The goal after the eggs go in is simple incorporation, nothing more. Beating the batter violently on high speed whips a ton of air into it. When the cake bakes, that trapped air expands in the oven, lifting the cake high. But as it cools, that air escapes, and POP! You get a sinkhole or a horrible crack.
By mixing gently, we keep the structure incredibly dense, which is what you want in a true New York style, and it vastly reduces the risk of cracks. You can see some great photos of success stories from others trying amazing versions, like this one they shared here, and they all follow that low-speed mixing rule!
Making Ahead and Storing Your Classic New York Cheesecake Recipe
Here is the part where I tell you that patience is truly the final, most delicious ingredient in this whole project. You just went through all that careful work—the wrapping, the slow bake, the hour-long oven cool-down—and you are *not* going to ruin that smooth texture by slicing into it too soon! For the absolute best flavor and the firmest, most sliceable texture, you need to treat this classic new york cheesecake recipe like a beautiful marathon, not a sprint.
I learned this the hard way bringing a slightly warm cheesecake to a party once. It looked… sad. It sort of slumped! Never again. The chilling time allows the cream cheese proteins to fully set up around the fat and moisture, creating that dense, luxurious mouthfeel we are aiming for.
You need to cover your cooled cheesecake loosely with plastic wrap—don’t press the wrap directly onto the surface, especially if you haven’t topped it yet, or you might accidentally leave marks! Then, it needs to chill in the refrigerator for a minimum of six hours. Honestly, though? Overnight is the golden standard. Twelve hours in the cold really transforms it into that perfect, firm slice.
If you’re making this ahead for a big event (which I highly recommend for any special occasion cheesecake), it keeps beautifully wrapped tightly in the fridge for up to four days. If you have any leftovers after that—which I doubt you will!—it freezes wonderfully. Just wrap it extra well in plastic wrap and then foil. To thaw, just move it slowly from the freezer to the fridge overnight. It comes out tasting just as incredible!
If you want another recipe that’s almost easier to prep ahead, you should definitely check out my recipe for no-bake Oreo balls. Sometimes you just need something simple waiting in the fridge!
Serving Suggestions for Your Special Occasion Cheesecake
This gorgeous, rich **new york cheesecake** stands proudly on its own, right? That’s the beauty of a classic! However, when you’re serving it up for a major event—a birthday, an anniversary, or maybe just that one Sunday when you deserve something truly spectacular—you might want a little flourish on top. The secret I’ve found is to keep the topping simple. We worked so hard to get that perfect tangy, creamy balance underneath; we don’t want a heavy sauce fighting with it!
If you’re looking for a light, fruity companion, I love something tart to cut through the richness. My go-to is often a homemade sour cherry topping. I usually pull out the cherries early in the season, but if you want a quick version, a high-quality jar of tart cherry preserves that you just warm up slightly does the trick. Check out my notes on my cherry cake recipe for how I prepare the fruit if you want to make your own.
For true purists, sometimes you just need something elegant and minimal. Dusting it lightly with high-quality cocoa powder or a tiny sprinkle of fresh citrus zest (lemon or orange) brightens up the whole experience without adding any extra texture to worry about.
And if you want decadence? A drizzle of dark chocolate ganache is totally acceptable, or even a simple, thin caramel sauce. Just remember, less is often more when you’ve already achieved that ultimate, creamy New York flavor profile. You can see how some folks like to top their masterpieces over on this creamy recipe site, too!
Frequently Asked Questions About This New York Cheesecake
I know you have questions! When you’re making something as iconic as a proper New York Cheesecake, you want to make sure you get it right every single time. I’ve gathered the big ones here—the ones readers ask me about most often after they’ve tried baking my recipe for the first time. Don’t worry if you’ve struggled before; we’re going to conquer those common cheesecake hurdles together!
If you’re looking for another showstopper that’s fun to assemble, you absolutely have to try my chocolate caramel toffee crunch cake next time.
Can I skip the water bath when making this easy new york cheesecake?
My answer, straight up? You really shouldn’t. While technically you *can* skip it, honestly, if you skip the water bath with this recipe, you’re taking a massive gamble with your beautiful batter. The water bath provides gentle, overall heat, which keeps the edges from cooking faster than the center. Without it, you’re much more likely to get dry edges and, yes, those painful cracks. The water bath is the single most important step for achieving that signature texture that makes this the best creamy cheesecake recipe.
What is the best way to get a rich cheesecake filling without lumps?
This goes back to my favorite lesson: ingredient temperature is everything! The richness of the final product depends on that smooth blend. You must ensure your cream cheese is completely, 100% room temperature—soft enough that you press your finger into it, and it sinks in without resistance. Beat that cream cheese *alone* until it is visibly satiny and smooth before you introduce any sugar or eggs. That pre-beating step is critical for transforming blocks of cheese into that luxurious, rich cheesecake filling you’ve been dreaming about!
Estimating Nutrition for This Decadent Cheesecake Tutorial
Now, before we wrap up this incredible baking adventure, let’s quickly touch on the numbers. I always like to include this because, let’s face it, something this decadent usually isn’t ‘diet food,’ but I believe in being honest about what we’re enjoying! These figures are just estimates based on the top-quality, full-fat ingredients we used to create that incredible rich cheesecake filling. Keep in mind, since this is a true new york cheesecake made from scratch, your exact numbers might vary slightly based on brands used.
If you want something a little lighter perhaps, you can always try my carrot cake muffins next time! But for this truly decadent cheesecake tutorial, here is what you can generally expect per slice:
- Serving Size: 1 slice
- Calories: 450
- Total Fat: 30g (Saturated Fat: 18g)
- Carbohydrates: 40g (Sugar: 35g)
- Protein: 8g
- Cholesterol: 120mg
See? Totally indulgent! That high fat content, which comes from that gorgeous cream cheese and butter, is what gives us that beautiful, dense structure we worked so hard for. Don’t sweat the small stuff when something tastes this good on a special occasion!
Share Your Baking Journey
And just like that, you’ve created a masterpiece! Seriously, whether this is your first time venturing into the world of new york cheesecake or you’re already a seasoned baker, I truly want to hear how it went for you. Hearing about your success is honestly the best part of my job here at Taste This Plate. It proves that baking delicious, impressive desserts like this ultimate cheesecake recipe doesn’t have to be complicated!
Did you manage to keep everything at room temperature? Did you get that perfect Jell-O jiggle in the center before turning off the oven? Did your family crowd the kitchen waiting for it to chill overnight? Tell me everything!
Please take a moment to leave your thoughts and, if you can, give this recipe a rating right here on the page. Your feedback helps other cooks feel confident tackling this classic next. And if you snapped a picture of your beautiful, tall, creamy creation, I’d be thrilled if you shared it on social media and tagged us. Knowing I played a small part in creating happiness around your table is exactly why I started this mission.
If you’re already thinking about what to tackle next, you can read a little more about my own kitchen philosophy over on my About Page. Happy baking, everyone! I can’t wait to see those gorgeous slices. If you’re curious, you can always compare notes on other fantastic recipes people are making, like this highly-rated one here!
PrintThe Ultimate Classic New York Cheesecake Recipe for a Creamy, Dense Dessert
Make a rich, dense, and velvety New York Cheesecake from scratch with this foolproof recipe. It features a buttery graham cracker crust and a smooth, tangy filling that guarantees a perfect, no-crack result every time you bake.
- Prep Time: 25 min
- Cook Time: 75 min
- Total Time: 13 hours 40 min
- Yield: 12 servings 1x
- Category: Dessert
- Method: Baking (Water Bath)
- Cuisine: American
- Diet: Vegetarian
Ingredients
- 1 1/2 cups graham cracker crumbs
- 1/4 cup granulated sugar (for crust)
- 6 tablespoons unsalted butter, melted
- 4 (8 ounce) packages full-fat cream cheese, softened to room temperature
- 1 1/2 cups granulated sugar (for filling)
- 1/4 cup all-purpose flour
- 1 teaspoon vanilla extract
- 1/4 teaspoon salt
- 4 large eggs, room temperature
- 1/2 cup sour cream, room temperature
Instructions
- Prepare your springform pan: Wrap the outside bottom and sides of a 9-inch springform pan tightly with heavy-duty aluminum foil to prevent water from entering during the water bath.
- Make the crust: In a medium bowl, mix the graham cracker crumbs, 1/4 cup sugar, and melted butter until evenly moistened. Press the mixture firmly and evenly into the bottom of the prepared springform pan. Bake the crust at 350°F (175°C) for 8 minutes. Remove and let it cool while you prepare the filling. Reduce the oven temperature to 325°F (160°C).
- Prepare the water bath: Place the foil-wrapped springform pan inside a larger roasting pan.
- Make the filling: In a large bowl, using an electric mixer on medium speed, beat the softened cream cheese until completely smooth, about 3 minutes. Scrape down the sides of the bowl frequently.
- Gradually beat in the 1 1/2 cups sugar, flour, vanilla extract, and salt until just combined. Do not overmix.
- Add the eggs one at a time, beating only until each egg is incorporated before adding the next. Mix in the sour cream last, mixing just until the batter is smooth.
- Pour the filling over the cooled crust in the springform pan.
- Bake: Carefully place the roasting pan with the cheesecake into the oven. Pour hot water into the roasting pan until it reaches about 1 inch up the side of the springform pan. Bake at 325°F (160°C) for 60 to 75 minutes. The edges should look set, but the center 2 inches should still jiggle slightly when the pan is gently nudged.
- Cool slowly: Turn off the oven, but leave the cheesecake inside with the oven door propped open slightly (use a wooden spoon) for 1 hour. This slow cooling prevents cracking.
- Chill: Remove the cheesecake from the water bath and let it cool completely on a wire rack. Once cool, cover loosely with plastic wrap and refrigerate for at least 6 hours, or preferably overnight, before serving.
- To serve, run a thin knife around the edge before releasing the springform side.
Notes
- Use room temperature ingredients for the filling; this prevents lumps and ensures a smooth, velvety texture.
- Do not beat the batter on high speed or for too long once the eggs are added; excess air causes cracks during cooling.
- For the best flavor and densest texture, chill the cheesecake for a full 12 hours before slicing.
Nutrition
- Serving Size: 1 slice
- Calories: 450
- Sugar: 35g
- Sodium: 350mg
- Fat: 30g
- Saturated Fat: 18g
- Unsaturated Fat: 12g
- Trans Fat: 0.5g
- Carbohydrates: 40g
- Fiber: 1g
- Protein: 8g
- Cholesterol: 120mg