
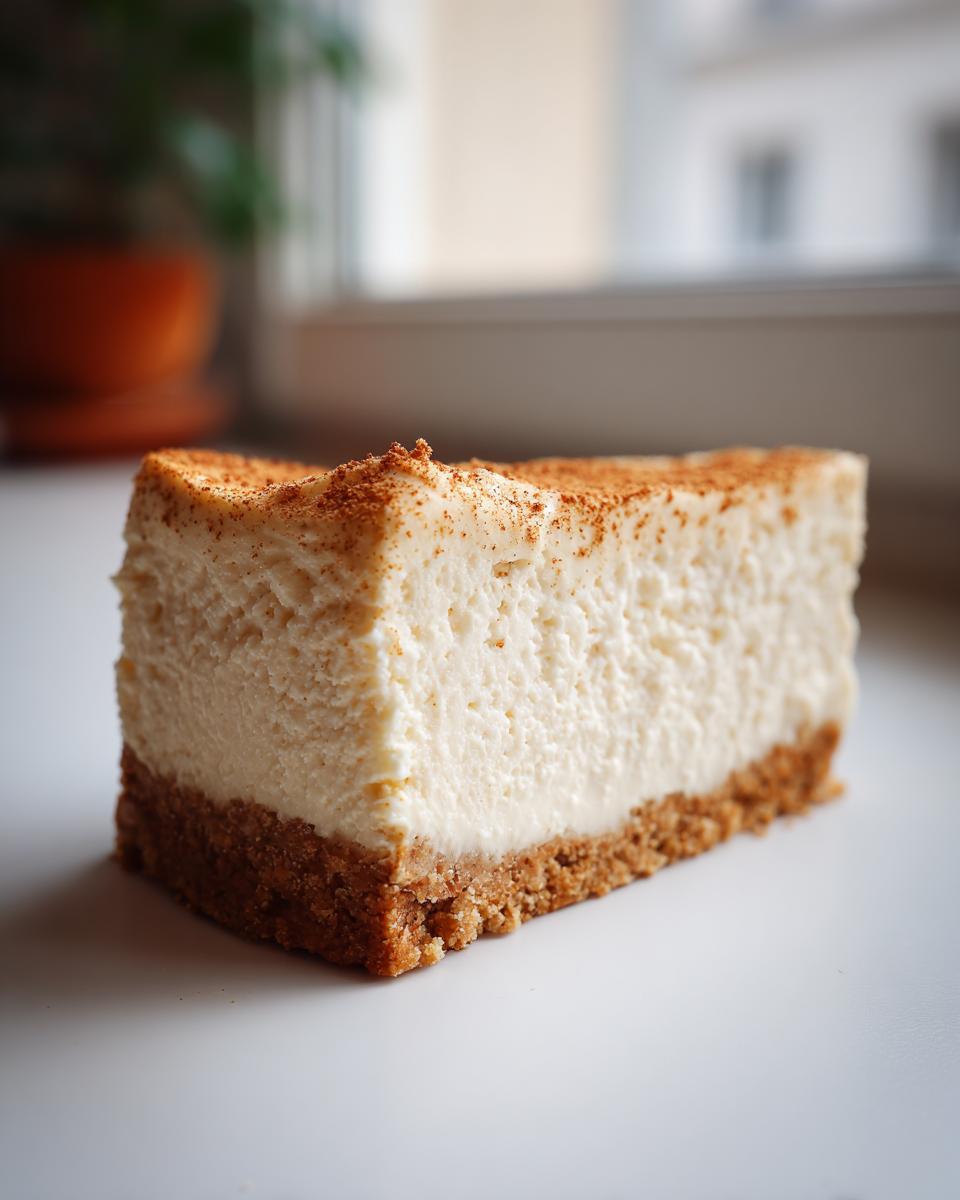
If you’ve ever thought making a real, decadent dessert like the ultimate white chocolate cheesecake meant wrestling with a water bath and praying it doesn’t crack, then I have fantastic news for you! I believe the best memories are made when we aren’t stressed out in the kitchen, and that’s exactly what this recipe delivers: pure, luxurious indulgence without the fuss.
I spent ages testing and re-testing this recipe until I landed on this foolproof method. This is my approach for achieving that unbelievably rich, smooth, and creamy cheesecake texture, even when going completely water bath free. Trust me, this luxurious dessert will become your new go-to for holidays or when you just need something truly special. You can find more of my favorite sweet treats over here at our desserts page!
- Why You Will Create the Best White Chocolate Cheesecake
- Gathering Ingredients for Your Creamy White Chocolate Cheesecake Recipe
- Step-by-Step Instructions for Your Baked White Chocolate Cheesecake
- Tips for a Perfectly Silky Cheesecake Success
- Creative Variations for Your White Chocolate Cheesecake
- Serving Suggestions for Your Showstopper White Chocolate Cheesecake
- Storage and Reheating for Leftover White Chocolate Cheesecake
- Frequently Asked Questions About Making White Chocolate Cheesecake
- Nutritional Estimates for This Decadent Dessert
Why You Will Create the Best White Chocolate Cheesecake
I know, I know, everyone promises the “best” recipe, but this white chocolate cheesecake is different. I took all the headache out of baking so you get that showstopper look and taste without any fancy tricks. Here’s why this recipe is going straight into your favorites folder:
- Seriously Creamy Texture: We use the right ratio of sour cream and high-quality white chocolate to guarantee a silky, smooth cheesecake filling that melts in your mouth. No grainy bits here!
- The Magic of No Water Bath: You read that right—no messy pans full of hot water to deal with! We use a simple, slow-cooling technique in the oven to prevent those dreaded cracks. This makes it the easiest cheesecake recipe even for your first try.
- Rich Flavor Without Overpowering Sweetness: The white chocolate gives that luscious sweetness, but the hint of vanilla and salt balances it perfectly. It’s decadent without being cloying.
- A True From Scratch Cheesecake Experience: You control every step, ensuring you get a dense, luxurious base and a perfectly set top every single time. It feels gourmet, but the steps are simple.
- Perfect for Any Occasion: Whether it’s a quiet weekend indulgence or a big holiday cheesecake gathering, this dessert is built to impress.
Gathering Ingredients for Your Creamy White Chocolate Cheesecake Recipe
Okay, friend, let’s talk ingredients. For a white chocolate cheesecake this good—a truly creamy cheesecake that sets up beautifully without any oven drama—quality matters, especially when it comes to that gorgeous white chocolate. I can’t stress this enough: everything dairy needs to be at true room temperature. I mean it! If your cream cheese is cold, you’re going to get lumps, and we simply can’t have lumps in this velvety dream.
Also, try to use a good quality white chocolate bar instead of chips if you can. The chips have extra stabilizers, and we want pure, smooth richness. This recipe is simple, but those small details—like making sure your melted chocolate is only slightly cooled before adding—are what turn a good cheesecake into an unforgettable experience. You can grab some inspiration for other treats over here if you’re feeling ambitious later!
For the Crust
- 1 1/2 cups graham cracker crumbs
- 1/4 cup granulated sugar
- 6 tablespoons unsalted butter, melted
For the Smooth Cheesecake Filling
- 3 (8 ounce) packages full-fat cream cheese, softened
- 1 1/2 cups granulated sugar
- 1 teaspoon vanilla extract
- 1/4 teaspoon salt
- 1 cup sour cream, room temperature
- 12 ounces high-quality white chocolate, melted and slightly cooled
- 4 large eggs, room temperature
- Optional: Raspberry sauce or fresh berries for topping
Step-by-Step Instructions for Your Baked White Chocolate Cheesecake
Now that we have our beautiful ingredients ready, let’s get assembling this white chocolate cheesecake!
Preparing the Crust and Oven Setup
First things first: water protection! Even though we’re skipping the dreaded water bath, wrapping the outside bottom and sides of your 9-inch springform pan tightly with heavy-duty foil is just good insurance. Don’t skimp on this part. Next, mix up your crust ingredients and press that mixture firmly into the bottom of the pan. Pop it into a 350°F (175°C) oven for 10 minutes. Once it’s done that quick pre-bake, take it out, let it cool just a touch, and drop your oven temperature down to 325°F (160°C). We’re setting the stage now!
Creating the Decadent White Chocolate Cheesecake Batter
You need to melt that 12 ounces of white chocolate until it’s totally silky smooth, and then you *must* let it cool down a bit before adding it to the cheese mixture. If it’s hot, it’ll cook your eggs, and we don’t want that! In a large bowl, beat your softened cream cheese with the main sugar, vanilla, and salt until there are absolutely no lumps left—that’s the secret to a smooth cheesecake filling. Beat in the sour cream gently. Then, slowly drizzle in that slightly cooled chocolate and mix on low. Finally, add your room-temperature eggs one at a time, mixing only until it just disappears. Seriously, keep that mixer on low speed; introducing too much air here is what causes cracks later!
Baking and Slow Cooling for a Water Bath Free White Chocolate Cheesecake
Pour that gorgeous batter right over your cooled crust. Give the pan a few gentle taps on the counter to coax any big air bubbles out. Bake this baby at 325°F (160°C) for about 55 to 65 minutes. You’re looking for the edges to be set, but that center 2 inches should still have a tiny wiggle when you nudge the pan—that’s perfect! Here’s our major trick for avoiding cracks: Turn the oven OFF, crack the door open just a bit, and leave the cheesecake inside for a full hour. That slow transition stops the temperature shock. After that hour, take it out, let it cool completely on the rack, and then it absolutely must chill for a minimum of six hours, but overnight is when the magic really sets in! You can read more about my favorite cheesecake secrets here.
Tips for a Perfectly Silky Cheesecake Success
Achieving that unbelievably silky cheesecake texture in your white chocolate cheesecake really comes down to two things: temperature and ingredient quality. You cannot rush the softening of your cream cheese and sour cream; they must be true room temperature, or you get lumps that no amount of mixing will fix! Secondly, please don’t grab those white chocolate chips if you can avoid it.
I always recommend using a real white chocolate bar. It melts cleaner, resulting in that luxurious, decadent dessert feel we are aiming for. Remember our slow-cooling trick? That’s your insurance policy against cracks and keeps the top perfectly smooth! If you want to see another fantastic dessert that people rave about, check out this wonderful recipe here.
Creative Variations for Your White Chocolate Cheesecake
While this pure white chocolate cheesecake is stunning all by itself—a truly decadent dessert that speaks for itself—that doesn’t mean we can’t play around a little! If you’re hosting a holiday party, you absolutely have to consider a flavor pairing. I love making a gorgeous swirl using raspberry. Just warm up some store-bought raspberry sauce—or better yet, make a quick homemade one—and drizzle it right over your batter before baking. Don’t stir it in too much; you want those beautiful streaks!
Another favorite, especially around Thanksgiving or Christmas, is bringing in cranberries. The tartness cuts through the richness of the white chocolate so perfectly. You can mix dried cranberries into the crust or make a whole tart cranberry topping later. For an elegant side dish, you might also want to check out my recipe for peppermint cookies, coming in with a completely different flavor profile! If you want visual inspiration for adding fruit, check out some great ideas here.
Serving Suggestions for Your Showstopper White Chocolate Cheesecake
Now that you’ve successfully baked and chilled your glorious, crack-free white chocolate cheesecake, the fun part is making it look as amazing as it tastes! Since this dessert is so rich and creamy, you really only need small, elegant touches to make it a true showstopper.
The recipe calls for optional raspberry sauce, and honestly, if you have time to do nothing else, just drizzle a little of that tart, bright red sauce over the slicing board or directly onto the slice before serving. That color contrast with the pale white cheesecake is just stunning. Don’t worry if you didn’t make your own; a good quality jarred sauce works wonders!
If you’re serving it plain, which highlights that incredible richness, I highly suggest finishing it just before cutting. A light dusting of high-quality powdered sugar looks classic, almost snowy. Alternatively, I love using a vegetable peeler to shave thin curls of high-quality dark chocolate over the top. The slight bitterness of the dark chocolate plays off the sweetness of the white chocolate beautifully.
For an extra burst of fresh flavor, especially if you’re pairing this with something heavy, try grating a little fresh orange or lemon zest right over the top just before bringing it to the table. It lifts the whole flavor profile! For more ideas on beautiful-looking desserts that taste just as good, you might love looking at my strawberry shortcake trifle presentation ideas!
Storage and Reheating for Leftover White Chocolate Cheesecake
Alright, let’s face it: sometimes there are leftovers, even with a huge hit like this white chocolate cheesecake! The good news is that this is one dessert that actually tastes even better the next day once all those flavors have really settled in. But you have to store it right to keep that heavenly, silky texture intact.
The most important step is chilling. You simply cannot rush this! The recipe calls for a minimum of six hours, but I’ve learned through trial and error (and lots of taste testing—it’s tough work!) that chilling your cheesecake overnight is the key to perfection. It needs that long rest to fully firm up, ensuring those clean slices you want later on.
When storing slices or the whole cake, you need to keep it airtight. I usually cover the ring-free cheesecake loosely with plastic wrap the first night, just to keep things snug. After that, I go for a proper container with a lid. Keep it tucked away in the main body of the refrigerator—avoid the fridge door where the temperature swings are biggest.
Now, about reheating—this is where we have to be careful, especially since this is a baked cheesecake. Do not even think about microwaving a slice; it will turn weirdly rubbery, and that gorgeous creamy texture we worked so hard for will vanish! If you want to serve a slice slightly softer than fridge-cold, just pull it out onto a plate about 20 to 30 minutes before you plan to eat it. That gentle warming up at room temperature is all the ‘reheating’ this dessert ever needs!
Frequently Asked Questions About Making White Chocolate Cheesecake
What is the best way to ensure I get a smooth cheesecake filling and avoid lumps?
That silky texture is what we’re aiming for! The number one secret to a lump-free smooth cheesecake filling is temperature. You absolutely must use your cream cheese and sour cream when they are at true room temperature. Take them out about an hour before you start mixing. Also, when you combine the cream cheese and sugar, beat them thoroughly until they look uniform and velvety before introducing any liquids or the eggs. If you’re using store-bought white chocolate, make sure it’s high quality, melt it slowly, and let it cool slightly so it doesn’t scramble anything when it hits the batter. No lumps, promise!
Since this recipe doesn’t use a water bath, how do I prevent my baked white chocolate cheesecake from cracking?
It all comes down to gentle handling and slow cooling! We took the fuss out of the water bath, but we need to respect the temperature change. First, always mix in those eggs one at a time on the absolute lowest speed, mixing only until they disappear—introducing air is the enemy of a crack-free top. Second, the slow cool is non-negotiable! Once your baking time is up, turn the oven off, crack that door open, and leave the cheesecake inside for a full hour. This gradual cooling prevents the sudden temperature drop that causes the top to shrink and crack. Keep practicing, and you’ll get that perfectly silky cheesecake look!
If I want a very simple cheesecake, can I use white chocolate chips instead of bars?
You totally can if you’re in a pinch for time, and for a home baking situation, it’s generally fine! However, if you want the richest, most luxurious flavor profile for this decadent dessert, I highly recommend stepping up to a good quality white chocolate bar. The bars usually have a higher cocoa butter content, which melts down smoother and incorporates better into the batter, giving you that ultra-rich melt-in-your-mouth experience. If you decide to use chips, make sure you melt them slowly and check out this recipe for creamy fudge for tips on handling cocoa products!
I’m short on time; is this easy cheesecake recipe adaptable to a no-bake version?
That’s a great question that pops up a lot! While this specific recipe is formulated for baking perfection (especially to handle the weight of the melted white chocolate slowly), many people love a No Bake White Chocolate Cheesecake for summer or quick entertaining. No-bake versions usually rely more heavily on stabilizers like gelatin or whipped topping to set, which changes the density completely. If you’re looking specifically for a no-bake approach, you’ll need a recipe designed that way! For now, stick to the slow cooling, because this baked version gives you that satisfying density you just can’t get otherwise. For more behind-the-scenes baking thoughts, take a look at this article I found helpful.
Nutritional Estimates for This Decadent Dessert
I always like to give a general idea of what you’re diving into when you make a truly decadent dessert like this one. Keep in mind, because we’re using full-fat cream cheese and good quality chocolate, this isn’t exactly a light snack—it’s a rich treat meant for celebrating!
These numbers are just estimates based on standard ingredient brands and how the recipe breaks down into 12 servings. If you add extra raspberry sauce or use a different crust, your counts will change, of course. But this gives you a starting point for enjoying your white chocolate cheesecake guilt-free!
- Serving Size: 1 slice
- Calories: 450
- Fat: 30g (with 18g Saturated Fat)
- Carbohydrates: 40g
- Sugar: 35g
- Protein: 8g
Enjoy every single bite! Baking is about pleasure as much as it is about precision, and this cheesecake delivers on both!
PrintUltimate Creamy Baked White Chocolate Cheesecake (No Water Bath Needed)
Create a showstopper dessert with this recipe for an unbelievably rich, smooth, and creamy white chocolate cheesecake. We skip the water bath to make this decadent dessert simple for your home kitchen.
- Prep Time: 25 min
- Cook Time: 65 min
- Total Time: 7 hours 55 min
- Yield: 12 servings 1x
- Category: Dessert
- Method: Baking
- Cuisine: American
- Diet: Vegetarian
Ingredients
- 1 1/2 cups graham cracker crumbs
- 1/4 cup granulated sugar
- 6 tablespoons unsalted butter, melted
- 3 (8 ounce) packages full-fat cream cheese, softened
- 1 1/2 cups granulated sugar
- 1 teaspoon vanilla extract
- 1/4 teaspoon salt
- 1 cup sour cream, room temperature
- 12 ounces high-quality white chocolate, melted and slightly cooled
- 4 large eggs, room temperature
- Optional: Raspberry sauce or fresh berries for topping
Instructions
- Prepare your 9-inch springform pan by wrapping the outside bottom and sides tightly with heavy-duty aluminum foil to prevent water seepage, even though we are not using a water bath.
- Make the crust: Combine graham cracker crumbs, 1/4 cup sugar, and melted butter in a bowl. Press the mixture firmly into the bottom of the prepared springform pan. Bake at 350°F (175°C) for 10 minutes. Remove and let cool slightly. Reduce oven temperature to 325°F (160°C).
- Melt the white chocolate using a double boiler or in short bursts in the microwave, stirring until smooth. Set aside to cool slightly; it should still be pourable but not hot.
- In a large bowl, beat the softened cream cheese with 1 1/2 cups sugar, vanilla extract, and salt until completely smooth, scraping down the sides of the bowl often. This step is key for a smooth cheesecake filling.
- Beat in the sour cream until just combined.
- Slowly pour in the slightly cooled melted white chocolate and mix on low speed until fully incorporated. Do not overmix.
- Add the eggs one at a time, mixing on low speed only until each egg is just blended into the batter. Overmixing eggs introduces air, which causes cracks.
- Pour the filling over the cooled crust. Gently tap the pan on the counter a few times to release any large air bubbles.
- Bake at 325°F (160°C) for 55 to 65 minutes. The edges should look set, but the center 2 inches should still have a slight jiggle when gently nudged.
- Turn off the oven, crack the door open slightly, and let the cheesecake cool inside the oven for 1 hour. This slow cooling prevents cracking.
- Remove the cheesecake from the oven and let it cool completely on a wire rack. Once cool, cover and chill in the refrigerator for at least 6 hours, or preferably overnight, before serving.
- Before serving, run a thin knife around the edge before releasing the springform side. Top with raspberry sauce or fresh berries if desired.
Notes
- Use full-fat, brick-style cream cheese for the richest texture. Do not use low-fat or whipped varieties.
- Ensure all dairy ingredients (cream cheese, sour cream) are at true room temperature to prevent lumps in your smooth cheesecake filling.
- For the best flavor, use a good quality white chocolate bar rather than chips, as chips contain stabilizers that affect texture.
Nutrition
- Serving Size: 1 slice
- Calories: 450
- Sugar: 35g
- Sodium: 250mg
- Fat: 30g
- Saturated Fat: 18g
- Unsaturated Fat: 12g
- Trans Fat: 0.5g
- Carbohydrates: 40g
- Fiber: 1g
- Protein: 8g
- Cholesterol: 110mg