
If you’re anything like me, planning a party means wanting food that looks spectacular but takes zero stress, especially the day of the event. Everyone asks me for my secret to effortless, crowd-pleasing appetizers, and I always point them straight to these italian pinwheel sandwiches. They are seriously my go-to solution for any gathering, potluck, or just when you need a fantastic, savory lunch that requires absolutely no oven time.
When I first started Taste This Plate, it was because I wanted to demystify great food, and these roll-ups are the definition of simple success. We’ve refined this recipe down to perfection here in my kitchen so you get that perfect, flavorful bite every single time. Forget fussy hors d’oeuvres; these creamy, savory wraps are guaranteed to be the first thing gone on your platter. You can see more of my favorite simple appetizers over at our appetizer collection!
- Why These Italian Pinwheel Sandwiches Are Your New Favorite Party Food
- Gathering Ingredients for Your Italian Pinwheel Sandwiches
- Step-by-Step Guide to Perfect Italian Pinwheel Sandwiches
- Tips for the Best Italian Pinwheel Sandwiches Presentation
- Variations on Classic Italian Pinwheel Sandwiches
- Make Ahead Party Sandwiches: Storing Your Italian Pinwheel Sandwiches
- Frequently Asked Questions About Cold Sandwich Pinwheels
- Nutritional Estimates for Your Italian Pinwheel Sandwiches
- Share Your Italian Pinwheel Sandwiches Creations
Why These Italian Pinwheel Sandwiches Are Your New Favorite Party Food
I love hosting, but I absolutely hate being stuck in the kitchen while everyone else is having fun. That’s why these roll-ups are a total game-changer! They truly hit all the marks for busy hosts or anyone needing a simple, reliable centerpiece for a shared meal. You’ve got to try them.
- These are legitimately some of the easiest party finger foods easy to pull off. Seriously, no oven required!
- They look so much fancier than they actually are. That swirl is just pure magic.
- You wrap them up hours ahead, making game-day snacks totally stress-free.

Quick Assembly for Italian Pinwheel Sandwiches
The assembly process is lightning fast. With only 20 minutes of prep time, you can have all the ingredients layered and rolled before you even think about setting out the cocktail napkins. Because they are served chilled, these are perfect **cold sandwich pinwheels**—no worrying about keeping them warm or dealing with melting cheese!
Perfect for Any Gathering: Savory Pinwheel Ideas for Crowds
We get a satisfying 16 slices out of just four tortillas, which means they stretch nicely for a crowd. Plus, since they feature all those classic Italian antipasto flavors—salami, provolone, savory spread—they feel substantial and celebratory without any effort on your part.
Gathering Ingredients for Your Italian Pinwheel Sandwiches
One of the best things about these **italian pinwheel sandwiches** is that everything you need comes from your standard grocery store. There’s no need for special trips! I always make sure I have the right things on hand so assembly goes smoothly, especially since we’re not cooking anything. This recipe is built on simple, bold Italian flavors, and using fresh herbs makes a huge difference, trust me on that one.
The Cream Cheese Spread for Best Italian Pinwheels
The spread is the secret glue here! You absolutely need 8 ounces of cream cheese, and it *must* be fully softened—take it out early! We mix that with half a cup of mayo, a little garlic powder, and some fresh parsley that you’ve finely chopped. The real flavor boosters come from measuring out that grated Parmesan cheese along with one tablespoon of Italian dressing mix (or just dry Italian seasoning if that’s what you have). This mixture holds our **italian pinwheel sandwiches** together beautifully.
Layering the Italian Cold Cuts
Once the spread is ready, we build the flavor tower! You’ll need 8 thin slices of provolone cheese, which gives us that nice creamy mouthfeel. Then, for the meat: grab 8 slices of Genoa salami, 8 slices of ham, and about 4 thin slices of good roasted turkey breast. Layer them evenly right over the cheese. If you want to see more great combinations using cured meats, check out my guide on Italian cold cuts sandwich ideas!
Step-by-Step Guide to Perfect Italian Pinwheel Sandwiches
Okay, now that you’ve got your ingredients ready, let’s put these beauties together! This is where the magic happens, and honestly, it’s so straightforward that you’ll be shocked you didn’t start making these sooner. I always put on some good music while I assemble. Remember, the main goal is even distribution and a tight roll!
Mixing the Flavorful Cream Cheese Spread
First things first: Step one is all about that spread. Grab your bowl and get that softened cream cheese in there with your mayonnaise. Don’t try to mix it while it’s cold, or you’ll end up with lumps—and nobody wants lumpy spread in their italian pinwheel sandwiches! Toss in your garlic powder, chopped parsley, Parmesan, and that Italian seasoning mix. Just mix it until it looks completely smooth and creamy. That seasoning truly wakes up the whole flavor profile here.
Assembling and Rolling the Tortilla Roll Ups Savory
Time to layer! Take one of your large flour tortillas and spread about a quarter of that gorgeous mixture all over it. A really important tip here: leave about a half-inch of space clear around the very edge. This keeps the filling from squeezing out everywhere when you roll. Next, lay down your provolone, then the salami, ham, and turkey evenly distributed. Now, roll it up! Starting from one side, roll it as tightly as you can without tearing the tortilla. You want a firm cylinder. This rolling technique is really what makes these the best **tortilla roll ups savory** snacks.
The Critical Chilling Phase for Rolled Sandwich Wraps Catering
This next step is non-negotiable, especially if you’re making these for a big crowd or treating them like professional rolled sandwich wraps catering appetizers. Take that tightly rolled log and wrap it super tight in plastic wrap. Then, they need at least two hours in the fridge. Why? Chilling firms up that creamy filling. If you try to slice them warm or right after rolling, they just squish mushy. We want clean, gorgeous slices, perfect for presentation!

Tips for the Best Italian Pinwheel Sandwiches Presentation
Presentation is half the fun with these easy snacks! Once your rolls are nice and firm from chilling, the final step makes all the difference. You absolutely need a very sharp knife for this—don’t try cutting them with a dull one, or you’ll just end up squishing all that gorgeous effort. I aim for slices that are about one inch thick.
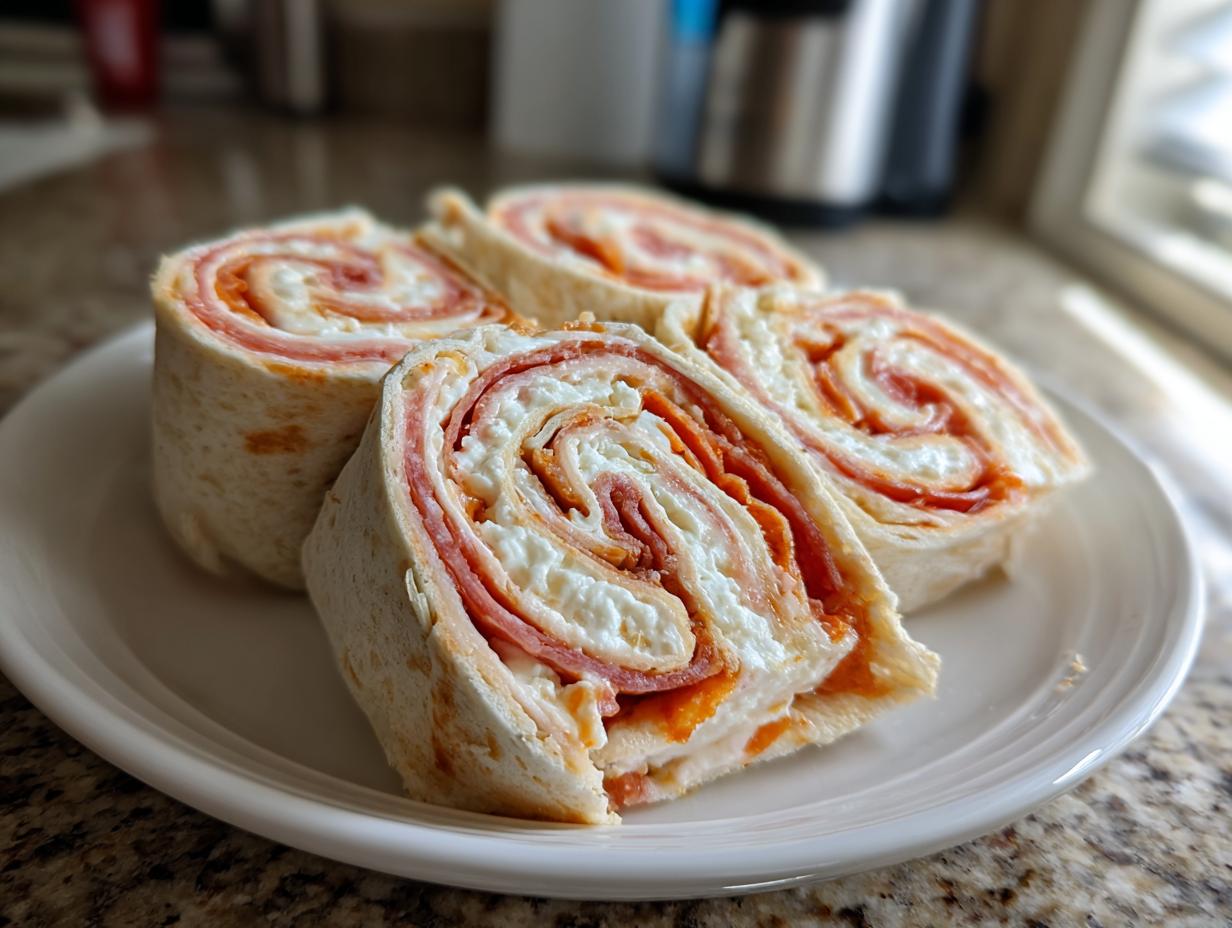
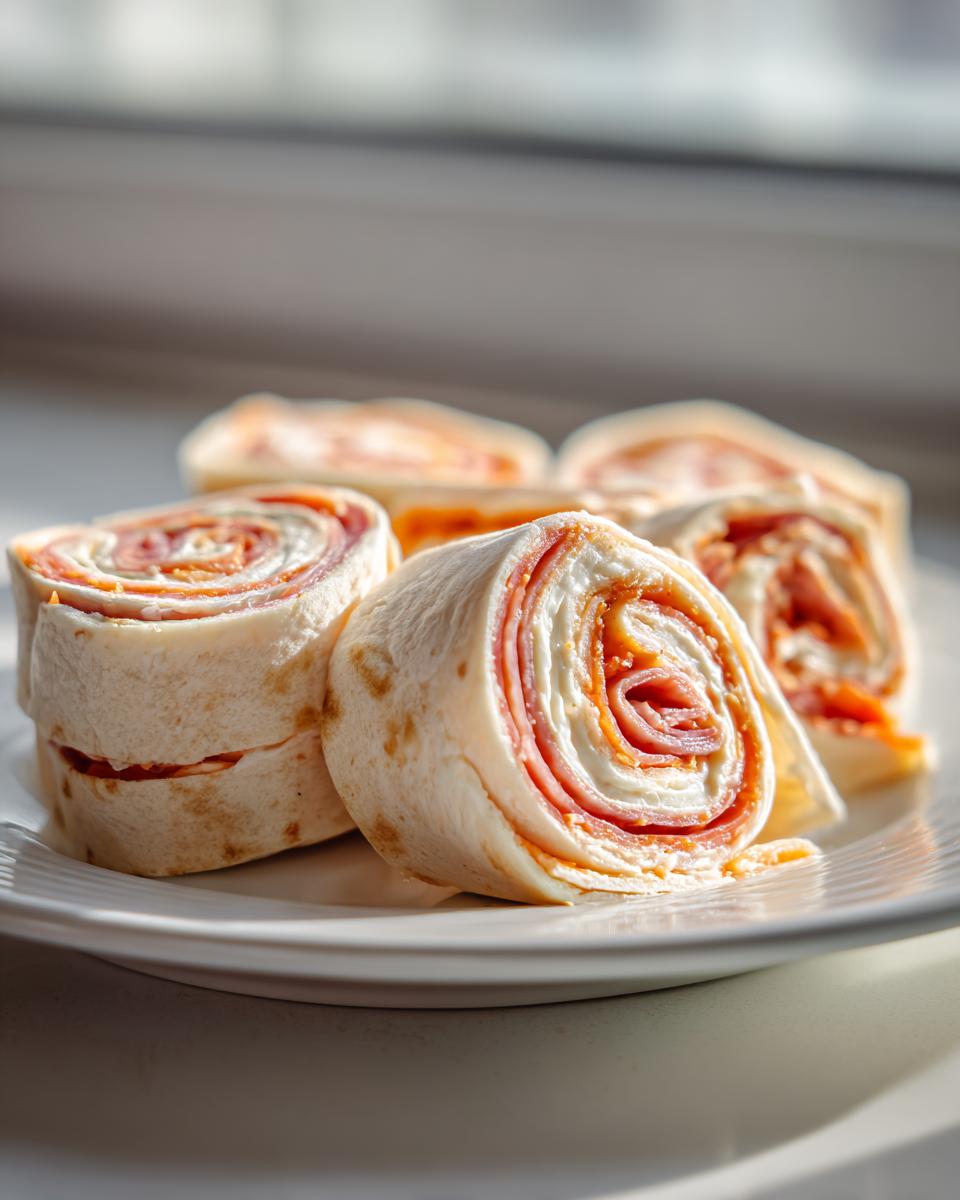
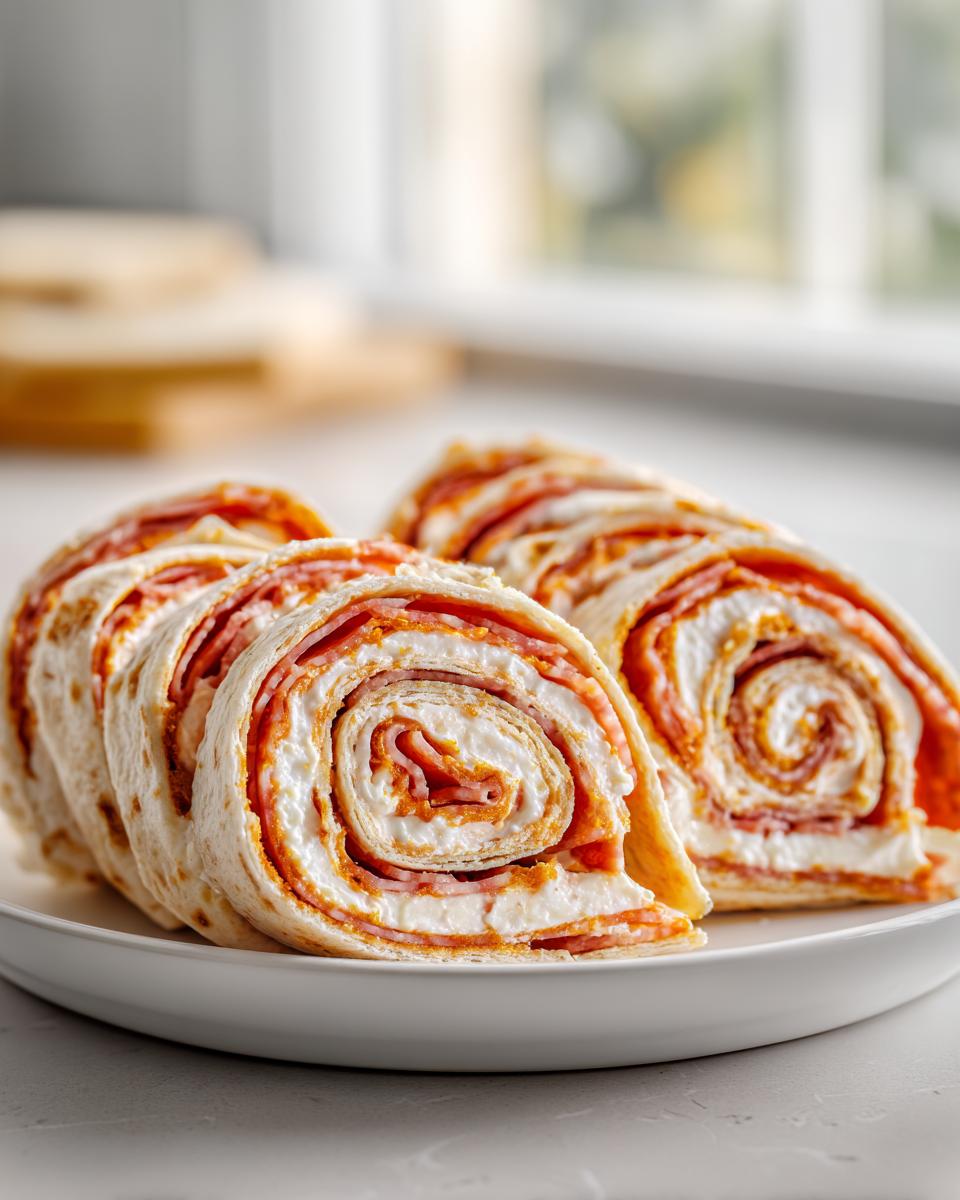
When you place them on the platter, arrange them cut-side up so everyone can see all those colorful layers of meat, cheese, and that creamy spread. Since we’ve followed all the steps for the **italian pinwheel sandwiches**, they should hold their shape perfectly!
A little extra something from my notes: to make them look really special for your Italian appetizer recipes spread, try garnishing the serving plate with a few black olives tucked in between the pinwheels or dropping a couple of tiny basil sprigs on top. That little pop of green just makes them look instantly professional!
Variations on Classic Italian Pinwheel Sandwiches
I love that this recipe is so flexible! Don’t worry if you’re missing one type of meat or if you have guests who don’t eat red meat; we can easily tweak these **italian pinwheel sandwiches** without losing the core deliciousness. Testing variations is how we learn to be intuitive cooks, right?
If you want a bolder, tangier kick in the filling, try swapping out a couple of ounces of the plain cream cheese for some softened Boursin cheese—the garlic and herb flavor is incredible here. Or, for a little savory depth, toss in a tablespoon of finely chopped sun-dried tomatoes right into that cheese mixture. Takes it up a notch!
If you’re looking for ideas on other great spreads for your sandwiches, I’ve got a whole guide dedicated to making the best cream cheese spreads for all sorts of sandwiches.
Making Deli Meat Roll Ups Vegetarian Friendly
If you need to switch gears and make our **deli meat roll ups** vegetarian, it’s super easy, and still totally bursting with Italian flavor. You’ll just skip the salami, ham, and turkey entirely. Instead, layer the provolone cheese with thinly sliced roasted red peppers. I also love adding marinated artichoke hearts, patted very dry first, of course! They bring a wonderful texture and tang that stands in perfectly for the meatiness.
Make Ahead Party Sandwiches: Storing Your Italian Pinwheel Sandwiches
This is where these snacks truly shine as the ultimate make ahead party sandwiches. I rely on this feature whenever I host! You can assemble all the rolls completely—spread them, layer the fillings, and roll them tight—just like we did in the previous steps.
Remember to wrap each log individually and truly tightly in plastic wrap. This keeps them fresh and stops them from drying out. They hold up wonderfully in the refrigerator for up to a full 24 hours. That means you can prep everything the day before a big event!
Here’s the final timing tip for serving beautiful italian pinwheel sandwiches: Don’t slice them until just before your guests arrive. Slice the chilled rolls into one-inch pieces no more than one hour before you plan to serve them. This ensures the edges are perfectly crisp and the filling hasn’t had time to soften up. Perfectly prepared for your next easy gathering or picnic food ideas sandwiches!
Frequently Asked Questions About Cold Sandwich Pinwheels
Whenever I share a recipe, the questions always start rolling in! That’s how we know we’re making something people genuinely want to try. For these **italian pinwheel sandwiches**, the main concerns usually revolve around keeping them firm and dealing with ingredients. Here are the top things folks ask me about when making these **cold sandwich pinwheels**.
Can I use different types of bread or wraps for these Italian appetizer recipes?
You certainly can experiment, but I really recommend sticking to those large, soft flour tortillas. They have the best pliability and strength. Thinner wraps sometimes tear when you roll them as tightly as needed, and frankly, they aren’t as sturdy once they chill. You want something that can handle that thick layer of creamy filling without getting soggy or breaking apart when sliced. You can see plenty of ideas for other no bake Italian snacks on our site!
How do I prevent the Italian pinwheel sandwiches from getting soggy?
This is all about building a moisture barrier! The thick layer of cream cheese spread we make acts like a waterproof seal between the wet fillings (like the meats) and the tortilla itself. Beyond that heavy spread application, the critical step is the chilling. Keep them wrapped tightly in plastic wrap in the fridge until you are absolutely ready to slice them. This keeps them firm and fresh, which is why these are fantastic **no bake Italian snacks**!
What is the best way to slice the rolls cleanly?
If you slice them warm, you’re doomed to a squished mess! The secret combination for a clean cut is twofold. First, they must be thoroughly chilled—at least two hours. Second, use the sharpest, non-serrated knife you own. Think of slicing bread, but use a long, smooth slicing motion rather than sawing back and forth. A very sharp knife glides through the chilled roll layers beautifully!
Nutritional Estimates for Your Italian Pinwheel Sandwiches
I always try to remember that knowing what’s in our food is helpful, but I also know that when we make something this delicious, we aren’t usually counting every single calorie! But just so you have the full picture for your gathering, I’ve put together some estimates for you.
Please remember these are just ballpark figures. Since we’re using a mix of deli meats, cheeses, and cream cheese, the exact numbers can shift based on the brands you buy or if you choose to substitute ingredients like I sometimes do!
These figures are based on a standard serving size of two of the **italian pinwheel sandwiches**:
- Serving Size: 2 pinwheels
- Calories: Approximately 250
- Total Fat: Around 18g (be mindful of that cream cheese!)
- Sodium: This is where the deli meats come in, usually around 650mg
- Carbohydrates: About 14g
- Protein: Roughly 10g
See? Nothing too scary in there! It balances out really well for a satisfying appetizer. Enjoy them without a second thought!
Share Your Italian Pinwheel Sandwiches Creations
Now you have the foolproof guide to making the absolute best **italian pinwheel sandwiches** for your friends and family! Seriously, you did the work, and now it’s time for the fun part: eating them!
Before you run off to make your first batch, I really want to know how they turned out for you. Did you add any fun little substitutions? Did the kids devour them? Did you get rave reviews at the party? Please, send me a note over at the contact page, I love hearing from every single one of you!
And if you snapped a picture of that beautifully arranged platter, please tag us on social media! Seeing your home kitchen creations come to life is truly why I started Taste This Plate in the first place. Tagging us shows other home cooks just how easy and delicious these recipes are. Happy cooking, friends!
PrintSimple Italian Pinwheel Sandwiches

Make these easy, no-bake Italian pinwheel sandwiches for your next party or quick lunch. They use classic deli ingredients rolled tightly in tortillas for a savory appetizer.
- Prep Time: 20 min
- Cook Time: 0 min
- Total Time: 20 min
- Yield: 16 pinwheels 1x
- Category: Appetizer
- Method: No Bake
- Cuisine: Italian
- Diet: Vegetarian
Ingredients
- 4 large flour tortillas (about 10 inches)
- 8 ounces cream cheese, softened
- 1/4 cup mayonnaise
- 1 tablespoon Italian dressing mix or dry Italian seasoning
- 1/2 teaspoon garlic powder
- 1/4 cup finely chopped fresh parsley
- 1/2 cup grated Parmesan cheese
- 8 thin slices provolone cheese
- 8 thin slices Genoa salami
- 8 thin slices ham
- 4 thin slices roasted turkey breast
Instructions
- In a medium bowl, combine the softened cream cheese, mayonnaise, Italian dressing mix, garlic powder, parsley, and Parmesan cheese. Mix until smooth and well combined. This is your spread.
- Lay one tortilla flat on a clean surface. Spread about one-quarter of the cream cheese mixture evenly over the entire surface of the tortilla, leaving about a half-inch border clear on the edges.
- Layer the fillings over the spread. Place two slices of provolone cheese over the spread. Then, layer two slices each of salami, ham, and turkey evenly across the tortilla.
- Starting from one edge, roll the tortilla up tightly, like a jelly roll. Do not press too hard, but keep the roll firm.
- Wrap the rolled tortilla tightly in plastic wrap. Repeat this process with the remaining three tortillas and fillings.
- Refrigerate the wrapped rolls for at least 2 hours, or up to 24 hours. Chilling helps the rolls firm up, making them easier to slice cleanly.
- When ready to serve, remove the plastic wrap from one roll. Use a sharp knife to slice the roll into 1-inch thick pinwheels.
- Arrange the Italian pinwheel sandwiches cut-side up on a serving platter.
Notes
- For a sharper flavor, substitute some of the cream cheese with softened Boursin cheese or add a tablespoon of finely chopped sun-dried tomatoes to the spread.
- If you do not have deli meats, you can use thinly sliced roasted red peppers and marinated artichoke hearts for a vegetarian option.
- To make these ahead for a crowd, assemble the rolls completely, wrap them, and keep them refrigerated. Slice them no more than one hour before serving for the best texture.
- For a nice presentation, garnish the platter with a few black olives or small sprigs of fresh basil.
Nutrition
- Serving Size: 2 pinwheels
- Calories: 250
- Sugar: 2
- Sodium: 650
- Fat: 18
- Saturated Fat: 9
- Unsaturated Fat: 9
- Trans Fat: 0.5
- Carbohydrates: 14
- Fiber: 1
- Protein: 10
- Cholesterol: 45