
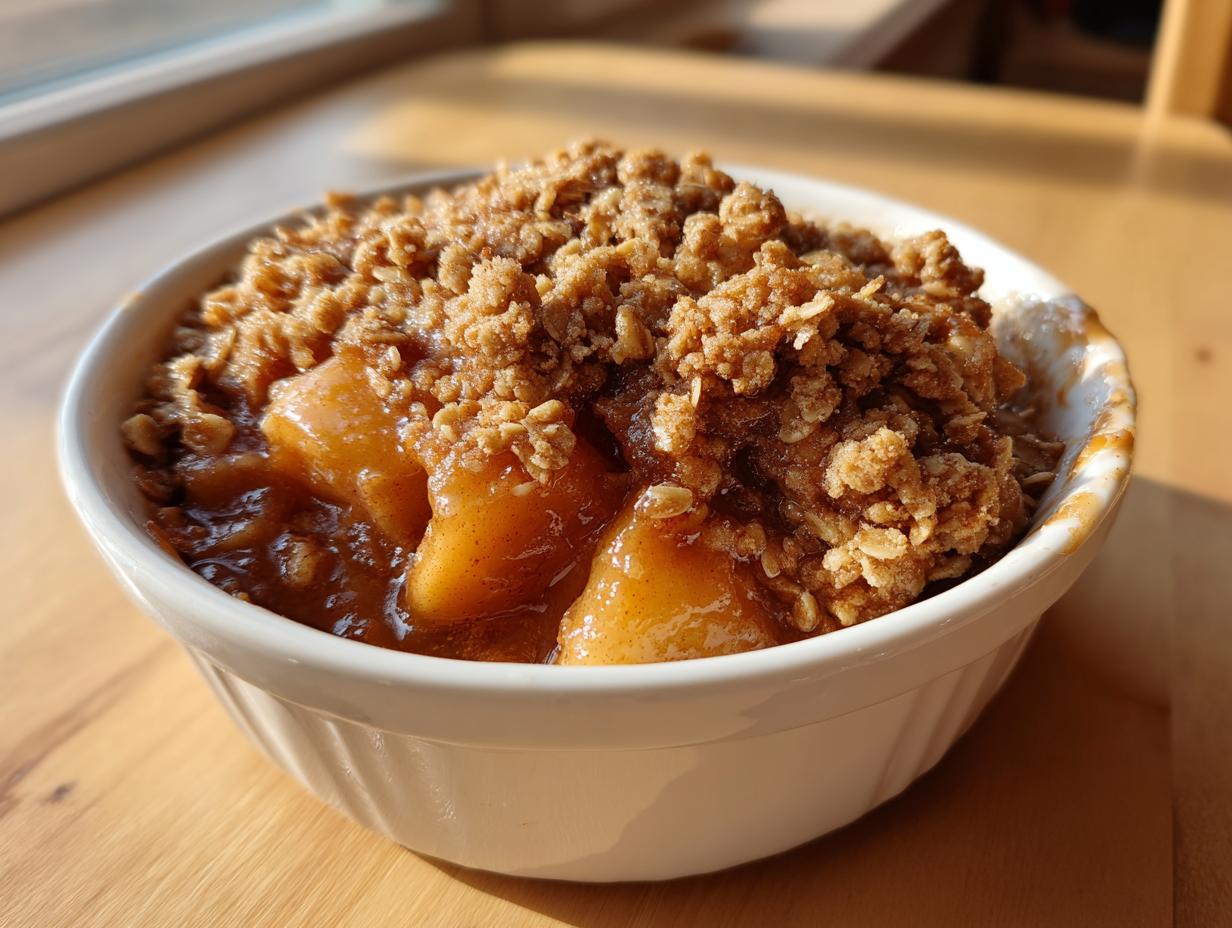
Oh, friend, let me tell you! When the air turns crisp and you need that one dessert that just smells like pure autumn happiness, you need an apple crisp. If you are searching for the perfect apple crisp recipe that just *works*—no soggy bottoms, no weak toppings—you’ve found your people. At Taste This Plate, Kate is all about ditching the stress and delivering a truly foolproof, old-fashioned dessert. This recipe is our absolute champion for delivering that golden, buttery, unbelievably **crunchy oat topping** every single time. It’s simple, it’s classic, and trust me, it’s the warm hug you didn’t know you needed!
- Why This is the Best Apple Crisp Recipe for Homemade Dessert Success
- Ingredients for Your Old Fashioned Apple Crisp Recipe
- Step-by-Step Instructions for This Easy Apple Crisp Recipe
- Tips for a Foolproof apple crisp recipe Bake
- Serving Suggestions for Your Warm Apple Dessert
- Storage and Reheating Instructions for this apple crisp recipe
- Variations on the Classic Cinnamon Apple Crisp Recipe
- Frequently Asked Questions About Making Apple Crisp
- Nutritional Estimate for This Simple Apple Dessert
- Share Your Thoughts on This Classic Apple Crisp Recipe
Why This is the Best Apple Crisp Recipe for Homemade Dessert Success
Listen, I’ve tinkered with enough baked goods to know that sometimes simplicity wins. That’s why this **Best Apple Crisp Recipe** is my go-to for any gathering. Kate started Taste This Plate because she kept hearing folks say, “I could never make that!” after she brought delicious things to potlucks. So, she vowed to make every recipe truly **foolproof**. This crisp shines because we respect the basic mechanics. We use apples that hold their shape, and we treat the topping with the seriousness it deserves. It’s designed to be a reliable **homemade dessert** that gives you amazing results without stress.
It’s all about that texture contrast, you know? Tender, cinnamon-spiced apples swimming in their own juices beneath that beautiful, golden crust. If you’re looking for a recipe that consistently delivers that satisfying crackle, you’re in the right place. You can check out our similar ideas over on our Apple Pie Dump Cake guide for more easy wins!
Achieving the Ultimate Crunchy Oat Topping
This is where most crisps fail, but ours won’t! The secret isn’t sugar; it’s temperature. You absolutely must use cold butter, right out of the fridge. When you mix the butter cubes into the oats, flour, and brown sugar, you’re working super fast—I mean *fast*. You’re aiming for coarse crumbs, maybe a few pea-sized buttery bits still floating around. If you mix too long or your butter gets warm, those buttery bits melt immediately in the oven, and suddenly, you have mush instead of that amazing **Crunchy Oat Topping**. Don’t overthink the mixing; just bring it together quickly, sprinkle it gently over the apples, and forget about it until it smells incredible!
Ingredients for Your Old Fashioned Apple Crisp Recipe
Putting together this **Old Fashioned Apple Crisp** is so straightforward because we stick to the basics. You probably have most of this stuff hanging out in your pantry right now! We need simple components for the filling, and then we build that glorious topping separately. Keep everything chilled until you absolutely need it—that’s key, especially for the butter!
For the Apple Filling, you’ll need:
- Around 6 medium apples. I always stress this: peel, core, and slice these about a quarter-inch thick. Not too thick, not too thin!
- 1/4 cup of regular granulated sugar.
- 1 tablespoon of all-purpose flour—this helps thicken those apple juices a bit.
- 1 big teaspoon of ground cinnamon for that warm hug flavor.
- Just a splash—1 tablespoon—of lemon juice. This keeps them looking pretty and bright!
And now, for the star of the show, the Buttery Crumble Topping:
- 1/2 cup of all-purpose flour.
- 1/2 cup of packed light brown sugar. Don’t skimp on the brown sugar; it gives us that rich, molasses flavor!
- 1/2 cup of old-fashioned rolled oats. Skip the instant stuff; we need that structure for the crunch!
- A smaller dash of cinnamon, about 1/4 teaspoon, to echo the filling.
- 1/4 teaspoon of salt to balance all that sweetness.
- And finally, the powerhouse ingredient: 1/2 cup (which is one full stick) of cold unsalted butter, cut into those little cubes. Remember: COLD!
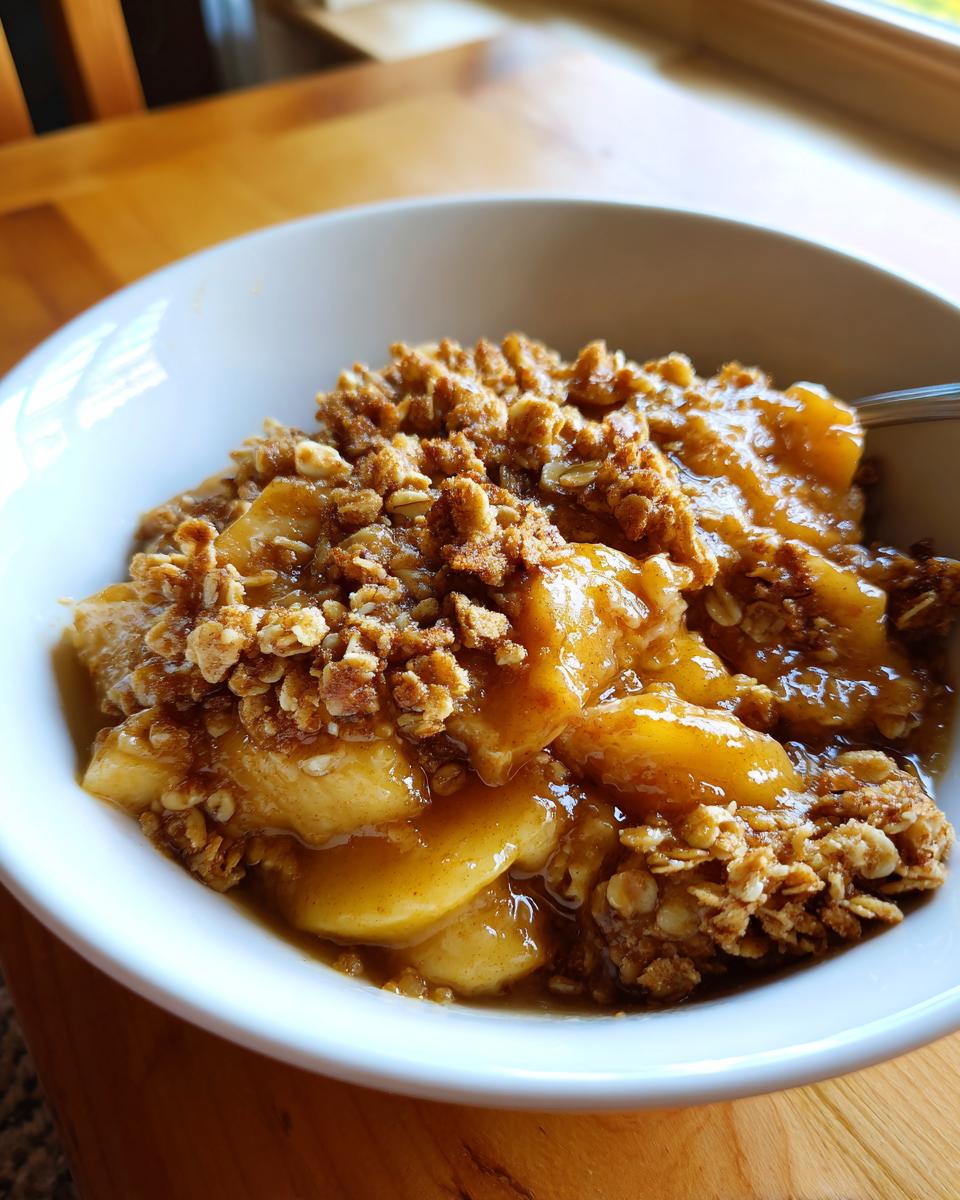
Selecting the Best Apples for Your Apple Crisp Recipe
Choosing the right apple is vital if you want that tender filling without it turning into total applesauce. Never rely on just one kind! I like a mix because it gives us depth. You need tartness to cut through the sugar, and you need some sweetness too. My absolute favorites for this **apple crisp recipe** are tart Granny Smiths mixed with sweeter Honeycrisp apples. They soften up perfectly in the oven while still holding their shape nicely. Trust me, this balance is everything for this **simple apple dessert**!
Step-by-Step Instructions for This Easy Apple Crisp Recipe
Okay, now that we’ve got our beautiful ingredients ready, let’s get this **Easy Apple Crisp Recipe** in the oven! Honestly, this whole thing comes together so fast, which is why it’s perfect for a weeknight treat or when company shows up unexpectedly. We’re looking for beautiful bubbling juices and a golden top, so let’s get moving. First things first: get that oven preheated to 375°F (that’s 190°C). You’ll want to lightly grease whatever dish you’re using—an 8×8 square or a 9-inch pie plate works great for this amount of filling.
Here are the steps we follow to guarantee success:
- We start with the apples and toss everything together until they’re completely coated in that sweet cinnamon mix.
- Next, spread those shiny apples out evenly in your prepared baking dish so they bake uniformly.
- Then, grab your separate bowl and work on that incredible topping! We’ll detail that in a second!
- Once the topping is ready, you sprinkle it generously over the apples. Here’s the crucial part: DO NOT press it down! Let it be fluffy and loose.
- Pop it into that hot oven for about 35 to 45 minutes. You know it’s done when you see the filling bubbling up around the edges like lava, and the topping looks deep golden brown.
- Pull it out. And this is hard, I know, but let it cool for at least fifteen minutes before you dive in. It firms up just enough so you don’t burn your mouth off!
If you want to see another super simple, speed-focused recipe from us, you should definitely check out how we make easy honey BBQ sauce! It’s all about maximizing flavor with minimal fuss.
Preparing the Cinnamon Apple Filling
This part is almost too easy! In a big mixing bowl, throw your sliced apples. Add that 1/4 cup of granulated sugar, the tablespoon of flour, the full teaspoon of cinnamon, and the lemon juice. Now, take a big spoon—or your hands, I won’t judge—and gently toss everything around. You want every single apple slice to get nicely coated. We’re not trying to mash them; we just want them evenly dressed before they go into the dish!
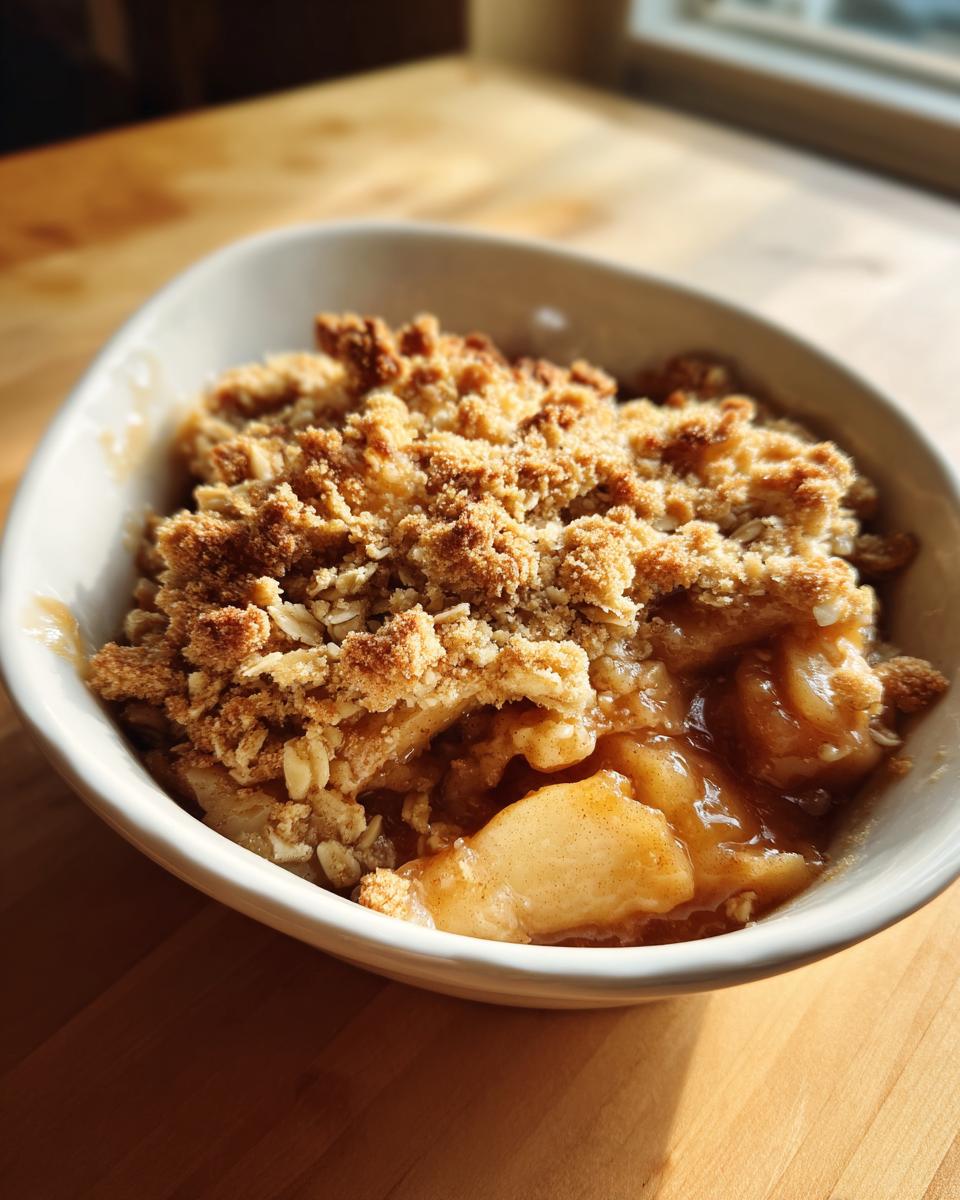
Creating the Buttery Crumble Topping
This is the texture magic, so pay attention! In a separate bowl, whisk together all the dry topping stuff: the 1/2 cup of flour, the brown sugar, the oats, the extra 1/4 teaspoon of cinnamon, and the salt. Now, take those cubes of very cold butter and drop them in. You need to cut that butter into the dry mix quickly. You can use a pastry blender if you have one, or just use your fingertips. Seriously, work fast! Stop mixing the second you see coarse crumbs forming—we want different sizes, including some buttery lumps that look like small peas. That’s what gives you that satisfying crisp!

Tips for a Foolproof apple crisp recipe Bake
Even with the absolute **Best Apple Crisp Recipe**, sometimes the universe throws a little curveball in the oven! That’s okay, because Kate always said that knowing what *not* to do is just as important as knowing what to do. We want that topping golden, not burnt, and we want those apples tender, not crunchy when you bite into them. When you bake a **Foolproof Apple Crisp**, you need a little flexibility in your back pocket.
First rule: if you see the topping getting too dark—say, around the 25-minute mark—but the apples underneath are still firm, don’t sweat it! Grab a sheet of aluminum foil and just loosely tent it over the dish. This protects that beautiful, crunchy oat topping while letting the heat work on softening the fruit underneath. It’s a classic trick for all our baked goods.
Also, remember the butter for the topping must be *very* cold. If your butter melts into the dry mix before it ever hits the oven, you’ll end up with a greasy cookie rather than a crisp, crunchy topping. Who wants to spend time making a **Simple Apple Dessert** only to have it turn out gummy? Never! Another great tip for texture is using a mix of apples—tart and sweet! You can pair up our suggestions with other great crispy ideas over on our Crispy Potato Wedges post for more texture inspiration.
Serving Suggestions for Your Warm Apple Dessert
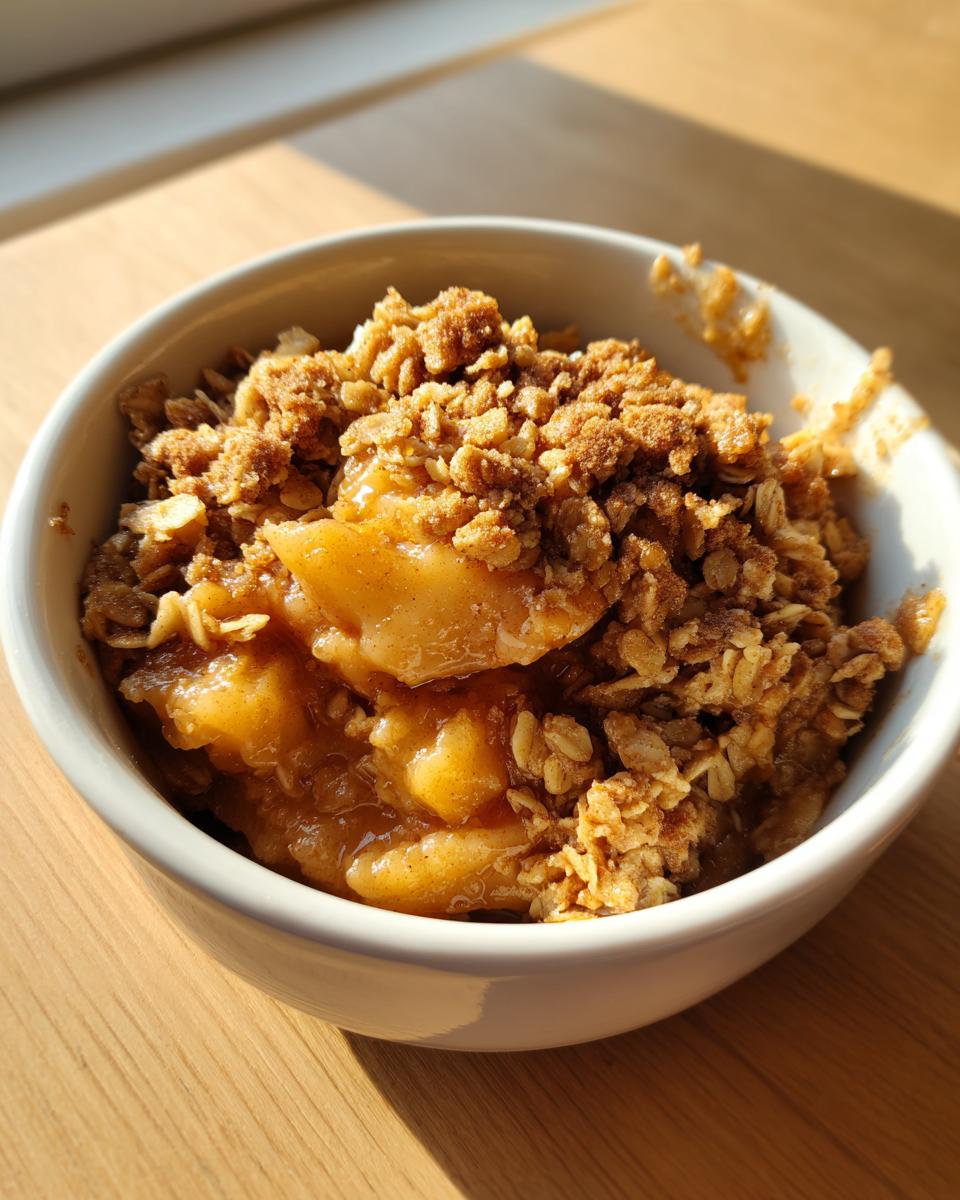
Okay, the crisp is out of the oven, it’s bubbling, and the entire house smells like heaven. Don’t even think about letting this sit and cool completely! This is meant to be a **Warm Apple Dessert**, and serving it right as it sets up is the only way to go. If you don’t serve it warm, you miss that pure, soul-soothing comfort this **apple crisp recipe** is famous for.
You asked, and yes, we absolutely insist: you have to try it with ice cream. Nothing contrasts better with that hot, spiced apple filling and crunchy topping than a big scoop of super cold vanilla ice cream. The combination of hot and cold—that’s the magic of **Apple Crisp With Ice Cream**! It melts down into the crevices of the topping and mixes with the cinnamon spice. Perfection, I tell you!
But if you’re feeling fancy, or maybe you just ran out of vanilla (we’ve all been there!), there are other ways to elevate this dessert. A generous drizzle of warm caramel sauce right over the top before you add the ice cream makes it extra decadent. You could also try a dollop of slightly sweetened, freshly whipped cream. That keeps it a little lighter than the ice cream but still gives you that lovely creamy contrast. For more sweet inspiration that plays on spices, take a peek at my Cinnamon Crunch Banana Bread recipe—it hits some similar cozy notes!
Storage and Reheating Instructions for this apple crisp recipe
Don’t you just love when you have leftovers from a great dessert? Me too! But the challenge with any crisp or crumble is keeping that topping crisp when you store it. If you have managed to have any of this glorious **apple crisp recipe** left over after serving, here’s what you do. Don’t try to seal it up tight while it’s piping hot; let it cool down to room temperature first. Once cool, cover your baking dish loosely with plastic wrap or foil. You can keep it covered at room temperature for maybe a day if your kitchen isn’t too warm, but honestly, I prefer the fridge for safety, especially if you’ve been hovering over it with ice cream like me!
Now, for the reheating—this is key to saving that crunch! Please, please, please, resist the urge to microwave it. The microwave heats the moisture in the apples and steams the topping, turning it instantly sad and soft. We can’t have that! If you want that perfectly **buttery crumble topping** back, you have to use the oven or an air fryer.
Here’s the best reheat method:
- Scoop out the portion you want onto a small, oven-safe plate or tray.
- Pop it into a moderate oven—about 350°F (175°C)—for about 8 to 10 minutes.
- Watch it until the apples are hot all the way through and you see a little bit of bubbling. That heat crisps up the oat topping beautifully again.
It turns out nearly as good as fresh from the oven, and it’s definitely worth the five extra minutes of heating time!
Variations on the Classic Cinnamon Apple Crisp Recipe
While I stand by this recipe as the ultimate classic, baking is all about playing around, right? Kate always encourages readers to treat our guidelines as the perfect starting point, not a strict law! If you want to give your **Cinnamon Apple Crisp** a little extra texture and depth, try tossing about a half cup of chopped pecans or walnuts into the topping mixture along with the oats and flour. They toast up beautifully alongside the crumble!
If you’re feeling adventurous with the spice blend, though, don’t go overboard; remember we want that apple flavor to shine. Swapping out some of that cinnamon for a warm grind of nutmeg or a touch of allspice can give it a slightly richer, almost holiday feel without changing the method one bit. These easy updates keep the prep time low but make the dessert feel totally customized. If you love baked fruit desserts with a spiced twist, you certainly need to check out my Carrot Banana Muffins Recipe—it carries that homey spice vibe!
Frequently Asked Questions About Making Apple Crisp
It’s completely normal to have questions when you’re trying to perfect a classic! Even with a **Simple Apple Dessert** like this, little questions pop up. I wanted to gather the ones Kate and I hear most often down in the comments section so you can feel totally confident pulling this out of the oven. We want every bite of your **Cinnamon Apple Crisp** to be perfect!
Can I make the apple crisp recipe ahead of time?
Yes, you certainly can! I often assemble the whole thing—apples in the dish, topping sprinkled right on top—and cover the whole thing tightly with plastic wrap. Then, it goes into the fridge for up to 24 hours. When you’re ready to bake it, you might need to add about 5 to 10 extra minutes to the baking time because the ingredients are starting off cold. It’s a great way to prep for a dinner party, knowing dessert is already waiting!
What is the best way to prevent a soggy apple crisp recipe topping?
This is the battle we fight against every time! To keep that amazing **crunchy oat topping**, you need two things locked down. First, make sure that butter you’re cutting in is ice cold; truly cold butter creates those steam pockets that turn into crispness. Second, be gentle when you place the topping on the apples—never press it down! Think of it like soft snow you’re dusting on top. Also, baking in a slightly shallower dish helps heat circulate better than a really deep casserole, which can trap steam and make the bottom soggy. For more helpful texture tips, you might find our guide to fall pasta salad interesting!
What kind of apples are essential for the best filling?
We already talked about mixing tart and sweet, but sometimes people wonder if they can just use what they have. If you have to pick just one, go for something firm like Honeycrisp or Fuji—they hold their shape well. But honestly, for the absolute best texture and flavor in your **apple crisp recipe**, use a combination! A blend ensures you get that nice tartness cutting through the brown sugar sweetness, and the varied densities mean you don’t end up with a uniform mush when it’s all baked through.
Can I bake this ahead of time and reheat it?
If you have fantastic leftovers, which you should! Never reheat a homemade dessert this delicate in the microwave unless you absolutely have to. The microwave steams the topping. Instead, scoop out your portion onto a small oven-safe dish and bake it at about 350°F (175°C) for about 8 to 10 minutes. This gentle heat warms the apples through and brings back the beautiful crisp texture to the topping so it tastes almost freshly baked!
Nutritional Estimate for This Simple Apple Dessert
Now, I know some of you dessert fans might be scanning the page wondering about the damage! Look, this is a **comfort food dessert**, and honestly, it’s made with simple ingredients like apples, flour, and butter, so it’s going to lean towards the decadent side. But getting the estimate out there is just good practice, right? Remember, Kate always says these numbers are just guides because brand sizes and how much sugar you sprinkle around can change things!
Based on standard measurements for this **Simple Apple Dessert**, here is what one serving generally stacks up to:
- Calories: Around 380
- Fat: About 20g (Hey, that butter is doing heavy lifting!)
- Carbohydrates: Roughly 50g
- Protein: About 4g
- Sugar: 35g (That’s where all the deliciousness comes from!)
Just keep this in mind: these are estimates based on a typical serving size. If you are serving it with a giant scoop of vanilla ice cream, you know that’s going to shift things up! But for the crisp itself, this gives you a great place to start when tracking things. It’s worth every single calorie, especially when that **buttery crumble topping** is warm!
Share Your Thoughts on This Classic Apple Crisp Recipe
Seriously, my favorite part of sharing any recipe, especially our **Classic Apple Crisp Recipe**, is hearing what you all think! We put so much heart and testing into making sure this hits that spot for you, and knowing it worked in your kitchen means the world. If you made this comforting dessert and it tasted like pure heaven, please take one second and leave a star rating right below this section. Five stars if it earned it!
Don’t be shy about leaving a comment, either. Did you try pecans in the topping, or maybe you discovered the perfect apple blend? Tell us about your successes! We learn so much from this wonderful community. Every time you share how our instructions helped you create a perfect **homemade dessert**, it just reinforces why Kate started Taste This Plate in the first place—to make cooking less stressful and more joyful.
If you snapped a picture of that perfectly bubbly, crunchy top, tag us on social media! We love seeing our recipes out in the real world. It really brings the kitchen to life for us!
And hey, if you’re curious about just *why* we are so obsessed with making sure every recipe is foolproof, hop over and read Kate’s full story on our About Page. It gives you the background on why we test everything until it’s perfect for the everyday home cook.
If you have questions that weren’t covered in our FAQ, or if you just want to send a high-five, feel free to reach out directly through our Contact Page. Happy baking, and I hope you enjoy every last warm bite!
PrintThe Ultimate Easy, Old-Fashioned Apple Crisp with a Buttery Cinnamon Oat Topping

Make this foolproof apple crisp recipe for a classic American comfort dessert. It features tender, cinnamon-spiced apples beneath a perfectly crunchy, buttery oat topping. Serve warm with vanilla ice cream.
- Prep Time: 15 min
- Cook Time: 40 min
- Total Time: 55 min
- Yield: 6 servings 1x
- Category: Dessert
- Method: Baking
- Cuisine: American
- Diet: Vegetarian
Ingredients
- 6 medium apples (like Granny Smith or Honeycrisp), peeled, cored, and sliced 1/4-inch thick
- 1/4 cup granulated sugar
- 1 tablespoon all-purpose flour
- 1 teaspoon ground cinnamon
- 1 tablespoon lemon juice
- 1/2 cup all-purpose flour (for topping)
- 1/2 cup packed light brown sugar (for topping)
- 1/2 cup old-fashioned rolled oats (not instant)
- 1/4 teaspoon ground cinnamon (for topping)
- 1/4 teaspoon salt
- 1/2 cup (1 stick) cold unsalted butter, cut into small cubes
Instructions
- Preheat your oven to 375°F (190°C). Lightly grease an 8×8 inch baking dish or a 9-inch pie plate.
- In a large bowl, combine the sliced apples, 1/4 cup granulated sugar, 1 tablespoon flour, 1 teaspoon cinnamon, and lemon juice. Toss gently until the apples are evenly coated.
- Spread the apple mixture evenly into the prepared baking dish.
- In a separate medium bowl, prepare the topping. Whisk together the 1/2 cup flour, brown sugar, oats, 1/4 teaspoon cinnamon, and salt.
- Cut the cold butter cubes into the dry topping mixture using a pastry blender or your fingertips. Work quickly until the mixture resembles coarse crumbs with some pea-sized pieces of butter remaining. This creates the crunch.
- Sprinkle the topping evenly over the apples in the baking dish. Do not press down.
- Bake for 35 to 45 minutes, or until the topping is golden brown and the apple filling is bubbly and tender when pierced with a fork.
- Remove from the oven and let it cool for at least 15 minutes before serving.
- Serve warm with a scoop of vanilla ice cream.
Notes
- For the best crunch, make sure your butter is very cold when mixing the topping.
- Use a mix of tart and sweet apples for the best flavor balance.
- If the topping browns too quickly before the apples are tender, loosely cover the dish with aluminum foil for the last 10 minutes of baking.
Nutrition
- Serving Size: 1 serving
- Calories: 380
- Sugar: 35g
- Sodium: 150mg
- Fat: 20g
- Saturated Fat: 12g
- Unsaturated Fat: 8g
- Trans Fat: 0.5g
- Carbohydrates: 50g
- Fiber: 4g
- Protein: 4g
- Cholesterol: 50mg