
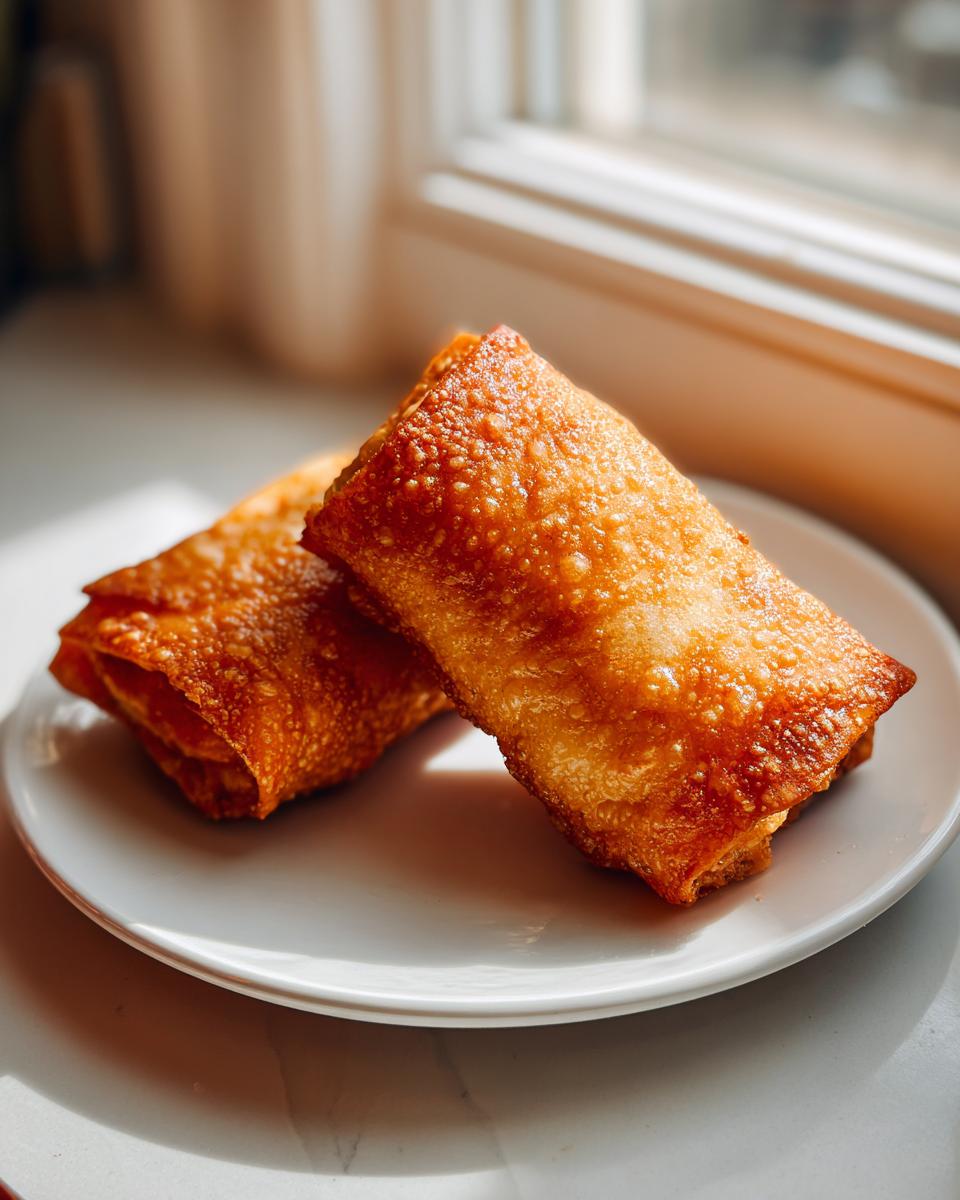
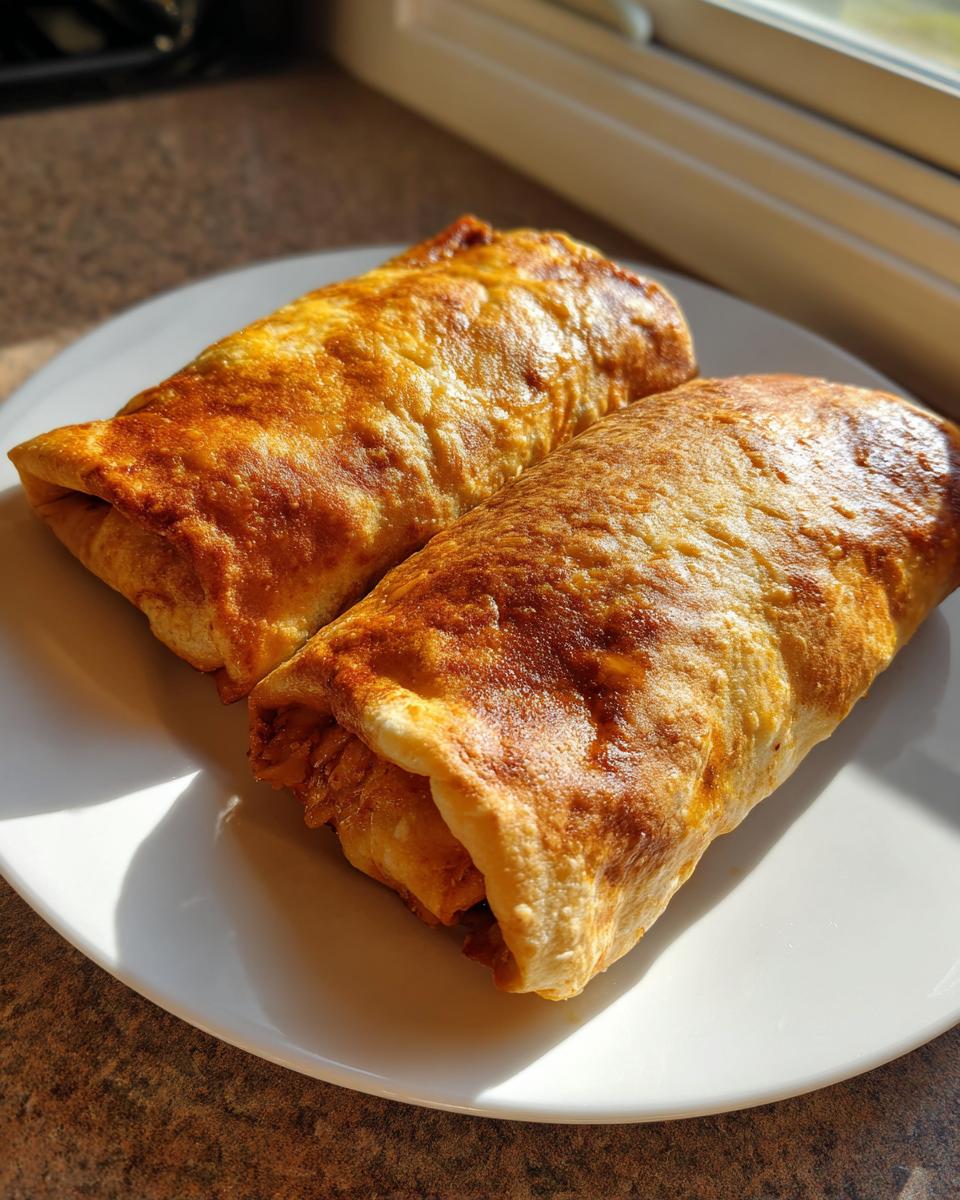
Oh, I know that craving! You want that satisfying crunch, the warm, savory filling of a classic Tex-Mex favorite, but the thought of deep-frying on a Tuesday night just feels like too much work—and maybe a little too greasy. Me too! That’s why I put so much effort into perfecting this recipe for Baked Chicken Chimichangas. Forget everything you think you know about oven food being soggy; we are absolutely achieving that golden, crispy exterior right here, trust me.
This isn’t just about making dinner; it’s about simplifying comfort food. When I started Taste This Plate, my goal was to take those dishes everyone loves but thinks are too complicated or unhealthy and make them accessible for everyday life, just like my grandmother taught me with her simple, honest cooking. You can read more about my journey and philosophy on my About Page! These are easy, super flavorful, and honestly make the best weeknight Mexican dinner because everything comes together in under 40 minutes. You get all the flavor payoff with none of the oil splatter. We’re proving that you can absolutely have guilt-free comfort food!
- Why You Will Love These Easy Baked Chimichangas
- Gathering Ingredients for Your Baked Chicken Chimichangas
- The Secret to Crispy Oven Baked Chicken Burritos: Prep Work
- Mastering the Roll: Assembling Your Baked Chicken Chimichangas
- The Key Step for Golden Brown Tortilla Rolls: Brushing for Crispness
- Baking Instructions for Perfect Baked Chicken Chimichangas
- Tips for Success with Your Weeknight Chicken Recipe
- Serving Suggestions for Your Simple Dinner Chicken
- Frequently Asked Questions About Baked Chicken Chimichangas
- Nutritional Snapshot of These Healthy Mexican Dinner Ideas
- Share Your Experience Making Baked Chicken Chimichangas
Why You Will Love These Easy Baked Chimichangas
I know you’re busy, and that’s why these Easy Baked Chimichangas are going to jump right into your regular rotation. Seriously, these hit all the right notes without keeping you chained to the stove after a long day.
- True Crispiness: We master that satisfying crunch in the oven—no fryer needed! It’s the perfect oven fried chimichangas hack.
- Healthy Mexican Dinner Ideas: You get that rich, cheesy flavor you crave, keeping this firmly in the Guilt Free Comfort Food category.
- Speedy Prep: This is a genuine Quick Tex Mex Dinner. By using pre-shredded chicken, you skip half the work!
- Family Approved: They are cheesy, savory, and roll up perfectly every single time.
Gathering Ingredients for Your Baked Chicken Chimichangas
Okay, let’s talk ingredients! Because we are aiming for that Simple Dinner Chicken status, I focused on using things you likely already keep stocked or can grab fast on your grocery run. No exotic spices here, just reliable flavors! Feel free to skip the refried beans if you’re keeping things super light, but I honestly think they add great body to the filling.
Here is what you’ll need for the filling and the wrapping:
- For the Filling: 2 cups cooked, shredded chicken (this is the key convenience step!), 1 teaspoon chili powder, 1 teaspoon cumin, 1/2 teaspoon garlic powder, 1/2 teaspoon onion powder, 1/4 teaspoon salt, 1/4 teaspoon black pepper, 1 cup shredded Monterey Jack or cheddar cheese, and 1/2 cup refried beans (if you’re using them!).
- For Assembly: 8 large flour tortillas—make sure they are the big burrito size, not taco size, so they can wrap tightly!
- For Crispness: 2 tablespoons butter, melted, or olive oil, plus cooking spray for the pan. That fat is what makes this a Best Baked Burrito Recipe.
The Secret to Crispy Oven Baked Chicken Burritos: Prep Work
Alright, friends, before we even think about rolling, we have to set the stage! Getting the oven hot is non-negotiable if you want those Crispy Oven Baked Chicken Burritos that taste almost fried. Preheat that bad boy to 400 degrees—no peeking or opening the door once we get baking! And yes, you absolutely need to spray your baking sheet down well, or grab some parchment paper. We want crispy bottoms, not sticking disasters!
Now for the speedy bit: the chicken prep. Since this is our go-to for a Weeknight Chicken Recipe, I rely on pre-cooked, shredded chicken. If you’re starting with an Instant Pot chicken breast or just used up some leftovers, this comes together lightning fast. This is where we build the flavor foundation before we even wrap anything.
Preparing the Flavorful Shredded Chicken Tortilla Bake Filling
Time to make our chicken sing! Grab a medium bowl because we’re getting everything coated. Throw in your 2 cups of shredded chicken. Then, we add our spices: chili powder, cumin, garlic powder, onion powder, salt, and pepper. Just mix it all up until every single strand of chicken looks beautifully seasoned. I like to take a second here just to run my hands through it to make sure there are no dry pockets left—that’s important!
If you are using the refried beans for extra body and richness (which I often do for a satisfying Shredded Chicken Tortilla Bake), now is the time to add that tablespoon or so right into the seasoned chicken. Gently fold it in. We don’t want to mash it; we want it marbled with the chicken mixture so every single future chimichanga gets a little bit of that creamy depth. You can check out my tips for making tender chicken for this base over on my Melt in Your Mouth Chicken post!
Mastering the Roll: Assembling Your Baked Chicken Chimichangas
This is the part where things start looking like actual, delicious chimichangas! Please, please, please—do not skip warming your tortillas. Cold tortillas hate being rolled; they crack halfway through, and you end up with a mess instead of what should be a perfect Cheesy Chicken Chimichangas Recipe.
I usually microwave them in a stack of four wrapped in a damp paper towel for about 20 seconds. They get perfectly soft and pliable. Lay one warm tortilla flat on your counter.
Next, structure your filling. Put a small layer of refried beans (if you used them) down the center line. Then sprinkle maybe a quarter cup of your seasoned chicken mixture right over the beans. Don’t overstuff them! This is the key mistake everyone makes. Too much filling means they burst open during baking.
Now, for the sealing technique. Fold both sides—the left and right edges—in toward the center, just barely overlapping them onto the filling. Think like you are folding a giant envelope. Then, starting at the bottom edge, roll it up tightly over the filling and continue rolling until you have a snugly sealed log. Keep that seam side down when you place it gently on your prepared baking sheet. We want tight rolls so they hold their shape and get that great crunch later!
The Key Step for Golden Brown Tortilla Rolls: Brushing for Crispness
Okay, this right here is the moment of truth! If you want to know the secret behind turning these into Baked Chicken Chimichangas that genuinely crisp up without getting submerged in oil, pay attention. It all comes down to the fat layer we apply right before they go into the oven. This step is truly the Oven Fried Chimichangas Hack that makes this recipe work!
You need that melted butter or olive oil. About two tablespoons should get you where you need to go for eight rolls. Take your pastry brush—I love using my inexpensive silicone one for this—and paint every single visible surface of those rolled tortillas. I mean *every* surface. If you miss a spot, that area will steam instead of crisp, and that is not what we want!
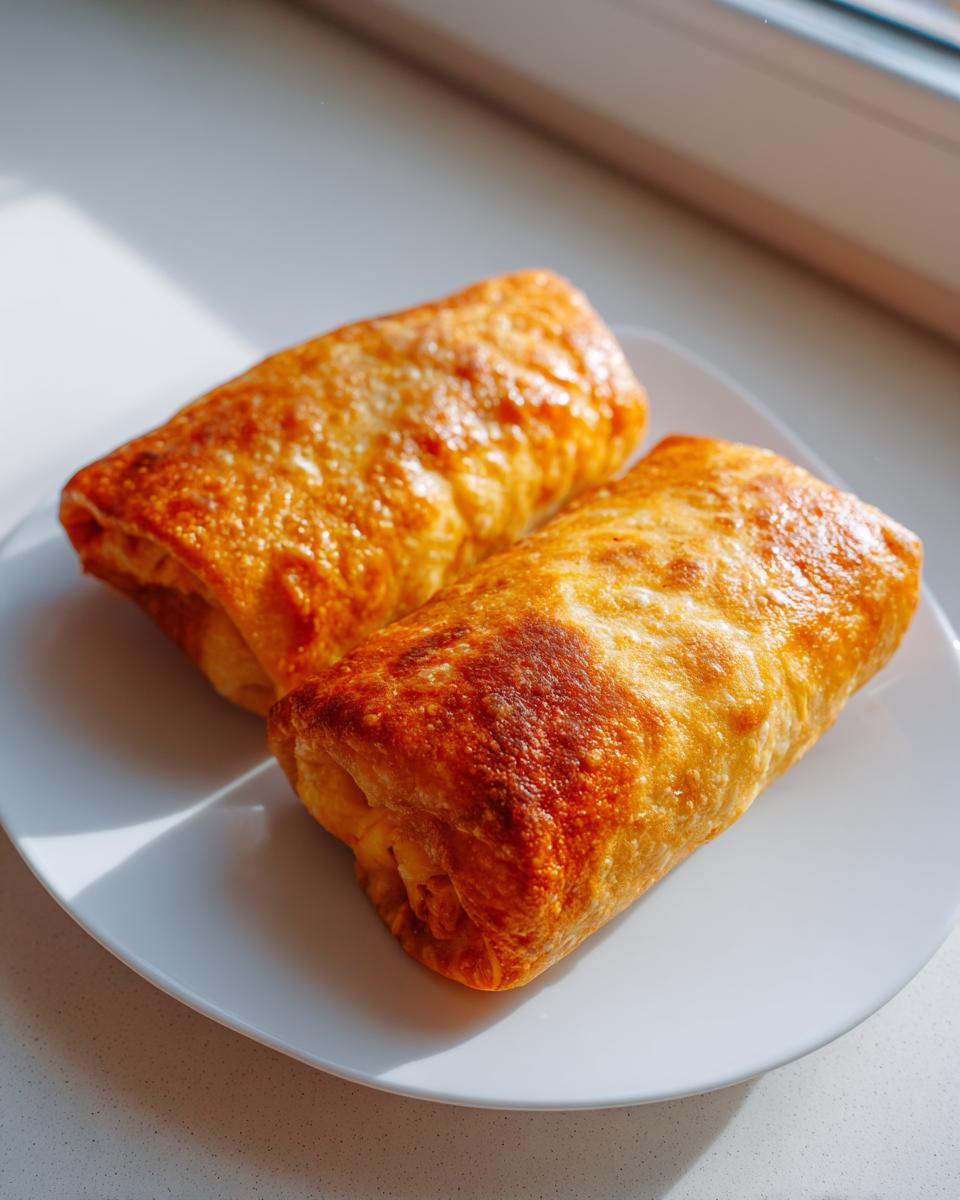
When you brush them thoroughly, you’re creating a barrier that protects the tortilla shell from drying out too fast while allowing the heat in the 400-degree oven to toast the outside golden brown. It’s simple science, really, but it makes these baked rolls taste incredible. Be generous! This is non-negotiable for maximum crunch!
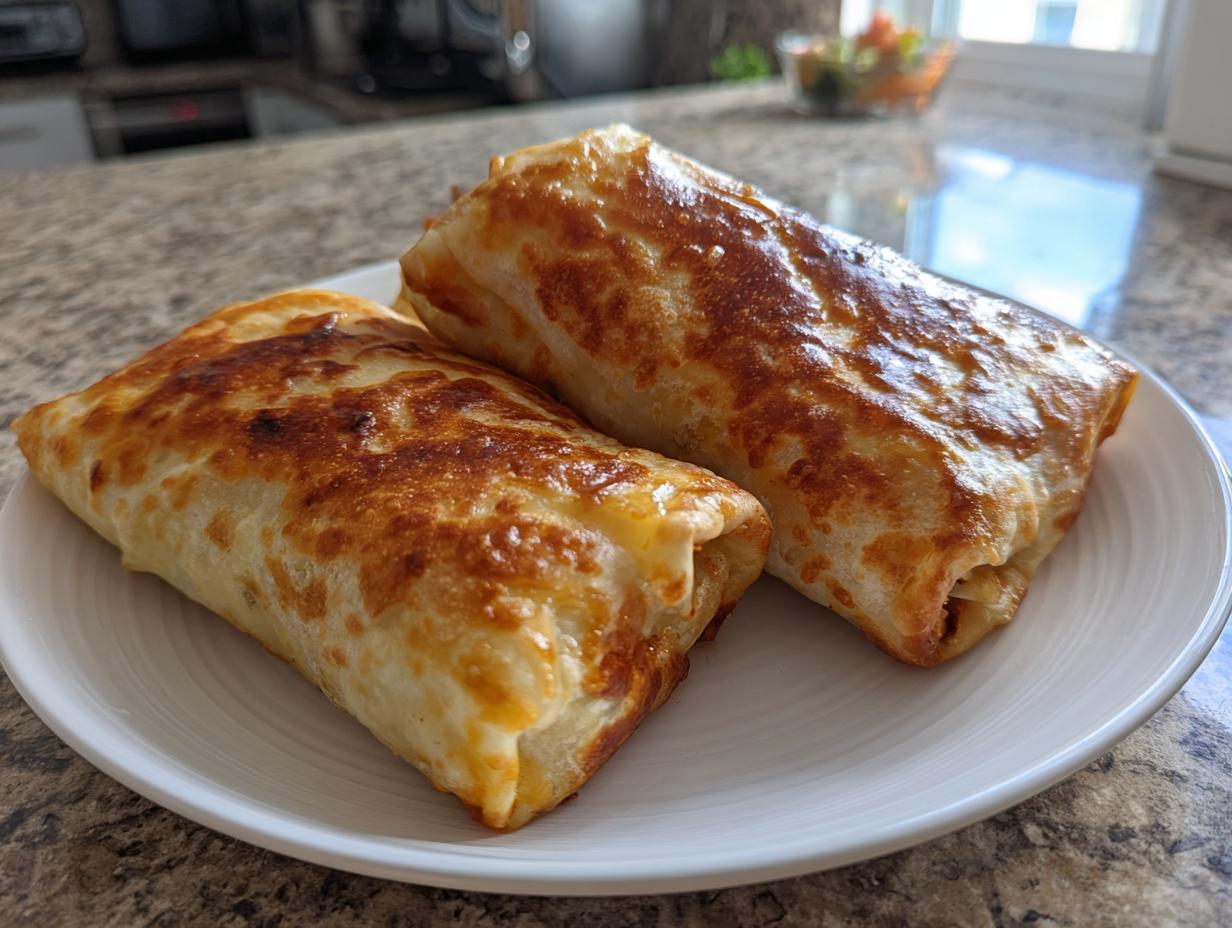
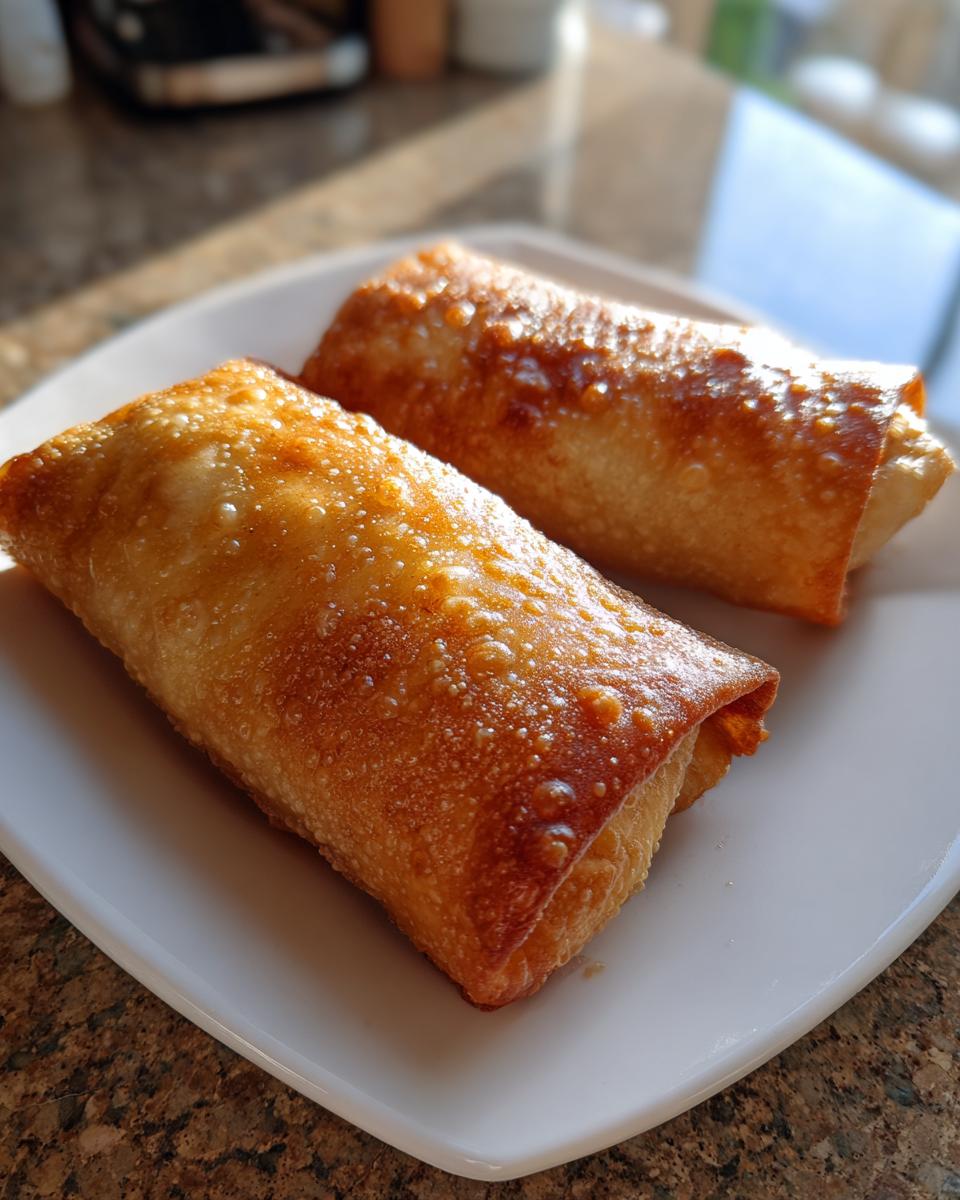
Baking Instructions for Perfect Baked Chicken Chimichangas
We’ve seasoned them, we’ve rolled them tight, and we’ve given them that beautiful buttery coat. Now it’s time for the heat! Remember, we’re aiming for true golden perfection here so they taste like genuine Authentic Flavor Baked Rolls, not just warm burritos.
Your oven should be roaring hot at 400 degrees Fahrenheit (200 degrees Celsius). Carefully place your baking sheet with the chimichangas seam-side down into that hot oven. Set your timer for about 15 to 20 minutes total, but don’t just walk away! The most critical part of getting that all-over crispness is the flip.
Halfway through baking—maybe around the 8-minute mark—you need to gently take the pan out and flip every single roll over. Use tongs if you want to keep your fingers safe! This ensures the tops get golden and the bottoms—which were sitting on the pan—get their turn to turn perfectly crisp too. You’ll know they are done when they look deeply golden brown all over, and they sound slightly firm if you tap them gently. If you want to speed up the process or see how others are doing theirs, stop on over at All Mom Recipes for inspiration!
Once they look exactly how you want them—crispy and brown—pull them out! I love resting them for just literally two minutes before serving; it helps any initial steam settle down and keeps the shell crunchy. If you want more oven magic tips, check out my favorites for Baked Hamburger Steaks!
Tips for Success with Your Weeknight Chicken Recipe
Even though these Baked Chicken Chimichangas are fast, I know life gets hectic! That’s why I always rely on make-ahead strategies. If you prep your seasoned chicken filling ahead of time—say, you make a big batch while you’re cooking one night—you can store it right in the fridge for up to three days. It makes assembling these on a busy weeknight literally just a 10-minute job. That’s a huge win for any Weeknight Chicken Recipe!
And listen, if you want that richer, almost creamy flavor that reminds people of those old restaurant favorites, I have a little trick for you. A small dollop of cream cheese mixed into the seasoned chicken is exactly what you need to get that Copycat Chi-Chi’s Chimichangas vibe. You can find lots of great ideas for making the whole meal easier, like prepping a big dish of Green Chile Chicken Casserole to reheat later, too!
The absolute best tip for maximizing ease is batch prepping! You can assemble all eight of these Make Ahead Chicken Burritos, place them seam-side down on your baking sheet, cover them tightly, and stick them in the freezer. When you’re ready to cook them, just toss them straight from frozen onto the hot sheet. You’ll need about 5 to 10 extra minutes in the oven, but having ready-to-bake comfort food tucked away is the best kind of organization. For more inspiration on making restaurant favorites at home, check out this recipe for Chi-Chi’s Baked Chicken Chimichangas!
Serving Suggestions for Your Simple Dinner Chicken
Now that you have these perfectly crispy, flavorful Simple Dinner Chicken rolls ready to go, you can’t just eat them plain, right? That’s where the toppings come in to complete the experience! Because the filling is savory and cheesy, it pairs beautifully with anything cool and tangy.
You absolutely need salsa—any kind works—and a dollop of sour cream or Greek yogurt. If you’re feeling like going all out, whip up a batch of fresh guacamole! You can find my super easy dip recipe here: Homemade Guacamole Party Dip. For a fuller meal, serve these chimichangas alongside some simple cilantro lime rice or a crisp, fresh green salad. That balances everything out so nicely!
Frequently Asked Questions About Baked Chicken Chimichangas
I had so many questions swirling when I was perfecting this recipe, especially about using the oven instead of the fryer for that crunch! I figured I should clear up a few common snags so your experience making these Baked Chicken Chimichangas is flawless from start to finish. Cooking should be fun, not frustrating!
Can I use store-bought rotisserie chicken for this recipe?
Oh, absolutely! If you’re using rotisserie chicken, that just makes this an even quicker Weeknight Chicken Recipe. Go for it! You just need two cups of shredded meat. Make sure you toss it really well with all those spices we talked about so it really soaks up the flavor. Honestly, that’s probably my favorite shortcut for a Simple Dinner Chicken.
How do I keep them warm before serving a big crowd?
This is smart thinking, especially if you’re making a big batch! You can totally keep these warm without losing too much crispness. After they come out of the oven golden brown, spread them in a single layer on a wire rack set over a baking sheet. You can pop that rack back into a very low oven, maybe 200 degrees, for about 20 minutes while you finish everything else. They’ll stay warm while staying less steamed than if you covered them.
Can I use corn tortillas instead of flour tortillas?
Here’s where we have to be a little picky about texture. Corn tortillas work great for tacos or flautas, but for these, I strongly recommend sticking to large, soft flour tortillas. Corn tortillas tend to crack when you try to roll them this tightly, and they won’t achieve that beautiful, puffy, golden crispness that makes these Crispy Oven Baked Chicken Burritos so satisfying. Flour gives you more flexibility for that tight roll!
Is there a way to make these leaner still?
If you want even more Healthy Mexican Dinner Ideas in your life, you can swap out the melted butter for olive oil, or even use a light coat of avocado oil spray instead of brushing. Also, swap the cheese for reduced-fat Monterey Jack. You can find more great tips on keeping proteins lean over on my post about Lemon Pepper Chicken Thighs—the technique of using great seasoning matters more than the fat!
Nutritional Snapshot of These Healthy Mexican Dinner Ideas
When we talk about making these Baked Chicken Chimichangas part of your regular rotation, we are talking about making smart swaps without feeling deprived. That’s the beauty of baking instead of frying—we slash the fat content significantly while keeping that wonderful savory chicken and cheese filling intact!
Because we want you to focus on having fun in the kitchen, not worrying about counting every ingredient, please see these numbers below as a general guide. This information reflects the recipe utilizing the optional refried beans but sticking standard cheese selections.
- Serving Size: 1 chimichanga
- Estimated Calories: 350
- Estimated Fat: 15g (See note below on how frying impacts this!)
- Estimated Protein: 20g
- Estimated Carbs: 35g
See that fat number? If you deep-fried these instead of brushing them lightly with oil, that number would easily double or triple. That’s why this is one of my favorite Healthy Mexican Dinner Ideas—we keep the comfort but ditch the heavy grease. You get a fantastic meal that fits into your busy, healthy lifestyle!
Nutrition Disclaimer
Now, a quick but important note because I want you to trust what you read here at Taste This Plate. These nutritional figures are just estimates based on standard ingredient calculations. If you use extra cheese, choose a leaner bean option, or if your tortillas vary in size, your final count will certainly change! Always measure your own ingredients if you are tracking specific dietary needs. Happy cooking!
Share Your Experience Making Baked Chicken Chimichangas
Well, that’s it! You’ve done it! You’ve transformed simple ingredients into a plate full of crispy, flavorful, Baked Chicken Chimichangas. I truly hope your kitchen smells amazing right now, just like mine does every time I make a batch for dinner.
Now that you’ve made them, I need to know how they turned out! Did you get that great golden-brown shell we were aiming for? The best compliments for me aren’t just around the dinner table—though those are great too! I love hearing from you in the comments below. Did you try the little cream cheese trick? Did you serve them up with my guacamole?
Your feedback really helps other cooks see that they can master this too, and that’s exactly what we’re here for at Taste This Plate. If you snapped a photo of your gorgeous, crunchy rolls, please tag us on social media! Seeing your finished meals and hearing that you’re creating happy kitchen memories is why I spend all my time testing these recipes.
If anything didn’t go exactly to plan, or if you have a brilliant substitution that worked for you, please don’t hesitate to reach out! You can always drop me a note through my Contact Page as well. Thanks so much for joining me in the kitchen today. Happy Cooking!
PrintThe Ultimate Crispy Baked Chicken Chimichangas: Easy Weeknight Mexican Dinner

Make flavorful, crispy chicken chimichangas in your oven. This easy recipe delivers a satisfying, guilt-free comfort food perfect for busy weeknights.
- Prep Time: 15 min
- Cook Time: 20 min
- Total Time: 35 min
- Yield: 8 servings 1x
- Category: Dinner
- Method: Baking
- Cuisine: Mexican
- Diet: Vegetarian
Ingredients
- 2 cups cooked, shredded chicken
- 1 teaspoon chili powder
- 1 teaspoon cumin
- 1/2 teaspoon garlic powder
- 1/2 teaspoon onion powder
- 1/4 teaspoon salt
- 1/4 teaspoon black pepper
- 1 cup shredded Monterey Jack or cheddar cheese
- 1/2 cup refried beans (optional)
- 8 large flour tortillas (burrito size)
- 2 tablespoons butter, melted, or olive oil
- Cooking spray
Instructions
- Preheat your oven to 400 degrees Fahrenheit (200 degrees Celsius). Lightly coat a baking sheet with cooking spray.
- In a medium bowl, combine the shredded chicken with chili powder, cumin, garlic powder, onion powder, salt, and pepper. Mix until the chicken is evenly seasoned.
- Warm the tortillas briefly in the microwave or a dry skillet for about 15 seconds each. This makes them pliable and prevents tearing when rolling.
- Lay a tortilla flat. If using, spread about 1 tablespoon of refried beans down the center. Top with about 1/4 cup of the seasoned chicken mixture, followed by a sprinkle of cheese.
- Fold the sides of the tortilla inward over the filling, then tightly roll the bottom edge up and over the filling, creating a sealed roll. Place the chimichanga seam-side down on the prepared baking sheet. Repeat with the remaining filling and tortillas.
- Brush the tops and sides of each rolled chimichanga generously with the melted butter or olive oil. This step is key for achieving a golden, crispy texture.
- Bake for 15 to 20 minutes, flipping them halfway through, until they are golden brown and crispy on all sides.
- Serve immediately with your favorite toppings like salsa, sour cream, or guacamole.
Notes
- To get the best crispiness without frying, make sure you brush the tortillas thoroughly with fat before baking.
- You can prepare the filling ahead of time and store it in the refrigerator for up to three days.
- For a make-ahead option, assemble the chimichangas, place them on the baking sheet, cover, and freeze them. Bake directly from frozen, adding about 5 to 10 minutes to the total cook time.
- If you want a copycat flavor similar to Chi-Chi’s, add a small amount of cream cheese to the chicken mixture for extra richness.
Nutrition
- Serving Size: 1 chimichanga
- Calories: 350
- Sugar: 3
- Sodium: 450
- Fat: 15
- Saturated Fat: 7
- Unsaturated Fat: 8
- Trans Fat: 0
- Carbohydrates: 35
- Fiber: 3
- Protein: 20
- Cholesterol: 60