
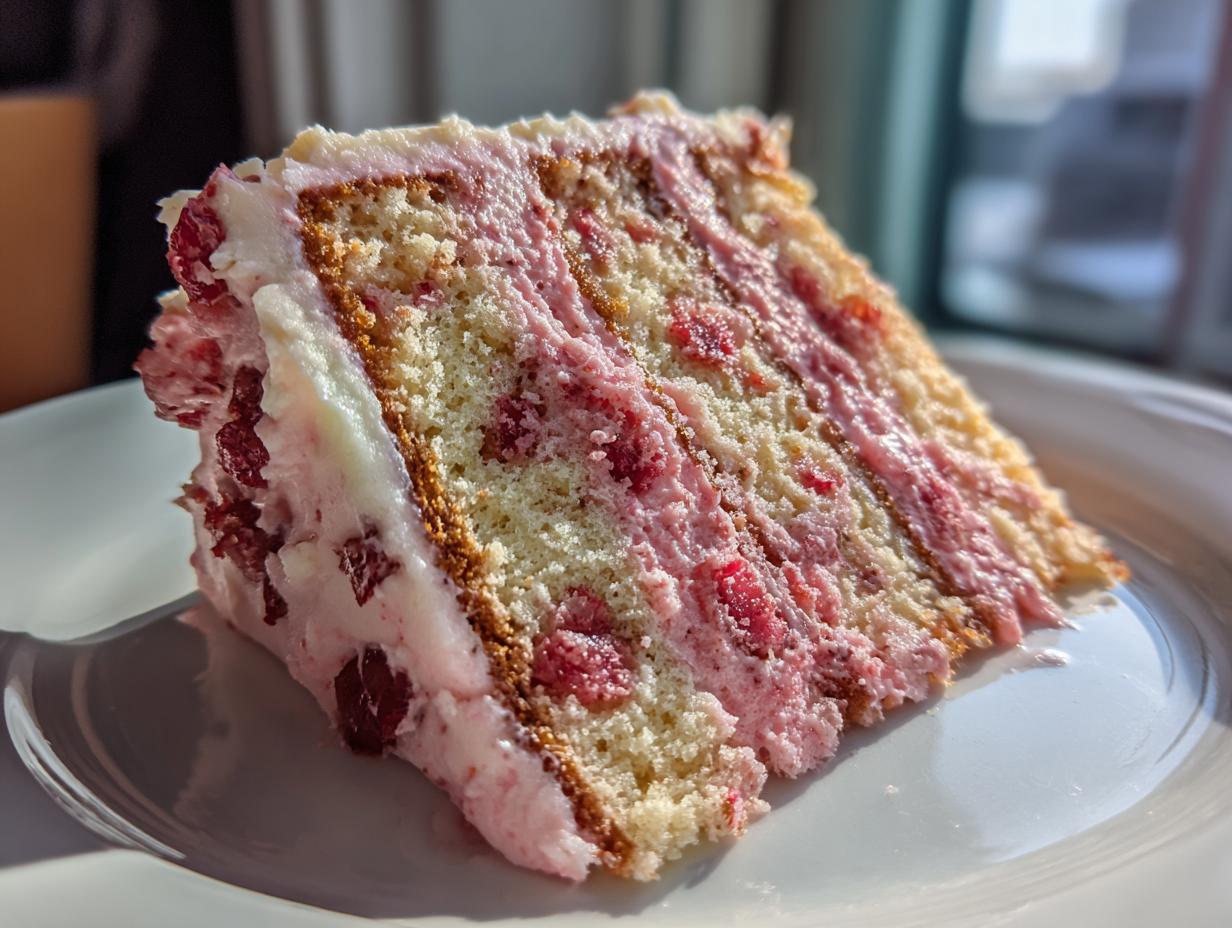
Forget those pale, weak excuses for dessert—when summer rolls around, we demand real strawberry flavor! This isn’t just any cake; this is truly the Best Homemade Strawberry Cake From Scratch you’ll ever bother with. Seriously, why settle for anything less when you can capture that pure, bright berry taste right here? Baking our strawberry cake from scratch means we control the quality, packing in as much fresh fruit goodness as possible for a texture that is just unbelievably moist. After years of trying every recipe out there, I finally landed on this method that honors the spirit of making things with love, just like Kate mentioned you should over at Taste This Plate!
- Why This Homemade Strawberry Cake Recipe is the Ultimate Dessert
- Gathering Ingredients for Your Strawberry Cake from Scratch
- Expert Tips for the Moist Strawberry Cake Tutorial
- Step-by-Step Instructions for Your Strawberry Layer Cake
- Crafting the Perfect Strawberry Cake with Cream Cheese Frosting
- Tips for Strawberry Layer Cake Design and Assembly
- Storage and Reheating for Your Strawberry Cake
- Frequently Asked Questions About This Strawberry Cake
- Estimated Nutritional Snapshot for This Dessert
Why This Homemade Strawberry Cake Recipe is the Ultimate Dessert
Look, I’ve made a thousand cakes in my life, and I can tell you this: store-bought flavorings just don’t cut it. If you want that real zing of summer, you have to go all the way! This Homemade strawberry cake recipe is the absolute best way to capture that essence. We’re ditching the fake stuff entirely. Because we make this Best strawberry cake from scratch, we control everything—the quality of the butter, the amount of actual fruit, and most importantly, that gorgeous crumb structure!
Key Features of Our Fresh Strawberry Cake
- We use real, fresh strawberries, smashed into a vibrant puree for depth of flavor. You can’t fake that!
- The texture is just fantastic—soft, tender, and unbelievably moist, thanks to using milk and that fresh fruit combo.
- That frosting? It’s rich, tangy, and perfectly complements the sweet cake layers. It simply sings!
If you’re ready to move past the average cake and create a centerpiece for your next get-together, jump over and browse some more amazing ideas at Taste This Plate. Trust me, this effort is worth it for the payoff!

Gathering Ingredients for Your Strawberry Cake from Scratch
Before we even think about turning on the mixer, we need to talk about what we’re putting in this beautiful strawberry cake. Remember how Kate always talks about simple ingredients creating extraordinary meals? That’s exactly my philosophy here! We are keeping this shopping list straightforward—everything you need should be easy to find at your regular grocery store. No specialty trips required, promise!
Cake Batter Ingredients
Get your mise en place ready! Having everything measured out makes the process smooth, especially since we’re getting real fruit involved:
- 1 3/4 cups all-purpose flour
- 1 3/4 cups granulated sugar
- 1 tablespoon baking powder
- 1/2 teaspoon salt
- 1/2 cup unsalted butter, softened just right
- 3 large eggs
- 1 teaspoon vanilla extract
- 1 cup whole milk
- 1/2 cup fresh strawberry puree (from about 1 cup fresh strawberries!)
- 1 cup fresh strawberries, finely diced
Strawberry Cake with Cream Cheese Frosting Components
For that dreamy topping, make sure your dairy items are good and soft. This is key for that smooth, fluffy outcome:
- 8 ounces cream cheese, softened
- 1/2 cup unsalted butter, softened
- 3 cups powdered sugar, sifted (don’t skip sifting, trust me!)
- 1/4 cup fresh strawberry puree (yes, more berry goodness!)
- 1/2 teaspoon vanilla extract
- Pinch of salt
Expert Tips for the Moist Strawberry Cake Tutorial
We all want that perfect slice, right? That’s why I’m sharing the secrets to making this the most Moist strawberry cake tutorial you’ll ever read. The main thing that separates a good cake from an unforgettable one is how you treat the fruit. If you just toss in raw, mushy berries, you end up with weird pockets and sometimes even a gummy texture. We want tenderness throughout!
Since we’re committed to incredible flavor, we treat our fresh strawberries with respect before they even hit the dry mix. This makes all the difference in the final bake—no kidding!
Preparing the Fresh Strawberry Puree
For half a cup of puree, you’ll take about a cup of really ripe strawberries. Toss those beauties into a blender—just blend them happy and smooth! Now, here’s the insider trick: run that bright pink mush through a fine-mesh sieve over a bowl. You’re just catching those tiny seeds so your batter is silky smooth. You might lose a tiny bit of volume, but the texture improvement is huge. Don’t forget, we’re also folding in diced fresh berries later for that little burst of texture, so we save those vibrant chunks!
Want to see how I manage moisture in other baked goods? Check out my tips for carrot banana muffins; the principles of avoiding dough shock are similar!
Step-by-Step Instructions for Your Strawberry Layer Cake
Alright, time to put those beautiful ingredients to work and bake up this gorgeous strawberry layer cake! Getting the timing right here, especially concerning mixing, is what keeps the cake tender and light, not tough. We are aiming for perfection in that crumb!
Mixing the Strawberry Cake Batter
First things first: always preheat that oven to 350°F (175°C) and get those 9-inch cake pans greased and floured. Now, for the mixing! Start by beating that softened butter with both sugars until it’s fluffy—this is called creaming, and it whips in the air we need. When we add the wet ingredients—that milky, pureed mixture—we do it slowly. Don’t just dump it all in at once! Mix only until it barely comes together. If you beat it too much now, you’ll develop the gluten and end up with a tough cake. The very last thing you do, using a spatula, is gently fold in those diced fresh strawberries. We want them suspended in the batter, not broken down by the mixer!
Baking and Cooling the Layers
Divide that lovely pink batter evenly between your two prepared pans. Pop them into the hot oven and let them bake for about 30 to 35 minutes. You know they’re done when a wooden pick slides right into the center and pops out clean! This is critical so you don’t get that sunken middle later. When they come out, resist the urge to flip them immediately—let them sit tight in those pans for a solid 10 minutes. This brief cooling period helps them firm up just enough so they come out cleanly when you invert them onto a wire rack to cool completely. Remember, frosting a warm cake is a recipe for disaster, so patience rules here!
If you want to see how I handle tricky batters, like those that use a lot of oil or fruit, take a peek at my tips for the gooey butter pecan cake; we take precautions there too!
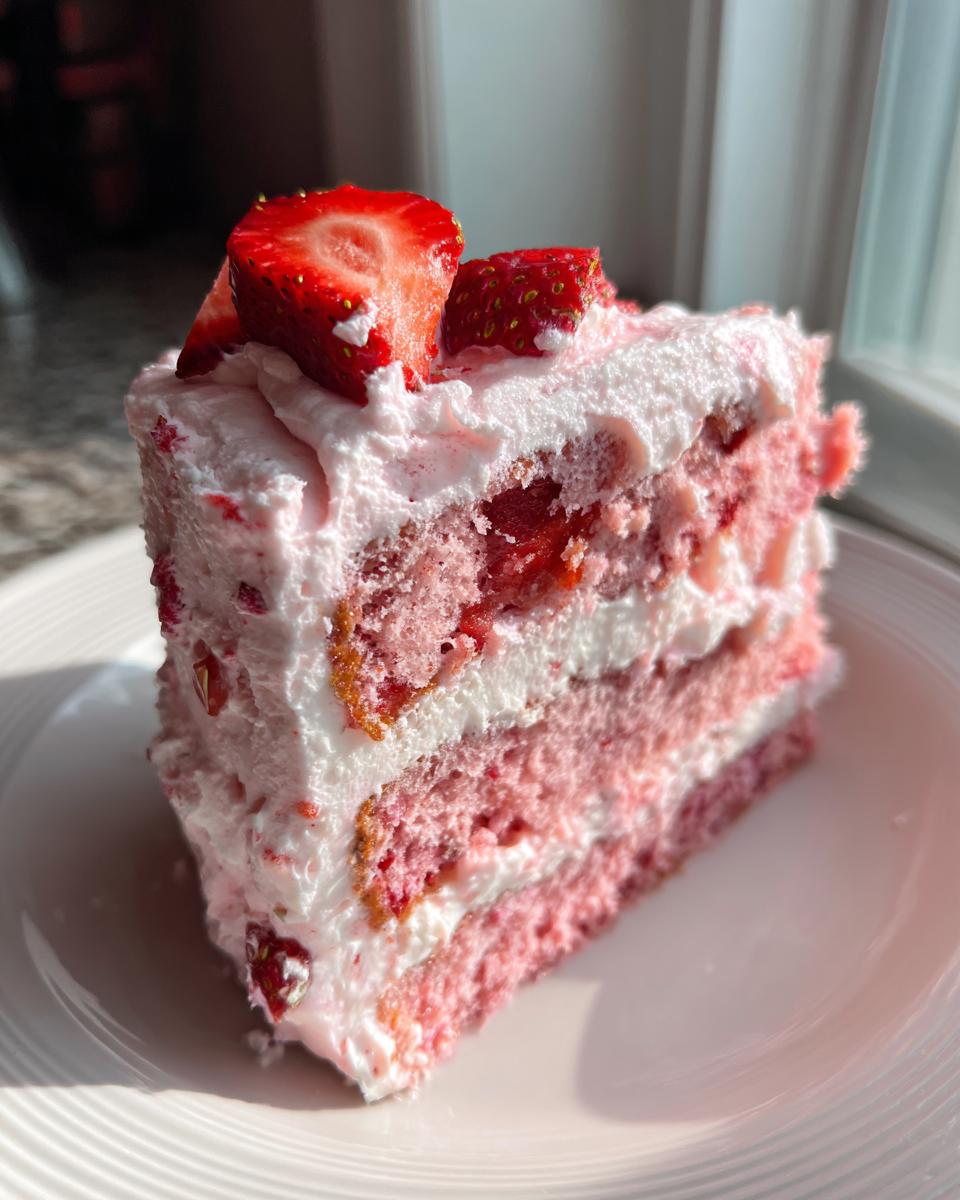
Crafting the Perfect Strawberry Cake with Cream Cheese Frosting
Okay, let’s talk about the crown jewel of this whole operation: the frosting! A truly supreme strawberry cake with cream cheese frosting needs that perfect balance of tang and sweetness, and a texture that just melts in your mouth. We aren’t making thin, runny icing here, oh no. We need something sturdy enough to stack those layers but light enough that it doesn’t weigh down the tender cake.
My absolute favorite part of making this is whipping up the frosting while the cakes chill. It smells incredible! If you’ve ever made a rich dessert, you know that the base of the topping matters just as much as the cake itself. While some crazy folks might use a simple strawberry whipped cream, we are going for rich decadence here!
Achieving Light and Fluffy Strawberry Buttercream Frosting Recipe
When we start whipping the cream cheese and butter—which should both be very soft, remember—we need to take our time. Beat those two together until they are completely smooth and there are zero little lumps hiding in there. Then, we slowly introduce that sifted powdered sugar, a cup at a time. If you dump it all in at once, you’ll launch a sugar cloud across your kitchen, and trust me, that is not fun to clean up! Once it’s mostly mixed, we drizzle in that final bit of strawberry puree and vanilla. Beat it on high for a full three minutes until it looks visibly lighter in color and seriously fluffy. It’s almost too good to put on the cake!
Speaking of rich, fruity toppings, if you ever need inspiration for other flavor pairings, you should check out the ideas on the pineapple coconut dream cake—it’s amazing!
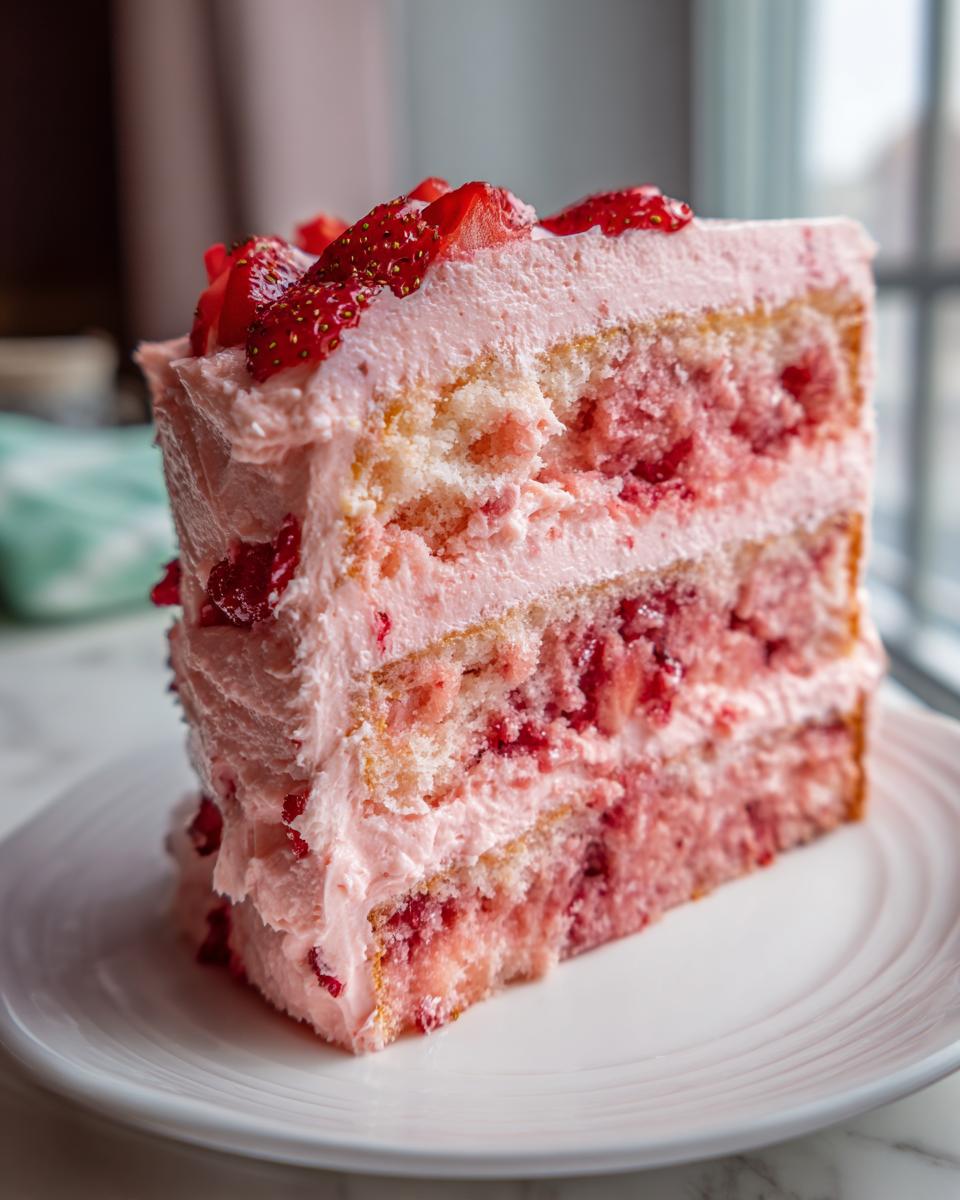
Tips for Strawberry Layer Cake Design and Assembly
Now that we have the moist cake, and we’ve got that gorgeous, fluffy strawberry cake with cream cheese frosting ready to go, it’s time for the fun (and sometimes scary) part: making it look beautiful! This is where we turn our homemade masterpiece into a real showstopper. We want an amazing Strawberry layer cake design that makes everyone pause before taking that first slice. Seriously, presentation matters when you’ve worked this hard!
I have learned this the hard way! Early on, I once tried stacking two slightly domed layers without leveling them first. Big mistake! It looked like a leaning tower of Pisa by the time I got to the outer coat, and half the frosting slid right off the side. Never again! You always want flat tops before you start stacking.
Leveling Your Cakes Like a Pro
Before anything else, those baked domes have to go. You can use a long, serrated knife—carefully, keeping it parallel to the counter—or, if you want my favorite trick, use a cake leveler tool. They are inexpensive and take the guesswork out. Shave off just enough so that the layer sits perfectly flat on your turntable. Keep those trimmed bits for yourself; they are the baker’s little reward!
The Essential Crumb Coat Trick
Once your layers are stacked, you absolutely must apply a crumb coat. This is a very thin layer of frosting that traps all those annoying loose crumbs that always seem to float up into your final, pretty layer of icing. Think of it like primer on a wall—it seals everything! Apply a thin, messy layer all over the stacked cake and then pop the whole thing into the fridge for about 20 minutes until that thin coat is set hard. It firms up the edges and makes the final coat look professional.
Achieving a Smooth Outer Finish
Once that crumb coat is set, bring out the rest of your frosting. Apply a generous amount to the top and sides of your chilled cake. Then, grab an offset spatula or a bench scraper. If you’re using a scraper, hold it vertically against the side of the cake while you slowly spin the turntable. This smooths things out like magic! If you want those nice sharp edges, use the back of a small metal spatula and gently run it around the top edge where the side meets the top surface. It takes practice, but the results are worth it for that stunning final presentation!
Once you master cake decorating, you might want to try some savory delights too, like my simple recipe for bacon gruyere egg bites—it’s all about technique!
Storage and Reheating for Your Strawberry Cake
It’s almost the worst feeling when you have leftovers of a perfect strawberry cake from scratch, only to realize two days later it’s gone weird! But good news—this cake holds up really well, as long as you treat it right. Since we used that luxurious cream cheese frosting, we have to be a little careful about leaving it out in a super warm kitchen, but freezing is honestly the secret weapon for long-term storage.
First rule: always cover the cake! Whether it’s the whole thing or just a slice waiting for your afternoon coffee, airtight containers are your best friend. Exposure to air is what dries out any cake, and we fought way too hard for this moisture to let that happen!
How Long Does It Last?
If your kitchen stays in a reasonable, cool spot (think low 70s Fahrenheit), you can typically leave the frosted layer cake on the counter, nicely covered, for about 24 hours. The sugar in the frosting acts as a bit of a preservative, but that cream cheese is best kept cool after that initial day on the dessert table.
For longer storage, refrigeration is the way to go. In the fridge, wrapped tightly with plastic wrap and then foil to prevent it from absorbing any fridge smells, this fresh strawberry cake can easily last four to five days. It will taste a little firm straight from the cold, but don’t worry—we have a fix for that!
Bringing Refrigerated Cake Back to Life
When you pull a slice of cake out of the fridge, it always feels a bit dense, right? That’s just the chilled fat in the butter and cream cheese tightening up. About 30 to 45 minutes before you plan to eat it, take the slice out and let it sit on the counter, still covered lightly, at room temperature. This slight warming allows the butter and cream cheese to soften back to that perfect creamy consistency. You get the best of both worlds: safe storage and that melt-in-your-mouth texture!
Freezing Slices for Later
If you really can’t get through the whole thing in five days—which is questionable, but I support you!—freezing is perfect. I actually prefer slicing the whole cake first, freezing the individual slices for an hour or so on a tray to set them up, and *then* wrapping each slice individually in plastic wrap and foil. They last great for about two months this way. When you want one, just unwrap it and let it thaw on the counter for a few hours; it comes back almost perfectly!
Frequently Asked Questions About This Strawberry Cake
Okay, I know when you tackle a recipe this good, you’re going to have questions! We want everyone to feel confident bringing this Homemade strawberry cake recipe to life, whether it’s your first time tackling a layer cake or you just ran out of fresh berries. I’ve pulled together the common things I hear people ask all the time when they’re planning to make this dessert. Don’t worry if you end up with a slightly different color; the flavor is what truly matters!
Can I use frozen strawberries instead of fresh in this strawberry cake recipe?
You absolutely can, especially if fresh ones are expensive or nowhere to be found! If you use frozen, you need to treat them carefully. Do not just toss them in frozen—they release too much water during baking and can mess up your beautiful batter structure. For the diced strawberries, thaw them completely and pat them super dry with paper towels before folding them in. For the required puree, you can use the frozen fruit as is, but strain the resulting liquid *extra* well to make sure you aren’t adding excess water to your cake batter.
How do I make this an Easy Strawberry Sheet Cake recipe?
If you need to feed a crowd or just prefer a simpler presentation (**Easy strawberry sheet cake recipe** alert!), adapting the batter is simple. Grease and flour a standard 9×13 inch pan (a true classic!). You’ll pour the batter in, just like normal, but you must watch the baking time. Because the batter spreads out over a wider, thinner area compared to two tall round pans, it’s going to bake faster. Start checking around the 25-minute mark. It might only take 28 to 32 minutes total. You still want that toothpick to come out clean, though!
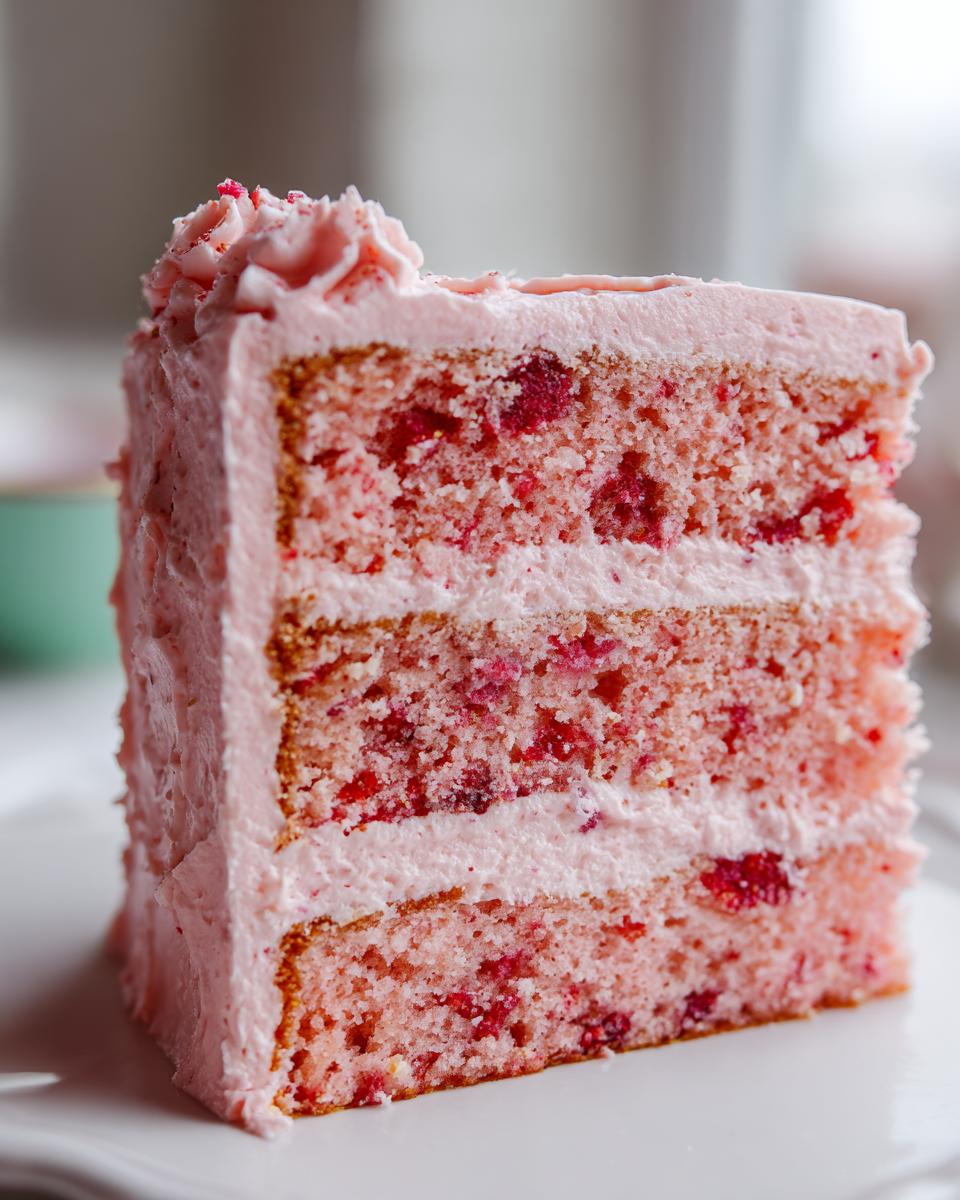
Will my cake turn out pink enough?
Honestly, sometimes the natural coloring from the puree only gives a very pale pink tint, which is totally fine! That just proves you used tons of real fruit. If you are aiming for that vibrant, classic pink color that pops on the table, a tiny drop or two of quality red food coloring in the frosting and the wet mix will help boost the hue without affecting the taste one bit. It really just depends on how bright your berries were to start with!
For more general cooking confidence and tips on substitutions that just make sense in the kitchen, you can always look at my guide on avocado toast with feta—simple swaps often lead to the best discoveries!
Estimated Nutritional Snapshot for This Dessert
Now, I know some of you are busy tracking macros or just trying to keep things balanced, so I wanted to give you a rough idea of what’s in a slice of this decadent strawberry cake. Keep in mind, this is based on cutting the recipe into 12 really generous slices, and since we’re using fresh fruit and real butter, it definitely delivers on flavor!
This doesn’t replace getting lab results, of course. As Kate always reminds us, baking should be joyful, not stressful, so take these numbers with a grain of salt, or in our case, maybe a sprinkle of sugar! These estimates help you plan, but the real joy is in the taste!
Here is the breakdown for one serving:
- Serving Size: 1 slice
- Calories: Around 450
- Sugar: About 55g (Hey, it’s cake, friends!)
- Fat: Roughly 22g (Mostly from that lovely butter and cream cheese)
- Protein: About 5g
- Carbohydrates: Around 60g
- Sodium: Close to 250mg
If you are trying to modify this for a lighter treat, perhaps consider swapping half the butter for something lower fat in the frosting, but honestly? Don’t mess too much with perfection. Just enjoy a smaller slice if you need to watch those numbers!
PrintThe Best Homemade Strawberry Cake From Scratch
Make this moist strawberry cake from scratch using fresh strawberries and top it with creamy strawberry cream cheese frosting. This recipe delivers superior flavor for your next celebration.
- Prep Time: 25 min
- Cook Time: 35 min
- Total Time: 60 min
- Yield: 12 servings 1x
- Category: Dessert
- Method: Baking
- Cuisine: American
- Diet: Vegetarian
Ingredients
- 1 3/4 cups all-purpose flour
- 1 3/4 cups granulated sugar
- 1 tablespoon baking powder
- 1/2 teaspoon salt
- 1/2 cup unsalted butter, softened
- 3 large eggs
- 1 teaspoon vanilla extract
- 1 cup whole milk
- 1/2 cup fresh strawberry puree (from about 1 cup fresh strawberries)
- 1 cup fresh strawberries, finely diced
- For the Frosting: 8 ounces cream cheese, softened
- 1/2 cup unsalted butter, softened
- 3 cups powdered sugar, sifted
- 1/4 cup fresh strawberry puree
- 1/2 teaspoon vanilla extract
- Pinch of salt
Instructions
- Preheat your oven to 350°F (175°C). Grease and flour two 9-inch round cake pans.
- In a large bowl, whisk together the flour, sugar, baking powder, and salt.
- Add the softened butter to the dry ingredients. Beat with an electric mixer on low speed until the mixture resembles coarse crumbs.
- In a separate bowl, whisk together the eggs, vanilla extract, milk, and 1/2 cup of strawberry puree until combined.
- Gradually add the wet ingredients to the dry ingredients, mixing on medium speed until just combined. Do not overmix.
- Gently fold in the finely diced fresh strawberries using a spatula.
- Divide the batter evenly between the prepared cake pans.
- Bake for 30 to 35 minutes, or until a wooden pick inserted into the center comes out clean.
- Let the cakes cool in the pans for 10 minutes before inverting them onto a wire rack to cool completely.
- To make the frosting, beat the softened cream cheese and butter together until smooth.
- Gradually add the sifted powdered sugar, mixing until incorporated.
- Beat in the 1/4 cup of strawberry puree, vanilla extract, and salt until the frosting is light and fluffy.
- Once the cakes are completely cool, frost and stack the layers.
Notes
- For the best flavor, use fresh, ripe strawberries for both the cake batter and the puree.
- To make the puree, blend fresh strawberries until smooth, then strain through a fine-mesh sieve to remove seeds if desired.
- If you want a deeper pink color, add a drop or two of red food coloring to the frosting.
Nutrition
- Serving Size: 1 slice
- Calories: 450
- Sugar: 55g
- Sodium: 250mg
- Fat: 22g
- Saturated Fat: 13g
- Unsaturated Fat: 9g
- Trans Fat: 0.5g
- Carbohydrates: 60g
- Fiber: 1g
- Protein: 5g
- Cholesterol: 90mg