
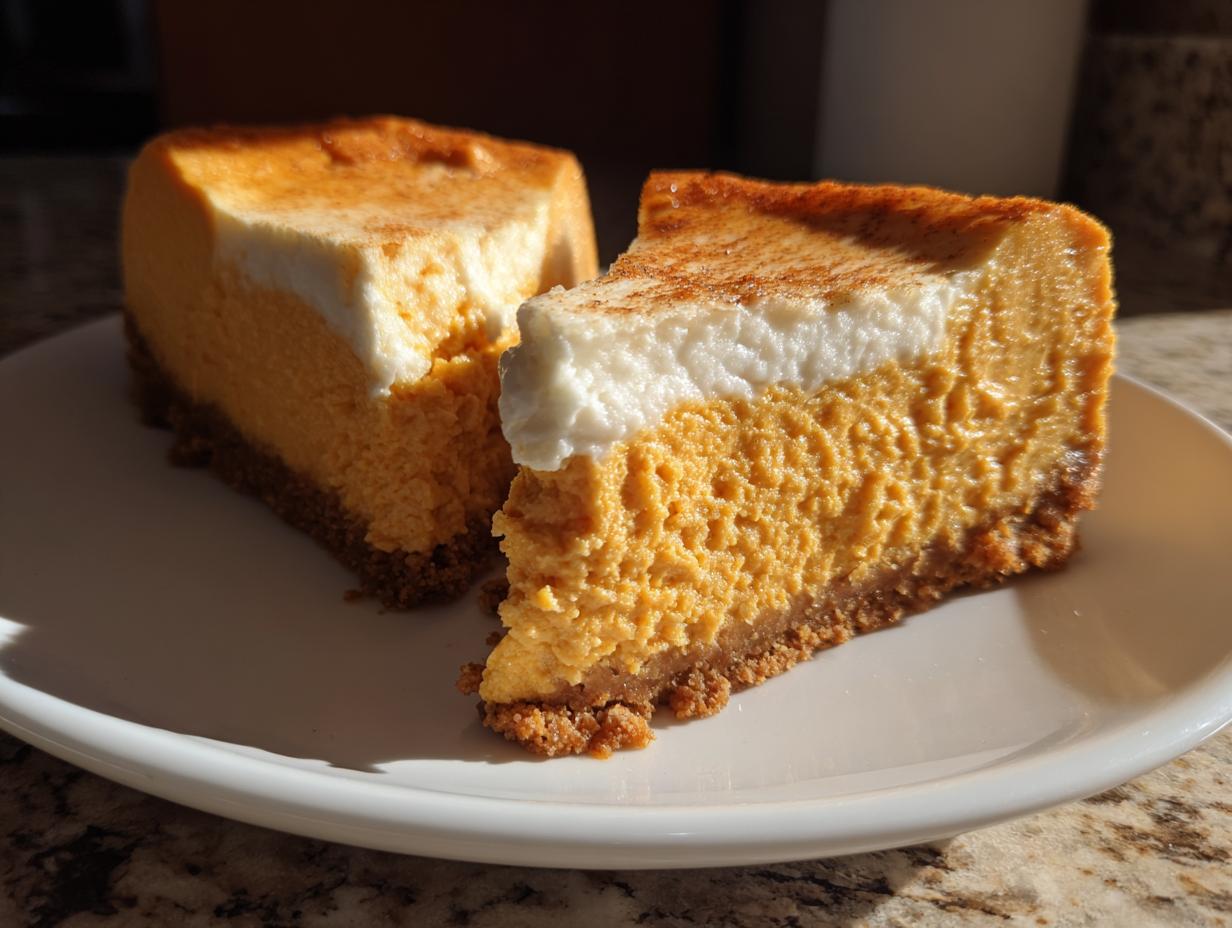
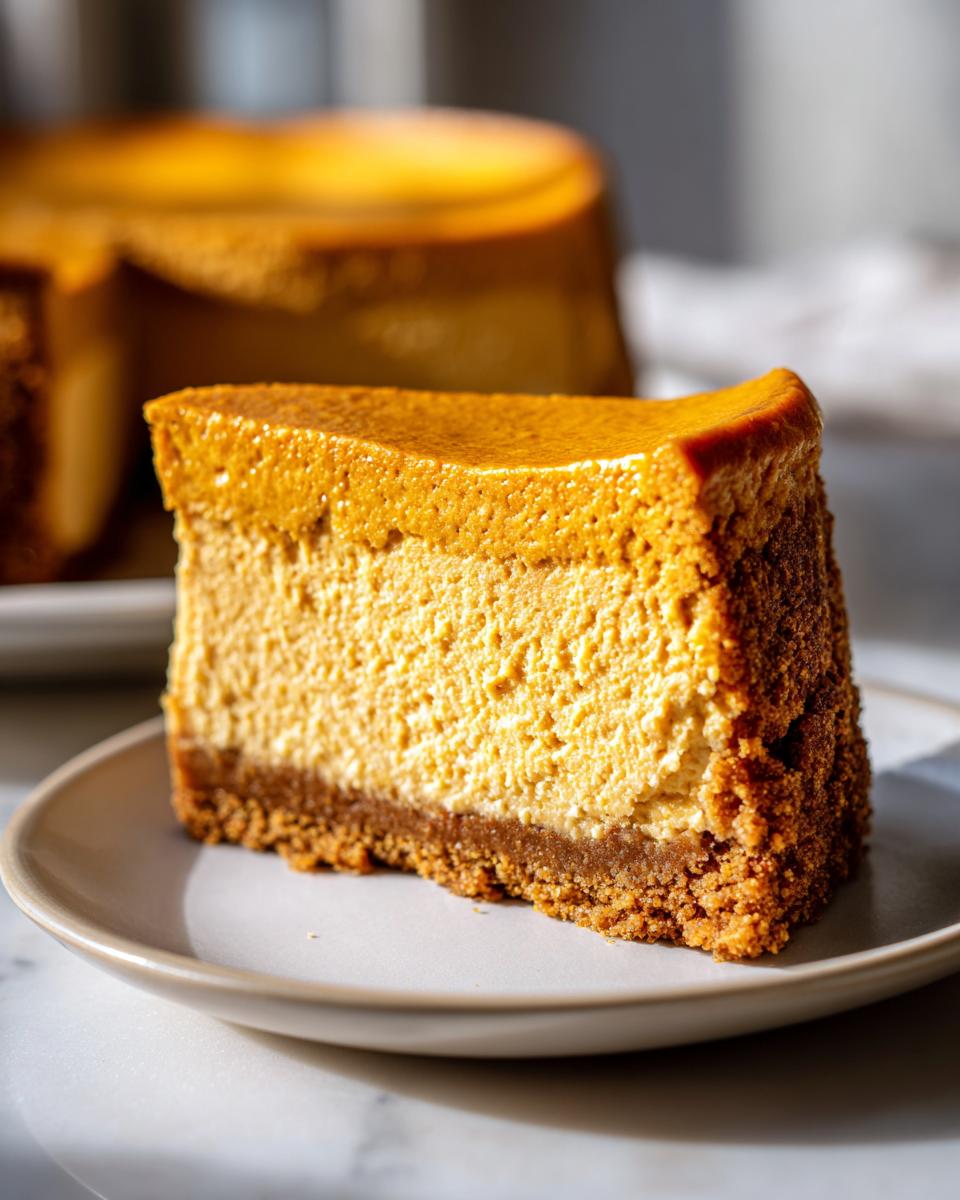
When autumn rolls around, I know exactly what my family craves: something rich, spiced, and creamy that screams ‘holiday.’ Forget apples, forget pecan pie for just a second—we’re talking about the ultimate indulgence: the perfect **pumpkin cheesecake**. I spent years studying why classic Midwestern desserts tasted the way they did, understanding the science behind richness and texture. That effort paid off because this recipe isn’t just good; it’s the best baked version out there. It has that smooth, velvety texture that sits perfectly on a cinnamon-spiced graham cracker crust. Trust me, bringing this out at Thanksgiving will make you the star of the dessert table, no professional chef skills required! Check out more about my food philosophy on the About Page if you’re curious how I develop these recipes.
- Why This Creamy Pumpkin Cheesecake Recipe is Your Showstopping Autumn Dessert
- Ingredients Needed for the Best Baked Pumpkin Cheesecake
- How to Make Perfect Pumpkin Cheesecake: Step-by-Step Instructions
- Variations for Your Pumpkin Cheesecake
- Tips for Success with Your From Scratch Pumpkin Cheesecake
- Serving Suggestions for Your Spiced Pumpkin Dessert
- Storage and Reheating Instructions for Pumpkin Cheesecake
- Frequently Asked Questions About Pumpkin Cheesecake
- Share Your Best Pumpkin Cheesecake Experience
Why This Creamy Pumpkin Cheesecake Recipe is Your Showstopping Autumn Dessert
You know I obsess over textures, and that velvety mouthfeel is what separates a good dessert from a truly *great* one, especially for your fall gatherings. This isn’t just another spiced pumpkin dessert; it’s a genuinely creamy pumpkin cheesecake recipe designed to be the highlight of your table. We’re aiming for that smooth, lush result every single time. The secret lies entirely in how we handle the bake and cooling, ensuring you get a showstopping autumn dessert that wows everyone without any stress.
Achieving Velvety Texture in Your Pumpkin Cheesecake
Listen, cheesecake hates being rushed. That glossy, crack-free surface everyone tries to achieve? It comes from respecting gentle temperature changes. We use a precise water bath—that simple pan of hot water we bake it in—to surround the cheesecake with steamy humidity. This gentle heat prevents rapid drying around the edges. Then, the crucial step: we let it cool slowly inside the turned-off oven for a full hour. Don’t skip that! This slow temperature drop is non-negotiable for a perfect, velvety texture that holds up beautifully.
Ingredients Needed for the Best Baked Pumpkin Cheesecake
Okay, let’s talk about what you need! Because this is an easy fall cheesecake that tastes incredibly luxurious, you want to treat your ingredients right. If you take only one thing away from my cooking philosophy, remember this: dairy products for cheesecake MUST be at room temperature. I mean it! Softened cream cheese, room temp eggs, room temp sour cream—this is how we guarantee that incredible smoothness and avoid lumps in the batter. Everything else is pretty straightforward pantry stuff, but the temperature control here is essential for getting this **from scratch pumpkin cheesecake** recipe right.
For simplicity, I’ve grouped the crust ingredients together, but honestly, the filling is where the magic spices—your cinnamon, nutmeg, and ginger—really shine through.
- For the Crust: 1 1/2 cups of graham cracker crumbs, 1/4 cup granulated sugar, 1/2 teaspoon ground cinnamon, and 6 tablespoons of melted unsalted butter.
- For the Velvety Filling: Three (8-ounce) packages of cream cheese (remember, softened!), 1 1/2 cups of granulated sugar, 1 teaspoon vanilla extract, 1 teaspoon ground cinnamon, 1/2 teaspoon ground nutmeg, 1/4 teaspoon ground ginger, 1/4 teaspoon salt, 2 large eggs, 1 (15-ounce) can of pure pumpkin puree (not pie filling!), and 1/2 cup of sour cream.
How to Make Perfect Pumpkin Cheesecake: Step-by-Step Instructions
Okay, this part is where we turn a pile of gorgeous ingredients into that dreamy **pumpkin cheesecake**. I’m going to walk you through my exact process so you know exactly why we do what we do—remember, understanding the ‘why’ makes you a more confident cook! Pay close attention through the mixing and the water bath setup. It’s easier than it sounds, I promise. If you want to make holiday cookies alongside this masterpiece, check out my cranberry sugar cookie recipe!
Preparing the Cinnamon Graham Cracker Crust Cheesecake Base
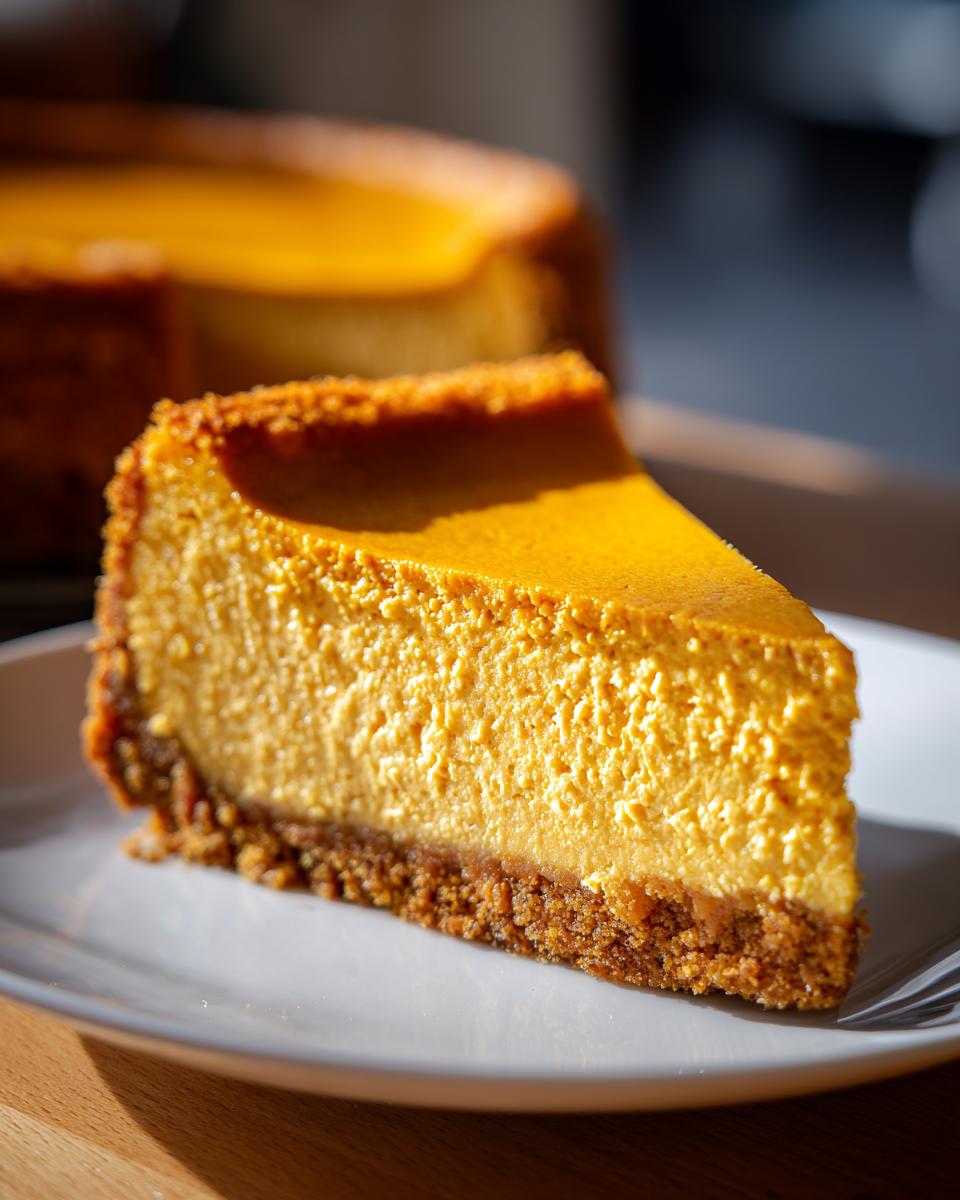
First things first: we need the oven warm! Preheat to 325 degrees F. Before anything else, wrap that 9-inch springform pan *really* well—like wrapping a precious gift—with heavy-duty aluminum foil. We’re wrapping it tight because this pan is going for a swim! Now for the base; this is your **Graham Cracker Crust Cheesecake** foundation. Mix the crumbs, the small amount of sugar (that 1/4 cup), and half a teaspoon of cinnamon right in a bowl. Pour in that melted butter and squish it all together until it looks wet, like sand you can actually shape. Press it down firmly across the bottom of your wrapped pan. Pop it in the oven for just 10 minutes to set, then pull it out to cool slightly while we whip up the filling.
Mixing the Spiced Pumpkin Cheesecake Filling
This is the texture magic moment. Grab your softened cream cheese and beat it until it’s completely smooth and dreamy. Seriously, scrape those sides down. Now, slowly beat in the rest of the sugar, along with the vanilla, that teaspoon of cinnamon, your nutmeg, ginger, and salt. These warm spices are what give it that cozy fall flavor! Once that’s combined, add your two eggs in one at a time. And here is crucial advice for how to make perfect pumpkin cheesecake: mix *just* until the dough incorporates the egg; stop immediately. Overmixing eggs creates air pockets, and that’s what leads to cracks later! Finally, gently fold in the pumpkin puree and the sour cream until you see one uniform, gorgeous orange batter.
Baking the Pumpkin Cheesecake with a Water Bath
Now we protect that smooth batter! Place your foil-wrapped springform pan inside a larger roasting pan. Carefully pour hot water into the *outer* roasting pan until the water comes about halfway up the sides of your cheesecake pan. This steam bath is the secret to preventing cracks and getting that truly creamy result. Bake this whole setup for about 60 to 75 minutes. You know it’s done when the edges are set firm, but the very center wiggles just a tiny bit when you nudge the pan, kind of like Jell-O. Then, turn the oven off, crack the door open a hair, and let it sit in that cooling oven for a whole hour. This slow goodbye to the heat is the second non-negotiable step!
Variations for Your Pumpkin Cheesecake
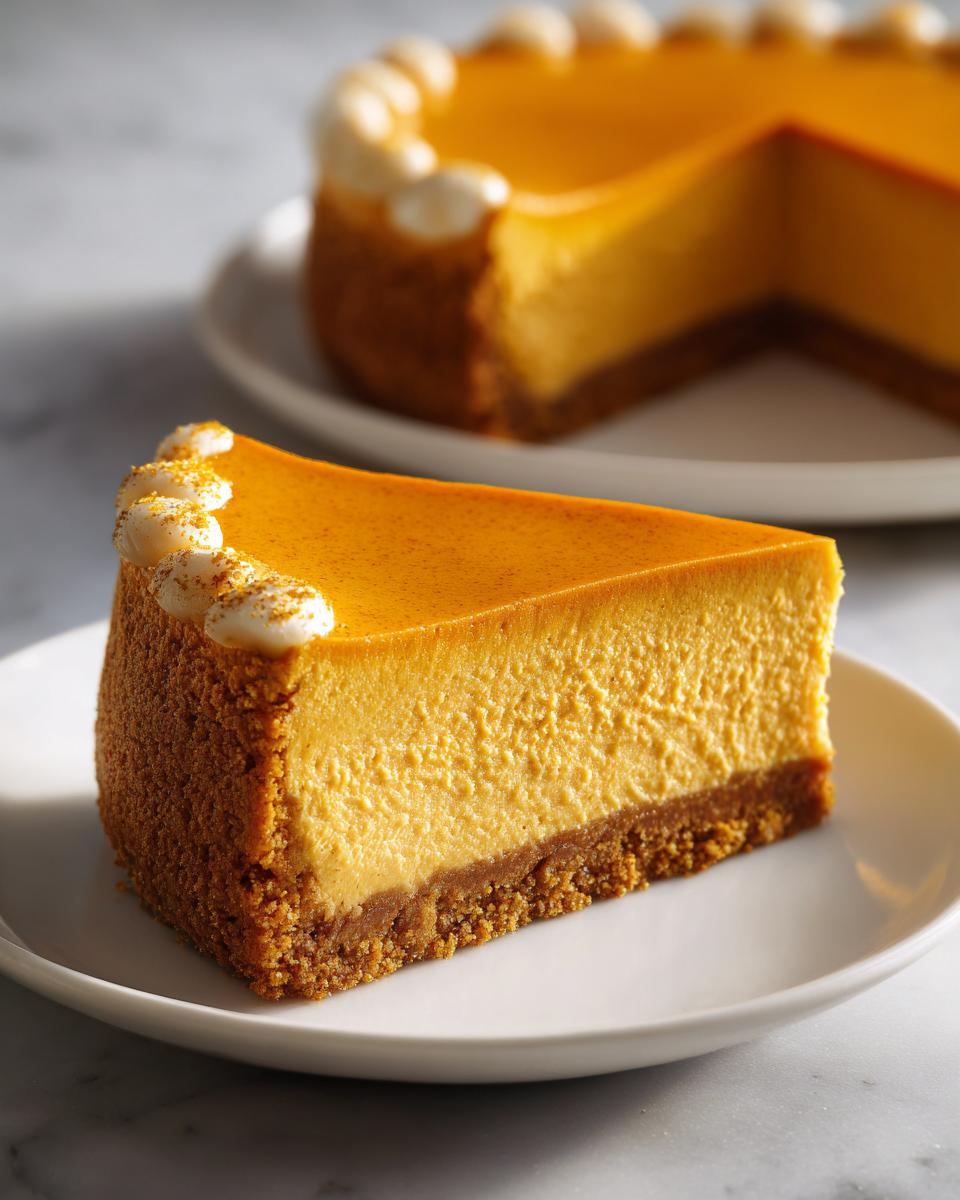
You know, not everyone wants to fuss with a water bath, and honestly, sometimes you just need dessert *fast*! That’s why I always include ways to adapt this amazing flavor profile. If you want something incredibly elegant but still easy, you can quickly make a **Velvety Pumpkin Swirl Cheesecake** by setting aside about a cup of that plain batter before you add the pumpkin. Then, dollop the pumpkin mixture over your crust, dot the reserved plain batter on top, and swirl it gently with a knife. So pretty for your table! For those true hot-weather emergencies or when the oven is just too much to handle, the no-bake version is your hero. You can find my tips for that next!
Making the No Bake Pumpkin Cheesecake Ultimate Guide
If you’re diving into the **No Bake Pumpkin Cheesecake Ultimate Guide**, skip all the oven steps, okay? Instead of baking, you need structure. You’ll mix your pumpkin base just like before, but instead of eggs and steam, you’ll carefully fold in one cup of heavy cream that you’ve whipped separately until stiff peaks form. That whipped cream gives it the volume and set needed! Then, smooth it into your crust and stick it in the fridge for at least eight hours, or, shoot, overnight is best. It comes out beautifully, super creamy, and way less stressful for an easy fall dessert!
It’s such a relief knowing you have options when you’re planning big holiday meals. If you love easy baking, you should definitely check out my carrot banana muffins recipe too—perfect for breakfast when you’re tired from all that cheesecake baking!
Tips for Success with Your From Scratch Pumpkin Cheesecake
Now that we’ve nailed the baking process, let’s nail the little things that make this **From Scratch Pumpkin Cheesecake** foolproof. If you’re aiming for that professional, velvety smooth finish, these two rules are the bedrock of all good cheesecake making. Remember, I tested these recipes over and over in my kitchen, so I learned these secrets the hard way so you don’t have to!
First, if you take away only one thing from this whole guide: everything dairy must be room temperature. I mean, let that cream cheese sit out for at least two hours. Cold ingredients don’t blend well, and you end up beating the mixture longer trying to smooth out lumps, which leads right back to cracking! Second, when you add those eggs, stop mixing the second they disappear into the batter. We are looking for dense richness, not light and fluffy cake batter, so resist the urge to over-agitate it!
If you are looking for another great spiced treat to make while you wait for this to chill, you absolutely must try my cinnamon crunch banana bread. It hits all those perfect fall flavor notes!
Serving Suggestions for Your Spiced Pumpkin Dessert
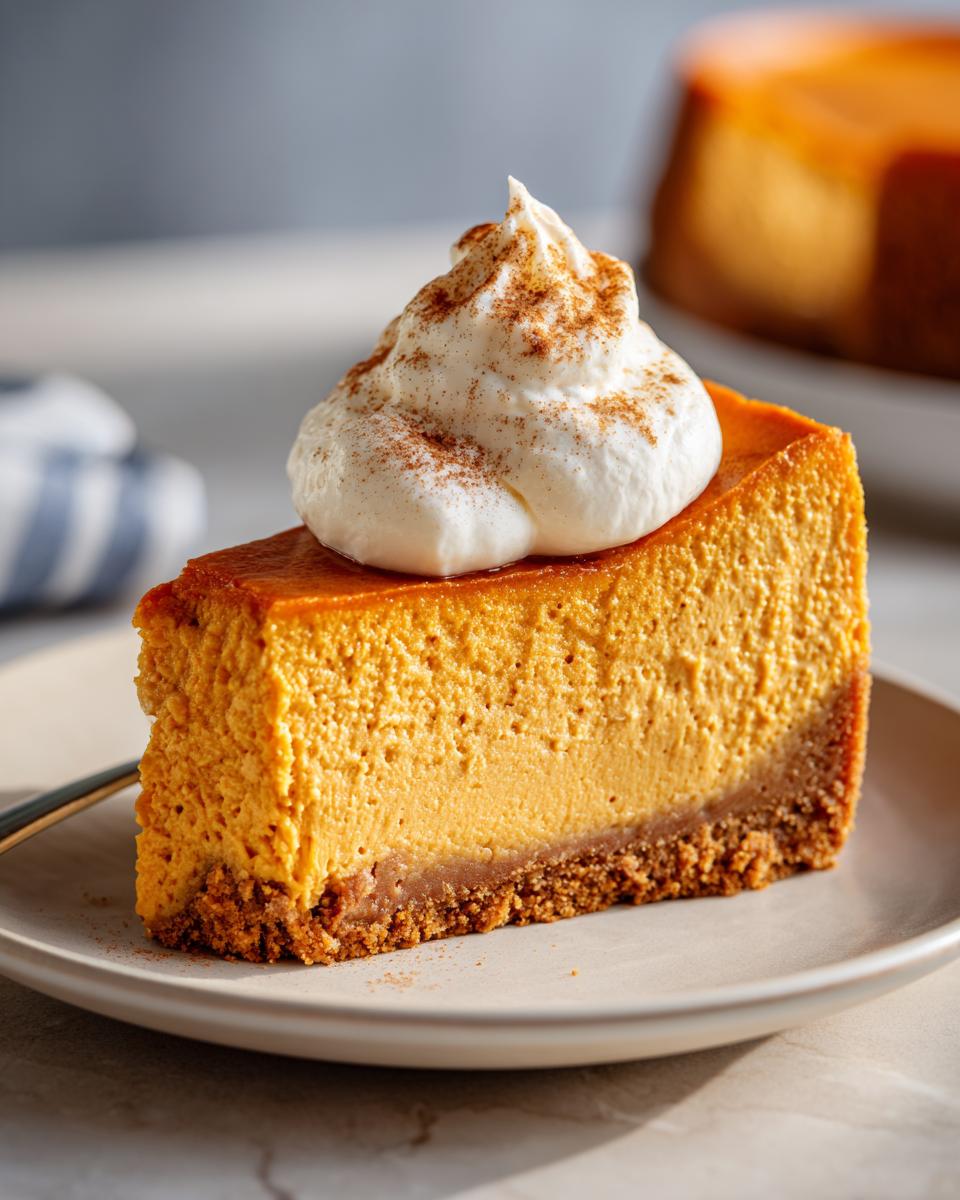
This gorgeous, spiced pumpkin dessert is fantastic all on its own, especially after setting overnight. It’s truly a memorable centerpiece for your Thanksgiving cheesecake ideas! But if you want to dress it up a little, I have a few super simple tricks up my sleeve. A dollop of freshly whipped cream is always a winner; the lightness cuts through the richness beautifully. Or, if you’re feeling extra indulgent, a drizzle of salted caramel sauce makes this cheesecake sing!
If you’re hosting thirsty guests, make sure you mix up a batch of my Cranberry Orange Punch! It’s the perfect palate cleanser to serve before you bring out the big guns!
Storage and Reheating Instructions for Pumpkin Cheesecake
Since this dessert relies on that wonderful, silky texture, knowing how to store it is just as important as knowing how to bake it! The hardest part is waiting, but seriously, you have to chill this cheesecake for at least six hours. Overnight is honestly my preference because that time lets all those gorgeous spiced flavors truly deepen and meld. Plus, being fully chilled is what gives you those clean, perfect slices when you cut into it.
When it comes to storage, keep it tightly covered in the refrigerator. I usually use plastic wrap, making sure it doesn’t touch the surface of the cheesecake, or I use a proper container with a tight lid. If you cover it well, it stays fantastic for about four or five days. Don’t even think about freezing slices unless you’re ready for a textural change; freezing and thawing can make cheesecake a little watery, and we worked hard for that velvety smoothness!
There’s really no reheating necessary for this lovely treat—it’s absolutely best served cool straight from the fridge. If you, by chance, left a slice out for a little while and it warmed up slightly, just pop it back in the fridge for 30 minutes before serving. We want cool and creamy, never warm and soft!
Frequently Asked Questions About Pumpkin Cheesecake
I know baking can bring up a few worries, especially with a showstopper like this! Cheesecake seems intimidating, but once you understand the little quirks—like why it might crack or what ingredients are non-negotiable—you’ll feel like an expert. Here are the things folks ask me most often about getting that perfect **creamy pumpkin cheesecake recipe** just right.
Why did my pumpkin cheesecake crack even with a water bath?
Ugh, the dreaded crack! If you used the water bath but still got a fissure, that almost always points to two things. First, we get too much air in the batter, which happens when you beat those eggs for too long. Remember, mix those eggs just until they disappear! Second, rapid temperature change is the enemy. If the oven cools down too fast, the center shrinks suddenly, and BAM—crack. That slow one-hour cool-down inside the turned-off oven prevents that collapse. It’s all about being gentle!
Can I use pumpkin pie filling instead of pure pumpkin puree in this pumpkin cheesecake recipe?
Please, please don’t swap the puree for the filling! This is super important for this recipe. The **pure pumpkin puree** is just, well, pure pumpkin. Pumpkin pie filling is basically pre-made, pre-sweetened, and pre-spiced pie filling. If you use that, your cheesecake will have way too much sugar, the spices will go totally haywire, and it might never set properly because of the extra liquid. Stick to the pure stuff so you can control the beautiful spice blend we created!
What is the best way to serve this easy fall cheesecake?
For the absolute best flavor and texture, this **easy fall cheesecake** needs to be served chilled. Seriously, the chilling time (at least six hours, preferably overnight) is part of the recipe because it firms up beautifully. When you slice it, you get those clean, velvety pieces. Serve it straight from the fridge! If you want to dress it up for your Thanksgiving dessert table, just add a swirl of homemade whipped cream or maybe a small drizzle of caramel sauce right before serving. And speaking of drinks, before diving into dessert, grab a glass of my Sparkling Honey Lemonade Soda—it’s bright and refreshing!
Share Your Best Pumpkin Cheesecake Experience
Now that you’ve got the roadmap to the creamiest, most flavorful autumn dessert imaginable, I really want to hear about it! Baking is all about sharing experiences, right? Did you nail that water bath? Did your family devour the cinnamon graham cracker crust before dinner was even over? Don’t be shy!
Please take a moment to leave a star rating right here on the recipe card once you’ve tried it. Even better, drop a comment below explaining how it went. Did you try the pumpkin swirl idea? Did you add a dash more nutmeg? I read every single comment, and your feedback helps me make sure this recipe stays flawless for everyone who tries it next. If you snap a picture of your gorgeous creation, tag me! Seeing your successes is truly the best part of running this kitchen. If you ever have a question about the process, you can always reach out through the Contact Page.
PrintThe Best Creamy Baked Pumpkin Cheesecake with Spiced Crust
Make the ultimate fall dessert with this creamy baked pumpkin cheesecake recipe. It features a velvety, spiced pumpkin filling atop a cinnamon graham cracker crust, perfect for Thanksgiving or any autumn gathering.
- Prep Time: 25 min
- Cook Time: 75 min
- Total Time: 100 min
- Yield: 12 servings 1x
- Category: Dessert
- Method: Baking
- Cuisine: American
- Diet: Vegetarian
Ingredients
- 1 1/2 cups graham cracker crumbs
- 1/4 cup granulated sugar
- 1/2 teaspoon ground cinnamon
- 6 tablespoons unsalted butter, melted
- 3 (8 ounce) packages cream cheese, softened
- 1 1/2 cups granulated sugar
- 1 teaspoon vanilla extract
- 1 teaspoon ground cinnamon
- 1/2 teaspoon ground nutmeg
- 1/4 teaspoon ground ginger
- 1/4 teaspoon salt
- 2 large eggs
- 1 (15 ounce) can pure pumpkin puree
- 1/2 cup sour cream
Instructions
- Preheat your oven to 325 degrees F. Wrap the outside of a 9-inch springform pan tightly with heavy-duty aluminum foil.
- Prepare the crust: Mix graham cracker crumbs, 1/4 cup sugar, and 1/2 teaspoon cinnamon in a bowl. Pour in the melted butter and mix until the crumbs are evenly moistened. Press the mixture firmly into the bottom of the prepared springform pan. Bake for 10 minutes. Remove from the oven and let cool slightly.
- Prepare the filling: Beat the softened cream cheese in a large bowl with an electric mixer until smooth. Gradually beat in 1 1/2 cups sugar, vanilla extract, 1 teaspoon cinnamon, nutmeg, ginger, and salt until combined. Scrape down the sides of the bowl.
- Beat in the eggs one at a time, mixing just until incorporated after each addition. Do not overmix.
- Mix the pumpkin puree and sour cream into the batter until just blended.
- Pour the pumpkin cheesecake batter over the cooled crust. Smooth the top with a spatula.
- Place the foil-wrapped springform pan into a larger roasting pan. Carefully pour hot water into the roasting pan until the water reaches about halfway up the sides of the springform pan (this is a water bath).
- Bake for 60 to 75 minutes, or until the edges are set but the center still jiggles slightly when gently nudged.
- Turn off the oven, crack the oven door open slightly, and let the cheesecake cool inside the oven for 1 hour. This slow cooling helps prevent cracks.
- Remove the cheesecake from the water bath and foil. Cool completely on a wire rack. Once cooled, cover and refrigerate for at least 6 hours, or preferably overnight, before serving.
Notes
- For a crack-free surface, ensure all your dairy ingredients (cream cheese, eggs, sour cream) are at room temperature before starting.
- If you want a Pumpkin Swirl Cheesecake, reserve 1 cup of the plain cheesecake batter, mix the pumpkin puree into the remaining batter, then dollop the reserved batter on top and swirl gently with a knife.
- For a No-Bake Variation: Skip the oven steps. Use 1 cup heavy cream whipped to stiff peaks, folded in at the end with the pumpkin mixture. Chill for 8 hours to set.
- Serve this showstopping autumn dessert chilled, topped with whipped cream and a sprinkle of cinnamon.
Nutrition
- Serving Size: 1 slice
- Calories: 450
- Sugar: 35g
- Sodium: 300mg
- Fat: 30g
- Saturated Fat: 18g
- Unsaturated Fat: 12g
- Trans Fat: 0.5g
- Carbohydrates: 40g
- Fiber: 1g
- Protein: 8g
- Cholesterol: 95mg