
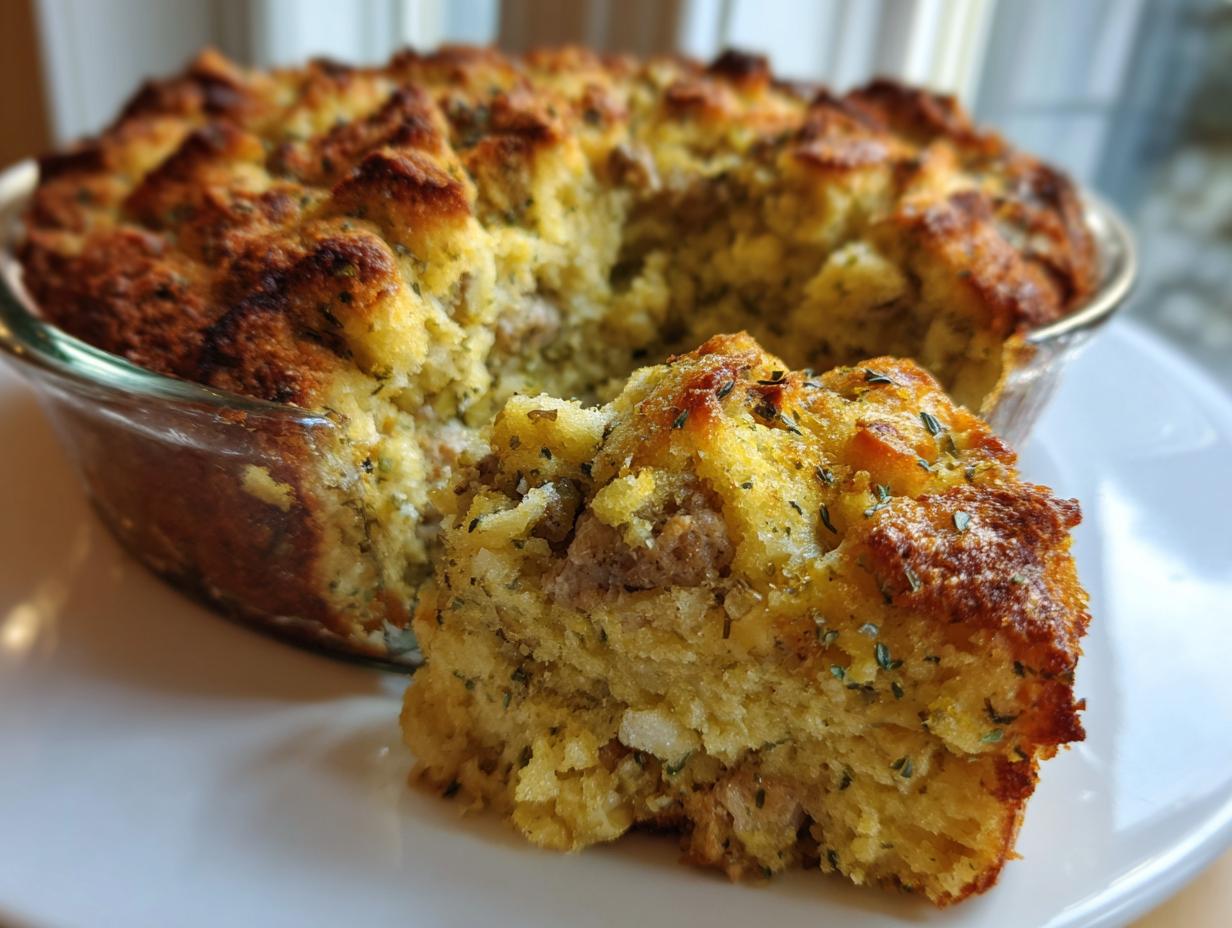
The holidays are amazing, but honestly, they can bring a pile of stress right along with the celebration, can’t they? We spend so much time worrying about the turkey or the gravy that the side dishes feel like an afterthought—or worse, a gamble. Well, you can throw out those worries! I developed this Best Ever sausage stuffing because I needed something I could trust year after year. This recipe is engineered to give you that incredibly moist interior that melts in your mouth, paired with that coveted golden, crispy top crust. Making delicious sausage stuffing shouldn’t require a culinary degree; it just needs the right steps. Trust me, this classic version is my go-to for guaranteed holiday success. If you want to know more about how we test everything here at Taste This Plate, check out my story on the About Page.
- Why This Classic Sausage Stuffing Recipe Works Every Time
- Gathering Ingredients for Your Savory Herb Sausage Stuffing
- Step-by-Step Instructions for Classic Sausage Stuffing
- Make Ahead Stuffing: Your Secret Weapon for Holiday Cooking
- Serving Suggestions for Your Traditional Thanksgiving Stuffing
- Troubleshooting Common Sausage Stuffing Issues
- Frequently Asked Questions About Sausage Stuffing Recipe
- Storing Leftover Sausage Stuffing for Later Enjoyment
- Estimated Nutrition for This Sausage Stuffing
Why This Classic Sausage Stuffing Recipe Works Every Time
I know you’ve probably made stuffing before that came out either like a brick or like a bowl of wet bread. That’s okay! It happens when you rush the process. What sets this recipe apart is that we focus on the balance needed for a truly fantastic holiday side dish. When you see the simple ingredients, you might wonder why it’s so reliable, but it really comes down to a few key techniques we’ve perfected right here in my kitchen. You can find more of our trusted favorite side dish recipes through that link!
Achieving the Perfect Moist Stuffing Interior
The secret to that tender inside isn’t just pouring in more broth—that just makes it gummy! It’s all in how you mix the wet and dry components. We rely on a precise ratio of eggs whisked with the broth. The eggs act like a binding agent, helping that liquid absorb evenly without collapsing the bread structure. When you toss everything gently, you’re ensuring every cube gets just enough moisture to steam during baking, keeping it lovely and soft inside.
Tips for a Golden, Crispy Top Stuffing Crust
That crunch on top is what I always aim for first! After gently combining everything, the final step before the oven is critical. You need to drizzle that melted butter evenly across the entire top surface. Don’t skip this! The butter essentially fries the top layer of bread cubes while the bottom steams. This drizzle creates that beautiful, golden, and undeniably Crispy Top Stuffing crust that contrasts perfectly with the soft middle.
Gathering Ingredients for Your Savory Herb Sausage Stuffing
You don’t need to hunt down specialty ingredients for this dish; that’s my whole philosophy here at Taste This Plate! We’re sticking to things you can grab on your regular grocery run. Everything in this savory herb stuffing list is chosen to work together harmoniously to deliver that incredible holiday taste we all crave. When you gather these items, you’re already halfway to stress-free holiday hosting!
Ingredient Notes and Substitutions for Sausage Stuffing
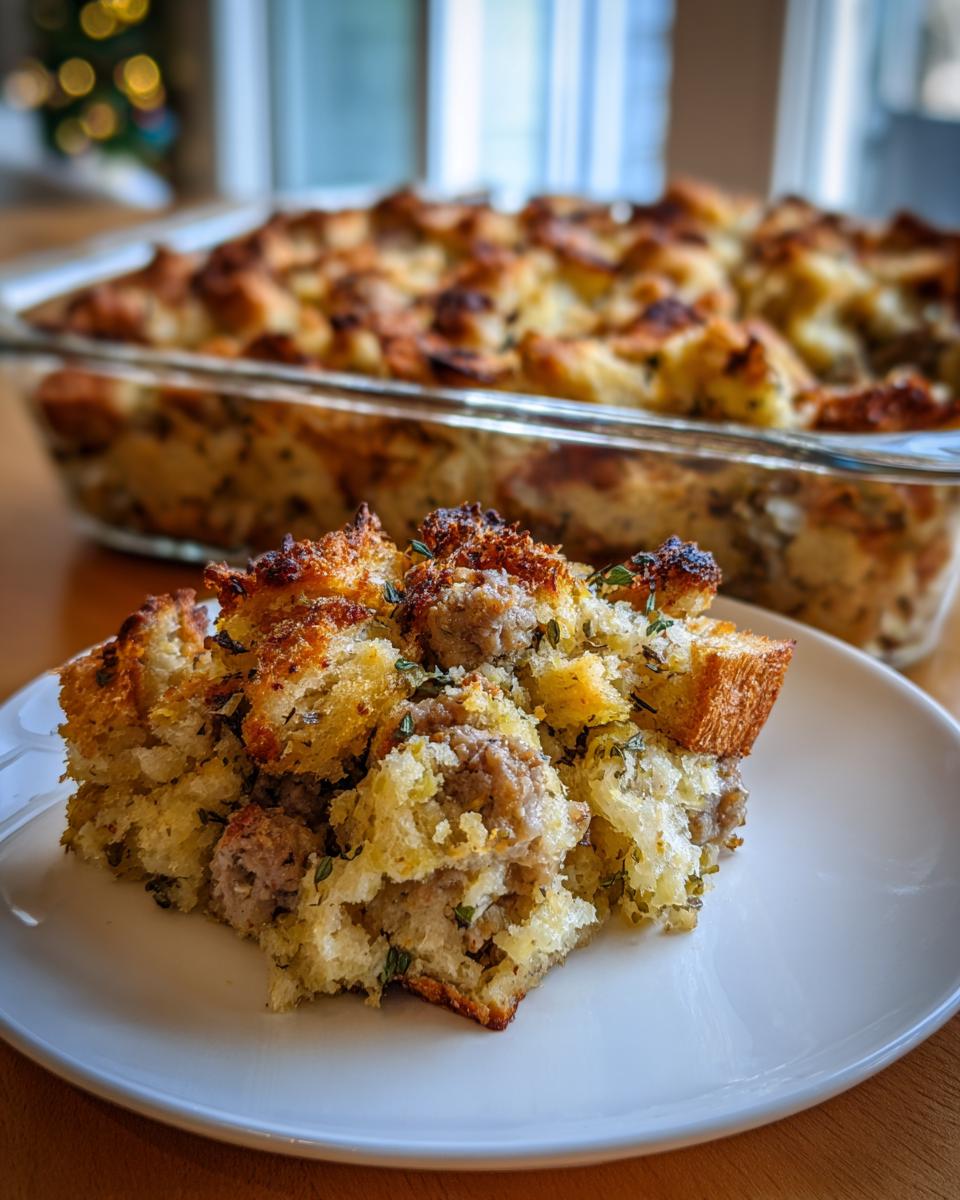
A quick word on bread cubes—this is important! Please, please try to use bread that is a day or two old. If your bread is too fluffy and fresh, it will absorb liquids too quickly and you’ll end up with a mushy mess. If all you have is fresh bread, just chop it up and toss it in a 300-degree oven for about 15 minutes until it dries out a bit. Also, while I love traditional bulk pork sausage for the flavor, turkey sausage works beautifully if you prefer something a little leaner. Just make sure you drain off most of the grease afterward so it doesn’t make the bottom swimming in fat!
Step-by-Step Instructions for Classic Sausage Stuffing
Alright, let’s get cooking so you can get this stunning Classic Stuffing Recipe into the oven! Remember, because we want a good bake time, you need to preheat that oven to 350 degrees F right away, and give your 9×13 dish a quick grease job. This sets us up perfectly for that golden finish later on. When you’re deep into holiday prep, having clear steps that work every time is a lifesaver, as you can see from this tried-and-true method found over at Food Dexterity.
Preparing the Sausage and Aromatics for the Sausage Stuffing
First things first: brown that sausage in a big skillet over medium heat. I want you to break it up as it cooks so you don’t get big clumps swimming around in there. Once it’s cooked through, this is crucial—drain off almost all the grease. Leave just about one tablespoon behind. That bit of fat carries flavor, but too much will weigh down your bread. Next, toss in your onion and celery and let them get soft, about five to seven minutes. Now, bring in the herbs—sage, thyme, and rosemary—and cook for just one minute until you can truly smell them. That’s your aroma cue! Then, take the whole skillet off the heat.
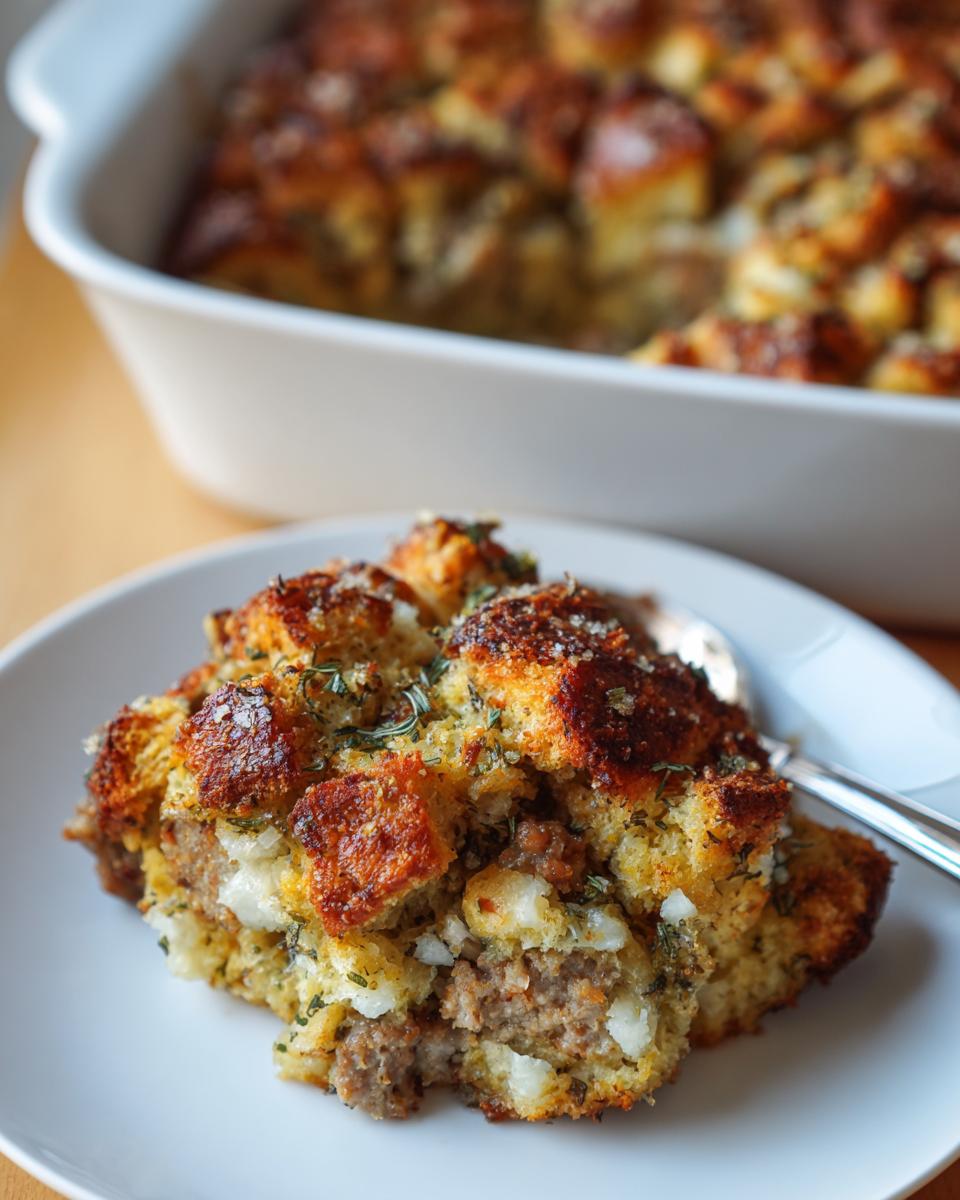
Combining Bread and Liquid for the Best Sausage Stuffing Texture
In your biggest bowl, mix those dried bread cubes with that savory sausage and veggie mix. Give it a gentle toss. Now, grab another bowl and whisk the eggs and the broth together—that’s your binding liquid. Pour that liquid mixture over the bread and gently toss everything until it’s just combined. Seriously, do not overmix! If you mash it, you’ll get mush. You need the mixture to be moist but still fluffy. If it looks dry when you squeeze a handful, add a tiny splash more broth until it holds together just right. This is the makeup phase for the best sausage stuffing texture!
Once it’s mixed beautifully, transfer it to your prepared dish and drizzle that melted butter all over the very top. It bakes for about 30 to 40 minutes. Make sure you let it rest for 10 whole minutes once it comes out—this helps everything set up nicely. If you are looking for a great pairing for this, check out my recipe for Garlic Parmesan Mashed Potatoes; the two are a match made in heaven!
Make Ahead Stuffing: Your Secret Weapon for Holiday Cooking
If you cook for holidays, you know that the morning of the big meal can feel like controlled chaos. That’s why I love that this recipe doubles as fantastic Make Ahead Stuffing! This is my secret weapon for keeping my stress levels low. You can absolutely assemble the entire dish—from cooking the sausage mixture right through to combining it with the broth and eggs (that’s Steps 1 through 7)—the day before you plan to serve it.
Just cover that baking dish tightly with foil and pop it in the fridge. When it’s time to bake the next day, just pull it out and let it sit on the counter for about 30 minutes to take the deep chill off. Then, stick it in the oven. Because it’s starting colder, you’ll need to bump that baking time up just a tiny bit, maybe 5 to 10 minutes extra, until it’s golden and hot all the way through. It’s a total game-changer!
If you want other super easy tricks for streamlining your holiday cooking, I learned some great tips from the folks over at Be Centsational on streamlining sides!
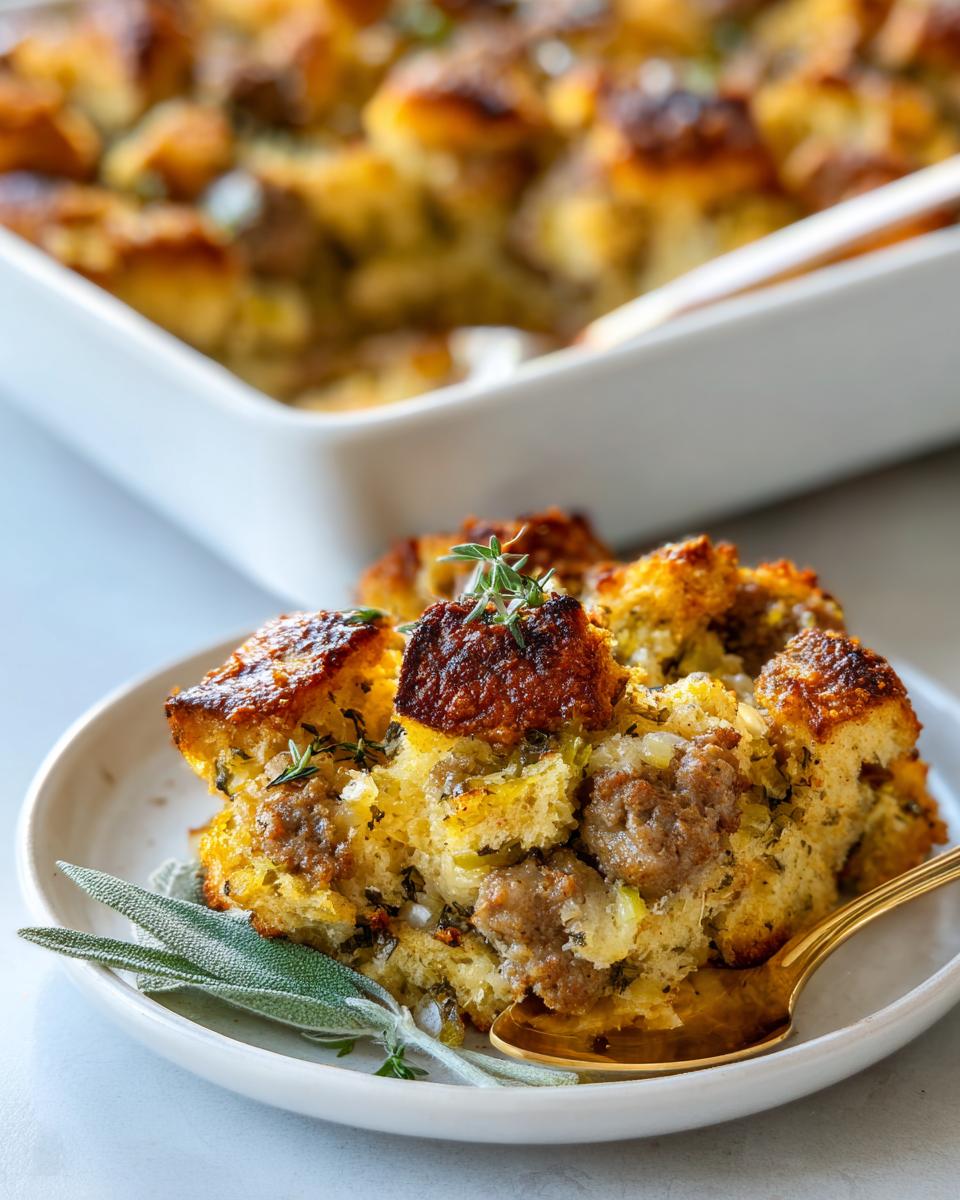
Serving Suggestions for Your Traditional Thanksgiving Stuffing
When you serve a stellar side dish like this, you want the rest of the table to match its hearty, comforting vibe! This savory herb stuffing pairs beautifully with almost any roasted meat, but it truly shines next to a perfectly seasoned turkey. It handles rich flavors really well, so don’t be afraid to pair it with something slightly sweet, like my Maple Mustard Pork Tenderloin, if you ever stray from tradition.
For other sides that complement the earthy sage, I always lean into classics. Creamy, cheesy dishes are the perfect foil to the crispness of the Traditional Thanksgiving Stuffing. If you need one more indulgent dish, you absolutely have to try the Hashbrown Casserole. It’s the perfect blanket dish to round out a truly fantastic and comforting holiday meal!
Troubleshooting Common Sausage Stuffing Issues
Even the best recipes can sometimes hit a snag, especially when we mess with the timing or oven settings! Don’t stress if your stuffing isn’t looking exactly like the picture when you pull it out. That’s exactly why I want to give you a few quick fixes. My goal is to give you reliable recipes, but sometimes life—or my oven, which always runs hot—gets in the way. Over the years of testing, I’ve learned how to rescue a batch that’s gone slightly off-track, ensuring you still get that amazing flavor profile without any major drama.
Fixing Dry Sausage Stuffing
If your stuffing comes out and it’s just a little too crumbly or dry—maybe you worried about it being soggy and baked it a touch too long—here’s the fix. The key is reintroducing steam gently. Take the dish immediately out of the oven, but don’t wash the dish! Pour about 1/4 cup of warm broth right over the top. Cover the dish *tightly* with aluminum foil. Put it back into the turned-off oven (or a very low oven, maybe 200 degrees F) for about 10 to 15 minutes. The foil traps the steam from the warm broth and lets it rehydrate those dry edges without turning the whole thing gummy. Give it a little press test before serving!
Preventing a Soggy Sausage Stuffing Bottom
The dreaded soggy bottom happens when there’s too much liquid or too much fat that never evaporated. The most common mistake here is forgetting to drain the sausage properly after browning. That rendered fat creates a barrier between the bottom layer of bread and the nice dry heat of the pan, essentially making the bottom steam in grease instead of bake. Always make sure you use a spoon to press out as much excess fat as physically possible from the skillet before you mix it with the bread. Also, using day-old bread—which you read about above—is your insurance policy against mushiness because it’s already slightly dry and ready to absorb the correct amount of moisture.
Frequently Asked Questions About Sausage Stuffing Recipe
I get so many questions about this recipe once the holidays roll around! It’s great that you’re thinking ahead and planning your menu. Having answers to common concerns means less scrambling when you’re trying to get everything ready for the table. If you’re looking up fun, non-casserole options, you might also enjoy checking out my favorite Appetizers and Snacks section for party food!
Can I make this sausage stuffing recipe without sausage?
Absolutely, you can! If you need a vegetarian option for your Holiday Stuffing, you can skip the sausage entirely. To keep that necessary savory depth, you need to replace the flavor it brings, not just the texture. I suggest using an extra tablespoon of chopped mushrooms sautéed in the butter with the onions and celery. Then, add a teaspoon of mushroom powder or a splash of vegetarian Worcestershire sauce when you add the herbs. This gives you that deep, rich umami flavor without relying on meat.
What is the best type of bread for moist stuffing?
When it comes to getting that perfect texture, the bread is truly half the battle! You absolutely want bread cubes that are dry, but not rock hard. I strongly suggest using a mix of everyday white bread (like plain sandwich bread) alongside something heartier, like sourdough. The sourdough holds its shape better, preventing a mushy result, while the white bread soaks up just the right amount of broth for that Moist Stuffing interior. Day-old bread is always the goal!
How do I make Sausage Stuffing Balls instead of a casserole?
Turning this into Sausage Stuffing Balls is such a fun way to serve it, especially if you’re handing out appetizers! After you mix everything together (up to the point where it’s moist but not soggy), use a small cookie scoop or spoon to form uniform balls. Place them on a baking sheet lined with parchment paper. Because balls have more surface area exposed than a casserole, they cook faster. You’ll bake them at 350 degrees F for a shorter time—usually only 20 to 25 minutes—until they are golden brown all the way around.
Storing Leftover Sausage Stuffing for Later Enjoyment
Now, if you somehow manage to have any sausage stuffing leftover—which in my house is a miracle—you’ll want to store it properly so it tastes just as good the next day. Food safety is important, even when we’re dealing with comfort food! Once the dish has cooled down a bit, don’t leave it sitting on the counter for more than two hours because of that sausage content. Scoop the leftovers into an airtight container and pop them into the fridge. It should keep perfectly fine for about three to four days.
When you are ready to enjoy those delicious leftovers, you have to think about reheating it gently to bring back that moist-yet-crisp structure. Don’t even think about the microwave unless you want soupy edges! The microwave heats from the inside out, and it totally ruins the crust we worked so hard to achieve.
Instead, grab a small baking dish—even an oven-safe ceramic one works—and scoop your stuffing in. Add a tablespoon or two of broth or water right over the top and cover it really well with foil. Pop it into a 350-degree oven for about 15 to 20 minutes. This gentle steam under the foil warms the center beautifully while the foil protects the edges. If you want to bring back a little bit of that crispness, take the foil off for the final five minutes of reheating. This little trick transforms day-old goodness back into something amazing!
Estimated Nutrition for This Sausage Stuffing
I always try to give you a general idea of what’s in the dishes we make here, but I have to be upfront: all nutrition data is an estimate! I’m cooking in my home kitchen, not a lab, right? Different brands of sausage, the exact amount of butter you drain off, or the type of bread you use—all of this changes the final count.
If you’re tracking macros or worried about sodium, use these numbers as a starting point for your planning. This breakdown is based on 8 servings of the casserole-style bake. Keep in mind that since this is a rich, savory side dish, it does contain a fair bit of fat from the delicious sausage and butter we use to get that perfect texture!
- Serving Size: 1 cup (approximate)
- Calories: 380
- Fat: 22g (Saturated Fat: 8g)
- Carbohydrates: 30g
- Protein: 15g
- Sodium: 650mg
See? It looks comforting because it is! If you’re focusing on keeping sodium down, I highly recommend reaching for low-sodium broth and perhaps choosing a lower-salt turkey sausage option. Happy cooking, and remember, these numbers are just guidelines for a fantastic, flavorful holiday experience!
PrintClassic Sausage Stuffing with Sage for a Moist Interior and Crispy Top

Create a memorable holiday side dish with this classic sausage stuffing recipe. You achieve a wonderfully moist interior and a coveted golden, crisp top using simple, accessible ingredients and reliable techniques.
- Prep Time: 20 min
- Cook Time: 40 min
- Total Time: 60 min
- Yield: 8 servings 1x
- Category: Side Dish
- Method: Baking
- Cuisine: American
- Diet: Vegetarian
Ingredients
- 1 pound bulk pork sausage (or turkey sausage)
- 1 large yellow onion, chopped
- 3 celery stalks, chopped
- 1 tablespoon fresh sage, rubbed and chopped
- 1 teaspoon dried thyme
- 1 teaspoon dried rosemary
- 1 teaspoon salt
- 1/2 teaspoon black pepper
- 10 cups dried bread cubes (use a mix of white and sourdough for best texture)
- 1 1/2 cups chicken or turkey broth (plus more if needed)
- 2 large eggs, lightly beaten
- 1/2 cup (1 stick) unsalted butter, melted
Instructions
- Preheat your oven to 350 degrees F. Lightly grease a 9×13 inch baking dish.
- In a large skillet over medium heat, cook the sausage, breaking it up with a spoon, until it is browned through. Drain off most of the excess grease, leaving about 1 tablespoon in the pan.
- Add the chopped onion and celery to the skillet with the sausage. Cook until the vegetables soften, about 5 to 7 minutes.
- Stir in the fresh sage, thyme, rosemary, salt, and pepper. Cook for 1 minute until the herbs are fragrant. Remove the skillet from the heat.
- In a very large bowl, combine the dried bread cubes and the sausage-vegetable mixture. Toss gently to distribute the sausage evenly throughout the bread.
- In a separate medium bowl, whisk together the chicken broth and the lightly beaten eggs. Pour this liquid mixture over the bread and sausage. Toss everything gently until the bread is evenly moistened. Do not overmix; you want the stuffing to remain slightly fluffy.
- If the mixture seems too dry to hold a shape when squeezed, add a few more tablespoons of broth until it is moist but not soggy. This step is key for a moist interior.
- Transfer the stuffing mixture to the prepared baking dish. Drizzle the melted butter evenly over the top surface of the stuffing.
- Bake for 30 to 40 minutes. The stuffing is done when the top is golden brown and crisp, and the center is heated through.
- Let the sausage stuffing rest for 10 minutes before serving. This allows the texture to set.
Notes
- For make-ahead convenience, you can assemble the entire dish (Steps 1 through 7) the day before. Cover the baking dish tightly with foil and refrigerate. Before baking, let it sit at room temperature for 30 minutes, then proceed with baking, adding 5 to 10 minutes to the total cook time if baking straight from the refrigerator.
- If you prefer stuffing balls, use a cookie scoop to form uniform balls and bake them on a parchment-lined baking sheet for 20 to 25 minutes.
- Use day-old, dried-out bread cubes. This prevents the stuffing from becoming gummy. You can toast fresh bread cubes in a 300 degree F oven for 15 minutes if you do not have stale bread.
Nutrition
- Serving Size: 1 cup
- Calories: 380
- Sugar: 2
- Sodium: 650
- Fat: 22
- Saturated Fat: 8
- Unsaturated Fat: 14
- Trans Fat: 0
- Carbohydrates: 30
- Fiber: 2
- Protein: 15
- Cholesterol: 55