
If you’re anything like me, sometimes you just crave something incredibly decadent that doesn’t require you to turn the oven on, especially when the house is warm. We believe that creating memories doesn’t need to be stressful, and that applies to desserts too! That’s why I’m sharing my foolproof recipe for the **Biscoff cheesecake**. This isn’t just another sweet treat; it’s rich, creamy, and packed with that spiced cookie butter flavor everyone adores. Honestly, making this **biscoff cheesecake** proved to me that you don’t need professional skills to wow your friends and family. It’s simple, trust me!
I first perfected this recipe when I needed a quick but impressive dessert for a neighborhood gathering and remembered picking up a jar of that delicious cookie butter.
We often talk about how food shows love, and this simple five-ingredient crust leading into a smooth filling is pure kitchen affection. If you love comforting flavors and want a showstopper without the fuss, you are going to adore this classic yet easy recipe. For more foolproof treats that bring people together, you might enjoy my recipe for gooey butter pecan cake next!
- Why This No-Bake Biscoff Cheesecake Recipe Works for You
- Gathering Ingredients for Your Ultimate Biscoff Dessert
- Step-by-Step Instructions for Your No Bake Biscoff Cheesecake
- Tips for Success Making a Flawless Biscoff Cheesecake
- Storage and Keeping Your Biscoff Cheesecake Fresh
- Frequently Asked Questions About This Biscoff Cheesecake Recipe
- Estimating the Nutrition for Your Biscoff Cheesecake
- Share Your Biscoff Cookie Butter Goodness
Why This No-Bake Biscoff Cheesecake Recipe Works for You
Look, I know life gets busy. That’s why I test recipes to make sure they deliver maximum flavor without wrapping you up in hours of kitchen time. This **Biscoff cheesecake** falls squarely into our category of **Easy Cheesecake Ideas** because it skips the oven entirely! It’s my go-to when I need **No Oven Treats** that still feel special.
This recipe is all about meeting you where you are, offering that luxurious outcome with minimal fuss. Seriously, you’ll be amazed at how simple it is.
Quick Assembly for Your Biscoff Cheesecake
The hands-on time here is just about 20 minutes, can you believe it? We are talking about a nearly instant crust and a no-fuss filling. This makes it one of those fantastic **Last Minute Desserts** if you plan the chilling time correctly. No pre-heating, no monitoring the oven temperature—just mixing, spreading, and chilling. It’s perfect for when you need a showstopper fast!
Achieving That Creamy Biscoff Filling Texture
The texture is everything, right? That’s why we focus on making this a true **Sweet Cream Cheese Dessert**. We use fully softened cream cheese and fold in freshly whipped heavy cream. This combination ensures that the filling sets up beautifully firm, yet remains unbelievably light and silky. It’s the secret to that wonderful, melt-in-your-mouth quality that makes this **Biscoff Cheesecake Recipe** irresistible. For more amazing, easy dishes, check out my collection of Simple Dessert Recipes!
Gathering Ingredients for Your Ultimate Biscoff Dessert
When I’m sharing a recipe here, I keep one thing front and center: accessibility. You shouldn’t have to hunt down specialty ingredients for a dessert that’s supposed to be easy! Luckily, making this amazing **biscoff cheesecake** only requires ingredients you can likely grab on your next standard grocery run. We need three main elements: the crust, the creamy filling, and that gorgeous topping.
I’ve written out the exact quantities below for our 9-inch springform pan. Just remember that precision with ingredients is what allows this no-bake magic to happen!
- 2 cups Lotus Biscoff cookie crumbs (that’s about 30 nice cookies crushed up, or just buy the crumbs if you find them!)
- 6 tablespoons unsalted butter, melted
- 16 ounces cream cheese, and this is important: it must be softened to room temperature
- 1 cup powdered sugar, sifted—yes, sifted!
- 1 teaspoon vanilla extract
- 1 cup heavy whipping cream, chilled cold
- 1 cup Biscoff cookie butter (spreadable, not the crunchy kind for the filling), divided
- 2 tablespoons milk (only if you need to thin the topping later)
If you want to check out other simple things I make, like my carrot banana muffins recipe, you’ll see I rely on straightforward flavor builders like this!
Notes on the Biscoff Crust Recipe
The **Biscoff Crust Recipe** is the foundation, and we need it solid because it’s holding up all that creamy filling. You are mixing your crumbs with 6 tablespoons of melted butter. When you press this into the pan, use the bottom of a flat glass or measuring cup. Really press it down firmly and evenly across the bottom, and even a tiny bit up the sides if you like a pronounced edge. Once it’s packed tight, it needs a quick trip to the freezer to firm up while you tackle the filling.
Key Components for the Creamy Biscoff Filling
Here’s where we build trust with the ingredients. If your cream cheese isn’t fully softened to room temperature—meaning you can press a finger into it easily without resistance—you will get lumps, and we absolutely don’t want that in this **Creamy Biscoff Filling**! On the flip side, your heavy whipping cream needs to be freezing cold. These temperature opposites are crucial for getting the right structure when you whip the cream separately before folding it in. That folding technique is what makes this a light **Sweet Cream Cheese Dessert** instead of a dense block!
Step-by-Step Instructions for Your No Bake Biscoff Cheesecake
Alright, it’s time to put the mixer to work! Since we aren’t baking, we have to be careful with our mixing technique to ensure that gorgeous, light texture. I want you to really focus on blending, not over-beating, especially when we bring the whipped cream into the main batter. Remember, we are building smiles here, not tough textures! Everything works together perfectly to create that ultimate **Biscoff cheesecake** experience.
Building the Perfect Biscoff Crust Recipe Base
This is Step 1, and we need to pack it right. Combine your Biscoff cookie crumbs and the melted butter. Once it looks like wet sand, dump it into your 9-inch springform pan. Use the bottom of a sturdy measuring cup to press that mixture firmly across the whole base. You want it packed! A well-packed crust won’t soak up filling or crumble when you slice it later. Pop that pan into the freezer for about 10 minutes while you get the filling ready. That quick chill helps it set up perfectly.
Mixing the Decadent Biscoff Cheesecake Filling
First, beat that room-temperature cream cheese until it’s beautifully smooth—no lumps allowed! Then, gently add your sifted powdered sugar and vanilla. Now, here’s the technique: in a separate, completely clean bowl, whip your cold heavy cream until you get stiff peaks. Why whip it separately? Because we need those air bubbles trapped tightly! Gently fold that whipped cream into your cream cheese base. See how light it becomes? That’s air doing the heavy lifting! Finally, lightly fold in 3/4 cup of your creamy Biscoff spread—just stir until you see those lovely brown ribbons disappear into the batter. Don’t mix it into oblivion; we want the flavor distributed, not beaten out!
Chilling and Finishing Touches for Your Biscoff Cheesecake
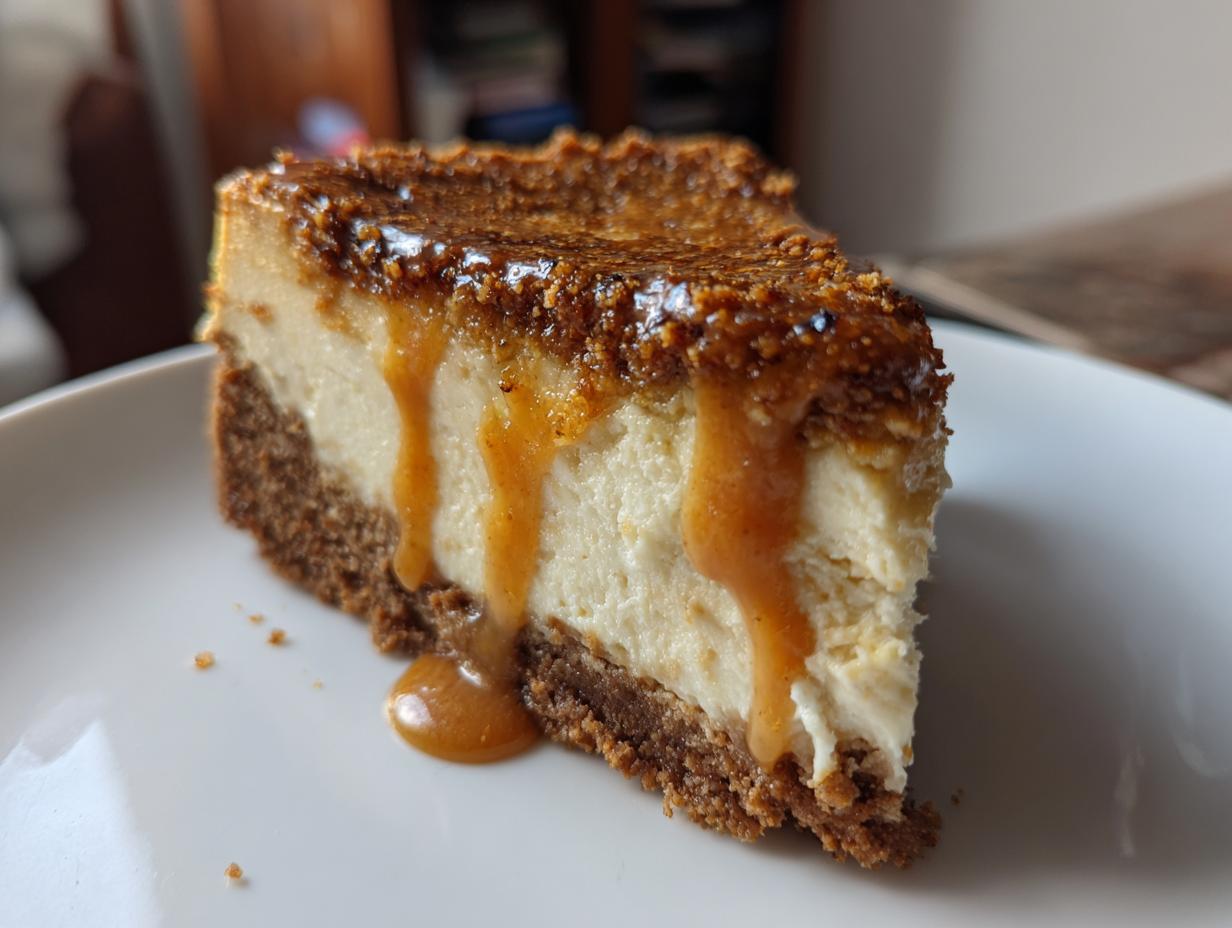
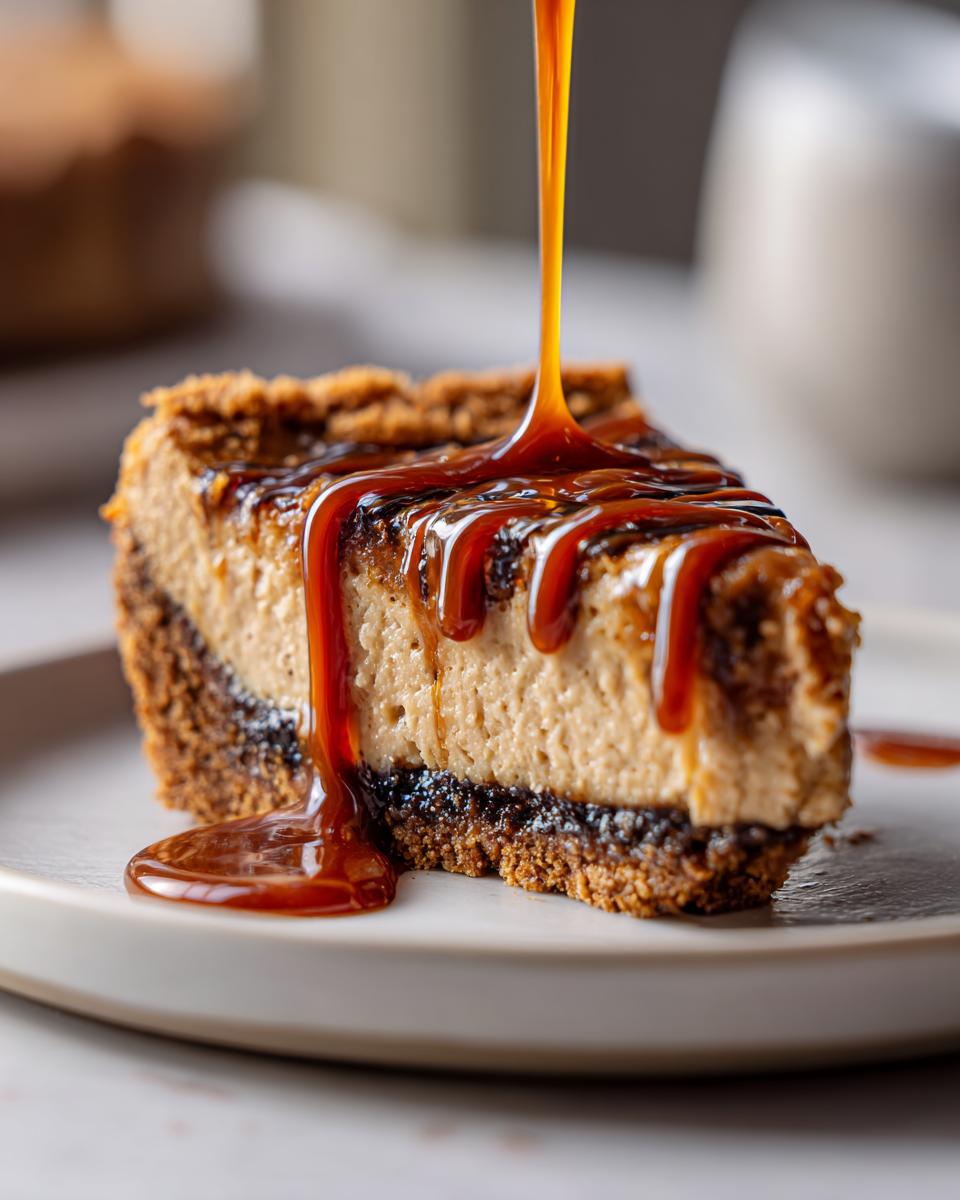
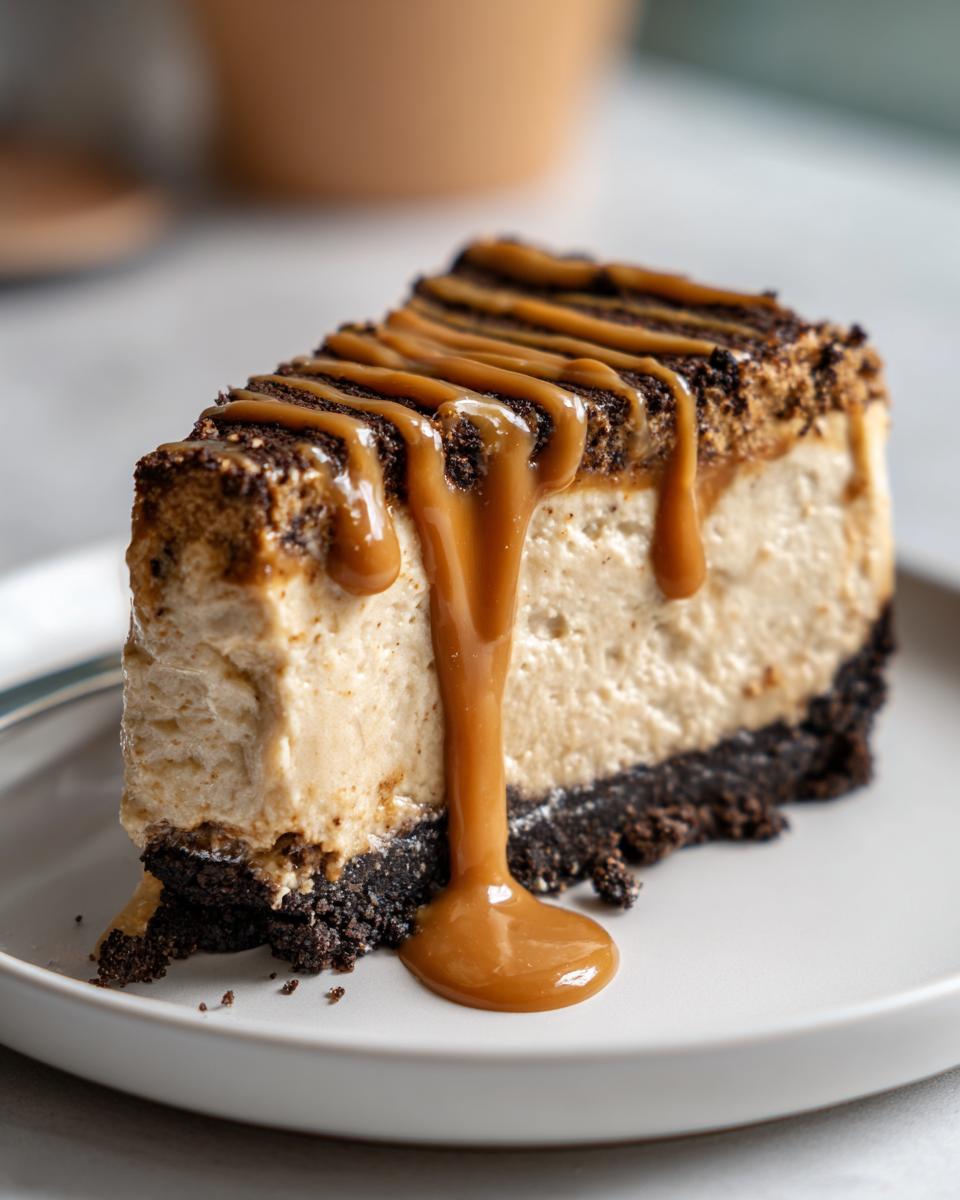
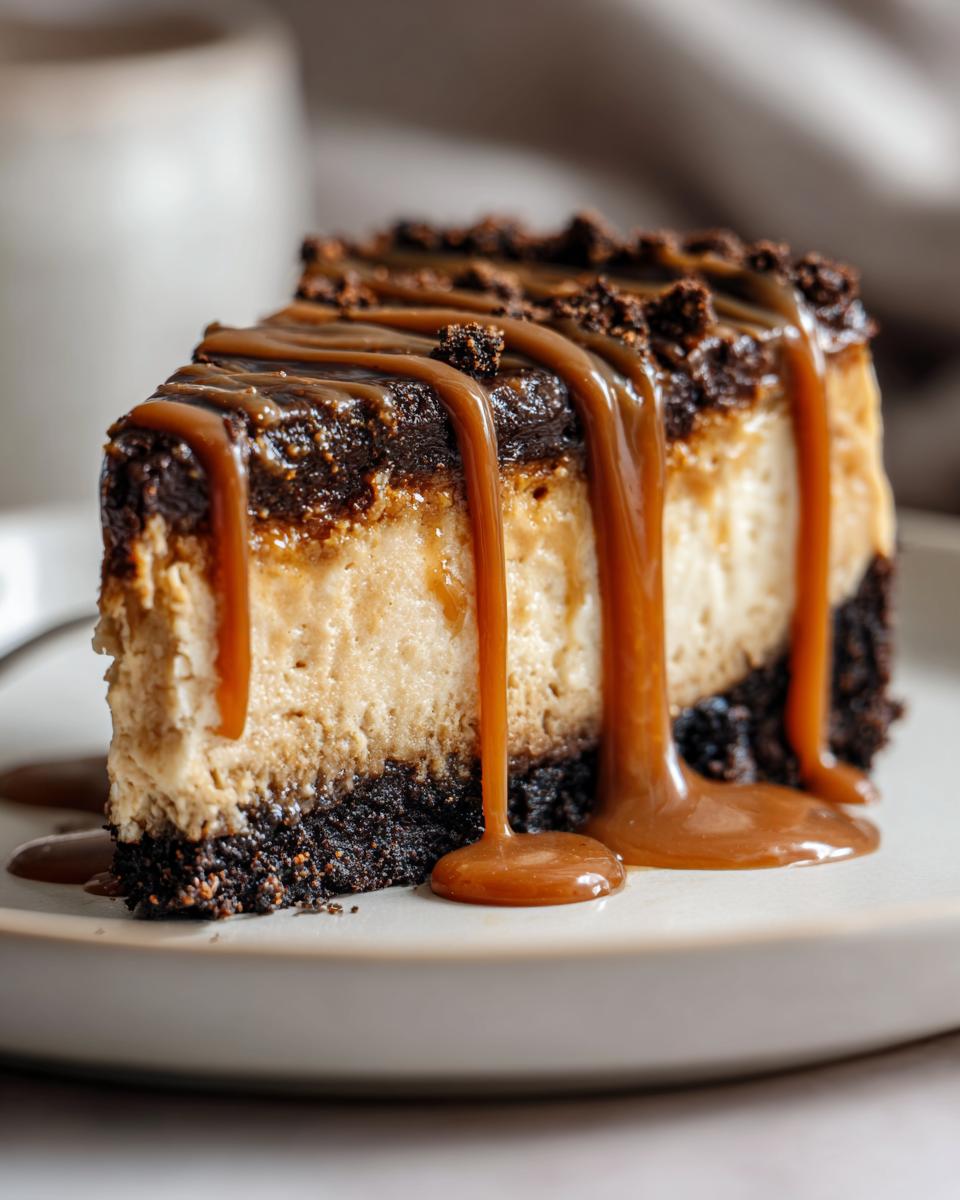
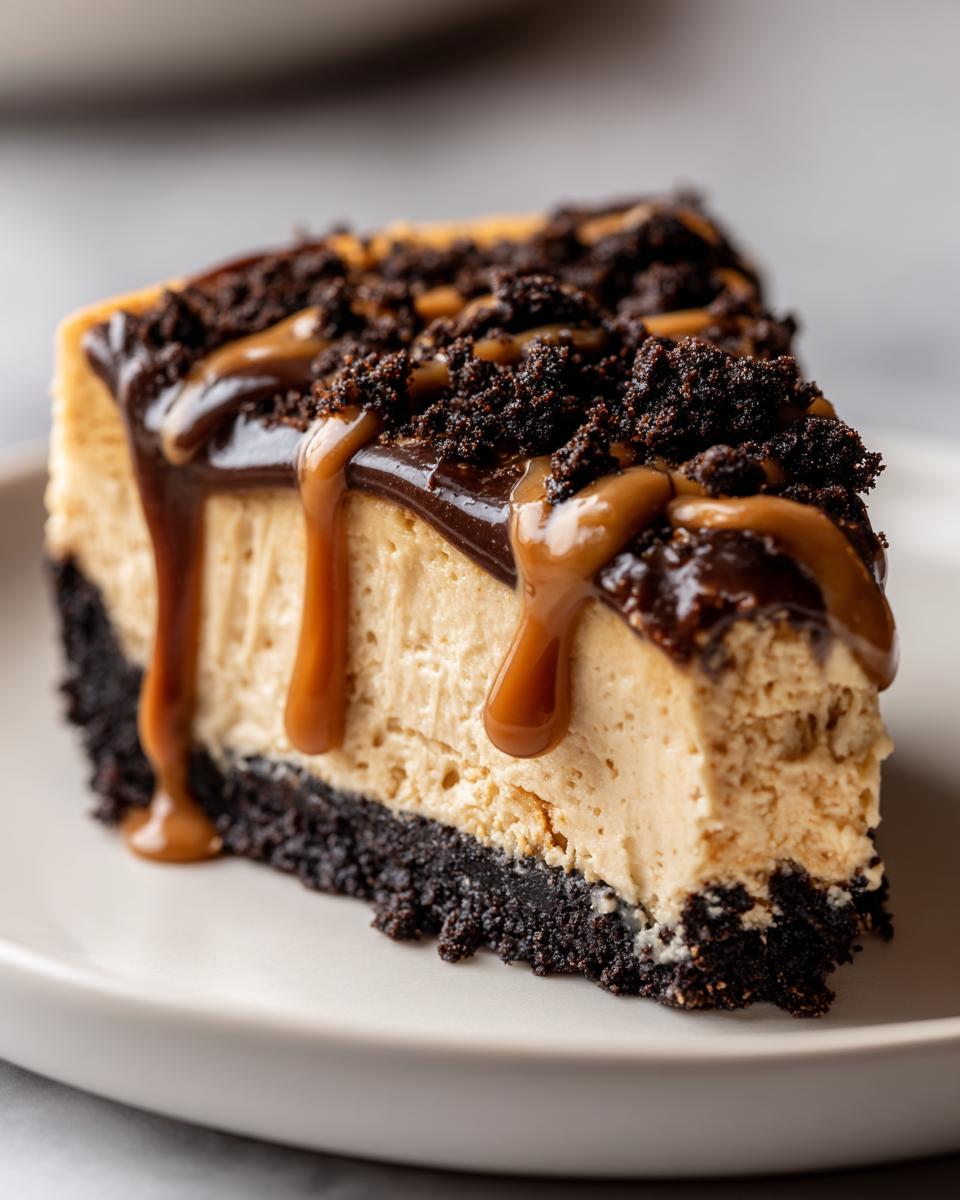
Pour that dreamy filling right over your chilled crust and smooth the top. This is the patiently hard part: it needs to chill in the refrigerator for a minimum of 6 hours, but honestly, overnight is best. This chilling time is non-negotiable for structural integrity; it allows the fats to firm up so you get perfect slices. If you’re wondering about other great no-bake inspirations, Jane’s Patisserie has a fantastic no-bake speculoos cookie butter cheesecake recipe you might enjoy comparing against! Once it’s fully set, warm the remaining 1/4 cup of Biscoff spread just slightly—maybe 15 seconds in the microwave is all it takes—until it’s glossy and drizzle-able. Drizzle it artfully over the top! For more inspiration on whipping up creamy, satisfying desserts without the fuss, check out my easy apple crumble recipe.
Tips for Success Making a Flawless Biscoff Cheesecake
It’s the little things that take a good dessert and make it absolutely unforgettable, isn’t it? Since this is such a rich treat, a few simple checks ensure your **biscoff cheesecake** turns out exactly as perfect as you pictured it. We’re going to rely on the wisdom I gleaned from testing this recipe until all five people in my house stopped complaining about eating it!
Ingredient Temperature Matters for Creamy Biscoff Filling
If you skip one thing, please don’t let it be this: your cream cheese needs to be completely soft. I learned this the hard way when I tried to rush it by microwaving the brick for ten seconds. The outside got warm and melty, but the center was still cold, resulting in little clumps of cheese marbled throughout what should have been a smooth surface. If your cream cheese is that stubborn, set it out an hour before you plan to mix. That warmth allows it to blend seamlessly with the sugar and vanilla, guaranteeing that luscious, hole-free **Creamy Biscoff Filling** we are aiming for.
Elevating Your Biscoff Cheesecake with Salted Caramel Swirls
So many of you asked about making this even more over-the-top—and who am I to stop you? If you want to try that bakery-style decadence, adding salted caramel is brilliant! You can easily do this during Step 4 when you fold in the cookie butter. Instead of just folding in the 3/4 cup of Biscoff spread, take maybe half of it out for drizzling later, and fold in the remaining cookie butter along with a couple of big tablespoons of good quality salted caramel sauce. Swirl it just slightly—don’t fully mix it in! That creates those beautiful, salty-sweet ribbons running through your **No Bake Cheesecake**. For some killer inspiration on layering flavors like this, take a peek at this salted caramel biscoff cheesecake recipe.
Also, remember that pinch of salt I mentioned for the crust? That’s the next level move that keeps this sweet dessert from tasting flat. Feel free to toss in a tiny bit of salt when you mix your crumbs—it really enhances that spiced cookie flavor. If you’re looking for other flavorful, simple recipes involving spices, you should try my cinnamon crunch banana bread recipe!
Storage and Keeping Your Biscoff Cheesecake Fresh
Because this is a no-bake beauty, storage is pretty straightforward, but keeping it fresh is key to enjoying that perfect texture later in the week. Since it’s primarily made of dairy—cream cheese and whipped cream—it absolutely needs to stay cold. Trust me, you don’t want to leave this gorgeous **biscoff cheesecake** sitting out on the counter!
You should aim to cover it tightly once it’s fully chilled and set. I usually use a large cake dome if I have one, but simple plastic wrap works just as well. If you’re using plastic wrap, try to cover it without letting the wrap actually touch the surface of the drizzled Biscoff topping, or you’ll end up peeling off your beautiful garnish when you go to serve a slice later. It’s a little finesse even in storage!
How long does it last? Because of the fresh cream, I recommend enjoying this heavenly cookie butter dessert within about 4 days of making it. After that, the crust starts to get a little soft, which isn’t the crunch we want. Keep it in the very back of the main refrigerator section, not jammed into the door where the temperature fluctuates!
If you manage to have some leftovers (a minor miracle at my house!), you can definitely freeze slices. Wrap individual slices tightly in plastic wrap, and then maybe wrap them again in aluminum foil. It thaws beautifully in the fridge overnight. This is honestly perfect if you want to make one for a party knowing you have easy leftovers for a snack tomorrow. If you’re ever looking for ideas on how to use up leftovers or just need other simple fridge-based meals, you should check out my avocado toast with feta recipe!
Frequently Asked Questions About This Biscoff Cheesecake Recipe
I know when I try a new recipe, my brain immediately starts firing off questions about substitutions and timing! That’s okay; that’s how we become intuitive cooks. I’ve gathered up the most common questions I get about this **Biscoff Cheesecake Recipe** to make sure your dessert comes out perfect the first time around. If you’re looking for more simple ideas for **Easy Cheesecake Ideas**, you should definitely explore that page!
Can I make this Biscoff Cheesecake ahead of time?
Oh, absolutely! In fact, I highly recommend it. Since this is a **No Bake Cheesecake**, the chilling time is what really sets the texture and locks in that amazing flavor combination. You can assemble the whole thing and let it set in the fridge for up to two days before you need to serve it. This is brilliant for party planning because you can focus on making sure your guests are happy on the day of the event! It tastes just as fresh and delicious on day two, sometimes even better because the flavors have more time to meld together.
What is the best way to cut a clean slice of No Bake Cheesecake?
This is the tricky part, especially when you have such a rich, creamy dessert like this **No Bake Cheesecake**. Trust me, nobody wants a messy slice presentation! My absolute favorite trick, one I use every single time, is the hot knife method. Get a long, sharp knife and run it under very hot water for about 20 seconds. Wipe the knife completely dry with a towel—you want it hot, not wet! Slice through the cheesecake once, then immediately repeat the process: back into the hot water, dry it off, then cut the next slice.
Wipe the knife clean between every single cut if you can. The heat melts just the barest layer of the filling, allowing the knife to glide through without dragging or tearing the sides. It makes for those beautiful, sharp slices that look like they came straight out of a professional bakery case!
Can I bake this cheesecake instead?
You know, you could probably adapt the filling ratio, but I really designed this recipe specifically to be a creamy, luscious, **No Oven Treat**. Baking it would change the texture entirely, likely requiring eggs to stabilize it, turning it into a traditional baked cheesecake rather than this smooth, dense cookie butter delight. For true **Easy Cheesecake Ideas**, stick to the no-bake method here! For more great ideas, don’t forget to check out my main guide on easy cheesecake ideas.
Do I have to use Lotus Biscoff cookies for the crust?
While you *could* substitute with another spiced cookie, like graham crackers mixed with a bit of speculoos spice, honestly, you’d be missing out on that signature deep flavor profile that makes this dessert so famous. The Biscoff cookies are the star! If you can’t find the actual Biscoff cookies, try to find another shortbread-style spiced cookie, but for the full experience, stick to the real deal for your **Biscoff Cookie Butter Goodness**!
Estimating the Nutrition for Your Biscoff Cheesecake
I always feel a little guilty when baking something this rich, but hey, that’s what celebrations are for, right? While I focus almost entirely on flavor and simplicity here at the blog, I know some of you like to keep track of the numbers. So, I put together an estimate of what’s in a standard slice of this **Biscoff cheesecake** based on the ingredients we use.
Remember, I’m a home cook, not a nutritionist, so these figures are just an approximation based on the standard ingredients listed and the 10-serving yield. Think of this as helpful guidance rather than exact science!
- Serving Size: 1 slice
- Calories: 450
- Sugar: 35g
- Fat: 30g
- Protein: 5g
- Carbohydrates: 40g
Like any good dessert, this is one to enjoy in moderation! If you’re looking for ways to incorporate more protein into your snacking throughout the week, I have a fun recipe for high-protein cookie dough that might be a better fit for your everyday baking list. But when you need that **Cookie Butter Dessert** hit of indulgence, this recipe is absolutely worth every single calorie!
Share Your Biscoff Cookie Butter Goodness
Now the best part—seeing what you all create! For me, the joy of cooking is sharing the final product, and I truly hope this easy **Biscoff Cheesecake Recipe** becomes a favorite memory-maker in your own home. That’s what Taste This Plate is all about: simple food leading to wonderful moments around the table.
When you make this **Cookie Butter Dessert**, please come back and tell me how it went! Did you stick to the simple drizzle, or did you try adding those salted caramel swirls we talked about? Did your family devour it in minutes? Drop a comment below; I read every single one, and your feedback helps make my recipes better for everyone.
If you’ve got a picture of your perfectly set, creamy **Biscoff cheesecake**, I would absolutely love to see it! Tag me on social media or get in touch directly through my contact page. Hearing about how a simple recipe helped you celebrate something—big or small—is why I do this. Happy cooking, friends, and thank you for inviting my kitchen into yours!
PrintEasy No-Bake Biscoff Cheesecake

Create a rich, creamy Biscoff cheesecake without turning on your oven. This simple recipe uses a Biscoff cookie crust and a decadent cookie butter filling for an ultimate dessert experience.
- Prep Time: 20 min
- Cook Time: 0 min
- Total Time: 6 hr 20 min
- Yield: 10 servings 1x
- Category: Dessert
- Method: No-Bake
- Cuisine: American
- Diet: Vegetarian
Ingredients
- 2 cups Lotus Biscoff cookie crumbs (about 30 cookies)
- 6 tablespoons unsalted butter, melted
- 16 ounces cream cheese, softened to room temperature
- 1 cup powdered sugar, sifted
- 1 teaspoon vanilla extract
- 1 cup heavy whipping cream, cold
- 1 cup Biscoff cookie butter (spreadable), divided
- 2 tablespoons milk (optional, for thinning topping)
Instructions
- Prepare the Crust: In a medium bowl, combine the Biscoff cookie crumbs and melted butter. Press this mixture firmly into the bottom of a 9-inch springform pan. Place the crust in the freezer while you prepare the filling.
- Make the Filling Base: In a large bowl, beat the softened cream cheese with an electric mixer until smooth. Add the sifted powdered sugar and vanilla extract, mixing until just combined and creamy. Scrape down the sides of the bowl.
- Whip the Cream: In a separate, clean bowl, whip the cold heavy whipping cream until stiff peaks form. Gently fold the whipped cream into the cream cheese mixture until no streaks remain.
- Incorporate Biscoff Spread: Gently fold in 3/4 cup of the Biscoff cookie butter into the cream cheese mixture until it is evenly distributed. Do not overmix.
- Assemble the Cheesecake: Pour the filling over the chilled crust and smooth the top with a spatula. Cover the pan loosely with plastic wrap and refrigerate for at least 6 hours, or preferably overnight, until the cheesecake is firm.
- Prepare the Topping: Once the cheesecake is set, gently warm the remaining 1/4 cup of Biscoff cookie butter in the microwave for about 15-20 seconds until it is easily pourable. Stir in the optional milk if you prefer a thinner drizzle.
- Serve: Drizzle the melted Biscoff spread over the top of the chilled cheesecake. You can also crush a few extra Biscoff cookies for garnish. Carefully release the springform side before slicing and serving this decadent dessert.
Notes
- For the best texture, make sure your cream cheese is fully softened before mixing. This prevents lumps in your creamy filling.
- If you want a slightly saltier crust, add a small pinch of salt to the cookie crumbs before adding the butter.
- This recipe is excellent for making mini cheesecakes in a muffin tin lined with paper liners. Adjust chilling time as needed.
Nutrition
- Serving Size: 1 slice
- Calories: 450
- Sugar: 35g
- Sodium: 250mg
- Fat: 30g
- Saturated Fat: 18g
- Unsaturated Fat: 12g
- Trans Fat: 0g
- Carbohydrates: 40g
- Fiber: 1g
- Protein: 5g
- Cholesterol: 80mg