
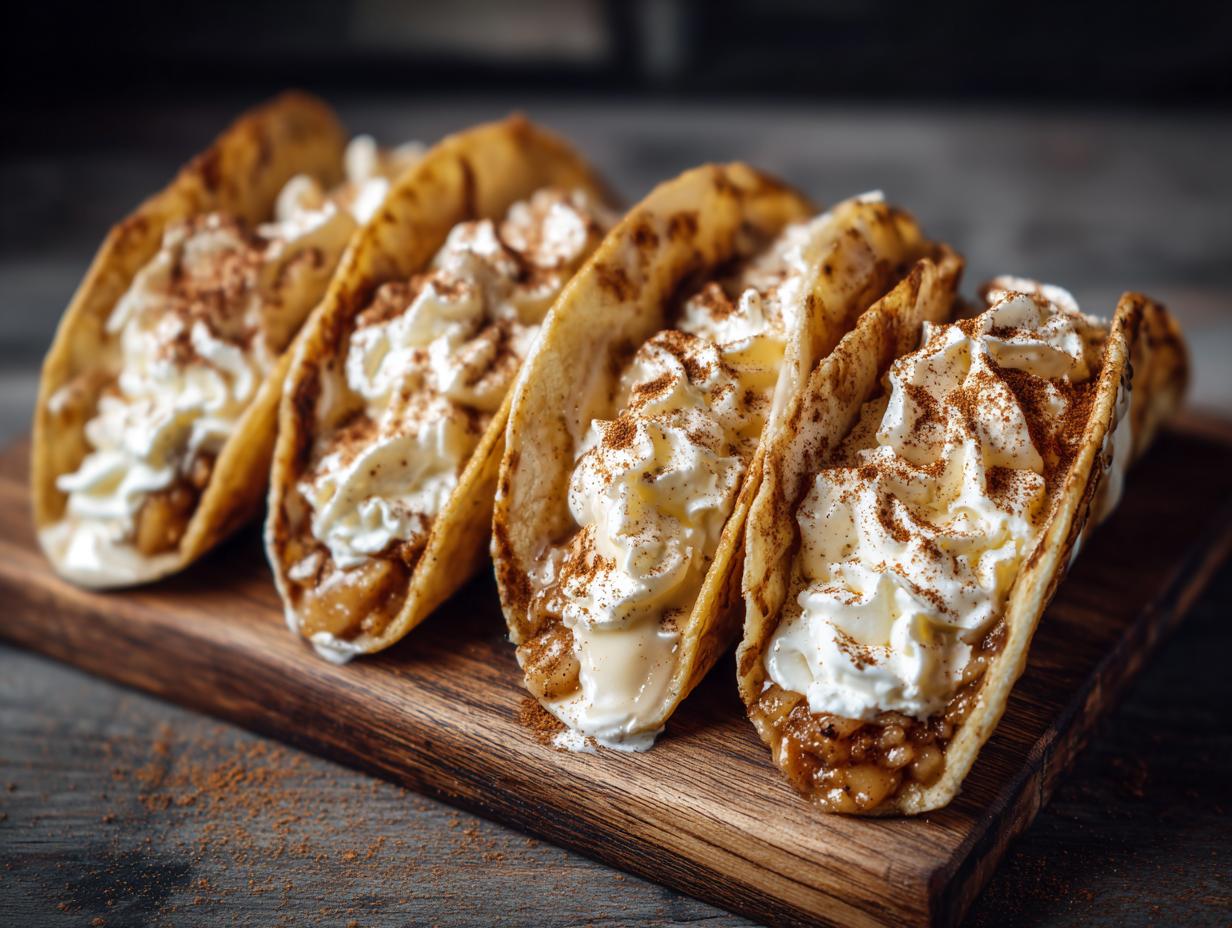
Alright, let’s talk parties and desserts! You know how sometimes you just want something FUN and totally handheld to enjoy? Forget fussy plates and forks for a sec. I’m talking about these incredible Apple Pie Dessert Tacos! Imagine crisp, sweet cinnamon sugar tortillas embracing this dreamy, creamy no-bake cheesecake filling, all topped with warm, gooey apple pie goodness. It seriously tastes like a party in your mouth! As Kate Reilly from Taste This Plate, I’ve always believed that good food brings people together, and these little tacos are perfect for making those special kitchen memories. While not a ‘blueberry breakfast quesadilla’, these sweet tacos are a delightful alternative for any gathering. After years of tinkering and testing recipes, I can promise you these are a winner!
- Why You'll Love These Apple Pie Dessert Tacos
- Gather Your Ingredients for Apple Pie Dessert Tacos
- Crafting Your Cinnamon Sugar Tortilla Shells
- Whipping Up the No-Bake Cheesecake Filling
- Assembling Your Delicious Blueberry breakfast quesadilla Inspired Dessert Tacos
- Tips for Success with Your Apple Cheesecake Tacos
- Frequently Asked Questions about Dessert Tacos
- Estimated Nutritional Information
- Share Your Apple Pie Dessert Taco Creations!
Why You’ll Love These Apple Pie Dessert Tacos
Seriously, these come together way faster than you think! Who doesn’t love dessert tacos? They’re a huge hit with everyone. Plus, you can prep the shells and filling ahead of time so you can relax when guests arrive. And that combo of crisp cinnamon sugar, creamy cheesecake, and warm apple pie? Pure bliss!
Gather Your Ingredients for Apple Pie Dessert Tacos
Okay, mamas and dadas, gather ’round! To whip up these amazing Apple Pie Dessert Tacos, you’ll want to have these goodies ready to go. Don’t worry, they’re all super easy to find at your regular grocery store. You’ll need eight 6-inch flour tortillas – the regular kind work just fine! For that irresistible cinnamon-sugar crust, grab some melted butter, granulated sugar, and ground cinnamon. For the dreamy filling, make sure you have one 8-ounce package of cream cheese that’s softened just right, half a cup of powdered sugar, and a teaspoon of vanilla extract. And of course, you can’t forget the star of the show: a cup of yummy apple pie filling. Oh, and have some caramel drizzle, whipped cream, or chopped nuts handy if you’re feeling extra fancy!
Crafting Your Cinnamon Sugar Tortilla Shells
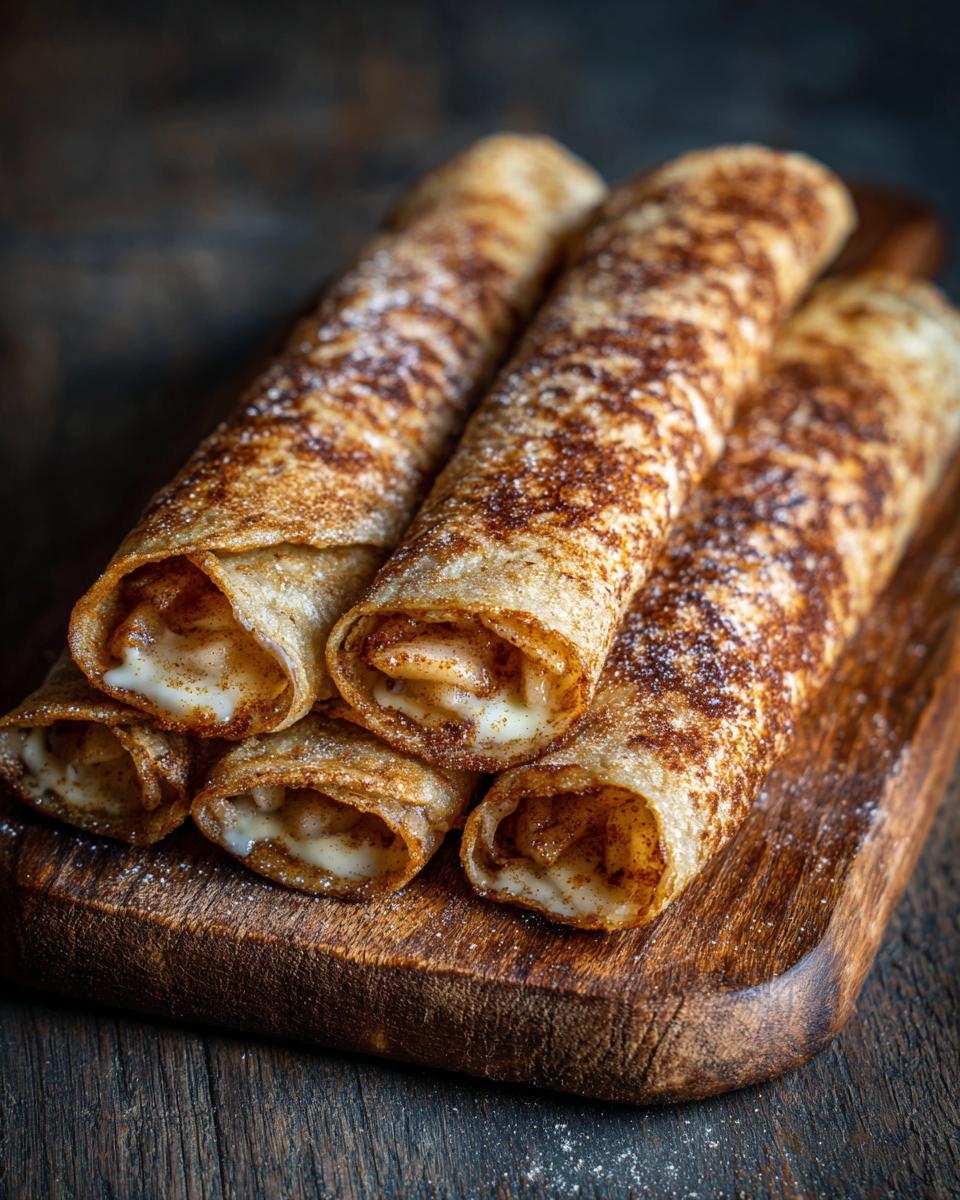
Alright, let’s get these shells made! First things first, preheat your oven to 350°F (175°C). This is where the magic starts. In a little bowl, mix up that melted butter, granulated sugar, and cinnamon until it’s all combined. Now, this is important: brush this yummy mixture evenly all over *both* sides of your flour tortillas. Trust me, coating both sides gives you that amazing, consistent crunch and sweetness all the way through. Once they’re all coated, it’s time to shape them! The easiest way I’ve found is to gently drape them over the bars of your oven rack. You can also use two oven-safe bowls, letting the tortillas hang down between them. Let them bake for about 8-10 minutes. Keep an eye on them! You want them to be lightly golden and crisp, not burnt. Once they’re done, carefully take them out and let them cool COMPLETELY. Seriously, don’t rush this part! Trying to fill warm shells is a recipe for a soggy mess. These crisp cinnamon sugar tortillas are the perfect foundation!
Baking Your Cinnamon Sugar Tortillas to Perfection
So, when you pop those beauties into the oven at 350°F (175°C), aim for about 8 to 10 minutes. What you’re looking for is a lovely golden-brown color and edges that start to feel firm to the touch. They should hold their shape without being floppy. Oh, and please, please, please let them cool down all the way before you even think about filling them. Patience is key here for that perfect, snappy crunch!
Whipping Up the No-Bake Cheesecake Filling
Now for the creamy, dreamy center! Honestly, this part is so satisfying. You’ll want to start with your 8-ounce package of cream cheese, but make sure it’s been sitting out long enough to get nice and soft. Trust me, soft cream cheese is your best friend here – it makes it SO much easier to get a totally smooth filling. Just pop it into a medium bowl and beat it with your mixer until it’s wonderfully smooth and lump-free. Then, add in the powdered sugar and that lovely splash of vanilla extract. Beat it all together again until it’s perfectly combined and super creamy. This ‘no-bake cheesecake filling’ is what makes these dessert tacos so ridiculously good, and getting that smooth texture is key! It’s all about building that delicious foundation for the apple pie goodness to come. You can find more tips on achieving the perfect no-bake cheesecake filling right here!
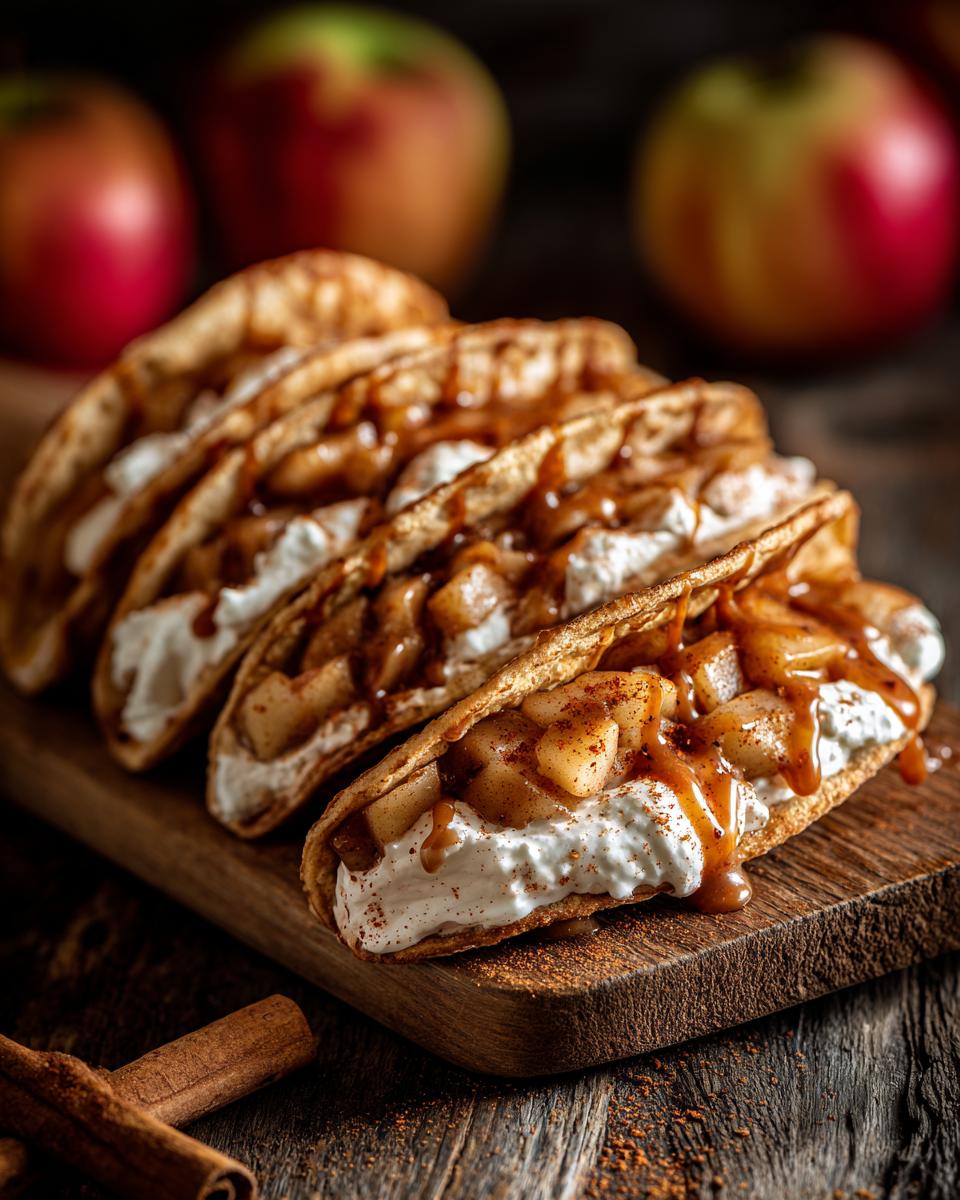
Assembling Your Delicious Blueberry breakfast quesadilla Inspired Dessert Tacos
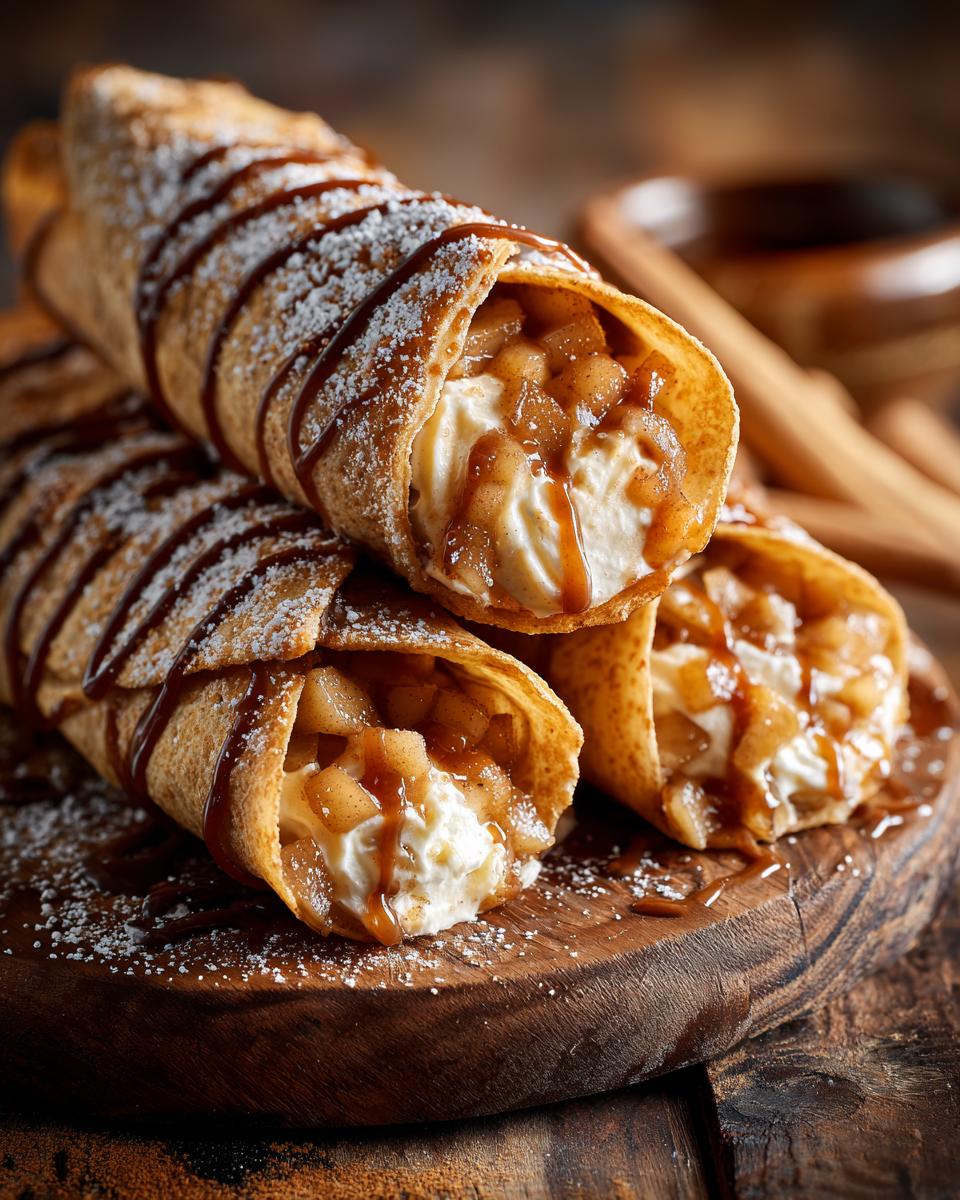
Okay, we’ve got our crispy cinnamon sugar shells and that luscious cheesecake filling ready to go. Now for the fun part – putting it all together! Grab your cooled tortilla shells. Spoon about 2 tablespoons of that creamy cheesecake filling into each one. Don’t be shy! Then, carefully top the cheesecake with about 2 tablespoons of your apple pie filling. If you’ve got caramel drizzle, whipped cream, or some chopped nuts hanging around, now’s the time to shower them on! These ‘dessert tacos’ are just begging for those extra touches. This combination of ‘apple pie filling dessert’ and creamy cheesecake is just divine, and serving them handheld makes them perfect ‘party desserts’.
Tips for Success with Your Apple Cheesecake Tacos
Want to make these Apple Pie Dessert Tacos absolutely perfect? I’ve got a few little tricks up my sleeve from all my testing! First off, for the make-ahead magic, you can totally bake those cinnamon sugar shells and whip up the cheesecake filling a day ahead. Just store them separately in airtight containers in the fridge. Then, right before your guests arrive, you can assemble them – super easy! For more on planning your party treats, check out my make-ahead tips for party desserts. If you’re worried about shaping the shells, try this: gently press your buttered tortillas into the cups of a muffin tin before baking. They’ll hold their shape like little edible bowls! Trust me, for effortless ‘party desserts’, this is a game-changer. Oh, and for an extra special touch, warm up your apple pie filling just a *tad* before spooning it into the tacos. That warm filling against the cool cheesecake? Heavenly! It’s these little things that make your ‘apple cheesecake tacos’ extra special.
Frequently Asked Questions about Dessert Tacos
Got questions about these awesome Apple Pie Dessert Tacos? I totally get it! It’s always good to know the little details. Can you make the cinnamon sugar shells ahead of time? Yes, you absolutely can! Just store them in an airtight container at room temperature for up to two days. What if you don’t have apple pie filling? No worries! You can totally use other fruit fillings like cherry, blueberry, or even just some sautéed cinnamon apples. These are such fun ‘fall dessert ideas,’ and they’re so versatile! Need to store leftovers? It’s best to store the filling and shells separately if possible, as assembled tacos can get soggy quickly. But if you must, store assembled ones in an airtight container in the fridge and eat them the next day. They’re really the ultimate ‘handheld sweets’ when fresh!
Storing and Reheating Your Blueberry breakfast quesadilla Dessert Tacos
When it comes to storing these yummy treats, it’s a bit of a balancing act. The shells themselves will stay pretty crisp if stored airtight at room temperature for a day or two. The cheesecake filling? Keep that in the fridge in a sealed container. If you’ve assembled them, they’re best eaten the same day. If you absolutely have to store assembled tacos, pop them into an airtight container in the fridge; just know the shells might soften up a bit. Reheating assembled tacos isn’t really recommended because the cheesecake filling can get weird and the shells will definitely lose their crunch. It’s always best to assemble them right before you’re ready to serve and enjoy them fresh!
Estimated Nutritional Information
Just a heads-up, these numbers are estimates since we all use slightly different ingredients and serve sizes! On average, one of these delicious Apple Pie Dessert Tacos has about 250 calories. You’re looking at roughly 12g of fat, with about 7g of that being saturated, around 30g of carbohydrates, and about 4g of protein. They also usually contain about 20g of sugar, which, let’s be real, is pretty good for a dessert taco!
Share Your Apple Pie Dessert Taco Creations!
I would absolutely LOVE to see your Apple Pie Dessert Taco masterpieces! Have you made them? Did you try a fun topping or shaping trick? Please, leave a comment below and tell me all about it! And if you’re sharing photos on social media, make sure to tag us so I can see your delicious creations. You can also share your recipe experiences on our recipe sharing page!
Apple Pie Dessert Tacos

Enjoy handheld sweet treats with cinnamon sugar tortillas, creamy no-bake cheesecake filling, and warm apple pie topping. These dessert tacos are perfect for parties and easy to make ahead.
- Prep Time: 20 min
- Cook Time: 10 min
- Total Time: 30 min
- Yield: 8 servings 1x
- Category: Dessert
- Method: Baking
- Cuisine: American
- Diet: Vegetarian
Ingredients
- 8 (6-inch) flour tortillas
- 2 tablespoons butter, melted
- 2 tablespoons granulated sugar
- 1 teaspoon ground cinnamon
- 1 (8 ounce) package cream cheese, softened
- 1/2 cup powdered sugar
- 1 teaspoon vanilla extract
- 1 cup apple pie filling
- Optional toppings: caramel drizzle, whipped cream, chopped nuts
Instructions
- Preheat your oven to 350°F (175°C).
- In a small bowl, combine the melted butter, granulated sugar, and cinnamon. Brush this mixture evenly over both sides of the flour tortillas.
- Drape the coated tortillas over the bars of your oven rack or over two oven-safe bowls so they form a taco shell shape. Bake for 8-10 minutes, or until lightly golden and crisp. Let them cool completely.
- While the shells bake, prepare the cheesecake filling. In a medium bowl, beat the softened cream cheese until smooth. Add the powdered sugar and vanilla extract, and beat until well combined and creamy.
- To assemble, spoon about 2 tablespoons of the cheesecake filling into each cooled tortilla shell.
- Top the cheesecake filling with about 2 tablespoons of apple pie filling.
- Add any optional toppings like caramel drizzle, whipped cream, or chopped nuts. Serve immediately.
Notes
- For a make-ahead option, prepare the tortilla shells and cheesecake filling separately and store them in airtight containers in the refrigerator. Assemble just before serving.
- You can also shape the tortillas by gently pressing them into a muffin tin before baking for a more stable shell.
- Warm the apple pie filling slightly before adding it to the tacos for a warm contrast to the cool cheesecake.
Nutrition
- Serving Size: 1 taco
- Calories: 250
- Sugar: 20g
- Sodium: 200mg
- Fat: 12g
- Saturated Fat: 7g
- Unsaturated Fat: 5g
- Trans Fat: 0g
- Carbohydrates: 30g
- Fiber: 1g
- Protein: 4g
- Cholesterol: 30mg