
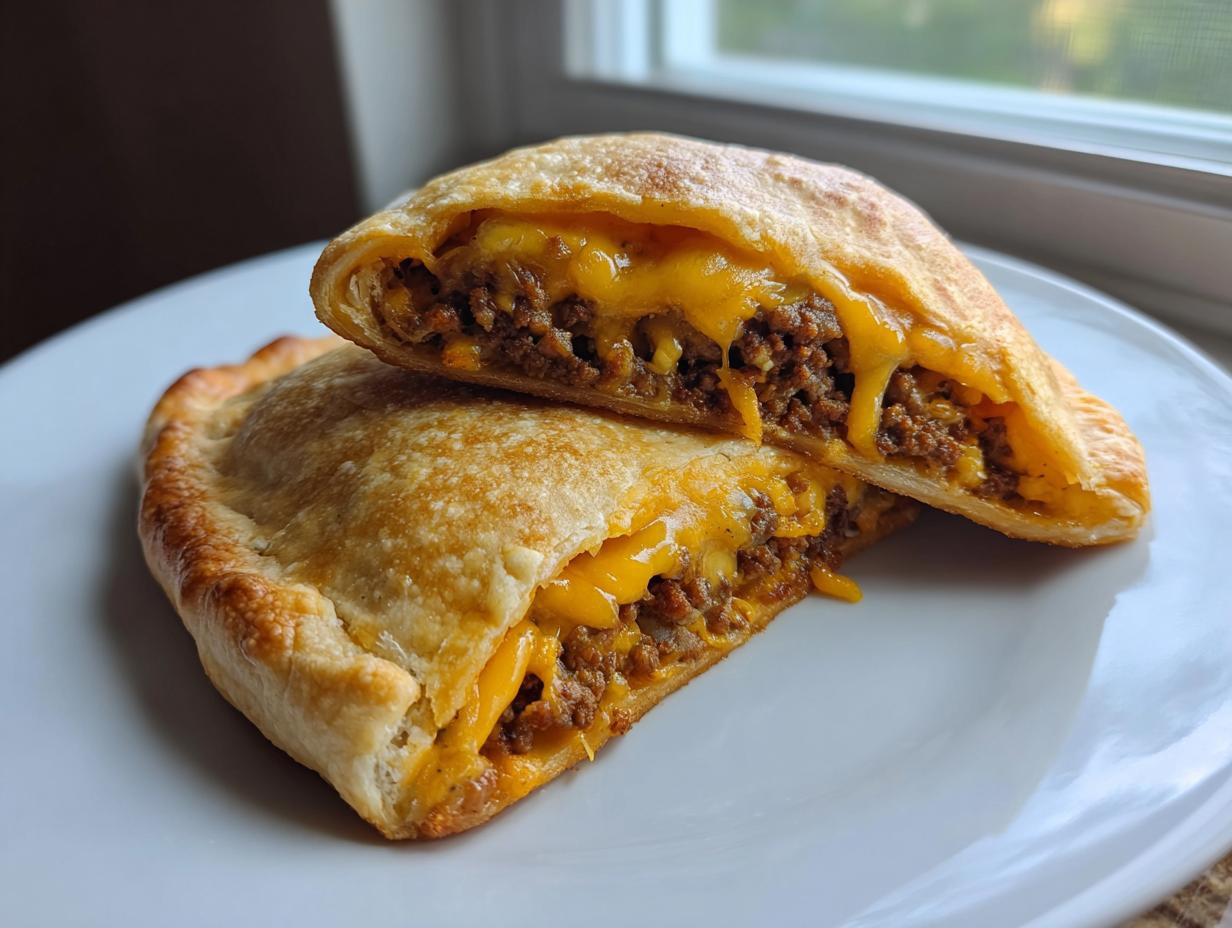
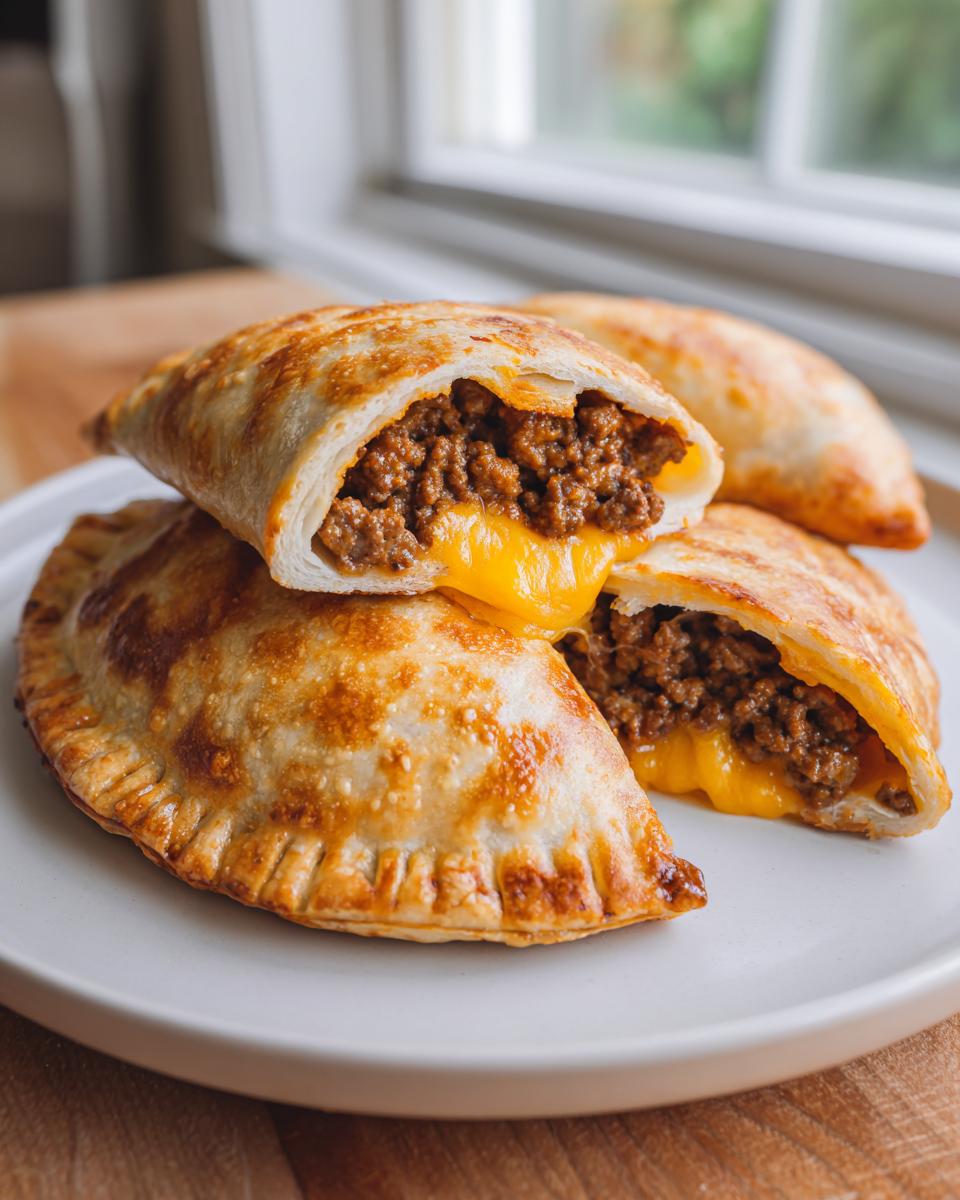
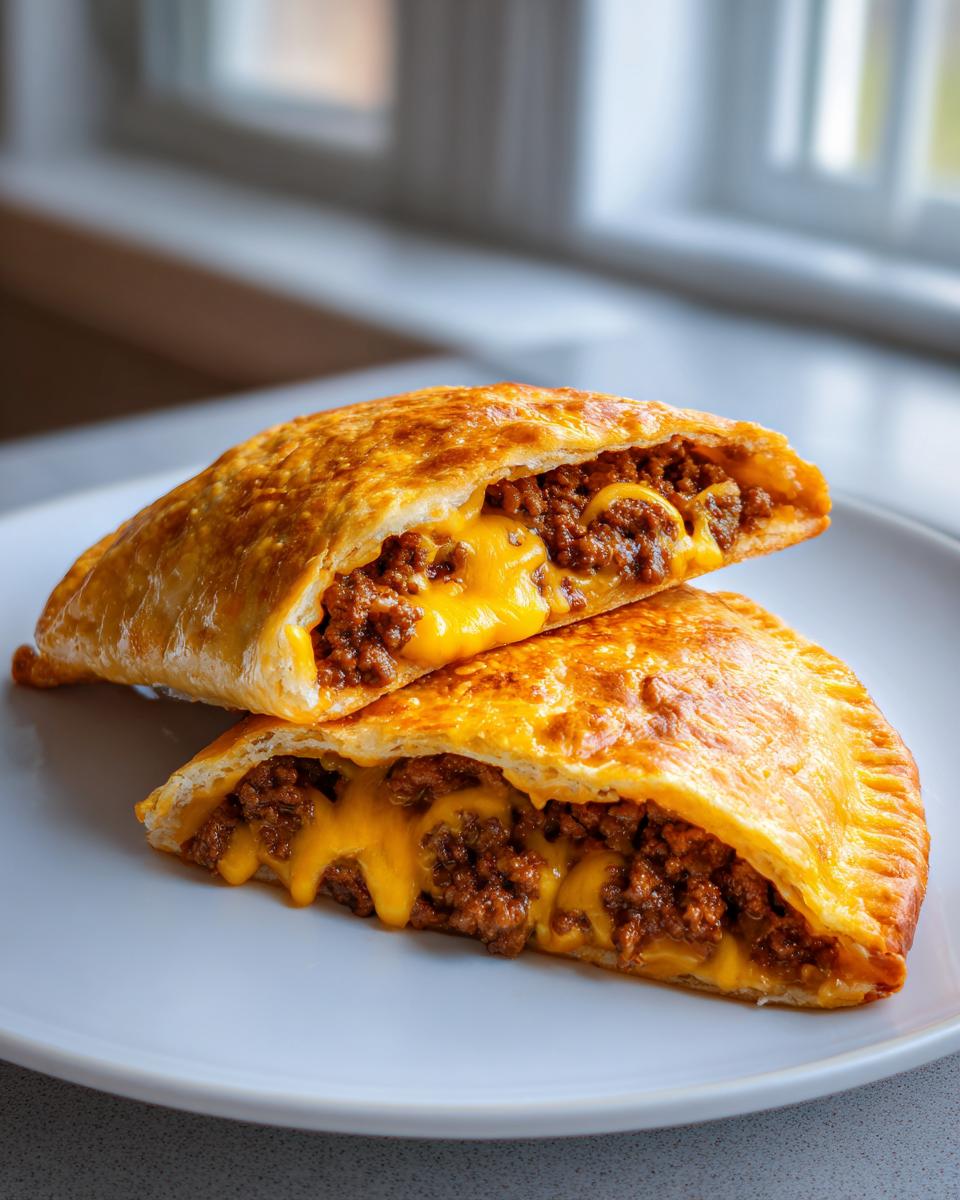
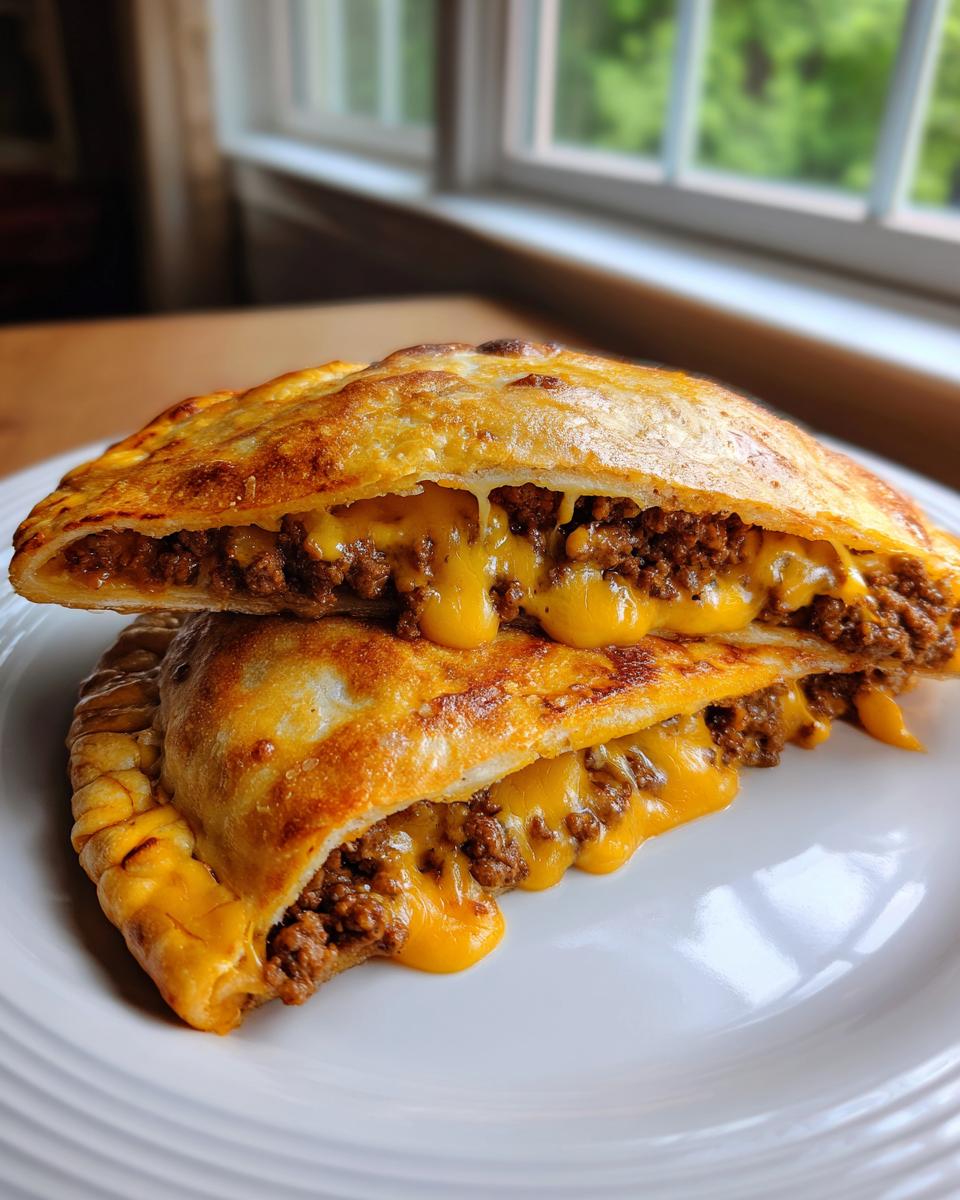
If you feel like you’re constantly wrestling with dinner ideas that promise flavor but deliver stress and a mountain of dishes, I completely get it. That used to be me every single Tuesday! But I found a secret weapon for those busy nights: the Ultimate Loaded Cheesy Baked Pocket Tacos. Seriously, these aren’t just tacos; they are handheld flavor bombs packed with seasoned beef and so much melted cheese it oozes out when you bite in. I talk a lot about why I started this blog and my mission to simplify cooking for everyone over on my About Page, but for now, just know that the beauty of these cheesy pocket tacos is that they take everything you love about taco night—the spices, the comfort, the gooeyness—and wrap it up neatly so cleanup is a breeze. Trust me, creating memorable meals doesn’t have to mean spending hours away from your family. We’re here to show you the simple way.
- Why You Will Love Making These Cheesy Pocket Tacos
- Ingredients for the Ultimate Cheesy Pocket Tacos
- How to Make Cheesy Pocket Tacos: Step-by-Step Instructions
- Tips for Perfect Cheesy Baked Recipes Every Time
- Storage and Reheating Instructions for Leftover Cheesy Pocket Tacos
- Serving Suggestions for Your Weeknight Taco Meals
- Frequently Asked Questions About Making Cheesy Pocket Tacos
- Nutritional Estimates for These Savory Cheese Pockets
- Share Your Experience Making These Easy Taco Pockets
Why You Will Love Making These Cheesy Pocket Tacos
I developed these pockets because I needed reliable weeknight meals that felt special but took almost no time. When you’re standing in the kitchen wondering what to make at 5 PM, you need assurance, and these deliver every single time. You’ll reach for this recipe again and again because:
- They are seriously fast! Prep clocks in around 15 minutes before they head into the oven.
- Hello, comfort food! This is hearty, savory, and exactly what you crave after a long day.
- Forget the toppings bar mess! These handheld snacks keep everything neatly contained.
- Guaranteed perfect cheese melt, thanks to a little trick inside the filling.
Ingredients for the Ultimate Cheesy Pocket Tacos
Getting started is the easiest part because almost everything here is stuff I already have sitting in my pantry or fridge! Remember, clarity equals confidence in the kitchen, so pull out everything before you start cooking. We are focusing on quality basics for maximum flavor in these savory pockets.
Here is what you’ll need for 8 perfect pockets:
- 1 tablespoon olive oil
- 1 pound ground beef
- 1 packet (1 ounce) taco seasoning mix
- 1/2 cup water
- 1/2 cup cream cheese, softened
- 1/4 cup salsa
- 1 cup shredded cheddar cheese, divided
- 8 medium flour tortillas (burrito size)
- Cooking spray
Ingredient Notes and Substitutions for Your Ground Beef Pockets
A couple of quick notes here to ensure your filling sets up just right. First, that cream cheese absolutely has to be soft! Take it out while you’re browning the meat, or zap it for about ten seconds. If your tortillas are the smaller taco size, they just won’t fold neatly over the filling, so make sure you grab the medium, burrito-sized ones.
If ground beef isn’t what you have on hand, don’t sweat it! These ground beef pockets handle substitutions really well. I’ve made batches using ground turkey, and they turn out great, or you can shred some leftover cooked chicken and mix that in when you add the cream cheese mixture. It’s all about making these work for *your* weeknight schedule!
How to Make Cheesy Pocket Tacos: Step-by-Step Instructions
I know the instructions look like a lot, but trust me, once you see how the filling comes together, you realize this is really just three simple stages: cook the beef, make the cheesy binder, and then wrap it up. The secret to a pocket that stays firm and doesn’t leak all over your baking sheet hinges on controlling moisture from the very start. We want gooey, yes, but we do *not* want soggy!
Preparing the Seasoned Filling for Your Pocket Tacos Recipe
First things first, you need a nice, hot skillet for that ground beef. Get it browned up and drained well—I usually blot the excess grease with paper towels because flavor is important, but grease is just going to slip out the sides later. Next, add your taco seasoning and water. Here’s the important bit for any good beef filling: you need to let that simmer down until nearly all the water is gone. We are cooking off the steam now so it doesn’t steam your tortilla later.
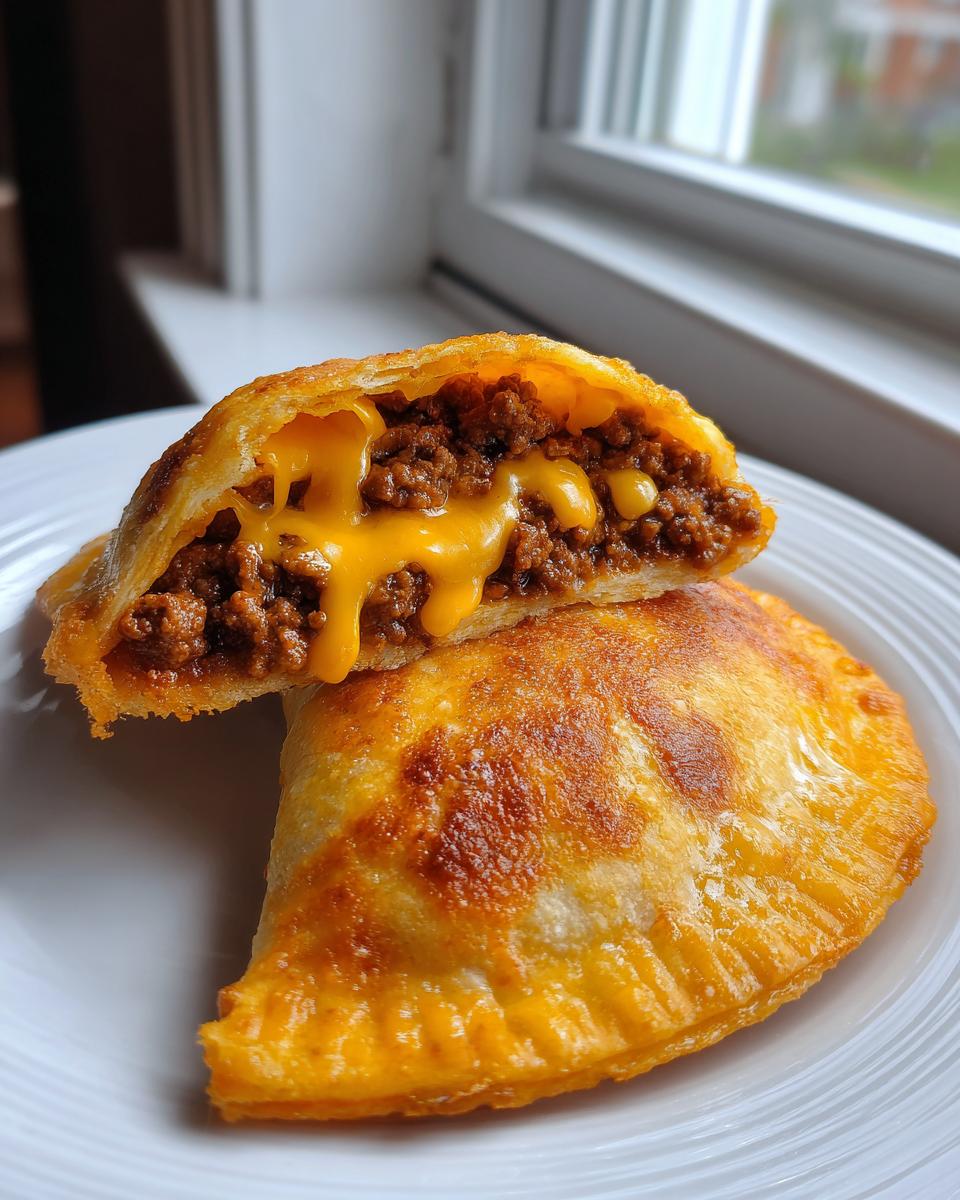
Now for the gooey magic! Take it off the heat, and then fold in your softened cream cheese and salsa. That cream cheese melts into the meat, creating that thick, savory sauce that makes these pockets so addictive. Stir in half of your cheddar, and boom—the filling is done.
Assembling and Baking Your Crispy Tortilla Pockets
Time to wrap things up! Get your oven preheated to 400 degrees Fahrenheit right now so it’s ready when you are. Lay out your medium tortilla flat. Don’t overstuff it! About a quarter cup of that rich meat mixture goes on one side. Sprinkle just a little more cheese right over the meat before you fold the other side over to make that classic half-moon. Press those edges together hard. If you want extra security against leaks, you can take a fork and crimp the edges—it looks great, too!
Place them seam-side down on your sprayed baking sheet. This is crucial for keeping them sealed while they bake. Spray the tops lightly with cooking spray (or use a brush with melted butter for extra color), then sprinkle the remaining cheese right on top. After 12 to 15 minutes, they come out golden brown with that bubbly, melted cheese finish we love. These Crispy Tortilla Pockets are worth the wait!
Tips for Perfect Cheesy Baked Recipes Every Time
Whenever I test a new recipe that involves stuffing dough or tortillas, the biggest fear is always leakage. We want the filling warm and gooey inside, not burnt onto the bottom of the pan! That’s why a tight seal is non-negotiable for these comfort food dinners.
Like I mentioned above, firmly press those edges together after folding. If you’re worried about your ground beef pockets separating in the oven, use a fork to do a quick crimp all the way around the semi-circle. It gives you the classic look and locks everything in tight.
For the best exterior texture—that light golden crunch—use a quality cooking spray right before they bake. If you want to elevate them even further, grab some melted butter and brush it lightly over the top of each pocket; this really helps the final sprinkling of cheddar brown beautifully. Check out another favorite baked classic here: this article has great tips for that crispy finish, too!
Storage and Reheating Instructions for Leftover Cheesy Pocket Tacos
Okay, first off, if you have leftovers, you are doing something right! Believe it or not, these handheld taco snacks are fantastic the next day, but you have to reheat them properly. If you just toss them in the microwave, you’re going to get a hot, steamy, soft pocket, and that just isn’t the same experience.
For storage, let any uneaten pockets cool down completely first. Then, place them in a good, airtight container. They do great in the fridge for about three days. Don’t leave them much longer than that; we want them fresh!
When you are ready to eat them, forget the microwave entirely if you want that nice texture back. The best way to reheat your cheesy pocket tacos is definitely in the oven or, even better, the air fryer. Set your oven to about 350 degrees Fahrenheit and bake them for about 8 to 10 minutes. If you toss them in the air fryer, 325 degrees for about 4 minutes usually crisps them up perfectly without drying out that amazing filling inside!
Serving Suggestions for Your Weeknight Taco Meals
Now that you have these perfect little beef and cheese tortillas ready, we need to talk about what makes the meal complete! Because the pockets are so rich from the melted cheese and beef, I always lean toward something cool and fresh to balance it out. Think of this as making your family friendly tacos feel next-level!
You absolutely must have cool sour cream or plain Greek yogurt nearby for dipping—it cuts right through the richness. Shredded crisp lettuce and diced tomatoes add that necessary crunch and freshness. If you want to make it a real feast, whip up a quick batch of homemade guacamole; you can find my super simple recipe for a party-sized dip here. A side of quick Spanish rice makes it a hearty dinner, but honestly, these pockets are so satisfying, sometimes just a handful of chips is all you need!
Frequently Asked Questions About Making Cheesy Pocket Tacos
I always get so many great questions once readers start trying out these Cheesy Tacos! It’s exciting to see how everyone brings their own little twist to this recipe for their family dinners. Here are a few things people ask me most often about making sure these pocket tacos recipe variations turn out perfectly.
Can I make these Cheesy Tacos ahead of time?
Yes, you absolutely can! This is why they make such fantastic meal prep components for quick dinners. The best way to prep ahead is to complete steps one through six—cooking the meat mixture, mixing in the cream cheese binder, and assembling the folded pockets. Once sealed, place them seam-side down on your lined baking sheet, cover them tightly with plastic wrap, and stick them in the fridge for up to 24 hours. When you’re ready to bake, just uncover them, spray the tops, add that final layer of cheese, and follow the baking instructions. They might need an extra minute or two in the oven since they are cold, but they’ll be just as fantastic!
What is the best way to get truly melted cheese recipes inside?
That gooey interior is what separates a good pocket from an amazing one! It really comes down to using cheese in two places. First, we mix half a cup of cheddar right into the meat mixture along with the cream cheese. That melts into the meat, creating a rich, creamy binder. The second layer of cheese goes on top of the filling *before* you fold the tortilla closed. That second layer really melts down into the cracks and then bakes into the outside, guaranteeing that wonderful texture you see in the best melted cheese recipes photos!
Another common question I get is about using hard shells. Please, don’t try it! Hard taco shells will just shatter when you try to fold them over the filling, turning your beautiful pocket into a crumbly disaster. Stick to the medium flour tortillas for these handheld taco snacks; they have the flexibility we need!
If you want to spice things up, you can easily make these spicy! Just add a teaspoon of cayenne pepper or a dash of your favorite hot sauce (like Cholula or Tapatío) right into the meat mixture when you add the taco seasoning. That gives you incredible flavor without compromising the structure. If you are looking for a totally different spicy recipe, check out my easy chili recipe—that one packs a real punch!
Nutritional Estimates for These Savory Cheese Pockets
I always try to be upfront about what goes into the food we make here, even when it’s pure comfort food like these incredible savory cheese pockets. Knowing what’s in the final dish helps you plan the rest of your menu, right? Remember, these numbers are just my best estimate based on standard ingredients—yours might look a little different depending on the fat content of your ground beef or the brand of salsa you use!
When you sit down to enjoy one of these stuffed tortilla wraps, here is what you can generally expect per serving (we yield 8 pockets):
- Calories: Approximately 350
- Fat: 18g (with 8g of that being saturated fat—that’s where the flavor lives!)
- Carbohydrates: 28g
- Protein: 20g
- Fiber: 2g
- Sugar: 2g
- Sodium: Around 550mg
Honestly, for a meal that feels this indulgent and satisfying for a quick dinner idea, I think those stats are pretty fair! They pack a good amount of protein, too, making them a solid choice for a hearty family dinner. Enjoy them without guilt!
Share Your Experience Making These Easy Taco Pockets
Now that you have the blueprints for the best cheesy pocket tacos in your repertoire, the fun part is seeing how YOU make them your own! That’s what being a home cook is all about—taking a great recipe and making it fit your kitchen and your family’s taste.
I truly hope these easy taco pockets become a reliable staple for your weeknight dinners. If you give them a try, please come back and let me know how they turned out! Leaving a recipe rating helps other busy cooks know they can trust this recipe for a quick, family-friendly meal. Did you add jalapeños? Did you try serving them with my favorite guacamole recipe?
Don’t be shy about sharing your tweaks or little wins in the comments below. I read every single one, and I absolutely love seeing photos of your creations! You can also reach out directly through my Contact Page if you have a specific question about stuffing or sealing. If you shared your finished dinner on social media, tag us! If you need some more quick inspiration later, check out what others are doing with great recipes like this one from this post. Happy cooking, friends—I can’t wait to hear about your cheesy successes!
PrintUltimate Loaded Cheesy Baked Pocket Tacos

Make these Ultimate Loaded Cheesy Baked Pocket Tacos for a satisfying, easy weeknight dinner. These handheld pockets are stuffed with seasoned ground beef and plenty of melted cheese, then baked until golden and slightly crisp.
- Prep Time: 15 min
- Cook Time: 15 min
- Total Time: 30 min
- Yield: 8 servings 1x
- Category: Dinner
- Method: Baking
- Cuisine: Mexican-Inspired
- Diet: Vegetarian
Ingredients
- 1 tablespoon olive oil
- 1 pound ground beef
- 1 packet (1 ounce) taco seasoning mix
- 1/2 cup water
- 1/2 cup cream cheese, softened
- 1/4 cup salsa
- 1 cup shredded cheddar cheese, divided
- 8 medium flour tortillas (burrito size)
- Cooking spray
Instructions
- Preheat your oven to 400 degrees Fahrenheit. Lightly grease a baking sheet or coat it with cooking spray.
- Heat the olive oil in a large skillet over medium-high heat. Add the ground beef and cook, breaking it apart, until it is fully browned. Drain off any excess grease.
- Stir the taco seasoning mix and water into the cooked ground beef. Bring the mixture to a simmer and cook for 3 to 5 minutes, or until most of the liquid has evaporated. Remove the skillet from the heat.
- In a small bowl, mix the softened cream cheese and salsa together until combined. Stir this mixture into the seasoned ground beef.
- Stir in 1/2 cup of the shredded cheddar cheese into the meat mixture. This creates the gooey, cheesy filling.
- Lay a tortilla flat. Spoon about 1/4 cup of the meat filling onto one half of the tortilla, leaving a border around the edges. Sprinkle a small amount of the remaining cheddar cheese over the filling.
- Fold the other half of the tortilla over the filling to create a half-moon shape. Press the edges firmly together to seal. You can use a fork to crimp the edges if you want extra security.
- Place the sealed pocket seam-side down on the prepared baking sheet. Repeat with the remaining tortillas and filling.
- Lightly spray the tops of the pockets with cooking spray. Sprinkle the remaining 1/2 cup of cheddar cheese evenly over the tops of the tacos.
- Bake for 12 to 15 minutes, or until the tortillas are lightly golden brown and the cheese on top is melted and bubbly.
- Let the cheesy pocket tacos cool for a few minutes before serving. Serve with your favorite taco toppings.
Notes
- For extra crispiness, you can lightly brush the tops of the tortillas with melted butter instead of using cooking spray before baking.
- If you prefer a softer texture, skip the baking step and serve the pockets immediately after filling, treating them like soft tacos.
- You can substitute the ground beef with ground turkey or shredded cooked chicken for a different protein option.
Nutrition
- Serving Size: 1 pocket
- Calories: 350
- Sugar: 2
- Sodium: 550
- Fat: 18
- Saturated Fat: 8
- Unsaturated Fat: 10
- Trans Fat: 0
- Carbohydrates: 28
- Fiber: 2
- Protein: 20
- Cholesterol: 60