
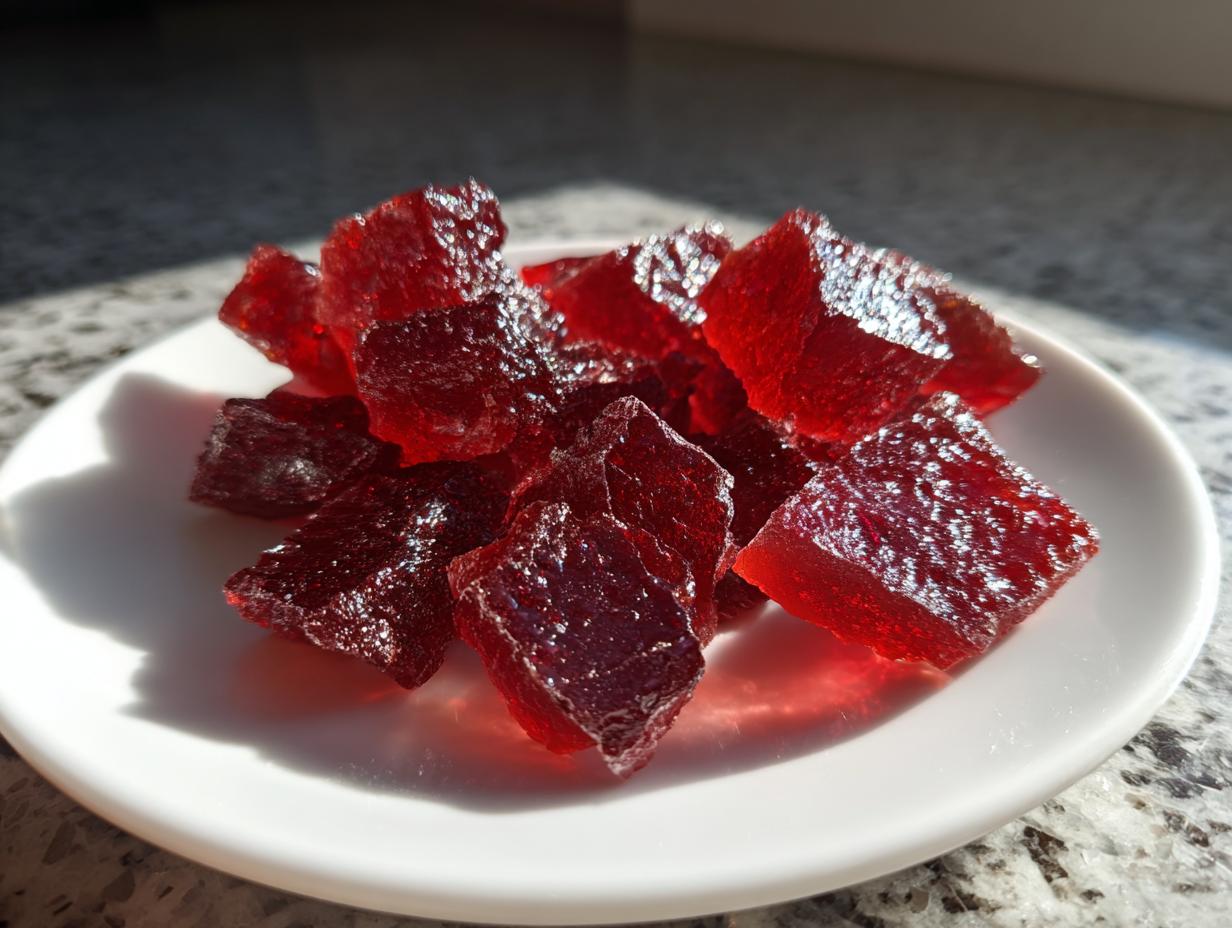
You know those treats that instantly transport you back to childhood holidays? For me, it’s always been the fiery little candies that pack a huge punch of flavor. Making homemade cinnamon rock candy brings back all those wonderful, nostalgic feelings, but with a boost of spice that modern sweets just can’t match. This simple recipe delivers that satisfying, unmistakable spicy-sweet flavor, coupled with the best, shatteringly crisp crunch you could ever ask for. I spent ages perfecting the temperature so you don’t have to worry about sticky sugar! Trust me, taking a little time for this old-fashioned candy making is totally worth the joyous little bursts of flavor you get afterward. I hope you enjoy making this as much as I enjoy sharing it with you. If you love easy holiday bakes, you really must check out my recipe for cinnamon roll casserole someday!
We found a fantastic tutorial on how to break up the candy perfectly, if you want another look over at this guide before you start!
- Why This Old-Fashioned Cinnamon Rock Candy Recipe Works
- Gathering Ingredients for Your Cinnamon Rock Candy
- How to Prepare Your Crunchy Cinnamon Rock Candy
- Tips for Crystallization Free Candy Making
- Flavor Variations for Your Spicy Sweet Candy Recipe
- Storing Your Homemade Hard Candy Cinnamon Rock Candy
- Frequently Asked Questions About Cinnamon Rock Candy
- Serving Suggestions for Holiday Edible Gifts
- Nutritional Estimate for Homemade Hard Candy
- Share Your Homemade Cinnamon Rock Candy Creations
Why This Old-Fashioned Cinnamon Rock Candy Recipe Works
When you’re making **best homemade hard candy**, the biggest worry is usually getting that perfect, satisfying crunch without the sugar turning grainy. That’s why this recipe uses corn syrup; it stabilizes the sugar so you get beautiful, clear, hard candy every single time. We walk through exactly what you need to hit that magical 300-degree mark, which is the secret to this crunchy candy tutorial. If you follow the temperature guide closely, you’ll see just how easy it is to create those nostalgic, spicy treats that remind everyone of Christmas past. For some great backup tips on the science of candy pulling, check out this article.
Simple Ingredients for Perfect Cinnamon Rock Candy
I didn’t want you hunting all over town for specialty supplies, so I stuck to the basics for this rock candy. You probably have most of this sitting in your pantry right now! We rely on simple sugar, water, and corn syrup to create the base structure. The real magic—that fiery, warm kick—comes from a specific extract and a touch of color, which we’ll talk about when we gather everything together in the next step.
Gathering Ingredients for Your Cinnamon Rock Candy
Okay, let’s get our ducks in a row! Having everything ready to go before you start heating the sugar is crucial when candy making. When that temperature hits 300 degrees F, things move fast, and you definitely don’t want to be scrambling for the food coloring!
For these spicy sweet homemade sweets, you need the following items on hand. Remember, this recipe is built on standard pantry staples because I believe simple candy making should be accessible to everyone. I also linked my recipe for sparkling honey lemonade because these two would be amazing served together!
- 2 cups granulated sugar
- 2/3 cup light corn syrup (This plays a big role in keeping things smooth, so don’t skip it!)
- 2/3 cup water
- 1 teaspoon cinnamon extract
- 1/2 teaspoon red food coloring (liquid or gel—I usually prefer gel for that deep color!)
- 1/4 teaspoon ground cinnamon (This is optional, but it really amps up that fiery taste.)
See? Nothing scary here! Just good, basic ingredients ready to be transformed into beautiful, crunchy Halloween or Christmas candy recipes.
How to Prepare Your Crunchy Cinnamon Rock Candy
Alright, buckle up, because this is where the magic happens! Making **DIY rock candy how to** style is so rewarding, but it requires attention, especially when you’re dealing with boiling-hot sugar. Safety first, always! Make sure your kids are well away from the stove, and always use an oven mitt when touching that heavy saucepan later.
We start by preparing our surface. You need a sheet pan lined with parchment paper or a silicone mat, maybe a little spray of neutral oil just to be safe. Then, combine your sugar, corn syrup, and water in a heavy pot. Cook this over medium heat, stirring just until that sugar completely dissolves—that’s key for a smooth finish. Once it dissolves, you add your essential candy thermometer and turn up the heat!
This process shows you why this is considered one of the best recipes for **simple candy making for beginners**; the steps are clear, even if the heat is intense.
Achieving the Hard Crack Stage for Cinnamon Rock Candy
The candy thermometer is your best friend here. We need to get that syrup to exactly 300 degrees Fahrenheit—that is the hard crack stage! Don’t guess; the thermometer tells no lies. As the temperature climbs past 280°F, things start happening super fast, so stand right there and watch it like a hawk. If it goes even a few degrees too high, you risk scorching, but hitting 300°F guarantees our **hard, crunchy candy texture**.
Adding Flavor and Color to the Cinnamon Rock Candy Syrup
The second we hit that 300-degree mark, pull the pan *off* the heat immediately. Let it sit for just 30 seconds so the raging bubbles calm down a bit. Now, quickly stir in your cinnamon extract and that bright red food coloring. If you’re adding that extra ground cinnamon, toss it in now too. You need to stir it fast, but gently—we are trying to incorporate flavor, not whip air into the mixture. Air bubbles mean cloudy candy, and we want this candy beautifully clear!
For great sauce-making tips while you wait for cooling, I have a great honey BBQ sauce recipe you might want to save for later!
Cracking the Hardened Cinnamon Rock Candy
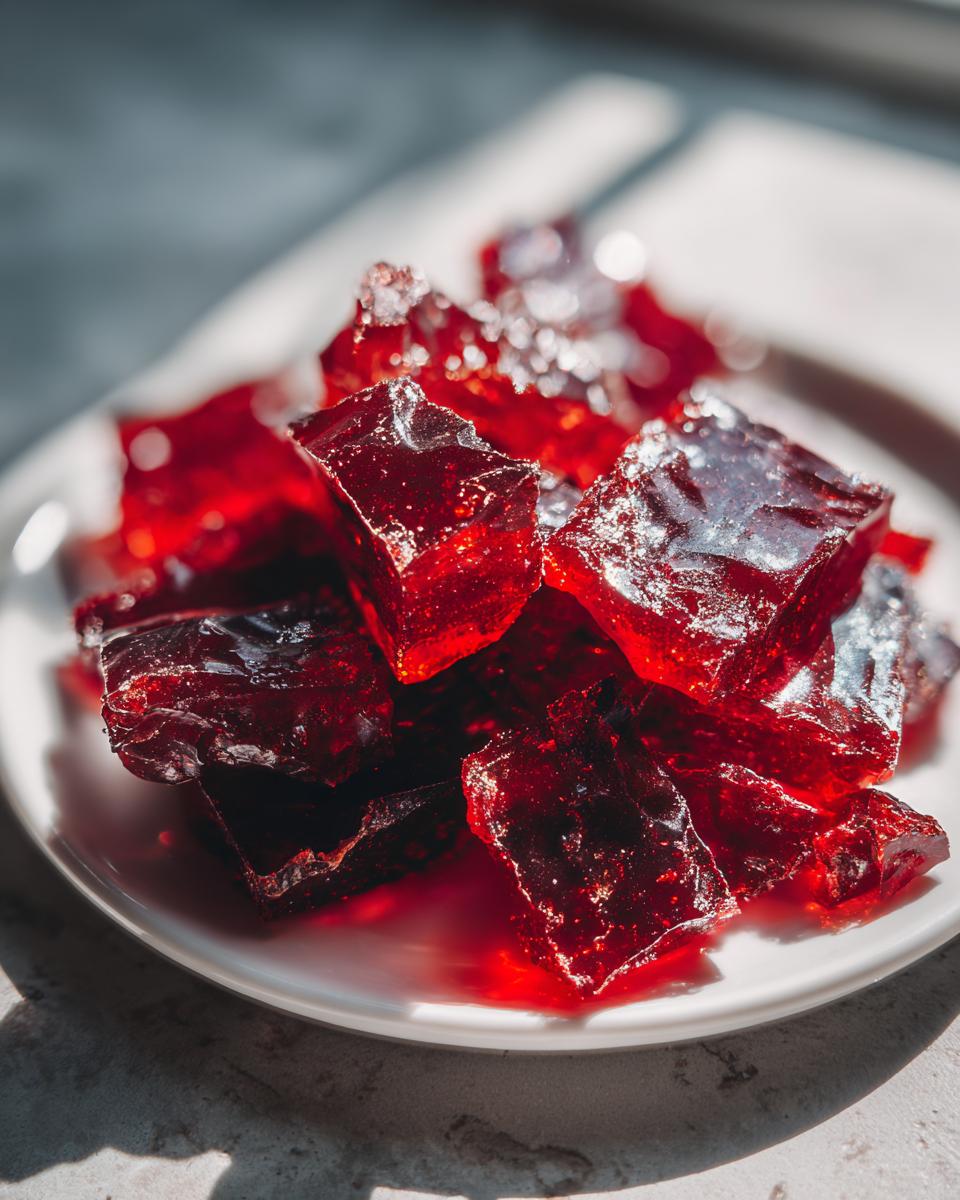
Now, carefully pour that glowing red liquid onto your prepared sheet. Don’t try to spread it or scrape the bottom of the pot—just let it flow into a thin puddle naturally. It needs to cool completely, about 45 minutes, just sitting on the counter. *Never* put hot candy in the fridge, or it gets sticky! Once it’s totally hard, move the sheet to a heavy-duty zip-top bag. Lay a towel over the bag and use a meat mallet (or the heavy bottom of a saucepan) to break it into those classic, irregular pieces. If you want to see someone else tackling this step, check out how they do it over at Paula’s site!
Tips for Crystallization Free Candy Making
If you’ve ever made hard candy before, you know the true villain: crystallization! It turns your beautiful, glassy syrup into gritty sludge, and nobody wants that when they are aiming for genuine **crystallization free candy**. The good news is that we planned ahead for this very specific problem. Remember those little sugar specks that sometimes creep up the side of the saucepan while it’s boiling? Those are the seeds of destruction for your smooth texture.
Here’s my trick, which I read about constantly back when I was testing these **vintage dessert recipes**: grab a clean pastry brush and dip it strictly in water. As you heat the syrup, gently brush down the interior sides of the saucepan above the liquid line. This washes any stray sugar crystals back into the bubbling syrup before they have a chance to grow into a big, grainy mess. It’s a simple, physical solution that guarantees a cleaner, clearer result for your homemade hard candy.
Flavor Variations for Your Spicy Sweet Candy Recipe
While the bold, fiery kick of cinnamon is the star here—and gosh, doesn’t it make for the spicy sweet candy recipe everyone remembers from the holidays?—I love playing with this recipe once I know the basic cooking method. Once you master the temperature, you can swap out the flavorings!
If you want to lean into that classic, intense ‘Red Hot’ vibe, don’t be afraid to bump up that cinnamon extract just a touch more. But remember what I said—too much extract can sometimes mess with the hardening process, so add it in tiny increments at the very end. If you want a slightly softer edge to the spice, try adding just a pinch of ground cinnamon after the extract; it adds depth.
Another thing I started doing recently, especially when preparing these for neighbor gifts, is adding a little zest right after I stir in the cinnamon. A tiny bit of orange or lemon zest really brightens up the whole thing and makes it taste fresh, not just spicy. It pairs beautifully with cinnamon, trust me!
If you’re looking around for other spiced treats after you’ve finished your batch of rock candy, I highly recommend taking a look at my cinnamon crunch banana bread. Similar warming spices, but totally different—and just as delicious!
If you’re researching other fiery candy options, you absolutely must check out this recipe for red hot cinnamon hard candy from Lemon Peony; it’s a great companion recipe!
Storing Your Homemade Hard Candy Cinnamon Rock Candy
We’ve done all the hard work—achieving that perfect temperature and shattering the candy just right—so let’s make sure this beautiful **homemade hard candy** lasts! Sugar is thirsty, and that’s the biggest enemy we face once the candy is ready to be put away. I’m talking about humidity, folks. Even a little extra moisture in the air can turn those sharp, glassy pieces into a sticky puddle overnight.
Because of this, you absolutely cannot store your **cinnamon rock candy** in the refrigerator. That cold, damp environment is a disaster for hard candy. Instead, we need an airtight environment at a cool room temperature. I use heavy-duty zip-top bags almost exclusively, squeezing every last puff of air out before sealing them tight.
If you’ve made a big batch destined for **Christmas candy recipes** or just snacking over several weeks, you can layer the pieces with wax paper inside a sturdy tin to give them extra protection. The key takeaway here is keeping the moisture locked out so you always get that clean, satisfying *snap* when you bite into a piece. If you are looking for other great ways to give homemade treats during the holidays, check out my recipe for easy Christmas jam!
For a great visual on how to store that gorgeous candy once it’s broken up, check out the method used over on this site. They show the exact storage container setup I recommend!
Frequently Asked Questions About Cinnamon Rock Candy
I know when you dive into **old fashioned candy making** you always end up with a few thoughts running through your head! We covered a lot of ground on temperatures and timing, but here are the most common questions I get asked about turning simple sugar into this spicy delight. I tried to keep the answers short and sweet, just like the candy itself!
Can I make cinnamon rock candy without corn syrup?
That’s a great question about substitutions, but honestly, I strongly advise against skipping the corn syrup here. Corn syrup might seem optional, but its main job is to interfere with sugar molecules trying to reform into crystals. When you boil sugar down like this, it really wants to crystallize, and the corn syrup acts as that barrier to give you that smooth, clear glass look. If you skip it, you are going to end up with grainy sugar instead of that beautiful **crunchy candy tutorial** finish you are hoping for.
How do I get the vibrant red color in my cinnamon rock candy?
This is where we talk about getting that perfect ‘Red Hot’ aesthetic! When you are aiming for a really deep, vibrant red, you need strong color concentration. Liquid food coloring works, but it adds a little extra water to your mix, which we don’t ideally want at the hard crack stage. For the absolute brightest color, I recommend using a small amount of gel food coloring at the end. You just stir it in quickly with the extract, and it saturates beautifully without thinning out that perfect 300-degree syrup. It makes them look so festive for Christmas cookie platters!
If you’re looking for another delicious way to make homemade treats that shine, let me know what you think of my cranberry sugar cookies next time! No cooking required there, just mixing!
Serving Suggestions for Holiday Edible Gifts
Once your beautiful batch of spicy, crackly **cinnamon rock candy** is broken up, the real fun begins: packaging! Since these are such a vibrant red, they look fantastic as **holiday edible gifts**. They don’t need much dressing up at all, which is lovely when you are making tons of different treats.
I always scoop the pieces into small, clear cellophane bags—just enough for one person to enjoy at a time—and tie them off with some festive colored ribbon, maybe a bit of baker’s twine. They look spectacular tucked into cookie tins alongside some less spicy items. Think of them as the spicy little accents for your next Christmas cookie exchange! If you’re looking for a refreshing beverage to go alongside these fiery candies, you should try stirring up my cranberry orange punch recipe.
If you need some more plating inspiration for gifting, I always love seeing what others are doing! You might get some great ideas from how they wrap things over at No Dash of Gluten.
Nutritional Estimate for Homemade Hard Candy
I know as home cooks, we are primarily focused on flavor and fun, especially with something like **cinnamon rock candy**, but I always look up the nutritional info just out of curiosity. While this is pure sugar and definitely a treat and not an everyday staple, it’s good to have a general idea!
Based on the exact measurements of sugar, syrup, and extract we used in this recipe, here is the estimated breakdown if you divide the entire batch into roughly what would be 32 one-ounce servings. Keep in mind these are just estimates, because the final yield always changes slightly depending on how thinly you spread the candy—and, of course, what brand of corn syrup you grab!
- Serving Size: 1 ounce
- Calories: 110
- Sugar: 28g
- Sodium: 1mg
- Fat: 0g
- Protein: 0g
So yes, this is decidedly old-fashioned candy making—lots of sugar, zero fat! But when you are making these kinds of **simple cinnamon treats** just for the holidays or as a special gift, who’s really counting? Enjoy it responsibly, friends!
Share Your Homemade Cinnamon Rock Candy Creations
Now that you have navigated the boiling sugar and successfully shattered your beautiful, fiery batch of **cinnamon rock candy**, I truly want to see what you’ve created! Candy making—even simple candy making—can seem a little intimidating, so when you pull off a perfect, crunchy result, you deserve a round of applause.
Did you package it up for **holiday edible gifts**? Did you use a slightly different extract, maybe adding a hint of vanilla along with the spice? Please leave a comment below and let me know how it went for you. Hearing about your successes (and any little lessons learned!) really helps me build better, more intuitive recipes for everyone who stops by Taste This Plate.
If you ended up with extra rock candy that you plan to snack on throughout the week, I hope you try it alongside something savory, like my favorite avocado toast with feta—the sweet/spicy counterpoint is shockingly good!
And if you snapped a picture of your colorful, cracked candy, tag me on social media! I love celebrating your kitchen wins. If you need one last visual reminder of how amazing this candy looks when it’s broken up, you should definitely take a peek at the photos shared over at Hearts Content Farmhouse!
Happy creating, and thank you so much for cooking with me today!
PrintOld-Fashioned Cinnamon Rock Candy: Simple Homemade Hard Candy Recipe
Make this classic, spicy-sweet cinnamon rock candy at home. This recipe provides clear steps for achieving a perfect, crunchy hard candy texture, ideal for holiday edible gifts or nostalgic treats.
- Prep Time: 5 min
- Cook Time: 15 min
- Total Time: 50 min
- Yield: About 2 cups 1x
- Category: Dessert
- Method: Stovetop Cooking
- Cuisine: American
- Diet: Vegetarian
Ingredients
- 2 cups granulated sugar
- 2/3 cup light corn syrup
- 2/3 cup water
- 1 teaspoon cinnamon extract
- 1/2 teaspoon red food coloring (liquid or gel)
- 1/4 teaspoon ground cinnamon (optional, for extra spice)
Instructions
- Prepare your surface: Line a large baking sheet with parchment paper or a silicone mat. Lightly grease the paper or mat with cooking spray or neutral oil.
- Combine sugar, corn syrup, and water in a heavy-bottomed saucepan. Stir over medium heat until the sugar dissolves completely. Do not let the mixture boil yet.
- Attach a candy thermometer to the side of the pan, ensuring the tip is submerged but not touching the bottom.
- Increase the heat to medium-high and boil the mixture without stirring. You want the syrup to reach 300 degrees Fahrenheit (the hard crack stage). Watch carefully, as the temperature rises quickly after 280 degrees.
- Once the mixture reaches exactly 300 degrees F, immediately remove the pan from the heat. Wait about 30 seconds for the bubbling to subside slightly.
- Carefully stir in the cinnamon extract and red food coloring. If using, stir in the ground cinnamon now. Stir quickly but gently to combine the additions without creating air bubbles.
- Pour the hot syrup onto the prepared baking sheet. Do not spread or scrape the pan; let the candy flow naturally into a thin layer.
- Allow the candy to cool completely and harden, which takes about 30 to 45 minutes at room temperature. Do not place it in the refrigerator, as this can cause stickiness.
- Once fully hard, place the candy sheet into a large, sturdy zip-top bag. Cover the bag with a clean kitchen towel and use a meat mallet or the back of a heavy pan to break the candy into small, irregular pieces (rock candy).
- Store your homemade hard candy in an airtight container at room temperature.
Notes
- To prevent crystallization (grainy candy), do not stir the syrup once it begins to boil. If sugar crystals form on the sides of the pan, use a wet pastry brush to wash them down into the syrup.
- For a vibrant red hue, use gel food coloring, as liquid coloring can sometimes thin the syrup too much.
- If you want a classic ‘Red Hot’ flavor, increase the cinnamon extract slightly, but be aware that too much extract can sometimes prevent the candy from hardening properly.
Nutrition
- Serving Size: 1 ounce
- Calories: 110
- Sugar: 28g
- Sodium: 1mg
- Fat: 0g
- Saturated Fat: 0g
- Unsaturated Fat: 0g
- Trans Fat: 0g
- Carbohydrates: 28g
- Fiber: 0g
- Protein: 0g
- Cholesterol: 0mg