
The holidays are wonderful, aren’t they? But let’s be honest: they often bring that frantic feeling of needing all twelve side dishes done perfectly when the oven is already packed with the main event. I used to get so stressed trying to nail the perfect holiday side until I figured out the secret to amazing, deeply flavorful homemade stuffing.
This traditional recipe solves everything. We focus on getting that ultimate texture—super moist and savory on the inside, with an undeniable golden, crispy top layer. This isn’t that dusty, dry stuff from a box, trust me. My grandmother, who made the best food I’ve ever tasted, taught me that the best side dishes come from paying attention to a few key steps. She always said that a great plate tells a story, and this classic Thanksgiving stuffing recipe is pure comfort and love, made easy for you right here at my table.
- Why This Classic Homemade Herb Stuffing is the Best Holiday Side Dish
- Ingredients for Your Traditional Stuffing Recipe
- How to Prepare This Savory Herb Stuffing Step-by-Step
- Make Ahead Stuffing Tips for Stress-Free Holiday Cooking
- Variations: From Sausage Stuffing to Cranberry Apple Stuffing
- Serving Suggestions for Your Perfect Turkey Side Dish
- Storage and Reheating Instructions for Leftover Stuffing
- Frequently Asked Questions About Classic Stuffing
- Share Your Homemade Stuffing Success
Why This Classic Homemade Herb Stuffing is the Best Holiday Side Dish
If you’re tired of serving dry bread cubes, stop right now! This recipe is your no fail stuffing recipe for showing up with the best holiday side dish, guaranteed. It’s all about tradition and technique, making sure everyone gets that perfect bite.
- It uses real, fresh ingredients you actually want to eat.
- It delivers that glorious contrast between soft and crunchy textures.
- It’s incredibly easy to scale up for a crowd.
Check out all our favorite side dishes!
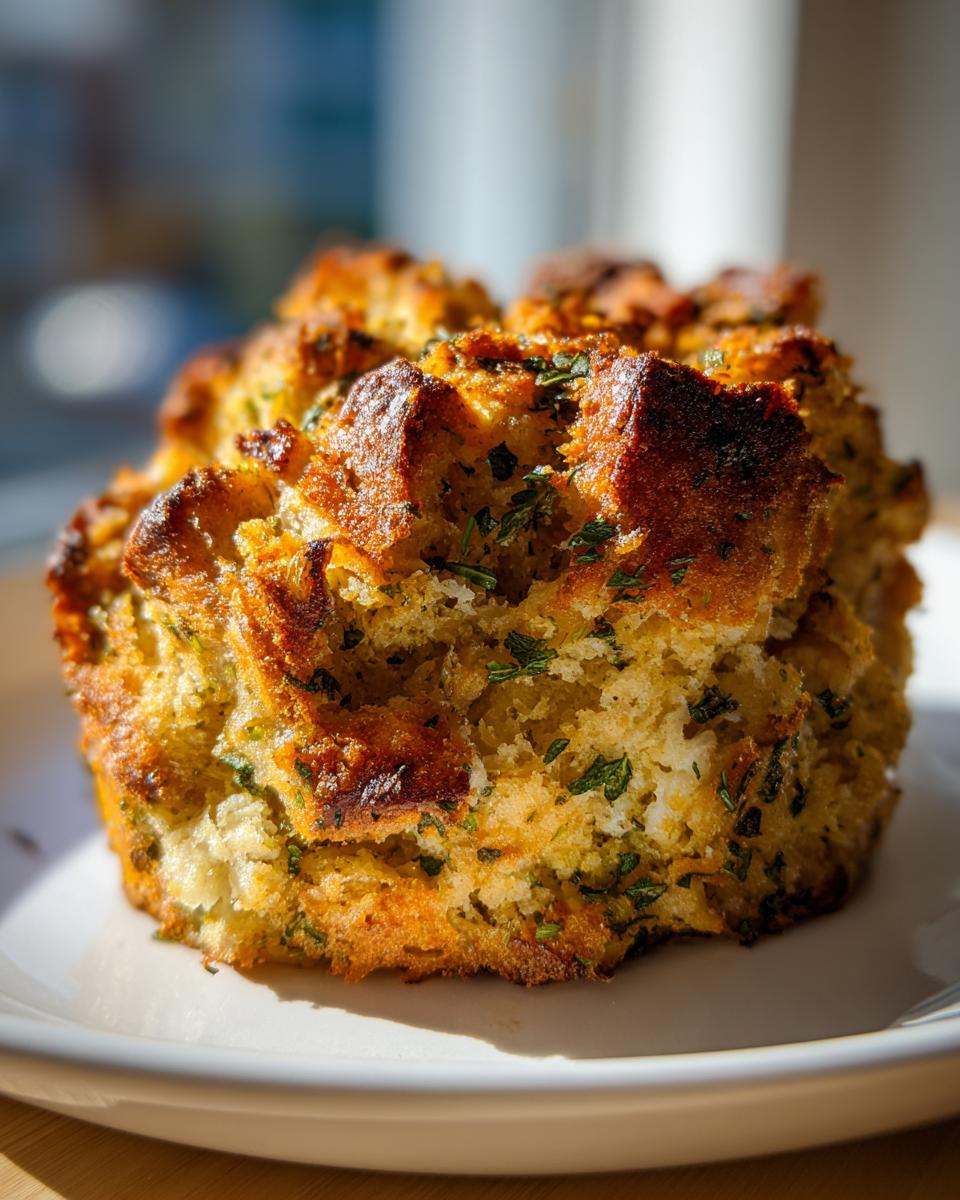
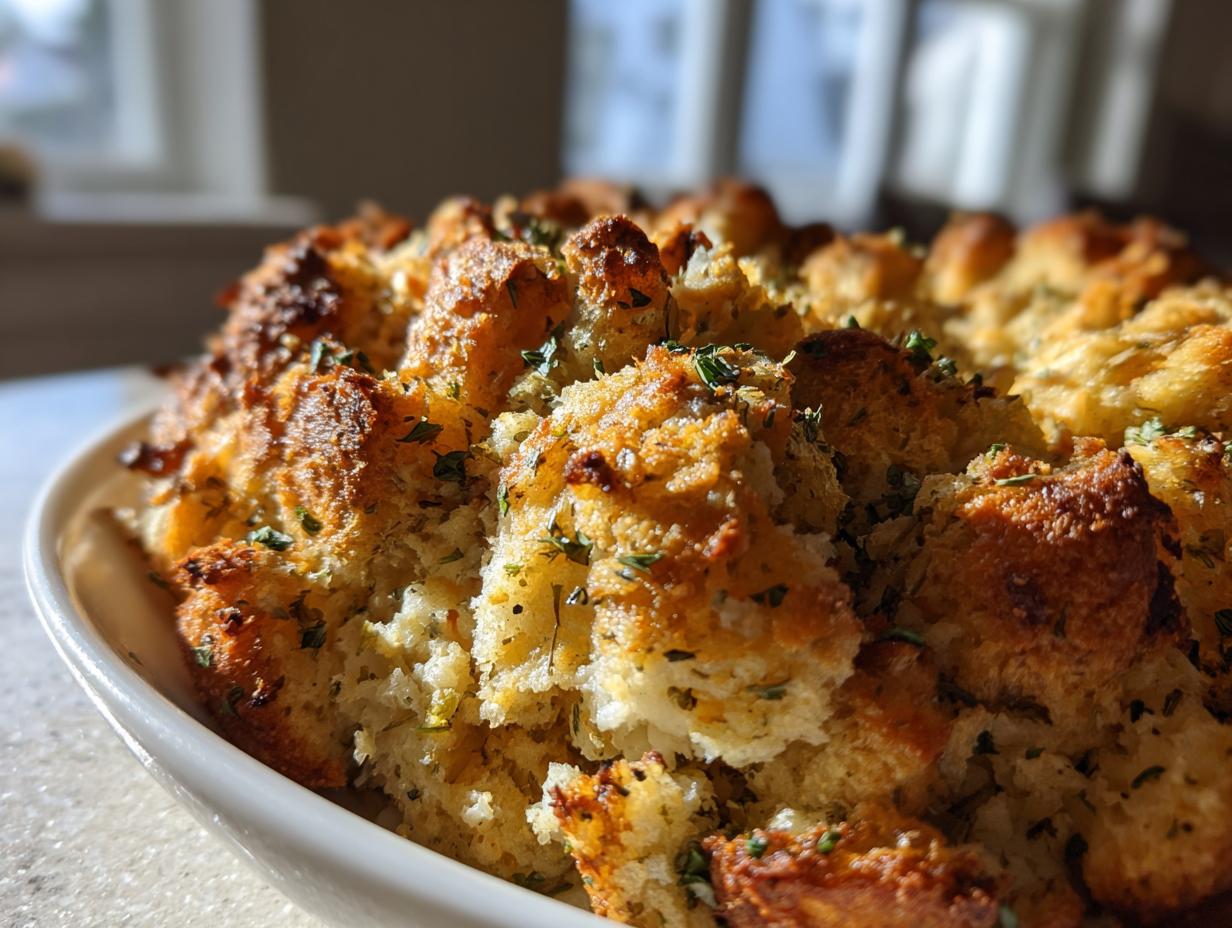
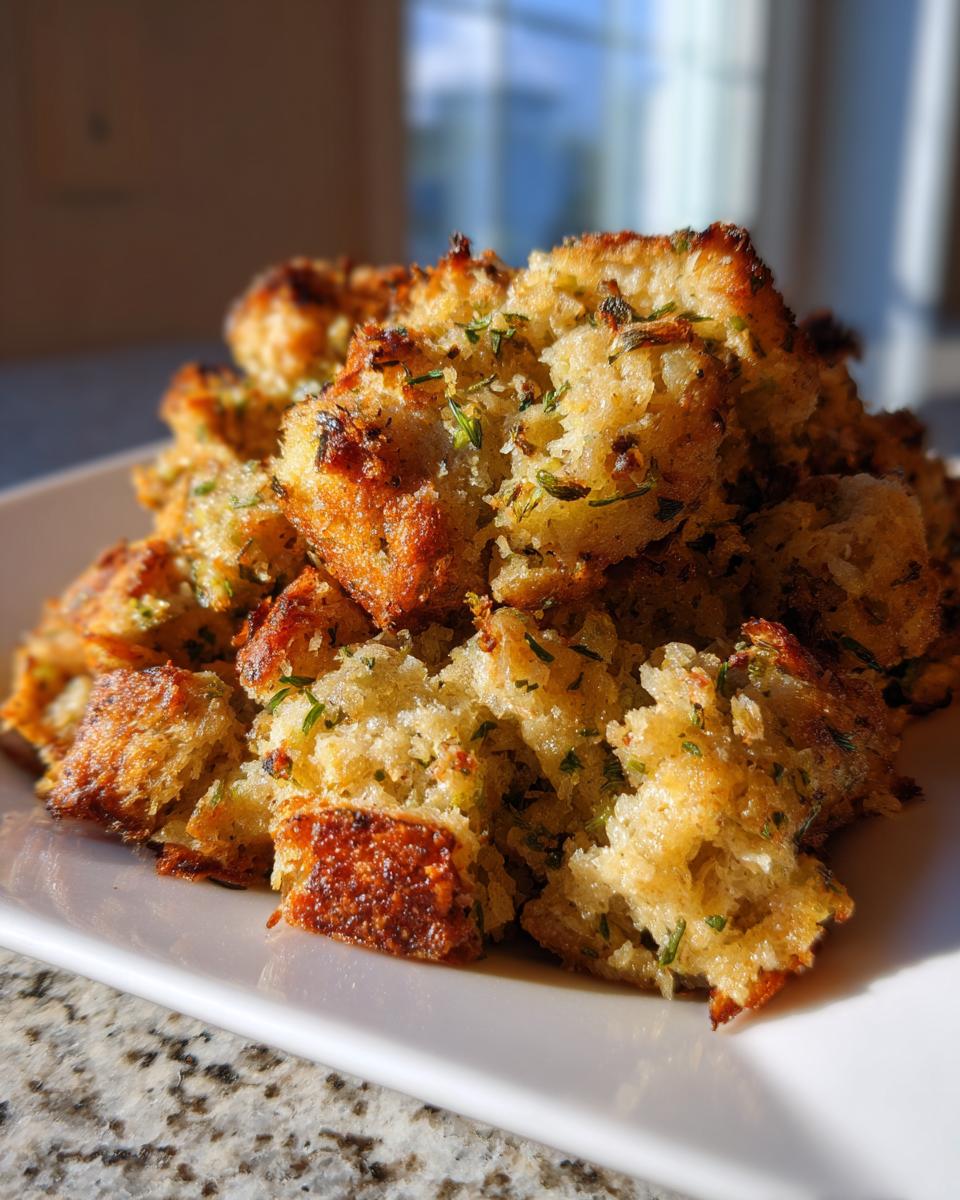
Achieving Perfect Moist and Crispy Stuffing Texture
The secret to truly moist and crispy stuffing lies in two simple things we do upfront. First, we dry the bread cubes slightly in the oven. This allows them to absorb the broth evenly later, preventing that soggy bottom layer without drying out the inside. Second, we add the broth slowly, only moistening the mixture until it’s damp—not swimming! That carefully measured liquid is locked in during baking, giving you that coveted interior texture every time.
Ingredients for Your Traditional Stuffing Recipe
When making this stuffing from scratch, don’t skimp on quality—it truly makes all the difference! We need sturdy bread cubes that can hold up to the moisture, along with lots of fresh aromatics. You’ll notice we use two full sticks of butter; yes, it’s worth every tiny bit!
- 1 pound day-old bread, cut into 1-inch cubes
- 1 cup (2 sticks) unsalted butter
- 2 cups chopped yellow onion
- 2 cups chopped celery
- 4 cloves garlic, minced
- 1 tablespoon fresh sage, chopped
- 1 tablespoon fresh thyme leaves
- 1 teaspoon dried rosemary, crushed
- 1 teaspoon salt
- 1/2 teaspoon black pepper
- 2 large eggs, lightly beaten
- 2 to 3 cups low-sodium chicken broth
Expert Ingredient Notes and Substitutions for Homemade Stuffing
The bread absolutely must be day-old! If yours isn’t stale yet, slice it and let it sit out, or quickly toast it like we do in the instructions. Fresh herbs are non-negotiable here; they release so much more savory flavor than dried ones. If you want to make this a hearty stuffing recipe with sausage, cook one pound of bulk breakfast sausage until done, drain it well, and toss it in with the vegetables later on.
How to Prepare This Savory Herb Stuffing Step-by-Step
This is where the magic happens! Don’t rush through these steps because they are pure stuffing gold. First things first: get your oven preheated to 350°F (175°C) and grab that 9×13 inch baking dish—lightly grease it now. We want to dry out our bread cubes first; spread them on a baking sheet and pop them in for about 10 to 15 minutes until they feel dry to the touch but aren’t brown yet. That drying step is critical, and I learned that trick the hard way!
Next, we build our flavor base. Melt that whole cup of butter in a big skillet over medium heat. Sauté your onions and celery gently until they soften up—that takes about 8 to 10 minutes. Then, stir in the garlic and all those gorgeous fresh herbs—sage, thyme, and rosemary—just until you can smell them, maybe a minute. Pull that skillet off the heat right away!
Now for the combining part. Dump the dried bread cubes into a huge mixing bowl, add your veggie/butter mixture, and sprinkle in the salt and pepper. Toss everything gently. This is where my grandmother’s biggest secret comes in: broth control! In a separate little bowl, whisk the eggs with just 2 cups of that chicken broth. Pour that over the bread and toss until it’s just damp. Add the remaining broth just a splash at a time until the mixture feels moist, but I mean moist, not swimming! Soggy stuffing is a crime.
Finally, spread the entire mixture into your prepared dish. Do not pack it down! We want air in there so it bakes up beautifully. Bake for about 30 to 40 minutes, and afterwards, let it rest for 10 minutes before you dare touch it. You can serve it just like this, or you can go for the extra finish in the next section. If you are looking for more impressive sides, you have to try my Garlic Parmesan Potatoes, too!
The Secret to Baking Perfect Stuffing
The baking part is straightforward once you’ve controlled your moisture. Keep it in the 350°F oven for 30 to 40 minutes. For that incredible, golden, shatteringly crisp top—the best part of any homemade stuffing—carefully slide the dish under the broiler for the last 2 or 3 minutes. Keep your eye on it like a hawk during those final moments, though! You want golden brown, not charcoal black. This simple baking finish ensures you get that perfect textural marriage every single time.
Make Ahead Stuffing Tips for Stress-Free Holiday Cooking
If you’re like me, the main event day needs all the help it can get! Planning ahead makes all the difference, and this stuffing is fantastic for prepping early. You can prepare the entire mixture right up through step 5—that’s when you combine the dried bread with the sautéed veggies and seasonings. Just stop right before you add the eggs and broth, got it?
Cover that bowl tightly and tuck it into the fridge for up to 24 hours. When it’s time to bake, just mix up the egg/broth mixture as usual, pour it over, and toss. Since the mixture is cold, you’ll need to add about 10 to 15 minutes extra to the baking time, but that little bit of extra time is worth it for a calm kitchen!
It’s such a relief to know this classic stuffing recipe is already handled. If you’re looking for other great dishes to prep early, you should check out my tips for making chili for a crowd, too, which is another make-ahead superstar. For more inspiration on easy holiday sides, I always love reading up on other tried-and-true methods, like those found right here.
Variations: From Sausage Stuffing to Cranberry Apple Stuffing
While I adore my original buttery sage profile, I know sometimes you need to mix things up, especially when feeding a crowd with different tastes! This base recipe for stuffing is wonderfully flexible. If your family expects something heartier, remember that easy modification we talked about in the ingredients section: add a pound of cooked, drained breakfast sausage in with the veggies. That transforms it right into a rich, savory version!
For a brighter flavor for Christmas dinner, I highly recommend leaning into sweet and tart notes. Think about adding dried cranberries and chopped fresh apples along with the celery and onion. That combination really cuts through the richness of the butter and makes the whole plate feel festive. You can find some great inspiration for that flavor profile over here, even though ours uses the same foundational savory herbs.
We even love turning this into something fun for appetizers! See how to make Cranberry Jello Salad later for more holiday side fun!
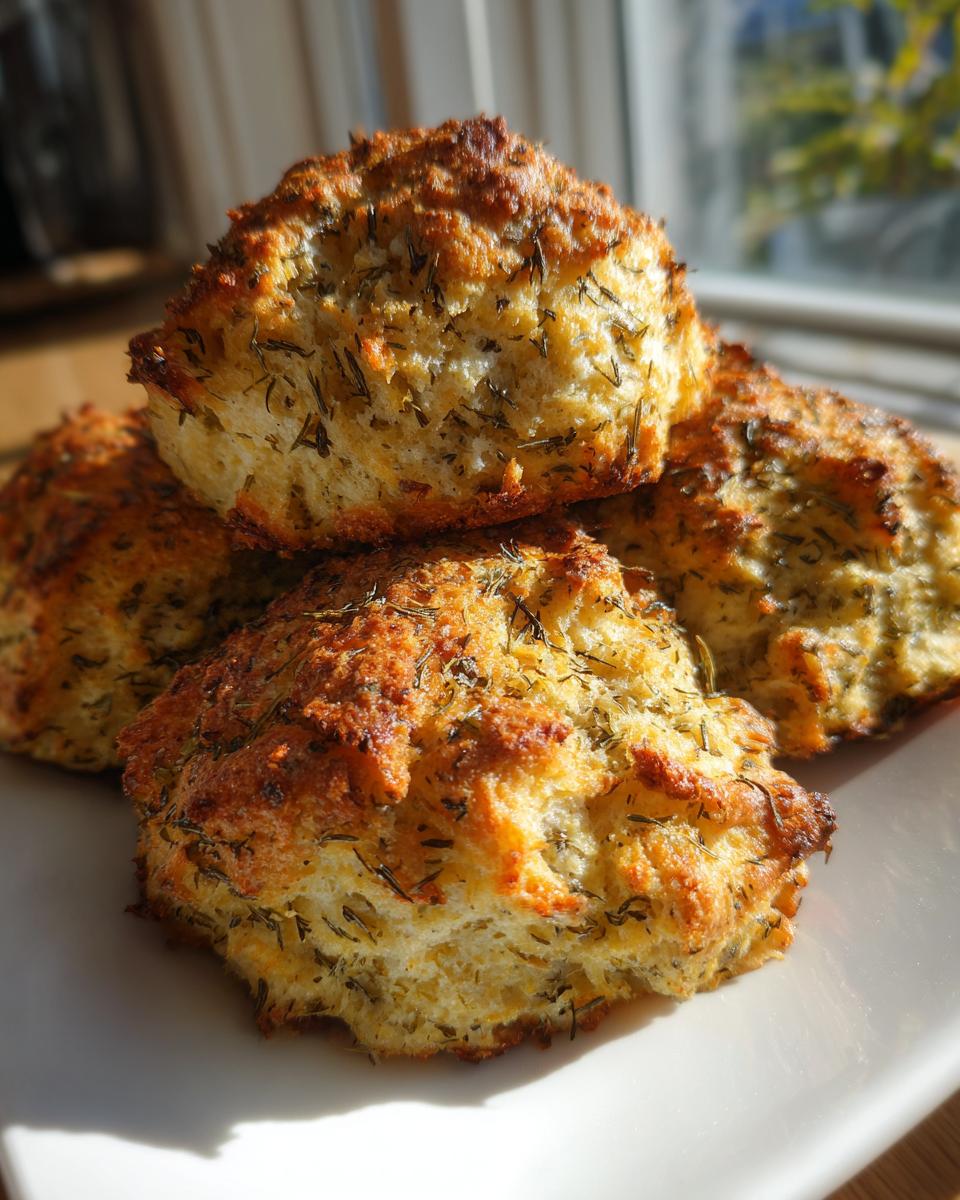
Making Appetizer Stuffing Bites
If you want to move away from the big casserole dish and make little portable bites—which kids absolutely love, by the way—it’s so simple. Once your mixture is ready (Step 6), line a baking sheet with parchment paper. Use a small cookie scoop or just a spoon to drop little mounds of the mixture onto the sheet. Bake these stuffing balls just like you would the casserole, maybe checking them a little sooner since they are smaller. They get wonderfully crusty on the outside and are perfect for grabbing directly off the buffet!

Serving Suggestions for Your Perfect Turkey Side Dish
Now that you have this show-stopping stuffing ready, you need dishes that can keep up with its flavor! This savory herb version is practically begging to be beside perfect roast turkey, obviously, but it also shines next to creamy mashed potatoes or glazed ham. I love pairing it with salty, crispy textures, so if you haven’t tried my Crispy Potato Wedges yet, you absolutely must put that on your menu. This dish is truly the centerpiece comfort food side you’ve been searching for!
Storage and Reheating Instructions for Leftover Stuffing
Don’t you hate wasting any of this homemade goodness? Luckily, this stuffing stores beautifully! Once it has cooled completely, pop any extras into an airtight container. It stays perfectly good in the fridge for about three to four days. That’s right, you get a bonus meal!
When you’re ready for seconds, don’t just microwave it—that kills the crispy top! Instead, place the leftovers in an oven-safe dish. Before baking it again at about 350°F, sprinkle just a tablespoon of chicken broth over the top. This simple trick restores all that lovely interior moisture while letting the top get lightly toasted again. It’s nearly as good as the first time!
Frequently Asked Questions About Classic Stuffing
I get so many great questions once you all start making this recipe! It’s exciting to see so many of you ditching the box and making your traditional stuffing recipe from scratch. Here are the things people ask me most often about getting this comfort food side dish just right.
Can I skip drying the bread cubes? Oh, please don’t! That initial light baking is the single most important step for achieving that moist and crispy stuffing contrast we love so much. If you skip it, the bread will turn mushy when the broth hits it. Also, while I call for low-sodium chicken broth, using a good quality vegetable broth or even turkey broth works perfectly fine if you’re swapping things around for your Thanksgiving side dish!
If you’re looking for something completely different to sip alongside all this savory goodness, you have to try my Honey Lemon Pink Soda recipe!
Is this a vegetarian stuffing recipe?
That’s a great question keeping everyone’s needs in mind! As written, the recipe uses chicken broth, so technically, no, it’s not vegetarian since we use that for flavor. However, making this into a fully vegetarian savory herb stuffing is incredibly easy! Just substitute the chicken broth with an equal amount of good quality vegetable broth. That keeps all the beautiful herb flavor profile intact without any meat products. Just be sure to use vegetable broth when you prep this for any vegetarian guests!
Share Your Homemade Stuffing Success
Now that you’ve got this unbelievably flavorful and texturally perfect side dish ready for your table, I really, really want to hear about it! Did you make any fun tweaks? Did you add sausage, or did you go full cranberry apple? Cooking should be fun, not stressful, and seeing your successes makes all the testing worth it.
Please don’t be shy! Drop me a rating below—even a quick five-star hit tells me you loved this stuffing. Or better yet, send me a note through my contact page or tag me on social media when you serve this star side dish. I love seeing my recipes become part of your family memories. Happy cooking, everyone!
PrintClassic Homemade Herb Stuffing: Moist Inside, Crispy Top

Make the best holiday side dish with this traditional homemade stuffing recipe. You will achieve a perfectly moist interior and a golden, crispy exterior using simple, fresh ingredients.
- Prep Time: 20 min
- Cook Time: 40 min
- Total Time: 60 min
- Yield: 8 servings 1x
- Category: Side Dish
- Method: Baking
- Cuisine: American
- Diet: Vegetarian
Ingredients
- 1 pound day-old bread, cut into 1-inch cubes
- 1 cup (2 sticks) unsalted butter
- 2 cups chopped yellow onion
- 2 cups chopped celery
- 4 cloves garlic, minced
- 1 tablespoon fresh sage, chopped
- 1 tablespoon fresh thyme leaves
- 1 teaspoon dried rosemary, crushed
- 1 teaspoon salt
- 1/2 teaspoon black pepper
- 2 large eggs, lightly beaten
- 2 to 3 cups low-sodium chicken broth
Instructions
- Preheat your oven to 350°F (175°C). Lightly grease a 9×13 inch baking dish.
- Spread the bread cubes in a single layer on a large baking sheet. Bake for 10 to 15 minutes until the cubes are dry but not browned. Set aside.
- Melt the butter in a large skillet over medium heat. Add the onion and celery. Cook until softened, about 8 to 10 minutes.
- Add the minced garlic, sage, thyme, and rosemary to the skillet. Cook for 1 minute until fragrant. Remove from heat.
- In a large bowl, combine the dried bread cubes and the cooked vegetable mixture. Sprinkle with salt and pepper. Toss gently to combine.
- In a small bowl, whisk the eggs with 2 cups of the chicken broth. Pour this mixture over the bread mixture. Toss everything together until the bread is evenly moistened. Add the remaining broth, a little at a time, until the stuffing is damp but not soggy. This step is key for a moist interior.
- Transfer the stuffing mixture to the prepared baking dish. Do not pack it down.
- Bake for 30 to 40 minutes. For a crispier top, you can place the dish under the broiler for the last 2 to 3 minutes, watching closely to prevent burning.
- Let the stuffing rest for 10 minutes before serving. This is the perfect turkey side dish.
Notes
- For make-ahead stuffing: Prepare the mixture through step 5, cover, and refrigerate for up to 24 hours. When ready to bake, add the broth mixture (step 6) and bake as directed, adding 10-15 minutes to the baking time if baking cold.
- If you want sausage stuffing, cook 1 pound of bulk breakfast sausage separately and add it to the bread mixture in step 4.
- To ensure a crispy top, use slightly less broth than you think you need. The bread should be moist, not swimming.
Nutrition
- Serving Size: 1 cup
- Calories: 320
- Sugar: 2
- Sodium: 450
- Fat: 20
- Saturated Fat: 12
- Unsaturated Fat: 8
- Trans Fat: 0
- Carbohydrates: 30
- Fiber: 2
- Protein: 6
- Cholesterol: 65