
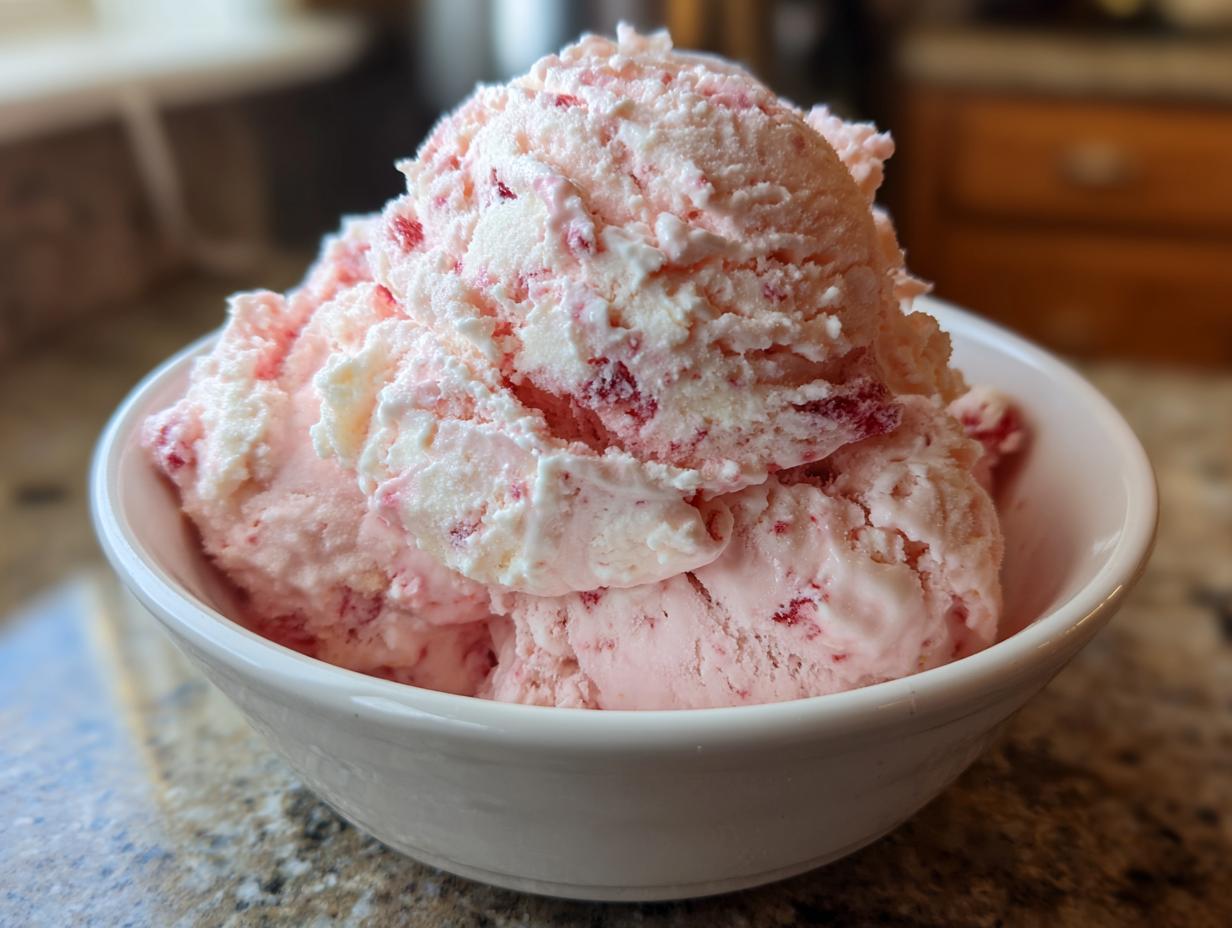
Summer just screams for incredible frozen treats, doesn’t it? And when the berries are at their peak, there’s absolutely nothing better than diving into a bowl of pure, sweet perfection. Forget those icy, bland grocery store tubs—today, we are making the Creamiest No-Churn Strawberry Ice Cream with Fresh Berries.
I promise you, this recipe delivers that rich, luscious texture you dream about in homemade strawberry ice cream, and the best part? You don’t need an ice cream maker, and we aren’t messing around with eggs or cooking anything beforehand. That’s my promise here at Taste This Plate: to take those classic desserts people think are difficult and prove they can be simple, relying only on good ingredients and solid technique. I spent years testing recipes to find the magic combination that skips the churning but still gives you dreamy results every single time. Let’s get scooping!
- Why This Creamy Strawberry Ice Cream Recipe Works (Expert Tips)
- Gathering Ingredients for Homemade Strawberry Ice Cream
- How to Prepare Creamy No Churn Strawberry Ice Cream
- Making Your Homemade Strawberry Ice Cream Ready to Freeze
- Ingredient Notes and Substitutions for Strawberry Ice Cream
- Variations on Classic Strawberry Ice Cream
- Serving Suggestions for Your Fresh Strawberry Ice Cream
- Storing Leftovers of Your Homemade Strawberry Ice Cream
- Frequently Asked Questions About Strawberry Ice Cream
Why This Creamy Strawberry Ice Cream Recipe Works (Expert Tips)
If you’ve tried no-churn recipes before and ended up with something grainy or icy, I totally get it! That’s why I worked so hard to nail down this easy strawberry ice cream recipe. The secret to getting truly creamy strawberry ice cream without all that churning is all about managing two key players: the heavy cream and the sweetened condensed milk. We whip the cream until it holds stiff, gorgeous peaks—that’s where all our airiness comes from. Then, the condensed milk steps in. It’s packed with sugar, which is crucial because sugar actually lowers the freezing point of the water in the mixture. This stops big, harsh ice crystals from forming, which is the enemy of creaminess!
I remember one of my earliest attempts where I thought, “I’ll just mix everything together and freeze it.” Nope! It came out like a block of flavored ice. I learned that you have to incorporate that air from the whipped cream slowly later on. It’s a technique that makes all the difference between a good homemade dessert and an absolutely unforgettable summer scoop.
The Secret to the Best Strawberry Ice Cream Texture
Before we even think about freezing, we have to handle those beautiful fresh strawberries. We macerate them first with a little sugar and lemon juice. Macerating just means letting them sit, which draws out their natural juices. This step is vital because it forces the berries to release their liquid *before* they hit the ice cream base. If you skip this, those little pockets of water in the fruit turn into big, crunchy ice shards in your final product. When we blend that super flavorful, pre-juiced fruit, we create a pure, smooth flavor bomb that chills perfectly without sabotaging our amazing creamy texture.
Gathering Ingredients for Homemade Strawberry Ice Cream
Okay, for this homemade strawberry ice cream to shine, we absolutely need the best raw materials. Seriously, this is where the magic begins! Since this is a no-churn recipe, every single ingredient pulls a lot of weight, so let’s focus on quality, especially with those berries.
When you grab your fruit, try to find the sweetest, ripest fresh strawberries you can find. That peak-season flavor translates directly into the best strawberry ice cream flavor imaginable. No need for fussy cooking here; we let the natural sugars and tartness do the work!
Here is exactly what you need to gather up. Don’t swap these measurements—they are locked in for the right creamy balance:
- 1 pound fresh strawberries, hulled and quartered
- 1/2 cup granulated sugar (this is just for soaking the berries for a bit!)
- 1 teaspoon lemon juice
- 2 cups heavy whipping cream
- 1 (14 ounce) can sweetened condensed milk
- 1 teaspoon vanilla extract
Keep everything cold except for the strawberries while you prep them. Trust me, a chilly base helps everything whip up faster and safer!
How to Prepare Creamy No Churn Strawberry Ice Cream
Alright, this is where we turn those amazing ingredients into scoopable magic! Since we are making no churn strawberry ice cream, our method relies on air incorporation rather than machine churning. It’s surprisingly easy, but precision in these first few steps is key to avoiding that icy texture people dread. We need to build our base layers separately so they don’t fight each other when we mix them!
Since we’re whipping cream stiff, if you want a fun look at how important that process is for texture in general, check out my guide on making easy creamy chocolate fudge—the whipping principle is the same! Let’s start with the fruit.
Macerating and Pureeing the Fresh Strawberry Ice Cream Base
First things first: those berries need to release their flavor! Follow Step 1 and let your strawberries, sugar, and lemon juice hang out for about half an hour. You’ll see a lovely pink syrup forming. Once they’ve soaked, flash the mixture in a blender or food processor. We aren’t looking for baby food here; a few little chunks remaining is exactly what we want for texture later on! The most critical thing is chilling that puree down completely. If it’s even slightly warm when it meets the whipped cream, it’s game over—your cream will melt right back into liquid. Stick that brightly colored puree in the fridge while you handle the cream.
Achieving Maximum Volume in Your Strawberry Ice Cream
Next up is the whipping! This is Step 3, and it’s where we trap all that air. Take your two cups of *very* cold heavy whipping cream and beat it until stiff peaks form. How do you know it’s right? Stick your mixer whisk straight up into the cream. If the peaks stand straight up without flopping over, you’re done! If you see any liquid pooling at the bottom of the bowl, keep going a little longer. Don’t let it turn grainy, though; that means you’ve gone into butter territory. Once you have stiff peaks, stop immediately!
Folding Technique for the Perfect Strawberry Ice Cream
Now we build the base. Whisk the sweetened condensed milk and vanilla separately. Then, lighten the condensed milk mixture by folding in about a third of your whipped cream—this gentle move prevents deflating all the air we just whipped in. Once that’s smooth-ish, gently fold in the remaining whipped cream. Finish by carefully folding in the chilled strawberry puree. Don’t stress about perfection here! Stopping when you see beautiful pink streaks but before it’s perfectly uniform ensures you get those distinct ribbons of flavor. That marbled look is what keeps this creamy strawberry ice cream so interesting to eat.
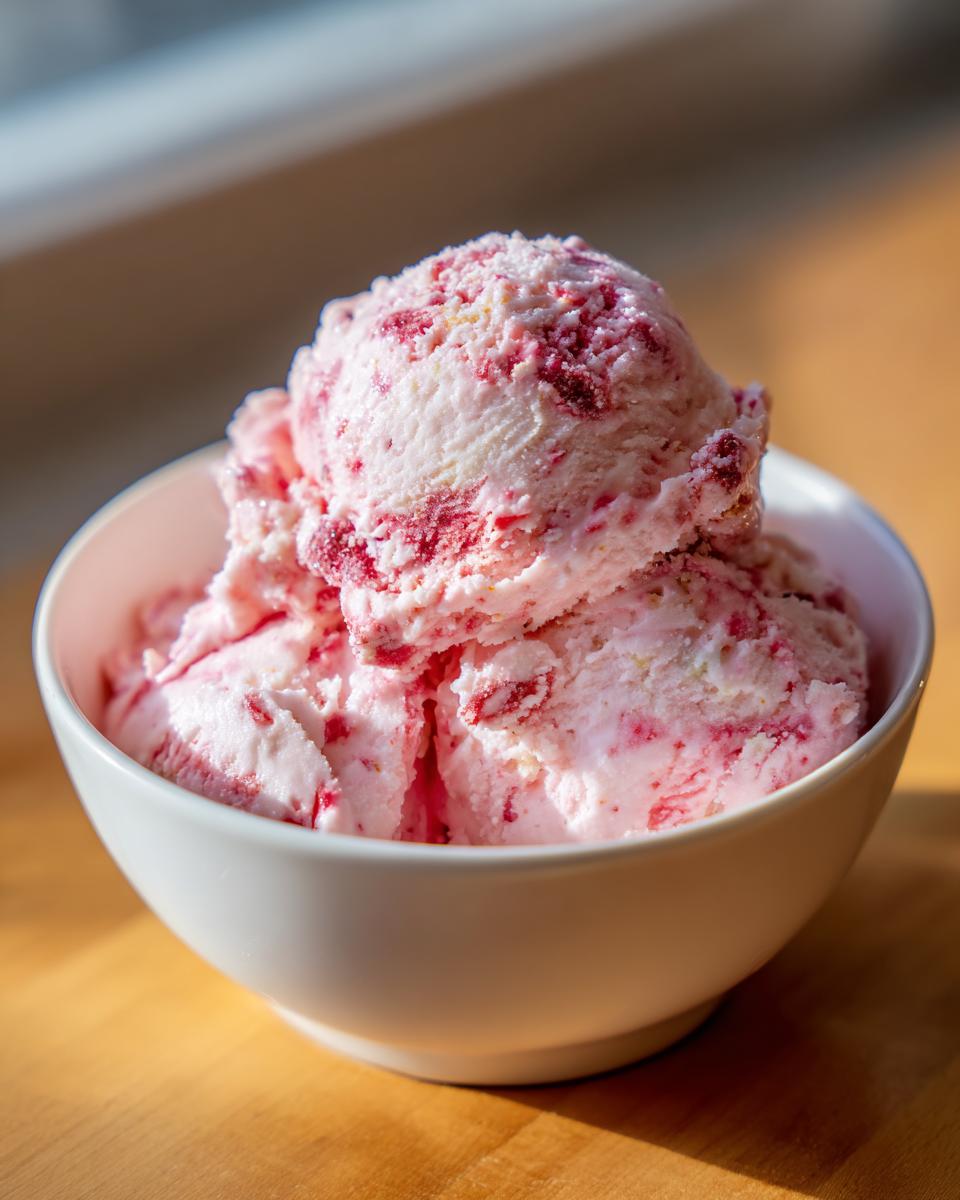
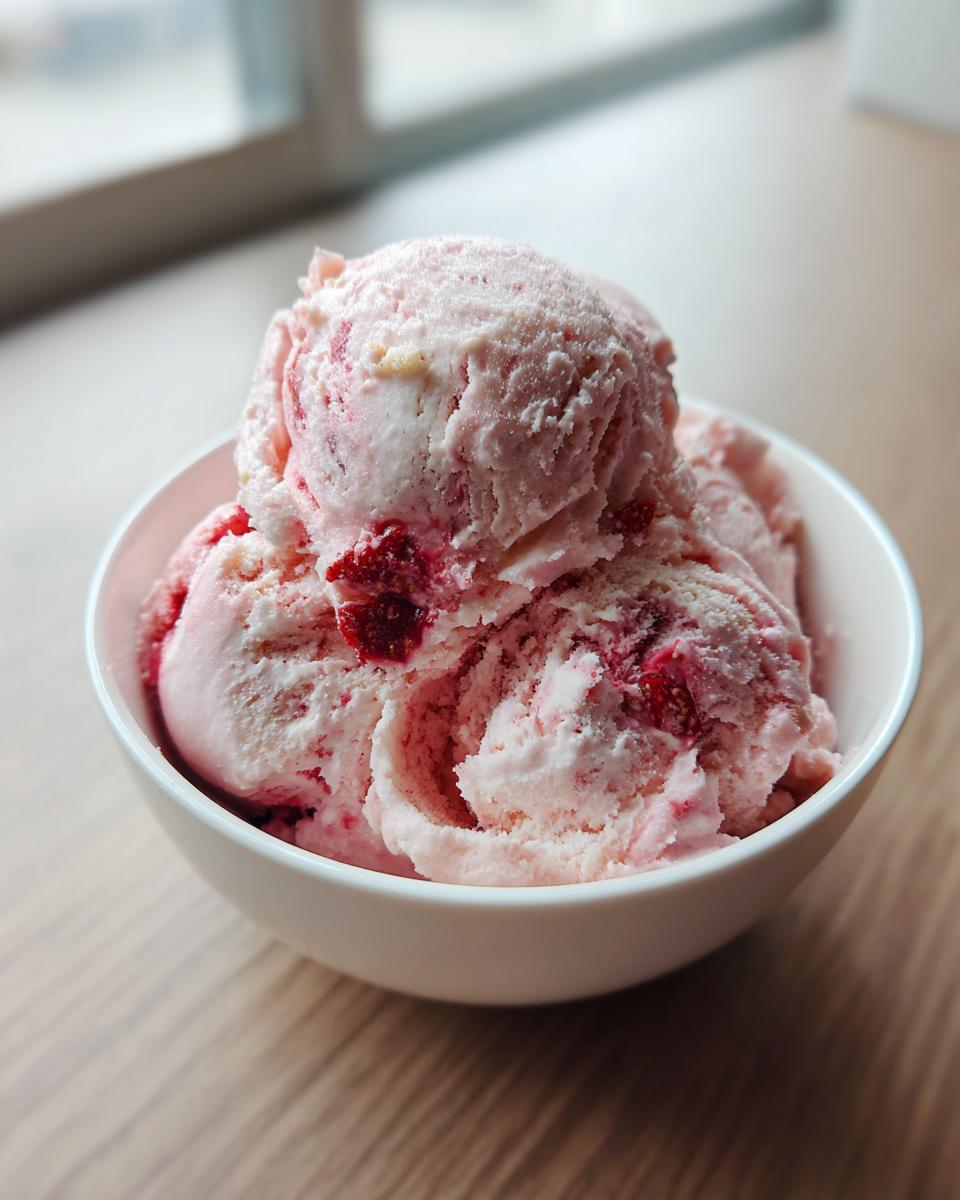
Making Your Homemade Strawberry Ice Cream Ready to Freeze
We’ve done the hard work! We’ve got our beautiful, swirly, strawberry-laced base that is packed with air and tasting exactly like summer. Now comes the toughest part: waiting. We need this base to set up into a firm scoopable dessert, but we have to treat it gently during this freezing time.
Take your base and pour it right into a freezer-safe loaf pan—or any container that’s shallow enough to freeze evenly. This is where you can prevent a watery disaster. Before you seal it up, grab a big piece of plastic wrap. You have to press that plastic wrap directly onto the surface of the ice cream. I mean, physically push it down so it’s touching the mixture everywhere. This is the absolute best defense against freezer burn and those annoying, crunchy ice crystals that like to form overnight. Once protection is on, seal the whole container tightly with a lid or foil.
We need commitment here! This easy strawberry ice cream recipe requires a minimum of 6 hours in the deep freeze, but honestly, overnight is always better. When you are finally ready to serve your sweet frozen treat, don’t just yank it straight from the freezer and try to scoop. That’s how people break their wrists! Let the pan sit out on the counter for about 5 to 10 minutes. This brief softening time makes scooping so much easier and allows the full creamy texture we worked so hard to build to come through in every single bite.
Ingredient Notes and Substitutions for Strawberry Ice Cream
One of the things I hear most often when people try my recipes is, “What if I don’t have fresh berries?” or “Can I skip the condensed milk?” Since this is a simple recipe, the ingredients are important, but don’t panic if you need to make a slight adjustment! The key is understanding *why* we use what we use, so you can substitute smartly without ruining the texture.
My biggest piece of advice when making any *strawberry ice cream* is to taste your fruit before you even start measuring your sugar. Berries are tricky, right? They can be wildly sweet one week and super tart the next. If your berries are bursting with natural sweetness, you might only need a tiny bit less of that 1/2 cup of granulated sugar during the macerating step. Trust your tongue! Since the sweetened condensed milk is already loaded with sugar, you have to be careful not to over-sweeten the mixture overall.
Can I Use Frozen Berries for This Strawberry Ice Cream?
Yes, absolutely! Frozen strawberries are great, especially if you can’t get the perfect fresh ones right now. If you lean on frozen berries, you need to adjust Step 1 a little bit. Don’t thaw them completely first—that ends up making them mushy and watery. Instead, take them almost straight from the freezer and toss them with your sugar and lemon juice. You’ll definitely need to let them sit longer than 30 minutes to release enough juice since they are starting frozen.
If you have a powerful food processor, you can actually skip the maceration time entirely with frozen berries that are just slightly softened. Pulse them right away with the sugar to break them down into a chunky puree. Because frozen berries might release less intense flavor than peak-fresh ones, you might decide to add just a tiny extra splash of vanilla extract to boost that overall flavor profile in your final base mixture.
Variations on Classic Strawberry Ice Cream
Now, while this classic strawberry ice cream recipe stands perfectly on its own—it’s rich, it’s fruity, and it’s so easy—I always encourage home cooks to play around once they master the technique. Once you’ve nailed the creamy base, adding mix-ins during that final fold (Step 6) is your gateway to endless deliciousness. Think about all those amazing desserts out there; we can incorporate those flavors right into our frozen treats!
If you love fun textures, this is the place to start experimenting. You could fold in chopped chocolate shavings, swirls of caramel sauce, or maybe even some toasted coconut flakes. For something structurally similar to a layered dessert, you might enjoy checking out my recipe for a decadent strawberry shortcake trifle—you can always translate those textural elements into your ice cream!
Making Strawberry Cheesecake Ice Cream
Oh, strawberry cheesecake ice cream! That’s such a popular request, and you can totally achieve that dreamy flavor profile with this no-churn base. We are skipping the eggs, so we don’t have a custard to worry about, which makes adding the cheesecake components super straightforward.
For this variation, you’ll need two things to fold in at the very end, right after you’ve added the strawberry puree: first, take about 4 ounces of softened cream cheese and beat it until it’s completely smooth, breaking up any lumps. Fold that gently into your base mixture until it’s just slightly marbled. Second, to get that classic graham cracker crunch, you can fold in about a cup of crushed graham crackers. Make sure they are crushed small! If you add large, stiff pieces, they will freeze rock hard. A little bit of graham dust mixed with that creamy strawberry tang? Divine, I tell you, absolutely divine!
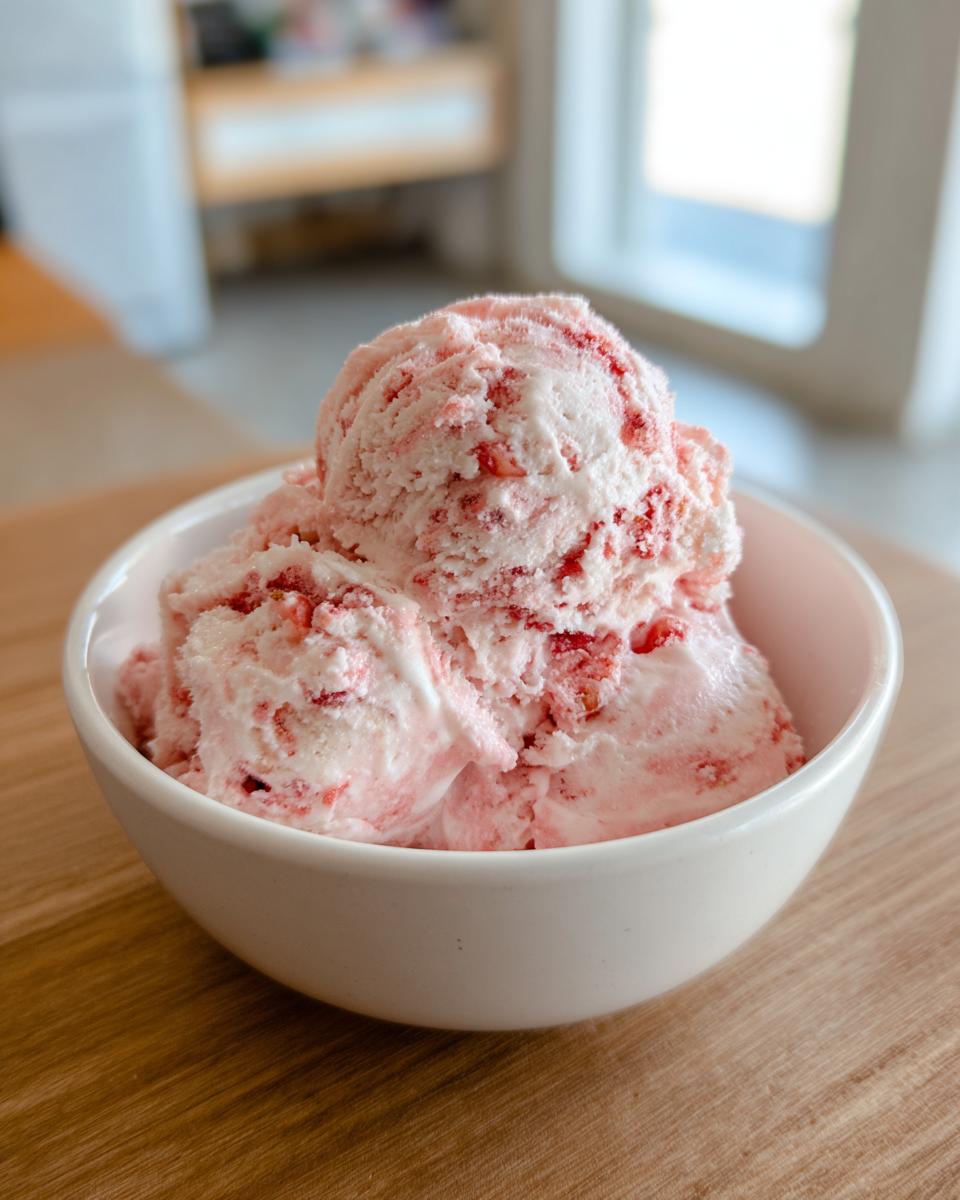
Serving Suggestions for Your Fresh Strawberry Ice Cream
I hope you’re ready to serve, because this summer ice cream recipe is begging to be enjoyed! Since this ice cream is so intensely flavored with real fruit, you don’t need a ton of fancy toppings to make it special. Honestly, a perfect scoop right out of the container is a win in my book.
But if you’re staging a big dessert spread or just want to treat yourself a little extra, I have a few favorite ways to dress it up. Since we nailed the texture so well, it holds up beautifully on its own, but a little drizzle never hurt anyone, right?

If you manage to have any leftovers after the initial serving frenzy, you might want to pair them with something warm and comforting later on. For example, this ice cream nestled next to a warm slice of sweet potato cobbler? The cool, tart strawberry against that warm, cinnamon-spiced depth is just heaven. It’s that perfect hot-and-cold combo that makes any meal feel special.
Here are my go-to, simple serving ideas:
- The Classic Drizzle: A light drizzle of high-quality vanilla sauce or a balsamic glaze if you want to lean into the fruit’s tartness.
- Crunch Factor: Sprinkle some toasted, slivered almonds or crushed shortbread cookies over the top right before serving.
- Strawberries on Strawberries: If you have a few extra fresh berries, slice them thin and fan them over the top, maybe with a tiny dust of powdered sugar. Can’t beat the classics!
Remember, Kate Reilly’s philosophy is all about making everyday meals feel special, and a perfect scoop of homemade frozen dessert checks that box every single time!
Storing Leftovers of Your Homemade Strawberry Ice Cream
First off, congratulations if you actually have leftovers! With how good this creamy strawberry ice cream tastes, it usually disappears fast around here. But for those times you just can’t finish the batch, proper storage is key to keeping that beautiful texture we worked so hard for. We want it tasting fresh and scoopable next week, not like an old block of ice!
The container you choose matters a lot. While I used a standard loaf pan to freeze it initially, if you plan on storing it for more than a couple of days, I strongly suggest transferring the remaining ice cream into a shallower, airtight container. The goal here is minimizing the amount of space the air has to wrestle with your dessert. Air exposure is what leads to those sad, crunchy freezer burn spots. Make sure the container has a really tight seal.
Just like we did before freezing, you must put a barrier between the actual surface of the ice cream and the lid. Cut a piece of plastic wrap—the cheap, thin stuff works perfectly fine here—and press it right against the top layer of the homemade strawberry ice cream. This traps any moisture that tries to rise and prevents it from crystallizing back onto the surface. Then, put the lid on tightly. If you follow this two-layer protection (plastic wrap barrier plus airtight lid), this easy recipe should stay perfectly scoopable for up to two weeks!
When you are ready to enjoy it again, remember that no-churn dessert gets a little bit harder than traditional ice cream because it doesn’t have commercial stabilizers. So, just like when you first pull it out of the freezer, give it about 5 to 10 minutes on the counter to temper slightly. This lets the sugars soften just enough so you can get a perfect scoop without chipping a tooth or pulling a muscle. Enjoy the fruits of your no-churn labor!
Frequently Asked Questions About Strawberry Ice Cream
It’s natural to have questions when you’re trying a new technique, especially when dealing with something as near-and-dear as homemade strawberry ice cream! I’ve pulled together some of the most common things I hear about this no-churn method. Don’t hesitate to reach out if you have another burning question!
Can I use an ice cream maker with this recipe?
That’s a great question! Since this is specifically designed as an easy strawberry ice cream recipe that skips the machine, the proportions are calibrated for the no-churn method. If you have an ice cream maker—like a Cuisinart or similar—you *can* churn this! However, you must chill the base mixture for at least 4 hours until it’s very cold (colder than the 1 hour chilling time we used for the puree). Churn it according to your machine’s directions, and it will likely take about 20 to 25 minutes. You’ll still want about 2-3 hours of subsequent freezing time to firm it up, but it should result in an incredibly smooth, classic texture!
How does this compare to Ninja Creami strawberry ice cream recipes?
The Ninja Creami is a totally different beast! Those recipes usually involve freezing a high-protein, lower-fat base almost solid and then spinning it dry. Our recipe focuses on fat (from the heavy cream) and sugar (from the condensed milk) to keep that creamy texture naturally soft, which is what gives us that dense, old-fashioned feel right out of the freezer. If you’re interested in using that specific machine, I’ve seen others have success with bases closer to what’s recommended by the manufacturer; you can check out tips from other sources like The Tasty Travelers, but this recipe is built around skipping extra equipment entirely.
Is this recipe suitable if I’m looking for lower-fat or no-eggs ice cream?
Yes, this is a fantastic choice for those looking for no eggs ice cream! Because we rely on the high fat content of the 2 cups of heavy whipping cream to create the structure, we skip the historical need for egg yolks usually found in custard-style ice creams. Now, it’s not a low-fat dessert—it uses heavy cream and condensed milk, both of which are high in dairy fat necessary for creaminess. If you are looking for lower-fat frozen treats, you might want to explore alternative bases, like cottage cheese bases, which I’ve written about here: cottage cheese ice cream, but know that the texture will be different from this indulgent version.
How long will this homemade strawberry ice cream last in the freezer?
When stored properly—remember that direct plastic wrap barrier we talked about?—this homemade strawberry ice cream lasts beautifully for about two weeks. After that, while it’s generally still safe to eat, you might start noticing a slight degradation in texture; the fresh fruit flavor can start getting a little muted, and tiny ice crystals might start to form on the edges. For the best flavor and that super creamy mouthfeel, try to enjoy it within 10 days!
PrintCreamiest Homemade Strawberry Ice Cream (No Churn)

Make truly creamy homemade strawberry ice cream without an ice cream maker or eggs. This simple, no-churn recipe uses fresh strawberries for the best summer flavor.
- Prep Time: 45 min
- Cook Time: 0 min
- Total Time: 6 hours 45 min
- Yield: 6 servings 1x
- Category: Dessert
- Method: No-Churn
- Cuisine: American
- Diet: Vegetarian
Ingredients
- 1 pound fresh strawberries, hulled and quartered
- 1/2 cup granulated sugar (for macerating)
- 1 teaspoon lemon juice
- 2 cups heavy whipping cream
- 1 (14 ounce) can sweetened condensed milk
- 1 teaspoon vanilla extract
Instructions
- Combine the quartered strawberries, 1/2 cup sugar, and lemon juice in a bowl. Gently stir to coat. Let the strawberries macerate at room temperature for 30 minutes, stirring occasionally until juices release.
- Transfer the macerated strawberries and their juices to a blender or food processor. Pulse until the mixture is mostly smooth but still has small pieces of fruit remaining for texture. Chill the strawberry puree completely in the refrigerator (about 1 hour).
- In a large bowl, use an electric mixer to beat the heavy whipping cream until stiff peaks form. This takes about 3 to 5 minutes.
- In a separate bowl, whisk together the chilled sweetened condensed milk and vanilla extract until combined.
- Gently fold about one-third of the whipped cream into the condensed milk mixture to lighten it. Then, gently fold in the remaining whipped cream until just combined. Do not overmix; you want to keep the air in the cream.
- Gently fold the chilled strawberry puree into the cream mixture until streaks of pink appear. Stop folding when the mixture is marbled; this creates a better texture than fully mixing.
- Pour the ice cream base into a freezer-safe loaf pan or container. Cover the surface directly with plastic wrap to prevent ice crystals, then cover the container with a lid or foil.
- Freeze for at least 6 hours, or preferably overnight, until firm. Let the ice cream sit on the counter for 5 to 10 minutes before scooping and serving your sweet frozen treat.
Notes
- For the best flavor, use ripe, sweet fresh strawberries. If your strawberries are not very sweet, you can add 1 tablespoon of extra sugar to the base mixture.
- If you prefer a smoother texture without any fruit chunks, blend the strawberries until completely smooth before chilling.
- This no-churn method relies on the fat in the heavy cream and the sugar in the condensed milk to keep the ice cream soft enough to scoop straight from the freezer.
Nutrition
- Serving Size: 2/3 cup
- Calories: 310
- Sugar: 35
- Sodium: 65
- Fat: 16
- Saturated Fat: 10
- Unsaturated Fat: 6
- Trans Fat: 0.5
- Carbohydrates: 38
- Fiber: 1
- Protein: 5
- Cholesterol: 55