Crusty Rustic Italian Bread: Bakery-Quality Loaf Made Easy
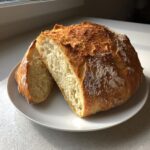
Bake a beautiful, crusty Italian loaf with a soft, airy interior right in your home kitchen. This recipe uses simple ingredients and straightforward techniques so you can achieve bakery-style bread for dipping or serving with dinner.
- Prep Time: 20 min
- Cook Time: 40 min
- Total Time: 2 hr 10 min
- Yield: 1 large loaf 1x
- Category: Baking
- Method: Baking
- Cuisine: Italian
- Diet: Vegetarian
Ingredients
Scale
- 3 cups All-Purpose Flour (plus more for dusting)
- 1 1/2 cups Warm Water (about 105-115°F)
- 2 1/4 teaspoons Active Dry Yeast (one standard packet)
- 1 teaspoon Granulated Sugar
- 2 teaspoons Salt
- 2 tablespoons Olive Oil (plus more for bowl)
Instructions
- Activate the Yeast: In a small bowl, combine the warm water, sugar, and yeast. Let this mixture sit for 5 to 10 minutes until it becomes foamy. This shows the yeast is active.
- Mix Dry Ingredients: In a large mixing bowl, whisk together the flour and salt.
- Combine Dough: Pour the yeast mixture and the olive oil into the flour mixture. Use a wooden spoon or spatula to mix until a shaggy, sticky dough forms. Do not overmix at this stage.
- First Rise (Bulk Fermentation): Lightly coat a clean bowl with olive oil. Place the dough in the bowl, turning it once to coat the top. Cover the bowl tightly with plastic wrap or a clean kitchen towel. Let the dough rise in a warm place for 1 to 1.5 hours, or until it has doubled in size.
- Shape the Loaf: Gently turn the risen dough out onto a lightly floured surface. Gently fold the edges of the dough toward the center a few times to form a rough round or oval shape. Avoid punching down the dough aggressively to keep air in the crumb.
- Second Rise (Proofing): Place the shaped dough onto a baking sheet lined with parchment paper, or into a proofing basket dusted heavily with flour or cornmeal. Cover loosely and let it rise again for 30 to 45 minutes. It should look puffy.
- Preheat Oven and Baking Vessel: About 20 minutes before the second rise finishes, place a Dutch oven (with the lid on) or a baking stone into your oven. Preheat the oven to 450°F (232°C). Achieving high heat is key for a crusty exterior.
- Bake the Bread: Carefully remove the hot Dutch oven or baking stone from the oven. Gently transfer the dough onto the hot surface. If using a Dutch oven, score the top of the loaf once or twice with a sharp knife or razor blade. Cover the Dutch oven with the lid, or if using a stone, place a pan of hot water on the bottom rack to create steam.
- Bake Covered: Bake for 20 minutes with the lid on (or with steam).
- Bake Uncovered: Remove the lid (or remove the water pan). Continue baking for another 15 to 20 minutes, or until the crust is deep golden brown and sounds hollow when tapped.
- Cool: Transfer the finished loaf to a wire rack immediately. Let the bread cool completely, at least 1 hour, before slicing. This allows the interior structure to set.
Notes
- To achieve the best crusty exterior, use steam during the first part of baking. A Dutch oven traps the dough’s moisture, creating steam naturally.
- If you want a softer crust, brush the loaf lightly with melted butter immediately after it comes out of the oven.
- For a rustic look, use a mix of bread flour and all-purpose flour.
Nutrition
- Serving Size: 1 slice
- Calories: 180
- Sugar: 1
- Sodium: 250
- Fat: 2
- Saturated Fat: 0.3
- Unsaturated Fat: 1.7
- Trans Fat: 0
- Carbohydrates: 35
- Fiber: 1
- Protein: 6
- Cholesterol: 0
Find it online: https://tastethisplate.com/crusty-rustic-italian-bread-recipe/