
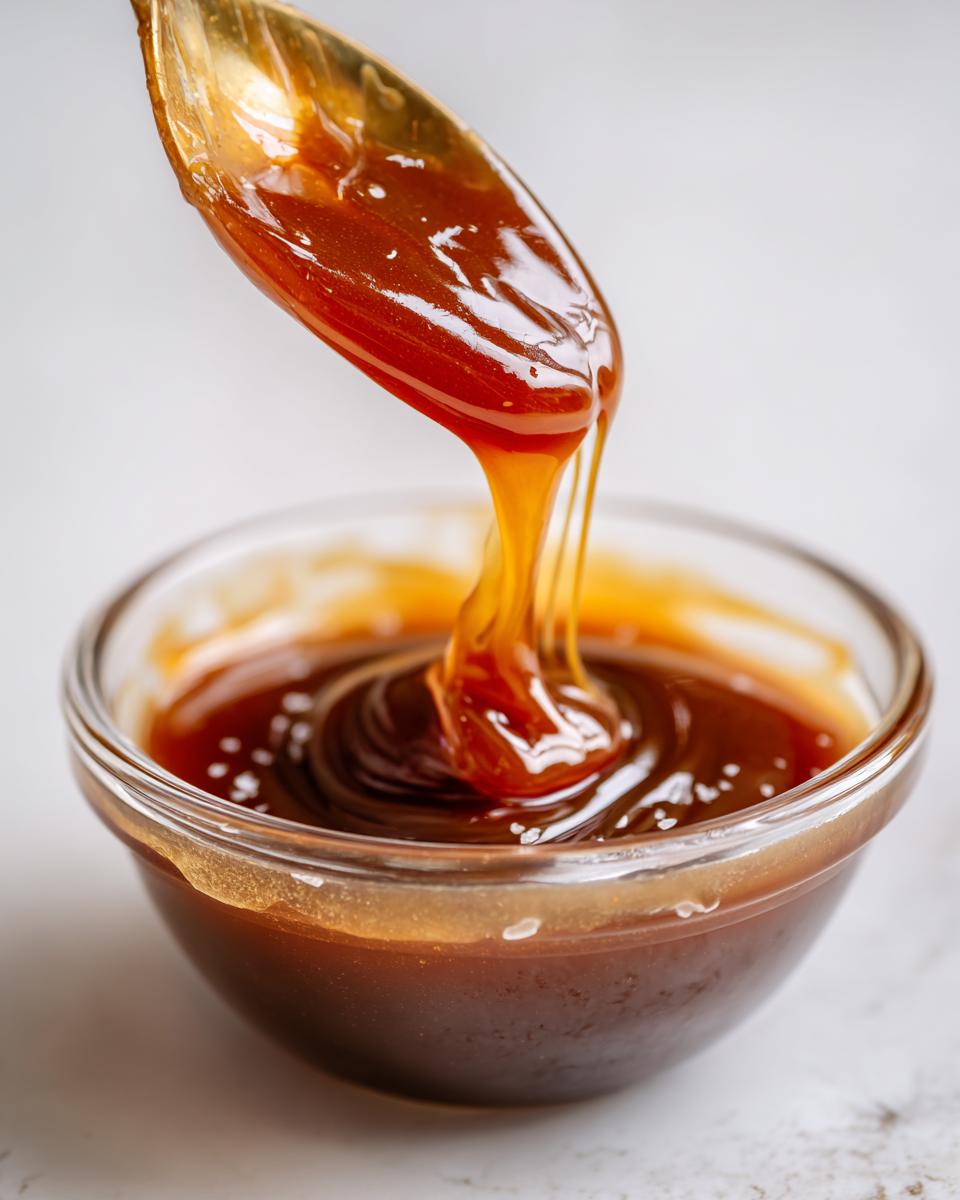
Doesn’t that afternoon craving just hit you out of nowhere? You know the one—you need something rich, buttery, and instantly satisfying, like a drizzle of pure gold over ice cream or maybe just eaten straight off the spoon. Forget those lengthy, intimidating recipes! Here at Taste This Plate, Kate’s philosophy is all about simple ingredients making extraordinary meals, and that absolutely counts for dessert toppings, too. Trust me when I say this is truly the easiest 5-minute **salted caramel sauce** recipe you will ever try. We are ditching that fussy candy thermometer; we tell time by color here!
- Why This Is Your Go-To Easy Caramel Sauce Recipe
- Ingredients for Perfect Salted Caramel Sauce
- Stovetop Caramel Recipe: Step-by-Step Instructions
- Tips for Success Making Homemade Caramel Sauce
- Serving Suggestions for Your Rich Caramel Dip
- Storage & Reheating Instructions for Your Salted Caramel Sauce
- Frequently Asked Questions About Making Salted Caramel Sauce
- Understanding the Nutrition of This Pantry Staple Sauce
- Share Your Homemade Caramel Sauce Creations
Why This Is Your Go-To Easy Caramel Sauce Recipe
I get it, standing over a hot pot worrying about crystallized sugar sounds like a nightmare! That’s exactly why I developed this version—it’s designed to be a truly No Fail Caramel Sauce. We skipped any difficult, specialized steps to bring you a rich, decadent syrup that tastes incredible but lets you move fast. This is meant to be a reliable, Quick Dessert Topping you can whip up when company shows up unexpectedly. We test these recipes again and again so you don’t have to worry about wasting those precious minutes. If you really want to see solid proof of how simple this is, check out this fantastic recipe for a similar sauce here.
Speed and Simplicity: The 5 Minute Caramel Promise
What’s the big secret to saving time? We skip the granulated white sugar entirely! Using brown sugar means we don’t have to worry about that initial painful stage where sugar melts into clear syrup before turning amber. Instead, we melt the butter and sugar together, which speeds things up dramatically. Honestly, if you can stir, you can make this:
- No need to pre-dissolve sugar.
- The butter and sugar melt together right away.
- Total cook time is reliably under seven minutes.
Achieving Velvety Caramel Texture Without a Thermometer
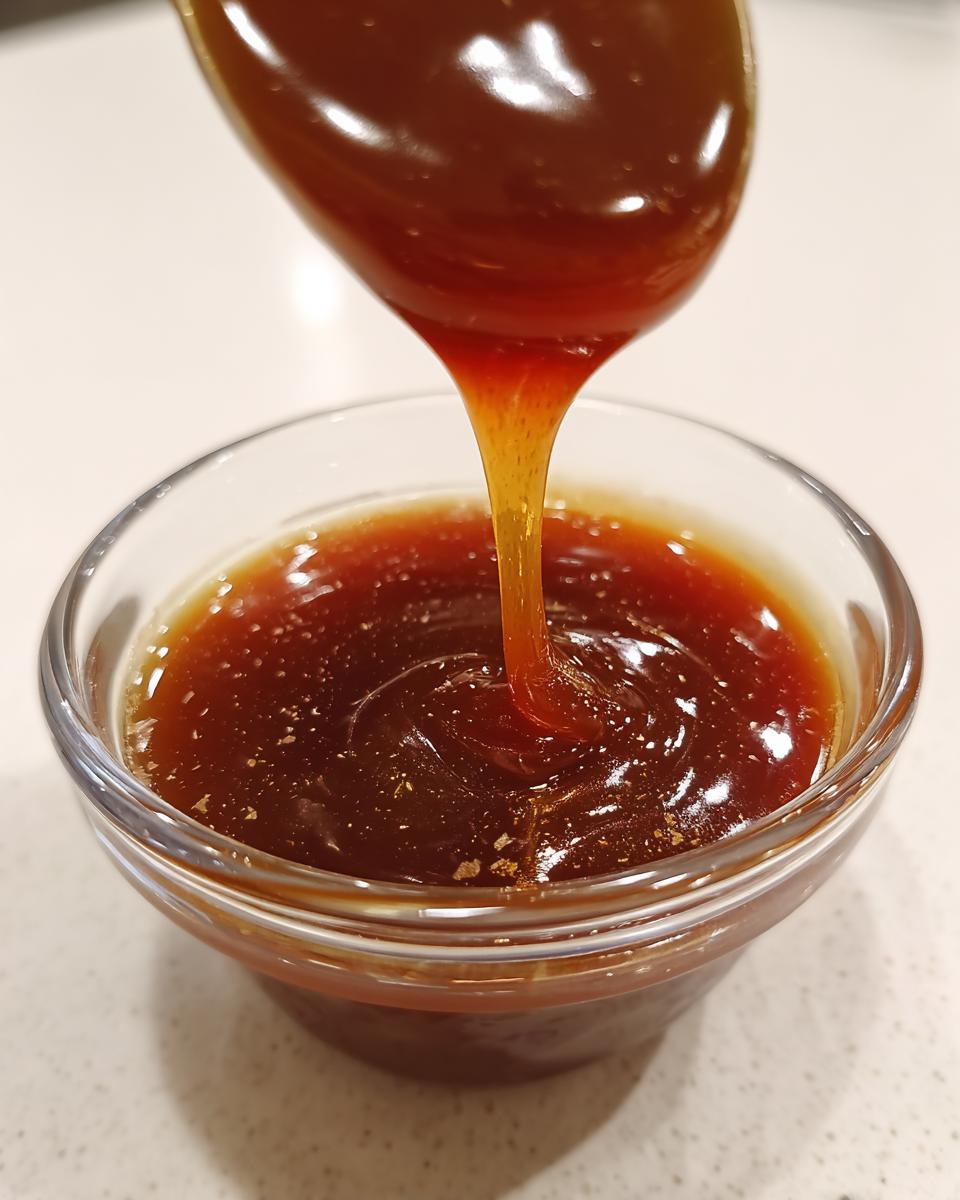
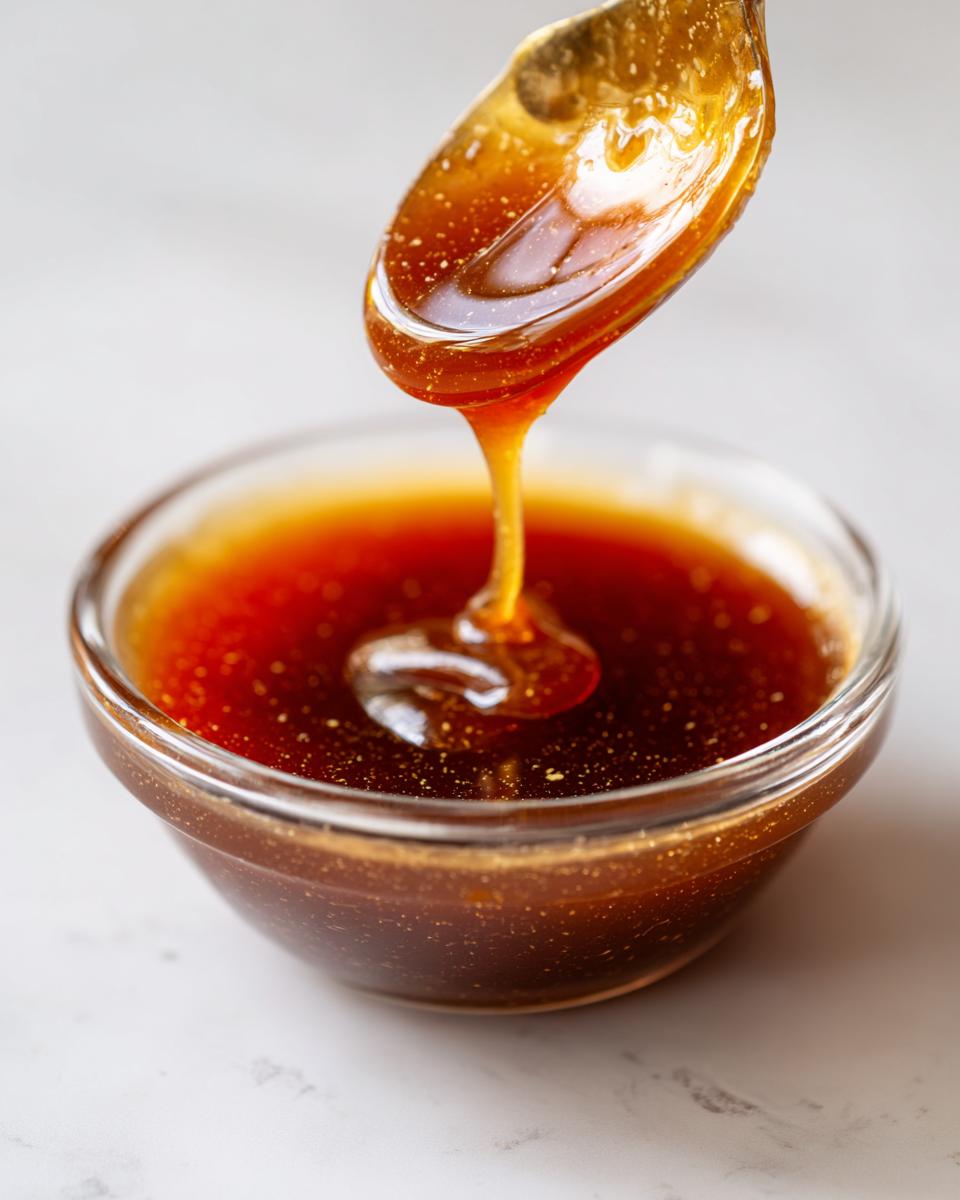
You absolutely do not need a candy thermometer for this! My analytical side used to want one, but I promise, color is all you need to aim for. When you melt the butter and brown sugar down, watch it carefully. You are looking for the mixture to start bubbling vigorously and change to a deep, rich amber color—think the shade of a good craft beer or dark maple syrup. That color change tells you the sugar has caramelized perfectly. When you add the cream, that visual check guarantees you a smooth, Velvety Caramel instead of grainy sludge. It’s foolproof!
Ingredients for Perfect Salted Caramel Sauce
The beauty of this recipe is stacking up simple things you probably already have, turning them into something totally decadent. We aren’t messing around with fancy additives here; this is pure, straightforward Brown Sugar Caramel magic. You’ll need just four core items, and getting the measurements right is the key to that amazing, thick texture we’re after. Remember, this makes about a cup, perfect for a dessert night or splitting up for a few weeks of drizzling!
Ingredient Notes and Substitution Tips
Listen, ingredients matter, even in a five-minute sauce! We specifically call for light brown sugar because it melts beautifully and carries that rich molasses note, which is crucial. If you try to use granulated sugar here, the timing changes completely, and you run the risk of burning it before it ever becomes thick—that’s why we stick to brown sugar for this quick stovetop method.
For the butter and cream, please try to make sure they aren’t icy cold if you have time to let them sit on the counter for 15 minutes. When you’re whisking in cold heavy cream after cooking the sugar hot, you risk a little bit of heat shock. It won’t ruin the sauce, but room temperature cream helps keep that bubbling reaction smoother and gentler. If you forget, no big deal—just whisk consistently and carefully when you pour it in, okay?
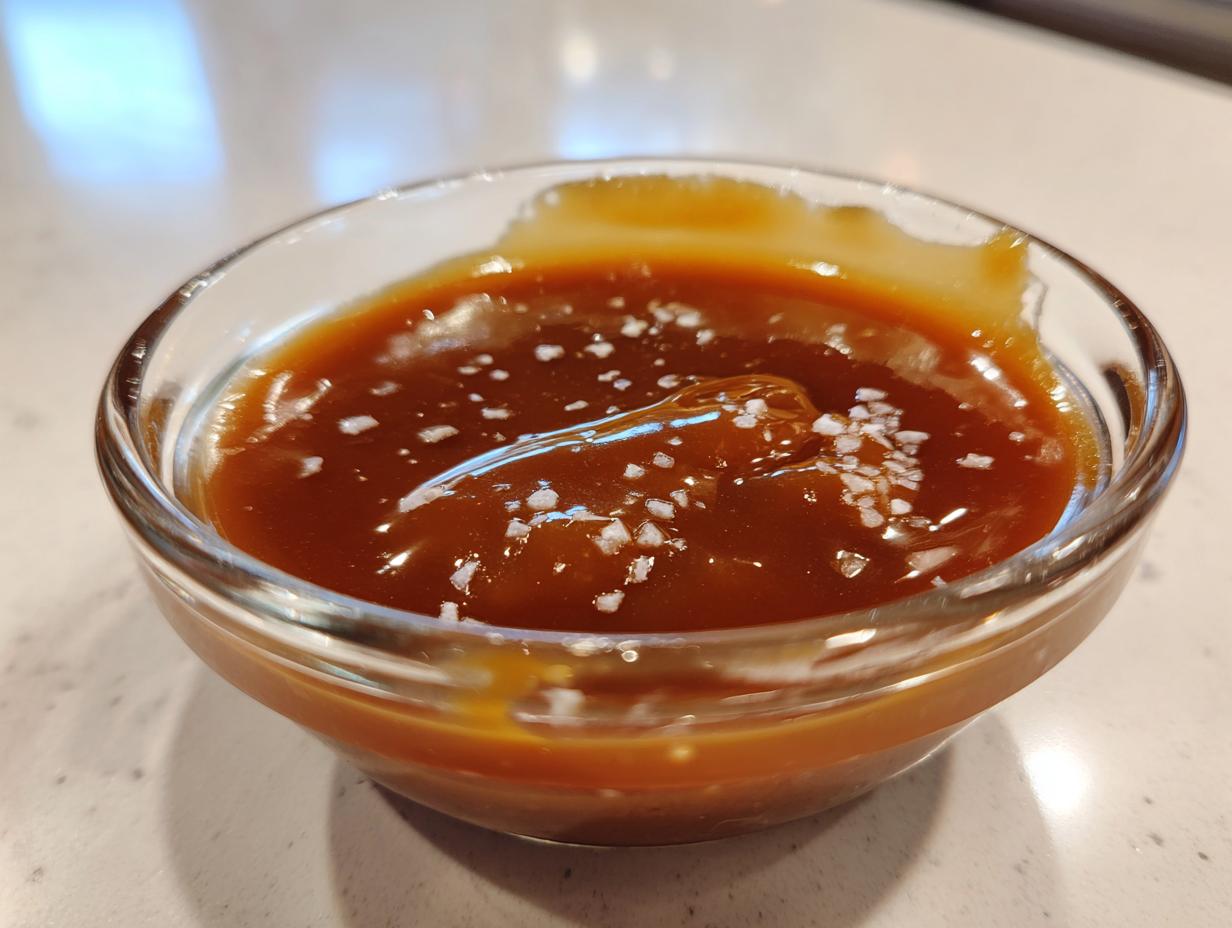
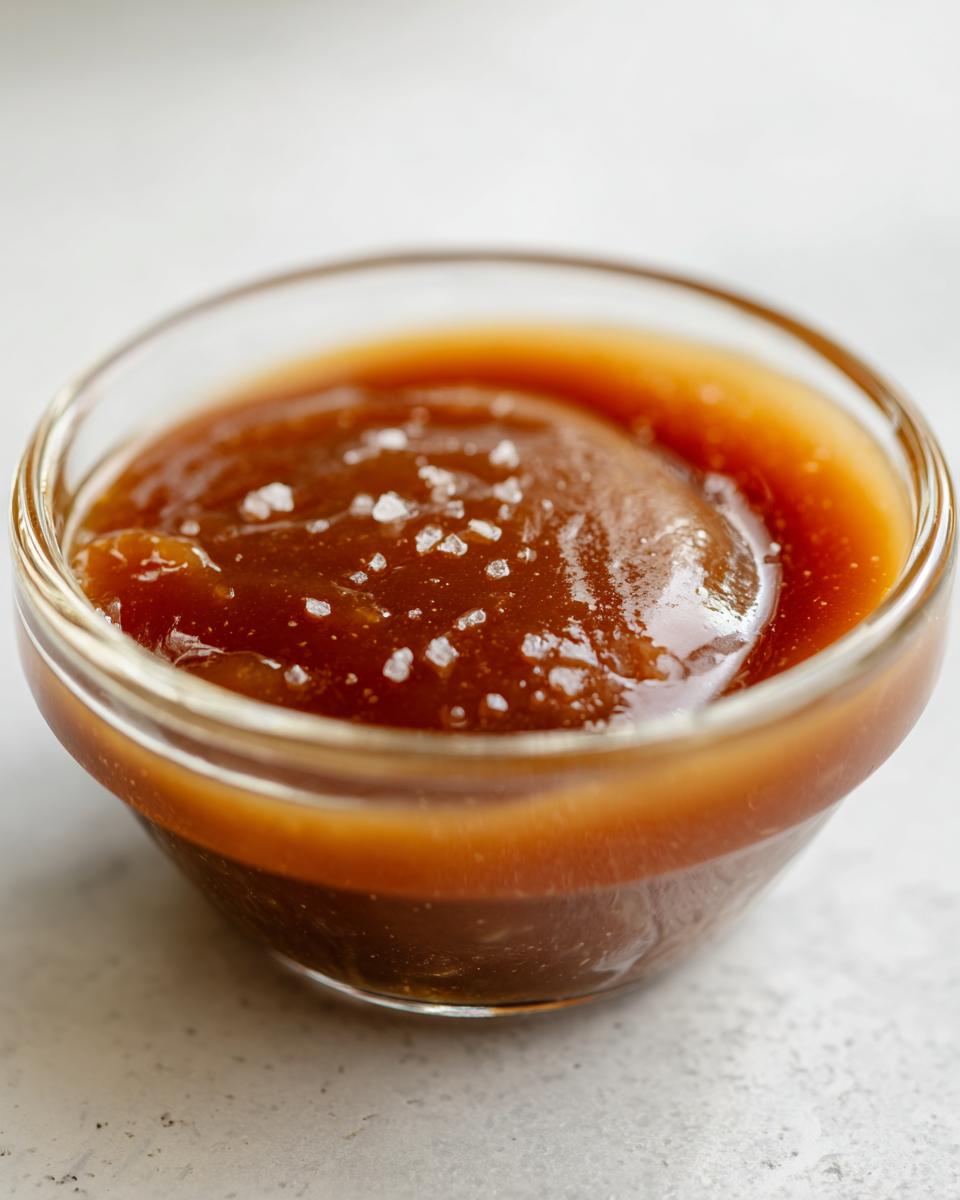
And don’t skimp on the salt! That tiny bit of sea salt is what makes it *salted* caramel. It just cuts through that intense sweetness and makes it taste incredible.
Stovetop Caramel Recipe: Step-by-Step Instructions
Okay, let’s get cooking! This whole process flies by, so make sure you have everything measured out and ready to go before you even turn on the burner. This is where we transform those boring pantry staples into the most glorious **salted caramel sauce** you’ve ever tasted. Remember, we are moving fast, but we must stir constantly—that’s my number one instruction for anyone making caramel! If you’re curious how we handle other simple stovetop items, check out my approach for three-ingredient stovetop mac and cheese.
Melting the Base for Your Salted Caramel Sauce
First things first: grab a small, heavy-bottomed saucepan. That heavy bottom means the heat spreads more evenly, and we absolutely do not want hot spots that can scorch the sugar! Put your cup of packed brown sugar and the stick of butter in there over medium heat. Now, stir, stir, stir! Don’t walk away from this pot for even a second while this melts. You need to stir until the butter is fully gone and the sugar grains have dissolved. This usually takes about three or four minutes. Keep stirring past the melting stage until you see it start to bubble and turn a beautiful, deep amber color. That color tells you the caramelization is happening just right! For more tips on getting that perfect color payoff, Sally from Sally’s Baking Addiction has a great guide on homemade salted caramel.
Incorporating Cream and Finishing the Quick Dessert Topping
Here comes the dramatic part, but please don’t panic! When you hit that deep amber color, yank the pan right off the burner immediately. Now grab your heavy cream and pour it in all at once while whisking like crazy. I mean it—whisk vigorously! The mixture will erupt in a huge, foamy bubble bath, and that is totally normal. Once the initial eruption calms down, put it back on low heat for just one more minute, whisking until everything is perfectly smooth. Take it off the heat for good, stir in your sea salt, let it cool for five minutes on the counter, and you’ve got a gorgeous, ready-to-use **Quick Dessert Topping**!
Tips for Success Making Homemade Caramel Sauce
Even though this is the easiest recipe out there, sometimes things go a little sideways in the kitchen, right? That’s why I want to set you up for success! Knowing what to do when things get sticky or bubbly means you’ll keep coming back to this recipe over and over again. This section is all about becoming a confident cook, even when dealing with molten sugar. Don’t worry if it seems scary; this works for any Beginner Caramel Recipe because we’re using simple brown sugar!
Troubleshooting Common Salted Caramel Sauce Issues
The two biggest fears when making caramel are burning it or having it seize up into a big, angry lump of sugar right when you add the cream. If you see any black specks, that means you went a little too far with the heating, and sadly, that batch might taste a little burnt—start over! Remember to stir constantly to keep that heat even.
Now, let’s talk about seizing. This happens when the hot sugar meets the cooler cream and locks up, creating hard clumps. If your sauce looks grainy or won’t smooth out after you whisk it, don’t throw it away! Just put the pot back on the lowest possible heat. Add just one teaspoon of very hot water or a splash more cream, and whisk gently but firmly. The heat will coax those sugar crystals apart, and usually, within a minute or two, you’ll have that smooth, beautiful texture back. It’s amazing how forgiving this recipe is!
If you found yourself pushing the heat too high while trying to reach that amber color, I have seen some great troubleshooting tips over at Ben’s Recipes that talk about recovery from high-heat issues here. But honestly, for this recipe, keeping the heat at medium and watching the color is the best prevention!
One final note: If your sauce cools down and it’s just a little too thick for your immediate needs—maybe you wanted a thinner drizzle than a dip—just stir in a tiny bit of hot water while it’s still warm until it loosens up. Easy peasy!
Serving Suggestions for Your Rich Caramel Dip
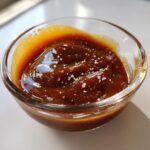
Now that you have this liquid gold in a jar, the real fun begins! This Homemade Caramel Sauce is so versatile, you’ll want to keep a batch on hand at all times. Since we believe meals should be enjoyable and not stressful, these ideas are quick ways to instantly elevate whatever you’re serving tonight. Honestly, I have absolutely stirred this right into my coffee on a Monday morning!
The primary goal here is decadence without effort. Keep these pairings in mind the next time you need a fantastic Caramel for Ice Cream topping or just some extra flavor boost for a simple treat. Think about what you have in the rotation for desserts—this sauce works with almost everything!
For pairing with baked goods, think about things that benefit from a contrast in texture. A slice of something dense and buttery, like my recipe for Gooey Butter Pecan Cake, is amazing when topped with a warm drizzle. The salty tang of the caramel cuts through the richness perfectly.
And don’t forget the unexpected pairings! It’s fantastic spooned over fresh sliced apples, or even mixed into plain yogurt for a super Simple Caramel Drizzle breakfast. If you are making something warm and cozy, like a Dump Cake, just pour this sauce right over the top while it’s still steaming. It becomes instant comfort food, I promise you that!
Storage & Reheating Instructions for Your Salted Caramel Sauce
Now that you have this beautiful, homemade caramel sauce, you want to make sure it stays perfect, right? Good news! Since this recipe uses heavy cream and butter—real ingredients that taste amazing—it does last a while, but it doesn’t need to be canned or anything fussy.
You can absolutely store this in an airtight container right in the refrigerator. I usually make a batch when I’m testing recipes, and honestly, it lasts fantasticly for about two full weeks. It’s basically an instant Pantry Staple Sauce once you realize you can just keep it on hand!
Now, when you pull it out the next day, expect a surprise! It’s going to be quite thick—more like a soft fudge than a drizzle. Don’t worry at all! This is just the butter firming back up in the cold. You just need to warm it up carefully to get that perfect, flowing consistency back.
The best way to reheat this is definitely on the stovetop over very low heat. Just stir it constantly until it melts back into a smooth sauce. You can use the microwave too, but you have to be really careful there. Use short, 10-second bursts, stirring well in between each burst. If you microwave it too long, you risk heating the sugar too fast and changing that lovely texture we worked so hard to achieve. A quick five minutes total, and your delicious sauce is ready for ice cream again!
Frequently Asked Questions About Making Salted Caramel Sauce
You’ve gone through all the steps, you have your jar of liquid gold, but maybe a few little thoughts are still lingering? That’s totally normal! When you’re getting used to stovetop quick recipes, having some quick answers handy is the best way to build confidence. Here are the things I hear most often when people try this recipe out for the first time.
Can I use granulated sugar instead of brown sugar for this salted caramel sauce?
That’s a great question, and I know why you’re asking—sometimes you just run out of brown sugar! The short answer is yes, you *can*, but if you switch to granulated white sugar, you completely lose the magic of this quick method. White sugar requires careful melting until it’s clear, then waiting until it hits that precise deep amber hue, and you absolutely need a candy thermometer to nail the temperature safely. That’s the complexity we were trying to avoid! Stick with the brown sugar for this version; it keeps the cooking time short and keeps us firmly in the **No Fail Caramel Sauce** territory we love.
How do I make a small batch caramel?
The recipe we made here actually yields about a cup, which I consider my perfect *small batch* for a week or two of serious drizzling! But if you need even less, maybe just enough for a single topping for four people, you can absolutely cut all the ingredient amounts in half. Just take half a cup of brown sugar, a quarter cup of butter, etc. You’ll still use the same medium heat, but you have to watch it like a hawk! Smaller amounts heat up faster, so that three-to-four-minute window for melting might shrink to two minutes. Keep an eye on that color, and you’ll have a lovely Small Batch Caramel!
What makes this a ‘Buttery Caramel Glaze’?
That rich, heavy texture is all thanks to the butter and cream relationship! In this recipe, we use a full stick of butter, which is a good amount relative to the sugar and cream we add. When everything cools down, that extra fat content firms up beautifully, giving you a thick sauce that clings perfectly to things. If you want to use it as a stiff drizzle over a cake or cookie—like a proper Buttery Caramel Glaze—just let it cool completely in the fridge for an hour or so. It holds its shape much better than thinner, store-bought syrups!
Understanding the Nutrition of This Pantry Staple Sauce
Okay, let’s talk real talk for a second. When you’re eating thick, buttery caramel, you know it’s a treat, not a daily multivitamin! I want to be super clear: the nutritional information below is just an estimate based on the recipe details provided. We use full-fat butter and cream here because that’s what makes it taste amazing, so keep that in mind when you are portioning it out. This measurement is for a two-tablespoon serving size, which is a hearty drizzle!
Here’s the breakdown:
- Serving Size: 2 tablespoons
- Calories: around 180
- Sugar: 20g
- Fat: 11g
See? It’s rich! But remember, this is meant for drizzling over things like my simple weeknight desserts or for special holiday sharing. Enjoy every single, perfect, buttery drop!
Share Your Homemade Caramel Sauce Creations
Alright, you made it! You conquered the heat, you whisked like a champion, and now you have this incredible, glossy, rich **Homemade Caramel Sauce** sitting on your counter. That deserves a celebration! I truly believe that the best memories are made right here, in the kitchen, sharing what we create.
So, I’m asking you, my fellow home cook: Don’t let that wonderful jar stay hidden! I desperately want to know what you drizzled it on. Did you manage to resist eating it all straight out of the jar? Did you try it on a slice of pound cake, or maybe you used it to elevate your afternoon coffee?
Please take a second and leave a rating right down below. Five stars means the world to me because it shows that this simple, no-fuss method works perfectly for you, too! If you have a moment, tell me in the comments how you enjoyed your Simple Caramel Drizzle. Seeing your creations—whether it’s topping an apple pie or just being used as a Rich Caramel Dip—inspires me to keep testing and simplifying recipes for everyone. If you want to know more about why we focus on building that community spirit here at Taste This Plate, you can read about our mission on our About page. Now go enjoy that caramel!
PrintThe Easiest 5-Minute Salted Caramel Sauce (No Thermometer Needed)
Make rich, velvety salted caramel sauce quickly using simple pantry ingredients. This beginner-friendly recipe requires no candy thermometer and is perfect for drizzling over ice cream, cakes, or eating straight from the spoon.
- Prep Time: 2 min
- Cook Time: 5 min
- Total Time: 7 min
- Yield: About 1 cup 1x
- Category: Dessert Topping
- Method: Stovetop
- Cuisine: American
- Diet: Vegetarian
Ingredients
- 1 cup light brown sugar, packed
- 1/2 cup (1 stick) unsalted butter
- 1/2 cup heavy cream
- 1 teaspoon sea salt (or to taste)
Instructions
- Combine the brown sugar and butter in a small, heavy-bottomed saucepan over medium heat.
- Stir constantly until the butter melts and the sugar dissolves completely. Keep stirring until the mixture bubbles and thickens slightly, about 3 to 4 minutes. Watch the color; you want it to turn a deep amber shade.
- Remove the pan from the heat. Carefully pour in the heavy cream while whisking continuously. The mixture will bubble up vigorously.
- Return the pan to low heat and whisk until the sauce is smooth. Cook for 1 minute more, stirring constantly.
- Remove from heat and stir in the sea salt.
- Let the sauce cool for 5 minutes before using. It will thicken as it cools.
Notes
- If the sauce seems too thick after cooling, whisk in 1 teaspoon of hot water until you reach your desired drizzling consistency.
- Store this homemade caramel sauce in an airtight container in the refrigerator for up to two weeks. Reheat gently on the stovetop or in the microwave before serving.
- For a variation, add 1/4 teaspoon of vanilla extract after removing the sauce from the heat.
Nutrition
- Serving Size: 2 tablespoons
- Calories: 180
- Sugar: 20g
- Sodium: 150mg
- Fat: 11g
- Saturated Fat: 7g
- Unsaturated Fat: 4g
- Trans Fat: 0g
- Carbohydrates: 21g
- Fiber: 0g
- Protein: 0g
- Cholesterol: 35mg