
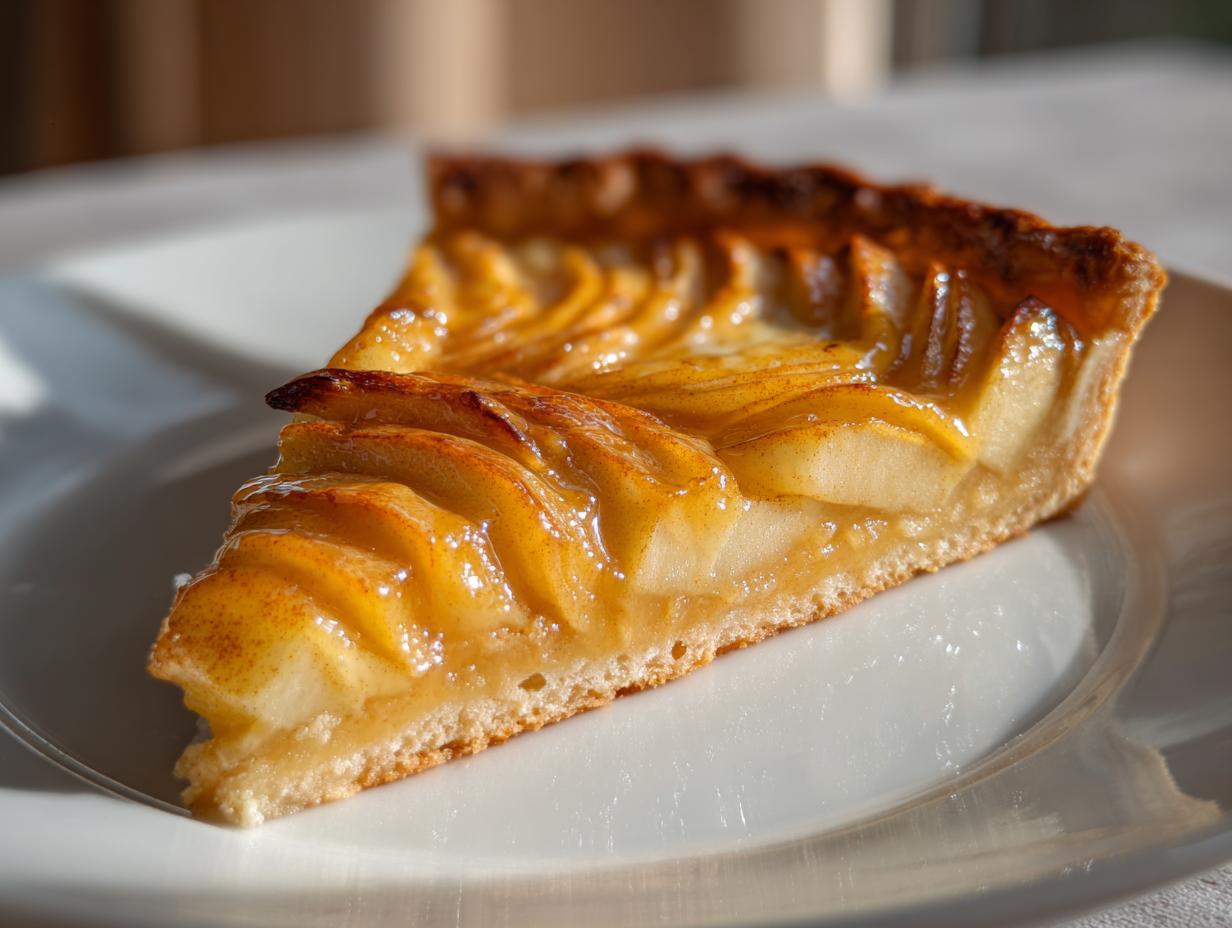
When the air gets crisp and you start craving those classic autumn flavors, sometimes a full, complicated double-crust pie just feels like too much work. That’s where my absolute favorite, the **apple tart**, swoops in to save the day! This classic French Apple Tart, or *Tarte aux Pommes*, proves that you don’t need a whole afternoon of fuss to create something truly elegant and delicious. We’re talking about thinly sliced apples, perfectly arranged, sitting atop what I promise you will be the best **buttery, flaky crust dessert** you’ve ever made at home. Trust me, mastering this simple pastry base is easier than you think, empowering you to serve up restaurant-quality desserts on a Tuesday night! If you’re looking for something even simpler next time, check out my approach to apple pie dump cake.
- Why This Classic French Apple Tart Recipe Works for You
- Gathering Ingredients for Your Homemade Apple Tart
- How to Prepare the Flaky Dough for Your Apple Tart
- Assembling the Classic Apple Tart: Arranging the Apples
- Baking and Finishing Your Perfect Apple Tart
- Tips for Success When Making an Easy Apple Tart
- Serving Suggestions for Your Classic Apple Tart
- Storage and Reheating Instructions for Leftover Apple Tart
- Frequently Asked Questions About Making the Best Apple Tart Recipe
- Share Your Homemade Apple Tart Creation
Why This Classic French Apple Tart Recipe Works for You
I want you to feel confident walking into your kitchen right now to make this dessert. Forget intimidating pastry techniques; this French Apple Tart Recipe is built for accessibility and incredible flavor payoff. It’s the perfect introduction to elegant baking without the stress.
- It’s a genuinely **Simple Apple Dessert** that looks stunning when served.
- The apples are perfectly seasoned with cinnamon for that warm, cozy taste.
- It uses minimal ingredients, focusing on quality over quantity. Plus, if you like this flavor profile, you should definitely check out my easy apple crumble recipe next!
The Secret to a Buttery Flaky Crust Dessert
The whole magic really lies in the chilling and the handling—or rather, the *lack* of handling. We keep the butter freezing cold and work it just enough so that when it hits the heat of the oven, those little butter pockets melt, creating steam. That steam pushes the flour layers apart, giving you that wonderful, shattered texture in every bite.
Gathering Ingredients for Your Homemade Apple Tart
Okay, let’s talk supplies! Making a truly beautiful **Homemade Apple Tart** starts and ends with what you put into it. You don’t need a specialty market run for this recipe, just standard stuff, but pay close attention to that butter—it needs to be cold, I mean *ice* cold. We rely on these beautiful, reliable ingredients to ensure we nail that thin, **Classic Apple Tart** look every single time. You can find my guide on making homemade applesauce recipe if you ever want a side, but for this tart, we stick to the plan!
Here is what you need to pull together this fantastic **Apple Pastry Dessert**:
- 1 1/2 cups all-purpose flour
- 1/2 teaspoon salt
- 1/2 cup (1 stick) cold unsalted butter, cut into small cubes
- 4 tablespoons ice water
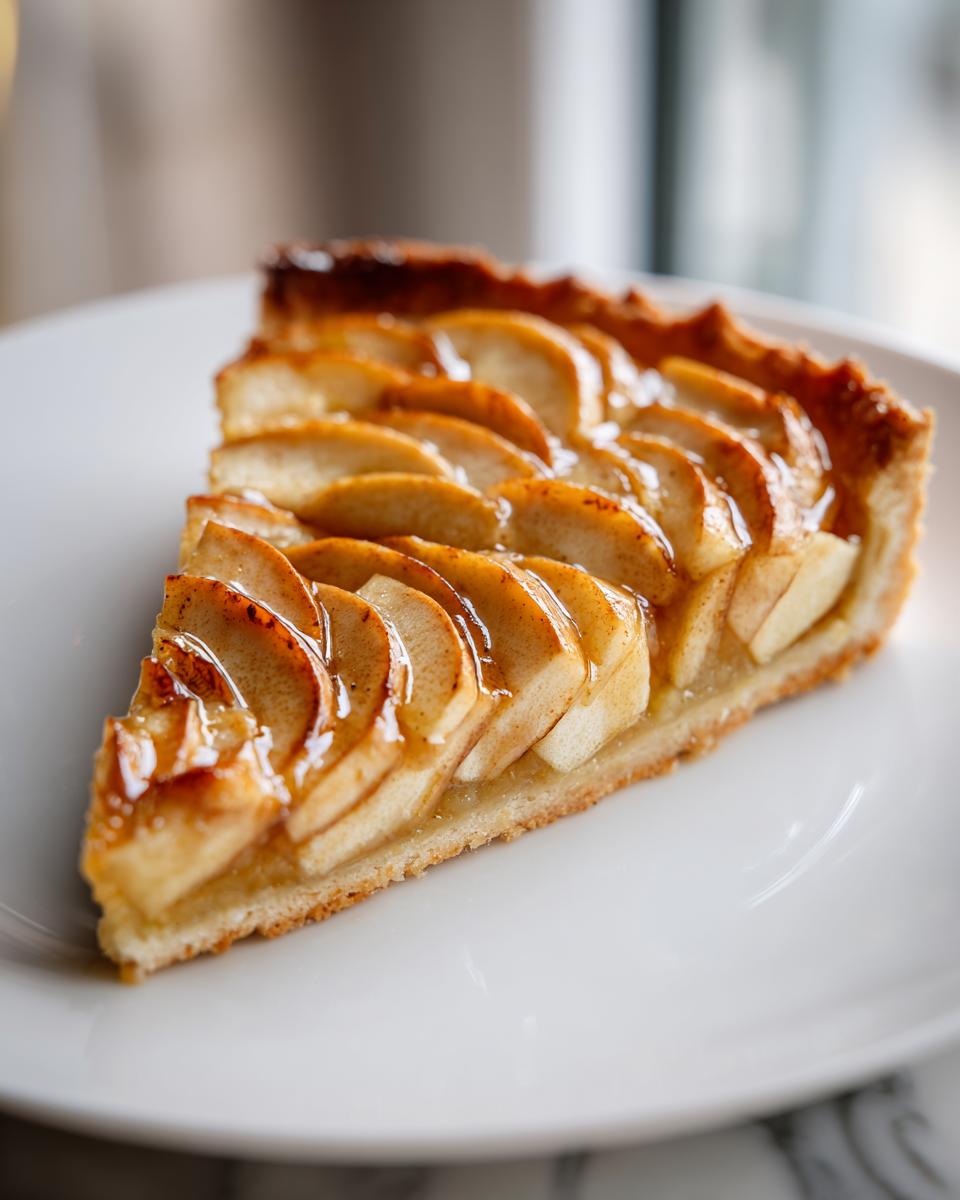
- 5 medium baking apples (like Honeycrisp or Granny Smith), peeled, cored, and thinly sliced
- 1/4 cup granulated sugar
- 1 tablespoon lemon juice
- 1 teaspoon ground cinnamon
- 2 tablespoons apricot jam or apple jelly, warmed
Ingredient Notes and Apple Selection for the Best Apple Tart
When it comes to the apples, please listen up! This is where many people lose the battle against a soggy bottom. You absolutely must choose firm baking apples. I love Granny Smith because they hold their shape perfectly, and Honeycrisp is fantastic if you want a bit more sweetness. If you use apples that are too soft, they turn into mush before the crust even gets close to done! The little bit of lemon juice helps keep those gorgeous slices from browning while you work. Finally, that apricot glaze at the end? It’s non-negotiable for presentation. Warming it up just slightly lets it become a beautiful brushable coat that gives your finished **apple tart** that glossy, elegant shine.
How to Prepare the Flaky Dough for Your Apple Tart
This is the part where we build the foundation—the **buttery, flaky crust dessert** that holds everything together. Because we are aiming for that simple, rustic presentation, we need to be mindful not to give the dough too much love. Overworking it is the enemy of flakiness, and I learned that the hard way back when I first tried making my grandmother’s pastry! Remember that time I tried rushing it? It came out tough as a hockey puck. Don’t be me!
First, let’s mix up the dry stuff: the flour and salt go into a big bowl. Now for the cold butter, cut into little cubes. You need a pastry blender, or if you’re feeling brave, just use your fingertips! You want to work that butter into the flour until it looks kind of shaggy, like coarse sand, but you need to see those pea-sized bits of butter still floating around in there. Those bits are the key!
Next, the water. You absolutely need ice water here; it keeps the dough from getting greasy while you bring it together. Add it slowly, maybe a tablespoon at a time. Just stir it with a fork—stop mixing the second the dough looks like it *might* hold together when you squeeze a handful. Seriously, stop squeezing!
Wrap that shaggy dough into a nice, flat disk. Pop it straight into the fridge. I usually let mine nap for a good 30 minutes, but if you have time, go for an hour. That chilling time lets the gluten relax, which means when you roll it out later, it won’t fight you every step of the way. While that’s resting, you can get those apples ready for slicing! If you need a sweet bread inspiration while you wait, check out my recipe for cinnamon crunch banana bread.
Assembling the Classic Apple Tart: Arranging the Apples
Now that your dough is nice and chilled, it’s time to make some magic happen! While the dough is resting, you should have tossed your perfectly sliced apples with sugar, cinnamon, and that splash of lemon juice. This gives them a little head start on flavor development. I’m getting ahead of myself, though! Let’s talk structure first, because nobody wants a sloppy bottom on their beautiful **Elegant Apple Tart**.
If you want to go the extra mile and guarantee a crisp bottom—and trust me, you do!—pop your baking sheet into the oven while it’s preheating to 375°F. Setting the cold dough onto a scorching hot sheet gives the crust a major blast of heat right away, which is fantastic for discouraging sogginess. This trick really helps pull off that perfect texture we reviewed earlier.
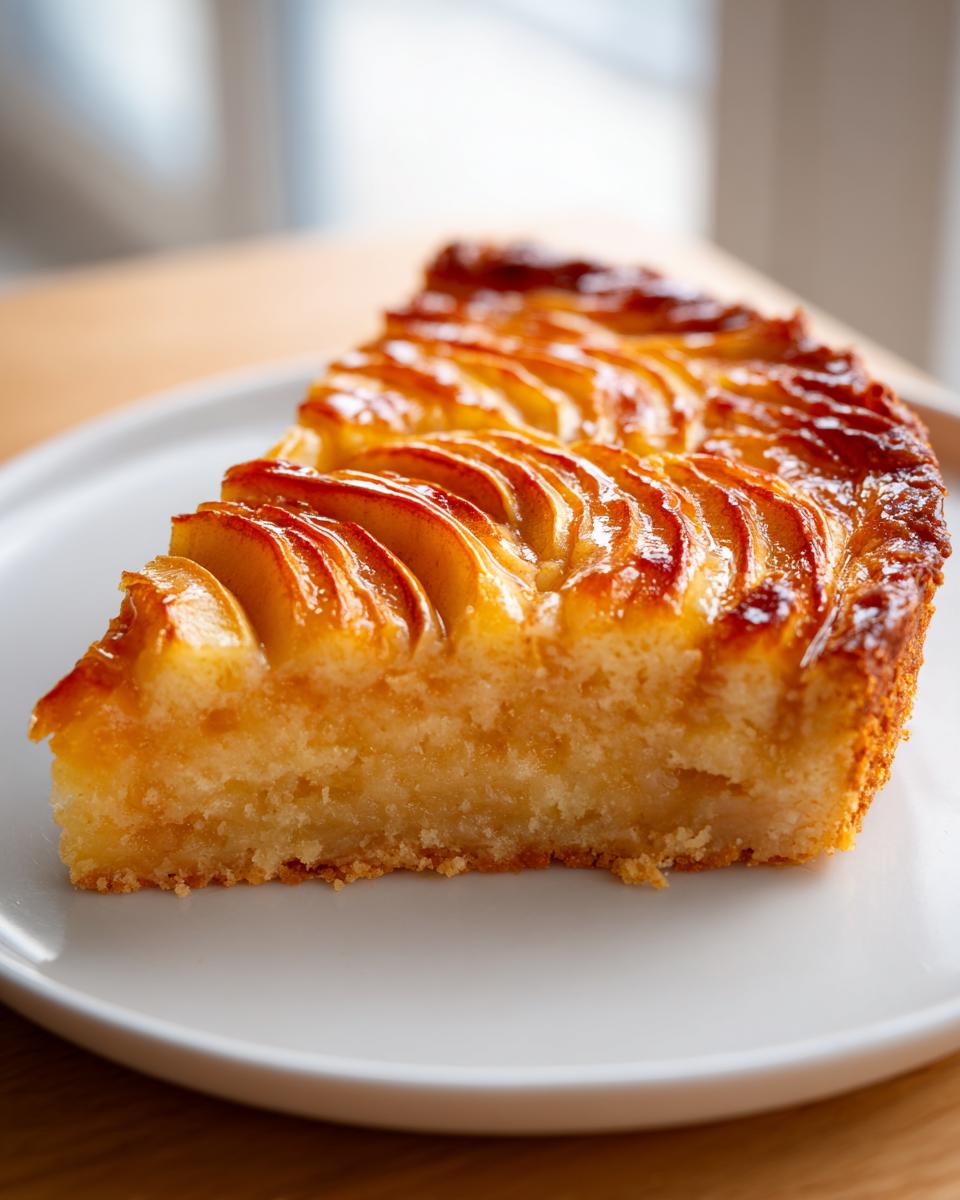
Lightly flour a clean surface and roll that dough out carefully into a rough circle, maybe about 12 inches across. Gently lay it onto your prepared (or pre-heated!) baking sheet. Now comes the fun, artistic part: the apple arrangement. I like to start from the outside edge, overlapping the thin slices barely, creating beautiful concentric circles that spiral toward the center. If you want to see another gorgeous example of this technique, check out this classic Tarte aux Pommes online for inspiration!
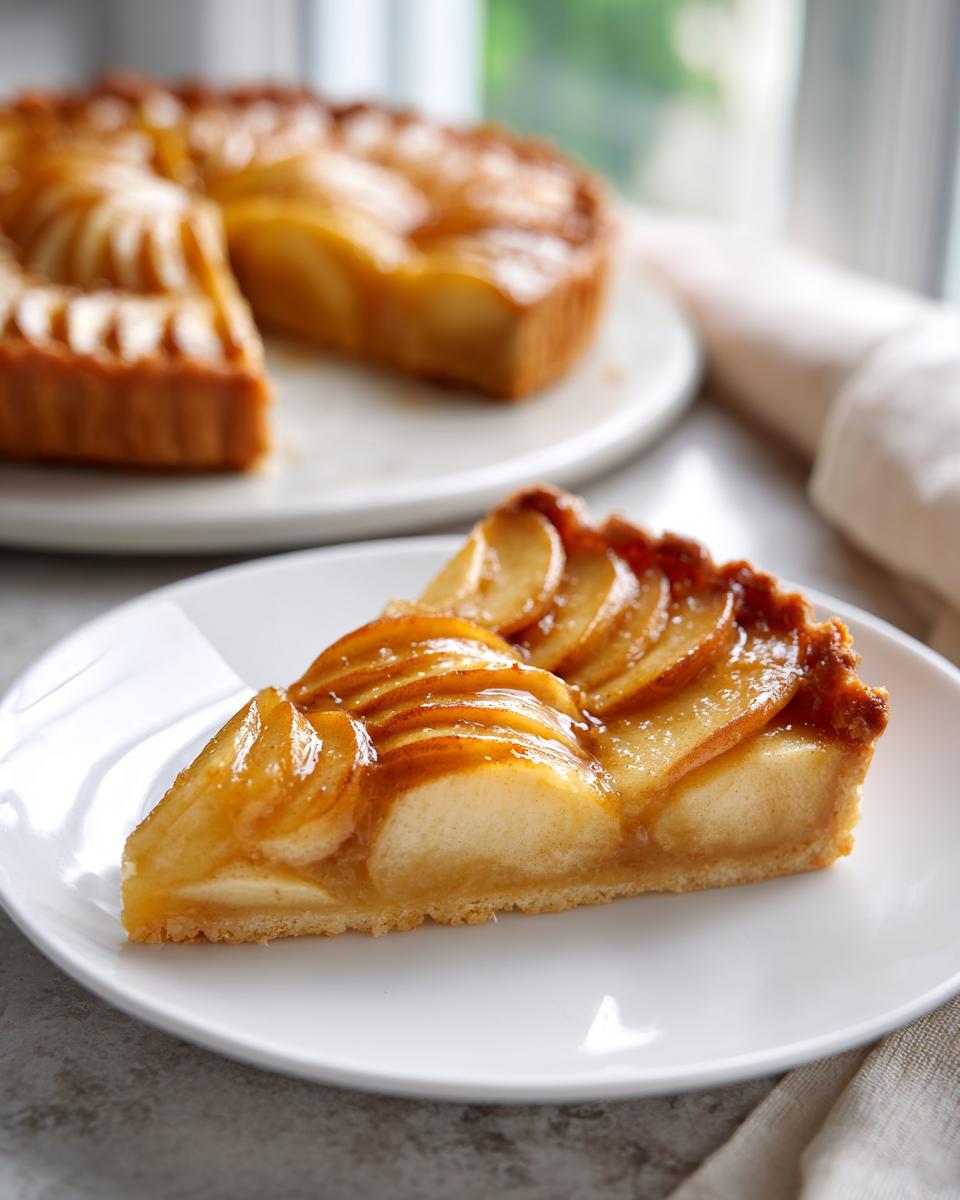
Once you’ve got your apples laid out—don’t stress if it looks a little rustic; this is part of the charm—you need to create a border. Just fold that 1 1/2-inch dough edge up and over the outside apples. It doesn’t need to be perfect, just enough to hold those sweet slices in while they bake. This rough rim is what makes this tart look so wonderfully homemade. If you’re looking for a similar delicious, slightly rustic vibe, my recipe for coffee cake muffins with cinnamon streusel is another winner!
Baking and Finishing Your Perfect Apple Tart
It’s time to get this beautiful apple tart into the oven! You want your oven humming at 375°F (190°C) for this bake. Pop the tart in (remember, maybe on that preheated sheet if you used one!) and let it go for about 35 to 45 minutes. You aren’t just waiting for the apples to soften; you are watching the crust. We are looking for that gorgeous, deep golden brown color around the edges. Seriously, use your eyes! If you’re baking something else sweet while you wait, try out my cinnamon roll casserole!
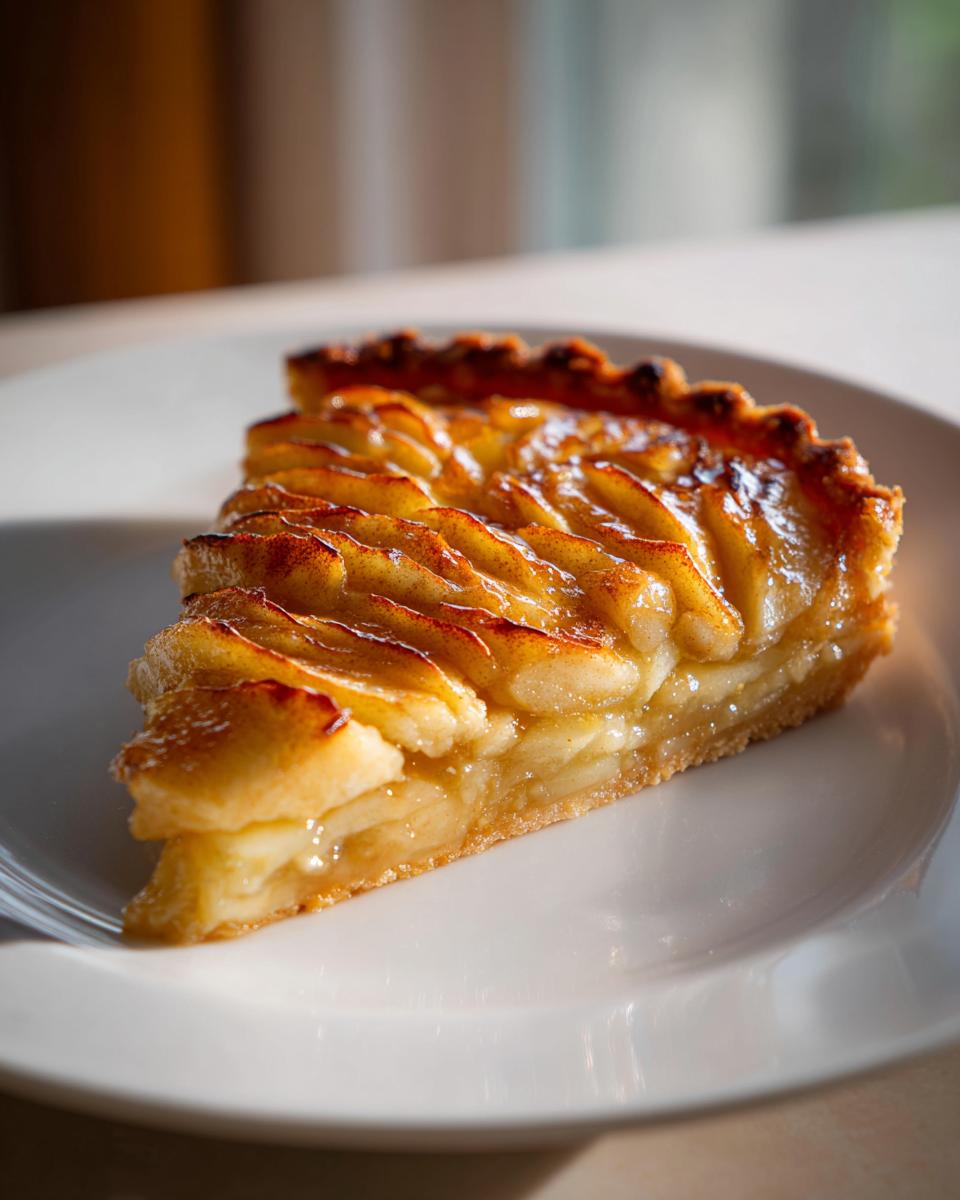
Once out of the oven, resist the urge to cut into it right away! The apples are molten lava right now. But here’s the key finishing touch: the glaze. While the **apple tart** is still warm, gently brush that warmed apricot jam or apple jelly right over the apple slices. This step is pure elegance! It seals in that lovely cinnamon scent, gives the entire dessert a professional, shiny sheen, and helps keep those apples looking fresh for hours. That’s it! Let it cool down just enough so you can handle it, then slice and serve your incredible **Simple Apple Dessert**.
Tips for Success When Making an Easy Apple Tart
Even though this is designed to be a foolproof, **Easy Apple Tart**, I always have a few behind-the-scenes tips I want to share so your result is flawless. My biggest early-baking disaster with this dessert? I once tried to use sweet, soft Red Delicious apples because that’s all I had in the fruit bowl one afternoon. Big mistake! They just melted away into sweet apple soup, and the whole **apple tart** collapsed into a soggy mess. Never again! That’s why we stick to firm apples.
Here are the key pointers I always follow for that perfect texture:
- For the crispiest bottom imaginable, you absolutely have to preheat your baking sheet underneath the oven rack before you put the tart on it. This quick blast of heat cooks the bottom pastry much faster.
- If you want a tiny bit of extra richness in your dough without compromising texture, try swapping out one tablespoon of that cold water for one tablespoon of cold vodka. Don’t worry, you won’t taste it, but it inhibits gluten development!
- When you finally serve this beautiful **Classic Apple Tart**, a scoop of good vanilla ice cream is non-negotiable in my house. Or, my husband likes it with a dollop of cool crème fraîche.
If you want to try another baking project next week, my recipe for carrot banana muffins is incredibly satisfying! And if you’re searching for even more inspiration on rustic presentation, you have to check out this variation on the rustic French style here.
Serving Suggestions for Your Classic Apple Tart
We’ve done all the hard work, from making that perfect **Buttery Flaky Crust Dessert** to arranging the apples just so. Now comes the fun part: deciding how to present this beautiful creation! Remember, at Taste This Plate, we believe in making the everyday special, and that certainly applies to dessert. You don’t need fancy complex sauces to elevate this **Simple Apple Dessert**; sometimes the simplest pairings make the biggest impact.
When I pull this warm French Apple Tart Recipe out of the oven, my family usually gravitates toward the classics. A big, slightly melty scoop of good quality vanilla ice cream is always a winner. The cold, creamy texture against the warm, spiced apples and crisp crust? Pure perfection. Honestly, it brings me so much joy seeing them happy!
If you’re looking for something less strictly sweet, I highly recommend swapping the ice cream for a dollop of crème fraîche or even a simple spoonful of full-fat Greek yogurt. It adds this wonderful, subtle tang that cuts through richness beautifully. That little sour note keeps the whole experience feeling balanced.
For a totally traditional French presentation, skip the heavy additions altogether. Just let the tart cool slightly, and then dust the whole thing—apples and crust alike—with just a light, ethereal coat of powdered sugar. It looks so elegant and lets the flavor of those amazing baked apples really shine through. And if you’re looking for a refreshing beverage to go alongside, this tart pairs perfectly with my recipe for sparkling honey lemonade soda!
Storage and Reheating Instructions for Leftover Apple Tart
It’s rare for us to have any leftovers when I make an **apple tart**, but when we do, storing it properly is key so it tastes just as good the next day! Since this recipe relies on that beautiful, crisp crust, we need to be smart about how we save it. If you slathered on that apricot glaze, the tart will stay looking beautiful for a day or two.
If you plan on finishing the **apple tart** in under 24 hours, you can usually keep it right on the counter under a cake dome or loosely covered with foil. Room temperature works fine for keeping that crust from getting too soft, provided your kitchen isn’t super humid. If you have more than a day left, wrap the slices tightly in plastic wrap and pop them into the fridge. It will firm up, which is normal.
Now, the reheating part is essential if you want that crust back to life! Don’t even think about the microwave unless you want a sad, chewy pastry. The best way to revive those buttery layers is in a moderate oven. I set mine to about 325°F (160°C). Wrap the slice loosely in foil and warm it through for about 8 to 10 minutes.
This short time in the oven warms the apples gently and dries out just enough surface moisture so the crust regains its lovely flake. It’s so much better than eating it cold from the fridge! If you need a delicious drink to go with your reheated slice, try mixing up a batch of my honey lemon pink soda.
Frequently Asked Questions About Making the Best Apple Tart Recipe
I know you probably have a few lingering questions! That’s totally normal when diving into a new recipe, especially one that seems as fancy as an **Elegant Apple Tart**. I’ve gathered the questions I get asked most often over email and in the comments. My goal is always to make sure you end up with a flawless result, whether you’re making a **Classic Apple Tart** or just need a super **Quick Apple Tart** for dessert tonight. If you’ve mastered this one, you might also love my avocado toast with feta for a savory change!
Can I use store-bought pastry for this apple tart?
Oh, that’s the million-dollar question! Yes, you absolutely *can* use store-bought dough, especially if you’re trying to whip up an **Easy Apple Tart** on a busy weeknight. It’s totally fine as a shortcut! However, if you want that ultimate, melt-in-your-mouth, shatteringly **Buttery Flaky Crust Dessert**, making it from scratch is worth the small effort we detailed above. Some folks prefer using pre-made puff pastry, which is great if you are specifically aiming for an **Apple Tart with Puff Pastry** variation, but for this classic French style, nothing beats that homemade fluted dough rim.
What is the best way to slice apples for a Tarte aux Pommes?
For the best texture and visual appeal in your **Tarte aux Pommes**, you must slice those apples thinly and uniformly. I aim for about 1/8 of an inch thick—just barely thicker than slicing paper if you have a mandoline, or about the width of two credit cards stacked together if you’re doing it by hand. If your slices are uneven, the thin ones turn to mush before the thick ones get tender. Uniformity equals even cooking, which helps battle the dreaded soggy bottom we talk about so much in **Fall Baking Recipes**!
If you are trying to get a super professional look, check out this amazing French cinnamon apple tart recipe online for visual guidance on arrangement. Remember, even if it looks rustic, aim for intentional slicing!
Share Your Homemade Apple Tart Creation
Seeing you create something wonderful in your kitchen is truly the best part of my job here at Taste This Plate. When you bake this **apple tart**, know you’ve joined a long line of home cooks creating moments of connection over delicious food. I genuinely hope that slicing into that buttery crust and seeing those perfectly tender, cinnamon-spiced apples brought a little bit of joy to your table.
Once you’ve enjoyed a slice (or two!), I would absolutely love to hear about it! Did you go for the simple powdered sugar dusting or did you try a rich glaze? Head down to the comments section below and leave a star rating for the recipe—that helps me know which recipes our community relies on the most. If you snap a picture of your gorgeous final product, please feel free to share it with me! Tagging me on social media lets me celebrate your baking success right along with you. If you’re ever looking to get in touch with a specific question about the dough or technique, you can always reach out via my contact page!
PrintClassic French Apple Tart (Tarte aux Pommes)

Make a beautiful and delicious French Apple Tart using simple steps. This recipe features a buttery, flaky crust and thinly sliced apples arranged for an elegant presentation, perfect for any occasion.
- Prep Time: 25 min
- Cook Time: 40 min
- Total Time: 1 hour 45 min
- Yield: 6 servings 1x
- Category: Dessert
- Method: Baking
- Cuisine: French
- Diet: Vegetarian
Ingredients
- 1 1/2 cups all-purpose flour
- 1/2 teaspoon salt
- 1/2 cup (1 stick) cold unsalted butter, cut into small cubes
- 4 tablespoons ice water
- 5 medium baking apples (like Honeycrisp or Granny Smith), peeled, cored, and thinly sliced
- 1/4 cup granulated sugar
- 1 tablespoon lemon juice
- 1 teaspoon ground cinnamon
- 2 tablespoons apricot jam or apple jelly, warmed
Instructions
- Prepare the crust: In a large bowl, whisk together the flour and salt. Cut in the cold butter using a pastry blender or your fingers until the mixture resembles coarse crumbs with some pea-sized pieces of butter remaining.
- Add the ice water one tablespoon at a time, mixing until the dough just comes together. Do not overmix. Form the dough into a disk, wrap it in plastic wrap, and chill in the refrigerator for at least 30 minutes.
- While the dough chills, prepare the apples: In a medium bowl, gently toss the thinly sliced apples with the granulated sugar, lemon juice, and cinnamon. Set aside.
- Preheat your oven to 375°F (190°C). Lightly flour a work surface. Roll out the chilled dough into a rough 12-inch circle. Carefully transfer the dough to a baking sheet lined with parchment paper.
- Arrange the apple slices over the dough, leaving a 1 1/2-inch border around the edge. You can overlap them in concentric circles for a classic look. Fold the dough border up and over the edge of the apples to create a rustic rim.
- Bake for 35 to 45 minutes, or until the crust is golden brown and the apples are tender.
- While the tart is still warm, gently brush the warmed apricot jam or jelly over the apples for shine and flavor.
- Let the apple tart cool slightly on the baking sheet before slicing and serving.
Notes
- For a crisp bottom crust, place the baking sheet in the oven while it preheats.
- Use firm apples that hold their shape well during baking to prevent a soggy tart.
- If you prefer a richer flavor, substitute 1 tablespoon of the cold water with 1 tablespoon of cold vodka when making the dough.
- Serve this classic apple tart warm with a scoop of vanilla ice cream for a simple dessert experience.
Nutrition
- Serving Size: 1 slice
- Calories: 350
- Sugar: 18
- Sodium: 150
- Fat: 18
- Saturated Fat: 11
- Unsaturated Fat: 7
- Trans Fat: 0
- Carbohydrates: 45
- Fiber: 3
- Protein: 4
- Cholesterol: 45