
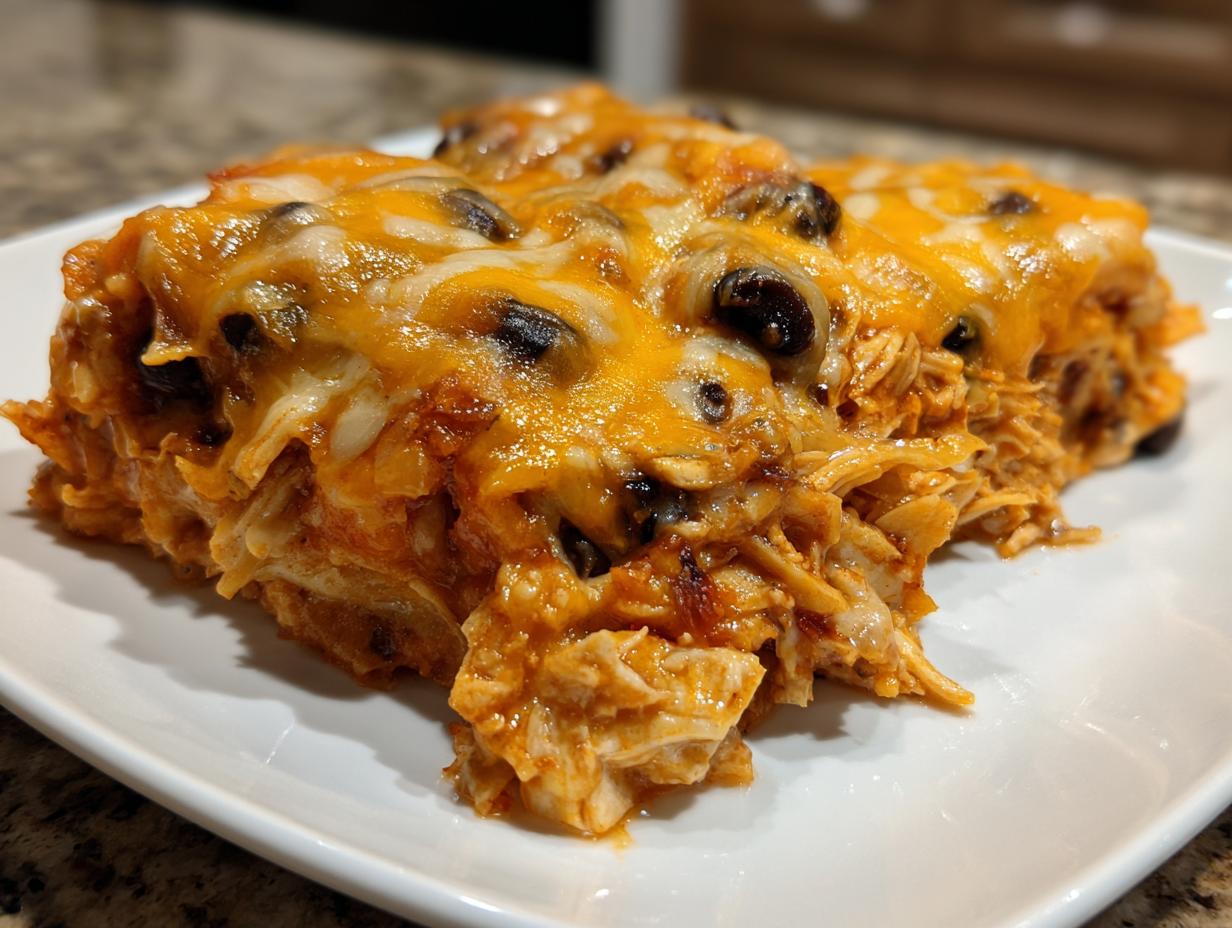
There’s just nothing that hits the spot quite like honest, comforting Tex-Mex flavor, is there? When the week is long and you need dinner on the table fast without ending up with a mountain of dishes, I lean hard on my simplest recipes. That’s exactly why I developed this Chicken Burrito Bake—it’s cheesy, hearty, and truly a one-pan dinner winner after we use the skillet to build the base! I’m Kate Reilly, and here at Taste This Plate, we focus on recipes you can trust to come out perfectly every time, even when you’re tired. This layered casserole dish brings all those amazing burrito fillings together beautifully. It’s truly the easy, family-friendly casserole you’ve been needing for those busy Tuesday nights!
- Why This Chicken Burrito Bake Recipe Works for Weeknights
- Gathering Ingredients for Your Cheesy Burrito Bake
- Step-by-Step Instructions for the Ultimate Burrito Bake
- Tips for Success with Your Chicken Burrito Bake
- Make-Ahead and Freezer Friendly Burrito Bake Instructions
- Serving Suggestions for This Hearty Burrito Dinner
- Storage and Reheating the Baked Tortilla Casserole
- Frequently Asked Questions About the Burrito Bake Recipe
- Nutritional Estimate for This Comfort Food Casserole
- Share Your Simple Weeknight Bake Creation
Why This Chicken Burrito Bake Recipe Works for Weeknights
When I set out to create this easy burrito bake, my main focus was cutting down on chaos. We all want big flavor, but who has time for washing five different bowls after a long day? This recipe is built for life, meaning it’s trustworthy and works beautifully even if you’re trying a new technique on a Tuesday night. It’s a fantastic simple weeknight bake! You can find more ideas like this in my collection of Main Dishes.
- It requires minimal hands-on time—you cook the base, assemble, and walk away while it bakes.
- It’s freezer friendly, meaning you can make it now for a dinner next month.
- It uses accessible, standard grocery store ingredients that I know you already have on hand.
One-Pan Simplicity for Easy Cleanup
See, I told you I wanted to cut down on dishes! While we use a skillet first to build up all that wonderful flavor by softening the onions and heating the filling, the final step is transferring everything to one 9×13 dish. That means only two dishes to wash once your family is fed and happy.
Family Friendly Casserole Appeal
This hits that perfect spot where comfort food meets exciting flavors. Everyone loves a family friendly casserole, and because this features layers of tortillas, chicken, and tons of melted cheese, I promise there won’t be any complaints—even from the pickiest eaters at your table. It tastes like a party in a dish!
Gathering Ingredients for Your Cheesy Burrito Bake
Trust me, getting your ingredients together first—what we call ‘mise en place’ in the fancy cooking world—is half the battle won, especially for this cheesy burrito bake. When everything is prepped, you just pour and stir, and before you know it, dinner is ready! I’ve listed everything you need below. Keep your eyes peeled for those little prep notes; they make a huge difference in the final texture. If you’re planning on making a side salad or some roasted veggies to go with this, you can check out my favorite Side Dish recipes!
Here’s your complete ingredient shopping list for this satisfying bake:
- 1 tablespoon olive oil (just standard stuff!)
- 1 pound boneless, skinless chicken breasts, which need to be fully cooked and shredded before we start.
- 1 medium onion, chopped finely.
- 1 (15 ounce) can black beans, make sure they are thoroughly rinsed and drained well.
- 1 (10 ounce) can diced tomatoes and green chilies (don’t drain these—we want that sauce!).
- 1 (10.5 ounce) can condensed cream of chicken soup.
- 1 cup water or chicken broth (I prefer broth for extra depth!).
- 1 packet (1 ounce) taco seasoning mix.
- 1 cup cooked white rice (leftover rice works perfectly here!).
- 8 small flour tortillas, and here’s the trick: cut them into 1-inch pieces.
- 2 cups shredded Monterey Jack or Mexican blend cheese, divided (you’ll use some inside and some on top!).
- 1 teaspoon ground cumin.
Step-by-Step Instructions for the Ultimate Burrito Bake
Now for the fun part! Turning those lovely ingredients into our ultimate burrito bake is surprisingly quick. Since everything is already cooked or canned, we are mostly just combining things and heating them through before baking. Remember, my goal is simple, trustworthy home cooking, so don’t rush the early steps!
Preparing the Base Mixture
First things first, make sure your oven is ready to go! Preheat it to 375 degrees F and lightly grease a 9×13 inch baking dish—get that ready now so you don’t forget later. Heat your olive oil in a big skillet over medium heat. Toss in that chopped onion and let it cook down until it’s nice and softened, usually about 5 minutes; we don’t want any crunch left!
Next, dump in the shredded chicken, those rinsed black beans, the undrained tomatoes and green chilies, the cream of chicken soup, your liquid (broth or water), the taco seasoning, and the cumin. Stir this whole mess up until it’s fully combined and heated through, about 5 minutes. Now for my tip: When you stir this filling, really take a moment to ensure that thick condensed soup is totally dissolved into the broth and seasonings *before* you add the rice next. If it’s patchy, it won’t coat the rice nicely later!
Remove the skillet from the heat. Stir in the cooked rice and half (that’s 1 cup!) of your shredded cheese until it just barely comes together. Don’t overmix it at this stage; we want to keep things light!
Layering and Baking the Burrito Casserole
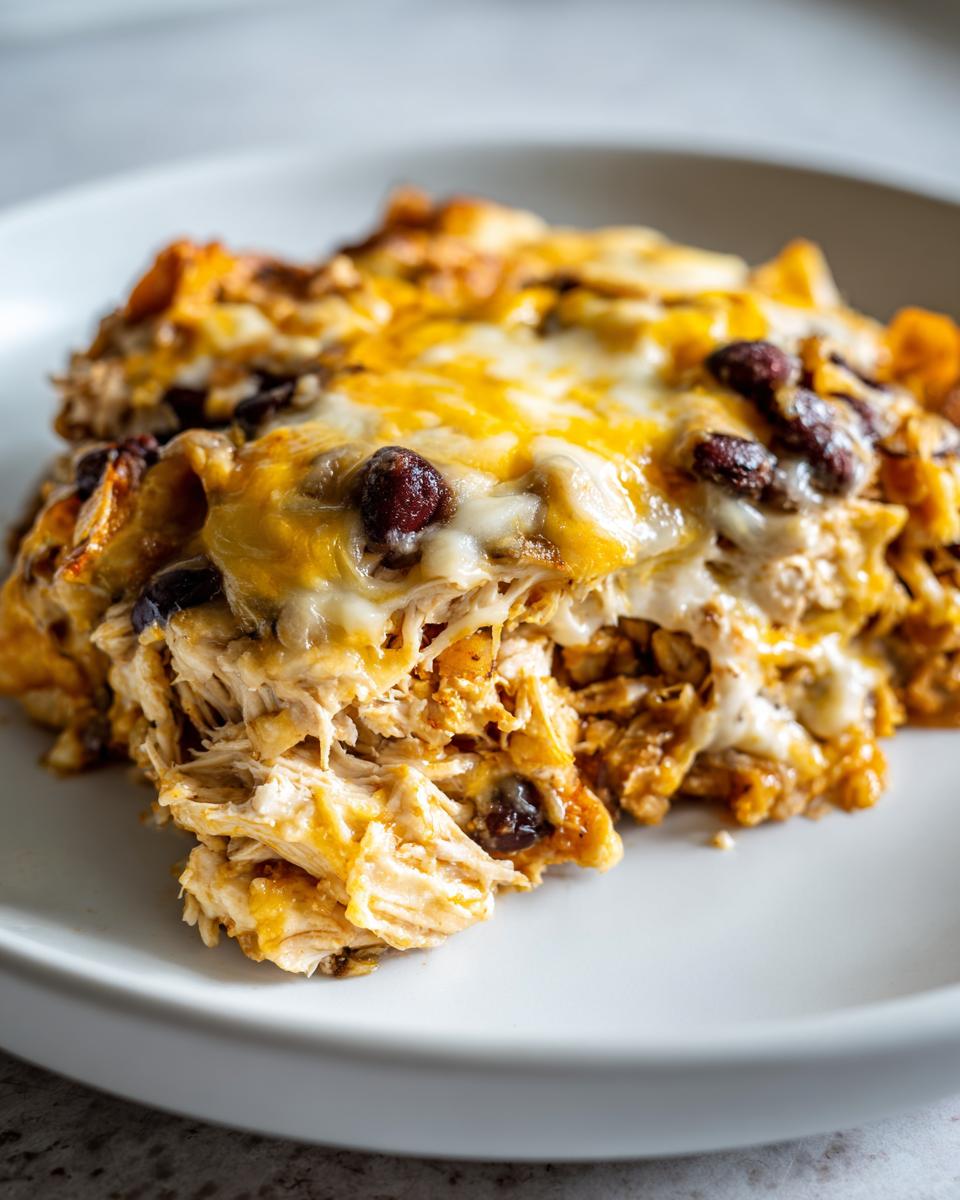
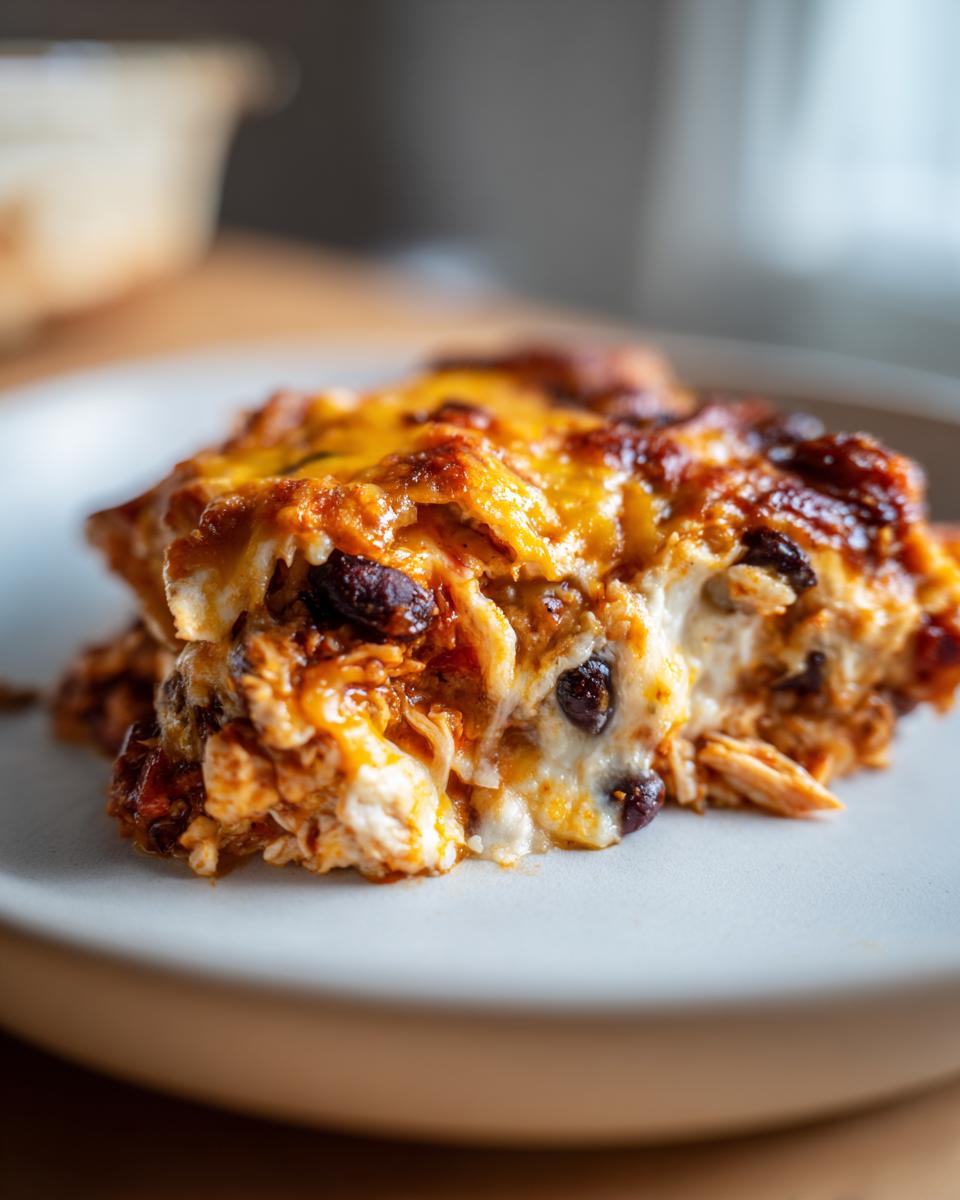
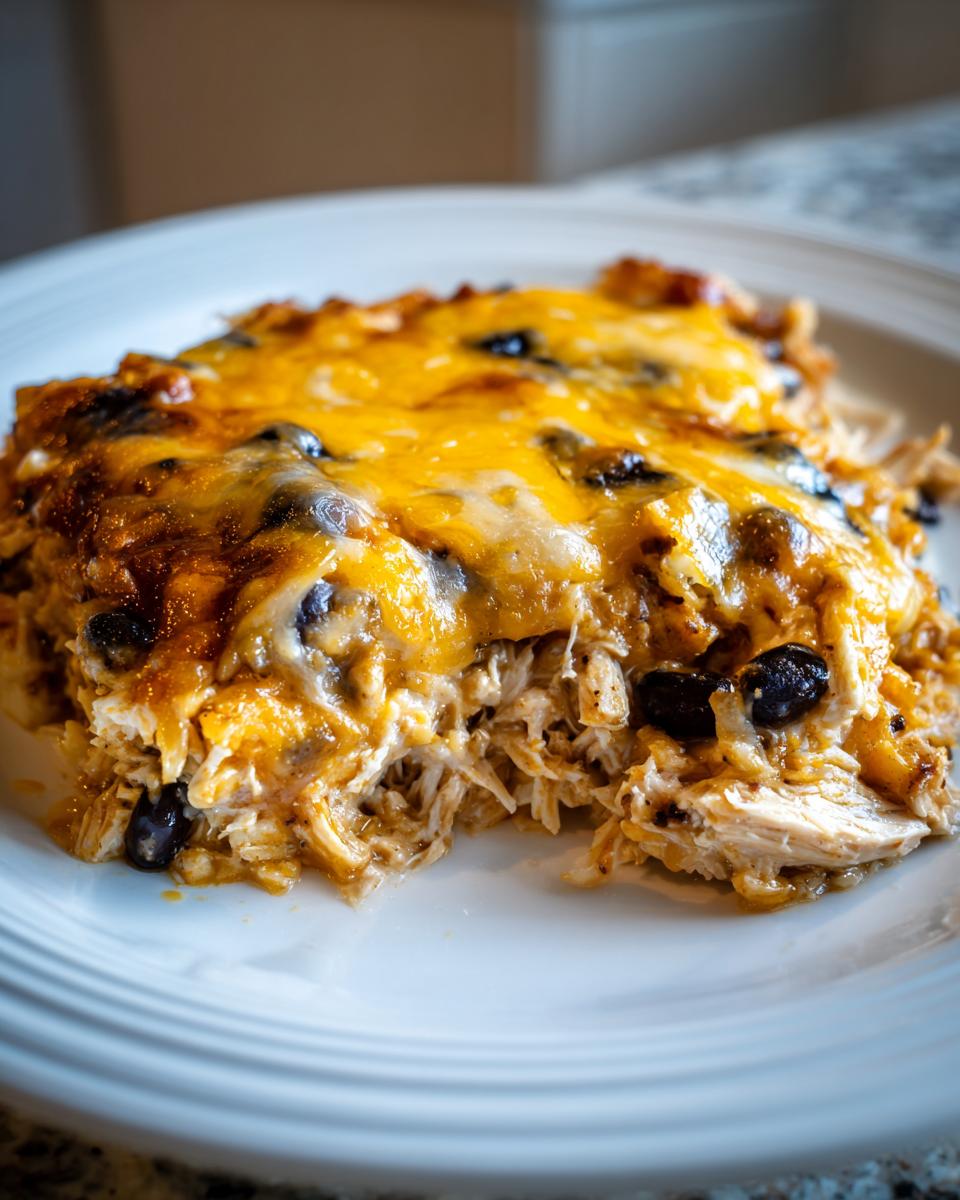
This is where the casserole magic happens! Take half of those chopped-up tortillas and spread them out evenly on the bottom of your prepared baking dish. Don’t worry about perfect coverage; they’ll puff up. Spoon half of your warm chicken mixture right over those tortillas. Then, sprinkle on about half of the remaining cheese—that’s about 1/2 cup of cheese right there.
We repeat! Place the rest of your tortilla pieces on top of that layer, followed by the rest of the chicken mixture, and finally, top the whole thing with the last bit of cheese. Pop it into the oven for 20 to 25 minutes. You’ll know it’s done when it’s bubbly all over and that top layer of cheese is perfectly melted and starting to look golden brown. One last crucial step: Let that beautiful burrito casserole stand for 5 minutes when it comes out. This lets it settle so it doesn’t collapse when you serve it!
You can check out more satisfying recipes like this over at my Main Dishes section when you have a moment!
Tips for Success with Your Chicken Burrito Bake
Even with a super simple recipe like this delicious chicken burrito bake, having a few tricks up your sleeve can elevate it from a Tuesday night dinner to something truly special. Since we are aiming for food that tastes like it took hours but really only took about 40 minutes, knowing these little insider secrets makes all the difference. These proven tips and swaps ensure you get that perfect, hearty texture every single time you serve it.
Ingredient Swaps: Beef Burrito Bake Option
I always build my base recipe around chicken because it’s so lean, but you absolutely do not have to stick with it! If you’re craving something a little richer, substituting ground beef is a fantastic option. If you go this route to make a beef burrito bake, just make sure you brown one full pound of ground beef in your skillet first, right when you melt the oil and before you add the onion.
The most important part of using beef, though, is draining off all that excess fat once it’s browned. We want the flavor, but we don’t want a greasy layer floating on top of our casserole! Once that fat is poured off, you can usually add your onions right into the same pan and keep moving along with the recipe as written.
Flavor Boosters for Your Easy Mexican Casserole
While the taco seasoning we use brings plenty of flavor to this easy Mexican casserole, sometimes I feel like it needs just a little extra pep right before it goes into the oven. If your family likes a touch of heat, feel free to stir in a tablespoon of your favorite mild or medium salsa right into the filling before you begin layering. That deepens the flavor beautifully.
Another thing I love to do is keep the toppings simple but fresh. After the casserole comes out of the oven and the cheese is all bubbly, I love topping it with a shower of fresh cilantro and a dollop of sour cream or a drizzle of plain Greek yogurt. That fresh green note cuts through the richness of the cheese! Trust me, these little additions take zero extra time but make the presentation feel so much more finished.
Make-Ahead and Freezer Friendly Burrito Bake Instructions
If you’ve been following along, you know this Chicken Burrito Bake is perfect for weeknights, but what about those weeks when you *know* you won’t have time to cook? That’s where the magic of making things ahead comes in! I love setting myself up for success, and this casserole is absolutely phenomenal as a freezer friendly burrito bake. It’s one of those comforting dishes that tastes just as good when reheated as it does fresh from the oven.
Getting this ready for the freezer is simple. You just assemble the entire dish exactly as you would if you planned on baking it right away, but you stop right before it hits the heat. Make sure you use a sturdy, freezer-safe 9×13 dish. Once it’s layered—tortillas, filling, cheese; repeat; top with final cheese—cover it tightly with plastic wrap, and then wrap the whole thing again in aluminum foil. This double layer prevents any freezer burn from sneaking in and ruining that cheesy top!
When you’re ready to bake it from frozen, you need to plan for a little extra time, but don’t worry, the oven does the work! Thaw it overnight in the refrigerator first, just like I mentioned in the notes. If you skip the thaw, you’ll need to add about 10 to 15 minutes to the baking time I listed. Keep it covered with foil for the first chunk of the cook time to let it heat evenly, and then pull the foil off for those last 15 minutes so that top layer of cheese gets golden and bubbly like we want!
I have a whole post about handling different meal prep routines for dishes that need baking, which might help you organize your week! You can read more about planning around meals like Sheet Pan Eggs and Sandwiches for inspiration.
Serving Suggestions for This Hearty Burrito Dinner
This hearty burrito dinner is fantastic all on its own, right out of the pan, but toppings are where we really let our personalities shine, don’t you think? Since this is such a rich, comforting casserole with all that melted cheese and creamy soup base, the best partners are those that add a little brightness, crunch, or tang to balance things out. You don’t need elaborate sides when the main dish is this satisfying!
For immediate serving, I always set out a little topping bar. Even if you’re just feeding the family, watching everyone customize their piece is fun! A cold dollop of sour cream or Greek yogurt is a must—it cools down the heat and mixes beautifully with the spiced filling.
Here are my favorite easy additions that turn this bake into a complete, colorful meal:
- Salsa Power: Don’t skip a fresh pico de gallo or a jarred salsa. The acidity brightens the whole dish.
- The Green Stuff: Fresh avocado, chopped, or our homemade Creamy Avocado Sauce if you want that richness dialed up even more!
- Crunch Factor: Thinly sliced radishes give an unexpected, peppery crunch, and crushed tortilla chips sprinkled on top just before serving add texture.
If you want a lighter side dish to balance out all that cheesy goodness, keep it simple. I often serve this with a quick, crisp side salad—nothing heavy, maybe just greens tossed with a lime vinaigrette. Check out my favorite Salad Recipes for simple ideas that won’t overpower the bake. Honestly, though, a slice of this casserole with some fresh toppings is often enough for a perfect, satisfying weeknight meal!
Storage and Reheating the Baked Tortilla Casserole
Okay, let’s talk realistically: sometimes, even after we’ve made the most incredible dinner, there are leftovers! And isn’t that the best part of cooking? Knowing you have guaranteed lunch or dinner waiting for you tomorrow? This baked tortilla casserole stores beautifully, but how you reheat it makes all the difference between a great leftover and one that tastes sad and dried out. We want great leftovers, always!
When you have leftovers of this burrito bake, the main goal when storing is protecting that moisture we worked so hard to build in the layers. Once the casserole has cooled down completely—and I mean *completely*—cut your desired portions. Store them in airtight containers. You can keep these leftovers safely in the refrigerator for about three to four days. Don’t leave them sitting on the counter too long, especially with all that delicious cheese and creamy soup base!
When it comes time to bring it back to life, you have two main paths, and your choice depends on how quickly you need it and how much texture you want to preserve.
Reheating in the Microwave (For Speed)
If you are in a huge rush, the microwave is your friend, but you have to be gentle! Microwaves are fantastic for heating quickly, but they can turn the tortillas rubbery or make the cheese oily if you crank the power too high. I suggest taking out a single serving and placing it on a microwave-safe plate. Cover it loosely with a damp paper towel before heating. This little trick adds needed steam back into the food. Heat it up in short 30 to 45-second bursts until it’s steaming hot all the way through. It won’t get that crispy top back, but it’ll be warm and comforting!
Reheating in the Oven (For Best Texture)
For the absolute best results, especially if you’re reheating a larger leftover portion, the oven is the way to go. It allows the casserole to warm evenly and brings a little bit of life back to the top layer. Preheat your oven (or toaster oven) to 350 degrees F. Place your portion in a small, oven-safe dish.
Here’s the key: cover the dish tightly with foil before placing it in the oven. This traps the steam and prevents the edges from drying out while the inside heats up. Bake for about 15 to 20 minutes, or until everything is hot. Right before serving, you can pull the foil off for the last five minutes. That little blast of direct heat will re-melt the cheese just perfectly!

Frequently Asked Questions About the Burrito Bake Recipe
I know that diving into a new casserole recipe, even an easy one, can bring up a few questions! That’s completely normal, and I’m here to help you feel confident about every step. Getting the layers just right in this burrito bake is simple once you know the little tricks. We want to make sure this turns out exactly like the perfect comfort food casserole you imagined—cheesy, warm, and satisfying!
Can I make this a beef burrito bake instead of chicken?
Oh, absolutely you can! If you prefer ground beef over the chicken thighs, please go right ahead. Remember what I preached above? You can easily switch this to a beef burrito bake. The key is to brown one full pound of ground beef in your large skillet first, right when the oil is hot. Once the beef is fully cooked through, you must drain off any excess grease. Seriously, don’t skip the draining step! After that, just toss the onion in with the beef grease you have left, and proceed with the recipe exactly as written. It makes for an equally amazing hearty burrito dinner!
What is the best way to prevent the top from burning during the bake?
This is such a good, practical question, because we want that cheese melted and bubbly, but not black and crunchy before the middle is hot! Because this is a layered casserole and takes a little time for the heat to penetrate all those tortilla layers, sometimes the top cheese can brown too quickly. If you notice your cheese getting deeply golden before the 15-minute mark—and trust me, sometimes my oven is very enthusiastic—just grab a piece of aluminum foil.
Loosely tent that foil over the top of the casserole dish. This shields the cheese slightly while allowing the heat to flow underneath and finish cooking the center layers. Once you’re about 5 minutes from being done, pull the foil off so the cheese can get that beautiful golden finish we all love. Easy peasy!
Can I use my own homemade taco seasoning?
Yes, please do! Using a packet is for pure speed, but if you prefer controlling the salt and spice level yourself, I highly encourage your own blend. If you are making your own seasoning, you’ll likely need about 3 tablespoons total to equal that flavor punch from the 1-ounce packet. Make sure you taste your mixture before adding it in, as homemade blends can vary widely in salt content.
Do I have to layer the tortillas, or can I just mix them in?
You *can* mix them in, but I strongly advise against it if you want the best texture! Mixing them thoroughly makes the dish more like bread pudding than a layered bake. When you layer them—tortillas on the bottom, then filling, then cheese, and repeating—you create those distinct, softer pockets of bread interspersed with the creamy filling. When you cut into the slice, those layers hold their shape. That layering is what keeps this from feeling like ‘slop’ and more like a structured, satisfying baked tortilla casserole. It’s worth the extra 30 seconds of assembly time, I promise!
If you’re looking for quick add-ins or other fun things to snack on while this bake is in the oven, you should check out my archive of Appetizers and Snacks!
Nutritional Estimate for This Comfort Food Casserole
Now, I have to preface this by saying I am far more passionate about making sure dinner tastes amazing than I am about counting every single macro! We believe in home-cooked food that brings people together, not food tracking. However, since many of you ask about the basics just to plan a balanced meal, I pulled the general estimates from the standardized recipe breakdown we used to test this comfort food casserole.
Please remember that these numbers are just an approximation based on the exact quantities listed above and standard grocery product assumptions. If you use extra-fatty beef, an industrial amount of sour cream on top, or different beans, your totals will change! We aren’t dietitians here at Taste This Plate; we are just cooks who love good food, so use this as a guideline, not an absolute fact!
Here is the estimated breakdown for one serving:
- Serving Size: 1 serving
- Calories: 550
- Fat: 24g
- Protein: 35g
- Carbohydrates: 52g
- Sodium: 950mg (This is where that packaged seasoning can add up, so keep that in mind!)
This makes for a wonderfully hearty burrito dinner that keeps you full! If you are focused on keeping the sodium lower, swapping out the packaged taco seasoning for your own blend is the single biggest thing you can do to manage those levels.
Share Your Simple Weeknight Bake Creation
Well, there you have it! From start to finish, that’s how I put together what I truly consider the best burrito bake on the internet—or at least, the one that fits perfectly into my chaotic, real-life schedule. This simple weeknight bake is designed to be a winner, and now that you’ve made it, I truly want to hear all about it!
We believe that great cooking is a conversation, not a lecture here at Taste This Plate. Your experience matters! Did you try it with ground beef? Did you add extra jalapeños? Did your family devour every last cheesy bite? Please, don’t keep those brilliant ideas to yourself!
Take a moment to leave a rating below. Five stars if it saved your weeknight, but be honest about what you loved and what you might change next time. Seeing your ratings and comments helps me know which recipes to test and refine even further for all of you busy home cooks!
If you have any specific questions or want to share a photo of your beautiful creation, you can always reach out through my Contact Page. I read every single message. Thank you so much for letting this family friendly casserole into your kitchen. Happy cooking, everyone!
PrintEasy One-Pan Chicken Burrito Bake Casserole

Create a hearty, family-friendly Chicken Burrito Bake using simple ingredients. This one-pan casserole delivers all the cheesy, bold flavors of your favorite burritos in a comforting, easy-to-make dish perfect for weeknight dinners or meal prep.
- Prep Time: 15 min
- Cook Time: 25 min
- Total Time: 40 min
- Yield: 6 servings 1x
- Category: Dinner
- Method: Baking
- Cuisine: Tex-Mex
- Diet: Vegetarian
Ingredients
- 1 tablespoon olive oil
- 1 pound boneless, skinless chicken breasts, cooked and shredded
- 1 medium onion, chopped
- 1 (15 ounce) can black beans, rinsed and drained
- 1 (10 ounce) can diced tomatoes and green chilies, undrained
- 1 (10.5 ounce) can condensed cream of chicken soup
- 1 cup water or chicken broth
- 1 packet (1 ounce) taco seasoning mix
- 1 cup cooked white rice
- 8 small flour tortillas, cut into 1-inch pieces
- 2 cups shredded Monterey Jack or Mexican blend cheese, divided
- 1 teaspoon ground cumin
Instructions
- Preheat your oven to 375 degrees F. Lightly grease a 9×13 inch baking dish.
- Heat the olive oil in a large skillet over medium heat. Add the chopped onion and cook until softened, about 5 minutes.
- Add the shredded chicken, black beans, diced tomatoes and green chilies, cream of chicken soup, water or broth, taco seasoning, and cumin to the skillet. Stir well to combine.
- Cook the mixture for about 5 minutes, stirring occasionally, until heated through.
- Remove the skillet from the heat. Stir in the cooked rice and half (1 cup) of the shredded cheese until just combined.
- Spread half of the tortilla pieces evenly over the bottom of the prepared baking dish.
- Spoon half of the chicken and rice mixture over the tortillas. Sprinkle with half of the remaining cheese (about 1/2 cup).
- Repeat the layers: remaining tortilla pieces, remaining chicken mixture, and the final layer of cheese.
- Bake for 20 to 25 minutes, or until the casserole is bubbly and the cheese is melted and lightly golden brown.
- Let the burrito bake stand for 5 minutes before serving. Serve with your favorite toppings like salsa or sour cream.
Notes
- This recipe works well for freezer-friendly meal prep. Assemble the casserole completely, cover tightly, and freeze before baking. Thaw overnight in the refrigerator before baking as directed, adding 10-15 minutes to the bake time.
- You can substitute ground beef for the chicken. Brown 1 pound of ground beef with the onion, drain any excess fat, and proceed with the recipe.
- For a richer flavor, use 1 cup of shredded cheddar cheese mixed with the Monterey Jack cheese.
Nutrition
- Serving Size: 1 serving
- Calories: 550
- Sugar: 6
- Sodium: 950
- Fat: 24
- Saturated Fat: 11
- Unsaturated Fat: 13
- Trans Fat: 1
- Carbohydrates: 52
- Fiber: 6
- Protein: 35
- Cholesterol: 95