
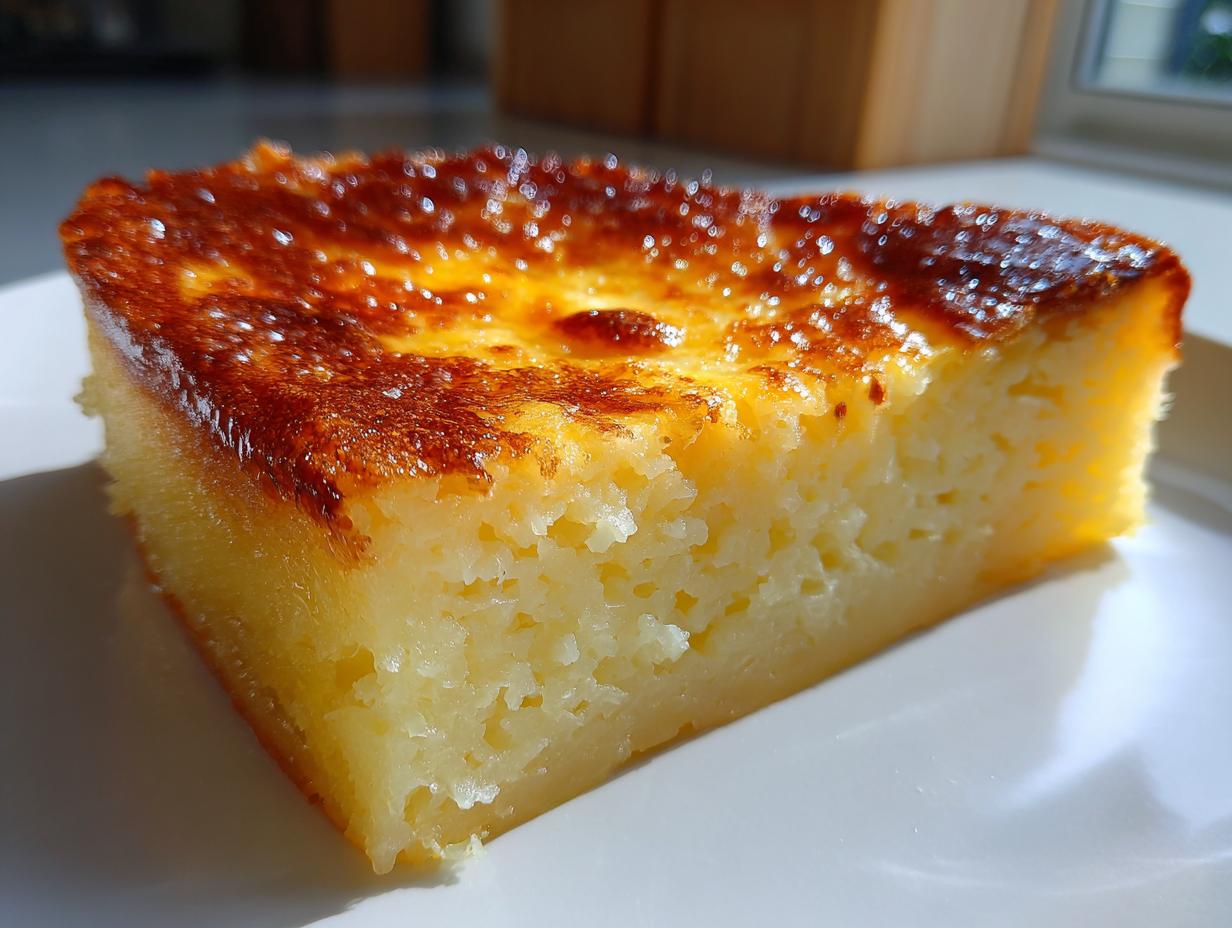
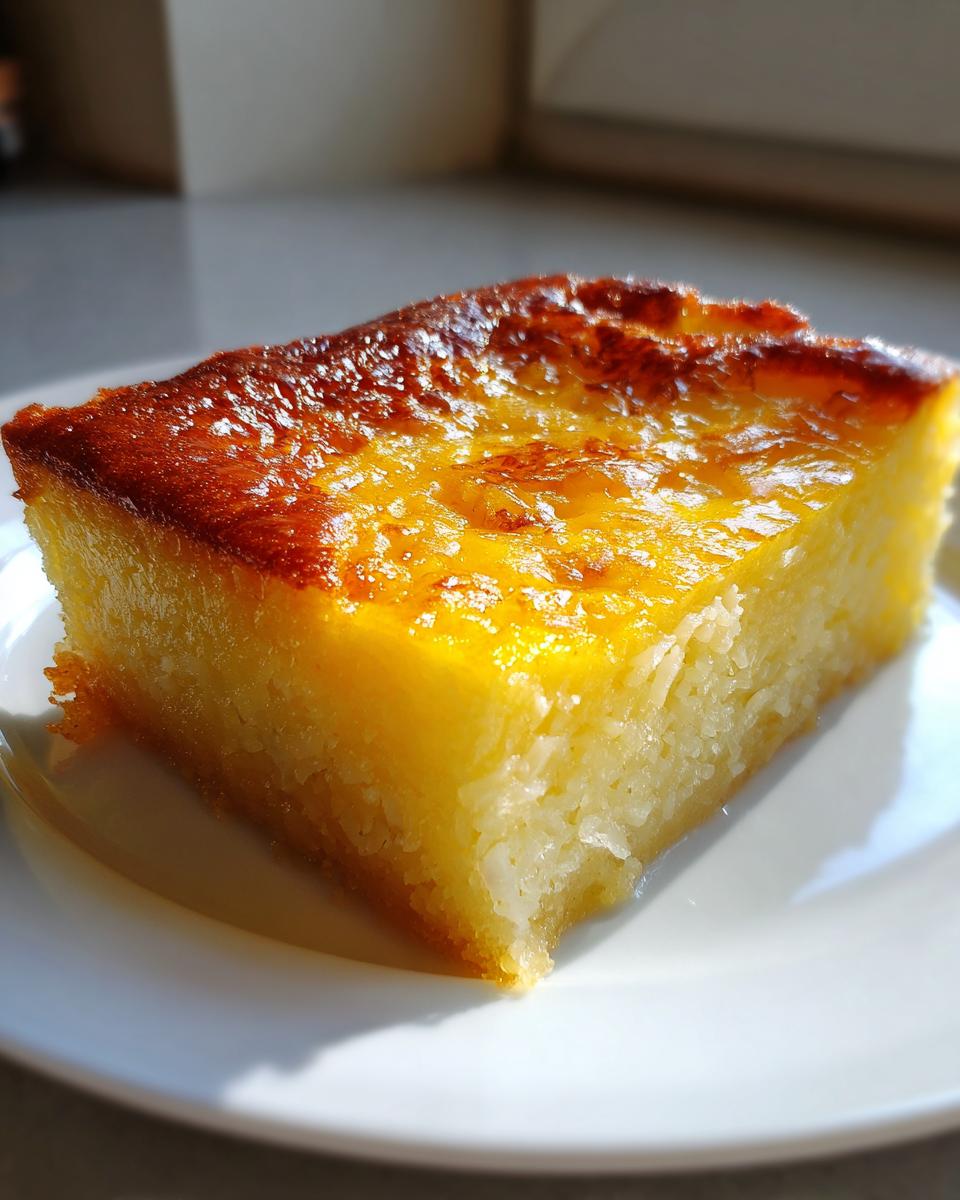
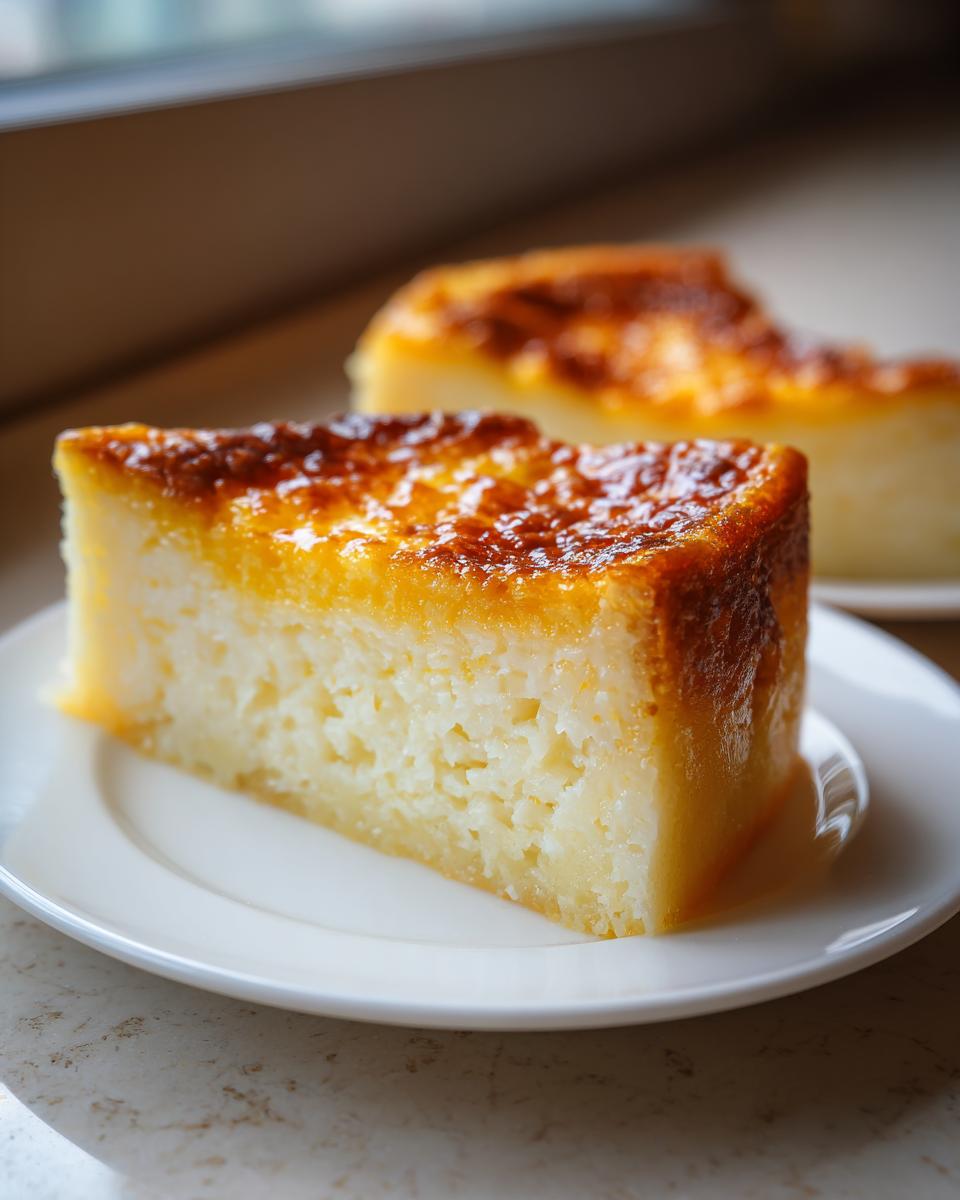
When I think about deeply satisfying, stick-to-your-ribs desserts, my mind immediately goes straight to tropical flavors. There’s something so comforting about rich coconut milk when it’s baked into a dense, chewy treat. That’s where this truly amazing Filipino Cassava Cake comes in! I promise you, friends, this is genuinely the easiest, creamiest recipe you will ever try, even if you’re just starting out your baking journey. My mission here at the table is always to strip away the complication, and this dessert proves you don’t need a dozen fussy steps to create something memorable. This recipe uses simple ingredients to achieve that perfect moist texture everyone chases. If you’ve been looking for a fantastic new dessert to share, you’ve found it. You can check out some other great sweets on our desserts page!
- Why This Easy Cassava Cake Recipe Works for You
- Gathering Ingredients for Your Homemade Cassava Cake
- Step-by-Step Guide to Making the Best Cassava Cake Recipe
- Tips for Achieving a Perfect Creamy Cassava Cake
- Variations on the Classic Cassava Cake
- Serving Suggestions for Your Tropical Cake Ideas
- Storage and Reheating for Your Cassava Cake
- Frequently Asked Questions About Cassava Cake
- Sharing Your Experience Making This Cassava Cake
Why This Easy Cassava Cake Recipe Works for You
I know what you’re thinking: Cassava cake sounds complicated. But honestly, this recipe cuts right through the noise! We’ve tested this relentlessly to make sure you get flawless results, which is why I stand by it.
- It delivers that coveted creamy cassava cake texture without any fuss.
- The steps are simple, and we focus on accessible ingredients you can find without a specialty trip.
- We nail that perfect balance of sweet base meeting the slightly savory contrast of the cheese topping (if you choose to use it!).
- Most importantly? This bake guarantees you a wonderfully Chewy Cassava Cake every single time.
Gathering Ingredients for Your Homemade Cassava Cake
Okay, the fun part! Getting the ingredients ready is half the battle, and trust me, these items are staples you’ll likely repeat using in other great appetizer recipes, too. I’ve broken them down so you can easily check your pantry. Remember, for that rich flavor, nothing beats using the full-fat coconut milk—don’t skimp on the richness here!
For the Creamy Cassava Cake Base
- 3 cups grated cassava (Get this fresh or thawed from frozen, but squeeze out that extra water!)
- 1 can (13.5 oz) full-fat coconut milk (This is non-negotiable for creaminess!)
- 1 can (14 oz) sweetened condensed milk
- 1/2 cup granulated sugar
- 1/4 cup melted unsalted butter, plus extra for greasing the pan
- 2 large eggs
- 1 teaspoon vanilla extract
- 1/2 cup macapuno strings (sweet coconut strings, only if you want that extra wonderful texture!)
For the Golden Custard Topping
This layer is what takes the cassava cake from good to “Where has this been all my life?”
- 1/4 cup all-purpose flour (We use this to help the topping set nicely.)
- 1/4 cup granulated sugar (For the topping’s sweetness.)
- 1/2 cup coconut milk (Use the leftover bits from your base can if you have any!)
- 1 large egg yolk (Just the yolk; this gives it that beautiful golden color.)
- 1/2 cup shredded sharp cheddar cheese (Totally optional, but this is the key to that classic sweet and savory experience!)
Step-by-Step Guide to Making the Best Cassava Cake Recipe
We need to make this happen in two stages, so setting up your oven first is key. We aren’t rushing anything here, but we’re moving efficiently! This process is what guarantees you get that rich, moist cassava cake texture that melts in your mouth.
Preparing the Base and First Bake
First things first: get that oven going! Preheat it to 350°F (175°C). While it heats up, grease and line your 8×8 inch baking pan—parchment paper is our best friend for easy cleanup. In one big bowl, just mix everything for the base together: grated cassava, coconut milk, condensed milk, sugar, melted butter, eggs, and vanilla. If you are using the macapuno, toss it in now and mix it until it looks like one happy, thick batter. Pour it into your prepared pan and slide it in for 45 to 55 minutes. You are looking for the edges to start looking set and just beginning to turn golden.
Creating the Creamy Cassava Cake with Custard Topping
While that base is doing its thing, let’s tackle the topping! In a separate small bowl, whisk together the flour, the extra 1/4 cup of sugar, the 1/2 cup of coconut milk, and that single egg yolk until it’s totally smooth—no lumps allowed! Once your base is mostly baked, pull it out carefully. Gently pour and spread that custard mixture right over the top of the hot cake. Now, sprinkle your cheese on top if you’re going for that sweet and savory vibe. Pop it back in the oven for another 15 to 20 minutes. You want that custard to look perfectly set and beautifully golden brown. For more baking inspiration, check out my recipe for Chocolate Bourbon Pecan Pie!
Cooling for Perfect Texture
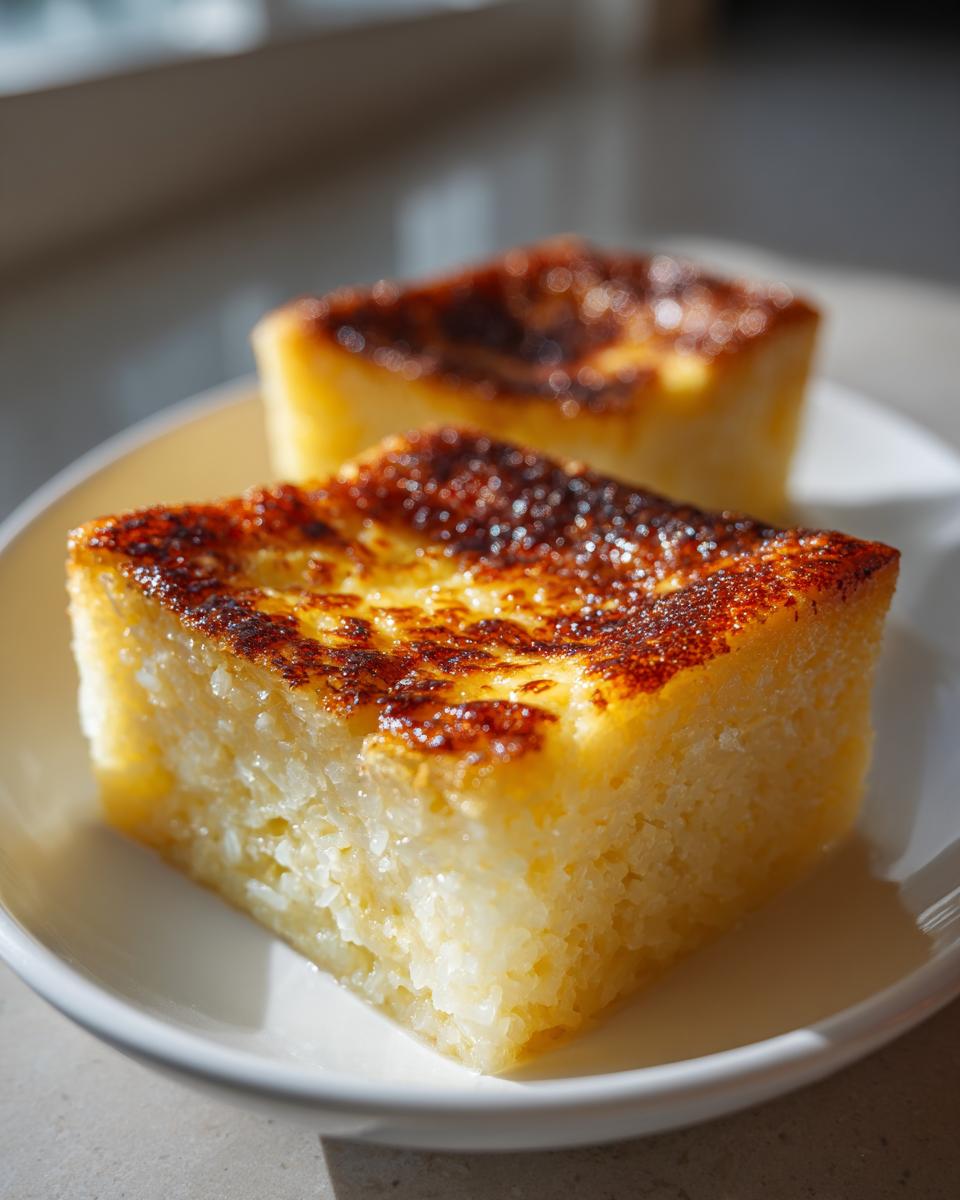
Now, this is where patience really pays off, so don’t skip this! You absolutely must let this cake cool completely in the pan before you go near it with a knife. If you try to slice it warm, it’s going to crumble because the structure hasn’t stabilized yet. For the ultimate, satisfyingly chewy cassava cake texture—the kind that makes you close your eyes—I actually recommend chilling it for at least two hours. Seriously, trust me on this one; the texture firms up so wonderfully! If you want to see how a pro handles theirs, check out this recipe as well.
Tips for Achieving a Perfect Creamy Cassava Cake
Since we are aiming for that ultra-creamy result you see in the best photographs, let’s talk about handling the main ingredient. If you’re using frozen grated cassava—because who has time to grate fresh cassava all day?—you absolutely must make sure it’s completely thawed. Then, here’s the real secret: squeeze out as much watery liquid as you possibly can! Too much water will make your base soupy instead of thick, and we definitely don’t want that.
Also, when we talk about richness, I love tweaking things just a touch. If you want an even more luxurious mouthfeel for your Filipino Cassava Cake Recipe, try swapping a quarter cup of the condensed milk with heavy cream. It sounds decadent, but it really elevates that creamy factor. If you want to explore another rich coconut treat, you might want to see my trick for Red Velvet Cheesecake!
For those of you who went all-in on the macapuno, make sure those sweet coconut strings are well-distributed throughout the base batter so you get a little sweet surprise mixed in with every bite. And if you are curious about a great recipe that features macapuno heavily, check out this one from Dishes Tasty.
Variations on the Classic Cassava Cake
While this base recipe gives you that incredible, traditional Filipino Cassava Cake flavor, I love seeing what everyone whips up next! Don’t be afraid to play around a little bit after you’ve mastered the basics. That sharp cheddar cheese on top is popular, but if you want something tangier, try using Monterey Jack or even a mild Queso de Bola for a different kind of salty kick.
For a brighter flavor profile in your sweet cassava dessert, zest about one teaspoon of lime or orange into the base batter before baking. That little bit of citrus really cuts through the richness of the coconut milk beautifully. And honestly, if you can’t find macapuno strings, don’t stress! You can substitute them with finely shredded, unsweetened coconut flakes, though you might want to soak those flakes in a little warm water first just to keep them soft during the bake.
Serving Suggestions for Your Tropical Cake Ideas
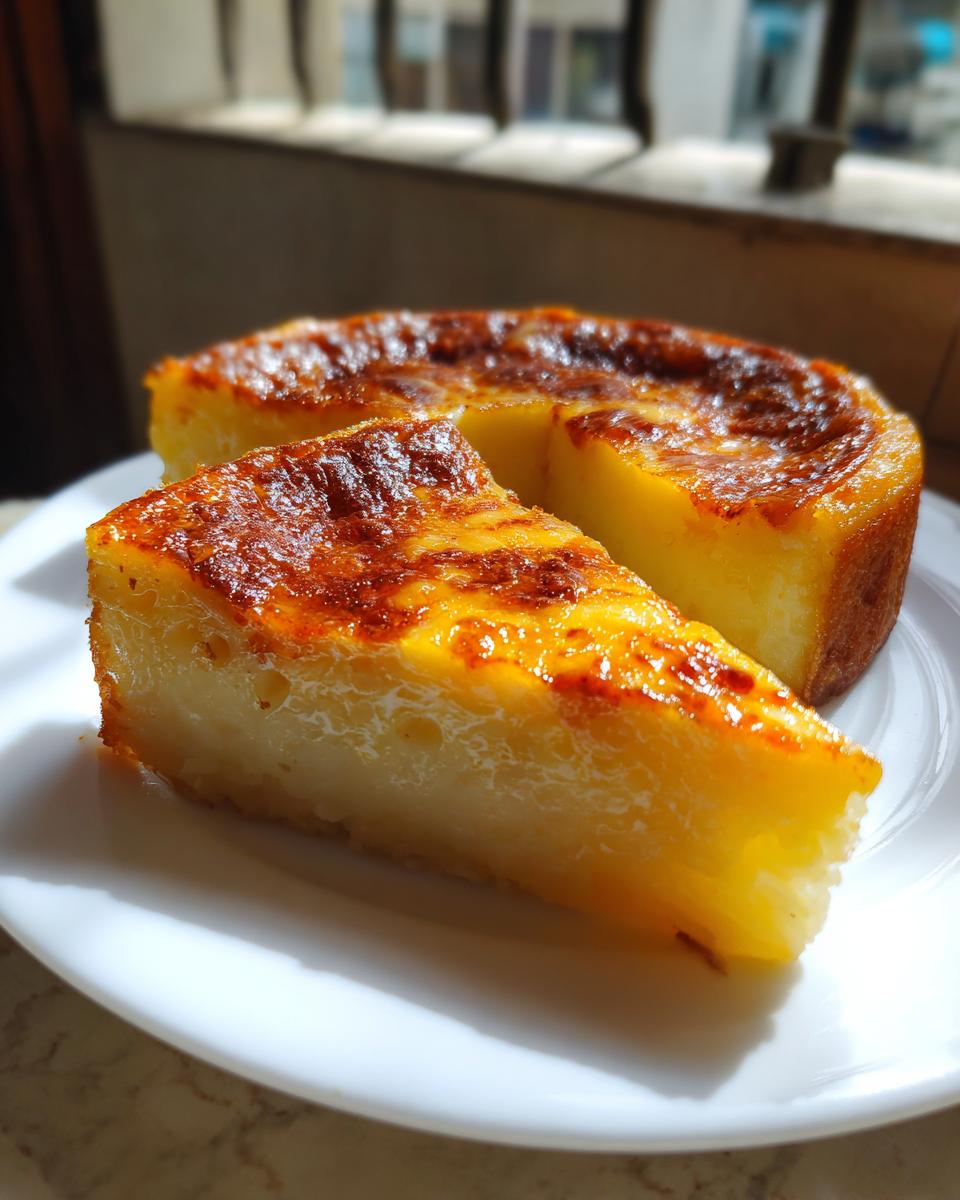
Now that you’ve mastered this incredible Cassava Cake, the final question is: How do we enjoy it? Because this dessert is so rich and satisfying, it really shines when paired with something simple. For me, there’s nothing better than a slice that has cooled to that perfect chewy texture, served alongside a piping hot cup of coffee in the afternoon.
If you prefer something sweeter, this cake pairs magically with a cup of my Best Creamy Hot Chocolate Recipe—the slight chocolate bitterness is a wonderful contrast to the sweet coconut. If you’re serving it for a big family gathering or a summer celebration, try plating a small square with a scoop of vanilla bean ice cream right on the side. The cool creaminess against the room-temperature or chilled cake is divine! It’s honestly a showstopper for any potluck because it travels well and always gets eaten first.
Storage and Reheating for Your Cassava Cake
Because this homemade cassava cake is so wonderfully moist and full of dairy from the coconut milk, we definitely need to treat it right for storage. You must keep leftovers sealed tight in the refrigerator. It stays perfectly fresh for about four days this way, but honestly, it tastes the best on day two or three!
When you go to serve it later, I highly recommend resisting the urge to warm it up too much. A little bit of chilling actually helps that texture firm up into that perfect chewiness we love. For the ultimate satisfying bite, serve it slightly chilled or let it sit on the counter for about 20 minutes before digging in.
Frequently Asked Questions About Cassava Cake
I know folks have questions when they tackle a new recipe, especially one with unique ingredients like this one. Don’t worry, if you’re wondering about an ingredient or a step, chances are someone else is wondering too! We want to make sure this Filipino Cassava Cake Recipe is foolproof for you. To learn more about how we test everything here, feel free to jump over to our About Page!
What is the best way to grate cassava for this recipe?
This really comes down to what you have on hand and how much time you’ve got! If I’m working with fresh cassava root, I use the large holes on my box grater to get a good, coarse texture—it ensures the final product is wonderfully chewy cassava cake. If you rely on the frozen grated cassava, which I totally understand, the most important part is that you squeeze *all* the excess water out after thawing. We want the starchiness, not the liquid!
Can I make this a Quick Cassava Cake without baking twice?
Oh, how I wish we could skip that second bake, but no, sweet friend, you really can’t skip it if you want that beautiful golden top! The first bake sets the base so it doesn’t turn to soup when the topping goes on. The second bake is specifically to cook through and set that rich custard topping. If you skip it, you just end up with hot, runny goo on top of cooked cassava. It’s worth the short wait, trust me!
Is the cheese topping mandatory for an authentic Filipino Cassava Cake Recipe?
That’s a great question about authenticity! The base—cassava, coconut milk, condensed milk—that is the heart of the dish. The cheese topping is definitely a popular, almost beloved addition now because it gives you that amazing sweet and savory hit, but if you skip it, you still have a fantastic sweet cassava dessert! If you skip it, check out this recipe for inspiration on other top layer ideas.
Sharing Your Experience Making This Cassava Cake
Now that you’ve successfully tackled this fantastic Filipino Cassava Cake, I just can’t wait to hear all about it! Did you go for the cheesy topping? Did the macapuno strings add that perfect bit of tropical chewiness you were hoping for? Baking is a journey, and nothing makes me happier than knowing you built something wonderful in your own kitchen.
Seriously, take a moment to rate this recipe with five stars if you loved how easy and creamy it turned out. And please, please tell me about it in the comments below! I love hearing which little twists you made. If you snapped a picture of your golden-brown custard top, I’d be thrilled if you shared it so we can all see your beautiful work. You can reach out to me directly through my contact page, too, if you have specific questions that need answering!
PrintEasy & Creamy Filipino Cassava Cake with Custard Topping

Make this authentic Filipino Cassava Cake, a rich, moist, and chewy dessert featuring a sweet coconut base and a smooth, golden custard topping. This simple recipe is perfect for beginners and delivers a memorable tropical treat.
- Prep Time: 20 min
- Cook Time: 75 min
- Total Time: 95 min
- Yield: 9 servings 1x
- Category: Dessert
- Method: Baking
- Cuisine: Filipino
- Diet: Vegetarian
Ingredients
- 3 cups grated cassava (fresh or frozen, thawed)
- 1 can (13.5 oz) full-fat coconut milk
- 1 can (14 oz) sweetened condensed milk
- 1/2 cup granulated sugar
- 1/4 cup melted unsalted butter, plus more for greasing
- 2 large eggs
- 1 teaspoon vanilla extract
- 1/2 cup shredded sharp cheddar cheese (optional, for topping)
- 1/2 cup macapuno strings (sweet coconut strings, optional)
- 1/4 cup all-purpose flour (for topping consistency)
- 1/4 cup granulated sugar (for topping)
- 1/2 cup coconut milk (for topping)
- 1 large egg yolk (for topping)
Instructions
- Preheat your oven to 350°F (175°C). Grease and line an 8×8 inch baking pan with parchment paper.
- In a large bowl, combine the grated cassava, 1 can of coconut milk, condensed milk, 1/2 cup sugar, 1/4 cup melted butter, 2 eggs, and vanilla extract. Mix well until everything is fully incorporated.
- If using, stir in the macapuno strings.
- Pour the cassava mixture into the prepared baking pan. Bake for 45 to 55 minutes, or until the edges are set and lightly golden.
- While the base bakes, prepare the custard topping. In a separate bowl, whisk together the flour, 1/4 cup sugar, 1/2 cup coconut milk, and 1 egg yolk until smooth.
- After the base has baked for 45-55 minutes, remove it carefully from the oven. Gently spread the custard mixture evenly over the partially baked cake base.
- Sprinkle the shredded cheddar cheese over the custard, if using.
- Return the cake to the oven and bake for another 15 to 20 minutes, or until the custard topping is set and the cheese is melted and golden brown.
- Let the cassava cake cool completely in the pan before slicing. This helps achieve a chewy texture. For the best results, chill for at least 2 hours before serving.
Notes
- If you use frozen grated cassava, make sure it is fully thawed and squeeze out any excess liquid before mixing to prevent a watery batter.
- For a richer flavor, substitute 1/4 cup of the condensed milk with heavy cream.
- This cake tastes best when served slightly chilled or at room temperature.
Nutrition
- Serving Size: 1 square
- Calories: 350
- Sugar: 35
- Sodium: 150
- Fat: 18
- Saturated Fat: 14
- Unsaturated Fat: 4
- Trans Fat: 0
- Carbohydrates: 45
- Fiber: 3
- Protein: 5
- Cholesterol: 55