
Listen, we all have those nights. You realize you need a stunning dessert for tomorrow, or maybe you just need a serious chocolate fix *right now*, and the thought of turning on the oven feels like too much work. Trust me, I get it! That’s why, here at Taste This Plate, I’ve spent countless hours testing treats that deliver maximum wow factor with minimal effort. And nothing—and I mean *nothing*—beats my recipe for oreo balls for sheer, simple success.
These little bites are our go-to for parties, last-minute guest drops, and honestly, just Tuesday nights. There’s no baking required, and usually, you only need three or four simple ingredients you likely already have. As someone who approaches recipes analytically, ensuring every step works flawlessly for you at home is my main goal. We are ditching complicated techniques here; we are making decadent, fudgy, crowd-pleasing chocolate cookie balls!
- Why These are the Best No Bake Oreo Truffles You Will Ever Make
- Gathering Ingredients for Your Oreo Balls Recipe
- How to Prepare Easy Oreo Bites Step-by-Step
- Tips for Perfect Oreo Balls Every Time
- Transforming Oreo Balls into Holiday Oreo Balls
- Storage and Reheating Instructions for Your Decadent Chocolate Bites
- Serving Suggestions for These Party Dessert Ideas
- Frequently Asked Questions About Oreo Cream Cheese Truffles
- Nutritional Information for Your Simple Oreo Snacks
- Share Your Homemade Oreo Balls Creations
Why These are the Best No Bake Oreo Truffles You Will Ever Make
I keep this recipe locked and loaded for emergencies—and you should too. When I say these are the best No Bake Oreo Truffles, I mean it because they require zero oven time and deliver shocking flavor. Forget dry, crumbly balls; these are intensely rich and satisfying. They’re my secret weapon for potlucks!
Simple Ingredients, Extraordinary Results with Oreo Balls
Honestly, simplicity is my jam. This recipe is truly a **3 Ingredient Oreo Dessert**. We are using the whole cookie—yes, even the cream filling—so there’s no fussing around. It’s accessibility and flavor combined, which is exactly what I aim for with every recipe on this site.
The Perfect Creamy Oreo Treats Texture
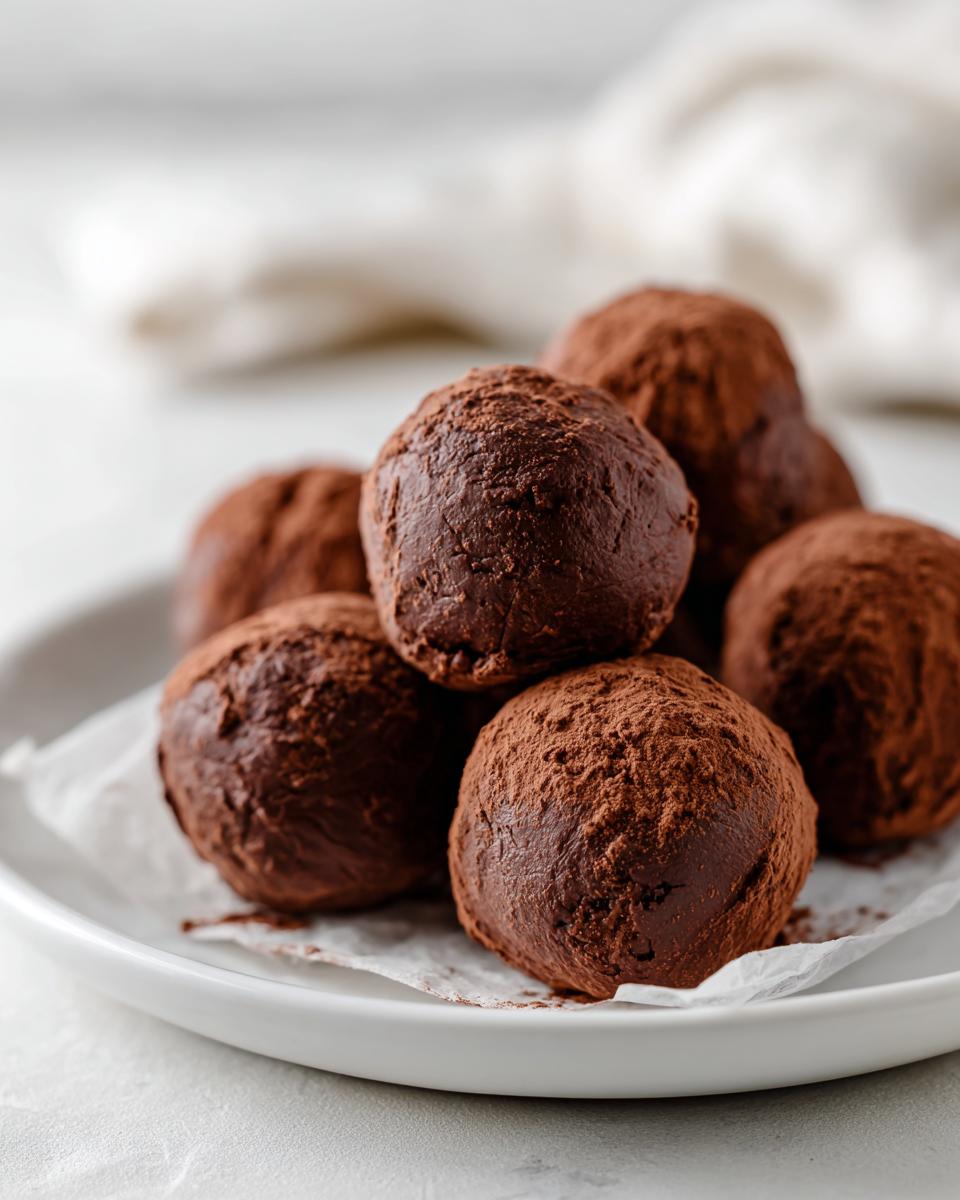
What stops these from just tasting like dry cookie crumbs? That wonderful, softened cream cheese! It binds everything together into these perfectly dense, **Fudgy Oreo Balls**. That creamy consistency results in a true melt-in-your-mouth experience, totally unlike most other simple snacks found online.
Gathering Ingredients for Your Oreo Balls Recipe
When you’re aiming for perfection, trusting your ingredients is step one—and for these **oreo balls**, the list is delightfully short. I tested ratios for ages to get this exact mix right. You don’t need specialty items here, just good basics handled correctly. Let’s look at exactly what you need to gather before we mix!
Essential Components for Classic Oreo Balls
Keep everything measured out nearby before you start crushing. When I say exactly what you need, I mean it—that attention to detail is what separates a good batch from the best batch of these **No Bake Oreo Truffles**.
- One full package of Oreo Cookies (that’s 14.3 ounces!)—and don’t scoop out the filling! We use every bit of that chocolatey goodness.
- Eight ounces of full-fat cream cheese, and this is crucial: make sure it’s completely softened to room temperature.
- Sixteen ounces of semi-sweet chocolate, which we’ll melt down completely for the final coating.
How to Prepare Easy Oreo Bites Step-by-Step
Okay, now that we have our supplies ready, we can actually get mixing! This process is so fast that you blink, and suddenly you have dessert ready for chilling. It’s the ultimate satisfaction for someone who wants to get straight to the good part. Get your food processor ready, because we’re diving in!
Crushing Cookies and Mixing the Oreo Balls Dough
First things first: we need crumbs. Dump that entire package of Oreos, filling and all, right into your food processor. Pulse it down until you have fine, sandy crumbs. If you don’t have a processor, don’t panic! Just toss them in a heavy zip-top bag and pound them with a rolling pin until they look like coarse sand. That’s my backup plan, and it works just fine!
Next, dump those crumbs into a sturdy bowl. Now, add the softened cream cheese. You need to mix this vigorously—I usually use my sturdy hand mixer just for this part. Keep going until it doesn’t look crumbly anymore; it needs to combine into one nice, thick, chocolatey dough. That’s the magic base for all our oreo balls!
Chilling and Coating Your Chocolate Cookie Balls
Once it’s dough, grab a small cookie scoop or use your hands and roll scoops into 1-inch balls. Put these little guys onto a sheet lined with parchment paper. They absolutely must chill in the fridge for at least 30 minutes. Seriously, don’t skip this! Chilling makes these **Chocolate Cookie Balls** firm enough to handle the dipping without falling apart.

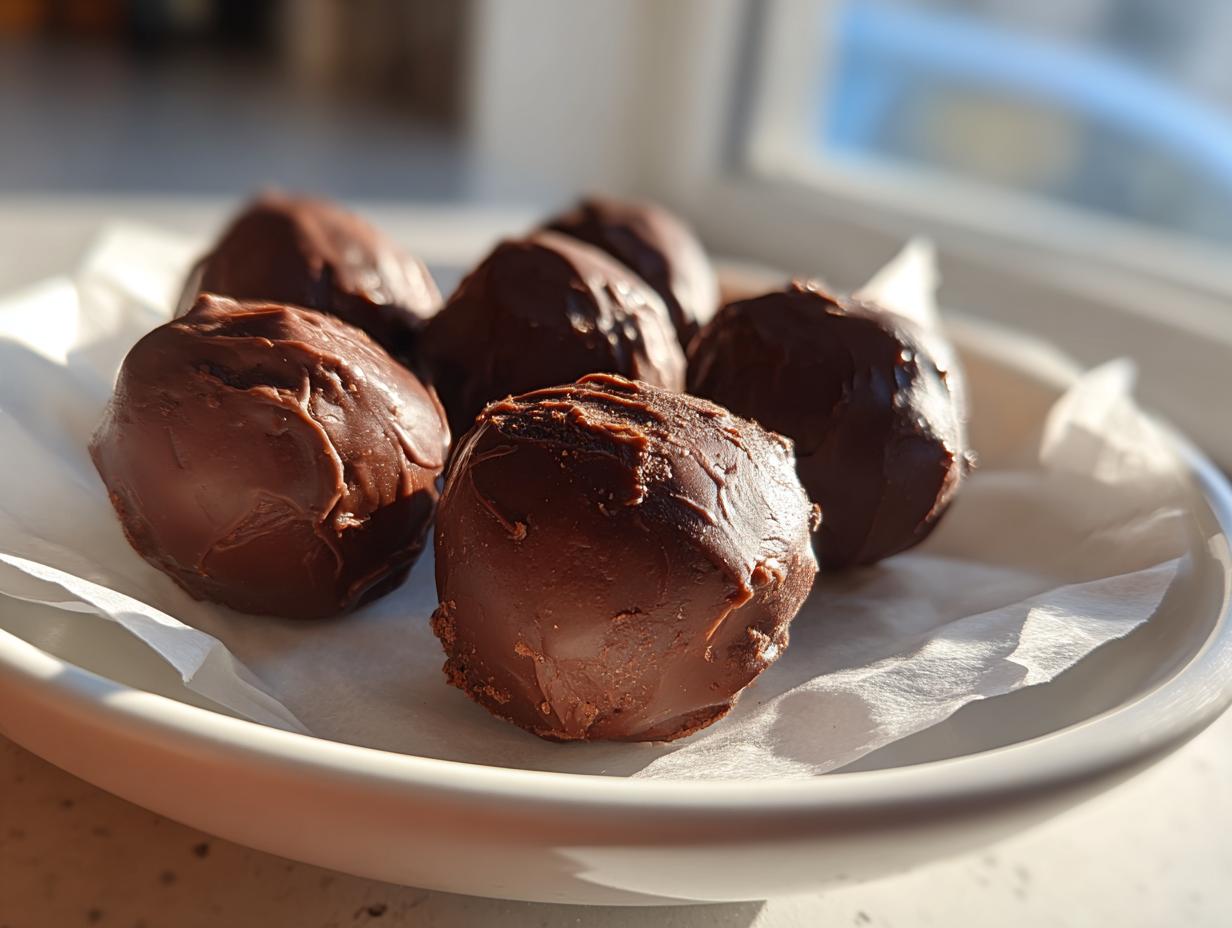
While they chill, melt your semi-sweet chocolate. I prefer the microwave method—use 30-second bursts, stirring well after every single one until it’s velvety smooth. Now, grab a fork, dip your first chilled ball until it’s fully covered, lift it out, let the excess drip off—just wiggle the fork a bit—and place it back on the parchment. If you want to get fancy, toss some sprinkles on right away! Pop them back in the fridge until that chocolate coating is completely firm. Done!
Tips for Perfect Oreo Balls Every Time
Listen, these are easy, but since we want them to be spectacular **Simple Oreo Snacks**, let’s talk about a few tricks I learned during my testing phase. If you want these **oreo balls** to look like they came from a professional candy shop, you’ve got to pay attention to that coating. I always make sure to give you the insider knowledge so you don’t have any messy fails!
Achieving the Smoothest Chocolate Coating
Here’s my favorite technique for getting that gorgeous, thin, shiny shell. If your melted chocolate seems a little stiff when you dip—and melted chocolate always seems to get thick too fast—add about a teaspoon of plain vegetable shortening or even coconut oil to it while it’s melting. Trust me on this one! It thins the chocolate out just enough so it flows beautifully over the ball and drips off easily. That shiny coat sets up perfectly hard every time.
Troubleshooting Common Issues
Occasionally, your dough mixture might feel a little too soft to roll, especially if your kitchen is warm. If that happens, just pop the whole bowl back into the fridge for another 15 minutes before rolling. If your dough seems right but your chocolate seizes up and gets gritty while you work, add a tiny spoonful of neutral oil or even a drop of water—carefully!—and stir until it smooths out again. You’ve got this, and these perfect little bites are worth knowing these little fixes, especially if you’re making them for a big event like the one they talk about over here.
Transforming Oreo Balls into Holiday Oreo Balls
You know that while plain chocolate is always fantastic, these **oreo balls** are total chameleons! They are absolutely perfect as is, but if you’re making them for a special occasion or a cookie exchange, dressing them up is where the real fun starts. This is your chance to turn a quick dessert into something that looks like you spent hours on it. Who doesn’t love easy wins like that?
When it comes to **Holiday Oreo Balls**, think color and texture contrast. After you dip them in melted chocolate—maybe switch to white chocolate for a snowy look, or try green candy melts for a Grinch effect—you have seconds to decorate before the shell sets. You’ll want to have everything ready to go right next to your dipping station.
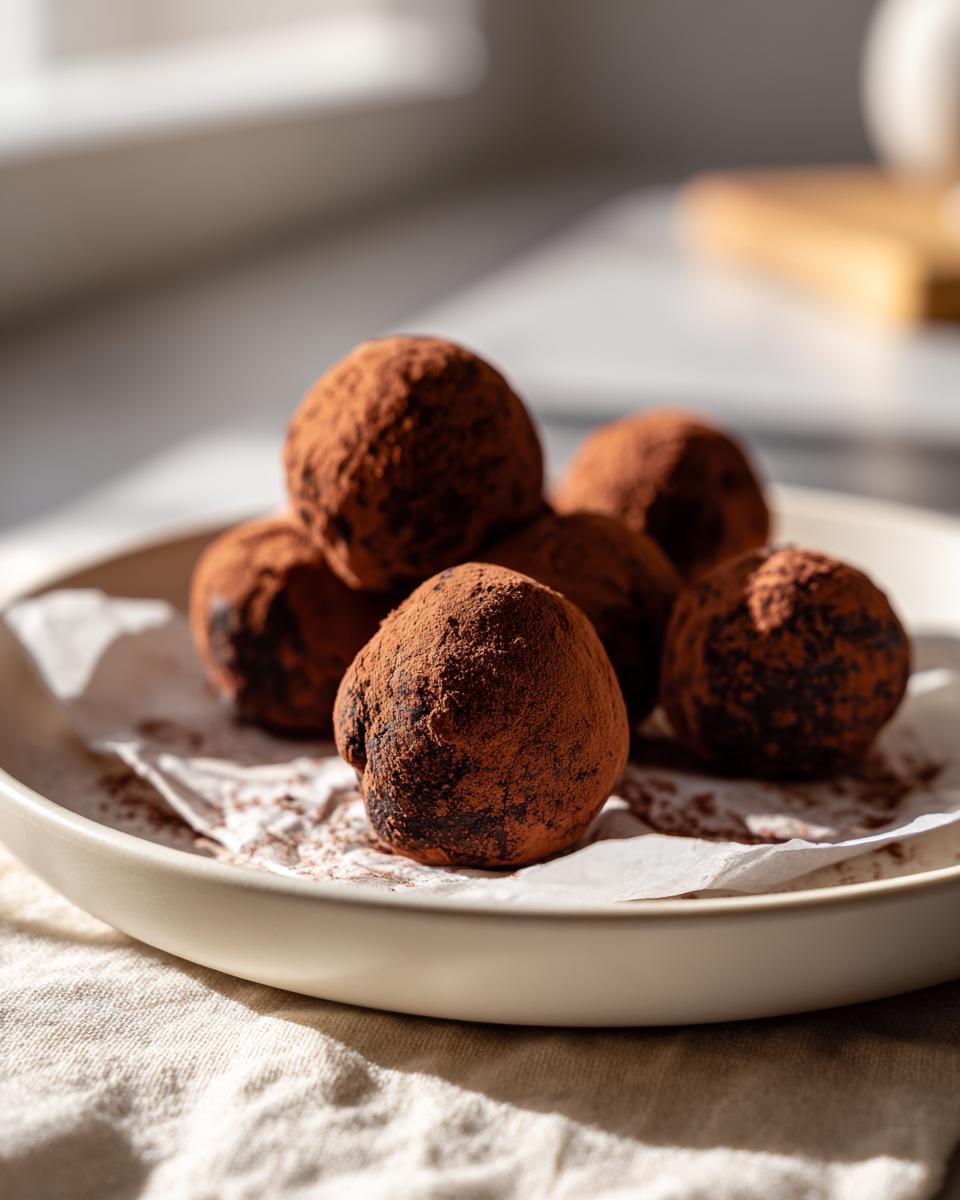
I love keeping a small container of crushed Oreos on hand. If you dip the ball and then immediately roll it in those extra crumbs, you get this amazing, textural exterior that just screams decadence. For real show-stoppers, especially during the holidays, I use colored sprinkles or crushed peppermint candies while the chocolate is still wet. For more beautiful ideas on leveling up your looks for your Christmas Cookie Exchange Recipes, that site has some gorgeous inspiration!
Remember, even a simple drizzle of contrasting chocolate (dark chocolate over white, or vice versa) instantly elevates these from **Simple Oreo Snacks** to something worthy of a fancy centerpiece. They’re so adaptable!
Storage and Reheating Instructions for Your Decadent Chocolate Bites
One of the many things I love about these **oreo balls** is how perfectly they transition from being a party favorite to a midday treat next week because they store like a dream! You don’t have to stress about finishing the whole batch right away. Since we aren’t baking and using cream cheese, how we store them matters a lot, but honestly, it’s so simple.
For keeping them fresh for snacking throughout the week—say, for enjoying with your afternoon coffee—you absolutely must keep them in an airtight container. Keep them in the refrigerator. I’ve tested this extensively (for science, of course!), and they stay wonderfully fresh, maintaining that creamy, fudgy texture for up to two weeks. That’s fantastic longevity for a no-bake treat!
Now, what if you made a huge batch for the holidays and need them to last longer? Yes, you *can* freeze these **Decadent Chocolate Bites**! Just layer them carefully in a freezer-safe container, separating the layers with wax paper so the chocolate coating doesn’t stick together. They thaw beautifully on the counter for about an hour, or you can place them in the fridge overnight. When you pull them out, grab over to this site for a reminder on keeping your chocolate shell perfect after chilling!
The beauty of these **No Bake Oreo Truffles** is that they taste just as rich and decadent straight from the fridge as they do when they are freshly dipped. No reheating needed, zero fuss!
Serving Suggestions for These Party Dessert Ideas
Once your amazing **oreo balls** are set and shining, the fun really begins: figuring out the best way to serve these little chocolate wonders! Since they are the perfect size—true **Bite Sized Desserts**—they work for everything from a huge bash to a quiet evening treat. They really shine brightest as part of a larger spread, though.
When I’m prepping for a gathering, I always make sure to feature these alongside some contrasting textures. Think about pairing them with something crunchy or slightly acidic. They are fantastic next to a fruit platter, or even nestled right alongside some salty pretzels or caramel popcorn offerings. It keeps things interesting on the palate!
For elegant presentation, try lining them up on a simple white platter, or if you’re feeling festive, use a tiered serving tray. Since they are so rich, a little goes a long way. They are phenomenal when served alongside a steaming mug of coffee—that slight bitterness cuts through the sweetness perfectly. If you’re looking for inspiration on how to arrange a full dessert table featuring these and other treats, check out the ideas over at this site. They really know how to make a spread look incredible, and these **Party Dessert Ideas** are always the first thing to disappear!
Frequently Asked Questions About Oreo Cream Cheese Truffles
I know you might have a few little questions buzzing around before you jump in and make your first batch of these addictive treats. That’s totally normal when you’re dealing with something this delicious! I want to make sure you have all the confidence in the world before you start rolling. So, let’s tackle some of the things I get asked most often about our fantastic **Oreo Cream Cheese Truffles**.
Can I make Oreo Balls without cream cheese?
That’s often the first question I get! The cream cheese is really the key ingredient that makes these **Oreo Cream Cheese Truffles** so wonderfully creamy and tender inside. If you absolutely can’t use it, you have a few options, but be warned: the texture will change. You could try using an equal amount of softened butter, or maybe even a very thick, room-temperature frosting, but it won’t achieve that signature decadent binder that the cream cheese gives us. It’s worth trying to use the cream cheese if you can!
What is the best way to get a smooth chocolate shell on my Oreo Truffles?
Oh, the dreaded seized or bumpy chocolate! That happens when your chocolate gets too hot or has a tiny bit of water hit it. For a truly professional-looking, smooth shell on your **Oreo Truffles**, my number one tip is to thin the chocolate slightly. You can do this by adding about a teaspoon of coconut oil or vegetable shortening right into the melted chocolate mixture. It makes the chocolate flow like silk, coating every corner of your chilled center perfectly. Remember to work quickly once the truffle is dipped!
Are Oreo Balls considered a Quick Dessert Recipe?
Are they ever! If you are crunched for time, these **oreo balls** are your savior. Think about it: you spend about 20 minutes actively mixing and rolling. That’s it! There is zero downtime waiting for anything to bake, making them a superb **No Oven Dessert**. They absolutely fit the bill for a **Quick Dessert Recipe**, perfect for those unexpected moments when you need something impressive right away.
Nutritional Information for Your Simple Oreo Snacks
Now, I know we aren’t making these **oreo balls** for their health benefits—they are pure indulgence, plain and simple! But I deeply believe in transparency here at Taste This Plate because that’s part of being a confident cook. You should know what’s going into your body, even when it’s a fantastic treat like this **No Bake Oreo Truffles** recipe. So, I ran the numbers for our standard batch, just as you’d expect!
Keep in mind these figures are estimates based on the standard ingredients listed. If you use dark chocolate instead of semi-sweet, or perhaps low-fat cream cheese, those values will shift quite a bit. Use this as a guideline, not a gospel!
- Serving Size: 1 ball
- Calories: Around 150 per bite
- Fat: About 9 grams
- Saturated Fat: Roughly 5 grams
- Carbohydrates: Around 16 grams
- Sugar: About 15 grams
- Protein: A couple of grams
See? Still fits perfectly into the category of a decadent treat! When you’re serving these incredible **Simple Oreo Snacks** at a party, just rest easy knowing you delivered big on flavor with very little effort. Enjoy them guilt-free, just perhaps not every single day!
Share Your Homemade Oreo Balls Creations
Well, there you have it! Aren’t these just the easiest, fudgiest, most ridiculously good **oreo balls** you’ve ever seen? Honestly, when I make a batch—and I make them a lot, especially around the holidays—I feel like the queen of quick desserts. Now that you’ve got the recipe in your hands, I really, really want to see what you do with them!
This community thrives on sharing. That’s really what Kate and I want for Taste This Plate—a place where we all learn and celebrate together. So, when you finish up your batch of these **No Bake Oreo Truffles**, please swing back and let’s chat in the comments below. Drop a rating, too! If you nailed the creamy center or if you tried a fun holiday coating, I want the full scoop.
Did you use dark chocolate instead of semi-sweet? Did you add a tiny pinch of espresso powder to boost the chocolate flavor? Tell me that secret! Sharing our successes (and even our little mishaps!) is how we all become more intuitive cooks. I look forward to seeing your delicious little **Easy Oreo Bites**!
Thank you so much for trying this recipe out. Happy baking—or should I say, happy *no-baking*!
PrintEasy No-Bake Oreo Balls (Creamy Oreo Truffles)

Make these simple Oreo Balls using just three ingredients for a rich, fudgy, no-bake treat. These creamy Oreo Truffles are perfect for parties or quick dessert cravings.
- Prep Time: 20 min
- Cook Time: 5 min
- Total Time: 25 min
- Yield: About 30 bites 1x
- Category: Dessert
- Method: No Bake
- Cuisine: American
- Diet: Vegetarian
Ingredients
- 1 package (14.3 oz) Oreo Cookies
- 8 oz cream cheese, softened
- 16 oz semi-sweet chocolate, melted for coating
Instructions
- Place the entire package of Oreo cookies, filling included, into a food processor. Pulse until you have fine crumbs.
- Transfer the cookie crumbs to a medium bowl. Add the softened cream cheese.
- Mix the crumbs and cream cheese together using a hand mixer or a sturdy spoon until the mixture is completely combined and forms a thick dough.
- Roll the dough into small balls, about 1 inch in diameter. Place the balls on a baking sheet lined with parchment paper.
- Chill the Oreo balls in the refrigerator for at least 30 minutes. This step helps them firm up before dipping.
- Melt the semi-sweet chocolate according to package directions. You can use a double boiler or microwave in 30-second intervals, stirring well between each interval.
- Dip each chilled Oreo ball into the melted chocolate, ensuring it is fully coated. Use a fork to lift the ball out, allowing excess chocolate to drip off.
- Place the coated balls back onto the parchment-lined sheet. If desired, immediately sprinkle with crushed Oreo pieces or festive sprinkles.
- Return the finished Oreo Balls to the refrigerator until the chocolate coating is completely set, about 15 to 20 minutes.
Notes
- For the smoothest coating, add 1 teaspoon of vegetable shortening or coconut oil to the melted chocolate. This helps thin the chocolate slightly.
- If you do not have a food processor, place the cookies in a large zip-top bag and crush them thoroughly with a rolling pin.
- These Oreo Truffles store well in an airtight container in the refrigerator for up to two weeks.
Nutrition
- Serving Size: 1 ball
- Calories: 150
- Sugar: 15
- Sodium: 100
- Fat: 9
- Saturated Fat: 5
- Unsaturated Fat: 4
- Trans Fat: 0
- Carbohydrates: 16
- Fiber: 0
- Protein: 2
- Cholesterol: 10