
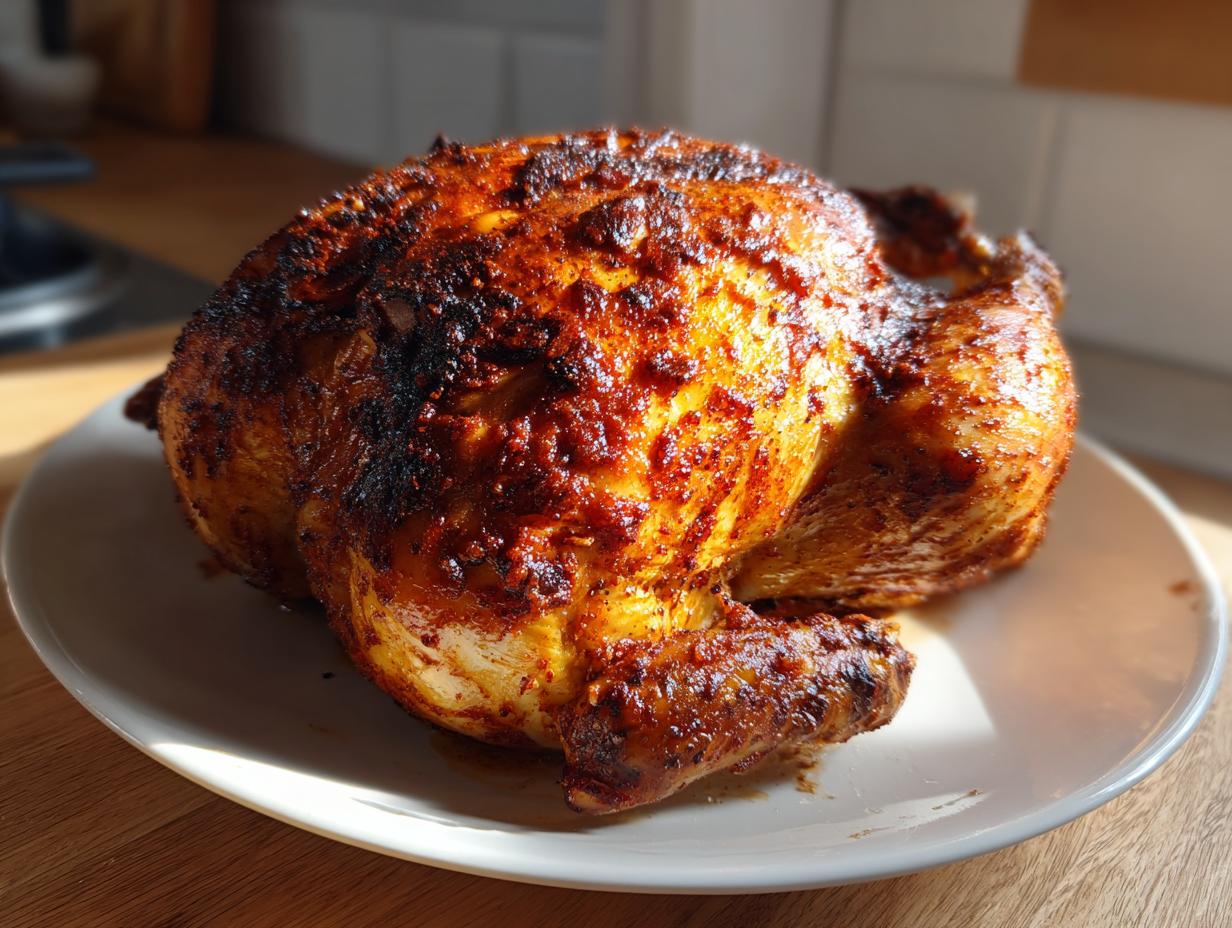
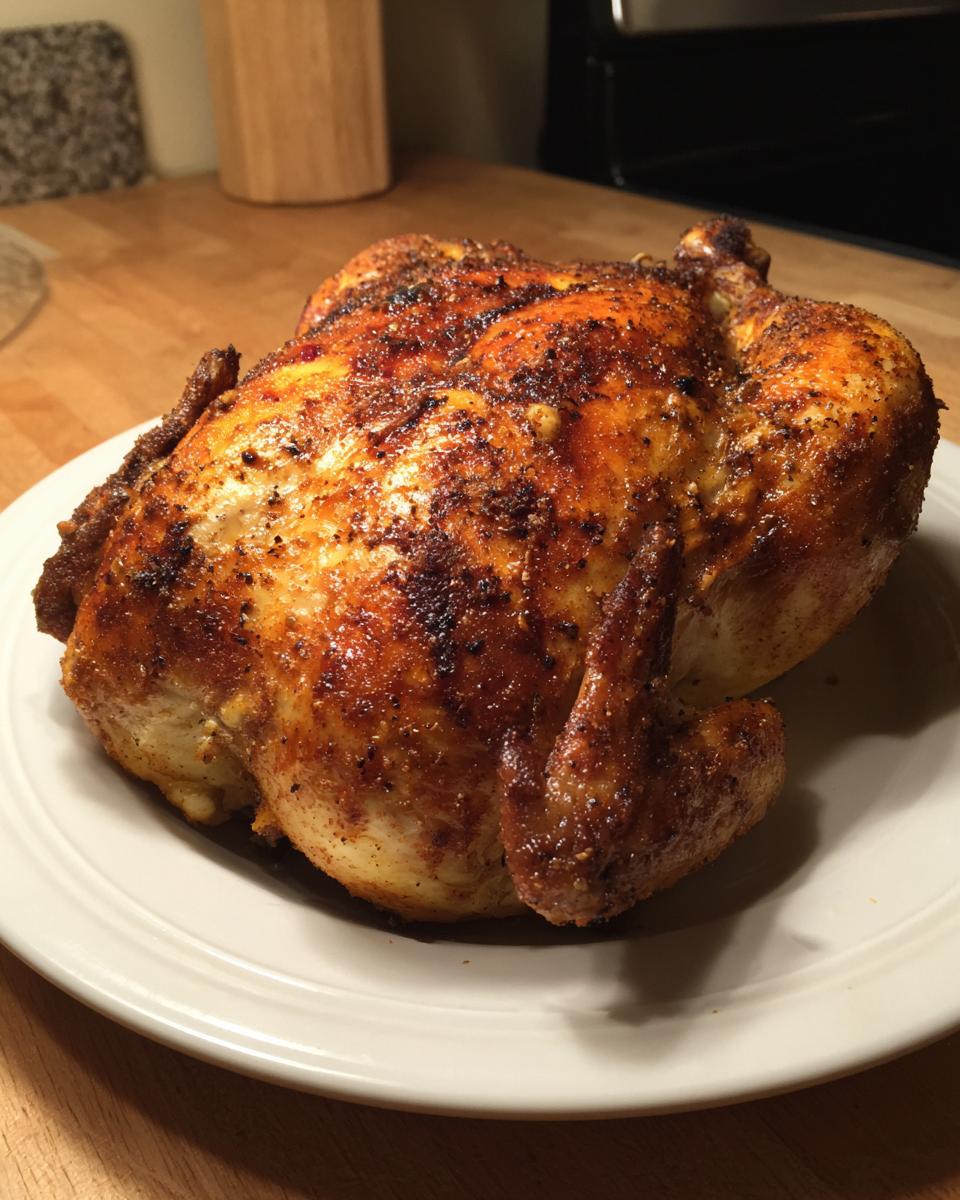
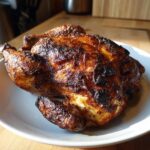
If you’ve always looked at a whole roasted bird and thought, “That looks amazing, but I just don’t have the time,” then I have a secret weapon for you! Mastering the art of the spatchcock chicken changes everything about your weeknight dinners. Trust me, this method is my favorite way to simplify those classic roasting techniques, bringing that impressive, golden-brown, crispy skin right to your table in under an hour.
I started Taste This Plate because I wanted to prove that home cooks don’t need crazy equipment or hours in the kitchen to make something truly memorable. This specific technique flattens the bird so everything cooks evenly and gets wonderfully crisp. It’s fast, it’s fun to watch, and the flavor is just incredible!
Whether you’re looking for a stunning centerpiece or just need a reliable, juicy bird without the fuss, this recipe is the one you’ll keep coming back to. It’s simple, and it works every single time. If you want to learn more about why I believe good food shouldn’t be stressful, check out my philosophy on the About Page!
- Why This Spatchcock Chicken Recipe Is Your Weeknight Hero
- Ingredients Needed for Perfect Spatchcock Chicken
- Essential Equipment for Spatchcock Chicken Success
- Step-by-Step Instructions: How to Spatchcock Chicken (The Right Way)
- Pro Tips for Achieving Crispy Skin on Your Spatchcock Chicken
- How Long to Cook Spatchcock Chicken and Checking Doneness
- Serving Suggestions to Complete Your Spatchcock Chicken Meal
- Storage and Reheating Tips for Leftover Spatchcock Chicken
- Frequently Asked Questions About Spatchcock Chicken
- Estimated Nutrition Facts for This Spatchcock Chicken
- Share Your Easy Spatchcock Chicken Results
Why This Spatchcock Chicken Recipe Is Your Weeknight Hero
When I developed this recipe, my goal was clear: give you the juicy interior and shatteringly crisp skin of a perfectly roasted bird, but in the time it takes to watch a sitcom rerun. Seriously, ditch your old roasting pan! This method is just superior for everyday cooking.
- It Cooks Way Faster! You get fantastic results in half the typical time—perfect for those nights when you’re starving by 6 PM.
- Even Cooking is Guaranteed. No more worrying about dried-out breast meat while the thighs catch up; everything finishes at the same time.
- Maximum Crispy Skin. That golden-brown perfection you see in magazines? You can achieve it easily because more skin is exposed to the heat.
If you’re ready for a chicken recipe that’s quick but tastes like you spent all day on it, you’re in the right place. For more incredible, simple poultry ideas, check out my recipe for Melt in Your Mouth Chicken!
Faster Roasting Times for Your Spatchcock Chicken
The reason this is so much faster than keeping the chicken shaped like a little bird is geometry, honestly. When you cut out the backbone and flatten it—a process called butterflying—you dramatically increase the surface area that touches the hot air in your oven. This means the heat reaches every part of the bird more equally and quickly. It’s a simple shift that saves you 30 minutes or more on your total cooking time. That’s quality time back in your evening!
Ingredients Needed for Perfect Spatchcock Chicken
Okay, let’s look at what you’ll need. I kept this list small because I want this recipe to be super accessible for any night of the week. You only need a few simple pantry staples and one beautiful bird. Remember our philosophy here at Taste This Plate: simple ingredients making extraordinary meals!
First up, grab one whole chicken, about four to five pounds—make sure you pull out those giblets stuck inside the cavity; we don’t need those for roasting! Then you’ll need olive oil, kosher salt, pepper, and a few dried spices to make that gorgeous crust.
Spice Blend for Your Spatchcock Chicken
This spice blend is classic American comfort, nothing fancy, just powerful flavor. It’s salt, pepper, garlic powder, dried thyme, and a little paprika. That’s it! If you wanted to swap anything, you absolutely could use rosemary or sage instead of thyme, but this mix is what gives the skin that deep, beautiful color and savory pop. Everything here is something standard you already have or can find on your next quick grocery run!
Essential Equipment for Spatchcock Chicken Success
Before we dive into the actual cutting part—which can look a little intimidating but I promise is easy—let’s make sure your kitchen is set up for success. Having the right tools on hand makes this whole process smoother. Think of this as prepping your workspace before starting a big DIY project!
You absolutely cannot do this without some heavy-duty kitchen shears. Regular scissors might work in a pinch, but they’ll struggle and you might end up wrestling your poor bird! Good shears make cutting through the backbone almost effortless. I keep mine tucked away near my cutting board just for this purpose.
The other non-negotiable tool is what you cook it on. You need a sturdy baking sheet, and ideally, you want to place a wire rack right on top of that sheet. Why the rack? That’s how we get all that air circulating underneath, which is crucial for getting the bottom side of the chicken just as crisp as the top. If you don’t have a rack, you can just prop the bird up on something sturdy in the pan, but the rack is really the easy way to go.
Finally, do yourself a favor and pull out an instant-read thermometer. I know, I know, you might be used to poking things with a knife, but since this cooks so much faster than a traditional roast, getting the exact temperature ensures you nail that juicy interior every time. It builds confidence in your cooking, which is what we are all about here!
Step-by-Step Instructions: How to Spatchcock Chicken (The Right Way)
Okay, deep breaths! This is the part where your bird goes from looking like a normal roast chicken to looking like it’s ready to conquer the world. I know cutting out the backbone sounds a little scary, but trust me, once you see how easy it is with the right shears, you’ll be flapping your arms like a chicken yourself!
First things first: pop your oven on to 425 degrees Fahrenheit so it’s ready to go when we are. Take your chicken out of its wrapping and place it breast-side up on your sturdy cutting board. Remember, flattening it out is the whole trick here. It ensures the heat penetrates everything evenly, so you aren’t left with undercooked dark meat—that’s the key to success!
Removing the Backbone for Your Spatchcock Chicken
Take your kitchen shears and start cutting right along one side of that backbone, from the tail end all the way up toward the neck. You’ll feel some resistance, but push through it firmly. Don’t force it, but don’t be timid either! Then, do the exact same thing on the other side.
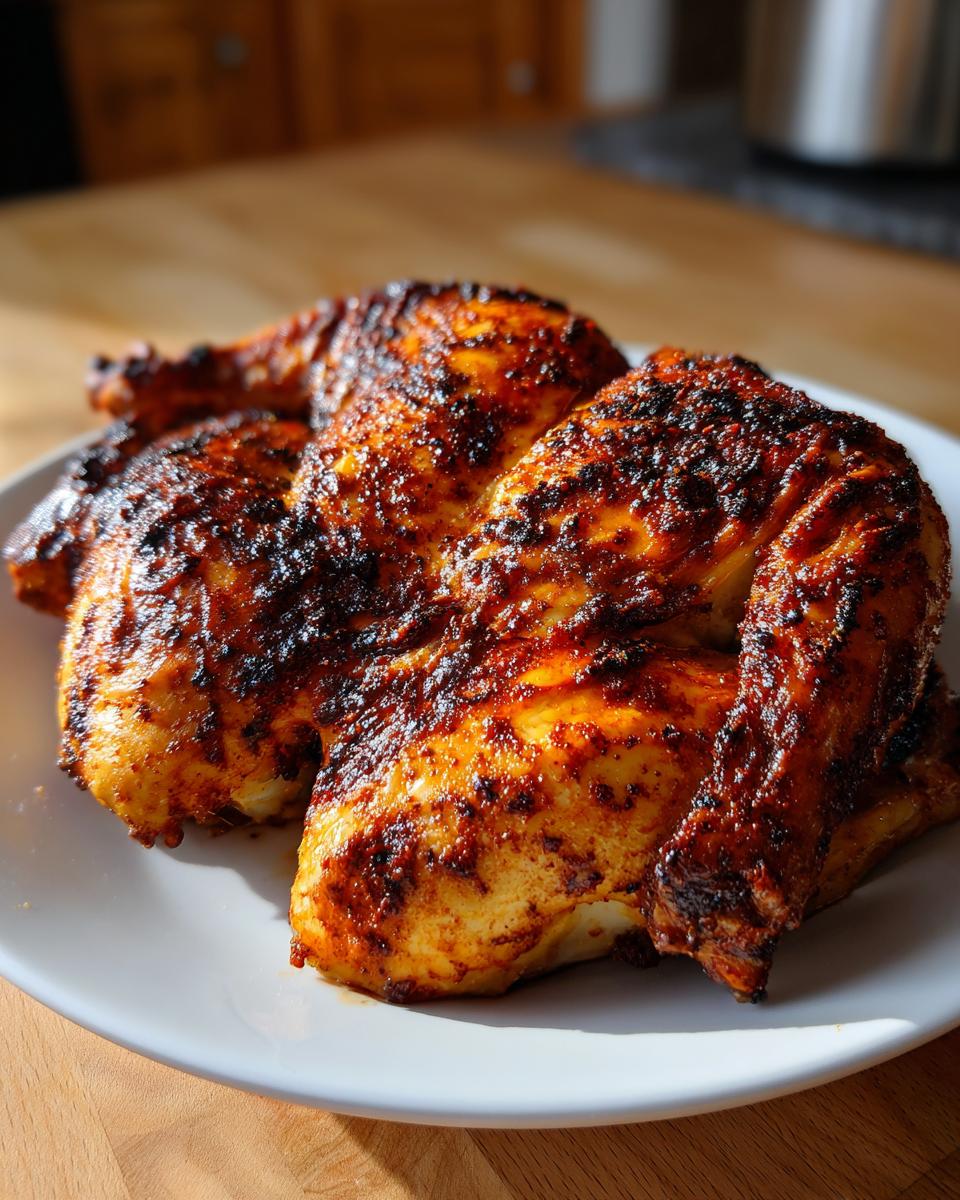
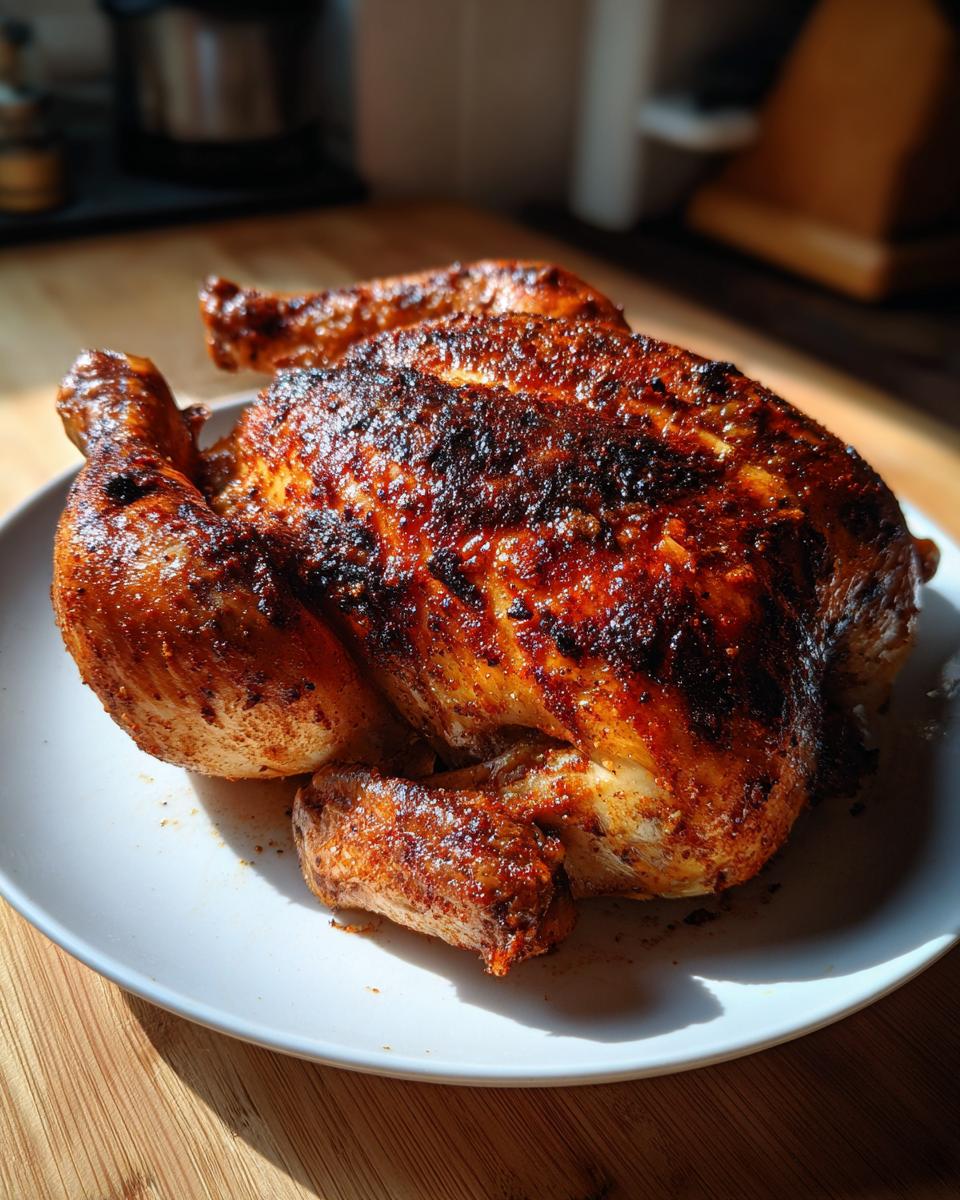
Once the backbone is cut free, set it aside! Don’t throw that away! It’s perfect for making a quick, rich stock later. Now, flip the bird over so it’s breast-side-up. Place the heels of your hands on either side of the breastbone and press down hard until you hear a satisfying *crack* and the chicken lies perfectly flat. Tuck those wing tips underneath so they don’t burn off in the oven. If you’re looking for more quick poultry tips, I love sharing ideas like my Lemon Pepper Chicken Thighs!
Seasoning for Maximum Flavor on Your Spatchcock Chicken
We made our awesome spice blend already, so now it’s time to slather it on! Mix your olive oil, salt, pepper, garlic powder, thyme, and paprika together in a little bowl until it’s a nice paste. Now, take a good handful of that mixture and rub it all over the entire outside of the chicken. Get your fingers right under that skin over the breast and thighs and rub some seasoning directly onto the meat, too. This stops the skin from peeling away from the meat during cooking, keeping everything juicy and flavorful!
Once it’s totally coated—and I mean totally coated—you’re ready for the rack. Place your flattened chicken skin-side up on that wire rack set over your baking sheet. If you want to see how other folks tackle this technique, I’ve seen some great tutorials over at Low Carb Spark!
Pro Tips for Achieving Crispy Skin on Your Spatchcock Chicken
You’ve cut it flat, you’ve seasoned it well, but if you want that skin to actually crackle when you slice into it, we need to talk about two quick things that make a huge difference. This isn’t about complicated techniques; it’s about paying attention to a couple of small details that professionals always focus on when roasting poultry.
My biggest piece of advice, which applies whether I’m roasting this bird or trying to get my crispy potato wedges perfect, is drying power. Seriously, moisture is the enemy of crispiness! Before you even think about rubbing on that olive oil and spice mix, pat the entire exterior of the chicken down with paper towels. You want it as dry as possible. I press that towel all over, paying special attention to the skin over the breast. The drier the skin is when it hits the oven, the better that golden crisp will form.
The second pro move is something I mentioned earlier, but it bears repeating: use that wire rack! If you just lay the bird directly on the baking sheet, the bottom of the chicken steams in its own juices. That’s guaranteed soggy bottoms, and we certainly don’t want that. The rack lifts the bird up so hot air can circulate completely around it. This allows the heat to evenly dry out and crisp up the skin on the bottom side too, giving you a perfect peel-off skin experience all the way around. If you skip the rack, you’re missing out on half the crispiness!
For science lovers who need more reading material on getting perfectly roasted birds, I really like the information over at Wholesome Yum. They go into great detail about heat distribution!
How Long to Cook Spatchcock Chicken and Checking Doneness
This is where all that preparation pays off! Because we flattened the bird, this cooks so much faster than a traditional roast. For a four to five-pound bird at 425 degrees Fahrenheit, you’re usually looking at 40 to 50 minutes total. But please, always trust your thermometer over the clock!
You need that internal temperature to hit 165 degrees Fahrenheit when you stick the thermometer deep into the thickest part of the thigh—make sure you’re avoiding bone contact! Once it hits that magic number, pull it out. And here’s the critical next step: resist the urge to carve it immediately. We must let the spatchcock chicken rest for a solid 10 minutes. This lets all those amazing juices redistribute, keeping your meat unbelievably tender. It’s worth the wait, I promise! For another great poultry dish, try my Baked Herb Chicken Casserole next week!
Serving Suggestions to Complete Your Spatchcock Chicken Meal
Now that you have this perfectly golden, juicy roast chicken cooling on the counter, you need companions! Remember, our whole philosophy here is making beautiful food simple, so we aren’t talking about fussy side dishes that take two hours to prep. We want things that roast right alongside the chicken or come together in minutes.
Since you’ve got your oven cranking out that fantastic heat, you might as well toss some veggies in there! Simple root vegetables are fantastic absorbers of all those chicken drippings. Think carrots, onions, and maybe some sweet potatoes tossed with a little olive oil and salt. They caramelize beautifully and taste like they took ages to make.
If you want something creamy and comforting, you can’t beat mashed potatoes. If you need an easy recipe that brings the richness without the effort, you have to try my Garlic Parmesan Mashed Potatoes. The garlic and cheese just sing right next to that simple roast bird. Honestly, that combination alone feels like a holiday meal.
For something green, keep it light to cut through the richness of the skin. A quick toss of green beans with butter and lemon juice right at the end is perfect. Or, if you’re looking for inspiration on what to pair with poultry in general, check out some of the delicious pairings mentioned on K-Pop Kitchen—they always have vibrant ideas!
Essentially, you want something starchy and something green, and your everyday dinner plate is instantly complete. Easy, right?
Storage and Reheating Tips for Leftover Spatchcock Chicken
Don’t you just love having leftovers? This bird is fantastic the next day, but you have to treat it right, or that gorgeous crispy skin will turn chewy fast. Once the chicken has cooled down completely—and I mean totally cool—carve up any remaining pieces.
Pop all that glorious meat into an airtight container. If you can, store the pieces without the skin tucked right against them, since the skin is what gets soft first. It keeps well for about three days in the fridge.
When you’re ready to reheat your spatchcock chicken, avoid the microwave if you can—it dries things out! I highly recommend reheating on a rack over a baking sheet in a 350-degree oven until it’s warmed through. It brings back just a little bit of that tenderness. If you need side dish inspiration for your next meal, I have tons of ideas on my Side Dishes page!
Frequently Asked Questions About Spatchcock Chicken
I get so many questions about this method because people assume flattening a bird is complicated, but trust me, it isn’t! Here are the few things I hear most often from folks trying this roast chicken technique for the first time.
Can I use the spatchcock method for a turkey?
Oh, that’s a great question! Yes, you absolutely can spatchcock a turkey, but it takes quite a bit more strength and a much, much bigger pair of shears! Turkey wings and thicker bones require serious muscle. For a huge bird, you need to be prepared for a serious cutting session. For your first time experimenting with this flattening technique, I always recommend starting with a standard 4 or 5-pound chicken first. If you want to see a step-by-step on the process regardless of bird size, check out the walkthrough at The Wooden Skillet.
I don’t have heavy-duty shears—what can I use instead?
If you are in a pinch and reading this just as you planned to hit the kitchen, you can try using a very sharp, sturdy chef’s knife, but please be careful! You’ll use the knife to slice down both sides of the backbone, but use a lot of pressure for the ribs rather than trying to hack through everything. It’s much harder work, which is why I always push that wire cutters or large shears are worth the small investment for this recipe. After the cut, you’ll still need to press down on the breastbone to flatten it, which is easier if you place a thick towel over the top for protection.
Can I grill my spatchcock chicken instead of roasting it?
Absolutely! Grilling a whole chicken this way is super popular, especially in the summer. The key is that because it’s flattened, you can’t just blast it over direct heat, or the skin will burn before the inside cooks. You want to set up your grill for indirect heat—coals banked on one side, chicken on the other, lid closed. This lets it roast beautifully and evenly, giving it that smoky flavor we all love. It usually takes about the same amount of time as the oven roast!

If you’re looking for more main dish inspiration that’s low-stress, browse through my collection of Main Dishes recipes!
Estimated Nutrition Facts for This Spatchcock Chicken
You know I always like to give you the full picture here at Taste This Plate, because good cooking is about knowing what you’re eating! We focus on simple ingredients, and these estimates reflect that a standard four to five-pound bird was used with just the olive oil and spices listed.
Keep in mind that since this recipe relies on an average-sized chicken and the exact amount of trimming you do (like skin removal), these numbers are just a guideline to help you plan your meal. I test everything in my own kitchen, but I’m not a certified nutritionist, so please treat these as helpful estimates!
- Calories: About 350 per serving (one quarter chicken)
- Protein: A whopping 40 grams—you won’t be hungry after this dinner!
- Carbohydrates: Zero! That’s right, this is carbless comfort food goodness.
- Total Fat: Around 18 grams per serving.
This recipe naturally comes out low in sugar (since we aren’t adding any sugary sauces!), making it a fantastic choice when you’re focused on a straightforward protein dinner. If you’re looking for more low-carb ideas that pair well with this poultry, I have a great list!
Share Your Easy Spatchcock Chicken Results
Whew! We did it! You’ve successfully mastered cooking a whole chicken in record time, and I bet your kitchen smells absolutely incredible right now. That beautifully roasted, crispy-skinned bird is ready for the table, and I truly hope this recipe makes your weeknight cooking feel a little more special.
But my job isn’t done until I hear back from you! I put all this work into testing and re-testing so you don’t have to stress, and knowing it worked in your kitchen is the best reward. So please, after you’ve carved that juicy meat, come right back here!
I would absolutely love it if you could take two seconds to rate this recipe right above this section. Are you giving it five stars? Tell me why in the comments below! Did you use a different herb blend? Did your teen miraculously try a bite of roast chicken? Spill the details!
And if you snapped a picture of that gorgeous bird resting on your dinner plate, please tag me on social media! Seeing your gorgeous results truly makes my day and shows everyone else just how easy this delicious roast chicken can be for everyday meals. If you have any lingering questions that I missed, pop over to the Contact Page, and I’ll get right back to you!
PrintEasy Spatchcock Chicken for Crispy Skin
Learn how to spatchcock a whole chicken for a juicy interior and perfectly crispy skin. This method cooks faster than traditional roasting, making it ideal for weeknight dinners.
- Prep Time: 10 min
- Cook Time: 45 min
- Total Time: 55 min
- Yield: 4 servings 1x
- Category: Dinner
- Method: Oven Roasting
- Cuisine: American
- Diet: Low Fat
Ingredients
- 1 whole chicken (about 4–5 lbs)
- 2 tablespoons olive oil
- 1 tablespoon kosher salt
- 1 teaspoon black pepper
- 1 teaspoon garlic powder
- 1 teaspoon dried thyme
- 1/2 teaspoon paprika
Instructions
- Preheat your oven to 425 degrees Fahrenheit.
- Remove the chicken from its packaging and place it breast-side up on a cutting board.
- Use kitchen shears to cut along both sides of the backbone, starting from the tail end, until the backbone is completely removed.
- Flip the chicken over so it is breast-side up. Press down firmly on the breastbone until you hear a crack and the chicken lies flat.
- Tuck the wing tips under the body of the chicken.
- In a small bowl, mix together the olive oil, salt, pepper, garlic powder, thyme, and paprika.
- Rub the spice mixture all over the chicken, including under the skin if possible.
- Place the flattened chicken skin-side up on a wire rack set over a baking sheet.
- Roast for 40 to 50 minutes, or until an instant-read thermometer inserted into the thickest part of the thigh reads 165 degrees Fahrenheit.
- Remove the chicken from the oven and let it rest for 10 minutes before carving.
Notes
- Spatchcocking, or butterflying, exposes more surface area to the heat, which results in faster cooking and crispier skin.
- You can substitute the herbs and spices with your favorite blend, such as rosemary and sage.
- If you plan to grill the chicken, use indirect heat for the same cooking time.
Nutrition
- Serving Size: 1 quarter chicken
- Calories: 350
- Sugar: 0
- Sodium: 450
- Fat: 18
- Saturated Fat: 5
- Unsaturated Fat: 13
- Trans Fat: 0
- Carbohydrates: 0
- Fiber: 0
- Protein: 40
- Cholesterol: 150