
I know that feeling. You spend hours rolling out dough, cutting perfect shapes, and then comes the moment of truth: the decoration. If your icing melts, cracks, or just refuses to dry, the whole project feels ruined! We’ve all been there, but I promise you, achieving that beautiful, professional, bakery-style look right in your own kitchen is totally possible. That’s why I’m sharing my definitive recipe for sugar cookie icing. This isn’t just any frosting; this is based on royal icing because it gives you that incredible smooth, glossy finish that dries completely hard. When I started Taste This Plate, my goal was to remove the stress from baking, and having icing you can trust—icing that sets firm every single time—is the first step to a flawless cookie.
- Why This Is the Best Sugar Cookie Icing Recipe That Hardens Perfectly
- Gathering Your Ingredients for Perfect Sugar Cookie Icing
- How to Prepare Your Easy Cookie Frosting for Decorating
- Tips for Making Sugar Cookie Icing Dry Hard
- Coloring and Storing Your Holiday Cookie Decorating Icing
- Serving Suggestions for Your Decorated Cookies
- Frequently Asked Questions About Making Sugar Cookie Icing
- Storage and Reheating Instructions for Leftover Icing
- Share Your Bakery Style Sugar Cookie Frosting Creations
Why This Is the Best Sugar Cookie Icing Recipe That Hardens Perfectly
When you’re looking for the best sugar cookie icing recipe, you’re really looking for reliability, right? You want professional-looking results without spending all day hovering over the mixer. This recipe, being a variation of classic royal icing, is specifically designed to deliver exactly what you need: durability and beauty.
Here’s why I stand by this base, especially when I need hard setting icing for sugar cookies that are going into gift boxes or traveling:
- It dries rock solid, so you can stack your cookies without smashing your hard work.
- The final look is naturally shiny and smooth—no dull or cracked surfaces here!
- It’s honestly so fast; you’re looking at maybe five minutes of active mixing time.
I’ve done the testing so you don’t have to worry about runniness or dull finishes. If you want to see more details on how this technique works, check out my deep dive on making sugar cookie icing that hardens properly.
Achieving That Smooth Glossy Cookie Icing Finish
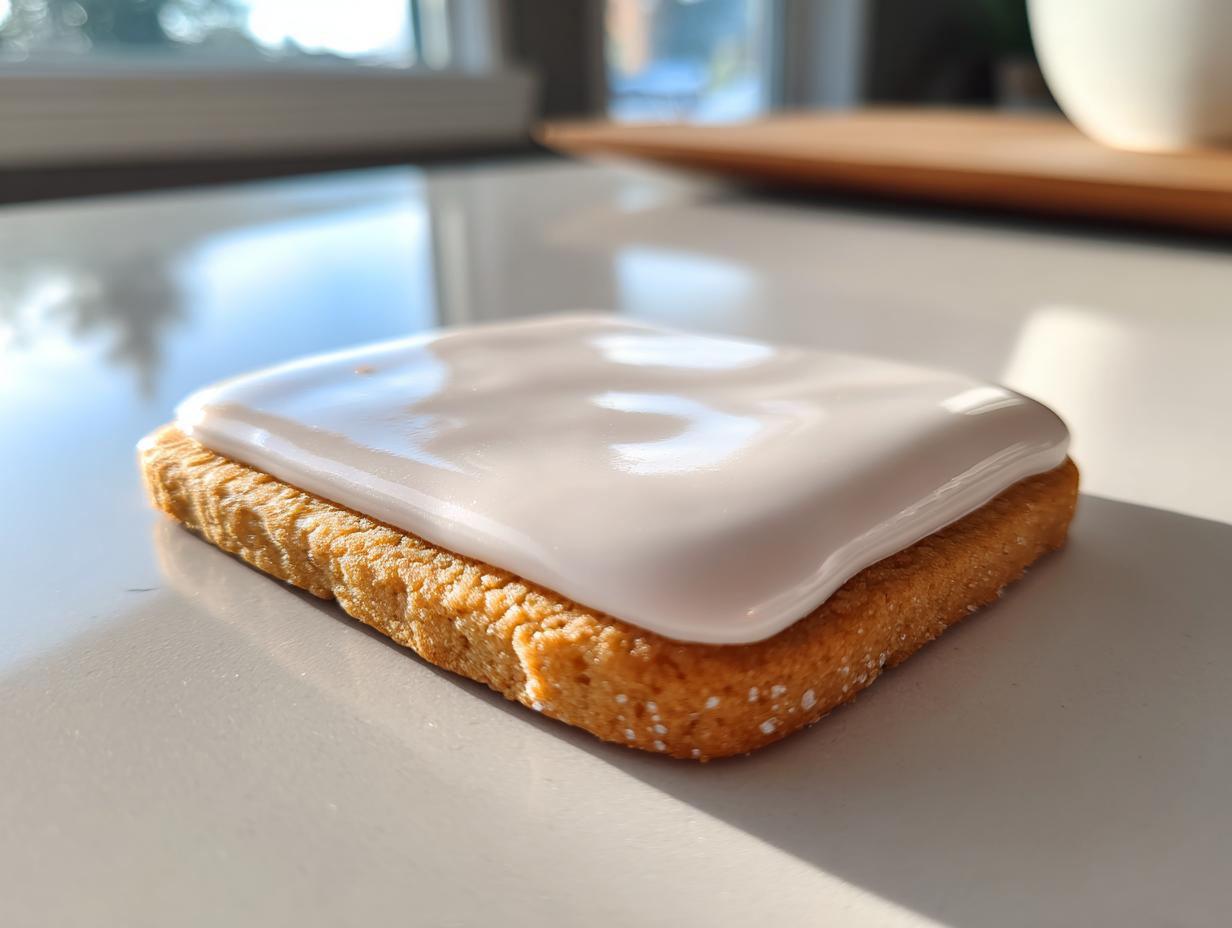
That gorgeous, almost porcelain look isn’t luck; it comes from technique! To get that signature smooth glossy cookie icing tutorial look, you need two things: properly sifted sugar and aggressive whipping. The extended beating time is what incorporates just the right amount of air, creating that satiny texture before it sets. When you beat it long enough, the sugar crystals fully dissolve into the whites, giving you that professional sheen.
Simple 4 Ingredient Cookie Icing Preparation
My favorite part about this recipe is how ridiculously quick it is. Seriously, it’s a simple 4 ingredient cookie icing that comes together in about 10 minutes total, including the necessary flavor additions. This speed is perfect when you realize you need a batch of frosting five minutes before the kids come over for cookie decorating!
Gathering Your Ingredients for Perfect Sugar Cookie Icing
Okay, let’s talk about what you need for this fantastic sugar cookie icing. The beauty here is that the ingredient list is so short, which means your quality really matters. Don’t try to skimp because every single item here plays a huge role in how firm the icing dries.
Here is exactly what you need to pull together for about two dozen good-sized cookies:
- Three large egg whites—these are crucial for structure!
- Four cups of powdered sugar, and please, please make sure you sift it first!
- One teaspoon of vanilla extract.
- If you like a little depth, a quarter teaspoon of almond extract is optional but tastes fantastic.
I have to stress the egg white part: using truly fresh, good-quality whites really helps that icing set up beautifully hard the way we want it to.
How to Prepare Your Easy Cookie Frosting for Decorating
This is where the magic happens, and honestly, it’s so straightforward! Since we are aiming for that beginner cookie decorating icing that dries rock hard, technique matters more than specialized ingredients. We’re going to put that mixer to work, but don’t rush the process. The time in the bowl is what makes this icing reliable for all your cut-out cookies.
First, get your egg whites foamy in the mixer—that’s step one. Then, you have to add the sifted sugar slowly, one cup at a time. If you dump it all in at once, you’re asking for trouble and a grainy texture. Once it’s all incorporated, you crank the speed up and let it beat for a full five to seven minutes. Trust me, that whipping time is non-negotiable if you want that hard setting icing for sugar cookies. After that, we do the flavor additions.
Once you have your stiff, brilliant white icing, you might need to thin it out a little, depending on what you’re doing next. If you’re outlining, keep it thick. If you are flooding the center, you need a slightly runnier batch. You can read a bit more about making sure your cookie icing recipe dries hard on the blog!
Whipping and Achieving Stiff Peaks for Sugar Cookie Icing
Listen, those five to seven minutes of beating are essential for creating the perfect powdered sugar icing that sets firm. You want the mixer to make the icing look very stiff—it should look bright white, and when you lift the whisk, you should have stiff peaks that don’t droop over. This long whip ensures maximum air incorporation which leads to that smooth, hard finish we love so much.
Adjusting Consistency for Outlining and Flooding
Once you hit those stiff peaks, we need to think about application. For outlining the edges of your cookies, you want the icing to be quite thick so it holds its shape right where you pipe it. For flooding inside that outline, add water—but only a half teaspoon at a time! Beat it well after each tiny addition. You are looking for the icing to flow off the whisk slowly, almost like thick honey. This patience prevents runny messes later! If you need more instruction on getting that perfect flow, I highly recommend reading up on how to make sugar cookie icing harden.
Tips for Making Sugar Cookie Icing Dry Hard
The biggest stressor when making sugar cookie icing is watching it stay gooey for hours, right? We want a satisfying, crisp shatter when someone bites into that holiday cookie. If you want to know how to make sugar cookie icing dry hard and fast, it really comes down to environment and preparation. After hours of testing, I found that letting the decorated cookies air dry uncovered in a cool, dry spot yields the best results. Please avoid stacking them or putting them in the fridge right away—that trapped moisture is your enemy! You can see some great tips on achieving that perfect set over at their guide on icing that hardens.
For super hard results, try to decorate on lower humidity days, if you can. We need that surface area to dry out efficiently so we get that durable finish ready for gifting.
Ingredient Quality for Hard Setting Icing for Sugar Cookies
As I mentioned before, quality matters here, especially for hard setting icing for sugar cookies. Make sure those egg whites are fresh; older whites don’t whip up as well, leading to a softer set. Also, *sifting* your powdered sugar isn’t just a suggestion—it’s vital. Lumps of improperly mixed sugar stay soft and sticky, preventing the entire surface of your beautiful coating from fully hardening. Keep it pure, keep it sifted, and they will dry perfectly!
Coloring and Storing Your Holiday Cookie Decorating Icing
So, you’ve got your perfect white base, but now it’s time to make those cookies pop for the holidays! If you’re planning on making batches of holiday cookie decorating icing in bright reds or festive greens, please hear me out: use gel food coloring, not the liquid kind you usually have in the spice rack. Liquid coloring adds too much water, and guess what that does? It breaks down the structure we just worked so hard to build, leading to icing that stays soft.
You want rich color without adding moisture, so gel pastes or professional drops are the way to go. A tiny toothpick dip is often enough!

Now, what about what’s left over? If you aren’t using all your icing right away—and trust me, you’ll always make too much because it’s so fun—storage is key. Take plastic wrap and press it directly onto the *surface* of the icing in the bowl. You cannot just cover the bowl; the plastic wrap needs to be touching the icing. This stops that dry skin from forming on top. If you’re storing it for a day or two, just keep it sealed tight in the fridge. When you bring it out, you might need to whip it for just 30 seconds to bring the texture back before you dive into a fun recipe like my Peppermint Chocolate Chip Cookies!
Serving Suggestions for Your Decorated Cookies
With this firm, glorious icing for cut out cookies, the possibilities are huge! Since it dries so hard, layering or stacking them for display or gifting is totally stress-free. These aren’t cookies that are going to smudge in the box, I promise. I love making simple stars and circles with this glaze and serving them alongside a warm mug of coffee, but honestly, they look just as good piled high on a tiered platter during a holiday party.
They also pair wonderfully with something a little richer, like my melt-in-your-mouth classic butter cookies—the simple, buttery flavor is the perfect base for this bright, sweet topping. Enjoy seeing how beautiful your creations look!
Frequently Asked Questions About Making Sugar Cookie Icing
I totally get it—when you’re in the middle of decorating, you need quick answers! People often ask me how to manage the ingredients or what happens after the mixer stops running. This recipe is fantastic, but knowing a few tricks makes decorating stress-free, especially for big holiday projects. Let’s tackle some of the most common questions I get about this specific sugar cookie icing.
If you’re looking for more specific info on troubleshooting, I have a whole guide on why your icing might fail, but generally, sticking to the recipe ensures success!
Can I use meringue powder instead of egg whites in this sugar cookie icing recipe?
Oh yes, you absolutely can! If you’re nervous about using raw egg whites, meringue powder is a great substitute. Generally, you can swap out one large egg white for about two teaspoons of meringue powder mixed with two tablespoons of water—just mix that powder with the water before beating it up! It will still give you that beautiful, hard finish.
How long does this royal icing recipe that hardens take to dry completely?
This is the million-dollar question! For this royal icing recipe that hardens perfectly, drying time depends on your home climate. In low humidity, it might be firm in four hours. But if it’s muggy, you might need eight or even overnight. Always prioritize letting them air dry uncovered to get that crisp, hard surface.
If you want to read up on another popular version that uses a different thickener, I found some interesting notes on cookie icing that hardens elsewhere.
Storage and Reheating Instructions for Leftover Icing
What do you do when you’ve decorated a dozen cookies but still have half a bowl of amazing sugar cookie icing left? Don’t just toss it! We want to keep it fresh for the next round of decorating. The trick I learned is all about blocking the air away from the surface. Take plastic wrap and press it directly onto the icing—it needs to touch the surface so a dry skin doesn’t form. Seal that bowl up tight. If you need to revive it later, don’t panic! Just give it a quick, gentle whip with the mixer for about 30 seconds, and it will be smooth and ready to go again.
Share Your Bakery Style Sugar Cookie Frosting Creations
Now you have the secret to making that perfect, reliable bakery style sugar cookie frosting! Seriously, you’re going to love how easy it is to decorate beautiful cookies now that you’ve mastered the hardening glaze. I truly hope you give this a try for your next baking project. When you do, please come back and leave me a rating below—I love hearing about your successes. And if you share photos online, tag me! I’d be thrilled to see what amazing designs you create. You can find out more about my baking philosophy right here on the About Page. Happy decorating, everyone!
PrintEasy Royal Icing That Hardens Perfectly for Sugar Cookie Decorating

Make bakery-style sugar cookie icing at home. This simple royal icing recipe dries smooth, glossy, and firm, perfect for decorating holiday or gift cookies.
- Prep Time: 10 min
- Cook Time: 0 min
- Total Time: 10 min
- Yield: Coats approximately 2 dozen cookies 1x
- Category: Dessert
- Method: Mixing
- Cuisine: American
- Diet: Vegetarian
Ingredients
- 3 large egg whites
- 4 cups powdered sugar, sifted
- 1 teaspoon vanilla extract
- 1/4 teaspoon almond extract (optional, for flavor)
Instructions
- Place the egg whites in the bowl of a stand mixer fitted with the whisk attachment. Beat on medium speed until the egg whites are foamy, about 1 minute.
- Gradually add the sifted powdered sugar, one cup at a time, mixing slowly until incorporated after each addition.
- Once all the sugar is added, increase the speed to medium-high and beat for 5 to 7 minutes until the icing is very stiff, bright white, and holds stiff peaks. This whipping time is key for a hard finish.
- Mix in the vanilla extract and almond extract, if using, on low speed until just combined.
- To achieve a smooth, glossy finish for outlining and flooding cookies, you may need to thin the icing slightly. Add water, 1/2 teaspoon at a time, beating well after each addition, until the icing reaches a consistency that flows slowly off the whisk.
- Separate the icing into bowls if you plan to color it. Add gel food coloring sparingly and mix until the color is uniform.
- Use the icing immediately to decorate your cooled sugar cookies. For outlining, use a slightly thicker consistency. For flooding the centers, use a slightly thinner consistency.
- Allow the decorated cookies to air dry uncovered at room temperature for several hours, or until the icing is completely hard to the touch. This ensures a durable, professional look.
Notes
- For the best results when making royal icing that hardens, use fresh egg whites.
- If you need to store leftover icing, press plastic wrap directly onto the surface of the icing to prevent a skin from forming, then seal the container.
- If your icing becomes too thick while decorating, add a few drops of water to restore the correct consistency.
Nutrition
- Serving Size: 1/4 cup
- Calories: 190
- Sugar: 48
- Sodium: 25
- Fat: 0
- Saturated Fat: 0
- Unsaturated Fat: 0
- Trans Fat: 0
- Carbohydrates: 49
- Fiber: 0
- Protein: 2
- Cholesterol: 0