
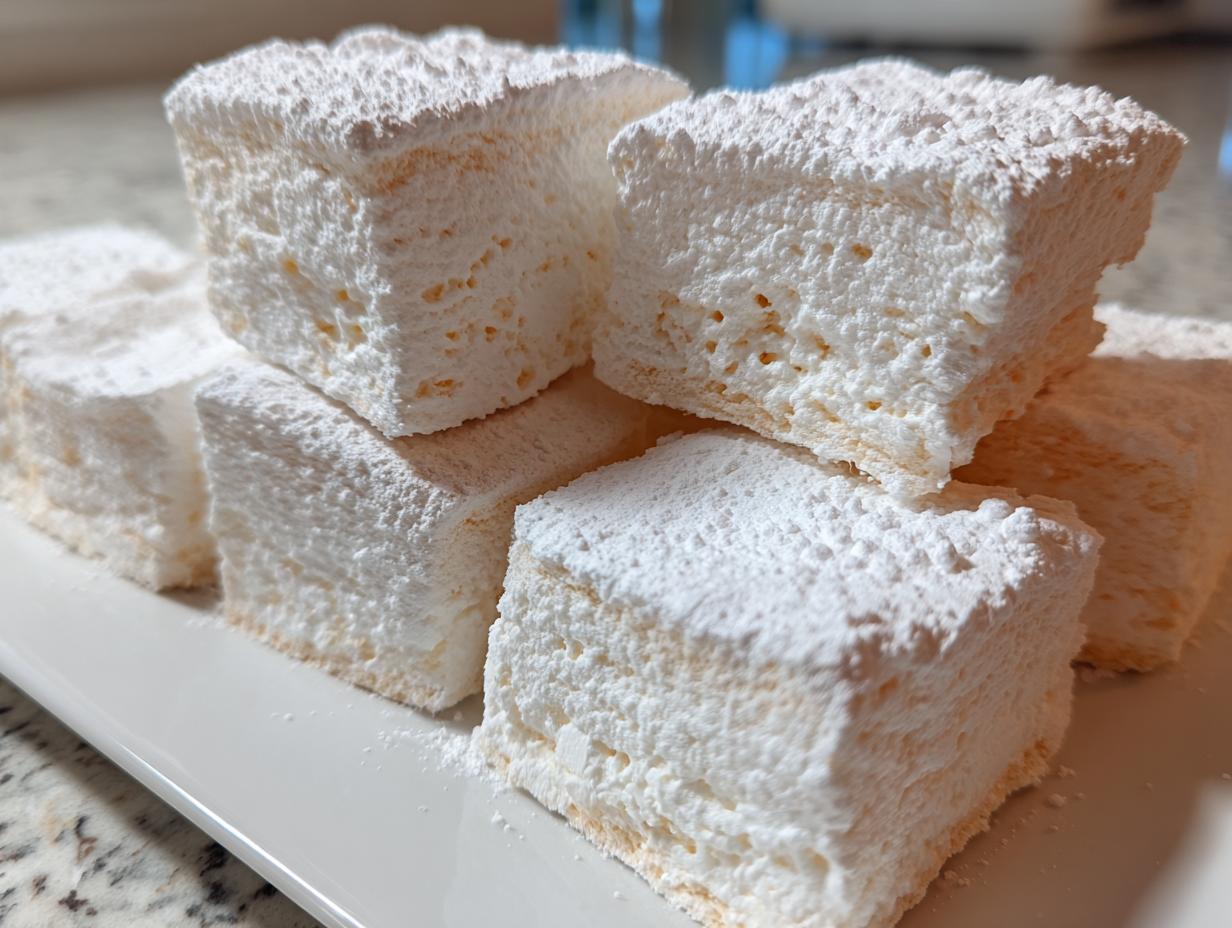
There is just something magical about transforming simple sugar into something light, airy, and cloud-like, isn’t there? For me, the scent of sweet vanilla is instantly comforting—it takes me right back to my grandmother’s kitchen, even when I’m not baking bread. Many people think that achieving that perfect, pillowy texture is reserved for professional candy makers, but I’m here to tell you that homemade marshmallows are surprisingly straightforward. We spent weeks testing the sugar syrup ratios and whipping times here in the Taste This Plate kitchen so you don’t have to! This recipe delivers the absolute softest, fluffiest texture you can imagine, miles better than anything you buy in a bag. Trust me, once you master this, you won’t go back. If you want to know more about why we test everything so thoroughly, check out our story right here.
- Why You Will Love These Homemade Marshmallows
- Gathering Your Ingredients for Perfect Homemade Marshmallows
- The Step-by-Step Guide to Making Homemade Marshmallows From Scratch
- Expert Tips for Perfect Homemade Marshmallows
- Variations: Beyond Classic Homemade Marshmallows
- Serving Suggestions for Your Pillowy Dessert Recipes
- Storage and Keeping Your Homemade Marshmallows Fresh
- Addressing Common Questions About Homemade Marshmallows
- Estimated Nutritional Data for Homemade Marshmallows
- Share Your Homemade Treats Experience
Why You Will Love These Homemade Marshmallows
I know you might be hesitant about candy making, but honestly, these treats are so worth the minimal effort. Forget those dense, weirdly firm store-bought blocks! When you make these at home, you get something spectacular.
- They are unbelievably soft and airy. Seriously, they melt the second they hit your tongue.
- We use only simple ingredients you probably already have; this is truly an easy marshmallow recipe to tackle.
- They are incredibly versatile—perfect for sinking into your best hot chocolate or becoming the best s’mores ingredients you’ve ever experienced.
Gathering Your Ingredients for Perfect Homemade Marshmallows
Okay, let’s talk about what you need. Making anything shiny and sweet like this requires precision, but thankfully, the ingredient list for these homemade marshmallows is super short. We aren’t trying to get exotic here; we’re using kitchen staples to achieve that gorgeous, pillowy dessert recipe texture. Making sure you have these items ready before you start heating anything is half the battle won!
Here is the full rundown:
- 3 tablespoons unflavored gelatin powder
- 1/2 cup cold water (this is just for waking up the gelatin!)
- 1 cup granulated sugar
- 1/2 cup light corn syrup (this is crucial for texture)
- 1/4 cup water (for the syrup bath)
- 1/4 teaspoon salt
- 1 teaspoon pure vanilla extract (don’t skimp here!)
- Confectioners’ sugar and cornstarch mixture, for dusting everything!
Essential Components for Fluffy Homemade Candy
The real secrets lie in the gelatin, which is what gives you that fantastic stretch, and the sugar syrup base. We need both the granulated sugar and the corn syrup, as they cook together to hit that magic soft-ball stage. That temperature is what guarantees your final product is that beautiful, fluffy homemade candy rather than sticky goo. Then, of course, we finish it all off with that rich vanilla; using pure extract makes all the difference in these homemade marshmallows.
The Step-by-Step Guide to Making Homemade Marshmallows From Scratch
This is the part where we turn ingredients into magic! I promise this is easier than it looks, but you do need to have your ingredients prepped before you start boiling the syrup, because things move fast once that temperature hits 240 degrees F. Candy making requires some focus, so keep kids and pets out of the kitchen, especially when that hot sugar comes out. We’re aiming for that signature soft and airy treats texture on the first try! If you want to check out some foundational mixing techniques that help in many different recipes, like when we make our classic chocolate chip cookies, they apply here too!
Preparing the Pan and Blooming the Gelatin
First things first, grab your 9×13 inch baking pan. You really need to grease this well—I reach for vegetable shortening, not oil—and then dust it generously with your sugar and cornstarch mix. Don’t be shy! We don’t want any sticky surprises later. Next, put your gelatin powder into the stand mixer bowl and gently sprinkle the 1/2 cup of cold water over it. This is called ‘blooming.’ It just means letting the gelatin fully absorb the water so it can do its job properly later on; let that sit for about ten minutes while you handle the syrup.
Cooking the Sugar Syrup to Soft-Ball Stage
While your gelatin is plump, you can focus on the main event. In your saucepan, whisk together that granulated sugar, corn syrup, the other 1/4 cup of water, and the salt. Heat this over medium until the sugar vanishes—stir gently to help that along, but stop stirring once it starts bubbling. Now, attach your candy thermometer! This is non-negotiable for success. You must cook this mixture until it hits exactly 240 degrees Fahrenheit. That temperature guarantees the perfect setting structure for your homemade marshmallows.
Whipping and Flavoring the Marshmallow Mixture
The second that thermometer hits 240°F, pull the syrup off the heat immediately. Now, turn your mixer (with the bloomed gelatin inside) onto low speed. You need to stream that hot syrup down the side of the bowl—seriously, aim it away from the whisk attachment, or it will splatter everywhere! Once it’s all in, crank that mixer up to high. You must whip this for a full 10 to 15 minutes. I know, it feels ridiculously long, but this is how you incorporate the air needed for that melt-in-your-mouth texture. In the last minute, drop in your vanilla extract.
Setting and How to Cut Homemade Marshmallows
When the mixture is thick, glossy, white, and looks like soft, stiff clouds in the bowl, it’s done. Work quickly now! Scrape that marshmallow cloud into your prepared pan. Use a lightly oiled spatula or oiled hands to gently coax it out to the edges evenly. Don’t press too hard, or you deflate all that good air we just whipped in there! Give it a final generous dusting of sugar mix on top. Now, the hardest part: patience! You have to let these set undisturbed for at least four hours, but overnight is even better. Once firm, flip the whole slab onto a cutting board dusted with more sugar. Use a large, sharp knife—oiled lightly—to cut them into whatever size squares you love. Toss those fresh cuts in the remaining dust so no two sides stick together!
Expert Tips for Perfect Homemade Marshmallows
Now that you’ve seen the steps, let me share a few little secrets I picked up through testing. Keeping these things in mind will ensure you get those truly superior, pillowy results every single time. Don’t try to rush the whipping stage—that 10 to 15 minutes on high speed is what incorporates the sheer volume of air needed. If you stop early, you’ll end up with that firmer, chewier center, not the airy treat we want!
Another thing I learned is that if you’re worried about handling that hot syrup, you can let it cool for just a minute before pouring it in, but never let it drop below 220°F, or it won’t activate the gelatin correctly. For the fluffiest texture, make sure you leave that whisk attachment on for the entire whipping time; switch to a paddle, and you start knocking out those precious air bubbles. If you’re interested in finding more deep dives on candy texture specifically, check out this great tip source for marshmallow tips and tricks.
Variations: Beyond Classic Homemade Marshmallows
Once you master the vanilla base, the sky is the limit for fun flavor additions—this is where you can start making truly gourmet marshmallow ideas! If you want a rich, dark treat, I suggest the chocolate variation mentioned in our notes. It’s simple: cut back the vanilla a tiny bit and sift in about 1/4 cup of unsweetened cocoa powder during the last few minutes of whipping. It makes the most incredible homemade treat!
But don’t stop there! This simple recipe is perfect for adaptation. Want peppermint for the winter? Add 1/2 teaspoon of peppermint extract with the vanilla. Making something for a coffee lover? A half teaspoon of good quality coffee extract works wonders. These simple swaps let you customize your own perfect homemade marshmallows for gifting or just snacking.
Serving Suggestions for Your Pillowy Dessert Recipes
Now that you have a pan full of these heavenly, pillowy dessert recipes, what are you going to do with them? Honestly, I love just grabbing a handful straight from the pan while they are still a little gooey inside. But they truly shine when used in your favorite ways! Dropping a few into a steaming mug of homemade hot chocolate elevates that drink instantly. And trust me, if you are making s’mores, treating your guests to these soft little clouds instead of the plastic-y ones from the store makes them the absolute best s’mores ingredients!

They are also really lovely served alongside a strong cup of coffee, just like a little sweet bite after dinner. And don’t forget, they make wonderful food gift ideas homemade! Bag some up with a nice ribbon for neighbors during the holidays. If you want something specific to pair them with, our cranberry orange punch is perfect for a cozy weekend treat.
Storage and Keeping Your Homemade Marshmallows Fresh
Once you’ve cut your beautiful batch of homemade marshmallows, keeping them fresh is key to that soft texture. You need to store them airtight at room temperature—never in the fridge! The humidity in the fridge makes them sweat and become sticky almost immediately. They hold up really well for about two weeks if stored properly in a container with extra dusting sugar tossed between the layers. If they start to feel a little tacky after a week, just toss them lightly in a bit more of that cornstarch and confectioners’ sugar mix, and they’ll be perfect again!
Addressing Common Questions About Homemade Marshmallows
It’s totally normal to have questions when you start making homemade holiday candy making! Candy making sometimes feels intimidating, but most issues come down to just a tiny tweak in temperature or time. We want every batch to turn out like those wonderful soft and airy treats we talked about. If you’re looking for another simple recipe to balance out the sugar rush, try our sparkling honey lemonade soda!
Can I make homemade marshmallows without corn syrup?
You absolutely can try! As mentioned in the recipe notes, you can substitute the corn syrup with honey or maple syrup. Just know that because they are natural sweeteners, they behave a little differently. Your final texture might be slightly softer, but you definitely don’t need corn syrup if you prefer to skip it. You can read more about that specific swap here.
Why is my marshmallow mixture not getting stiff?
If you’re whipping and it still looks soupy after ten minutes, you probably didn’t reach the correct temperature with your sugar syrup, or you stopped whipping too soon. Remember, we need that full 10 to 15 minutes on high speed to incorporate enough air! If you stop early, you won’t get the right consistency for that fluffy homemade candy.
What is the trick to cutting them without making a mess?
This is all about lubrication! Make sure your knife or pizza cutter is slightly oiled, and keep a small ramekin of that dusting mixture nearby. As you cut, dust the blade constantly. Another trick is to wait until they are fully rested—trying to cut them when they are still warm is a recipe for disaster!
Estimated Nutritional Data for Homemade Marshmallows
I always believe in full transparency in the kitchen, and that includes knowing what’s in what we lovingly make from scratch. When you make these homemade marshmallows, you’re using real sugar, so the numbers are what they are, but knowing you skipped all those artificial stabilizers is worth it!
The nutritional breakdown below is an estimate based on the recipe as written, serving about 4 squares per serving. Keep in mind this can shift a bit depending on the brand of corn syrup or the exact amount of dusting sugar you use to coat the final cuts.
- Serving Size: 4 squares
- Calories: 145
- Sugar: 28g
- Sodium: 25mg
- Fat: 0g
- Protein: 3g
We’re focusing on beautiful, homemade treats here, not necessarily low-sugar snacks, but these values should help you plan if you’re keeping track. Honestly, when they are this good, portion control is the hardest part!
Share Your Homemade Treats Experience
Well, that’s it! You’ve done it! You’ve successfully made a batch of the fluffiest, most incredible homemade marshmallows out there. I sincerely hope you enjoyed the process and, more importantly, I hope you are enjoying the results right now—maybe dropped into your favorite hot chocolate, or perhaps just popping them in your mouth!
We here at Taste This Plate thrive on knowing that these recipes are working for you in your own kitchen. So, please, don’t be shy! If you made these airy wonders, I really want to hear about it. Did you try the chocolate variation? Did you manage to get perfectly clean cuts? Drop a rating down below and let me know how it went in the comments.
If you run into any trouble down the line, or just want to share a picture of your beautiful handiwork, feel free to reach out to us directly on our contact page. We love seeing our recipes come to life!
Thank you for gathering around our table today. I hope this recipe becomes one of your go-to moves for a truly simple, yet extraordinary, homemade sweet. Until next time, happy cooking!
Warmly,
Kate Reilly
PrintSimple Homemade Vanilla Marshmallows: Soft and Fluffy Treats
Make soft, airy homemade marshmallows using basic ingredients. This easy recipe guides you to pillowy perfection, far better than store-bought versions, perfect for hot chocolate or s’mores.
- Prep Time: 20 min
- Cook Time: 10 min
- Total Time: 4 hours 30 min
- Yield: About 4 dozen 1x
- Category: Dessert
- Method: Candy Making
- Cuisine: American
- Diet: Vegetarian
Ingredients
- 3 tablespoons unflavored gelatin powder
- 1/2 cup cold water (for blooming gelatin)
- 1 cup granulated sugar
- 1/2 cup light corn syrup
- 1/4 cup water (for syrup)
- 1/4 teaspoon salt
- 1 teaspoon pure vanilla extract
- Confectioners’ sugar and cornstarch mixture, for dusting
Instructions
- Lightly grease a 9×13 inch baking pan. Dust the bottom and sides generously with the confectioners’ sugar and cornstarch mixture. Set aside.
- In the bowl of a stand mixer fitted with the whisk attachment, sprinkle the gelatin over the 1/2 cup cold water. Let it sit for 5 to 10 minutes to bloom.
- While the gelatin blooms, combine the granulated sugar, corn syrup, 1/4 cup water, and salt in a medium saucepan. Stir over medium heat until the sugar dissolves.
- Attach a candy thermometer to the saucepan. Bring the mixture to a boil without stirring. Cook until the syrup reaches 240 degrees Fahrenheit (soft-ball stage).
- Once the syrup reaches 240 degrees F, remove it from the heat immediately.
- Turn the stand mixer on low speed. Slowly and carefully pour the hot syrup down the side of the mixing bowl into the bloomed gelatin. Avoid pouring directly onto the whisk.
- Once all the syrup is added, increase the mixer speed to high. Beat for 10 to 15 minutes until the mixture is very thick, glossy, white, and has cooled significantly. It should hold stiff peaks.
- Beat in the vanilla extract during the last minute of mixing.
- Working quickly, scrape the marshmallow mixture into your prepared pan. Use a lightly oiled spatula or oiled hands to gently spread the mixture evenly into the pan.
- Dust the top surface generously with more of the sugar/cornstarch mixture.
- Let the marshmallows set uncovered at room temperature for at least 4 hours, or preferably overnight.
- Once set, invert the marshmallow slab onto a cutting board dusted with the sugar mixture. Peel off the parchment paper, if used.
- Use a sharp, oiled knife or pizza cutter to cut the slab into squares. Toss the cut sides in the remaining sugar mixture to prevent sticking.
Notes
- For an extra fluffy texture, use the whisk attachment for the entire whipping time.
- If you want to make chocolate marshmallows, reduce the vanilla extract to 1/2 teaspoon and add 1/4 cup of sifted unsweetened cocoa powder during the last 5 minutes of whipping.
- To make these marshmallows without corn syrup, substitute the corn syrup with 3/4 cup of liquid honey or maple syrup, but note that the texture and setting time may change slightly.
- Use these homemade treats for the best s’mores ingredients or drop them into your hot chocolate.
Nutrition
- Serving Size: 4 squares
- Calories: 145
- Sugar: 28
- Sodium: 25
- Fat: 0
- Saturated Fat: 0
- Unsaturated Fat: 0
- Trans Fat: 0
- Carbohydrates: 37
- Fiber: 0
- Protein: 3
- Cholesterol: 0