
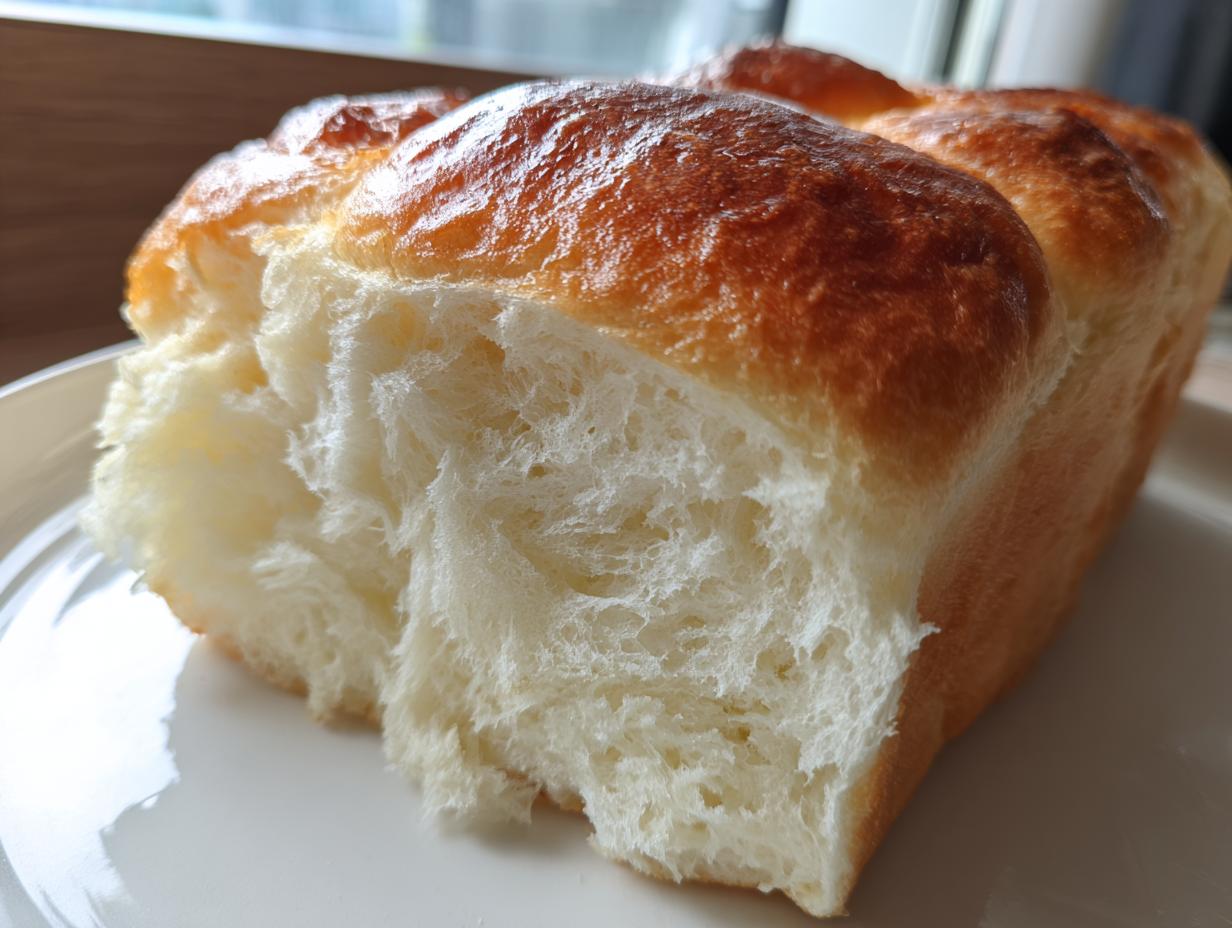
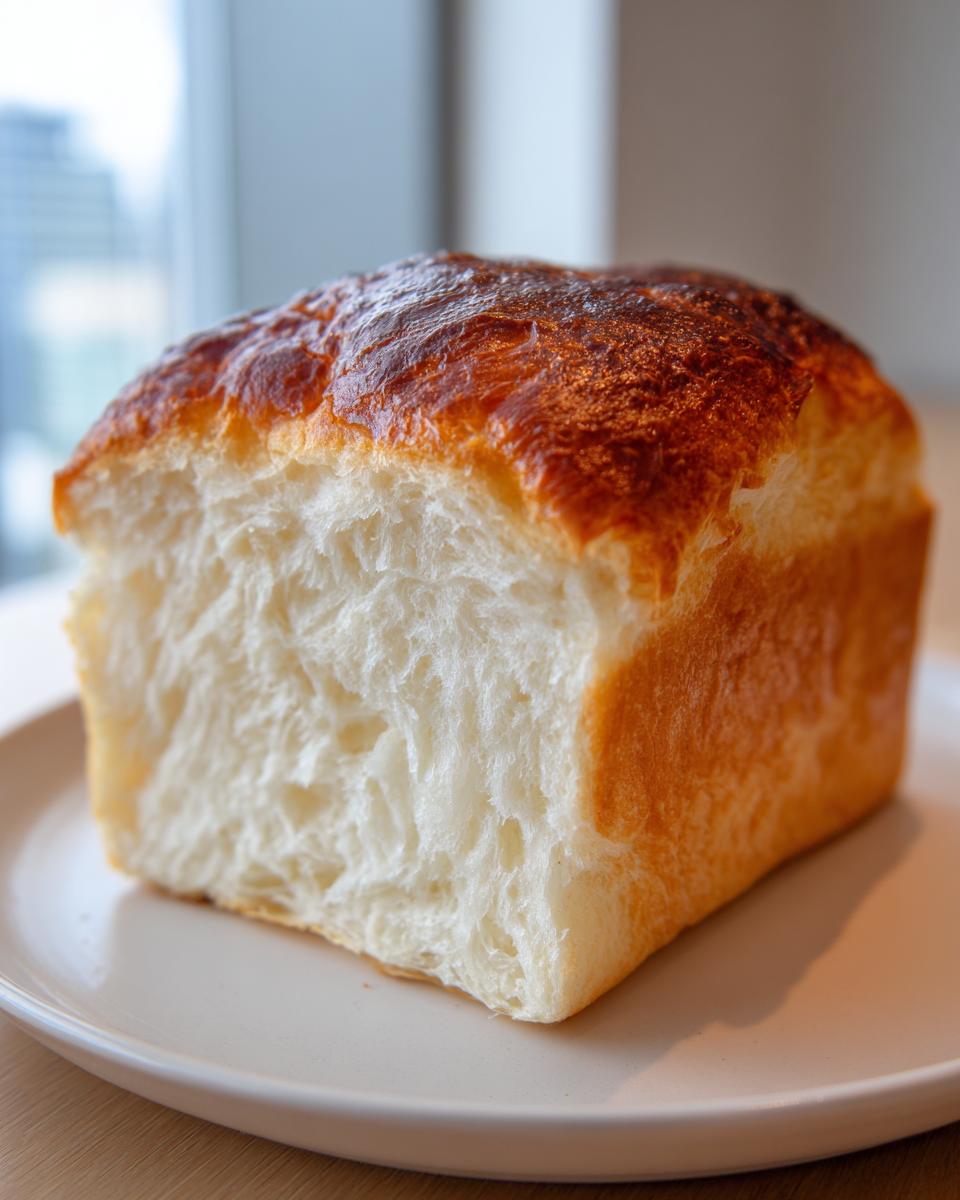
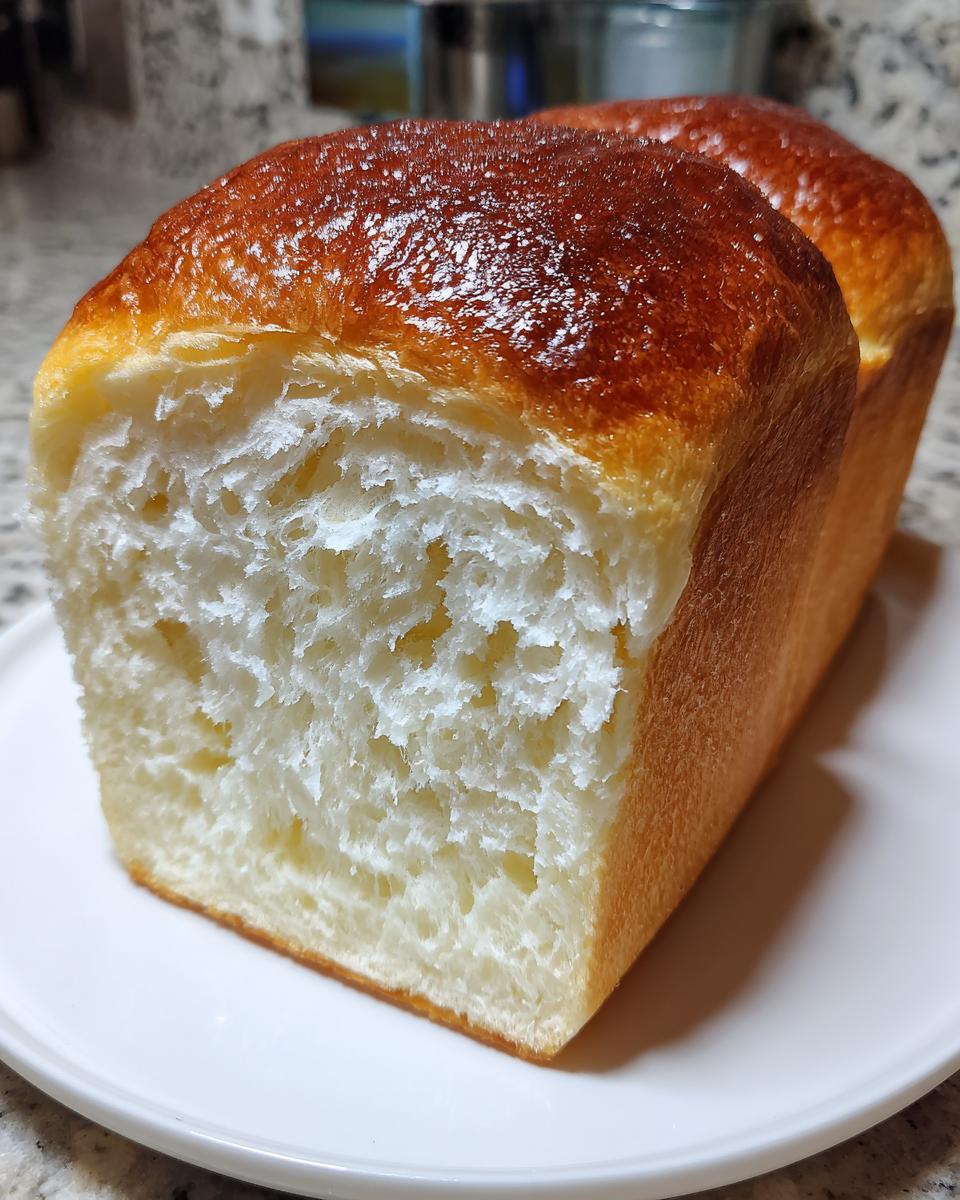
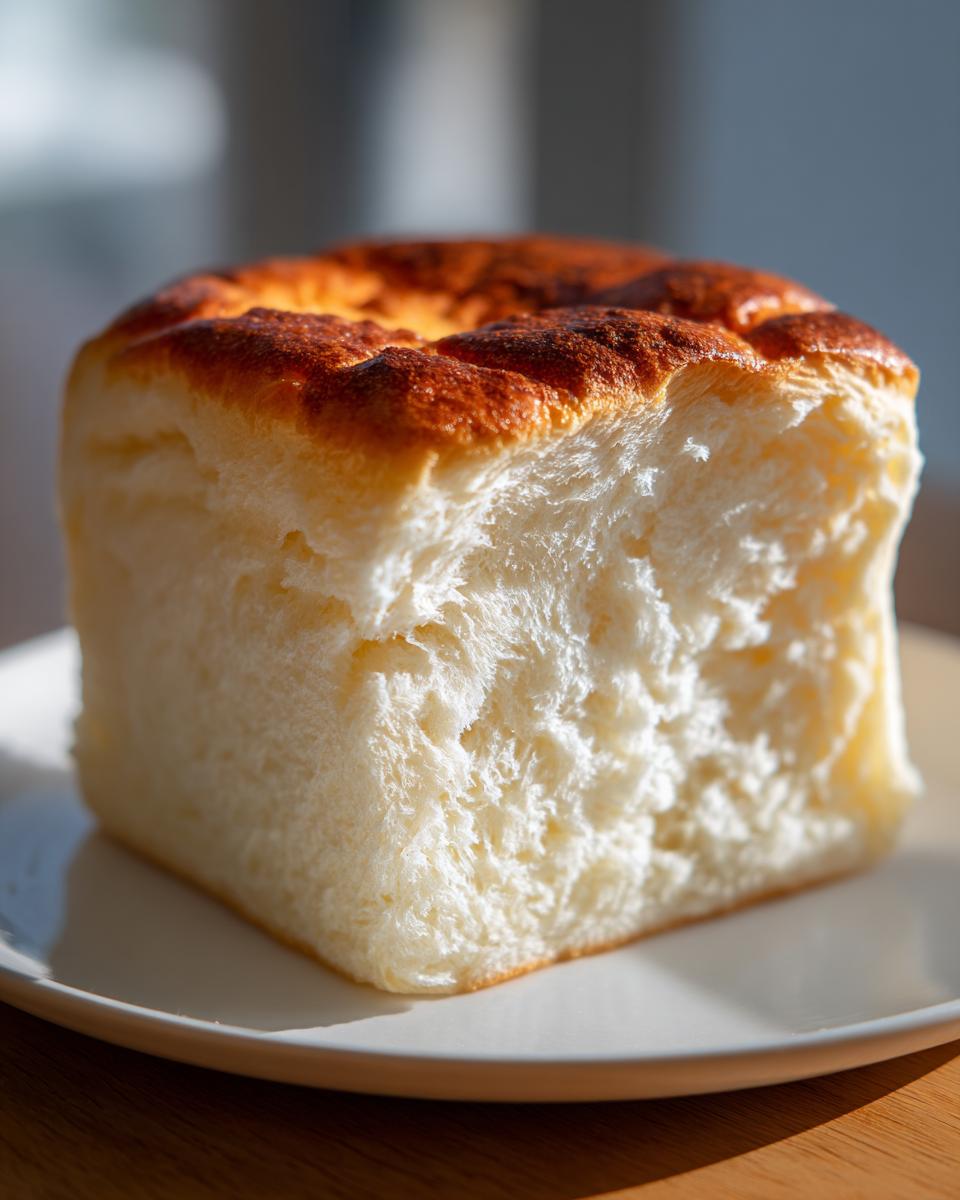
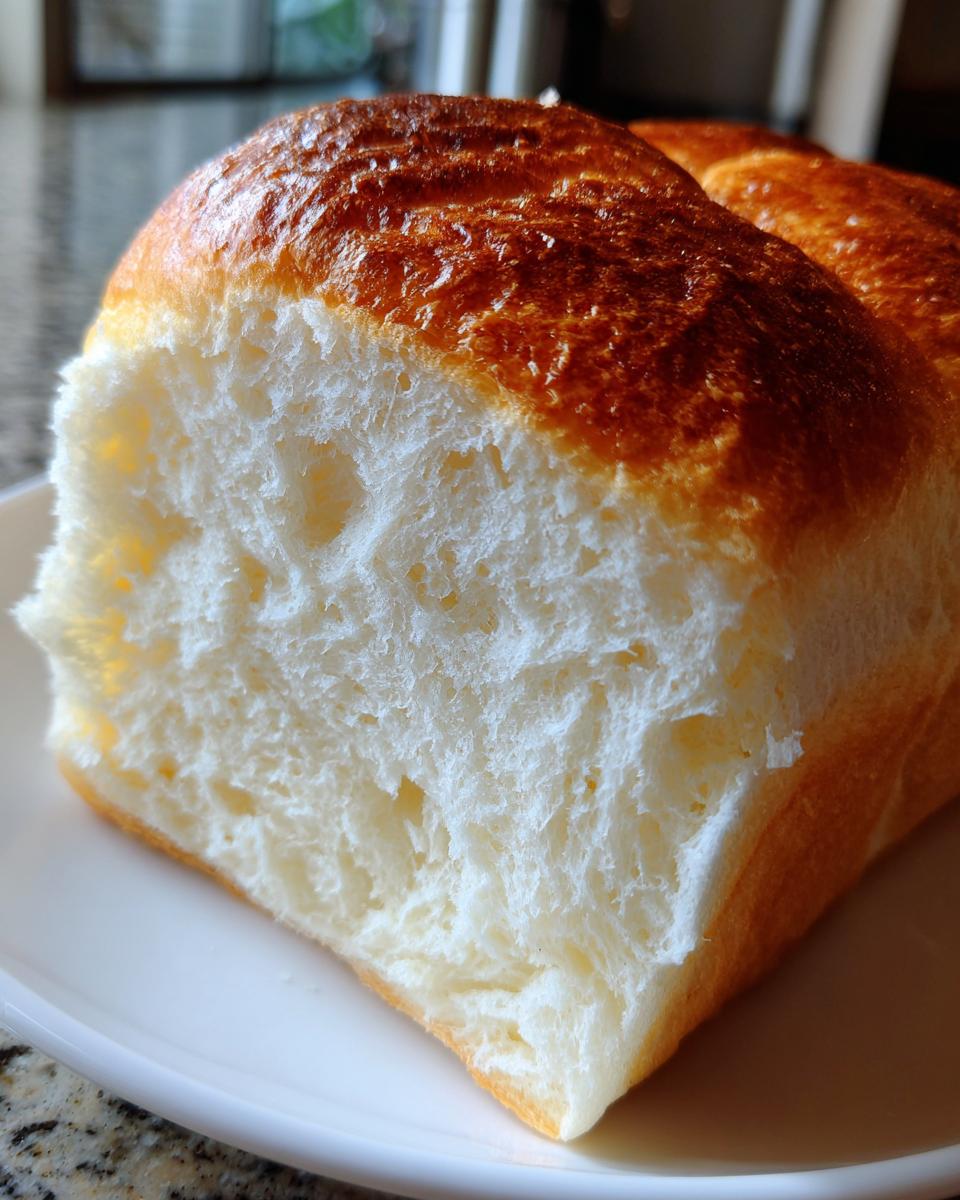
Doesn’t everyone dream of baking a loaf of bread so soft it feels like you’re slicing through cotton candy? I get it; that pillowy, cloud-like texture you see in Asian bakeries seems impossible to replicate at home. Well, I spent weeks testing things in my own kitchen—analyzing recipes and tweaking temperatures—to crack that code. I’m so thrilled to share the absolute best version: the Ultimate Soft & Fluffy japanese milk bread (Shokupan) using the Tangzhong Method. Seriously, I promise you, this technique isn’t nearly as scary as it sounds. We’re going to prove that you don’t need fancy equipment or professional training to achieve that melt-in-your-mouth crumb right here on your own counter. Visit our philosophy page to see why we believe every home cook can master this! We believe the best memories are made in the kitchen.
- Why This Japanese Milk Bread Recipe Delivers Cloud-Like Softness
- Gathering Ingredients for Your Soft Fluffy Bread
- Step-by-Step Hokkaido Milk Bread Tutorial with Tangzhong
- Baking and Cooling Your Shokupan Homemade Masterpiece
- Tips for Baking the Easiest Milk Bread Recipe
- Serving Suggestions for Your Sweet Milk Bread
- Storage and Keeping Your Japanese Milk Bread Fresh
- Frequently Asked Questions About Tangzhong Bread Recipe
- Sharing Your Best Homemade Bread Creations
Why This Japanese Milk Bread Recipe Delivers Cloud-Like Softness
When I first tried making Japanese milk bread, I kept wondering why my loaves were just… fine. They were nice, certainly, but they weren’t that bouncy, ethereal bread I’d swooned over in pictures. It took way too much testing—and a few flat loaves—before I realized the secret wasn’t just butter; it was moisture retention. That’s where the Tangzhong method steps in like a hero!
This technique is what separates a good loaf from an absolutely incredible one. If you want bread that actually **stays soft** for days, you need to use this technique every time. It truly is one of the most important Japanese bread secrets I stumbled upon.
Understanding the Tangzhong Method for Pillowy Bread Baking
So, what exactly is Tangzhong? It’s super simple, I promise! You just take a small portion of the flour and milk listed in the recipe and cook them together gently on the stovetop until it becomes a thick, smooth paste. This process basically pre-gelatinizes the starch in the flour.
When that starchy paste goes into the main dough, it acts like a tiny sponge, soaking up and holding onto moisture way better than raw flour ever could. This is the mechanical reason your bread will feel impossibly fluffy and retain that cloud bread texture long after it cools. It’s the simplest trick that makes the biggest difference for achieving true pillowy bread baking results.
Gathering Ingredients for Your Soft Fluffy Bread
I love this part because it really shows you how simple luxury can be made from everyday things! You absolutely do not need to run to a specialty shop for this Japanese Milk Bread Recipe. Every item on this list is something you can easily grab on your regular trip to the grocery store. We’re using bread flour, of course, for that perfect chew, and softening that beautiful butter so it incorporates nicely.
The richness we get from using whole milk and that single egg yolk is what makes this such a satisfyingly **sweet milk bread**. Take a look at what you need to gather up before we start cooking that magic Tangzhong paste!
Ingredient Notes and Simple Substitutions
We have a specific requirement for bread flour here, folks. Please try to stick to it! Bread flour has a higher protein content, which helps develop the strong gluten network needed to hold all that air we create later. Using regular all-purpose flour will still work in a pinch, but your bread won’t have that incredible, bouncy structure we are aiming for when making Shokupan homemade.
Also, make sure you use whole milk, not skim. The fat content in the milk—along with the butter—is crucial for that silky, melt-in-your-mouth texture that defines good Hokkaido bread. Good news for my vegetarian friends: this recipe uses no meat products whatsoever!
Step-by-Step Hokkaido Milk Bread Tutorial with Tangzhong
Okay, deep breaths! This is the heart of the recipe, and while it has more steps than your standard quick bread, I promise each stage is straightforward. If you can stir a pot and manage a stand mixer, you can absolutely nail this. This recipe is designed to give you that perfect, tall **Milk Bread Loaf Pan** outcome we all crave, which means we follow procedure closely. Trust me, the effort pays off in sheer fluffiness!
Preparing the Essential Tangzhong Paste
We start with Step 1, making the magical Tangzhong. In a small saucepan, whisk together just 1/4 cup of your total milk measurement and 2 tablespoons of bread flour. It will look like thin milk at first.
Now, put this over low heat. This is crucial—low heat! If you try to rush it by cranking up the flame, you’ll end up with gluey lumps instead of a paste. You need to stir constantly until it visibly thickens. We’re looking for it to reach about 160°F (71°C). Think of it like mixing gravy; it has to get thick enough to leave nice stripes when you pull your spoon through it. Once it’s thick, take it off the heat immediately! Cover the surface directly with plastic wrap—this stops a dry skin from forming—and let it cool completely down to room temperature. Don’t try to rush this cooling part either!
Mixing and Kneading the Rich Japanese Milk Bread Dough
Once that paste is cool, we move to the stand mixer bowl for Steps 2 through 5. Dump in all your remaining dry ingredients first: the larger pile of bread flour, sugar, yeast, and salt. Give it a quick buzz on low speed just to combine them uniformly.
Next, we introduce the wet stuff along with that cooled Tangzhong paste: the rest of the cold whole milk and your single egg. Mix that on low until it looks like a complete mess—a shaggy dough. This is normal! After about 5 minutes on low speed, it’s time for the star, the butter. Add that softened butter one tablespoon at a time, letting each piece fully incorporate before adding the next. This slow process is what keeps the dough smooth.
Now comes the serious arm workout, or rather, the mixer workout! Keep it kneading on medium-low for another 10 to 15 minutes. You are looking for perfection here. The dough should come together, clean the sides of the bowl, and pass the famous windowpane test—where you can gently stretch a piece thin enough to see light through it without it tearing. If you master this step, you’ve unlocked the **Japanese bread secrets** to a bakery-quality loaf!
Shaping and Proofing for the Perfect Milk Bread Loaf Pan Result
After that long kneading session, the dough needs a rest (Step 6, the first rise). Lightly oil your bowl, pop the dough in, cover it, and walk away for 1 to 1.5 hours until it has doubled. Seriously, go make yourself a cup of coffee or maybe even plan what you’ll serve this with—it’s fantastic alongside something savory like creamy mashed potatoes!
Once risen, gently punch the air out. For the loaf pan (Step 7), divide the dough evenly into three portions. Roll each piece into a tight little ball. Place these three balls right next to each other in your greased 9×5 loaf pan. They’ll puff up and join forces during the final rise.
The second rise (Step 8) is key for that beautiful dome. Cover it loosely and let it rest until the dough has crested about an inch over the top rim of your pan. If you wanted soft dinner rolls instead of a loaf, this is where you’d divide the dough into 12 smaller pieces and place them in a 9×13 pan for a single, larger rise.
Baking and Cooling Your Shokupan Homemade Masterpiece
We are almost there! Preheat that oven to 350°F (175°C) while your dough finishes its second rise. This is the moment we’ve been waiting for—baking time!
In Step 9, make a simple egg wash by whisking that single egg yolk with a teaspoon of water. Don’t overdo it; a gentle brushing over the crowned top of the dough is all you need to get that gorgeous, deep golden color.
Bake for 30 to 35 minutes. I always use my digital thermometer now, checking for an internal temperature of 200°F (93°C) right in the center. That’s one of the little Japanese bread secrets that ensures perfection!
Now, here’s the most important part of cooling: DO NOT let this bread sit in the hot pan. As soon as it comes out of the oven, gently turn it onto a wire rack. If you leave it in there, the trapped steam will turn that beautiful, crisp crust soft and soggy. Gotta let it cool completely before slicing, even though I know smelling that fresh bread might make you want to cheat!
Tips for Baking the Easiest Milk Bread Recipe
Even though we established that the Tangzhong makes this Japanese Milk Bread supremely soft, sometimes the process of making bread at home can still throw curveballs. Don’t panic! Remember, the goal here is to empower you, not stress you out. Knowing a few simple fixes means you can recover from those little baking hiccups. These are the little Japanese bread secrets I learned through trial and error—the stuff that doesn’t always make it into the main recipe steps.
If you’re ever worried about sticking, you absolutely must try the parchment paper lining trick for future bakes, or try a homemade cake release like a thin brush of oil and flour paste. It works wonders, especially for rich doughs like this one. If you need a bubbly, refreshing drink while you wait for the rises, try out my recipe for Sparkling Honey Lemonade!
Troubleshooting Common Japanese Milk Bread Issues
The most common sticking point for bakers is usually right in the middle of the kneading process, after you’ve added the butter. This dough is naturally very soft and sticky—it has a high liquid content thanks to the Tangzhong, warm milk, and egg! If it seems way too wet and is just clumping into a sticky mess on the sides of the bowl, don’t dump in more flour right away!
More flour means less moisture, and less moisture means a less fluffy final product. Instead, if it’s struggling, just continue kneading. That extended kneading time lets the gluten develop fully, and it will eventually start climbing the dough hook and cleaning the bowl walls. If it’s truly unmanageable after a few more minutes, add flour one teaspoon at a time until it just starts coming together.
Conversely, if your dough feels stiff or isn’t stretching well during the windowpane test, the ‘why’ is usually tied to temperature. If your kitchen is cold, the butter might have tightened up, or the yeast might be slow! Try placing your bowl near a slightly warm oven (not turned on!) or just let it rest, covered, for an extra 15 minutes. Sometimes, the only secret is patience. If you want to see another baker’s approach to this bread, check out this recipe while you wait!
Serving Suggestions for Your Sweet Milk Bread
Now that you’ve created the most perfect, cloud-like loaf, what do you eat it with? Since this Japanese Milk Bread is naturally a little sweet—thank you, sugar and milk!—it goes great with both sweet and savory things. I adore using slices for those beautifully layered Japanese fruit sandwiches, loaded up with whipped cream and soft strawberries. That’s next-level delicious!
But honestly, just slicing it thick and toasting it lightly with a generous smear of salted butter is heaven on earth. It’s the perfect sponge for soaking up the goodness! If you need something wonderfully bright to drink alongside your fresh bake, you have to try my recipe for Sparkling Pink Lemonade. It cuts through the richness of the bread so nicely. For more inspiration on how to use your loaf, check out this site.
Storage and Keeping Your Japanese Milk Bread Fresh
This is where that hard work with the Tangzhong really pays off! Because we locked in so much moisture with the cooked paste, this Japanese Milk Bread simply refuses to go stale quickly. You want that ethereal texture to last, right?
The number one rule is to keep air away from it. Once completely cool, wrap your loaf tightly—I mean tightly—in plastic wrap before you even think about putting it in a container. Then, place that wrapped loaf into an airtight container or a sealed zip-top bag.
Keep it right on the counter at room temperature. Do not refrigerate it! Cold temperatures actually dry bread out much faster. Kept sealed up this way, this bread that stays soft will be absolutely perfect for three to four days. It really is amazing!
Frequently Asked Questions About Tangzhong Bread Recipe
I know sometimes the science behind baking can feel a little mysterious, but asking questions is how we all get better! People always ask me the same few things when they first attempt this Tangzhong bread recipe, especially regarding the texture and the key ingredients. Let’s clear up those final little doubts so you can jump into baking with total confidence!
Can I use the Yudane Method instead of Tangzhong for Japanese Milk Bread?
That is such a smart question! Yes, you absolutely can, and the result will still be wonderfully soft. Think of Tangzhong and Yudane as cousins; they both use heat to pre-gelatinize the starch for moisture retention.
The main difference is preparation. Tangzhong (which we used here) involves cooking the flour and liquid on the stove until it forms a thick paste. The Yudane method is easier—you simply pour boiling water over your flour and whip it together until it forms a paste. While both methods create incredibly soft, pillowy bread baking results, the cooked Tangzhong tends to give the absolute softest crumb that lasts the longest. You can find some great roll recipes that use Yudane, like these dinner rolls!
What is the best flour for making Soft Fluffy Bread?
My rule on this remains strict: use bread flour if you possibly can! Bread flour has a higher protein count, usually around 12% to 14%. That extra protein is what allows the prolonged kneading we do to build a huge, strong, elastic gluten network. This network is what traps all the gas from the yeast and holds onto the moisture from the Tangzhong, giving you true cloud bread texture.
If you’re in a pinch and can only find all-purpose flour, you can use it, but I highly suggest blending it with a little bit of vital wheat gluten (about 1 tablespoon per cup of AP flour) just to bump up that protein content. It won’t be quite as perfectly structured as pure bread flour, but it will save your bake! If you ever want to try a different tender baked good, my Carrot Banana Muffins are another easy win.
Sharing Your Best Homemade Bread Creations
Now that you’ve mastered the Tangzhong secret and pulled out a loaf of the softest, most incredible **Shokupan homemade** you’ve ever seen, I truly want to hear about it! Baking is so much better when we share the excitement.
Seriously, don’t be shy! Did it pass the windowpane test? Did your family devour the whole thing before you could even slice it? Let me know in the comments below how that **Japanese milk bread recipe** turned out for you. I always love seeing your photos!
If you crushed this bake, I highly encourage you to try some of my other favorite treats that are just as rewarding, like my totally foolproof Classic Chocolate Chip Cookies. Happy mixing, and happy eating!
If you’ve still got bread dough ambitions, make sure you also check out how they handle these incredible Japanese Milk Bread Rolls next time!
PrintUltimate Soft & Fluffy Japanese Milk Bread (Shokupan) using the Tangzhong Method
Make the softest, fluffiest bread at home. This recipe uses the Tangzhong method to create a pillowy, cloud-like texture that stays moist for days.
- Prep Time: 45 min
- Cook Time: 35 min
- Total Time: 3 hours 20 min
- Yield: 1 loaf (about 10 slices) 1x
- Category: Breakfast
- Method: Baking
- Cuisine: Japanese
- Diet: Vegetarian
Ingredients
- 1/4 cup Milk (for Tangzhong)
- 2 tablespoons Bread Flour (for Tangzhong)
- 1 1/2 cups Bread Flour (for dough)
- 1/4 cup Granulated Sugar
- 1 teaspoon Instant Dry Yeast
- 1 teaspoon Salt
- 1/2 cup Whole Milk (cold)
- 1 large Egg
- 4 tablespoons Unsalted Butter (softened)
- 1 large Egg Yolk (for egg wash)
- 1 teaspoon Water (for egg wash)
Instructions
- Make the Tangzhong: Whisk together the 1/4 cup milk and 2 tablespoons of bread flour in a small saucepan. Cook over low heat, stirring constantly, until the mixture thickens into a paste (about 160°F or 71°C). Remove from heat, cover the surface with plastic wrap, and let it cool completely.
- Combine Dry Ingredients: In the bowl of a stand mixer fitted with the dough hook, combine the 1 1/2 cups bread flour, sugar, yeast, and salt. Mix briefly on low speed.
- Add Wet Ingredients: Add the cooled Tangzhong, 1/2 cup cold milk, and the whole egg to the dry ingredients. Mix on low speed until a shaggy dough forms.
- Knead: Increase the speed to medium-low and knead for 5 minutes. Add the softened butter, one tablespoon at a time, waiting until each piece is incorporated before adding the next.
- Continue Kneading: Knead for another 10 to 15 minutes until the dough is very smooth, elastic, and passes the windowpane test. The dough will be soft.
- First Rise: Place the dough in a lightly oiled bowl, turning to coat. Cover and let rise in a warm spot until doubled in size, about 1 to 1.5 hours.
- Shape the Loaf: Gently punch down the dough. Divide it into three equal pieces. Roll each piece into a tight ball. Place the three balls side-by-side in a greased 9×5 inch loaf pan.
- Second Rise: Cover the pan loosely and let the dough rise again in a warm place until it has crowned about 1 inch over the rim of the pan, about 45 to 60 minutes.
- Bake: Preheat your oven to 350°F (175°C). Whisk the egg yolk and water together for the egg wash. Gently brush the top of the dough with the wash.
- Bake for 30 to 35 minutes, or until the top is deep golden brown and the internal temperature reaches 200°F (93°C).
- Cool: Immediately remove the bread from the pan and cool completely on a wire rack before slicing.
Notes
- The Tangzhong method traps moisture, which keeps this bread soft for several days.
- A stand mixer is recommended for the extended kneading time required for this rich dough.
- For soft dinner rolls, divide the dough into 12 equal pieces and bake in a 9×13 inch pan.
Nutrition
- Serving Size: 1 slice
- Calories: 180
- Sugar: 7
- Sodium: 150
- Fat: 6
- Saturated Fat: 3.5
- Unsaturated Fat: 2.5
- Trans Fat: 0
- Carbohydrates: 26
- Fiber: 1
- Protein: 5
- Cholesterol: 35