
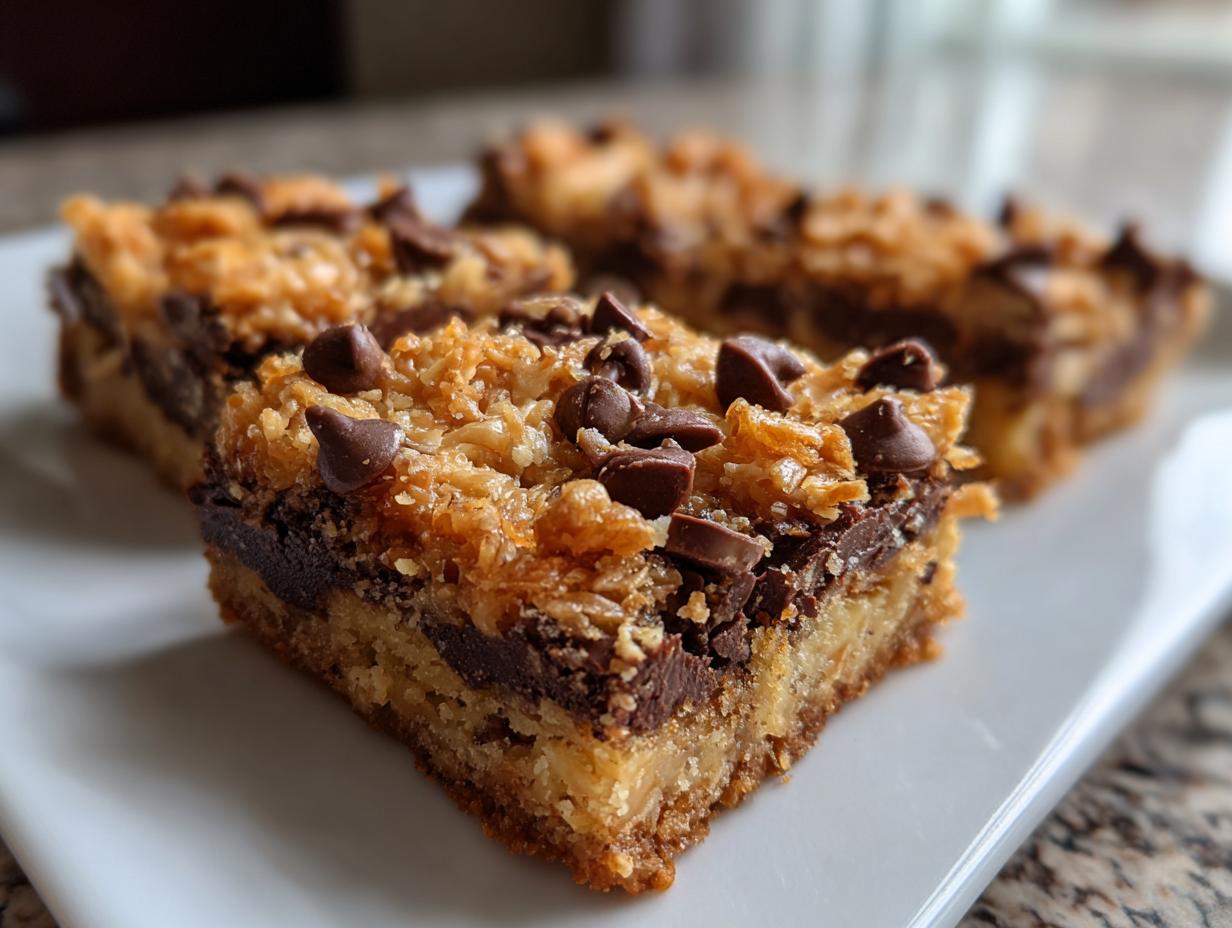
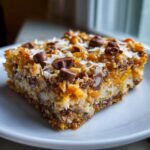
Sometimes, the desserts we remember most fondly aren’t the fancy layered cakes with complicated frosting. They are the simple, deeply satisfying treats that require almost no effort but deliver pure joy. That’s exactly what we have here with these magic cookie bars. You might know them as 7-Layer Bars or maybe even Hello Dollies—it doesn’t matter what you call them, because they are foolproof!
This recipe is one of those retro classics that simply refuses to go out of style, mostly because you just pile things into a pan, pour milk on top, and walk away. I’ve tested this exact combination numerous times in my kitchen to make sure the layers hold together beautifully, resulting in that perfect, gooey texture you’re dreaming of. If you need a seriously fast, crowd-pleasing dessert, you can absolutely trust this guide.
- Why You Will Love These Classic Magic Cookie Bars
- Gathering Ingredients for Your Magic Cookie Bars
- Step-by-Step Guide to Making Gooey Cookie Bars Recipe
- Tips for Making Perfect Magic Cookie Bars Every Time
- Variations on the Classic Magic Cookie Bars
- Serving Suggestions for These Potluck Dessert Bars
- Storage and Reheating for Your Magic Cookie Bars
- Frequently Asked Questions About Magic Cookie Bars
- Nutritional Estimates for This Easy Layered Dessert
- Share Your Ultimate Cookie Bar Recipe Experience
Why You Will Love These Classic Magic Cookie Bars
I really believe that baking should feel happy, not like a test you might fail. That’s why I’ve worked so hard to ensure this recipe is reliable. When you make these, you’re getting fantastic results with minimal stress, which is exactly what I aim for here on Taste This Plate.
- They are the definition of an easy layered dessert—no fancy standing mixer required, just a bowl and a pan.
- You get that signature chewy and unbelievably gooey cookie bars recipe texture thanks to the magic of sweetened condensed milk.
- They are practically a pantry staple recipe; you likely have most of these ingredients already!
- These are perfect for sharing! They slice cleanly (once cooled!) and travel easily, making them ideal potluck dessert bars.
- They satisfy every craving: sweet chocolate, salty nuts, and chewy coconut all in one bite.
- This is a true set-it-and-forget-it bake. Once the layers are down, the oven does all the heavy lifting, giving you time back.

Gathering Ingredients for Your Magic Cookie Bars
The beauty of needing just a few components makes these magic cookie bars a true staple. When I talk about simple ingredients bringing extraordinary meals to life, this recipe is Exhibit A! Seriously, measuring out the layers is the hardest part—and even that is a breeze.
You will need to have everything measured and ready to go before you start, especially since we are layering them quickly. Because we cover these layers with that vital liquid, everything needs to look neat before the final pour. Making sure you have high-quality chocolate and nice, sweet coconut makes a huge difference here.
Essential Components for the Ultimate Cookie Bar Recipe
Here is exactly what you need to bring these classic dessert bars together. See that sweetened condensed milk? That’s the real secret sauce; it’s what holds all those disparate layers together into one delicious, chewy package. If you’re looking for a true condensed milk dessert that delivers every single time, this is it!
- 1 1/2 cups graham cracker crumbs
- 1/2 cup unsalted butter, melted
- 1 (14 ounce) can sweetened condensed milk
- 1 cup semi-sweet chocolate chips
- 1 cup butterscotch chips
- 1 1/2 cups shredded sweetened coconut
- 1 cup chopped pecans or walnuts. For a traditional, rich flavor, I always lean toward pecans. If you grab yours from a reliable source for baking nuts, they’ll be perfectly crunchy.
Step-by-Step Guide to Making Gooey Cookie Bars Recipe
Making these magic cookie bars is pure joy because they truly are as simple as they sound. I always start by telling people to take a deep breath because there’s no complicated mixing technique here. You’re basically building a delicious little tower of sweets! Remember, we preheated the oven to 350 degrees F already, which is the absolute first step. After that, it’s all about careful stacking.
Don’t rush the cooling phase later on—that’s where many home cooks mess up and get sticky, messy squares instead of perfect bars. But don’t worry, I’ll guide you through all the timing!
Preparing the Graham Cracker Crust Bars Base
First things first: get that 9×13 pan ready! I always line mine with parchment paper, leaving the edges hanging over like little handles. This is a trick I learned the hard way so I never fight to get the bars out. Now, take your graham cracker crumbs and mix them thoroughly with that melted butter. You want it to look like damp sand.
Press that mixture firmly into the bottom of your prepared pan. Use the bottom of a drinking glass or a measuring cup to really pack it down tight. A solid base means your graham cracker crust bars won’t crumble when you cut them later!
Layering Ingredients for Perfect Magic Cookie Bars
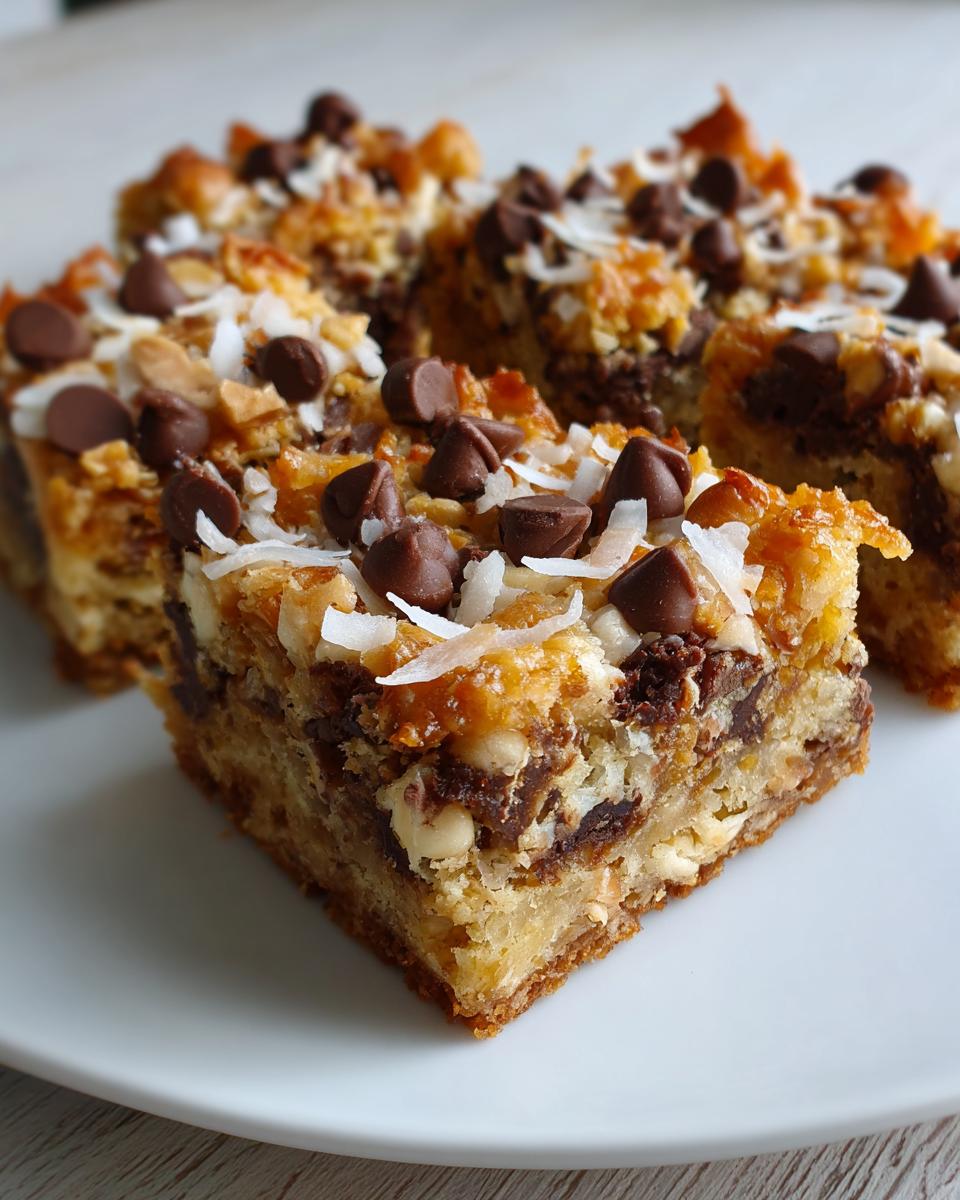
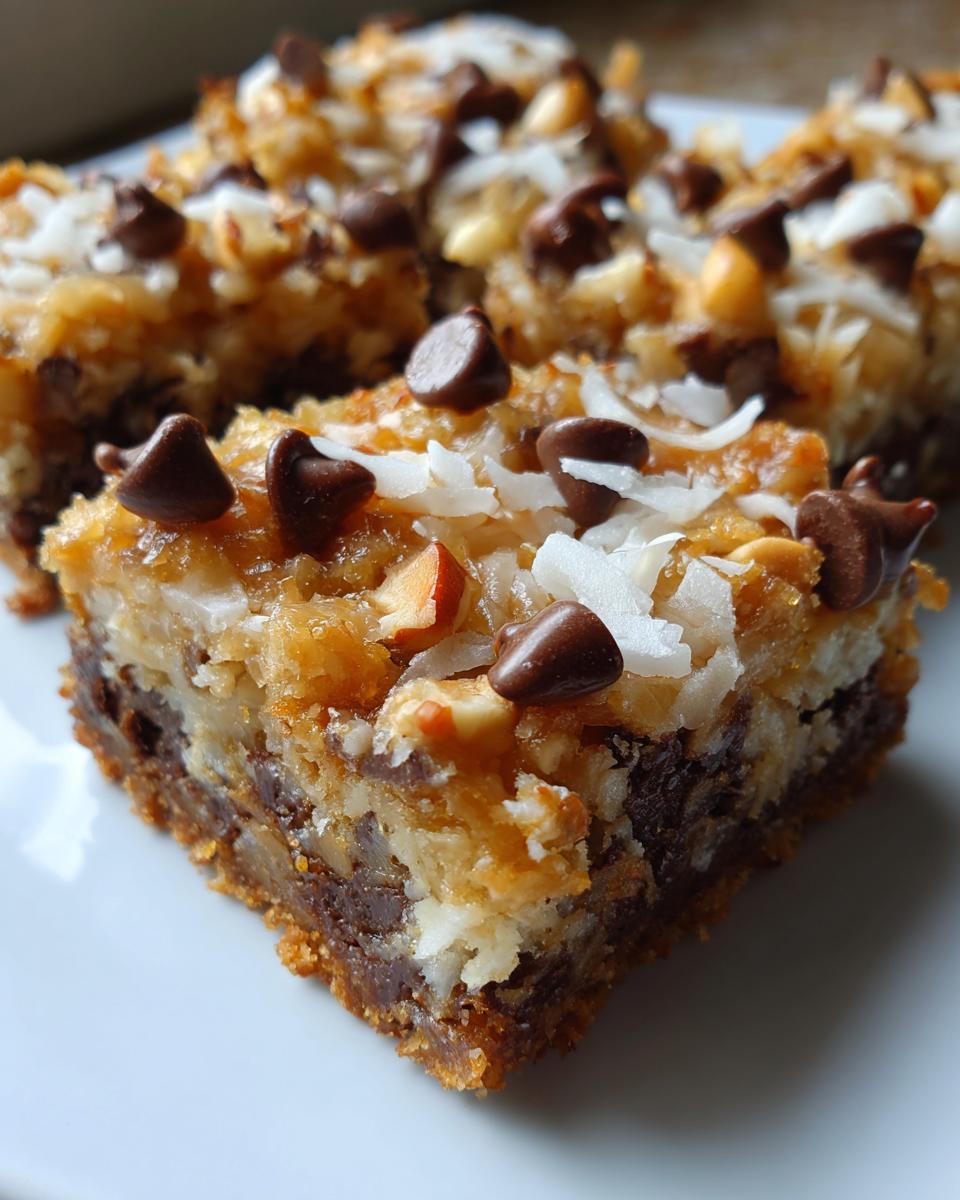
Once the base is set, it’s time for the fun part—layering! Sprinkle the chocolate chips evenly across the crust, then follow with the butterscotch chips. Next up is the shredded coconut, making sure you spread it out over the whole surface. Finally, toss those chopped pecans or walnuts on top. If you’re looking for the secret to true seven layer bars, it’s making sure these layers are distributed nicely before we move on to the finale.
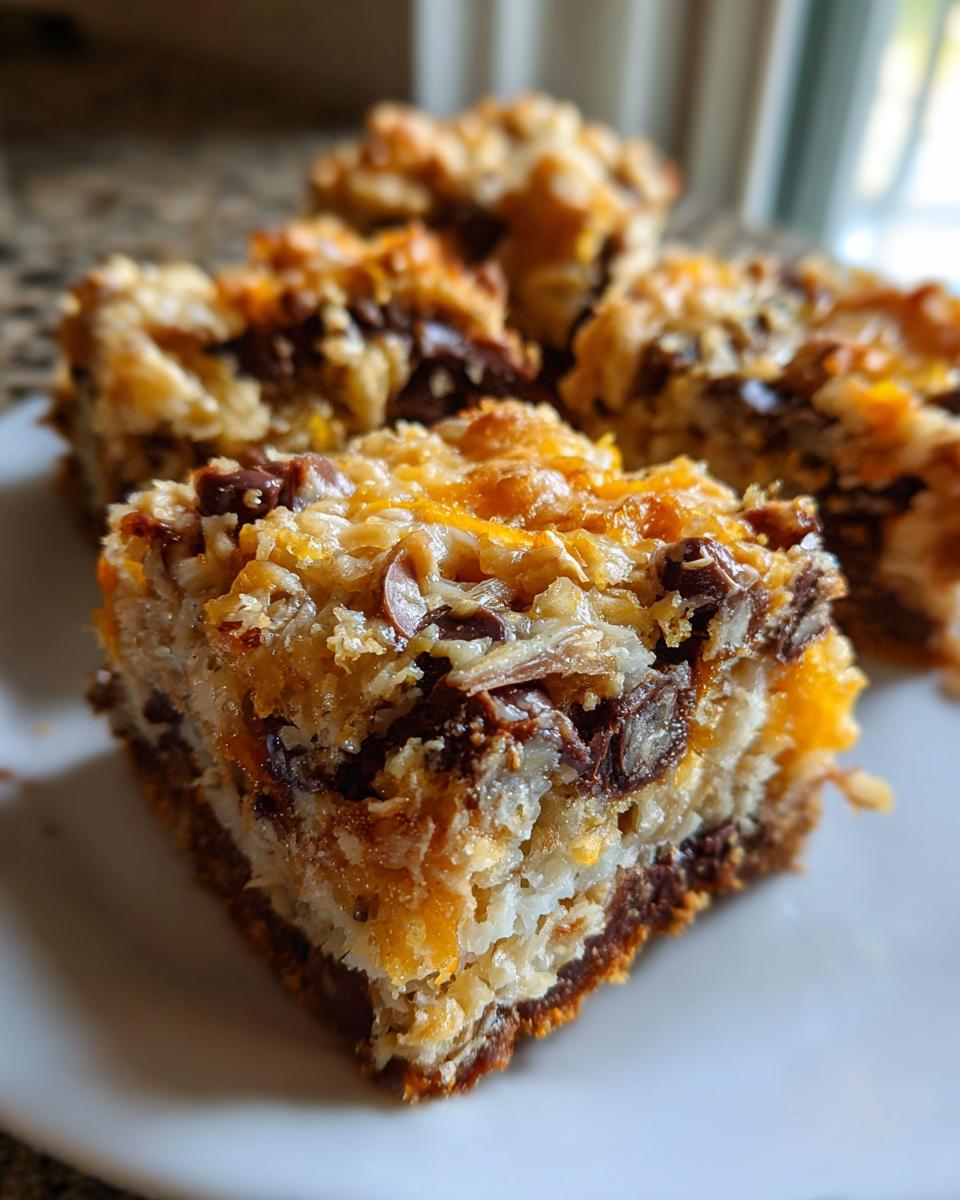
Now, take your can of sweetened condensed milk. Slowly, and I mean slowly, drizzle the entire amount over all the layers you just built. You want to move the can back and forth so the milk seeps down into all the nooks and crannies. This milk is the essential binder; it’s what gelatinizes everything into that chewy texture we love. You can see a quick video on how I layer mine over at a great resource for layered bars, but honestly, just pouring it evenly is key!
Baking and Cooling the Best Ever Magic Bars
Pop that pan into the preheated oven and let it bake for about 25 to 30 minutes. You are looking for the edges to get nicely golden brown, and you’ll see the condensed milk get all bubbly and thick. Resist the urge to take them out early! When they come out, the pan is going straight to a wire rack. This might be the hardest part of the whole recipe: you *must* let them cool completely, ideally for a couple of hours. If you cut them hot, they turn into a gooey mess. If you wait till they’re cool, they cut into these beautiful, perfect squares. Trust me on the cooling part; it transforms them from batter into the best dessert!
Tips for Making Perfect Magic Cookie Bars Every Time
Even though these are incredibly forgiving—truly one of the most no fail bar cookies out there—there are a few little tricks I picked up over the years that really elevate them, making them the best ever magic bars.
When you are assembling your layers, think about texture. We want everything to bake evenly with that amazing ribbon of condensed milk binding it all together. These tiny adjustments take your dessert brownies from good to absolutely unforgettable.
Here are my personal non-negotiables for success:
- Lightly Toast Your Coconut: This is my favorite little elevation trick! If you have an extra five minutes, spread out that shredded coconut on a baking sheet and pop it under the broiler for just a minute or two until you see gorgeous golden edges. It deepens the flavor so much and keeps that chewy texture fantastic. Just watch it like a hawk because coconut can go from toasted to burnt in about ten seconds flat!
- The Alcohol Soak (If You’re Feeling Fancy): If you are making these for adults and want a subtle depth, try soaking your pecans or walnuts in a tiny splash of bourbon or dark rum for about 15 minutes before you scatter them on top. You don’t soak them long enough for them to get totally mushy, just long enough to absorb some flavor. It pairs wonderfully with the chocolate.
- Nut Swaps are Welcome, But Check Your Pantry: While I swear by pecans or walnuts for that classic crunch, if you are out, just swap them! Slivered almonds are a great alternative if you have those lying around. The point of these bars is to use what you have to make something wonderful. Check out this great post on making easy magic cookie bars if you are looking for other substitution ideas!
- Don’t Skip the Parchment Handle: I know I mentioned it in the steps, but I really can’t stress this enough for any bar recipe. Use parchment paper that hangs over two sides of the pan. When the bars are cool, you just lift the whole slab out, set it on a cutting board, and slice cleanly. Much better than trying to wrestle a sticky square out of the corner!
- M&M Swap for Fun: If you are making these for a birthday party or around the winter holidays, swapping the butterscotch chips for festive M&Ms is always a huge hit. It adds a beautiful pop of color right there in the middle layer. It works just as well, and who doesn’t love a little candy surprise in their simple homemade sweets?
Variations on the Classic Magic Cookie Bars
Part of the joy of a simple, layered recipe like this is that you can truly make it your own without messing up the core structure. Since the sweetened condensed milk is the powerhouse that binds everything, you have a lot of freedom with what you layer on top of that graham cracker crust! These bars are wonderful straight from the cookbook, but customizing them makes them really special for a cookie exchange or just because you feel like mixing it up.
If you’re looking to switch things up, think about what flavors you love most. Do you want more chew? More crunch? More chocolate? You can create fantastic chewy coconut squares or loaded chocolate bombs just by swapping out one component. I find that people often gravitate toward making them ultra-festive, and that’s where the best variations come from.
I highly recommend checking out ideas for making these seasonal because they are such a reliable potluck addition. For instance, if you’re baking for Christmas parties, you can get really creative. Many people ditch the butterscotch or swap out some of the nuts for something festive, like adding those bright red and green M&Ms, which looks absolutely stunning once baked.
What I love most is that you can change the nut completely or even leave them out if you’re worried about allergies, and the bars still come out perfectly. You aren’t compromising the bake when you experiment with these layers, unlike a delicate cake where one wrong move can ruin the whole thing. For some fun, holiday-specific takes, people often look at special recipes like the ones detailed over at this Christmas specific baking site for inspiration on using seasonal candies.
Serving Suggestions for These Potluck Dessert Bars
You made a giant pan of gooey, sweet perfection—now what? Honestly, these magic cookie bars are best served exactly as they are because they pack such a punch of flavor! They stand up beautifully on their own, which is why they are my go-to choice for anything involving crowds.
If you are taking these to a big event, they truly shine as one of those ultimate potluck dessert bars. They never need plating, they don’t melt easily (unlike frosting), and they just disappear fast. For holidays cookie exchange recipes, you’ll want to cut them into slightly smaller squares so people can sample more variety!
If you need a pairing suggestion, keep it simple. I find they are wonderful alongside something tart or a little salty to cut through that rich sweetness. Think about serving them alongside a big, warm bowl of chili—like my recipe for Potluck Chili for a Crowd—or maybe with a slightly bittersweet coffee for dipping. They are so satisfying; honestly, you don’t need much else!
Storage and Reheating for Your Magic Cookie Bars
One of the best things about choosing magic cookie bars for a bake sale or a weekend treat is that they are actually better the next day! That little bit of chill time lets that sweetened condensed milk really firm up and lock all those layers in place. This is great news if you need an easy holiday baking item you can make ahead of time without worrying about freshness.
Thankfully, these bars are fairly non-fussy when it comes to storage, but because they are so gooey, being a little careful makes a huge difference in keeping that perfect texture. Nobody wants a crusty, dried-out center!
Here’s my simple routine for keeping your gooey cookie bars recipe tasting fresh:
- Room Temperature Patience: If you plan on eating these within two days, keeping them tightly covered in an airtight container at cool room temperature works perfectly fine. Seriously, just make sure they are completely cool before you cover them, otherwise you trap moisture and steam them, which we absolutely do not want!
- When in Doubt, Chill Them Out: Because they are so moist and full of chips, these bars tend to keep even better in the fridge than on the counter. If you know you won’t finish that 9×13 pan within 48 hours, wrap them tightly—I usually use plastic wrap followed by foil—and pop them in the refrigerator. They stay wonderfully fresh for up to a week this way.
- The Best Way to Serve Them Chilled: I know some people like bar cookies straight out of the fridge, but I find they are a little too firm straight from the cold. If you’ve chilled them, just pull the container out about 20 minutes before serving. That little bit of time allows them to soften back up just enough so they slice cleanly and taste perfectly chewy again.
And don’t worry about trying to reheat them! Seriously, these are delicious cold, room temperature, or slightly warmed by sitting out for a few minutes. They are too rich for any fancy reheating necessary. Just cover them up, keep them safe, and enjoy them over the next few days!
Frequently Asked Questions About Magic Cookie Bars
I get so many questions about my classic recipes, and these bars always generate the best inquiries! It’s because everyone wants to make sure they get that perfect, gooey result. Here are a few things I hear most often about these layered delights.
Are Magic Cookie Bars the same as Hello Dolly Bars?
Yes, they absolutely are! I laugh because depending on where you grew up, people call them something different. Whether you know these as magic cookie bars, seven layer bars, or Hello Dolly bars, you’re talking about the same stack of buttery crust, crunchy chips, sweet coconut, and that signature pour of condensed milk. It’s just regional slang for our favorite American classic!
Why is my condensed milk not setting in these seven layer bars?
Oh, that can be frustrating! If your bars feel too soupy after baking, it almost always comes down to two things: not enough baking time or not enough cooling time. Remember, you need to bake them until that milk layer is golden and bubbling around the edges—that vigorous bubbling means the milk is setting up beautifully. Even more important is the cooling! If you cut them while they are warm, the milk hasn’t had a chance to fully firm up, and they will just ooze out. Make sure you let them cool completely on the counter, or even cheat and pop them in the fridge for an hour after they’ve cooled down a bit; that ensures that lovely, chewy structure is locked in place. For more troubleshooting, I always point readers over to the great advice found on this comprehensive guide to bar cookies.
Can I make magic cookie bars without nuts?
Of course! Nuts are totally optional in this recipe. If you have an allergy or just aren’t a fan of pecans or walnuts, you can skip them entirely. The bars are still fantastic, though you might want to add a little something extra back in to replace the volume and crunch. My suggestion? If you skip the nuts, sprinkle a little extra shredded coconut or a handful of mini chocolate chips right over top of everything before you pour the milk on. That way, you still get great texture!
Nutritional Estimates for This Easy Layered Dessert
Now, I want to be super clear about something before you look at these numbers. Because we are using simple, high-quality ingredients—and because every single brand of butterscotch chip or sweetened coconut is slightly different—these are just estimates! When I developed this ultimate cookie bar recipe by testing it repeatedly, the goal was deliciousness, not calorie counting. But if you are curious about what’s going into these sweet treats, here is a general snapshot based on the standard ingredients used in my testing.
These magic cookie bars are definitely rich—that’s what makes them so good! They are meant to be a decadent treat for special occasions or a holiday gathering, not necessarily an everyday thing. Keep that in mind when you slice them, and enjoy every last crumb!
- Serving Size: 1 bar
- Calories: 220
- Sugar: 18g
- Sodium: 110mg
- Fat: 14g
- Saturated Fat: 7g
- Unsaturated Fat: 7g
- Trans Fat: 0g
- Carbohydrates: 22g
- Fiber: 1g
- Protein: 3g
- Cholesterol: 25mg
Remember, these values don’t account for any substitutions you might make, so if you add extra chocolate or use a different kind of nut, things will shift a bit. But the main takeaway is that this is a decadent, satisfying retro dessert recipe you should save for those moments when you just need something truly sweet!
Share Your Ultimate Cookie Bar Recipe Experience
Well, we did it! We took simple ingredients and turned them into something truly memorable. Look at that pan of beautiful, gooey, layered perfection! If you followed along, you now have a batch of what I truly believe is the best ever magic bars, ready to bring smiles to whatever gathering you’re headed to next.
This is where the magic of home cooking really takes over. When I started Taste This Plate, it was because I wanted people to feel confident enough to share their own culinary wins. So, please, don’t be shy! I want to hear all about how your magic cookie bars turned out.
Did you toast your coconut like I suggested? Did you sneak in some festive M&Ms? Or maybe you stuck exactly to the classic recipe? Let me know in the comments below! I read every single note, and nothing makes me happier than hearing that one of my treasured recipes has found a home in your kitchen.
If you made these and loved them, please give the recipe a rating right here on the page! Your feedback helps other home cooks feel confident trying this easy layered dessert. Remember, food isn’t just about eating; it’s about creating those small moments of happiness.
For those of you who want to know a little more about why we keep these simple, classic recipes alive, you can always pop over and read my full story on the About page. Happy baking, everyone. I’m so glad to share this table with you!
PrintThe Ultimate Classic Magic Cookie Bars (7-Layer Bars)
Make these irresistibly easy Magic Cookie Bars, also known as 7-Layer Bars or Hello Dollies. This recipe uses simple ingredients like graham cracker crust, chocolate chips, coconut, and sweetened condensed milk to create a gooey, chewy dessert perfect for any gathering.
- Prep Time: 15 min
- Cook Time: 30 min
- Total Time: 45 min
- Yield: 24 servings 1x
- Category: Dessert
- Method: Baking
- Cuisine: American
- Diet: Vegetarian
Ingredients
- 1 1/2 cups graham cracker crumbs
- 1/2 cup unsalted butter, melted
- 1 (14 ounce) can sweetened condensed milk
- 1 cup semi-sweet chocolate chips
- 1 cup butterscotch chips
- 1 1/2 cups shredded sweetened coconut
- 1 cup chopped pecans or walnuts
Instructions
- Preheat your oven to 350 degrees F. Line a 9×13 inch baking pan with parchment paper, leaving an overhang on the sides for easy removal.
- Combine the graham cracker crumbs and melted butter in a medium bowl. Mix until the crumbs are evenly moistened.
- Press the crumb mixture firmly and evenly into the bottom of the prepared baking pan. This forms your graham cracker crust.
- Sprinkle the chocolate chips evenly over the crust layer.
- Next, sprinkle the butterscotch chips over the chocolate chips.
- Distribute the shredded coconut evenly over the chips.
- Scatter the chopped nuts over the coconut layer.
- Slowly pour the entire can of sweetened condensed milk over all the layers, moving the can back and forth to cover the ingredients as much as possible. This milk binds the layers together.
- Bake for 25 to 30 minutes, or until the edges are lightly golden brown and the condensed milk is bubbly.
- Let the bars cool completely in the pan on a wire rack before lifting them out using the parchment paper overhang.
- Once cool, cut the bars into squares. This cooling time is important for a clean cut.
Notes
- For a richer flavor, toast the coconut lightly before adding it to the layers.
- If you prefer a different nut, slivered almonds work well in this recipe.
- To make these bars gluten free, substitute the graham crackers with gluten free crumbs or use a shortbread cookie base.
- You can substitute M&Ms for the butterscotch chips for a festive look, especially around the holidays.
Nutrition
- Serving Size: 1 bar
- Calories: 220
- Sugar: 18
- Sodium: 110
- Fat: 14
- Saturated Fat: 7
- Unsaturated Fat: 7
- Trans Fat: 0
- Carbohydrates: 22
- Fiber: 1
- Protein: 3
- Cholesterol: 25