
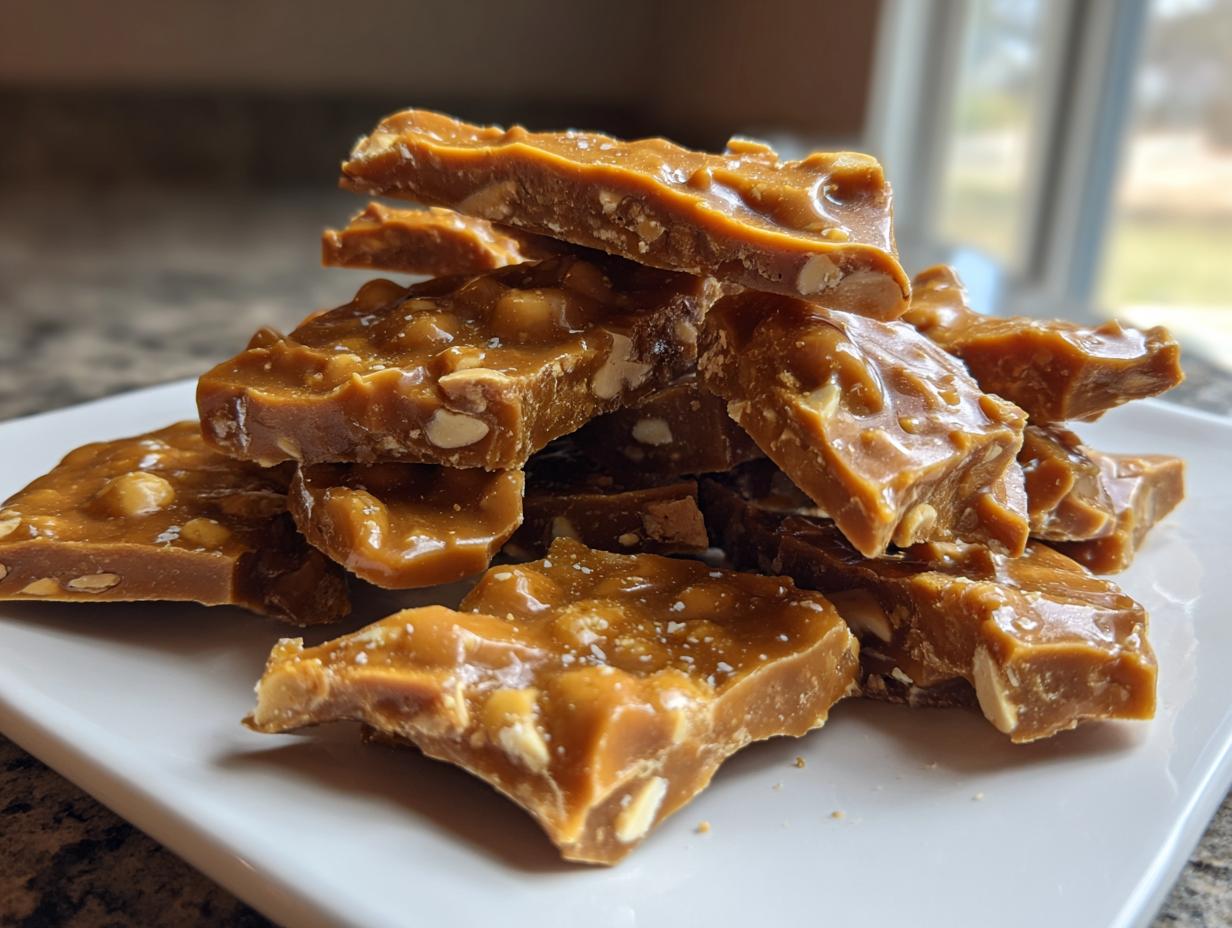
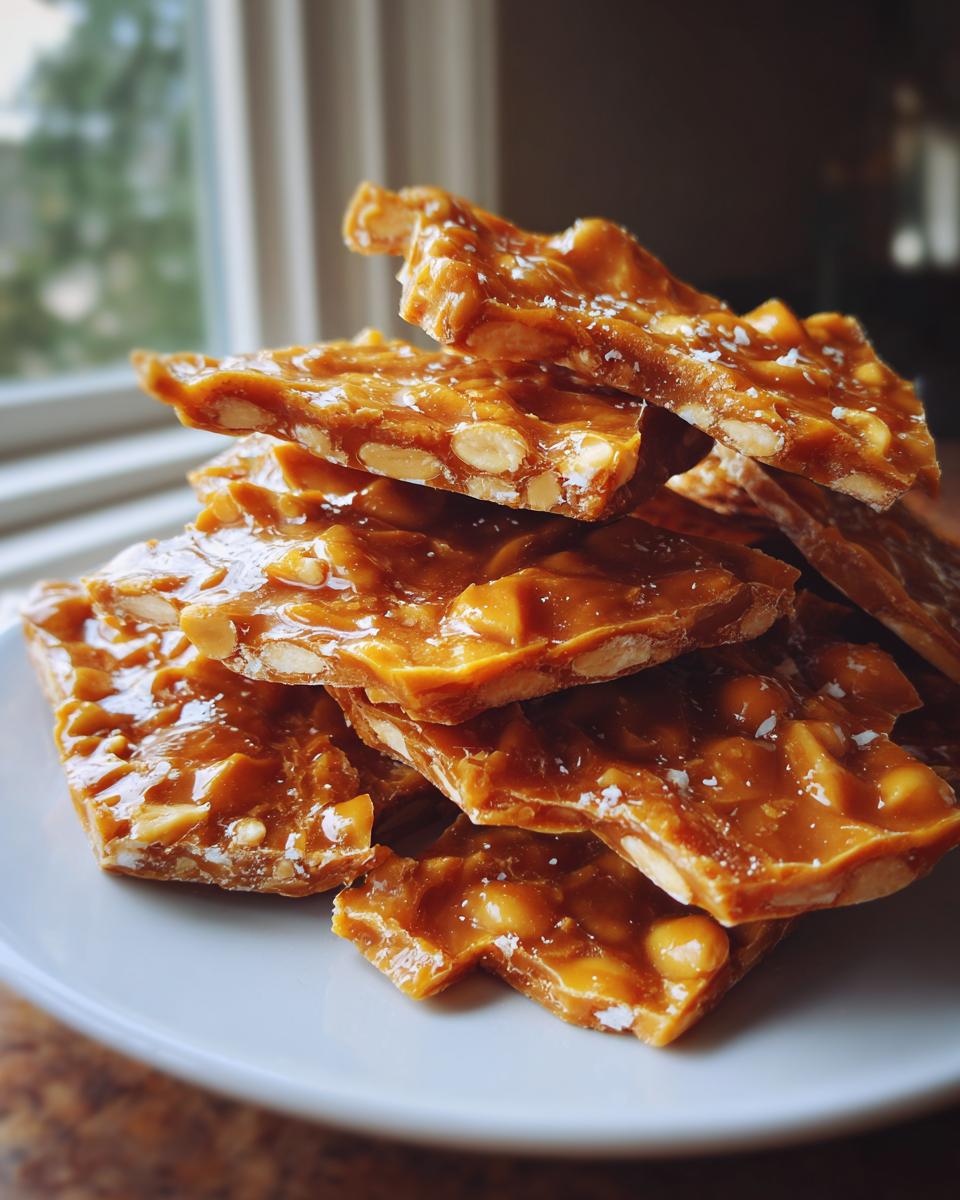
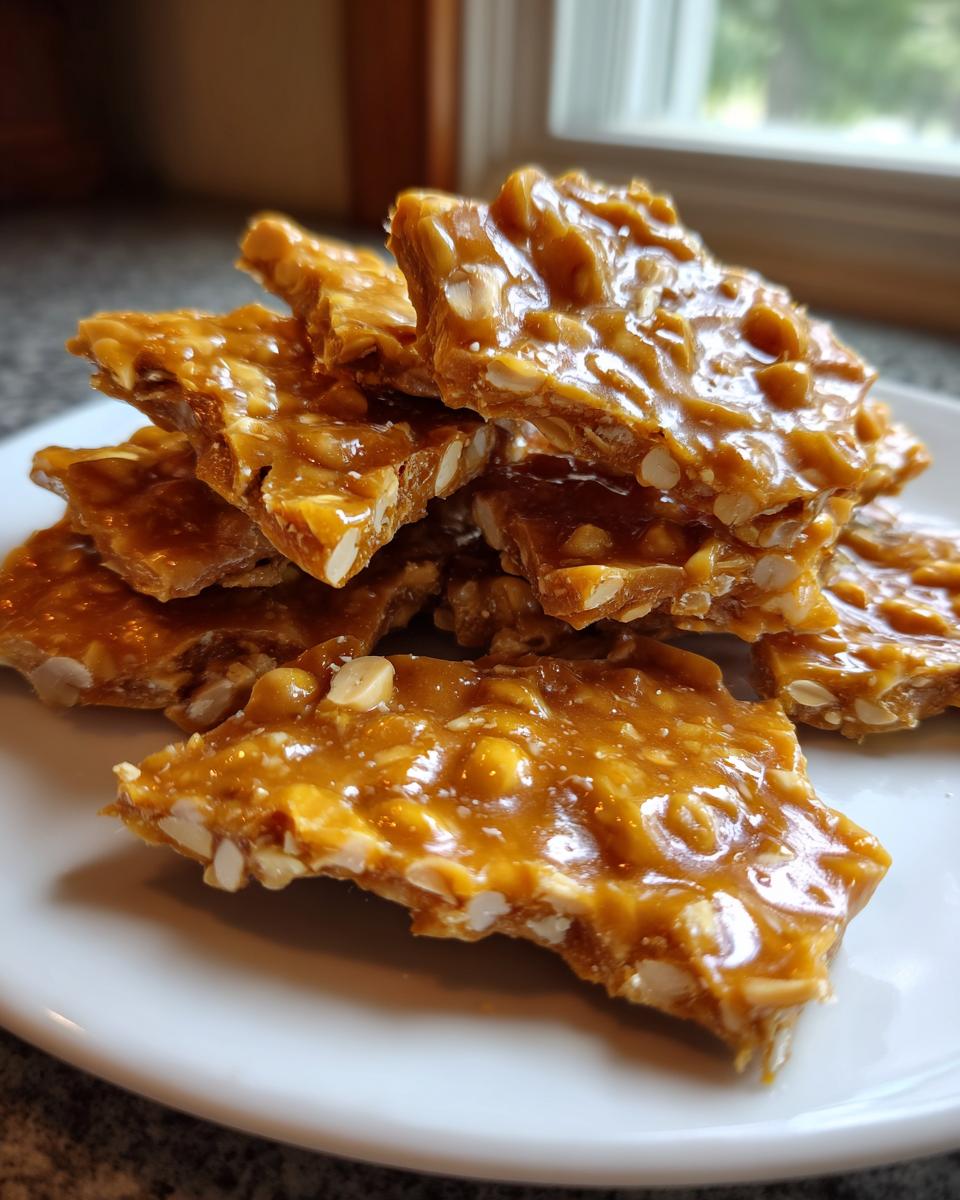
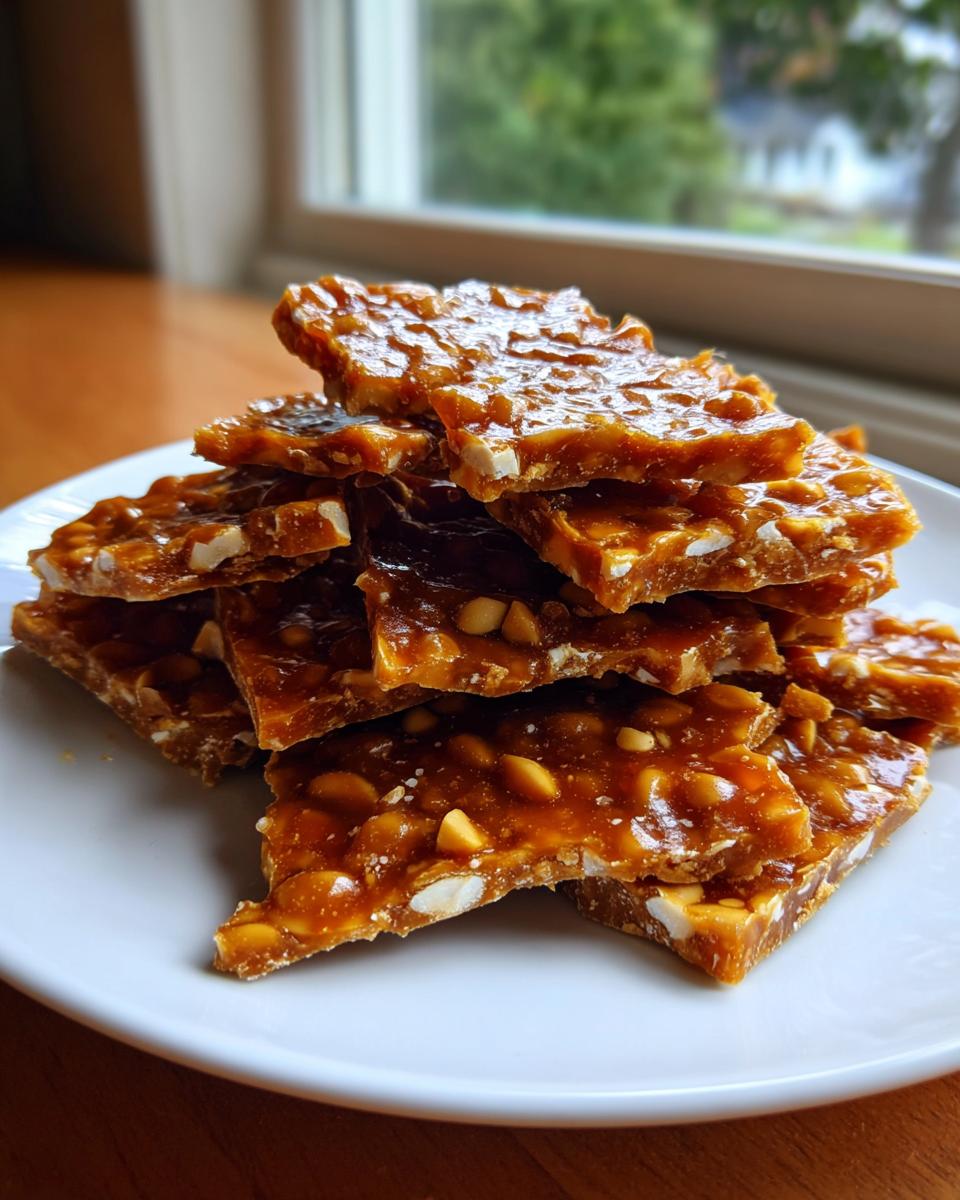
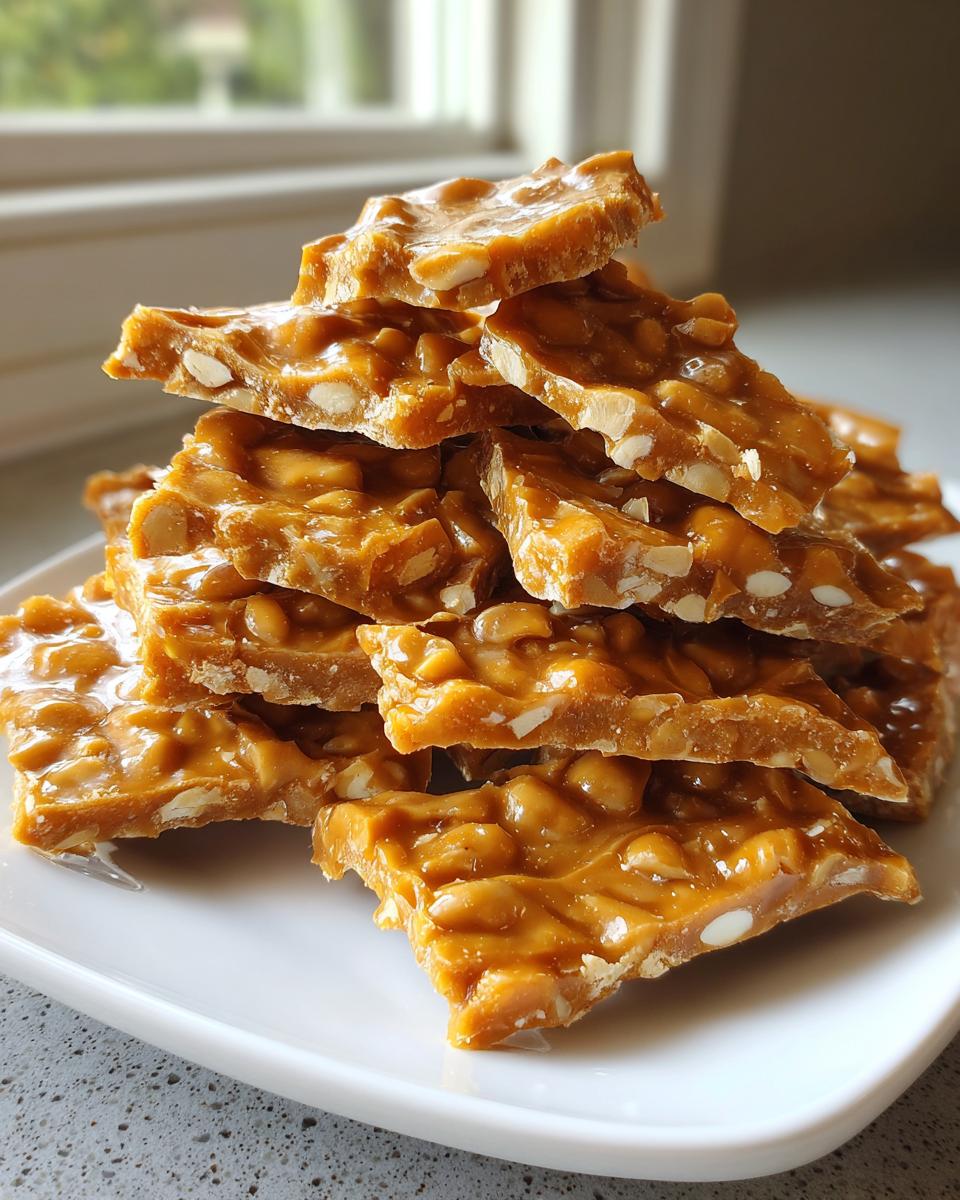
There is simply nothing as satisfying as that loud, sharp crack sound when you break off a piece of perfectly made homemade candy. Honestly, that sound is music to my ears! For me, learning kitchen traditions started with my grandmother, and nothing brought out the celebratory mood faster than her peanut brittle recipe. It looks intimidating, right? Like something only the pros handle. But trust me, when you understand the ‘why’ behind the heat, this old-fashioned brittle delivers the most incredible, buttery snap imaginable.
When I first tried making this, I definitely ended up with chewy, tacky sadness—ugh! But after testing and tweaking, I nailed down the science to ensure you get that perfect confection every single time. We focus on simple, accessible ingredients, and I’m happy to walk you through the process so you can add this joy to your own dessert lineup. You’ve got this!
- Why This Classic Peanut Brittle Recipe Works Every Time
- Gathering Your Ingredients for the Peanut Brittle Recipe
- Step-by-Step Instructions for This Peanut Brittle Recipe
- Tips for Success When Making Homemade Candy
- Making This Peanut Brittle Recipe for Gifts
- Storage and Keeping Your Peanut Brittle Crisp
- Frequently Asked Questions About the Peanut Brittle Recipe
- Estimated Nutritional Information for This Homemade Candy Recipe
- Share Your Perfect Peanut Brittle Snap
Why This Classic Peanut Brittle Recipe Works Every Time
When you stick to this peanut brittle recipe, you skip all the guesswork that ruins other candy batches. I promise, this version is reliable because we focus on the chemistry! This isn’t just about throwing things in a pot; it’s about achieving that nostalgic, golden-edged, Old Fashioned Brittle texture that melts in your mouth, not sticks to your teeth.
Here’s why I trust this process completely:
- It guarantees that perfect, satisfying crunch every time.
- We only use straightforward, accessible ingredients you likely have right now.
- The candy thermometer guiding us takes all the anxiety out of the cooking.
Achieving the Perfect Crunchy Peanut Brittle Snap
The number one reason people end up with chewy candy instead of brittle is simple: they stop cooking too soon! For that unbelievably rewarding Perfect Brittle Snap, we absolutely must hit the hard crack stage, which means 300 degrees Fahrenheit on your thermometer. If you pull it off the heat at 290°F, it’ll be sticky tomorrow. We are aiming for glass-like perfection here!
Simple Ingredients for Buttery Peanut Confection
You don’t need fancy molasses or specialized flavorings for this incredible buttery peanut confection. We’re using basic sugar, light corn syrup (that’s the trick to keep it from crystallizing!), peanuts, and a dash of vanilla. That’s it! It proves that the best tasting treats often come from the simplest, highest-quality components.
Gathering Your Ingredients for the Peanut Brittle Recipe
Okay, let’s talk about what you need for this fantastic peanut brittle recipe. Because we rely on that high, consistent heat, preparation is half the battle! Unlike baking where we can easily compensate if we’re short an egg, candy making is unforgiving, so let’s make sure your ingredients are ready to go before we even approach the stove. You’ll notice we don’t need much, which is why this Old Fashioned Brittle feels so approachable.
Here’s the simple list we’re working with:
- 2 cups white granulated sugar
- 1 cup light corn syrup
- 1 cup water
- 1 teaspoon baking soda
- 1 teaspoon vanilla extract
- 1/2 teaspoon salt (we’ll adjust this based on your peanuts!)
- 2 cups roasted, unsalted peanuts
- 1 tablespoon butter, only for greasing your sheet
Ingredient Notes and Substitutions for Old Fashioned Brittle
I always have people ask me about swapping in salted peanuts. If you happen to only have salted roasted peanuts, go ahead and use them! Just reduce the added salt in the recipe down to maybe 1/4 teaspoon, or skip it entirely. The saltiness is key, but you don’t want to overdo it when the peanuts are already seasoned.
Now, about the corn syrup—this is non-negotiable, friends. It’s not there for flavor; it’s there to prevent crystallization, which is what turns your beautiful candy into grainy rock candy. Seriously, don’t skip it if you want that smooth, clear base! Easy candy making relies on that corn syrup.
For the pan prep, I’ve included butter for greasing, which is the traditional way. But if you’re a modern cook like me, trust me—a good silicone baking mat makes turning this out and cleaning up so much easier. You still need that tablespoon of butter to rub directly onto the mat right before you pour, just give it a good, even coating.
Step-by-Step Instructions for This Peanut Brittle Recipe
Okay, this is where the real magic happens! Making this peanut brittle recipe from scratch requires you to be present, but I promise, the process moves fast once you start heating the sugar. Think of this as choreography: steps must follow in order! Your biggest helper here is that candy thermometer. Get it clamped onto the side of your pot before you even turn the burner on.
Preparing the Sugar Base and Reaching Soft-Ball Stage
First things first: go ahead and make sure your greased sheet or silicone mat is ready to go—we won’t have time to do this later! In a heavy-bottomed pan, combine your sugar, corn syrup, and water. I always use a big, thick-sided pot for this. That’s my expert tip for even heating; thin pans create hot spots, and hot spots create burnt spots in your candy!
Place it over medium heat and let it bubble away until the thermometer hits 250 degrees Fahrenheit. This is the soft-ball stage. Here’s a super important warning: Do not stir once it starts boiling! If you stir, those sugar crystals clinging to the side of the pan will cause the entire pot to crystallize and turn gritty. We need smooth caramel, not sugary sludge.
The Critical Hard Crack Stage for Crunchy Peanut Brittle
Once you hit 250°F, add your peanuts in. Now you need to stir gently but constantly until you hit 300 degrees Fahrenheit. This is the Guide to Hard Crack Stage, and stopping here is the non-negotiable secret to that Crunchy Peanut Brittle texture. Seriously, watch that thermometer like a hawk. The second it touches 300°F, yank that pot off the heat immediately. If you wait 10 more seconds, you risk scorching the whole batch!
The Final Foaming Reaction in the Peanut Brittle Recipe
This next part is dramatic, so be ready! Remove the pan from the heat and quickly stir in the baking soda and vanilla extract. Whoa! It will foam up like crazy—that’s the baking soda reacting with the heat, creating air pockets that make the candy light instead of rock hard. You only need to stir just until the foam is evenly distributed. Don’t overmix, or you’ll deflate those precious bubbles. Immediately pour the foamy mixture onto your prepared sheet. I mean immediately! Do not use a spatula to try and spread it; just let it flow out naturally across the surface. Then, step back and let it cool completely. Find more candy making inspiration while you wait!
Tips for Success When Making Homemade Candy
Now that you know the core steps for this peanut brittle recipe, let’s talk about the little things that turn a good batch of candy into a legendary batch. Even when you follow the temperature guide perfectly, the environment in your kitchen plays a massive role in candy making. This is where becoming an intuitive cook comes in, turning a simple technique into a real Kitchen Tradition Candy.
I learned this the hard way one miserable, damp November morning trying to make candy for holiday gifts. The humidity in my house was through the roof, and my brittle—even though I hit 300°F perfectly—came out soft and slightly sticky the next day. It was truly heartbreaking after all that careful stirring!
So, for my Beginner Peanut Brittle cooks out there, here are the pro tips that will save you from that sticky heartbreak:
- Humidity is the enemy! If it’s raining or super muggy outside, consider tackling this recipe on a drier day. Candy sugar loves moisture, and it makes your brittle weep.
- Scrape down the sides just once, right before you add the peanuts if you see any sugar crystals forming high up the pot walls. Just one quick scrape with a wet pastry brush, and that’s it. Don’t do it while it’s boiling, though!
- Once the peanuts are in, stay put. Pay attention to the sound and the color change. As the sugar gets closer to 300°F, it darkens rapidly from amber to a deep mahogany. You are looking for a rich, golden color, not dark brown.
- If you are new to this, have your baking soda and vanilla measured out in a tiny bowl right next to the stove. When that thermometer hits 300°F, you MUST move on the next step in under five seconds.
Trust me, paying attention to the weather and moving quickly at the end ensures you get the right texture. You can find a few more candy making tips over here if you want to dive deeper into sugar science!
Making This Peanut Brittle Recipe for Gifts
Oh, making Classic Peanut Brittle isn’t just about having a delicious Sweet and Salty Snack around for yourself—it’s one of my absolute favorite things to do when the holidays roll around! Truly, nothing beats giving someone a bag of homemade candy wrapped up nicely. It feels so much more personal than store-bought stuff, don’t you think?
Since this peanut brittle recipe is so delightfully crunchy, it travels really well, provided you package it correctly. That’s because we nailed the hard crack stage, meaning it won’t get sticky and gum up the bag!
If you are getting ready for Christmas or just want to whip up some thoughtful treats, here are my go-to methods for packaging this Homemade Candy Recipe perfectly for gifting:
- Cellophane Bags are Your Friend: The absolute best way to keep humidity away from your brittle is individual wrapping. Grab small cellophane bags—the kind you can twist tie shut. Seriously, take the time to wrap each large shard or a few smaller pieces individually. It keeps everything crisp.
- Tying it Up Pretty: Once the candy is bagged, tie it off with some festive ribbon. Red velvet ribbon works wonders, or even just a simple twine looks great for a more rustic, Old Fashioned Brittle feel. Tie a little gift tag right onto the ribbon.
- Don’t Pack too Tight: If you’re putting several bagged pieces into one larger gift tin or box, make sure you pad the container. Use tissue paper or small crumpled squares of parchment paper to stop the pieces from knocking against each other too much during transit. We want the *snap* to happen when the recipient bites into it, not when they carry the tin!
- Labeling is Kind: Even if everyone knows you made it, I always write a quick note on the tag: “Classic Homemade Peanut Brittle – Made [Date].” This isn’t just sweet; it reminds them to store it correctly in an airtight container once they open the main tin.
There is just something so heartwarming about sharing something you made with such care. Even if you start with this recipe as a total beginner, the finished product feels like a professional-grade Holiday Candy Recipe!
Storage and Keeping Your Peanut Brittle Crisp
Alright, you’ve done the hard work—you hit that 300°F hard crack stage, you worked fast, and you have beautiful, golden shards of sweet perfection cooling on the counter. Congratulations! Now comes the part that can ruin all your efforts if you aren’t careful: storage. This is where many people who master the cooking part fail the final step. Why? Because our finished peanut brittle recipe treats moisture like an absolute enemy!
Sugar loves humidity, and if your beautiful, crunchy peanut brittle sits out on the counter uncovered for even a few hours, it will start absorbing the moisture from the air. That beautiful snap you worked so hard for turns into a soft, chewy disaster. Believe me, I’ve learned that lesson the hard way more times than I care to admit!
To keep this confection crisp and ready to shatter beautifully until you eat the last piece, you need three simple rules:
- Airtight is Everything: You must store your brittle in a genuine airtight container. Not a plastic bag with the air squeezed out—that’s not reliable enough. Use a sturdy container with a gasket seal or a good latching lid.
- Room Temperature Only: Never, ever put your peanut brittle in the refrigerator! The cold, damp environment of the fridge will ruin that crisp texture faster than anything else. Keep it on the counter or in a cool pantry, away from the stove or dishwasher, which generate steam.
- Consider the Silica Packets: This is my secret little trick for making candy gifts that last a long time. If you get those little silica gel packets (you know, the ones that say “DO NOT EAT” that come in new shoes or vitamin bottles?), wipe them down very well, let them dry completely, and drop one into the airtight container with your buttery peanut confection. They are designed to absorb moisture, and they work like a charm to keep that snap in place for weeks!
If you store it right, this batch of homemade candy will last beautifully for at least two weeks leading up to the holidays. Even better, when you pack it up for gifting, make sure whoever receives it knows that key piece of advice: keep it tightly sealed!
Frequently Asked Questions About the Peanut Brittle Recipe
Can I make this peanut brittle recipe without a candy thermometer?
Honestly? I highly discourage it if you are aiming for that glorious, shattering snap! The thermometer is your best friend here because hitting that precise 300°F—the hard crack stage—is the only surefire way to guarantee your Classic Peanut Brittle won’t be soft tomorrow. If you absolutely cannot find one, you can try the cold water test: drop a tiny bit of syrup into a glass of ice water. If it forms hard, brittle shards that snap immediately, you’re good. If it bends, keep cooking! But trust me, buying one for under $10 is the best investment for any homemade candy recipe.
Why did my peanut brittle turn out chewy instead of crunchy?
This usually comes down to one of two things, and both relate back to timing and temperature control. Nine times out of ten, it means you pulled the mixture off the heat before it reached 300°F. If the temperature is too low, the sugar sets into a softer, stickier glass rather than the hard glass we want. The other reason might be if you added the baking soda too slowly or stirred too much once the baking soda went in—that rapid foaming reaction is what creates the light, airy structure needed for a Perfect Brittle Snap. If you add the baking soda outside the pot or stir for too long, you deflate the fragile air structure.
Can I substitute the peanuts in this peanut brittle recipe?
Yes, you absolutely can! This process works beautifully with almost any nut you like. Pecans are divine in this, and almond brittle is a classic for a reason. If you swap the peanuts for pecans or almonds, just keep one thing in mind: denser nuts might change the cooking time slightly. Always rely on the thermometer! You might find that your nuts absorb the heat differently, causing the syrup to climb a degree or two faster or slower toward the 300°F mark. But go ahead and experiment; that’s how we discover new favorites for our Homemade Dessert Boards!
Estimated Nutritional Information for This Homemade Candy Recipe
Now, I always like to mention this up front: since we are dealing with pure sugar and butter here, this peanut brittle recipe should definitely be treated as a special occasion Sweet and Salty Snack, not an everyday food! The estimates below are based on dividing the entire batch into roughly 16 one-ounce servings. Since this is a homemade confection, these numbers are certainly an approximation, but they give you a good idea of what you’re working with per piece.
When you make this Classic Peanut Brittle, remember that the nutrition really depends on the exact brand of corn syrup and the type of peanuts you use. But here is what we generally find in a standard serving size:
- Serving Size: 1 ounce (about one small shard)
- Calories: Roughly 150 calories
- Total Fat: About 8g
- Saturated Fat: Keep it low, usually around 1g
- Carbohydrates: Around 19g (this is where most of that sugar is!)
- Protein: About 4g—thanks to those wonderful peanuts!
- Sodium: Generally around 45mg, but this shifts based on whether you use salted or unsalted nuts.
- Cholesterol: 0mg
The beauty of making this Old Fashioned Brittle yourself is that you can tweak the ingredients more easily than buying a bag off the shelf. Whether you are adding this to a Homemade Dessert Board or wrapping it up for Holiday Candy Recipes, enjoy every buttery, crunchy, sweet piece!
Share Your Perfect Peanut Brittle Snap
Well, we made it! You’ve officially conquered the world of candy making, and I am so excited for you to try this peanut brittle recipe. Remember when I said that loud *crack* sound was music to my ears? Now it’s going to be *your* music, too!
At Taste This Plate, our favorite part isn’t just giving you instructions; it’s seeing what you create in your own kitchen. I truly hope this Classic Peanut Brittle becomes a cherished tradition for you, whether it’s for a big holiday platter or just an afternoon craving!
I would absolutely love to hear about your adventure. Did you nail that 300°F temperature on the first try? Tell me about the color of your caramelized sugar! Drop a comment below and let me know how your crunchy peanut brittle turned out. Don’t be shy—sharing the wins (and maybe the amusing sticky fails!) is how we all learn to become more confident cooks.
If you snapped a picture of your golden, glorious brittle, please tag us on social media! Seeing your beautiful homemade candy makes my day and proves that anyone can master these recipes. Use the hashtag so I can find your shiny, shattering masterpiece. If you need to reach me directly with a specific question about your batch, you know where to find the contact form right here: Send me a message.
Thank you so much for trusting me with your kitchen time today. Happy snapping, friends!
PrintClassic Old-Fashioned Peanut Brittle Recipe for That Perfect Snap
Make homemade peanut brittle with that perfect buttery crunch and satisfying snap. This easy recipe uses simple ingredients and clear candy thermometer guidance to help you achieve the hard crack stage every time. It is ideal for holiday candy trays or thoughtful gifts.
- Prep Time: 10 min
- Cook Time: 25 min
- Total Time: 35 min
- Yield: About 1 pound 1x
- Category: Dessert
- Method: Stovetop Candy Making
- Cuisine: American
- Diet: Vegetarian
Ingredients
- 2 cups granulated sugar
- 1 cup light corn syrup
- 1 cup water
- 1 teaspoon baking soda
- 1 teaspoon vanilla extract
- 1/2 teaspoon salt
- 2 cups roasted, unsalted peanuts
- 1 tablespoon butter, for greasing
Instructions
- Lightly grease a large baking sheet with butter or line it with a silicone mat. Set aside.
- In a heavy-bottomed, large saucepan, combine the sugar, corn syrup, and water. Stir gently until the sugar dissolves.
- Place the saucepan over medium heat and attach a candy thermometer. Do not stir the mixture once it begins to boil.
- Cook the sugar mixture until it reaches 250 degrees Fahrenheit (the soft-ball stage). This usually takes about 15 to 20 minutes.
- Add the roasted peanuts to the syrup. Continue to cook, stirring constantly but gently, until the mixture reaches 300 degrees Fahrenheit (the hard crack stage). Watch carefully to prevent burning.
- Remove the saucepan from the heat immediately when it reaches 300 degrees Fahrenheit.
- Quickly stir in the baking soda and vanilla extract. The mixture will foam up rapidly. Stir just until combined.
- Pour the hot mixture onto the prepared baking sheet. Do not spread it with a spatula; let it flow naturally.
- Allow the brittle to cool completely, about 30 minutes, until hard.
- Once fully cooled and hard, break the peanut brittle into irregular pieces. Store in an airtight container.
Notes
- Use a candy thermometer for accuracy; hitting the hard crack stage (300°F) is the secret to a perfect snap.
- Work quickly once you add the baking soda, as the reaction happens fast.
- For a sweeter, saltier snack, use lightly salted peanuts.
- If you want to make this for holiday candy gifts, wrap pieces individually in cellophane bags.
Nutrition
- Serving Size: 1 ounce
- Calories: 150
- Sugar: 18g
- Sodium: 45mg
- Fat: 8g
- Saturated Fat: 1g
- Unsaturated Fat: 7g
- Trans Fat: 0g
- Carbohydrates: 19g
- Fiber: 1g
- Protein: 4g
- Cholesterol: 0mg