
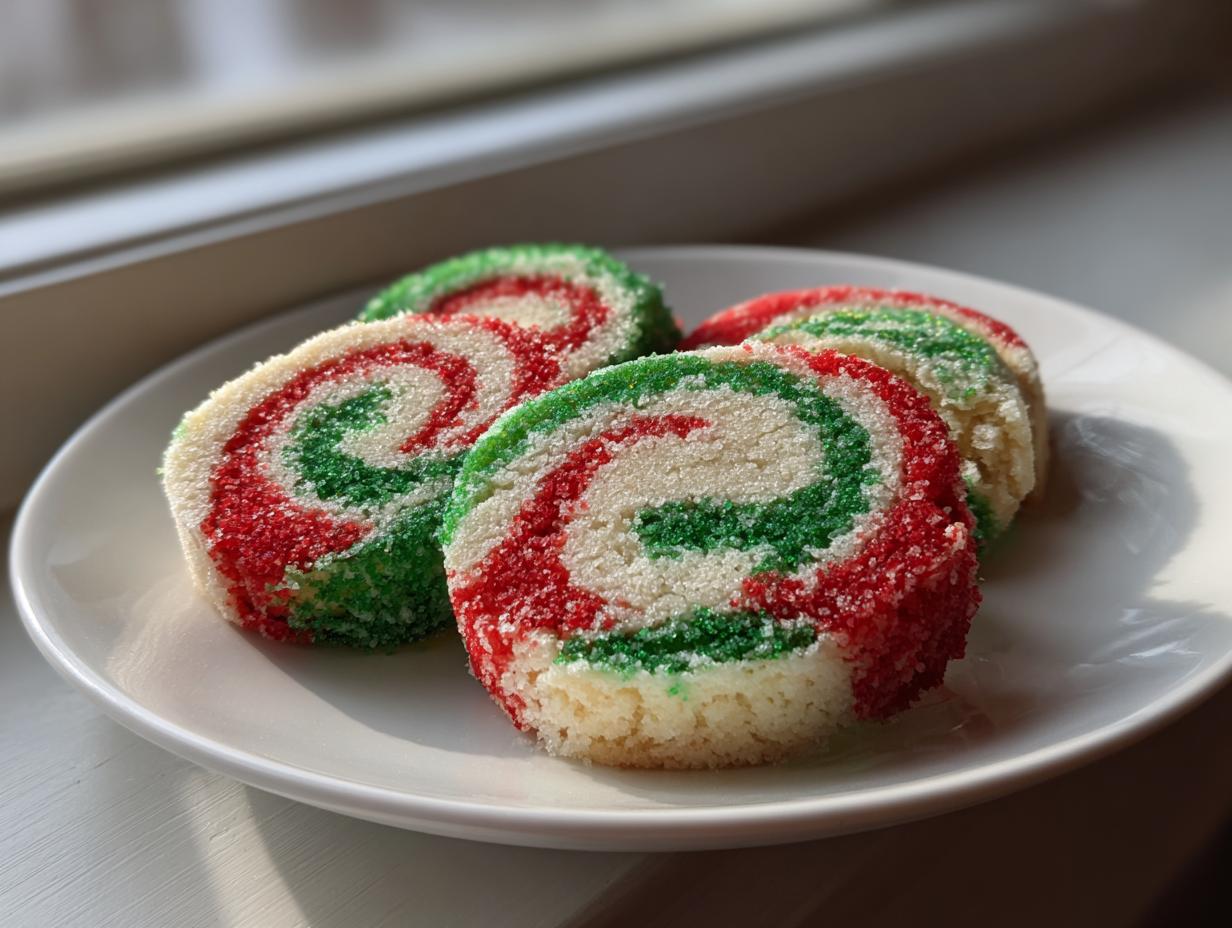
Few things make a holiday spread look instantly better than perfectly lined-up, colorful cookies, right? I absolutely adore the way these vibrant red and green pinwheel cookies catch the light on a dessert tray. When I started Taste This Plate, my mission was to take those traditional, visually stunning treats that look like they took hours and simplify them completely. That’s what this recipe delivers!
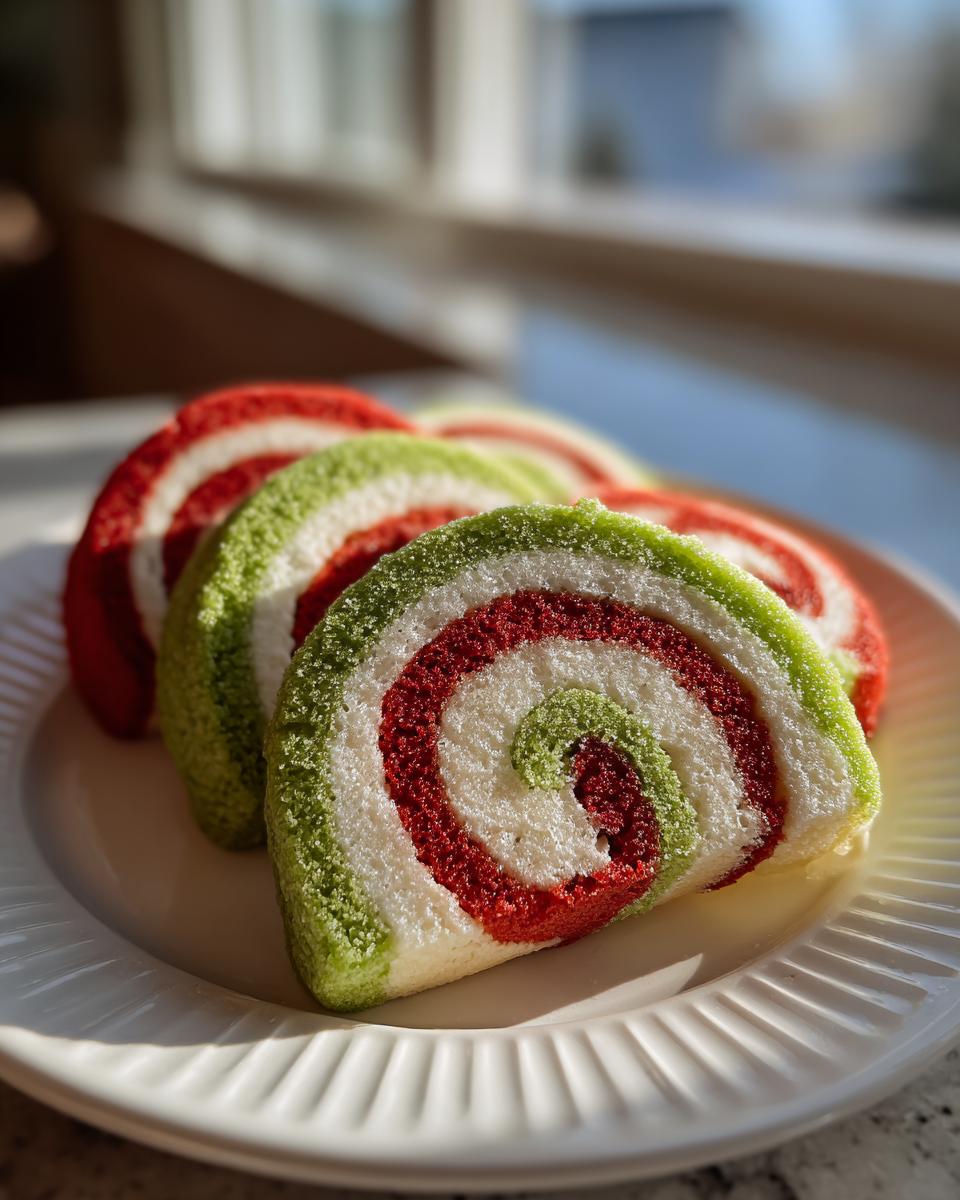
Forget fussing with complicated cutouts; these are the easiest, most satisfying slice and bake cookies you’ll ever make. By separating the classic sugar dough into three parts—one for our festive red, one for green, and one left snowy white—we create tight, beautiful spirals. This method, honed from years of testing classic American recipes, ensures every single pinwheel cookie you pull from your oven is gorgeous and tastes beautifully buttery. No stress, just stunning cookies for your next party. If you love this idea of rolling dough for festive results, you absolutely must check out my guide on cranberry sugar cookies and rolls too!
- Why These Classic Red and Green pinwheel cookies Are a Holiday Must-Have
- Gathering Your Ingredients for Buttery pinwheel dough
- Expert Tips for Perfecting Your pinwheel cookie Dough
- Step-by-Step Guide: How to Make pinwheel cookies
- Troubleshooting Common pinwheel cookies Issues
- Storage and Make Ahead Tips for pinwheel cookies
- Serving Suggestions for your Festive cookie Ideas
- Frequently Asked Questions about pinwheel cookies
- Nutritional Estimates for Your Festive pinwheel cookies
Why These Classic Red and Green pinwheel cookies Are a Holiday Must-Have
I promise you, these aren’t just another cookie; they are a holiday showstopper that barely requires any effort! When you’re juggling lights and grocery lists, you need recipes that deliver big on look but low on stress. This pinwheel cookie recipe is my go-to because it practically does the decorating for you. You get that perfect, buttery texture every single time. Look at how amazing these turn out; you’ve got to try them!
Here’s why this specific recipe needs to make it onto your baking sheet this year:
- They last, too! If you’re building platters ahead of time, these are your friends. You can check out my tips for making perfect cranberry sugar cookies for even more make-ahead motivation.
The Magic of Slice and Bake Cookies
This is the ultimate secret weapon for busy bakers. Because we shape the dough into a firm log, you can chill it completely, and then just pull out the knife and slice consistent rounds. This slice and bake cookies technique is what gives you those instantly recognizable, tight, colorful spiral cookies without any messy rolling pin work once the dough is colored and stacked. It saves so much time!
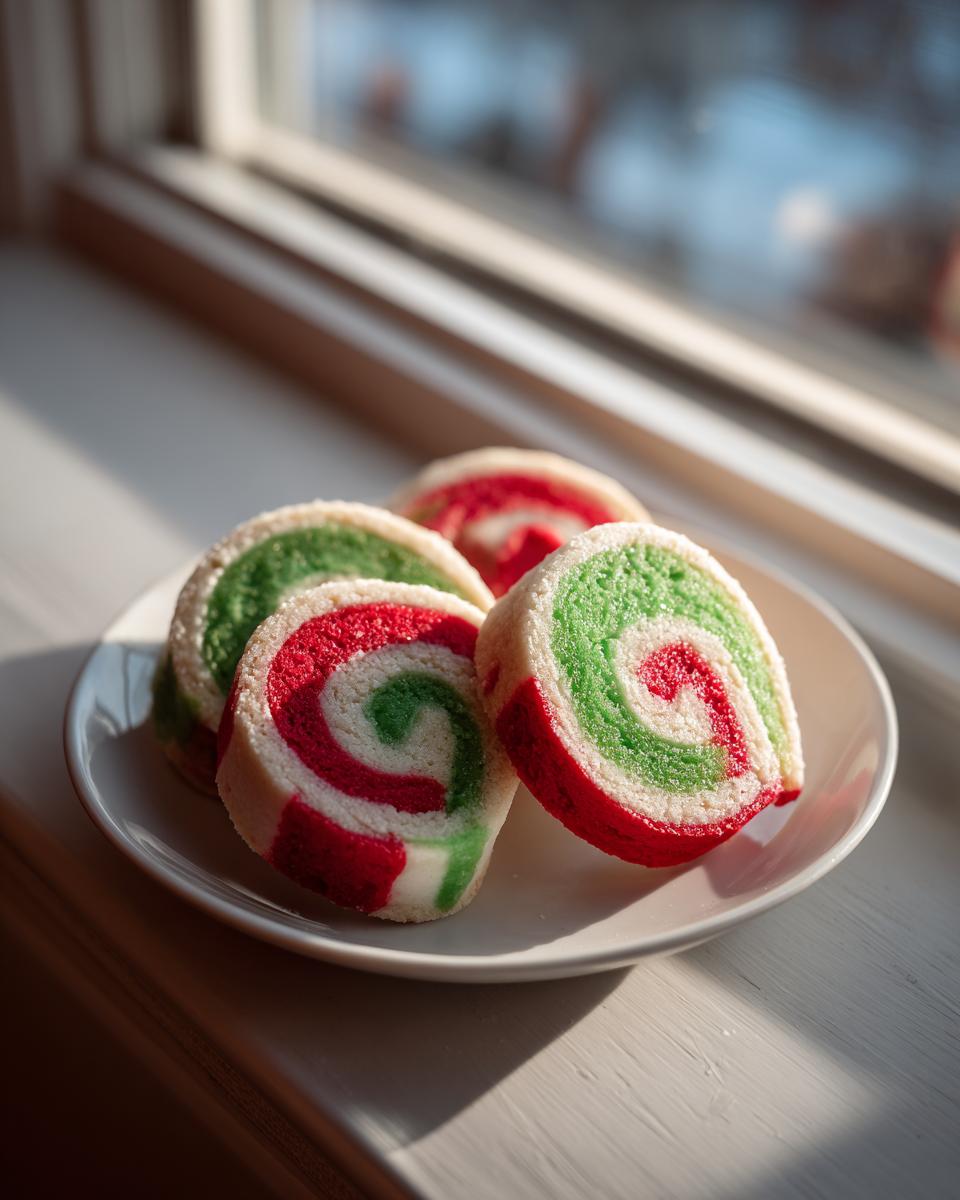
Festive Visual Appeal of pinwheel cookies
Honestly, who can look away from those bright red and green spirals? They look like they came straight from a high-end bakery, but they are so much easier than they look! That vibrant, tied-together look makes them the undisputed star of any dessert table. Seriously, these are the ultimate holiday cookie exchange treats—everyone asks for the recipe!
Gathering Your Ingredients for Buttery pinwheel dough
Baking, especially when you are aiming for such visual impact as these beautiful swirl cookies, always starts with getting your ducks in a row. I learned early on that having all my ingredients measured and ready before I even turn the mixer on prevents so many little kitchen disasters! This pinwheel cookie recipe relies on standard pantry staples, but treating those staples right is what makes the buttery pinwheel dough so tender and delicious.
When you check your list, pay close attention to my notes next to the butter and coloring, okay? Those little details make a huge difference in the final texture and color saturation. If you love buttery cookies, you might also want to check out my recipe for whipped shortbread cookies—so melt-in-your-mouth!
Ingredient Checklist for Classic pinwheel cookies
Here is exactly what you need to grab from your pantry and fridge to get started on these amazing red, white, and green spirals:
- 1 cup (2 sticks) unsalted butter, softened
- 1 cup granulated sugar
- 1 large egg
- 1 teaspoon vanilla extract
- 3 cups all-purpose flour
- 1 teaspoon baking powder
- 1/2 teaspoon salt
- 1/4 teaspoon almond extract (optional)
- Red food coloring (gel preferred)
- Green food coloring (gel preferred)
- 1/2 cup powdered sugar (for dusting)
- 1/4 cup nonpareil sprinkles (optional, for coating)
Expert Tips for Perfecting Your pinwheel cookie Dough
Before we even hit the ‘cream’ button on the mixer, I want to talk about preparation. Getting the dough right from the jump is crucial, especially when you are dealing with these colorful layers. If the base dough isn’t perfect, those beautiful swirls get all messy and spread out too much in the oven. Trust me when I say, taking an extra minute here saves you from disappointment later! This is where we build that amazing foundation for our easy rolled cookies.
Also, keep your butter ready! Don’t try to cream rock-solid butter. It needs to sit out until it’s soft enough to leave an easy indent, but definitely not greasy or melty. Temperature matters! If you need more tips on mastering base cookie doughs before diving into swirls, you can see how I handle the creaming process in my classic chocolate chip cookies recipe.
Achieving the Right Buttery pinwheel Dough Consistency
When you mix that softened butter and the sugar, you are building the texture for the whole cookie. We need it light and fluffy—like perfectly whipped clouds! This step traps the air that gives the dough structure without being hard. Once you start adding the flour, you must switch to low speed or even mix by hand gently. Overmixing the flour develops gluten, and gluten means tough cookies, not these soft, tender cookies we want. We are aiming for those soft, melt-in-your-mouth edges that make these bakery style pinwheels so famous.
Coloring Dough: Gel vs. Liquid
I see so many people reach for the grocery store liquid coloring first, but don’t do it here! For vibrant, festive colors like the red and green we need, you absolutely need gel food coloring. Why? Because the regular liquid stuff is mostly water. If you add enough liquid dye to get a deep red, you dump too much water into the dough, making it sticky and runny. Gel coloring is concentrated, so a drop or two gives you amazing saturation without changing the delicate chemistry or texture of the wonderful buttery pinwheel dough. It’s a small thing, but Kate Reilly notices these things!
Step-by-Step Guide: How to Make pinwheel cookies
Okay, friend, this is where the magic—and the construction work—happens! Don’t let the layering intimidate you. I promise that once you see the dough stack, you’ll realize how simple it is to create those amazing spirals. Remember, success here relies on timing and testing your dough’s firmness. We want structured layers that snap into place as we form the log. If you’re doing a big batch, getting the dough chilled properly is the secret to keeping your sanity later on. If you want to see a fun alternative to this red and green design, check out my apple snickerdoodle dump cake for less complicated holiday layering!
Mixing and Dividing the pinwheel cookie Dough
First things first, get your creamy butter and sugar mixture ready, then mix in your egg and vanilla just until it comes together. Now, slowly add in your dry ingredients—that’s the flour, baking powder, and salt. Mix it slowly until you see just barely no flour streaks left. Don’t try to make it perfect! Immediately divide that white dough evenly into three bowls. In two of those bowls, mix in enough of your gel coloring—red in one, green in the other—until the color is rich and uniform. Wrap each color tightly in plastic wrap and flatten it a little bit with your hand or a rolling pin. Pop these all into the fridge for at least 1 hour until they feel firm to the touch.
Layering and Rolling the Colorful Swirl cookies
Once those dough discs are firm, it’s time to build our tower! Take one color out at a time onto a lightly floured surface. Roll that color into a thin rectangle—about 1/8 of an inch thick works great. Repeat that rolling for the other two colors. Now, this is the fun part: carefully lay one color right on top of the next until you have a three-layer stack. Line up those edges! If you want extra sparkle, this is the moment to roll the entire layered dough stack in your nonpareil sprinkles now. Then, starting at one long edge, roll that layered dough tightly, like rolling up a poster, making sure it’s compact so you get those beautiful, defined swirl cookies when you slice them later.
The Crucial Chill Time for Slice and Bake Desserts
Seriously, don’t rush this part if you crave clean cuts! Wrap that beautiful log super tightly in plastic wrap again and send it back to the fridge. It needs a minimum of 2 full hours, but I always aim for closer to 3 hours, or until the log feels rock hard. Why so long? Because if the dough is soft when you slice it, those colorful layers will smear together, and you’ll lose your beautiful spiral design. A super firm log means super clean cuts, which is the absolute hallmark of great slice and bake desserts. If you need a refresher on other great make-ahead recipes, you can look at this external guide for more tips on handling chilled dough!
Baking and Cooling Your pinwheel cookies
Time for the oven! Preheat everything to 375°F (190°C) and line your baking sheets with parchment paper—we don’t want these sugary beauties sticking! Take that firm log out and slice it into rounds that are about 1/4 inch thick. Make sure they are all about the same thickness so they bake evenly. Place them about an inch apart on your sheet. Bake them for 8 to 10 minutes. Watch them closely! You want the edges to just look set, but keep that center soft. Overbaking turns these pinwheel cookies crunchy when we want them tender. Let them set on the hot pan for five minutes before moving them to a rack to cool completely. A light dusting of powdered sugar right before serving makes them look extra special!

Troubleshooting Common pinwheel cookies Issues
Even with the best recipes, sometimes things don’t go exactly as planned, especially with elaborate pinwheel cookies. Don’t panic or toss the batch! Most issues come down to temperature or timing, which are things we can easily adjust next time. Part of my job here at Taste This Plate is to walk you through the hiccups so you feel totally confident the next time you pull out that dough log. Let’s troubleshoot the three most common problems I hear about when folks try to master these pretty swirl cookies.
If you’ve had issues with dough that just won’t cooperate, you might find my guide on bacon gruyere egg bites helpful, as it covers temperature control for things that need to set properly—it’s the same concept!
My Slices Look Squished, Not Neat Swirls!
This is almost always a chilling issue. If your cookie slices look more like colorful puddles after they come out of the oven, it means the dough log wasn’t firm enough when you sliced it, or it warmed up too fast before baking. Remember, those layers need to be locked solid! If the dough is even slightly soft, the butter melts too quickly in the oven before the structure can set. Next time, give that log an extra 30 minutes in the freezer right before slicing—it’s a lifesaver for getting those crisp edges.
Why Are My Colors Bleeding Together?
If you notice the red and green mixing into a muddy brown-ish color during the chilling or baking process, it usually means you either used liquid food coloring instead of gel, or you didn’t wrap the individual colored dough portions tightly enough before that first chill. Liquid coloring adds moisture, which lets the colors migrate between the layers too easily. You want distinct lines! Also, when you are rolling the final log, make sure that you are rolling tightly and pressing the seam closed securely so the colors stay where they belong.
The Cookies Are Spreading Too Much on the Pan
Spreading is often a sign that there was too much fat or not enough flour in the base dough, or maybe you skimped on the chilling time for the *sliced rounds* before they went into the oven. If your dough is soft, the cookies spread before they bake. Make sure you are using proper room temperature (not melted!) butter during the creaming stage, and weigh your flour if you can—a cup of flour scooped right out of the bag is often way too much. If they still spread, place the arranged slices on the baking sheet back into the fridge for 15 minutes before baking. That small hit of cold will tighten things up right before they hit the heat!
Storage and Make Ahead Tips for pinwheel cookies
This is the part of the recipe I get the most excited about when discussing Christmas pinwheel cookies—you can literally bake them weeks ahead of time! Honestly, for me, holiday baking is stressful if I try to do everything the day before the party. The magic of this slice and bake cookies method means you can get ahead of the game. That’s why I always make sure these logs spend a good amount of time chilling. It’s the ultimate way to use this recipe if you’re looking for the best holiday cookie recipes that save you time when it counts!
If you need a little more motivation for planning ahead, looking at my tips for make ahead sugar cookies can help streamline your entire holiday baking schedule.
So, how do you keep these beauties fresh? Generally, once they are fully baked and cooled, store the finished pinwheel cookies in a single layer, or place parchment paper between layers, in an airtight container at room temperature. They stay wonderfully fresh for about a week at room temperature, which is great for keeping the cookie tray stocked!

But if you’re really planning ahead, freezing the dough logs is where it’s at. Wrap those firm, ready-to-slice logs really, really well in plastic wrap, and then tuck them into a freezer bag. This protects them from freezer burn. You can store them this way for up to three months! I know my friend over at Frugal Haus Frau talks about the convenience of icebox cookies, and it’s true—fresh cookies whenever you need them! They have a great philosophy on how these keep.
The instructions in the main recipe mention this, but I want to re-emphasize it: You can bake them straight from frozen! Just pull the log out, slice your 1/4-inch rounds, and add about 1–2 minutes extra to the baking time. That little bit of extra time ensures they bake evenly through since they’re coming into the oven ice-cold. It works like a dream!
Serving Suggestions for your Festive cookie Ideas
Once you have your vibrant, buttery pinwheel cookies cooled and ready to go, the fun shifts to presentation! These cookies are so visually striking—all those lovely red and green swirls—that they really don’t need much extra fanfare, but that doesn’t mean we can’t pair them with something delicious. Since these are rich, sweet, and utterly classic, I usually lean toward beverages that either complement the vanilla base or cut through the richness a bit.
When I set out my holiday platter, I always make sure I have something refreshing on hand. If you’re looking for a lovely non-alcoholic fizzy drink to serve alongside these beautiful spirals, you absolutely have to check out my recipe for sparkling honey lemonade soda! The tartness is a perfect foil for the sweet dough.
What to Pair with these easy rolled cookies
For sipping, you really can’t go wrong with the classics. A simple, hot mug of coffee or even just a tall, cold glass of milk is perfect for dunking these easy rolled cookies. The buttery dough melts beautifully with creaminess!
If you are serving these as part of a larger dessert set, I suggest pairing them with something a little bright or tart. They look stunning next to some fluffy powdered sugar topping, but for balance on the palate, consider adding a small bowl of something zingy nearby. A simple, jewel-toned cranberry salad or a lemon shortbread cookie (if you’re making more than one kind!) can really make the sweetness of the pinwheels shine through. It’s all about contrast, honey!
Frequently Asked Questions about pinwheel cookies
I know when you try a new recipe, especially one that looks this impressive, you always have a few little technical questions buzzing around. Getting the swirls just right can feel a bit intimidating, but I’ve got you covered. We’re going to nail down the details so your Christmas pinwheel cookies are absolutely flawless! If you’re still digging into the basics of dough management, you might want to browse my carrot banana muffins recipe; it has some great foundation handling tips!
Can I make these pinwheel cookies without chilling the dough?
Oh, sweetheart, please don’t even try it! Chilling is not optional here; it’s the difference between a beautiful, tightly patterned cookie and a flat, colorful mess. If you skip the chilling time, your pinwheel cookie dough will be too soft when it hits the heat. The butter melts instantly, and that tight spiral you worked so hard to create just relaxes and spreads right out onto the pan before the structure can set. You’ll end up with thin, almost lacy cookies instead of these fabulous, thick swirl cookies. Trust me, the extra waiting time for the dough to firm up is what makes the magic happen!
How do I store leftover pinwheel cookie dough logs?
This is the best news about learning how to make pinwheel cookies: the dough loves the freezer! If you have dough left over, or if you just want to prep for a future baking emergency, just make sure that log is wrapped absolutely tightly in plastic wrap—I usually go for two layers. Then, pop it into a freezer-safe bag or container. It stays happy and fresh like that for up to three months! This makes these one of the best make ahead sugar cookies you can find. When you’re ready to bake, you don’t even need to thaw it completely. Just slice and add a couple of extra minutes to your oven time, just like I mentioned above. Easy peasy!
Are these the same as traditional date pinwheel cookies?
That’s a great question! While they share the same beautiful, rolled spiral shape, the textures and fillings are usually different. Traditional, old-fashioned ones often use a date paste filling, which gives them a chewier, fruitier flavor but a slightly different dough structure. Our recipe here is based on a classic, buttery sugar cookie dough that we color, which lets the pure vanilla flavor shine through and keeps them perfect for bright colors like red and green. If you’re looking for that classic version, you can check out one of my favorite baker friends who details that recipe over here!
Nutritional Estimates for Your Festive pinwheel cookies
Now, I know when we’re talking about the best holiday cookie recipes, we’re definitely not thinking about the nutrition label first, are we? But since I always want you all to have the full picture here at Taste This Plate, I tracked down the basic estimates for these delicious pinwheel cookies derived from the recipe instructions.
Remember, these figures are based on my specific ingredient measurements and dough consistency—so they are just a guide! If you add extra sprinkles or make your slices thicker, you’ll change these totals. If counting macros is important to you, you can always check out my notes on high-protein cookie dough for some healthier recipe foundations, but for these classic versions, we focus on the joy!
Here is what you can generally expect per single, 1/4-inch slice of our buttery, festive treat:
- Serving Size: 1 cookie
- Calories: 120
- Sugar: 9g
- Sodium: 75mg
- Fat: 6g
- Saturated Fat: 3.5g
- Unsaturated Fat: 2.5g
- Trans Fat: 0g
- Carbohydrates: 15g
- Fiber: 0.3g
- Protein: 1.5g
- Cholesterol: 25mg
Classic Slice-and-Bake Christmas Pinwheel Cookies
Make beautiful, festive pinwheel cookies using a simple slice-and-bake method. These buttery swirl cookies are perfect for holiday cookie exchanges and trays.
- Prep Time: 45 min
- Cook Time: 10 min
- Total Time: 155 min
- Yield: 3 dozen cookies 1x
- Category: Dessert
- Method: Baking
- Cuisine: American
- Diet: Vegetarian
Ingredients
- 1 cup (2 sticks) unsalted butter, softened
- 1 cup granulated sugar
- 1 large egg
- 1 teaspoon vanilla extract
- 3 cups all-purpose flour
- 1 teaspoon baking powder
- 1/2 teaspoon salt
- 1/4 teaspoon almond extract (optional)
- Red food coloring (gel preferred)
- Green food coloring (gel preferred)
- 1/2 cup powdered sugar (for dusting)
- 1/4 cup nonpareil sprinkles (optional, for coating)
Instructions
- In a large bowl, cream together the softened butter and granulated sugar until light and fluffy. Beat in the egg and vanilla extract until combined.
- In a separate bowl, whisk together the flour, baking powder, and salt. Gradually add the dry ingredients to the wet ingredients, mixing on low speed until just combined. Do not overmix.
- Divide the dough evenly into three separate bowls. Leave one portion plain (white). Add several drops of red food coloring to the second portion and mix until the color is uniform. Add several drops of green food coloring to the third portion and mix until the color is uniform.
- Wrap each colored dough portion tightly in plastic wrap and flatten slightly into a disk. Chill the dough in the refrigerator for at least 1 hour, or until firm enough to handle.
- Once chilled, take one portion of dough at a time. On a lightly floured surface, roll the dough into a rectangle approximately 1/8 inch thick. Repeat this process for the other two colors.
- Place one color of dough directly on top of another color, carefully lining up the edges to form a layered rectangle. Place the third color on top of the second layer. You should have a three-layer stack (e.g., Red, White, Green).
- Gently roll the layered dough stack tightly into a log, starting from one long edge. You want a compact roll to create tight swirls. If desired, roll the log in nonpareil sprinkles before proceeding.
- Wrap the finished log tightly in plastic wrap and chill for at least 2 hours, or until very firm. This step is key for clean slices.
- Preheat your oven to 375°F (190°C). Line baking sheets with parchment paper.
- Remove the dough log from the refrigerator. Using a sharp knife, slice the log into 1/4-inch thick rounds.
- Place the cookie slices about 1 inch apart on the prepared baking sheets.
- Bake for 8 to 10 minutes, or until the edges are just set and lightly golden. The centers should remain soft.
- Let the cookies cool on the baking sheet for 5 minutes before transferring them to a wire rack to cool completely. Dust lightly with powdered sugar before serving, if desired.
Notes
- Chilling the dough logs until they are very firm allows you to cut clean slices, which results in better swirl definition after baking.
- For the best color saturation, use gel food coloring instead of liquid coloring, as it requires less product and keeps the dough consistency correct.
- You can freeze the dough logs wrapped tightly for up to three months. Slice and bake directly from frozen, adding 1-2 minutes to the baking time.
Nutrition
- Serving Size: 1 cookie
- Calories: 120
- Sugar: 9
- Sodium: 75
- Fat: 6
- Saturated Fat: 3.5
- Unsaturated Fat: 2.5
- Trans Fat: 0
- Carbohydrates: 15
- Fiber: 0.3
- Protein: 1.5
- Cholesterol: 25