
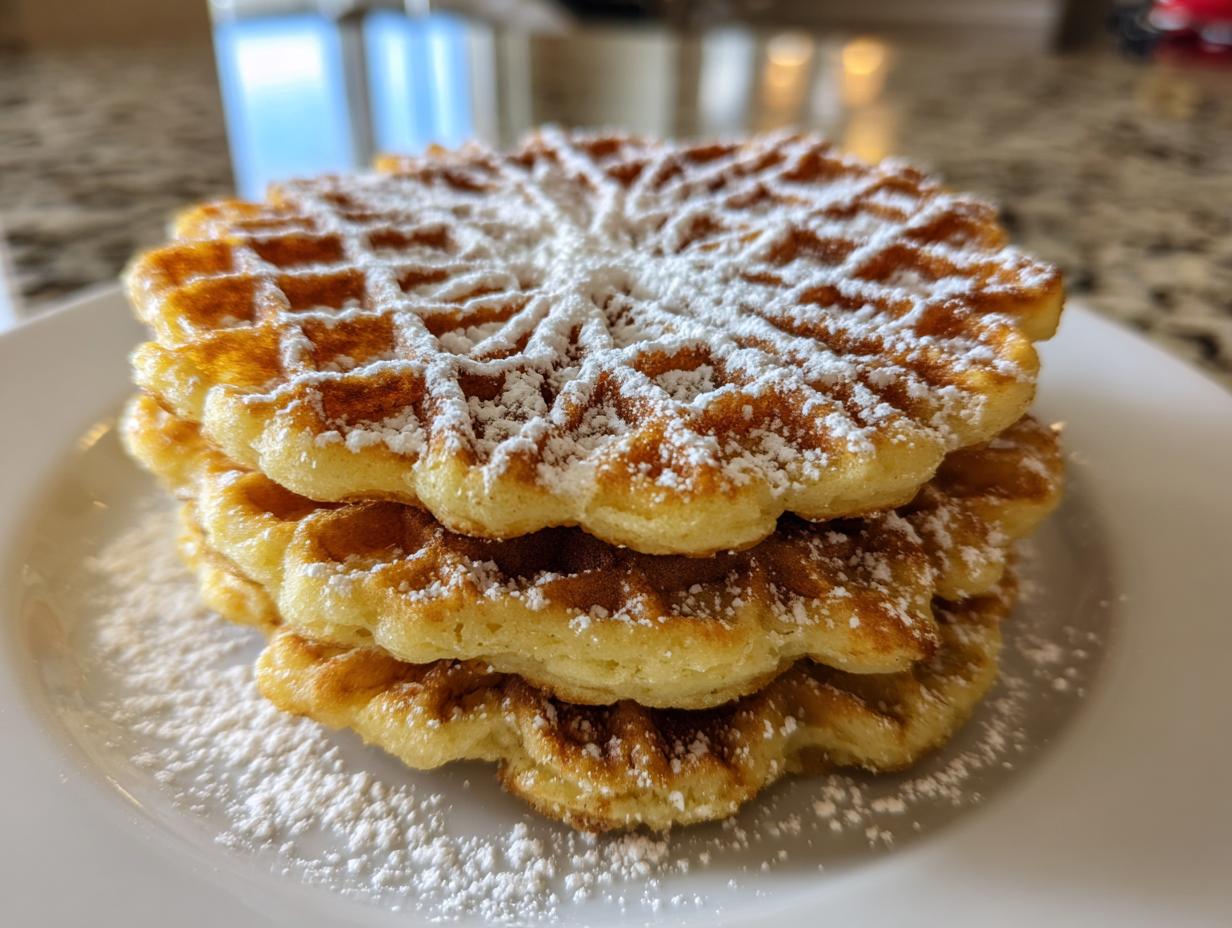
There is just something magical about pulling something delicate and beautifully patterned right off a hot iron, isn’t there? For me, it brings me right back to the warmth of my grandmother’s kitchen, even though her specialty was Midwestern staples, not Italian sweets. But the feeling? That sense of creating something truly special that connects generations? That’s universal. And that’s exactly what we’re doing today with my very best, utterly reliable recipe for perfect, thin, and crispy pizzelle cookies.
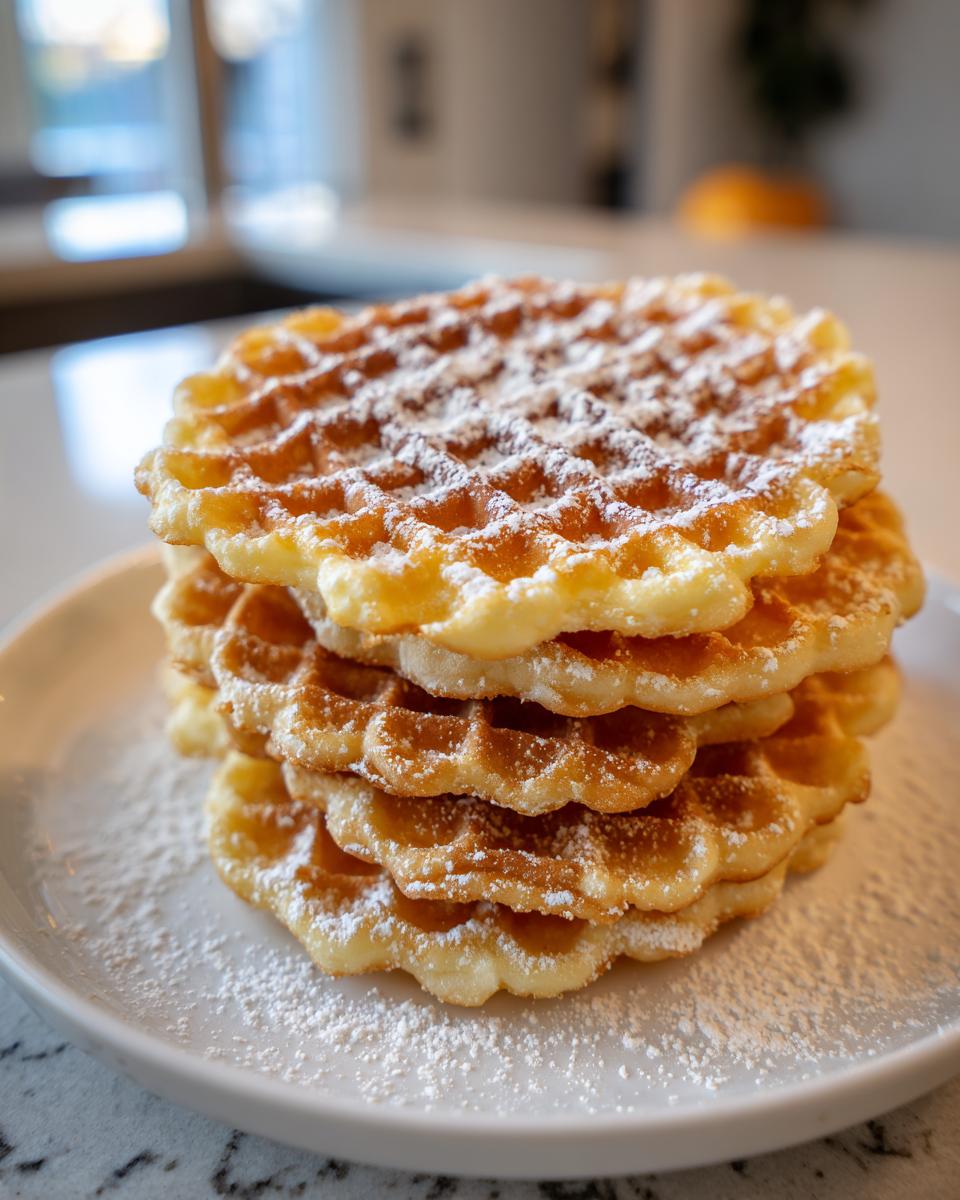
If you’ve been looking for the secret to those paper-thin, delicate waffle cookies that shatter just right when you bite into them, stop scrolling! This recipe is built on precision, ensuring you get that lovely lace pattern and amazing flavor every single time. We aren’t settling for anything less than Authentic Italian Cookies right here in your own home. If you want to explore more of my favorite baked goods, be sure to check out my main desserts page!
- Why This Is the Best Pizzelle Recipe Ever
- Essential Ingredients for Perfect Pizzelle Cookies
- Pizzelle Maker Instructions: Getting Started with Homemade Pizzelle Treats
- How to Prepare Classic Vanilla and Anise Pizzelle Cookies
- Tips for Success: Mastering Your Pizzelle Cookies
- Storage and Reheating Instructions for Pizzelle Cookies
- Pizzelle Variations: Beyond Vanilla Flavored Pizzelle
- Serving Suggestions for Your Homemade Pizzelle Iron Treats
- Frequently Asked Questions About Pizzelle Cookies
- Creating Joyful Holiday Cookie Recipes
Why This Is the Best Pizzelle Recipe Ever
I get the panic when you look at an unfamiliar recipe, especially for something delicate like pizzelle. You’re always worried it’s going to end up chewy or thick, right? Well, forget that feeling! This recipe for pizzelle cookies is the one I landed on after testing batters until my kitchen looked like a flour explosion. (My husband was not thrilled about cleaning that up, by the way.)
- We tested flour ratios until we hit the sweet spot for thin crispy cookies that won’t break before they hit your tongue.
- The butter and egg ratio is carefully calibrated to create true buttery patterned cookies—crisp edges, delicate centers.
- Every step is designed around maximizing that wonderful, lacy texture. Trust me, this version works.
Achieving That Signature Thin Crispy Pizzelle Recipe Texture
If you want crispness, it all comes down to two main things, and neither involves magic, thankfully. First, your batter consistency has to be right. It’s thinner than pancake batter, almost like heavy cream. If it’s too thick, you end up with a soft, cake-like cookie, and that’s just not what we want from an Italian waffle cookie.
Second, the heat! You absolutely must let your iron get scorching hot before you ever drop in that spoonful of batter. When the iron is hot enough, it cooks the water out of that batter almost instantly. That quick cooking process is what sets those beautiful patterns and locks in the crispness before the cookie has a chance to steam itself soft.
Essential Ingredients for Perfect Pizzelle Cookies
When you’re aiming for authentic Italian waffle cookies, the ingredients really do matter. You only have a handful of components here, so let’s make sure they’re the best ones we can grab at the local store. I always start with unsalted butter—it gives us better control over the final salt level, and honestly, butter just tastes richer when it comes to desserts like this.
Here’s what you’ll need for this batch. Remember, these are pizzelle cookies, so the extracts carry a lot of the flavor load!
- 1 cup unsalted butter, softened
- 1 cup granulated sugar
- 4 large eggs (Make sure they’re room temperature; it helps them mix in without breaking the creamed butter!)
- 1 teaspoon vanilla extract
- 1 teaspoon anise extract
- 2 teaspoons baking powder
- 2 1/2 cups all-purpose flour
- Pinch of salt
Ingredient Notes and Flavor Substitutions for Pizzelle Cookies
Okay, let’s talk flavor. The combination of vanilla and anise is classic for pizzelle cookies, but I know anise isn’t everyone’s favorite. If you aren’t a fan of that slight licorice taste, you can substitute the 1 teaspoon of anise extract with almond extract for a sweeter, nuttier flavor, or use lemon extract for a bright pop. Be careful when substituting—go slow!
For those of you wanting to try chocolate, it’s so easy! Just remove about 1/4 cup of the required flour from the recipe and swap it out with 1/4 cup of unsweetened cocoa powder. You mix that cocoa powder right in with the rest of your dry stuff. These chocolate pizzelle ideas are fantastic, especially dusted with powdered sugar!
Pizzelle Maker Instructions: Getting Started with Homemade Pizzelle Treats
If you’re new to these beautiful patterned cookies, the pizzelle maker itself can feel a little intimidating—it looks like a fancy waffle iron, right? But honestly, using this equipment is so straightforward once you get the hang of it. This is where having good Pizzelle Maker Instructions really helps you build confidence fast.
The absolute, non-negotiable first step is preheating. Don’t rush this! Your pizzelle iron needs to be screaming hot—fully hot—before you even think about adding batter. If it’s not hot, you’ll get something soft and doughy instead of those crispy Italian waffle cookies we love.
Generally, most modern electric pizzelle makers are non-stick and don’t need oiling. However, if you find your first couple of cookies sticking badly, give the inside plates a very light brush with a neutral oil—just a tiny bit using a pastry brush. Don’t just dunk a paper towel in oil and wipe; that’s too much and it will make your cookies greasy. You can check out some great tips over at Walking on Sunshine Recipes for more iron-specific pointers!
How to Prepare Classic Vanilla and Anise Pizzelle Cookies
Now we get to the fun part! Getting this batter mixed properly is the difference between a flat disk that shatters beautifully and something slightly too soft. We’re building structure here, but gently. Start by creaming that softened butter and sugar until it’s light and fluffy—it should practically look like pale whipped clouds in your bowl. Then, we add those four eggs, one by one. Take your time here; beating well after each one ensures everything emulsifies nicely.
After the eggs are incorporated, stir in both your vanilla and your anise extract. Oh, when that anise hits the sweet butter and sugar mix, it just fills my kitchen with the most incredible, nostalgic scent! It reminds me of Christmas Eve gatherings, even though this recipe is perfect any day of the year. Finally, we add the dry ingredients carefully.
Mixing the Batter for Light and Delicate Cookies
Here’s the golden rule: Do NOT overmix the flour! Once you start adding the flour, baking powder, and salt mixture, you stir it on low speed just until everything barely comes together. I mean it—you should still see a tiny whisper of flour streaks when you stop. If you beat that batter hard once the flour is in, you’ll develop too much gluten, and your wonderful pizzelle cookies will turn tough and chewy instead of staying light and delicate.
When it’s ready, the batter for these pizzelle cookies will seem quite thin, almost like a heavy liquid. Don’t panic! This is exactly right. That thin consistency is necessary so the batter spreads thinly across the hot iron plates when you press down.
Cooking and Shaping Your Pizzelle Cookies
Once your iron is ready (and trust me, don’t skimp on the preheating!), drop about one tablespoon of batter right into the center of the plate. Close the lid immediately but gently. You’ll hear the sizzle, and then you’ll see the steam start to escape. When that jet of steam slows down significantly, that’s your cue to check it. Usually, it’s about 45 seconds to a minute.
Carefully use a thin, offset metal spatula to lift the cookie. It will be soft, like warm taffy! Work fast. If you want those beautiful cannoli shells or cones, you’ll need to carefully wrap the hot, soft pizzelle around a mold right there on the cooling rack. If you are happy with flat, patterned cookies, just leave them flat to cool completely. They get crisp as they cool down, I promise! If you want to see more of my favorite holiday treats, feel free to browse my desserts category.
Tips for Success: Mastering Your Pizzelle Cookies
Okay, we’ve mixed the batter, we’ve got the iron humming, but sometimes even when we follow the steps, things get a little… weird. That’s why I call these the ‘mastering’ tips—they are the little adjustments that take great pizzelle cookies and make them absolutely flawless.
My biggest piece of advice here involves troubleshooting the final texture. If you pull one off the iron and it feels soft or bendy when it cools, don’t throw it out! Seriously, don’t. It just means your iron wasn’t quite hot enough, or maybe you used slightly too much moisture in your batter.
Here is my go-to fix for texture:
- If They Aren’t Crisp: Pop those soft cookies right back onto the hot iron for just 5 to 10 seconds per side. This blasts out any lingering steam and dries them right up. Another trick is placing them on a baking sheet in a 300°F oven for five minutes. Instant crispness restored!
- Don’t Forget the Salt: You saw that tiny pinch of salt in the recipe list, right? Don’t skip it! Salt is crucial because it balances all that sugar and butter richness. Without it, the flavor of your pizzelle cookies falls flat.
- Using Anise Flavoring: If you feel like the anise flavor—which is so traditional—isn’t coming through strong enough, my personal trick (and this is slightly beyond the original recipe note) is to slightly warm your anise extract for just a few seconds in the microwave before adding it to the wet ingredients. It helps the oils release their flavor better. You can read more about pure anise flavors over at MealunO if you want to dive deeper into that specific spice!
Remember to check out all my favorite baked goods any time you need inspiration for more incredible sweets!
Storage and Reheating Instructions for Pizzelle Cookies
These lovely, thin pizzelle cookies are famous for being delicate, which is wonderful until humidity decides to show up. If you live in a humid area, they can start to soften up overnight—and nobody wants a chewy pizzelle!
Here is my firm rule: once they are completely cool, you MUST store them in an airtight container. I usually layer them between sheets of parchment paper just to keep them separated, but otherwise, seal that container tight. Don’t store them in the fridge; that moisture is their enemy!
If you happen to pull out a batch that’s lost its snap, don’t fret! It’s an easy fix. You can refresh them instantly by popping them back onto your hot pizzelle iron for just about 5 seconds a side. It reactivates that crispness. A quick warm-up in a low oven works too, but the iron is faster!
Pizzelle Variations: Beyond Vanilla Flavored Pizzelle
While this classic vanilla and anise version grabs the top spot, I love experimenting once I nail the basics. That’s the fun of making pizzelle cookies at home—you get to customize your own batch of Traditional Italian Desserts! It’s so rewarding to know you can pivot the flavor profile for different holidays or just whatever you happen to be craving that week.
If you want that truly traditional flavor profile—the one that tastes like stepping into an Italian bakery during Christmas—you need to lean hard into the anise. I’ve seen folks make an official Anise Pizzelle Cookies Recipe by bumping that extract up to 1 1/2 teaspoons and skipping the vanilla completely. The licorice spice is strong, but oh so authentic!
But maybe you’re feeling nutty? Swap the anise for almond extract for lovely Almond Pizzelle Cookies. Or, if you want something rich and dark, remember that cocoa powder trick! I’ve gathered up lots of ideas for making pizzelle variations to keep things interesting. You can find lots of inspiration, especially around holiday twists, if you check out the great ideas shared over at Un Sophisti Cook.
Serving Suggestions for Your Homemade Pizzelle Iron Treats
So, you’ve got a beautiful pile of perfectly crisp pizzelle cookies cooling on the rack! Congratulations! While dusting them lightly with confectioners’ sugar is traditional and totally delicious, I think it’s time to get a little creative with these incredible Homemade Pizzelle Iron Treats. Eating them flat is great, but shaping them opens up a whole new world of desserts.
The key, and I can’t stress this enough, is speed. You must shape them while they are still hot and pliable—they cool down in seconds! If you wait too long, they will snap if you try to bend them.
Here are a few ways I love to serve them:
- Cannoli Shells: This is my absolute favorite way to use them when I want to show off. Right after they come off the iron, gently wrap the hot pizzelle around a small cannoli form or even a wooden dowel to create a little cone shape. Once they cool, they become sturdy, lacy vessels perfect for filling with sweetened ricotta or pastry cream!
- Dipped for Extra Flavor: If you made the vanilla version, taking the cooled cookies and dipping one edge into high-quality melted chocolate adds a lovely richness. For an extra festive touch, especially around the holidays, sprinkle some finely chopped nuts over that melted chocolate before it sets.
- Simple Coffee Companion: Sometimes, the simplest is the best. These paper-thin cookies are the perfect accompaniment to a strong espresso or a hot cup of coffee. They are so light you barely feel like you’re having dessert! They’re just fantastic with a simple cup of strong coffee shared with friends.
I love seeing what people make besides just stacking them on a plate. If you use your pizzelle to make something amazing, feel free to tag me! You can always find more inspiration for serving sweets over on my desserts page.
Frequently Asked Questions About Pizzelle Cookies
I know you probably have a few last-minute questions swirling around before you dive into making your first batch. That’s totally normal when you are working with specialized equipment like the pizzelle iron! People always ask me about texture and tools, so I gathered up the most common ones right here. We want your first batch of pizzelle cookies to be a total success story!
Can I make pizzelle cookies without a pizzelle iron?
This is a tough one, and my answer has to be an honest no, at least not if you want true pizzelle. Think of the pizzelle iron like a specialized mold—it’s what creates those beautiful, lacy patterns and, crucially, pushes that batter out so thin that it bakes up crisp instantly. If you tried to press this batter thin in a regular cookie sheet or even a standard waffle maker, the texture and pattern would be completely different. Now, if you happen to own a waffle cone or cannoli roller maker, those molds might work in a pinch to get a shape if you already have those, but for the classic patterned look, the specialized iron is the gatekeeper!
How do I ensure my pizzelle cookies are crispy and not chewy?
This is the million-dollar question, and I’ve given you the key secrets already, but it’s worth repeating because this defines a great Crispy Pizzelle Recipe. First, make sure your batter is thin. Second, and this is huge, the iron must be completely, fully preheated. If you cook them even 10 seconds too short, they’ll be soft when they come off. The third critical step happens *after* they leave the heat: they must cool completely on a wire rack. Don’t stack them! Stacking traps the heat and the steam right underneath, softening them up again. Get them cooled quickly on that rack, and they’ll snap perfectly.
Creating Joyful Holiday Cookie Recipes
Well, my friend, that’s it! We’ve gone from simple pantry staples to creating something truly elegant and delicious. That’s what I love most about baking—it takes basic things like flour, eggs, and butter, and turns them into something that symbolizes celebration and love. I truly believe that the best memories are made right here, standing over the hot iron, watching those patterns form.
These are more than just thin, crispy cookies; they become part of the tradition when you share them. Whether you stick to the classic vanilla and anise, or swap them out for almond or chocolate, these are always my go-to when I’m putting together my biggest trays of Holiday Cookie Recipes. Don’t be afraid to use this recipe often—it stands up to repeat baking!
If you try out these Italian waffle cookies, please take a picture! I genuinely love seeing your kitchen successes. Tag me or let me know in the comments how they turned out, or if you tried any fun shaping techniques. We’re all learning and growing as cooks together, and I’m so happy you stopped by my table today. You can always find more inspiration for treats and sweets over at my desserts page.
Happy baking! And don’t forget to check out the wonderful pizzelle cookies ideas shared by the great cooks over at The Fresh Cooky for even more inspiration!
PrintClassic Vanilla and Anise Pizzelle Cookies
Make authentic, thin, and crispy Italian waffle cookies at home using this reliable recipe. We explain the simple steps for perfect pizzelle every time.
- Prep Time: 15 min
- Cook Time: 20 min
- Total Time: 35 min
- Yield: About 3 dozen 1x
- Category: Dessert
- Method: Iron Baking
- Cuisine: Italian
- Diet: Vegetarian
Ingredients
- 1 cup unsalted butter, softened
- 1 cup granulated sugar
- 4 large eggs
- 1 teaspoon vanilla extract
- 1 teaspoon anise extract
- 2 teaspoons baking powder
- 2 1/2 cups all-purpose flour
- Pinch of salt
- Confectioners’ sugar, for dusting
Instructions
- Heat your pizzelle maker according to the manufacturer’s directions. You need it hot to get crisp cookies.
- In a large bowl, cream together the softened butter and granulated sugar until the mixture is light and fluffy.
- Beat in the eggs one at a time, mixing well after each addition.
- Stir in the vanilla extract and anise extract.
- In a separate bowl, whisk together the flour, baking powder, and salt.
- Gradually add the dry ingredients to the wet ingredients, mixing on low speed until just combined. Do not overmix the batter.
- Place one small spoonful (about 1 tablespoon) of batter onto the center of the hot pizzelle iron. The amount needed will vary based on your iron size.
- Close the lid and cook for 30 to 60 seconds, or until the steam stops escaping and the cookie is golden brown.
- Carefully remove the hot pizzelle using a thin spatula. It will be soft.
- Immediately place the hot cookie on a wire cooling rack. If you want to shape them (into cannoli shells or cones), do this while they are still hot and pliable.
- Let the pizzelle cool completely on the rack; they will crisp up as they cool.
- Dust the cooled pizzelle cookies with confectioners’ sugar before serving.
Notes
- For the best texture, ensure your pizzelle iron is fully preheated before adding any batter.
- If you prefer a strong licorice flavor, increase the anise extract to 1 1/2 teaspoons and omit the vanilla extract.
- To make chocolate pizzelle cookies, remove 1/4 cup of flour and replace it with 1/4 cup of unsweetened cocoa powder.
- If your cookies are not crisping, bake them for an additional 10 to 15 seconds.
Nutrition
- Serving Size: 1 cookie
- Calories: 110
- Sugar: 8
- Sodium: 35
- Fat: 5
- Saturated Fat: 3
- Unsaturated Fat: 2
- Trans Fat: 0
- Carbohydrates: 15
- Fiber: 0
- Protein: 2
- Cholesterol: 30