
When I bring desserts to a potluck or family gathering, I love seeing that moment where everyone stops talking just to look at the plate. If you live for that ‘wow’ factor—but don’t want to spend all day fussing in the kitchen—I’ve totally got you covered. Today we are making the ultimate showstopper: incredibly rich, fudgy red velvet cheesecake brownies with that perfect, beautiful swirl. Seriously, these desserts are famous in my house. They combine that deeply satisfying chocolatey richness with a bright, tangy cream cheese layer. I promise that once people taste them, they’ll be asking you for the recipe, just like they always ask me!
- Why This Recipe for Red Velvet Cheesecake Brownies is a Showstopper
- Gathering Ingredients for the Best Red Velvet Cheesecake Brownies
- Step-by-Step Instructions for Perfect Red Velvet Cheesecake Brownies
- Baking and Cooling: Tips for the Ultimate Red Velvet Cheesecake Brownies
- Expert Tips for Perfect Red Velvet Cheesecake Brownies Every Time
- Serving Suggestions for Your Red Velvet Cheesecake Brownies
- Storage and Reheating Instructions for Red Velvet Cheesecake Brownies
- Frequently Asked Questions About Red Velvet Cheesecake Brownies
- Nutritional Estimates for Red Velvet Cheesecake Brownies
- Share Your Showstopping Desserts for Parties
Why This Recipe for Red Velvet Cheesecake Brownies is a Showstopper
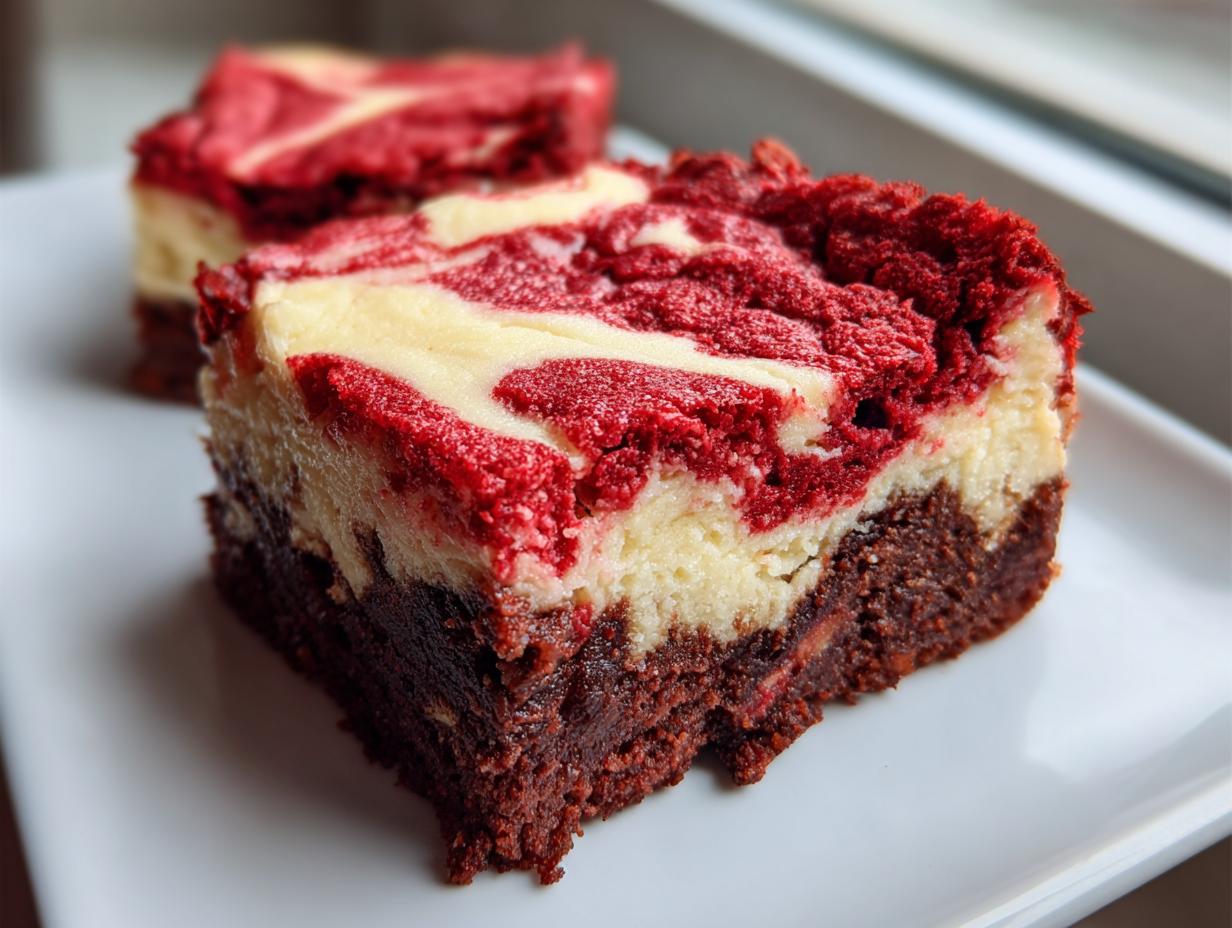
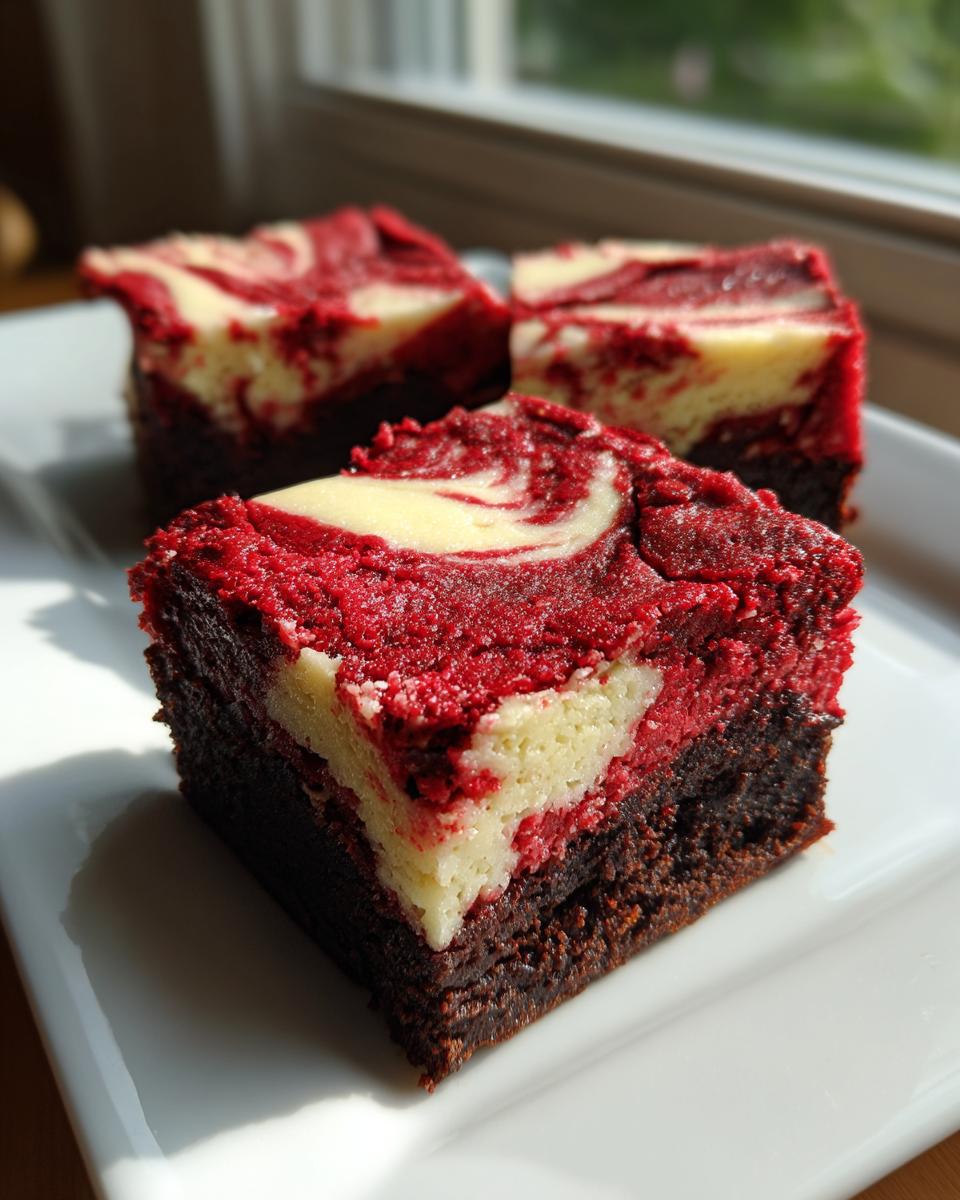
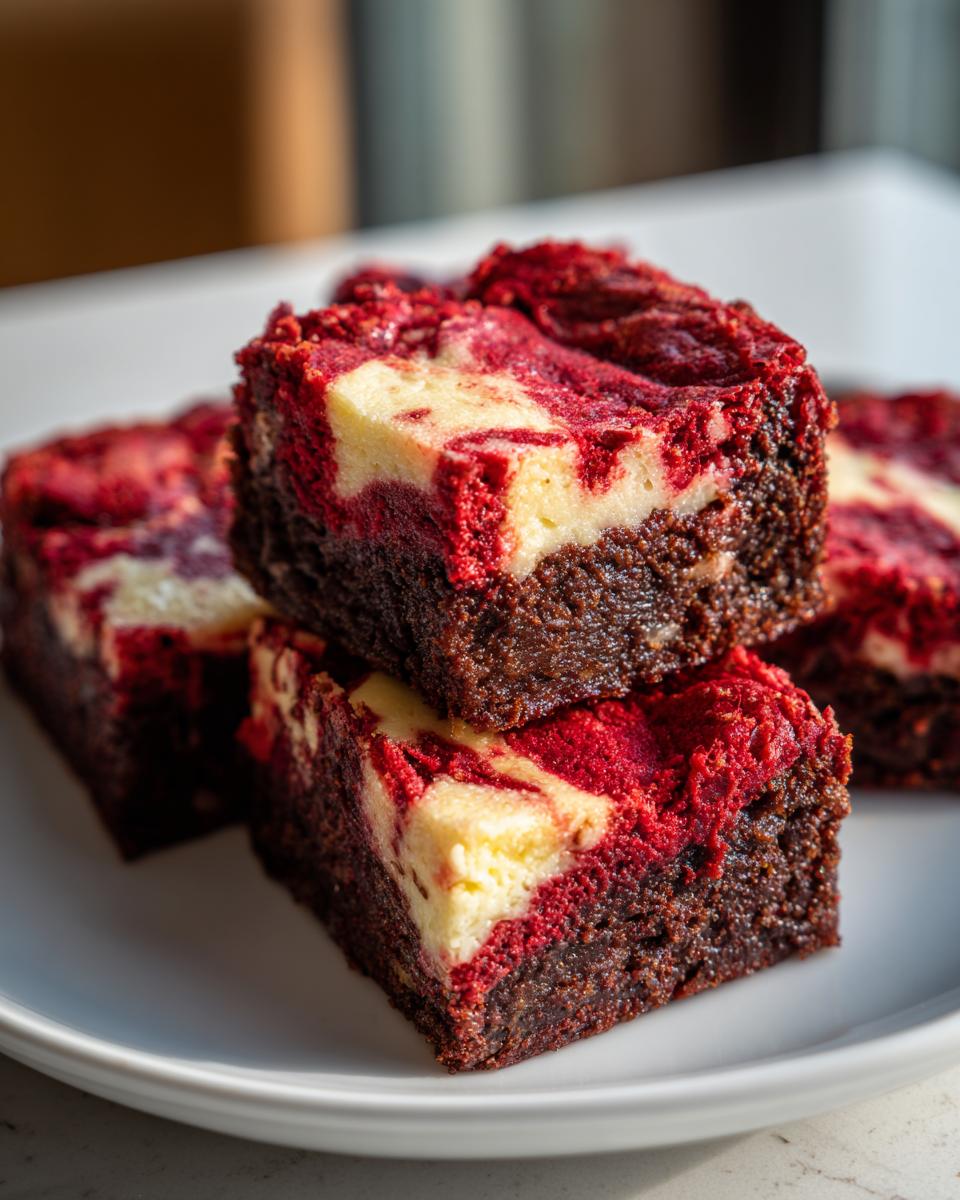
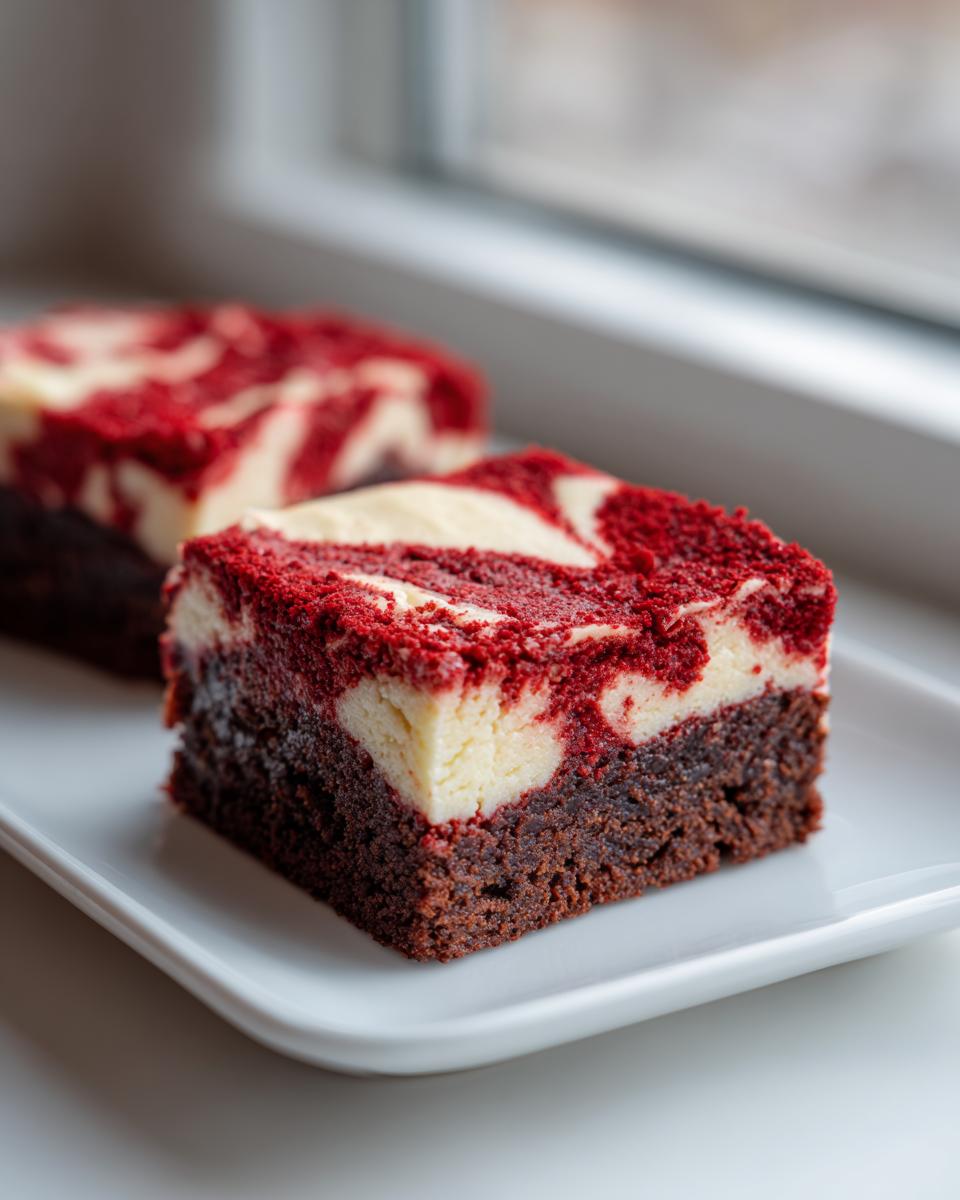
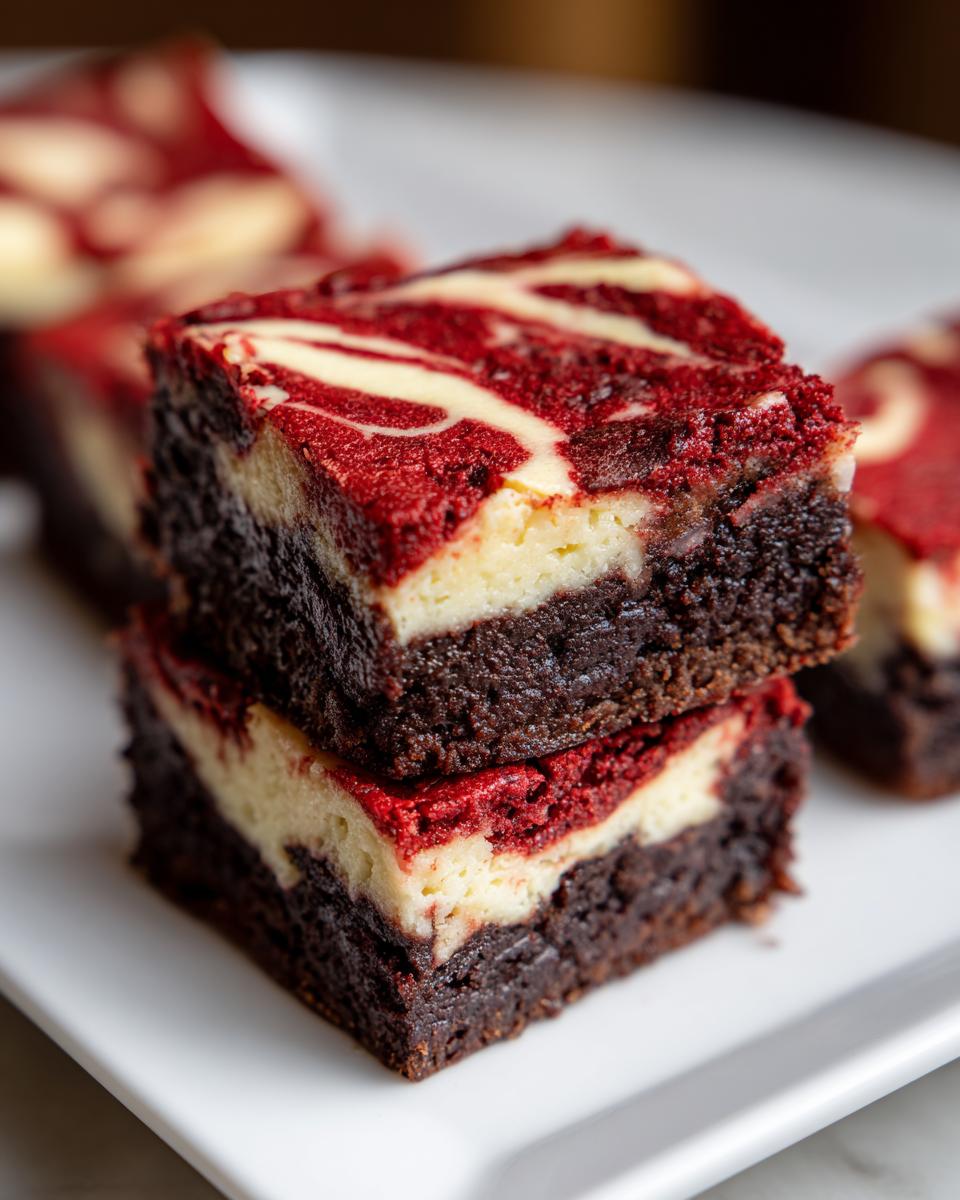
This isn’t just a simple sheet pan bake; this is one of those decadent baked treats you bring out when you really want to impress everyone. Trust me, these red velvet cheesecake brownies disappear first when I bring them to parties! What makes them so special is the marriage between two incredible textures. The visual appeal of that sharp, marbled red and white swirl grabs people immediately every single time.
If you’re looking for showstopping desserts for parties, this is absolutely it. It’s visually stunning but takes less effort than a fussy layer cake. I always joke that these brownies contain all the wow factor with none of the stress!
Achieving the Perfect Fudgy Texture in Your Red Velvet Cheesecake Brownies
The secret to that amazing fudgy bite is all in the batter science. We use a good amount of melted butter and just the right amount of flour. See, we aren’t trying to make them cakey here! By actually cutting back a little on the leavening agents, we encourage a dense, chewy structure. That means every bite is rich, chocolatey, and melts right in your mouth—no dry edges allowed!
The Tangy Balance: Cream Cheese Swirl Highlights
You know how sometimes a dessert is so rich it’s almost too much? That’s where the cheesecake layer swoops in to save the day! This layer is wonderfully light and brings that essential bright, tangy cream cheese desserts flavor. It cuts right through the richness of the chocolate and the red velvet. It’s the perfect contrast that keeps you going back for one more square, and I sourced some great inspiration for these swirls from places like blogs that ace the swirl technique!
Gathering Ingredients for the Best Red Velvet Cheesecake Brownies
One of the biggest things I learned from Kate Reilly about baking is to trust simple ingredients! You won’t need to hunt down anything exotic for these red velvet cheesecake brownies; everything is right there at your standard grocery store. That’s the beauty of making something impressive without stress. You can read more about our simple approach to ingredients here!
Ingredients for the Fudgy Red Velvet Brownie Batter
Okay, for the brownie part, make sure you grab that full 1 cup of unsalted butter and melt it down completely first. We need 2 cups of sugar for that rich sweetness. You’ll also need 4 large eggs, 1 teaspoon of vanilla, and a teaspoon of white vinegar—don’t skip the vinegar, it really helps the red velvet pop! Then, mix up your flour (1 cup), 1/2 cup cocoa powder, baking soda, and salt. The real showstopper here is the coloring: use about a tablespoon of red food coloring, but if you want that deep, luxurious hue, use a gel coloring for better results. Finishing off the red velvet batter, you mix in that little extra teaspoon of cocoa powder too.
Ingredients for the Cream Cheese Swirl Layer
For the cheesecake swirl itself, you absolutely must grab 8 ounces of cream cheese, and please make sure it’s fully softened up before you start beating it! We mix that with 1/2 cup of sugar, one large egg, a little salt, and 1/2 teaspoon of vanilla. Keep this bowl separate until batter assembly! If your cream cheese is cold, your swirl will look lumpy instead of smooth and dreamy.
Step-by-Step Instructions for Perfect Red Velvet Cheesecake Brownies
Okay, let’s get down to the action! Making these red velvet cheesecake brownies look as good as they taste is easier than you think, as long as we follow the layering order closely. I promise, if you take your time on the swirl, you’ll end up with something truly beautiful. You can check out some amazing marble techniques over at Cheff Recipes if you need a visual guide!
Preparing the Pan and Cheesecake Filling
First things first: get that oven heating up to 350°F (175°C). You absolutely need to line your 9×13 inch pan with parchment paper, leaving some overhang so we can lift the whole thing out later—trust me on this! Now, for the cheesecake layer, we beat the softened cream cheese with its sugar, egg, salt, and vanilla until it is totally smooth and creamy. There shouldn’t be any little lumps hiding out in there. Set that bowl aside while we make the main event.
Mixing the Fudgy Red Velvet Brownie Batter
Grab your large bowl! Whisk the melted butter and the 2 cups of sugar together first. Then, whisk in those 4 eggs, the vanilla, and the white vinegar until everything looks happy and combined. Next, we fold in the dry ingredients—the flour, cocoa, baking soda, and salt—just until you see no more streaks of white. This is important: do not overmix! Once it’s just combined, gently stir in the red food coloring and that little extra teaspoon of cocoa powder. Keep mixing until it’s a vibrant, even red. That little bit of extra cocoa powder stops the red from totally fading during baking for your perfect red velvet cheesecake brownies.
Layering and Creating the Signature Cream Cheese Swirl Brownies
Time to stack! Spread about two-thirds of that gorgeous red batter evenly into your lined pan. Don’t use all of it yet! Next, take spoonfuls of that reserved cheesecake filling and dollop them right over the brownie base. Now, use your remaining one-third of the red batter and scatter that over the top of the cheesecake dollops. To get those lovely cream cheese swirl brownies, take a butter knife or a wooden skewer and gently drag it back and forth across the top. Stop moving it when you see the patterns forming—you want that marbled look, not a completely mixed batter!
Baking and Cooling: Tips for the Ultimate Red Velvet Cheesecake Brownies
The oven magic happens fast, so don’t wander off! We are baking these at 350°F for just 30 to 35 minutes. How do I tell when my red velvet cheesecake brownies are perfectly done? Look for the edges to look set and firm, but the center should still look a little soft—that’s the fudgy part coming through! The actual doneness test is to insert a toothpick near the center. You want moist crumbs attached, not wet batter clinging to it. If it comes out totally clean, you’ve baked too long!
Now for the hardest part: cooling! You have to let these cool completely on a wire rack—and I mean totally cool. If you try to cut them warm, you’ll end up with a gooey mess, and nobody wants sloppy squares. Seriously, for those beautiful, clean cuts that make them look so professional, you need patience. I learned that the best way to guarantee flawless results, like the ones you see pictured on sites like Savor Queen, is to actually let them chill in the fridge after they come to room temperature. It firms everything up perfectly!
Expert Tips for Perfect Red Velvet Cheesecake Brownies Every Time
When you’re making something this decadent, you want every single batch to look and taste like magazine-worthy perfection, right? I’ve taken all the little scribbled notes from the original development process, and these are the things I stick to religiously for that flawless finish on my red velvet cheesecake brownies.
First, let’s talk color, because a faded red is just sad! If you really want that deep, dramatic color, ditch the liquid food coloring. You have to use the gel coloring—it’s more concentrated, so you use less, and the color stays incredibly vibrant through the oven heat. Also, remember that chilling tip I mentioned about cooling? It’s so important for these cream cheese swirl brownies. You must chill the entire cooled pan in the fridge for at least two hours. This firms up the cheesecake layer so much that you get those perfectly clean cuts, making them look professional!
Making the Best Cream Cheese Swirl Brownies with Box Mix (Variation)
Look, sometimes life is busy, and that is okay! If you’re in a pinch and need an easy cheesecake brownie recipe but still want that red velvet look, you can totally fake it with a box mix. Here’s my hack: use one box of red velvet cake mix, but instead of following the box liquid directions, you mix in 1/2 cup of vegetable oil, 2 eggs, and 1/4 cup of water. That extra fat from the oil helps bring it closer to a fudgy brownie texture instead of a cake texture. Then, you use the exact same measurement of our cream cheese filling dolloped on top and swirl away! It saves major time but still tastes great.
Serving Suggestions for Your Red Velvet Cheesecake Brownies
Wow, you made it! These red velvet cheesecake brownies are so rich and decadent that they really don’t need much help, but if you’re serving them up as part of your holiday brownie recipes spread, a little garnish goes a long way. For Valentine’s Day, like the ideas over at Dishori suggest, a light dusting of powdered sugar makes the red pop beautifully.
If you serve them slightly warm (after they’ve chilled, of course!), a small scoop of vanilla bean ice cream is heaven. Or, for an extra festive feel, try a drizzle of a bright, contrasting sauce. I often pair mine with a chilled glass of cranberry orange punch—the tartness balances the richness perfectly. It’s all about creating that moment, isn’t it?
Storage and Reheating Instructions for Red Velvet Cheesecake Brownies
You made such a beautiful batch of red velvet cheesecake brownies—the last thing you want is for them to go bad! Because we have that lovely cream cheese layer in there, these absolutely must be stored in the refrigerator. Don’t leave them sitting out on the counter for more than a couple of hours, especially if your kitchen is warm.
Wrap them up tightly! I usually place the entire cooled, cut slab into an airtight container, or I wrap the squares individually in plastic wrap before putting them in a bag. Stored correctly in the fridge, they stay fantastic for almost a full week. Honestly, I think they taste even better on day two because the chilling process really firms up that cheesecake filling and makes the brownie layer even more intensely fudgy.
Now, for reheating—though most people eat these chilled or at room temperature—if you *must* warm one up, don’t use the microwave for too long! Pop a single square in there for maybe 10 or 15 seconds just to soften it up slightly. If you zap it too long, the cheesecake part gets weirdly soft and might melt right off the brownie. Room temperature is usually the sweet spot for the best structural integrity and flavor balance!
Frequently Asked Questions About Red Velvet Cheesecake Brownies
I get so many questions when I post pictures of these treats online! It totally makes sense; everyone wants their red velvet cheesecake brownies to turn out beautifully, especially when you put in the effort for that gorgeous color. I always try to answer all your doubts right here so you can bake with confidence. If you’re looking for other great ideas for using your oven, you can browse my breakfast and brunch favorites too!
Can I make these Red Velvet Cheesecake Bars ahead of time?
Oh yes, please do! In fact, I highly recommend it. These aren’t like cookies that are best eaten warm from the oven. For the best results—and I mean the absolute cleanest, most perfect squares—you need to let these red velvet cheesecake bars chill completely. If you can manage it, assemble everything and then let them chill in the fridge overnight. This ensures the cheesecake layer is totally firm, making the slicing process so much easier and cleaner.
How do I prevent my cheesecake swirl from sinking into the brownie batter?
This is a classic worry when making any cream cheese swirl brownies, isn’t it? You want them to marble on top, not disappear! The main thing is batter thickness. Make sure your red velvet brownie batter is thick and fudgy—if it’s too watery, it lets the cheesecake sink right through. Also, don’t get too wild when you’re dolloping the cream cheese; try to keep the dollops relatively close together so the final layer of batter covers them slightly without crushing them down to the bottom.
What is the best way to get clean cuts on my baked treats?
This is essential for presentation! Remember how I preached about chilling them until they are totally cold? That’s step one toward clean cuts. Once they are chilled, take a big, sharp knife—the kind you’d use for carving meat works well—and dip the blade into a tall glass of hot water. Wipe the knife clean and dry immediately, then make your cut. Wipe and re-heat the knife after every single slice! This prevents the fudgy brownie from dragging and keeps the cheesecake layer from smearing. It makes a world of difference!
Nutritional Estimates for Red Velvet Cheesecake Brownies
Okay, let’s talk numbers for a second. I know when we’re making something this utterly decadent—these rich chocolate cheesecake bites wrapped in velvet—we aren’t exactly aiming for health food status! But it’s good to have a general idea, right? When I looked over the amounts of butter, sugar, and cream cheese needed for these glorious red velvet cheesecake brownies, I ran the estimates based on our 16-serving pan size.
Please remember, these figures are just general guidelines. If you use light cream cheese or switch out some sugar for a substitute, your numbers look completely different! These estimates are based on using the full-fat ingredients listed in the recipe and yield 16 perfect squares. Treat these as a fun starting point, not a strict rulebook for your glorious baking!
Here is what my calculations show for one square:
- Serving Size: 1 brownie square
- Calories: 350
- Total Fat: 21g (with about 12g being saturated fat)
- Cholesterol: 75mg
- Sodium: 210mg
- Total Carbohydrates: 37g (with about 35g of that being sugar—oops!)
- Protein: 4g
See? Deliciously high in fat and sugar, just like a perfect brownie should be! The goal here is enjoyment and creating those great memories, not counting macros. If you’re looking for lighter eats, maybe check out our lighter fare next time, but for these Ultimate Brownie Fusion treats, we embrace the richness!
Share Your Showstopping Desserts for Parties
Now, you have the absolute secret to making the most incredible red velvet cheesecake brownies! My hope is that you take this recipe and bring it to your next gathering—whether it’s a big Valentine’s Day celebration or just a cozy weekend treat like Kate always talks about. When you make these, please, please come back and let me know how they turned out!
Did you get that perfect swirl? Were they fudgy enough? Leave a star rating below—it really helps other bakers feel confident about diving into a new recipe. And if you snap a picture of your finished, gorgeous squares, tag us on social media! Seeing your creations is genuinely my favorite part because it means another amazing, shared dining memory was made possible in someone’s kitchen. If you ever need to reach out with questions or just want to share a success story, don’t ever hesitate to hop over to our contact page. Happy baking, friends!
PrintThe Ultimate Decadent Red Velvet Cheesecake Brownies: Perfectly Swirled and Fudgy
Make rich, moist red velvet cheesecake brownies with a beautiful cream cheese swirl. This recipe combines fudgy brownies and tangy cheesecake for a showstopping dessert perfect for any gathering.
- Prep Time: 20 min
- Cook Time: 35 min
- Total Time: 2 hours 55 min
- Yield: 16 servings 1x
- Category: Dessert
- Method: Baking
- Cuisine: American
- Diet: Vegetarian
Ingredients
- 1 cup (2 sticks) unsalted butter, melted
- 2 cups granulated sugar
- 4 large eggs
- 1 teaspoon vanilla extract
- 1 teaspoon white vinegar
- 1 cup all-purpose flour
- 1/2 cup unsweetened cocoa powder
- 1 teaspoon baking soda
- 1/2 teaspoon salt
- 1 tablespoon red food coloring (or more for deep color)
- 1 teaspoon unsweetened cocoa powder (for the red velvet batter)
- 8 ounces cream cheese, softened
- 1/2 cup granulated sugar (for the cheesecake layer)
- 1 large egg (for the cheesecake layer)
- 1/4 teaspoon salt
- 1/2 teaspoon vanilla extract
Instructions
- Preheat your oven to 350°F (175°C). Line a 9×13 inch baking pan with parchment paper, leaving an overhang on the sides for easy removal. Lightly grease the paper.
- Prepare the cheesecake layer: In a medium bowl, beat the softened cream cheese, 1/2 cup sugar, 1 egg, salt, and vanilla extract until smooth and creamy. Set aside.
- Prepare the red velvet brownie batter: In a large bowl, whisk together the melted butter and 2 cups of sugar until combined. Whisk in the 4 eggs, vanilla extract, and white vinegar until smooth.
- In a separate bowl, whisk together the flour, 1/2 cup cocoa powder, baking soda, and salt. Gradually add the dry ingredients to the wet ingredients, mixing until just combined.
- Stir in the red food coloring and the extra 1 teaspoon of cocoa powder until the batter is uniformly red and fudgy. Do not overmix.
- Spread two-thirds of the red velvet batter evenly into the prepared pan.
- Dollop spoonfuls of the cheesecake mixture over the brownie batter.
- Pour the remaining one-third of the red velvet batter over the cheesecake dollops.
- Use a knife or skewer to gently swirl the layers together to create a marbled effect. Do not over-swirl; you want distinct layers.
- Bake for 30 to 35 minutes, or until the edges are set and a toothpick inserted near the center comes out with moist crumbs attached. The cheesecake portion should look mostly set.
- Let the brownies cool completely in the pan on a wire rack. This is crucial for clean slicing.
- Once cool, use the parchment paper overhang to lift the brownies out of the pan. Cut into squares.
Notes
- For a richer red color, use gel food coloring instead of liquid.
- Chill the brownies for at least 2 hours before slicing for the cleanest cuts and best texture.
- If you prefer a less tangy cheesecake layer, reduce the cream cheese by one ounce.
Nutrition
- Serving Size: 1 brownie square
- Calories: 350
- Sugar: 35
- Sodium: 210
- Fat: 21
- Saturated Fat: 12
- Unsaturated Fat: 9
- Trans Fat: 0.5
- Carbohydrates: 37
- Fiber: 1
- Protein: 4
- Cholesterol: 75