
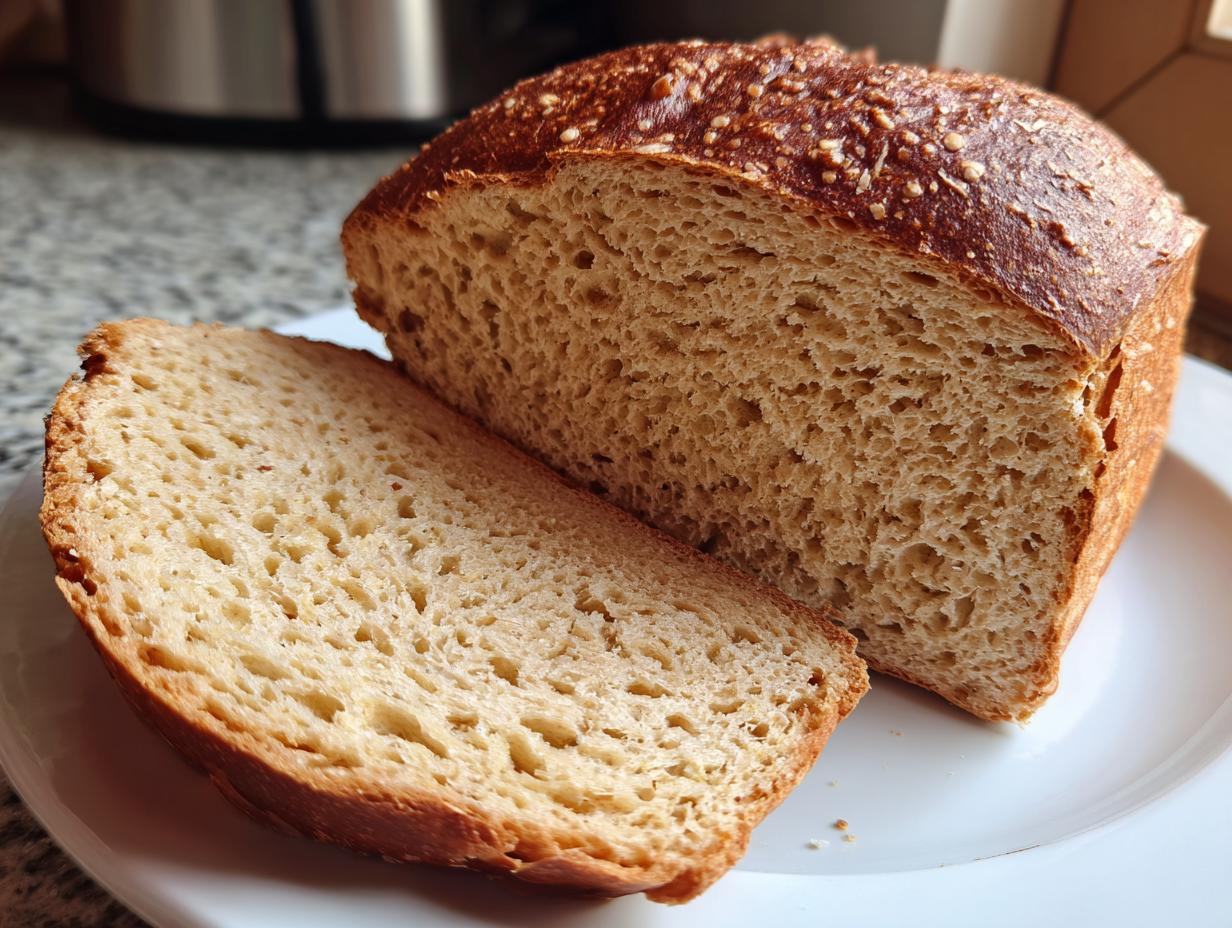
Oh, the moment you pull a loaf of bread from the oven—that smell just fills the whole house with comfort, doesn’t it? It’s pure magic! For me, baking is the best way to slow down. That’s why I’m thrilled to share my ultimate recipe for **Soft Honey Whole Wheat Sandwich Bread**. I know what you’re thinking: whole wheat bread is usually dense and heavy, right? Wrong! This is my go-to easy whole wheat bread recipe because it delivers that unbelievably soft, fluffy texture we all want, wrapped up in a healthy package. My goal here at Taste This Plate has always been to prove that magnificent, memorable meals don’t require chef skills, just a good, trustworthy guide. This loaf is proof of that!
- Why This Soft Honey Whole Wheat Bread Recipe Works for You
- Essential Kitchen Baking Staples for Perfect Whole Wheat Bread
- Step-by-Step Guide to Making Soft Whole Wheat Bread
- Expert Tips for Perfect Whole Grain Loaves
- Storing Your Fresh Baked Bread
- Troubleshooting Common Issues When Baking Bread
- Serving Suggestions for Your Homemade Loaf
- Frequently Asked Questions About This Recipe
- Nutritional Estimate for This Loaf
- Share Your Baking Journey
Why This Soft Honey Whole Wheat Bread Recipe Works for You
Let’s be honest, one of the biggest disappointments in home baking is when your whole wheat bread comes out dry and crumbly. We’ve all been there, peeling off a slice for a sandwich only to have it shatter! That’s why I developed this recipe to conquer dryness head-on. I wanted a loaf that was genuinely soft enough for little hands but hearty enough to be nutritious.
Here’s what makes this particular recipe a keeper:
- Guaranteed Soft Texture: We use a touch of all-purpose flour alongside the whole wheat to keep that structure beautifully tender, giving you truly fluffy whole wheat bread every time.
- Natural Moisture Boost: The honey isn’t just for sweetness; it’s a humectant! It locks moisture into the crumb, meaning your loaf stays fresh longer.
- Perfect for Sandwiches: This bakes into the ideal shape and density for everyday use—no sad, floppy sandwiches here!
- Beginner Bread Baking Approved: If you’re new to yeast, this recipe is straightforward and forgiving. Just follow the rising times, and you’ll feel like a pro in no time. If you love easy baking, you should check out my carrot banana muffins recipe too!
Essential Kitchen Baking Staples for Perfect Whole Wheat Bread
Baking this beautiful homemade whole wheat bread starts long before the oven gets hot. It starts with having exactly what you need ready to go! Trust me, not scrambling for the right pan mid-rise is a game-changer for stress-free baking. For this recipe, you absolutely need a standard 9×5 inch metal loaf pan—this shape is what guarantees that classic sliceable form we’re aiming for.
You’ll also want a large mixing bowl, a whisk or sturdy spoon, and of course, a good quality wire rack for cooling. Having these kitchen baking staples ready makes the whole process feel streamlined, even for beginners!
Gathering Ingredients for Your Honey Whole Wheat Bread
When you pull out your ingredients, make sure everything is measured precisely. Remember, baking is chemistry, especially when working with wholesome grains! You’ll need 2 cups of warm water, but listen closely: that water needs to be between 105 and 115 degrees Fahrenheit so the yeast wakes up happy. We use 1/2 cup of golden honey because it does so much heavy lifting for moisture. Then, melt 1/4 cup of good unsalted butter. Don’t forget the salt—1 1/2 teaspoons—a crucial flavor element in any amazing honey whole wheat bread.
For flour, we start with 4 cups of whole wheat flour. If you are nervous about it being too heavy, I give you permission to grab 1/2 cup of all-purpose flour to mix in later. That little bit makes a huge difference in keeping this 100% whole wheat loaf nice and tender, giving you that fluffy interior everyone craves!
Step-by-Step Guide to Making Soft Whole Wheat Bread
Okay, this is where the actual fun starts! Making delicious **whole wheat bread** is all about respecting the yeast and building real structure in the dough. Don’t worry if you’ve messed up a loaf before; we are going to take this slow and use some insider knowledge to make sure your crumb is perfectly fluffy.
Activating Yeast and Mixing the Dough for Fluffy Whole Wheat Bread
Ready? First things first: we need happy yeast! Take your large bowl and mix that warm water—remember, 105 to 115 degrees—with the active dry yeast. If you use water that’s too hot, you’ll kill your yeast, and we can’t have that! Let it sit for five minutes until it looks foamy and alive. That foam is your green light! Next, stir in the honey, the melted butter, and the salt. We’re keeping the mixing simple before we move on to the kneading stage. This initial step is just as important as the final bake; it sets the foundation, much like knowing when to pull your bacon and gruyère egg bites out of the oven!
Kneading and First Rise for Your Homemade Whole Wheat Bread
Time to build that gluten structure that makes for wonderful homemade whole wheat bread. Turn your shaggy dough out onto a lightly floured surface. Now, you have to work it! Knead this dough firmly for a full 8 to 10 minutes. I know, it feels like forever after stirring it in the bowl, but this is what develops the strength needed for a great texture. You’re looking for a dough that feels smooth and elastic, not sticky. Once it’s ready, place it in a lightly greased bowl, turn it over once so it’s coated, and cover it up. Let it rest in a warm spot for 1 to 1.5 hours until it has doubled. While you wait, maybe try checking out my recipe for homemade granola; the kitchen stays warm!
Shaping, Second Rise, and Baking the 100% Whole Wheat Loaf
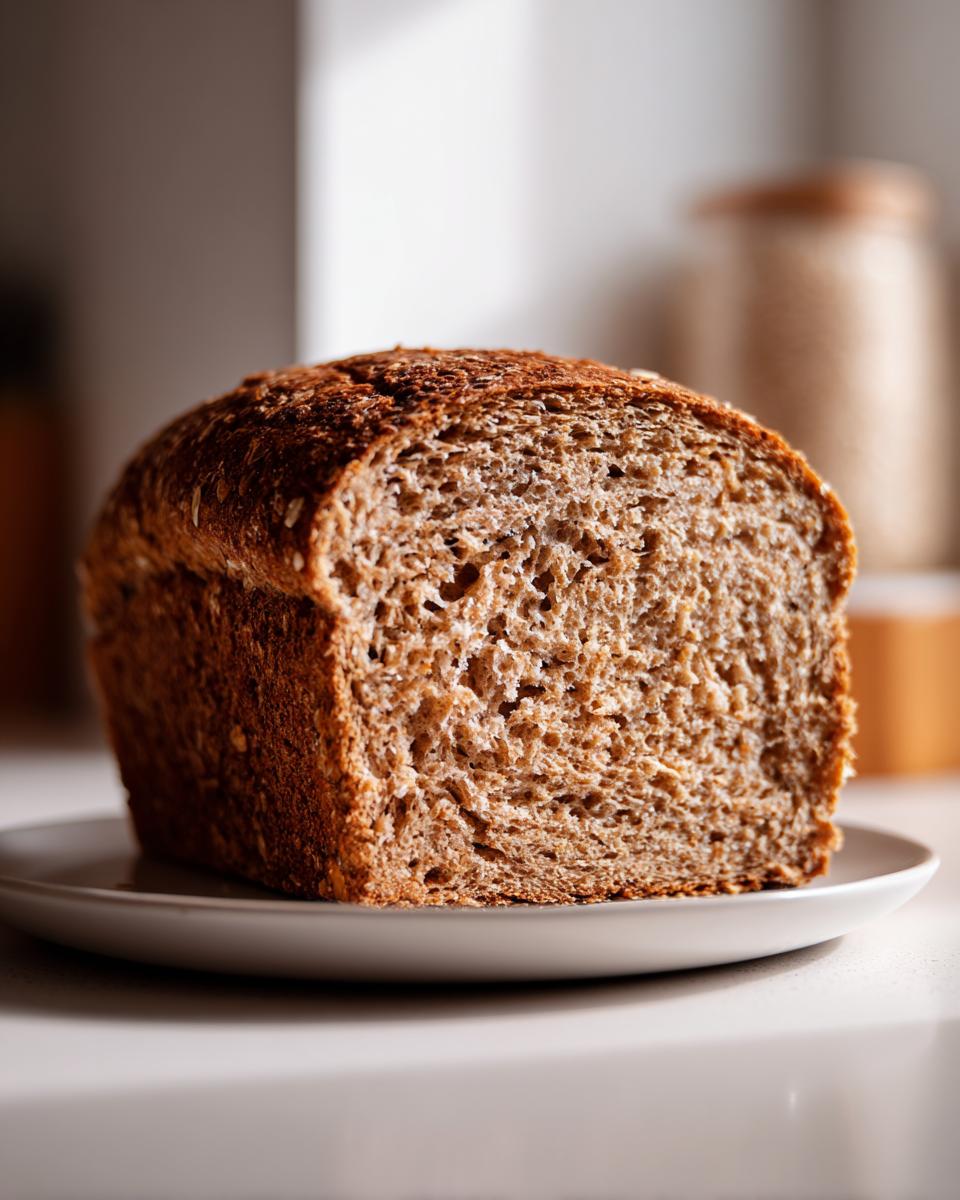
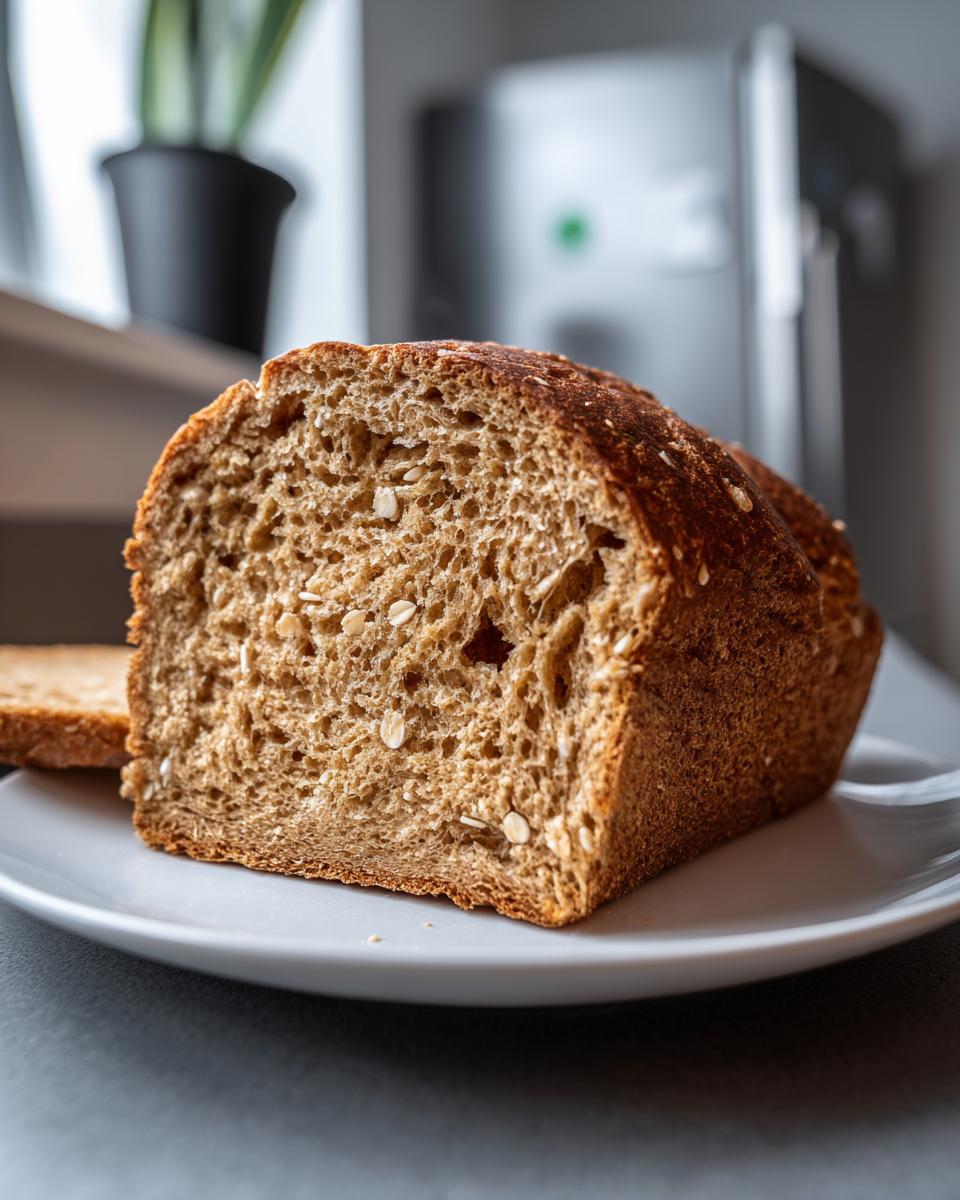
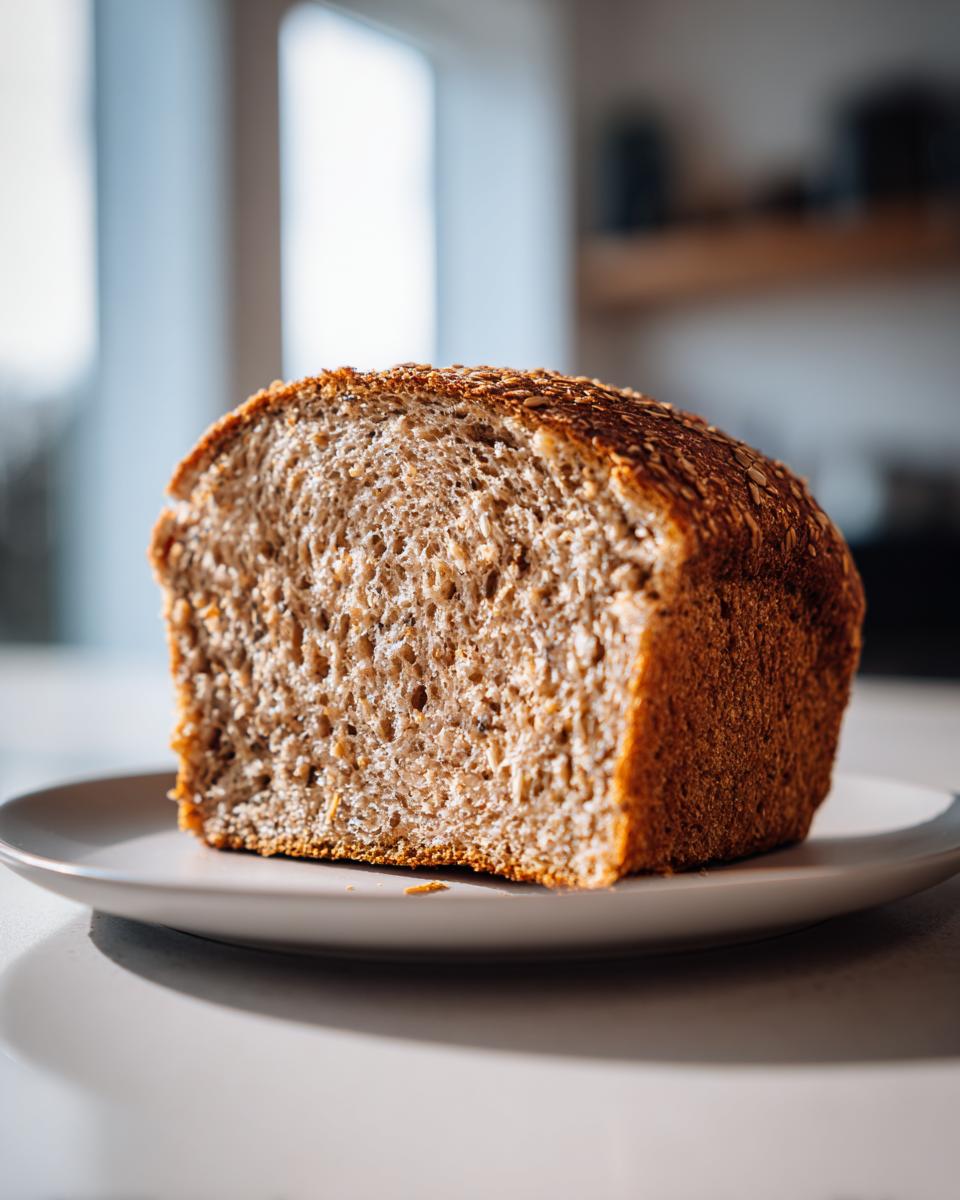
When that dough has ballooned up nicely, gently punch it down—that just lets the extra gas escape. Shape it into a log and tuck it right into your greased 9×5 loaf pan. Now, it rests again (the second rise!), usually 30 to 45 minutes. It should crest about an inch over the rim. Right before that second rise finishes, preheat that oven to 375°F. You want it hot! Bake it for 30 to 35 minutes. My best trick for making sure this 100% whole wheat loaf isn’t gummy is using a thermometer: pull it out when the center hits 200°F. Always let it cool fully on a wire rack before slicing, or you’ll compress that beautiful interior.
Expert Tips for Perfect Whole Grain Loaves
I’m so glad you stuck with this recipe because the difference between good whole wheat bread and *great* whole wheat bread is often just a small technique tweak. If you want to push this recipe toward that glorious artisan whole wheat baking aesthetic, you can totally skip the loaf pan!
If you choose to bake it free-form directly on a baking stone or a heavy baking sheet, you’ll end up with a more rustic whole wheat baking experience. Just be sure to shape it tightly into a smooth, round boule before that second rise happens. This method usually requires a slightly longer bake time, so check the internal color and temperature more closely.
Also, remember that note about the flour swap? If you want to boost the softness even more (making it the best whole wheat recipe for picky eaters), swap out 1/2 cup of the whole wheat flour for high-protein bread flour instead of all-purpose. It gives the gluten an extra boost. For more general grain insight, I always recommend reading up on how different flours interact; it really changed my whole grain loaves for the better. You can start by checking out this easy homemade whole wheat bread recipe source for comparison!
Oh, and a quick tip if you’re planning on serving this with dinner: I love using a little melted butter mixed with herbs, like rosemary, and brushing it on top right before the last 5 minutes of baking instead of a plain egg wash. It makes the crust fantastic, especially if you’re serving it alongside something like my crispy potato wedges.
Storing Your Fresh Baked Bread
The hardest part is done—you baked it! Now we need to make sure your gorgeous loaf of **whole wheat bread** stays perfect for sandwiches all week. Here’s my golden rule: never refrigerate bread! Cold air dries it out way faster than leaving it on the counter. For up to three days, just wrap it up tightly in plastic wrap or place it in a clean paper bag, maybe covered loosely with foil, at room temperature.
If you know you won’t finish it in three days, then we freeze. My notes mention that this healthy homemade bread freezes like a dream. Wait until it is completely cooled—and I mean *completely*—then slice it first. Pop those slices into a good freezer bag, squeezing out all the air, and toss it in the freezer. Reheating a slice straight from the freezer for 30 seconds in the toaster makes it taste like it just came out of the oven!
Troubleshooting Common Issues When Baking Bread
Even with the most reliable **easy whole wheat bread recipe**, sometimes things just don’t go according to plan, especially the first few times. Don’t panic if your dough acts weird; that’s just part of learning how these hearty grains behave! If your dough feels super sticky—like it’s trying to glue itself to your counter—resist the urge to dump in a ton of extra flour. Whole wheat flour absorbs liquid slower than white flour. Just work it a bit longer during kneading and add only tiny pinches of flour if you absolutely must.
The most common failure, especially for beginners, is a flat loaf. If your fluffy whole wheat bread didn’t rise much during the first proof, 99% of the time it’s your yeast or your water temperature—it was too cold, or maybe too hot! Make sure that water is right in that 105-115°F zone. If you skip the second rise, you’ll get a dense crumb, so don’t rush that part! A bit of patience goes a long way toward achieving that perfect, sliceable texture for your sandwiches. Need inspiration for what to put on that perfectly baked (and hopefully risen!) toast? Try topping a slice with my avocado toast with feta.
Serving Suggestions for Your Homemade Loaf
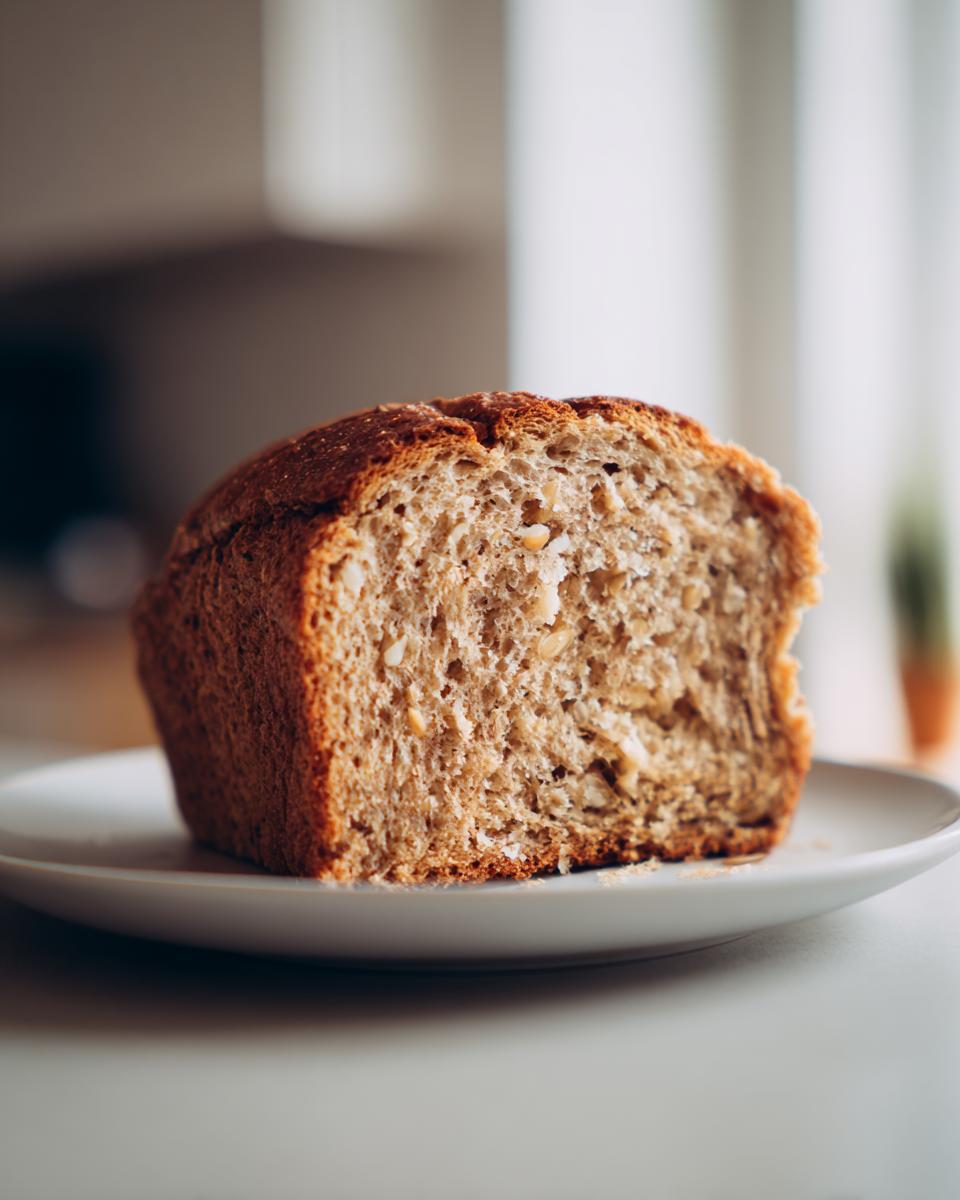
Now that you’ve made the perfect **whole wheat sandwich bread**, what do you do with it? Honestly, the best way to eat it is still warm, sliced thick, with a swipe of good salted butter—that’s simple bread making at its finest. But this versatile loaf shines at every meal! It’s sturdy enough to hold up against thick fillings for lunch, or you can slice it and use it as the absolute best dipping bread for soup.
If you’re having this hearty bread alongside dinner, it pairs wonderfully with something rich and comforting, like my recipe for garlic parmesan mashed potatoes. Don’t forget to toast up any leftovers for breakfast tomorrow morning!
Frequently Asked Questions About This Recipe
I always get asked a few things when people realize they can make such a fantastic loaf of **whole wheat bread** at home! Here are the most common questions I get from fellow bakers:
Can I really use 100% whole wheat flour?
Yes, absolutely! This recipe is designed to handle 100% whole wheat flour beautifully, which is the key to making a truly healthy homemade bread. If you do stick to 100%, you might find the dough a tiny bit stiffer at the kneading stage compared to when we add that optional AP flour. Don’t worry; just trust the process. The honey and butter really help keep that 100% whole wheat loaf from tasting too heavy.
What if I don’t want to knead the dough? Is there a ‘no knead bread recipe’ option?
That’s a great question for busy days! While this recipe leans on kneading to create maximum strength for that fluffy texture, you *can* adapt it into a very wet, no knead bread recipe. You would skip Step 4 entirely and just let the dough mix slowly in the bowl for 10 minutes, treating the rising time as your ‘kneading’ time. You’ll need a longer first rise, maybe closer to 2.5 hours, and you should bake it free-form on a hot surface instead of in a pan for the best oven spring.
Is the honey mandatory, or can I substitute it?
I highly recommend keeping the honey! It’s vital for the moisture retention that makes this soft whole wheat bread so good two days later. If you *must* swap it, use maple syrup, but you might need slightly less liquid overall. Sugar just doesn’t perform the same moisture-locking trick that honey does. If you’re making something light to drink alongside this hearty bread, like my sparkling honey lemonade, you’ll notice how honey adds more depth!
Why is the second rise so important for this sandwich bread?
That second rise is everything when you are striving for that perfect lift in a loaf pan! The first rise builds flavor and strength. The second rise builds the final volume and creates those little air pockets that result in a fluffy whole wheat bread. If you skip it or cut it short, your bread will bake up dense where the pan restricted it. Patience here earns you that beautiful, high-domed sandwich loaf!
Nutritional Estimate for This Loaf
I always get asked about nutrition when people realize how fantastic this whole wheat bread is! Remember that baking is never perfectly precise, so these numbers are just an estimate based on using only whole wheat flour (Option A). For one slice, you’re looking at around 150 calories, 3 grams of fat, 4 grams of fiber, and 6 grams of protein. It’s a wholesome addition to any meal, but rest assured, these values can shift slightly depending on your exact honey and butter measurements!
Share Your Baking Journey
Truly, seeing your results warms my heart more than the smell of fresh bread itself! I hope this recipe for whole wheat sandwich bread has shown you just how simple and rewarding baking truly is. Please, if you make this loaf, come back and leave a rating! Five stars means the world to me and helps other bakers trust this recipe too.
I absolutely love when you share photos of your creations on Instagram or Facebook and tag me. Seeing your beautiful, **fresh baked bread** sitting on your counters tells me we’re succeeding in bringing a little more homemade joy into your every day. Whether you kept it as the honey whole wheat loaf or tweaked it slightly, I want to see it!
Thank you for trusting me with your oven time. I’m so glad to have you at our table here at Taste This Plate. Head over to my About Page if you want to read more about how we approach simple cooking!
Happy Cooking,
Kate Reilly
PrintSoft Honey Whole Wheat Sandwich Bread

Follow this simple recipe to bake a soft, fluffy loaf of 100% whole wheat bread sweetened with honey, perfect for everyday sandwiches and toast.
- Prep Time: 20 min
- Cook Time: 35 min
- Total Time: 2 hours 5 minutes
- Yield: 1 loaf 1x
- Category: Baking
- Method: Kneading and Baking
- Cuisine: American
- Diet: Vegetarian
Ingredients
- 2 cups warm water (105-115°F)
- 2 tablespoons active dry yeast
- 1/2 cup honey
- 1/4 cup unsalted butter, melted
- 1 1/2 teaspoons salt
- 4 cups whole wheat flour, plus more for dusting
- 1/2 cup all-purpose flour (optional, for a softer crumb)
Instructions
- In a large bowl, mix the warm water and yeast. Let it sit for 5 minutes until foamy. This shows your yeast is active.
- Stir the honey, melted butter, and salt into the yeast mixture.
- Add the whole wheat flour, one cup at a time, mixing until a shaggy dough forms. If using, mix in the all-purpose flour now.
- Turn the dough out onto a lightly floured surface. Knead the dough for 8 to 10 minutes until it becomes smooth and elastic. You are building the structure for a fluffy whole wheat bread.
- Lightly grease a large bowl. Place the dough in the bowl, turning it once to coat. Cover the bowl with plastic wrap or a clean kitchen towel.
- Let the dough rise in a warm place for 1 to 1.5 hours, or until it has doubled in size. This is the first rise.
- Gently punch down the dough to release the air. Shape the dough into a loaf and place it into a greased 9×5 inch loaf pan.
- Cover the pan loosely and let the dough rise again in a warm spot for 30 to 45 minutes, or until the dough has crested about 1 inch above the rim of the pan. This second rise is key for soft loaves.
- Preheat your oven to 375°F (190°C) during the last 15 minutes of the second rise.
- Bake for 30 to 35 minutes, or until the top is golden brown and the internal temperature reaches 200°F (93°C).
- Remove the bread from the pan immediately and let it cool completely on a wire rack before slicing. Cooling prevents a gummy texture.
Notes
- For an even softer crumb, substitute up to 1/2 cup of the whole wheat flour with bread flour.
- If you prefer a rustic whole wheat baking look, you can skip the loaf pan and bake it free-form on a baking stone after the second rise.
- This homemade whole wheat bread freezes well once completely cooled. Slice it first, then freeze in an airtight bag.
Nutrition
- Serving Size: 1 slice
- Calories: 150
- Sugar: 5
- Sodium: 200
- Fat: 3
- Saturated Fat: 1
- Unsaturated Fat: 2
- Trans Fat: 0
- Carbohydrates: 28
- Fiber: 4
- Protein: 6
- Cholesterol: 5