
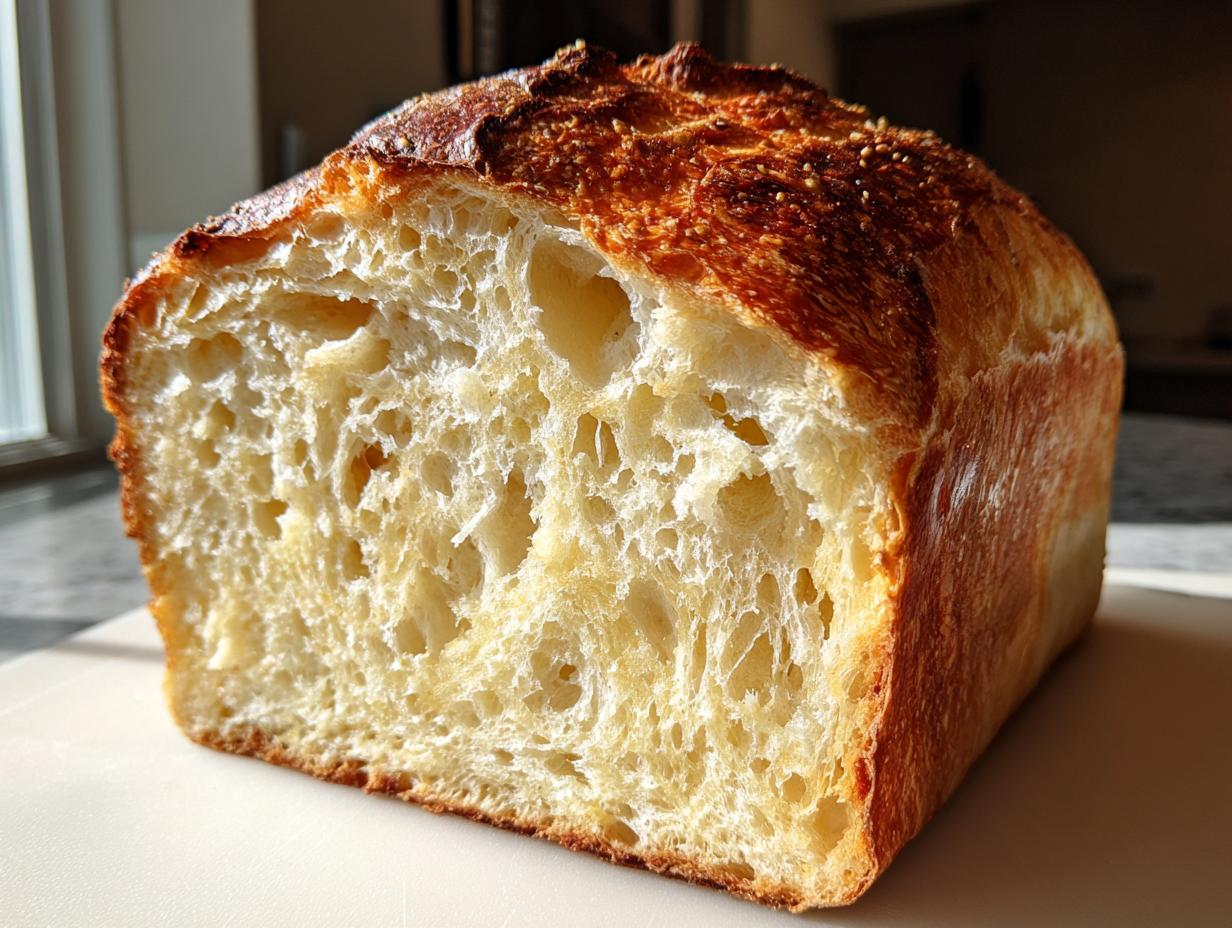
If you’ve ever given up on making your own leavened bread because every loaf came out dense, chewy like a brick, or just refused to slice nicely, I totally get it! We’re ditching that stereotypical sourdough struggle today. I’m so excited to share what I think is truly the best sourdough sandwich bread recipe out there, especially if you’re just starting out on your sourdough journey. This loaf is unbelievably soft, perfectly sliceable for school lunches or avocado toast, and fits right in with Kate Reilly’s philosophy here at Taste This Plate: great food shouldn’t be stressful. Trust me, this reliable recipe is going to change how you think about homemade bread!
- Why This is the Best Soft Sourdough Sandwich Bread Recipe for Beginners
- Gathering Ingredients for Your Sourdough Sandwich Bread
- Step-by-Step Instructions to Make Sourdough Sandwich Bread
- Tips for Perfect Sourdough Sandwich Bread Every Time
- Troubleshooting Common Sourdough Sandwich Bread Issues
- Serving Suggestions for Your Sourdough Sandwich Bread
- Storing and Reheating Your Sourdough Sandwich Bread
- Frequently Asked Questions About Sourdough Sandwich Bread
- Understanding the Nutrition in This Sourdough Sandwich Bread
- Share Your Homemade Sandwich Bread Sourdough Experience
Why This is the Best Soft Sourdough Sandwich Bread Recipe for Beginners
Okay, let’s talk about texture. We all love that tangy sourdough flavor, but when you need bread for jam or a turkey stack, you need softness, not chewiness! That’s precisely why this particular Soft Sourdough Sandwich Bread Recipe stands out. I developed and tested this recipe repeatedly to match Kate’s philosophy: real, reliable results without stress. It’s honestly one of the best Beginner Sourdough Recipe options, even if you dread shaping dough.
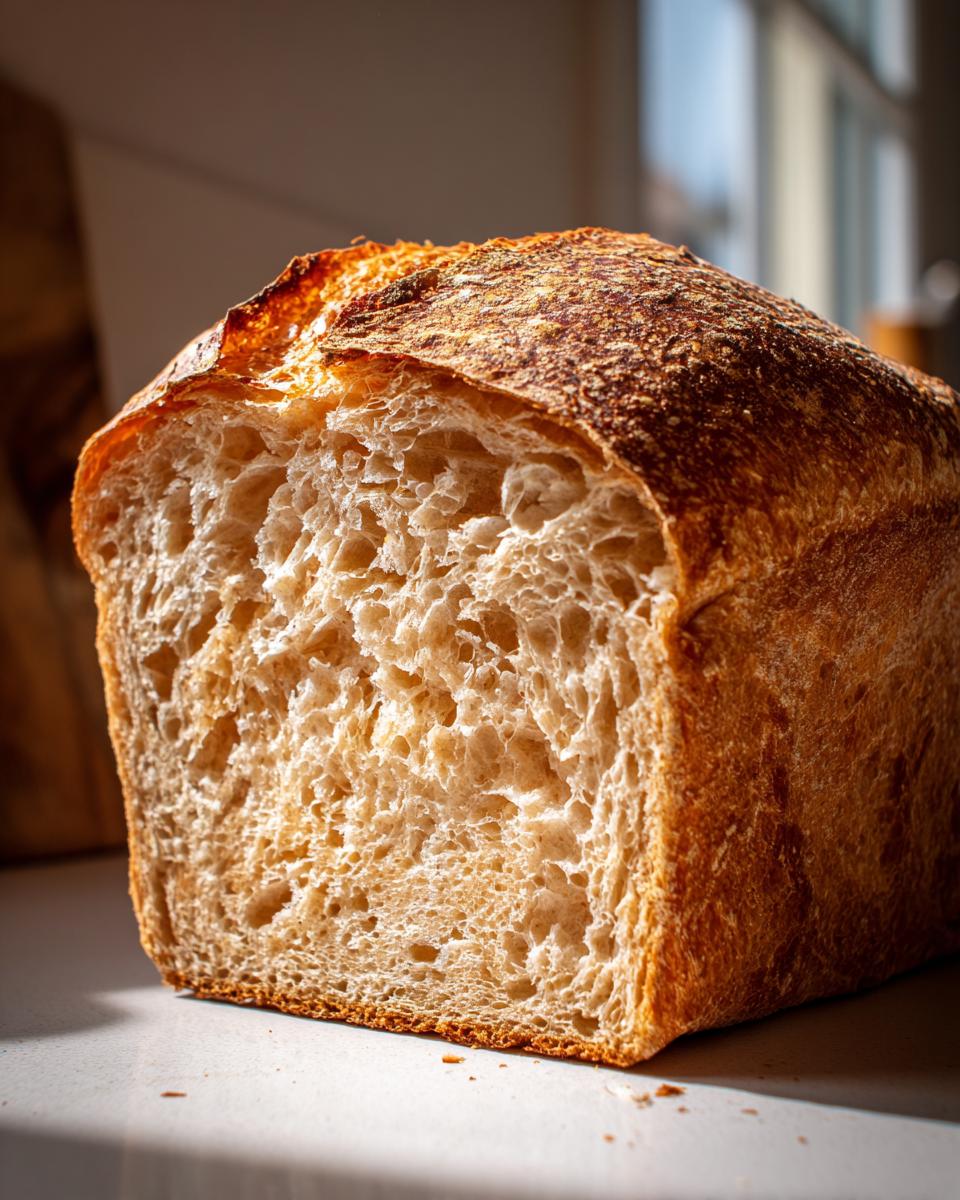
Achieving That Fluffy Sourdough Bread Texture
The secret to making this fluffy sourdough bread feel like a cloud instead of a doorstop is simple: we sneak in a little help! Unlike rustic boules, this loaf gets avocado oil and honey. That addition of fat creates what I like to call a forgiving, almost Buttery Sourdough Crumb. It keeps the crumb tender, even after cooling completely. This is the key difference that makes it perfect for slicing!
Gut Healthy Sourdough Through Long Fermentation
The best part about using your mature starter here is that you get all those wonderful health benefits! Sourdough baking is inherently about slow work, which breaks down complex starches. This extended time transforms our dough into a truly Gut Healthy Sourdough option, making digestion easier. We manage the timing so it’s not overly sour—just perfectly flavored and easy on the tummy.
Gathering Ingredients for Your Sourdough Sandwich Bread
Baking sourdough, especially a sandwich loaf, relies on accurate measurements—it’s just the nature of working with wild yeast! Don’t worry, all these ingredients are simple to find at any standard grocery store. Get your scale ready, and let’s assemble what we need for this fantastic loaf that everyone wants to make!
- 150g active sourdough starter
- 325g warm filtered water
- 20g avocado oil
- 25g honey
- 500g unbleached bread flour
- 10g salt
Ingredient Notes and Substitutions for Sourdough Sandwich Bread
Just a couple of quick notes here before you jump in, because these little details make a huge difference in a Sweet Sourdough Sandwich Recipe like this one.
First up: that starter! It absolutely must be active—I mean seriously bubbly and ready to rock, usually doubled in size within 4-6 hours of feeding. If your starter seems sluggish, your dough won’t rise right. Second, stick to unbleached bread flour. It has the higher protein content we need to support the structure of this loaf while keeping the crumb soft. Finally, yes, we are using honey! It helps tenderize the crumb, but if you prefer, you can swap it one-for-one with maple syrup for similar results. See? We are making this recipe work for you!
Step-by-Step Instructions to Make Sourdough Sandwich Bread
This is where the magic happens, and honestly, this process keeps things super simple for our No-Fail Sourdough Sandwich Loaf! I’ve broken down the steps so you don’t have to stress about traditional hard-core kneading. We let time and gentle folding do the heavy lifting for us. Remember, sourdough is patient work, but the individual steps are quick! Make sure you have your 9×5 pan ready and lightly oiled before you start step five. Even if you’ve felt scared off by sourdough before, I promise this method is gentle and really produces that beautiful, soft loaf we are aiming for.
Mixing and Initial Rest (Autolyse)
First, grab your large bowl and mix all your wet ingredients together: starter, the warm water, that pretty avocado oil, and the honey. Give it a good swirl until the water looks a little milky—that means the starter is starting to incorporate! Now, toss in your flour and salt. Mix everything with a spoon or your hands until you literally can’t see any dry flour sneaking around. It’s going to look shaggy and messy; that’s perfect! Cover that bowl and just leave it alone for a full hour. This rest time, sometimes called autolyse, lets the flour soak up the water properly before we start developing any gluten structure.
Developing Strength with Stretch and Folds
Now we build the strength for our Easy Sourdough Loaf! Set a timer for 30 minutes. After the first rest, wet your hands slightly (this keeps the dough from sticking to you like crazy) and gently grab one side of the dough, stretch it up high, and fold it over the center. Rotate the bowl a quarter turn and repeat until you’ve done all four sides. That’s one set! Cover it back up and repeat this process four times, with 30 minutes of rest in between each set. Seriously, don’t skip these; this technique replaces all that intense kneading your arms usually have to do!
Bulk Fermentation Timing for Your Sourdough Sandwich Bread
Once you’ve finished your last set of stretch and folds, it’s time for bulk fermentation, and this timing is the trickiest part of any sourdough recipe! You need to let the dough sit, covered, for anywhere from 4 to 8 hours. Why such a huge range? Because your kitchen temperature controls everything! If it’s warm in your house (like 75°F or warmer), it’ll be closer to 4 hours. If it’s cooler, hang out for closer to 8. You are looking for visual cues: the dough should look puffy, jiggly, and have increased by about 30% to 50% overall. Don’t look at the clock; look at the dough!
Shaping and Final Proofing for a Sliceable Sourdough Bread
Once the bulk fermentation looks great, gently turn the dough out onto a lightly floured surface. Shape it into a tight log or oval that fits nicely inside your oiled loaf pan. The tighter the shape, the better the oven spring and the more structured your final loaf will be—this is key for getting that true Sliceable Sourdough Bread! Place the shaped log, seam-side down, into your prepared pan. Cover the pan loosely with plastic wrap or a damp tea towel and let it proof at room temperature for maybe 1 to 3 hours. We want it puffy enough that the dough is just peeking about one inch over the rim of the pan when ready. If it rises too much, it tends to collapse once it hits the hot oven!
Baking and Cooling the Homemade Sandwich Bread Sourdough
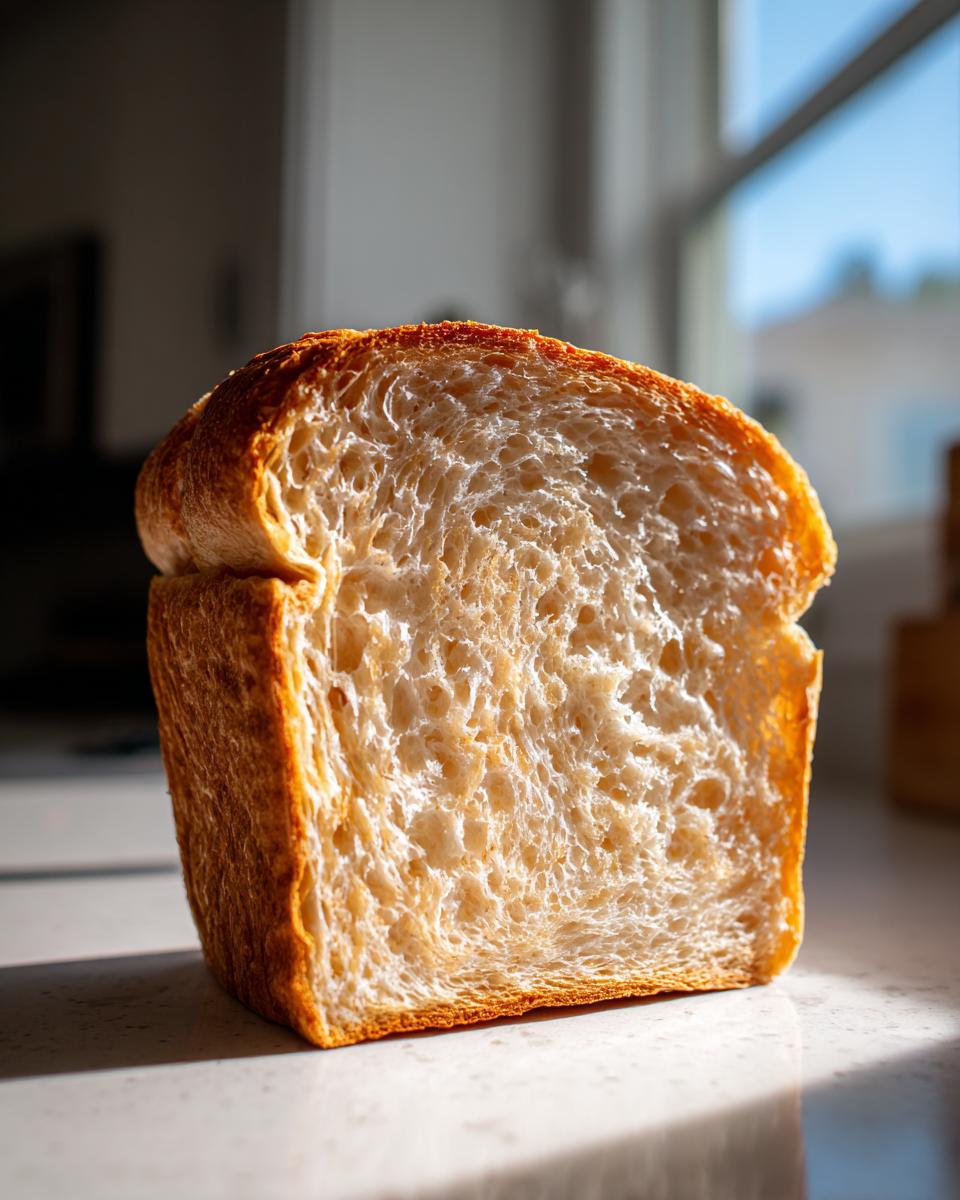
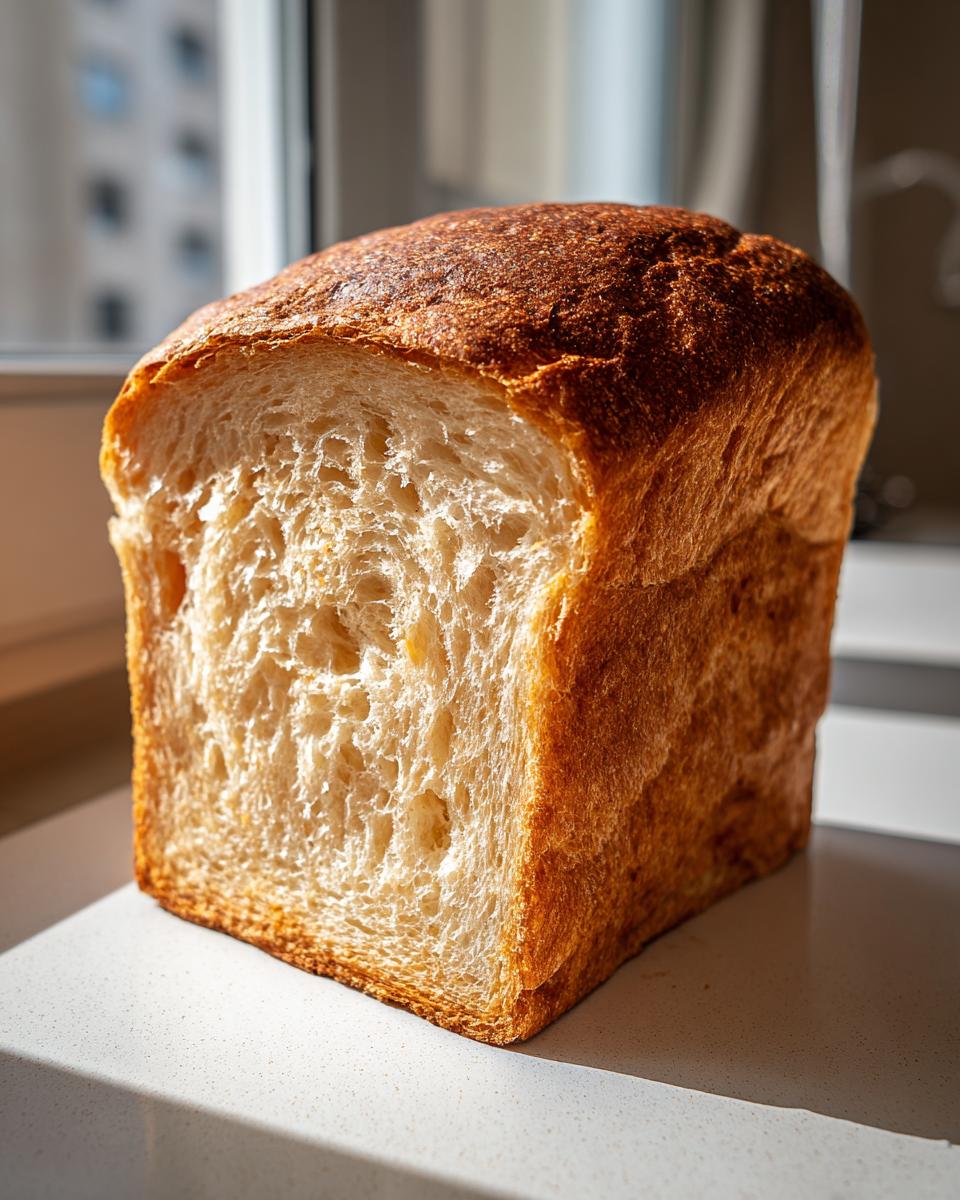
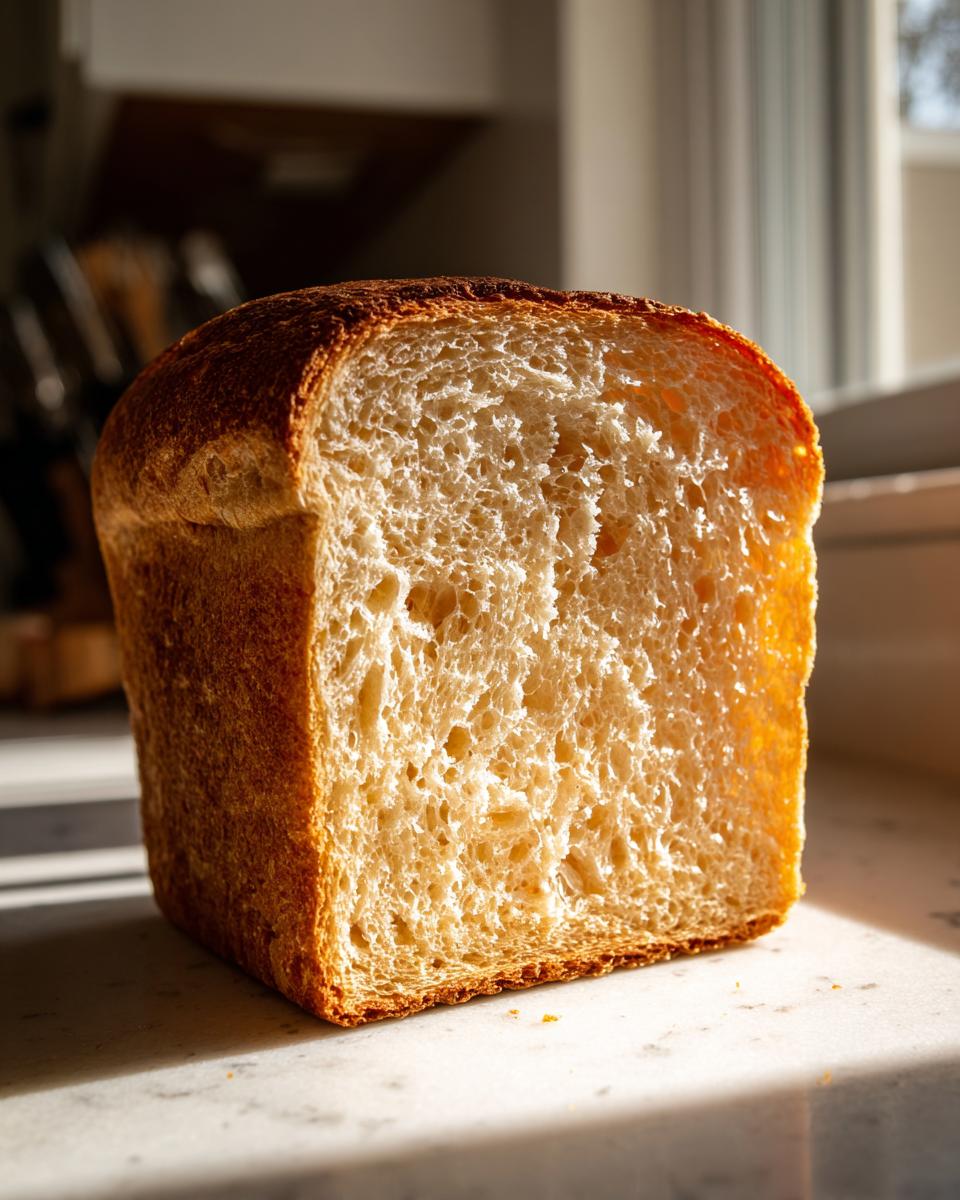
Go ahead and preheat your oven to 375°F (190°C) about 20 minutes before your dough looks ready. Here’s a pro tip: timing the bake by temperature is far better than timing by minutes! Bake for 35 to 45 minutes. When you think it’s done, pull it out and check the inside temperature with a thermometer. You are aiming for 200 to 210°F—that means it’s fully cooked through. Get that loaf out of the hot pan right away and set it on a wire rack to cool down. Please, please, please, wait until it’s totally, completely, 100% cool before you try to slice it. If you cut into it warm, you’ll unleash steam, and the perfectly soft interior will turn gummy, ruining that beautiful Homemade Sandwich Bread Sourdough texture!
Tips for Perfect Sourdough Sandwich Bread Every Time
Now that you know the steps, let’s lock in some of those make-or-break little details that ensure this remains your favorite Fluffy Sourdough Bread recipe. First, always, always use active starter. If your starter hasn’t reliably doubled in volume in four hours, don’t even bother mixing the dough; that’s a recipe for a dense brick, not a soft sandwich loaf.
Second, keep a close eye on your kitchen temperature. Sourdough is basically weather-dependent! If it’s cold in your kitchen, give your bulk fermentation an extra hour or two. Don’t rush it just because the recipe says 4 hours! You have to feel when the dough is ready.
And finally, when it comes to shaping for this loaf, be gentle but firm. You want to create surface tension without deflating all those lovely air bubbles we worked so hard to create during the stretch and folds. Handle this dough with a little love, and it truly rewards you!
Troubleshooting Common Sourdough Sandwich Bread Issues
We’ve all been there, right? You follow the steps perfectly, you wait patiently, and yet your beautiful sourdough sandwich bread comes out looking a little sad. Don’t you dare throw it away! In Kate’s world here at Taste This Plate, we see hiccups not as failures, but as learning opportunities. Let’s look at the three biggest beginner blues and how to fix them for your next attempt at the homemade sandwich bread sourdough.
My dough felt like soup, way too sticky!
This almost always means your balance is off, or you didn’t let those initial rest periods work their magic. If it feels too wet during the stretch and folds, it usually means either your starter wasn’t quite strong enough yet (not enough lift) or you just need a little more time for hydration during the autolyse. If you are in a really hot kitchen, your bulk fermentation might be moving too fast before the dough develops the structure to hold itself up. Remember what I said about watching the dough, not the clock? Humidity plays a big role here!
My loaf came out dense and heavy.
Ugh, the dreaded dense loaf! Ninety-nine times out of a hundred, this boils down to one thing: under-proofing. Your dough didn’t ferment long enough during the bulk stage, meaning the yeast hadn’t created enough gas bubbles to give the crumb lift. If you cut it while it was still warm, that’s another major culprit that ruins that soft crumb we want! Make sure you wait until the bread is completely cool next time, even if you’re desperate for a slice.
The crust is pale, even after baking it long enough.
If the temperature says it’s done inside (200°F) but the outside is still beige, your oven probably isn’t heating evenly, or maybe your oven temperature gauge is a little off. Sourdough loves heat, and that golden-brown crust helps lock in moisture. Next time, try adding steam to your first 10 minutes of baking—a pan of hot water on the bottom rack helps immensely! Once you pull the hot water pan out, the crust should brown up nicely. Don’t worry; pale crusts still taste delicious when slathered with butter!
Serving Suggestions for Your Sourdough Sandwich Bread
Now that you’ve got this incredible, soft loaf of Sourdough Sandwich Bread cooling, I know you’re excited to use it! This bread is built for everyday versatility. Forget those flimsy, airy store-bought slices; this homemade loaf is tough enough to handle whatever you throw at it, perfectly achieving that sliceable texture we worked so hard for.
Of course, it makes hands-down the best standard sandwich. Seriously, pack this for lunch; it holds up beautifully for hours. But beyond turkey and lettuce, this bread shines in a few specific areas that really highlight its soft crumb.
The Ultimate Grilled Cheese
You have to try this bread for grilled cheese. Because we used oil and honey, the exterior toasts up so perfectly golden brown and shatteringly crisp, but the inside stays tender and soft when you bite into it. Layer on some sharp cheddar or pepper jack, grill it low and slow in a little butter, and you have a five-star comfort meal in minutes—no fancy techniques required!
Perfect for French Toast
This is probably my favorite way to use up the end pieces or a slightly thicker slice! This sourdough is thick enough that it won’t disintegrate the second it hits the egg batter. When soaked and then cooked, it soaks up all that flavor. If you’re looking for a protein boost alongside your breakfast, you should definitely check out my recipe for Protein French Toast—it pairs perfectly with a thick slice of this slightly sweet sourdough!
Simple Toast with Butter and Jam
Sometimes, the simplest things are the best. When this bread is perfectly cooled, slice it thick, toast it until it’s just lightly colored, and slather it with good quality butter that melts right down into the open pockets. If you have some homemade berry jam, even better. It lets the honest flavor of your long-fermented bread really shine through. It’s rustic, it’s simple, and it’s exactly what Kate talks about—making something wonderful out of everyday ingredients.
Storing and Reheating Your Sourdough Sandwich Bread
You did it! You baked the perfect, soft sourdough sandwich bread. Now, the real test: keeping it soft for those lunchtime sandwiches! Because we added that little bit of oil and honey, this loaf stays lovely and tender longer than a rustic boule, but you still need to handle storage the right way.
For the first couple of days, honestly, keep it on the counter! Put the whole loaf in a sealable plastic bag or wrap it tightly in clean plastic wrap. You want it airtight to trap the moisture we worked so hard to build in there. Don’t put it in the fridge! I know it sounds counterintuitive, but the cold temperatures actually make bread go stale much faster, turning that fluffy interior dry and hard.
If you know you won’t eat the whole loaf in three days—and that’s okay, this loaf is quite rich!—you absolutely must freeze it. Wait until it’s completely cool, slice it up first (this is crucial for easy retrieval later!), and wrap the slices tightly in aluminum foil or a freezer bag. You can freeze it for up to three months this way. Frozen sourdough slices up beautifully!
Reviving Stale Sourdough Sandwich Bread Slices
Let’s say it’s day five, and your slices are looking a bit stiff. Don’t toss them! That amazing crumb is still in there, just needing a little encouragement. For toast, they’ll be fine, but if you want that fresh-from-the-oven tenderness back, you need a splash of moisture and heat.
Take the slice you want and quickly run it under the faucet—just a second on each side to dampen the very surface, don’t soak it! Then, pop the slice directly onto the oven rack at about 350°F for just four to six minutes. That quick blast of heat warms the water vapor inside the bread, steaming the crumb back into soft submission. It comes out so soft you’ll wonder where the stale slice went!
Keeping Flavored Loaves Fresh
If you decided to try making our herb and cheese version, storage is slightly different. With added fats and dairy elements, you need to be a bit quicker using it up. I’d aim to eat those flavored loaves within two days at room temperature, wrapped tightly. If you can’t finish it, freezing is still your best bet for preservation. Just microwave a slice briefly—maybe 15 seconds wrapped in a damp paper towel—and that cheese or herb flavor blooms right back up!
Frequently Asked Questions About Sourdough Sandwich Bread
I know when you’re just getting started, there are always little questions buzzing around! That’s totally normal when you’re trying to make sourdough sandwich bread for the first time. Don’t worry about being perfect; we just want a delicious, soft loaf!
Can I make this Sourdough for Beginners Loaf without a 9×5 pan?
Oh absolutely you can! If you don’t have that specific loaf pan, or you just want a rustic rounder shape, just shape your dough tight and place it directly onto a preheated baking stone or a parchment-lined baking sheet. The main thing you lose is that perfectly squared-off edge that makes stacking sandwiches so easy, so it might not be quite as sliceable in the rectangular sense, but the flavor will be just as amazing!
How long does the bulk fermentation take for the Best Sourdough Sandwich Bread?
This is the million-dollar question in sourdough, isn’t it? For this recipe, we anticipate between 4 to 8 hours, assuming your kitchen is hanging out at a nice, cozy room temperature, say around 70 to 75°F. I can’t stress this enough: forget the clock! You are looking for that nice 30% to 50% volume increase. If your kitchen is cold, let it chill out longer. If it’s super warm, it’ll be ready much faster. Watch the dough, not the hour hand!
Can I use this recipe for a Picky Eater Sourdough Bread?
Yes, I really think so! This is a fantastic starter loaf if you have family members who turn their nose up at strong, sour flavors. Since we added that little bit of honey, it brightens the flavor profile naturally. Plus, the long fermentation process we use does a wonderful job of mellowing out the super sharp tang that some people dislike. It’s soft, slightly sweet, and approachable—perfect for that Picky Eater Sourdough Bread situation!
Understanding the Nutrition in This Sourdough Sandwich Bread
You know I love keeping things simple here at Taste This Plate, and that includes understanding what goes into our bodies! Part of being a confident home cook, as Kate says, is knowing the facts behind the food we send out of our kitchens. Since we went to the trouble of making this sourdough sandwich bread long-fermented and gut-healthy, knowing the estimated nutrition can be super helpful!
Below are the approximate nutritional facts for one slice of this homemade loaf. Please take these counts with a big grain of salt, though! Baking is an art, and just like when I try to perfectly replicate Grandma’s old recipes, measurements shift slightly, and different brands of flour or honey will change the final breakdown.
We calculated these based on the recipe listed, assuming the loaf yields 14 even slices. This shows you the good stuff—like the lower sugar count compared to store-bought bread because we relied on natural activation from the starter!
- Serving Size: 1 slice
- Calories: Around 200
- Fat: About 3g
- Saturated Fat: Under 1g
- Carbohydrates: 38g
- Sugar: Just 1.5g (thanks to that little touch of honey!)
- Protein: Roughly 7g
- Sodium: Around 200mg
See? When you make your own homemade sandwich bread sourdough, you are totally in control of what goes in it. No weird preservatives, no mystery ingredients—just flour, water, starter, and a few simple additions that make it perfect for your family’s everyday meals!
Share Your Homemade Sandwich Bread Sourdough Experience
Well, friend, that’s it! You’ve officially made the best, softest sourdough sandwich bread you could ask for. I really, truly hope this bread lives up to the hype and makes your lunches so much better!
Now comes the fun part: sharing the love! I want to hear all about your experience, especially if this was your very first time tackling a sourdough loaf. Did you nail that fluffy texture? Was it easy enough for a busy weeknight? Please, take a moment and drop a rating and a comment down below!
Your feedback is gold to me because it helps me make sure these recipes truly deliver reliable, stress-free results for everyone, just like Kate aims for on the site. And if you managed to get a beautiful picture of your golden-brown loaf cooling on the rack, trust me, I want to see it! Tag me online or shoot me a message through the contact page!
Once you’ve enjoyed slathering butter on these super soft slices, why not try another simple staple? We’ve got a ton of easy recipes around here designed to make you feel like a kitchen hero without needing a culinary degree. Happy baking, and come back soon!
PrintThe Best Soft Sourdough Sandwich Bread for Beginners

This recipe creates a soft, sliceable sourdough loaf perfect for everyday sandwiches, toasting, or French toast. It is designed to be easy for beginner bakers and results in a gut-healthy, long-fermented bread.
- Prep Time: 30 min
- Cook Time: 45 min
- Total Time: 6 hours 15 min
- Yield: 1 loaf 1x
- Category: Bread
- Method: Baking
- Cuisine: American
- Diet: Vegetarian
Ingredients
- 150g active sourdough starter
- 325g warm filtered water
- 20g avocado oil
- 25g honey
- 500g unbleached bread flour
- 10g salt
Instructions
- Combine starter, water, oil, and honey in a large bowl. Mix until the liquid looks milky.
- Add the flour and salt to the wet ingredients. Mix until just combined into a shaggy dough. Cover the bowl and let it rest for 1 hour (autolyse/initial rest).
- Perform four sets of stretch and folds, spaced 30 minutes apart. Gently stretch the dough up and fold it over itself, repeating four times per set.
- After the final set of folds, cover the dough and allow it to bulk ferment for 4 to 8 hours, or until it has increased in volume by about 30-50% and shows signs of life. The time depends on your kitchen temperature.
- Gently shape the dough into a tight log or oval suitable for a standard loaf pan (9×5 inch).
- Place the shaped dough seam-side up into a lightly oiled loaf pan.
- Cover the pan and allow the dough to proof at room temperature for 1 to 3 hours, or until the dough has risen about 1 inch above the rim of the pan.
- Preheat your oven to 375 degrees Fahrenheit (190 degrees Celsius).
- Bake the loaf for 35 to 45 minutes, or until the crust is golden brown and the internal temperature reaches 200-210 degrees Fahrenheit (93-99 degrees Celsius).
- Remove the bread from the pan immediately after baking and cool completely on a wire rack before slicing. This ensures a sliceable crumb.
Notes
- Using honey helps create a softer crumb texture suitable for sandwiches.
- For a gut-healthy loaf, allow a longer, cooler final proof in the refrigerator overnight after shaping.
- Wait until the bread is completely cool before slicing to prevent a gummy texture.
Nutrition
- Serving Size: 1 slice
- Calories: 200
- Sugar: 1.5
- Sodium: 200
- Fat: 3
- Saturated Fat: 0.5
- Unsaturated Fat: 2.5
- Trans Fat: 0
- Carbohydrates: 38
- Fiber: 1.5
- Protein: 7
- Cholesterol: 0