

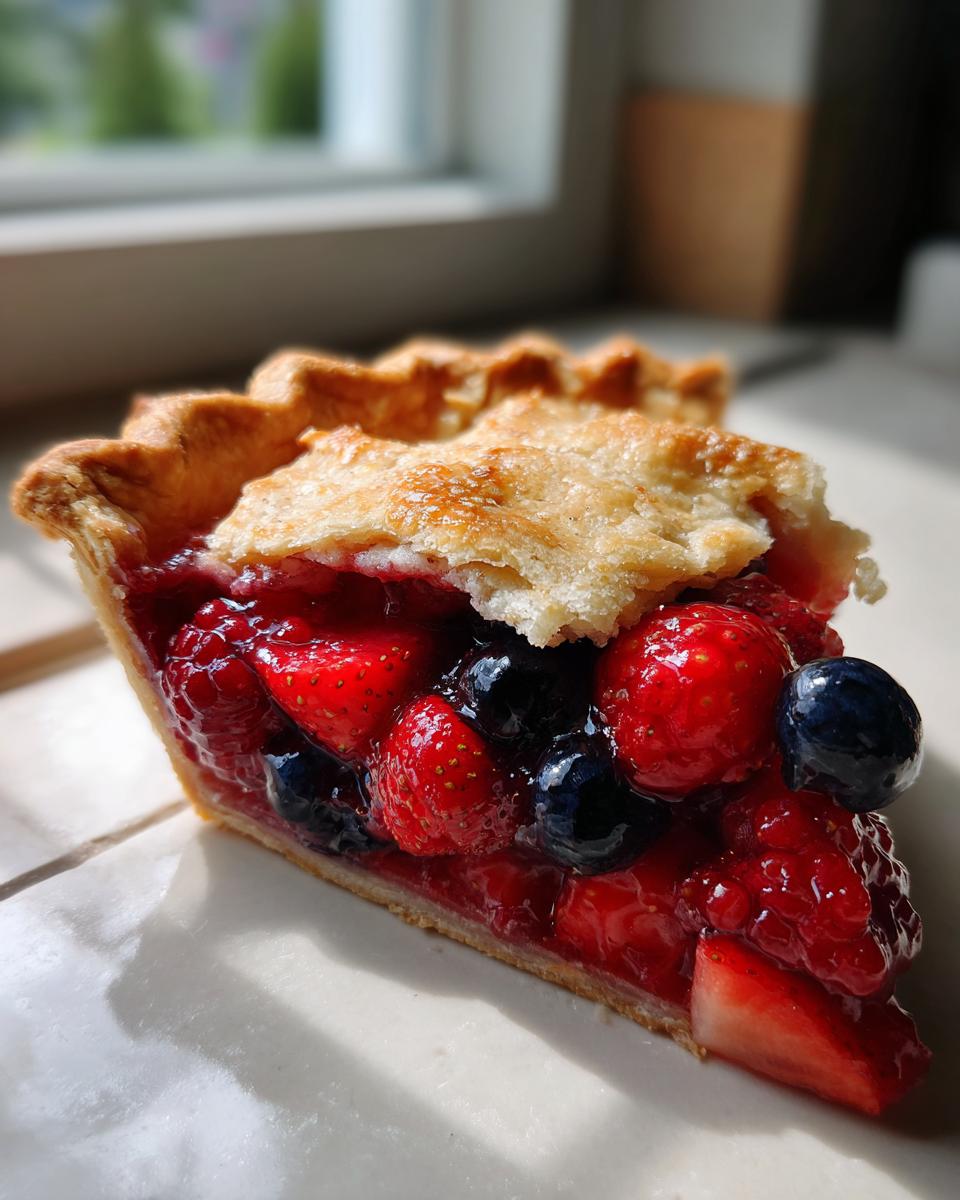
When summer hits, there’s nothing that says American comfort like a truly gorgeous, overflowing fruit pie. But let’s be honest, achieving that perfect slice without a watery mess underneath can feel like wizardry. Trust me, I get it. As someone who approaches cooking analytically, I spent years deconstructing classic recipes—figuring out the science behind why some fillings run and why other crusts taste like cardboard.
This Triple Berry Pie recipe isn’t just another version; it’s the definitive guide. We nail two major pain points right out of the gate: we’re making a buttery, unbelievably flaky pie crust from scratch, and we are guaranteeing a thick, juicy filling that sets beautifully so you get that clean slice everyone admires. Say goodbye to runny messes and hello to your new favorite summer pie.
- Why This Ultimate triple berry pie Recipe Works for You
- Ingredients for Your Homemade Fruit Pie
- How to Prepare the Flaky Crust for Your triple berry pie
- Assembling the Perfect triple berry pie Filling and Crust
- Baking Instructions for Your triple berry pie
- Tips for Baking with Fresh Berries and Variations
- Serving Suggestions for this Summer Berry Dessert
- Storage and Reheating Instructions
- Frequently Asked Questions About Berry Pie
Why This Ultimate triple berry pie Recipe Works for You
I believe baking should empower you, not intimidate you. That’s why I obsessed over the tiny details in this triple berry pie to ensure you get bakery-worthy results without the stress. This recipe is built on simple science, turning fresh berries into a spectacular homemade fruit pie.
- We use a precise ratio of cornstarch and sugar to lock in those berry juices, meaning you never deal with that dreaded soupy bottom layer.
- The crust technique is straightforward but hinges on keeping everything cold, giving you that light, shattering flakiness every single time.
- It works brilliantly whether you’re picking fresh berries at the market or reaching for a bag of frozen ones in January.
Flaky Pie Crust Tutorial: The Foundation of a Great triple berry pie
If you take one thing away from my testing process, let it be this: the colder your ingredients, the flakier your crust. I always cut my cold butter into pieces about the size of a small green pea—not too big to melt out entirely, but big enough to create those wonderful pockets of steam that make the crust lift and separate. Now, if you’re short on time, please don’t hesitate! This recipe works great even if you substitute with a quality store-bought crust for an easy pie recipe variation.
Achieving the Best Berry Pie Ever: Perfect Mixed Berry Pie Filling
The secret weapon against runny fruit pie is the thickening agent, and in this berry pie recipe, we rely on cornstarch because it gives a clearer, glossier set than flour. We also use enough sugar to balance the natural tartness of the raspberries and blueberries, creating that sweet yet sharp flavor profile people crave in a perfect mixed berry pie filling. Mix everything gently right before assembling, and trust the science!
Ingredients for Your Homemade Fruit Pie
Okay, let’s talk about what you need. For me, building a solid recipe starts with respecting the ingredients. I always insist on knowing exactly what form each item needs to be in before we hit the mixing bowl. Forget those vague measurements; we want perfection for this homemade fruit pie!
We are going to break this down into two parts: the crust and the magnificent berry mix. If you’re using store-bought crust, you can just skip the first part, obviously. But if you’re making it from scratch—and I hope you are!—here is the lineup.
For a truly amazing triple berry pie, here’s what you need on hand:
For the Flaky Pie Crust:
- 2 1/2 cups all-purpose flour
- 1 teaspoon salt
- 1 cup (that’s two sticks!) unsalted butter, kept very cold and cut into small cubes
- 1/2 cup ice water, plus maybe an extra tablespoon or two if your kitchen is warm
For the Mixed Berry Pie Filling:
- 6 cups mixed berries—I use strawberries that are hulled and halved, plus blueberries and raspberries.
- 1 1/4 cups granulated sugar (we need that sweetness to balance the tartness!)
- 1/4 cup cornstarch—this is your insurance policy against runny fruit, don’t skip it!
- 1 tablespoon lemon juice
- 1 teaspoon vanilla extract
And for that gorgeous golden finish, you’ll need a wash and sprinkle:
- 1 large egg, beaten well with 1 teaspoon water (your egg wash)
- 2 tablespoons coarse sugar for sprinkling on top—this gives such a lovely crunch!
I pulled these measurements right from my master spreadsheet to ensure the ratios between the fat in the crust and the starch in the filling are spot on. This way, you can spend less time worrying about the math and more time enjoying the process. For more tips on mastering fruit fillings, sometimes I look back at what worked for my apple pie filling experiments!
How to Prepare the Flaky Crust for Your triple berry pie
This flaky crust is where we start proving that you can absolutely create a classic American pie that tastes like it came straight from a bakery! Seriously, homemade is always superior here. We’re going to tackle Step 1—mixing the dry ingredients and cutting in that beautiful, cold butter. Remember my point about temperature? It’s not just a suggestion; it’s the law of flaky physics. You want the butter to stay icy cold so when it hits the hot oven, it creates steam and pushes the layers apart, resulting in those perfect flakes.
In your big mixing bowl, whisk together your flour and salt. Then, toss in those cold cubes of butter. Now, don’t use an electric mixer here—I know it’s tempting! Use a pastry blender or just your fingertips. You’re aiming for coarse crumbs, and I mean it: there *must* be pieces of butter the size of little peas scattered throughout that flour. If you blend it until it’s all fine like sand, you’ll just end up with tough, cracker-like dough. Why? Because those pea-sized chunks are what melt and create the steam that lifts the dough layers sky-high. It’s pure chemistry!
Once the butter is cut in, you’ll gradually add the ice water. Use just enough until the dough barely holds together when you squeeze a piece. Overmixing dough activates gluten, which makes your crust tough. We want tender here, not chewy! I’ve found that using just a tiny bit less water than you think you need is the key for my butter cookies, and the same holds true for this triple berry pie crust.
Chilling the Dough: A Critical Step for Success
Once that sloppy dough is just formed into two disks, wrap them tight. You absolutely have to chill this dough for at least an hour, minimum. This step is critical for two reasons. First, it allows the water you added to fully hydrate the flour without developing gluten, meaning the dough rests and relaxes. Second, and this is key for a flaky pie crust tutorial, it solidifies the butter pieces again. If you try to roll out warm dough, the butter smears into the flour, and you lose your flakes before you even get to the oven. Don’t rush this chilling time if you want the best berry pie ever!
Assembling the Perfect triple berry pie Filling and Crust
Alright, now that your dough is perfectly chilled and your berries are ready for their close-up, it’s time to bring this triple berry pie together! This is where that sweet, tart filling meets that buttery crust structure we worked so hard on. Remember, gentle handling is key from here on out.
First, let’s get that filling mixed up. In a big bowl, gently toss your 6 cups of berries with the sugar, cornstarch, lemon juice, and vanilla. You want to coat everything evenly, but please, treat those raspberries gently! They break down easily, and we want them to hold their shape somewhat until baking. We let this sit while we roll out the bottom crust—that sugar starts pulling out the juices immediately, which is exactly what we want to see.
Turn your oven up to 400°F (200°C). On a lightly floured surface—and I mean lightly, we don’t want to introduce extra flour into the dough—roll out one disk into a circle about 12 inches across. Carefully drape that dough right into your 9-inch pie plate. Don’t stretch it! Let gravity help you settle it into the corners. Trim the overhang to about an inch, and then pour in that glorious berry mix. Keep in mind, if you decide you want a berry crumble pie instead of a full crust top, this is when you prepare that crumble topping using the leftover bits from the pantry!
Now for the top! Roll out your second disk. You can cover it totally—just cut a few vents in the top so that steam can escape while it bakes. Or, you can be like me when I want to show off, and cut strips to weave a lattice top. It really lets the beautiful colors of the berries peek through! Once the top is on, seal those edges—crimp them however you like best—to lock all that summer flavor inside. I brush the top gently with the egg wash and sprinkle on that coarse sugar. That egg wash gives you that deep golden shine we all aim for in a perfect classic American pie. If you’re curious about decorating, sometimes I look at photos from other bakers to get ideas, like this beautiful lattice top example.
Before it goes in the oven, place the whole thing on a baking sheet. Believe me, this saves your oven from sticky, burnt berry drips. For more on balancing fruit fillings, I always refer back to my notes on handling things like cherries, which can also get a bit messy in the pie filling process.
Baking Instructions for Your triple berry pie
It’s time for the magic to happen, but a word of caution: your oven temperature settings are crucial here! We need high heat at the beginning to set that flaky crust quickly, and then a slower bake to cook the filling through without burning the edges of our beautiful triple berry pie.
First up, you want to preheat that oven to 400°F (200°C). Pop your pie, resting safely on a baking sheet to catch drips (seriously, don’t skip the sheet!), into that hot oven. Bake it hard for the first 20 minutes. This initial blast of heat is what puffs up those layers in your crust!
After those 20 minutes are up, you have to turn the temperature down. Reduce the heat to 375°F (190°C). Don’t peek too much, but let it continue baking for another 35 to 45 minutes. You’re looking for two things: the crust should be deep golden brown, and you should see the filling bubbling up richly through those vents you cut or through the lattice wires. If you see the edges getting too dark too fast, just grab a strip of aluminum foil and loosely tent it over the crimped edges. That keeps the crust looking beautiful while the center finishes cooking perfectly.
The Non-Negotiable Cooling Time for a Clean Slice
Okay, listen up, because this is the most important step in the entire Berry Pie Recipe, and folks skip it every single time! When you pull that piping hot pie out, your instinct will be to slice into it immediately to admire your work. Resist that urge with every fiber of your being! The filling will be liquid right now, not because you messed up the cornstarch, but because it’s too hot for the starch to set.
You absolutely must let this triple berry pie cool on a wire rack for a minimum of four hours. I sometimes let mine sit for five just to be safe, especially if the kitchen is warm. Those four hours allow the cornstarch to fully hydrate and gel, transforming your juicy berries into that thick, glorious, sliceable mixed berry pie filling we talked about earlier. If you cut it early, you’ll have a beautiful puddle on your plate. Patience here means a perfect slice every time!
Tips for Baking with Fresh Berries and Variations
Since I approach baking like a culinary scientist, I’ve stress-tested this triple berry pie recipe with every kind of berry situation imaginable. The beauty of this combination—strawberries, blueberries, and raspberries—is its adaptability! Whether you’re in the middle of the berry season or trying to make a berry pie recipe in the dead of winter, we’ve got you covered.
First, let’s talk about keeping things cold for that crust. You know my general rule: keep that butter frigid! But if you’re baking with fresh berries from your garden, the crust is the easiest part! Just make sure you use the absolute coldest water you can find when bringing that dough together. Remember that wonderful blueberry muffin recipe I shared? The same cold rule applies for textural success!
Now, what happens when you reach for the freezer? This is a common scenario, right? If you decide to use frozen berries instead of fresh ones, you need to make one small, vital adjustment. Frozen berries release a lot more liquid as they warm up in the oven. To prevent seepage, simply toss 1 extra tablespoon of cornstarch into your filling mixture along with the original amount. It’s a tiny addition, but it gives you that insurance policy needed for a firm, perfectly set filling—even when starting from frozen.
And because I always love giving options, let’s discuss the topping for this summer berry dessert. While I adore a classic lattice top, sometimes I just don’t want to roll out that second layer of dough. If that’s you, ditch the top crust entirely and go for a crumble! It’s fantastic, especially when you want that slight crunch on top of the warm fruit. To make a quick crumble, just mix 1 cup of flour, 1/2 cup of brown sugar, 1/2 cup of rolled oats, and 1/2 cup of cold butter cut in until it looks like coarse, delicious gravel. Sprinkle that all over the filling instead. It turns your pie into something wonderfully rustic. People absolutely flip for the topping variation, and you can see a great example of how beautiful that berry crumble pie looks when baked!
Whether you use fresh or frozen, crust or crumble, the heart of this dessert remains the same: those vibrant, tart-sweet berries ready to be enjoyed.
Serving Suggestions for this Summer Berry Dessert
Once that incredible triple berry pie has cooled its jets for a solid four hours and you’ve managed to slice into it without any filling catastrophe—congratulations! You’ve earned the right to make this summer berry dessert shine even brighter with the right accompaniments. Remember, this pie hits that perfect sweet and tart note, so we want pairings that either support that or provide a wonderful temperature/texture contrast.
If you ask me, nothing beats a slice of warm (not hot, wait for that cooling time!) homemade fruit pie next to a giant scoop of high-quality vanilla bean ice cream. The contrast between the warm, spiced berries and the cold, creamy dairy is just peak American dessert perfection. It melts right down into those cracks in the crust—it’s heaven.
For gatherings, I also love serving it slightly chilled with a dollop of fresh, unsweetened whipped cream. The lightness of the cream cuts through the richness of the buttery crust beautifully. If you ever find yourself needing a comforting warm drink to go alongside your dessert on a chilly evening, I’ve got a recipe for the best creamy hot chocolate that works perfectly for dipping crust edges!
And please, don’t feel like you need to dress this Berry Pie Recipe up too much. It’s incredible all on its own. But a little something extra never hurt anyone, right? Just serve, share, and enjoy the compliments!
Storage and Reheating Instructions
So, you managed to save a slice—or maybe even half the pie! That’s a win in my book. Even though this triple berry pie filling is perfectly set thanks to our cornstarch magic, how you store it matters a lot for keeping that crust flaky. My goal is to maintain that texture we worked so hard for, whether you’re saving it for a midnight snack or packing it up for a picnic tomorrow.
The best way to store leftover pie is actually uncovered on the counter for the first day, provided your kitchen isn’t scorching hot. Why uncovered? Because trapping steam overnight is the fastest way to make that gorgeous bottom crust soggy! If you notice humidity, loosely tent it with foil, but try to avoid fully sealing it, especially if it’s a warm day. If you need to keep it longer than 24 hours, you should definitely move it to the fridge. Always opt for an airtight container in the fridge to keep out any competing food smells, but try to use those leftovers within three days.
Now, reheating is where most people slip up! You never want to microwave a slice of fruit pie; it turns the crust instantly chewy. If you want that ‘fresh from the oven’ feeling on a leftover slice, forget the microwave. I highly recommend using a toaster oven or a standard oven set to about 325°F (160°C).
Pop your slice directly onto a baking sheet or piece of foil and heat it up for about 10 to 15 minutes. This gentle heat warms the filling through evenly, and, most importantly, it lets the bottom crust crisp back up beautifully. It takes a little longer than using the microwave, but trust me, that buttery, flaky texture is worth the patience. This technique works wonders for getting any leftovers of our homemade fruit pie back to their amazing state!
Frequently Asked Questions About Berry Pie
I know sometimes after all the mixing and baking, a few little questions pop up. That’s totally normal! I’ve been there countless times, taking apart recipes to make sure every variable is covered. Here are some of the things I hear most often about making the best berry pie ever, especially when tackling a gorgeous triple berry pie recipe like this one.
Can I use only frozen berries for this triple berry pie recipe?
Oh, absolutely, you can! This works beautifully as a freezer berry pie recipe anytime the fresh ones aren’t in season. The key thing here is adjusting for the extra liquid. Remember when we talked about that insurance policy against runny fruit? Well, for frozen berries, you need a little extra coverage. Just make sure you toss in one extra tablespoon of cornstarch when you combine the filling ingredients. Don’t thaw the berries first; use them straight from the freezer! That little bit of extra starch handles the melt perfectly.
What is the simplest way to make a lattice top?
Lattice tops look fancy, but they’re actually an easy way to make this an easy pie recipe with style. Forget fussy weaving for your first few tries! Take your second disk of dough and roll it out like normal. Then, use a pizza cutter or a sharp knife to cut strips about 3/4 inch wide. You don’t need them to be perfect, seriously! Lay half the strips parallel across the top of your filling, spaced evenly. Then, take the remaining strips and just weave them over and under the first set. It doesn’t have to be mathematically precise; the goal is just airflow and visual appeal. Crimp the ends securely to the bottom crust, and you’re done!
How do I know when the filling is truly set?
This is the big moment! You’re looking for two checks throughout the baking process. While it’s in the oven, if you see the filling bubbling up through the vents, it should look thick, gloopy, and slow—not watery and splashing fast. That means the starch is working! But the true confirmation comes later. You absolutely cannot judge if the filling is set until it has cooled completely. I repeat: waiting that 4-hour minimum cooling period is essential. Once it’s cooled down, if you slide a knife in, the juices should cling lightly to the knife, rather than running off freely. That means the structure is solid, and you’re ready for that perfect slice!
If you want to brush up on all the dough secrets for your next attempt, I’ve laid out the whole process for making dough from scratch over here at my pie crust tutorial. Happy baking!
PrintUltimate Triple Berry Pie with Flaky Crust and Perfect Set Filling

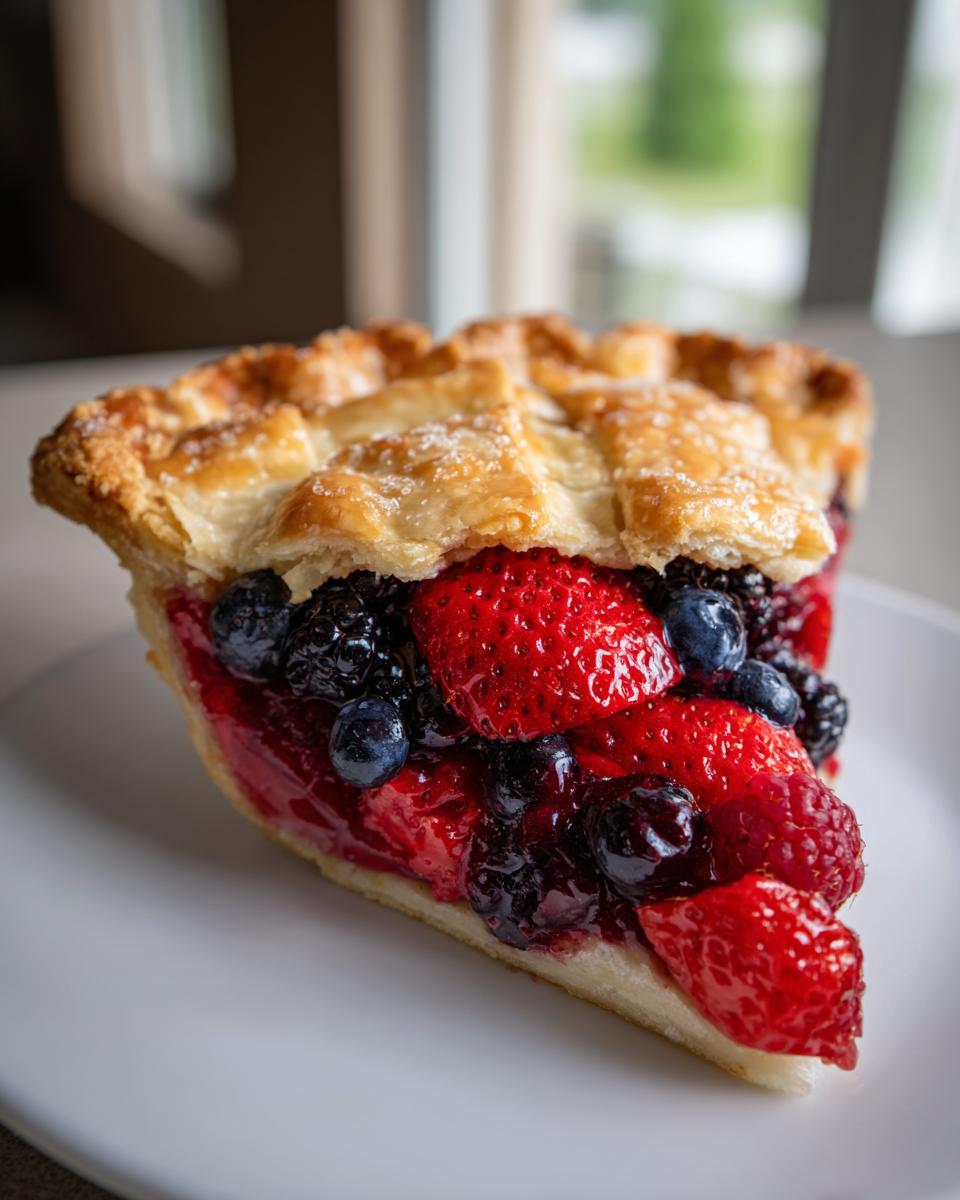
Create a memorable homemade triple berry pie using strawberries, blueberries, and raspberries. This recipe guides you to a buttery, flaky crust and a thick, juicy filling that slices cleanly every time, perfect for summer gatherings or holidays.
- Prep Time: 45 min
- Cook Time: 65 min
- Total Time: 170 min
- Yield: 8 servings 1x
- Category: Dessert
- Method: Baking
- Cuisine: American
- Diet: Vegetarian
Ingredients
- 2 1/2 cups all-purpose flour
- 1 teaspoon salt
- 1 cup (2 sticks) cold unsalted butter, cut into cubes
- 1/2 cup ice water (plus 1–2 tablespoons more if needed)
- 6 cups mixed berries (strawberries hulled and halved, blueberries, raspberries)
- 1 1/4 cups granulated sugar
- 1/4 cup cornstarch (for thickening)
- 1 tablespoon lemon juice
- 1 teaspoon vanilla extract
- 1 large egg, beaten with 1 teaspoon water (for egg wash)
- 2 tablespoons coarse sugar for sprinkling
Instructions
- Prepare the Flaky Pie Crust: In a large bowl, whisk together the flour and salt. Cut in the cold butter using a pastry blender or your fingers until the mixture resembles coarse crumbs with some pea-sized pieces of butter remaining. Gradually add the ice water, one tablespoon at a time, mixing until the dough just comes together. Do not overmix. Divide the dough in half, flatten each half into a disk, wrap in plastic, and chill for at least 1 hour.
- Prepare the Berry Filling: In a large bowl, gently combine the mixed berries, granulated sugar, cornstarch, lemon juice, and vanilla extract. Toss lightly until the berries are evenly coated. Let the mixture sit while you roll out the bottom crust. This allows the sugar to start drawing out the juices.
- Assemble the Pie: Preheat your oven to 400°F (200°C). On a lightly floured surface, roll out one dough disk into a 12-inch circle. Carefully transfer the dough to a 9-inch pie plate. Trim the edges, leaving a 1-inch overhang. Pour the berry filling into the crust.
- Top the Pie: Roll out the second dough disk. You can place it over the filling as a solid top crust (cutting vents for steam release) or cut strips to create a lattice top. Crimp the edges of the top and bottom crusts together to seal.
- Bake: Brush the top crust with the egg wash and sprinkle evenly with coarse sugar. Place the pie on a baking sheet to catch any drips. Bake at 400°F (200°C) for 20 minutes. Then, reduce the oven temperature to 375°F (190°C) and continue baking for another 35 to 45 minutes, or until the crust is golden brown and the filling is bubbling thickly. If the edges brown too quickly, cover them loosely with foil.
- Cool Completely: This step is crucial for a perfect set filling. Let the pie cool on a wire rack for at least 4 hours before slicing. This allows the cornstarch to fully set the juices.
Notes
- If using frozen berries, do not thaw them first. Add 1 extra tablespoon of cornstarch to the filling mixture to account for extra moisture.
- For the flakiest crust, keep all your ingredients, especially the butter and water, very cold.
- If you prefer a crumble topping instead of a top crust, substitute the top crust ingredients with a mixture of 1 cup flour, 1/2 cup brown sugar, 1/2 cup rolled oats, and 1/2 cup cold butter cut in until crumbly.
Nutrition
- Serving Size: 1 slice
- Calories: 410
- Sugar: 35g
- Sodium: 280mg
- Fat: 22g
- Saturated Fat: 13g
- Unsaturated Fat: 9g
- Trans Fat: 0.5g
- Carbohydrates: 52g
- Fiber: 3g
- Protein: 4g
- Cholesterol: 55mg