
Oh, the holidays! Everyone talks about the joy of baking, but honestly, sometimes it feels like a marathon, doesn’t it? All those steps, those delicate timings—it can be stressful just looking at the list! That’s why when I look at my grandmother’s philosophy—simple ingredients creating memorable dishes—this recipe immediately jumps to the top of my list. Forget the oven; forget tempering until your hands shake. We are making the easiest, most delicious peppermint bark recipe you’ll ever try. Seriously, this no-bake chocolate peppermint bark delivers gourmet results with hardly any effort. It’s the perfect way to celebrate the season without adding stress to your already busy kitchen schedule.
- Why This Peppermint Bark Recipe Works Every Time (E-E-A-T)
- Gathering Ingredients for Your Classic Peppermint Bark Recipe
- Step-by-Step Instructions for the Easiest No Bake Peppermint Bark Recipe
- Tips for Perfect Peppermint Bark Recipe Results
- Making Your Peppermint Bark Recipe Ideal for Quick Holiday Gifts
- Storage and Keeping Your Peppermint Bark Recipe Fresh
- Serving Suggestions for Festive Peppermint Sweets
- Frequently Asked Questions About This Peppermint Bark Recipe
- Estimated Nutritional Data for This Peppermint Bark Recipe
Why This Peppermint Bark Recipe Works Every Time (E-E-A-T)
When I promise you a fantastic result, I really mean it. This entire peppermint bark recipe has been tested right here in my own countertops, and trust me, I do the hard part so you don’t have to! We skip the whole intimidating tempering process that throws so many people off. You simply melt, pour, and chill. It’s designed to be one of those fantastic Easy no bake treats that look way more complicated than they are.
- It’s inherently foolproof since there’s no actual oven time required.
- The two-layer system ensures that great dark-to-white chocolate flavor ratio we all crave.
- It comes together fast—you can throw this in the fridge and forget about it until it’s time to snap!
Simple Ingredients, Extraordinary Results in Our Peppermint Bark Recipe
My philosophy holds true here: use the best simple ingredients you can find. Because this peppermint bark recipe only uses four core items, the quality of your chocolate really shines through. Don’t skimp on the chocolate bars; that smooth, rich melt makes the difference between store-bought tasting candy and something that feels genuinely gourmet. Better chocolate means a better snap and a more luxurious feel when you bite into it.
Gathering Ingredients for Your Classic Peppermint Bark Recipe
Alright, let’s get our gear ready! Since this is such a straightforward peppermint bark recipe, having everything prepped before you start melting is key. You’ll need two types of chocolate, peppermint extract, and of course, those festive candy canes. Remember, we want that beautiful crunch!
Make sure that dark chocolate and white chocolate are chopped up into small, uniform pieces. This helps them melt evenly in the microwave—no one wants scorched chocolate! For your canes, crush them up until you have a nice mix of fine powder and chunky pieces. That variation is what makes the texture so fun!
Ingredient Notes and Simple Substitutions for Peppermint Bark
When you’re picking out your chocolate for this peppermint bark recipe, I highly recommend using good quality baking bars over standard chips, especially for the white chocolate, as chips sometimes contain stabilizers that make them harder to melt smoothly. If you use melting wafers, stir them extra carefully!
For the mint, start with one teaspoon of peppermint extract. Taste it before you pour it in; some extracts are super strong! If you want to try that amazing crunch, think about making a salted peppermint bark by sprinkling flaky sea salt over that top candy cane layer right before it sets up. It’s just the perfect sweet and savory moment!
Step-by-Step Instructions for the Easiest No Bake Peppermint Bark Recipe
Now for the fun part! Grab that parchment-lined cookie sheet we talked about. We’re working fast here to make sure our layers stay separate and our peppermint bark recipe turns out perfect. First, melt your dark chocolate slowly in the microwave, stirring every 30 seconds so it doesn’t scorch. Don’t rush this step!
Spread that smooth dark chocolate thinly across the parchment—we want a nice, even sheet. Sprinkle half your candy cane bits over it and gently press them in. Pop this in the fridge for about 10 minutes until it’s set but not totally hard.
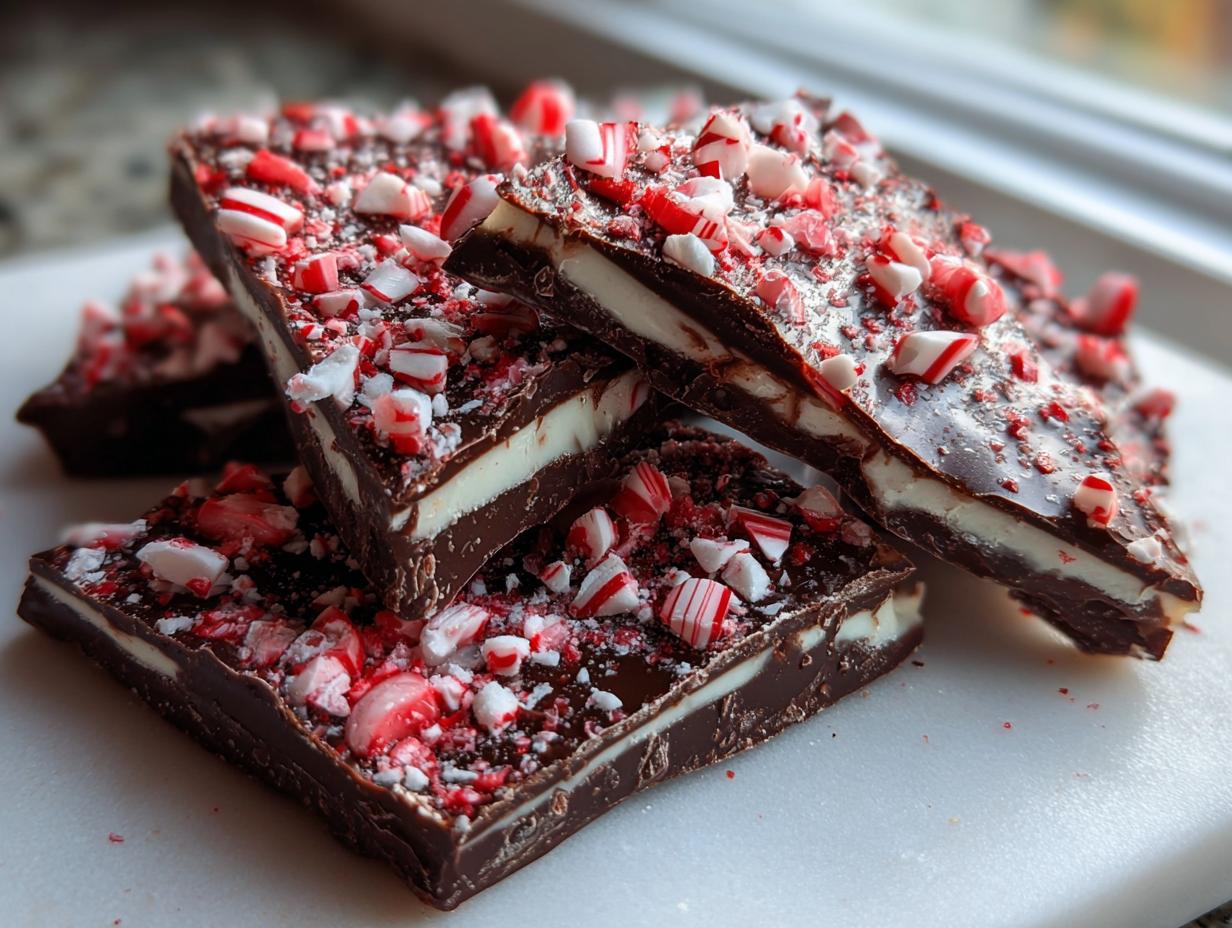
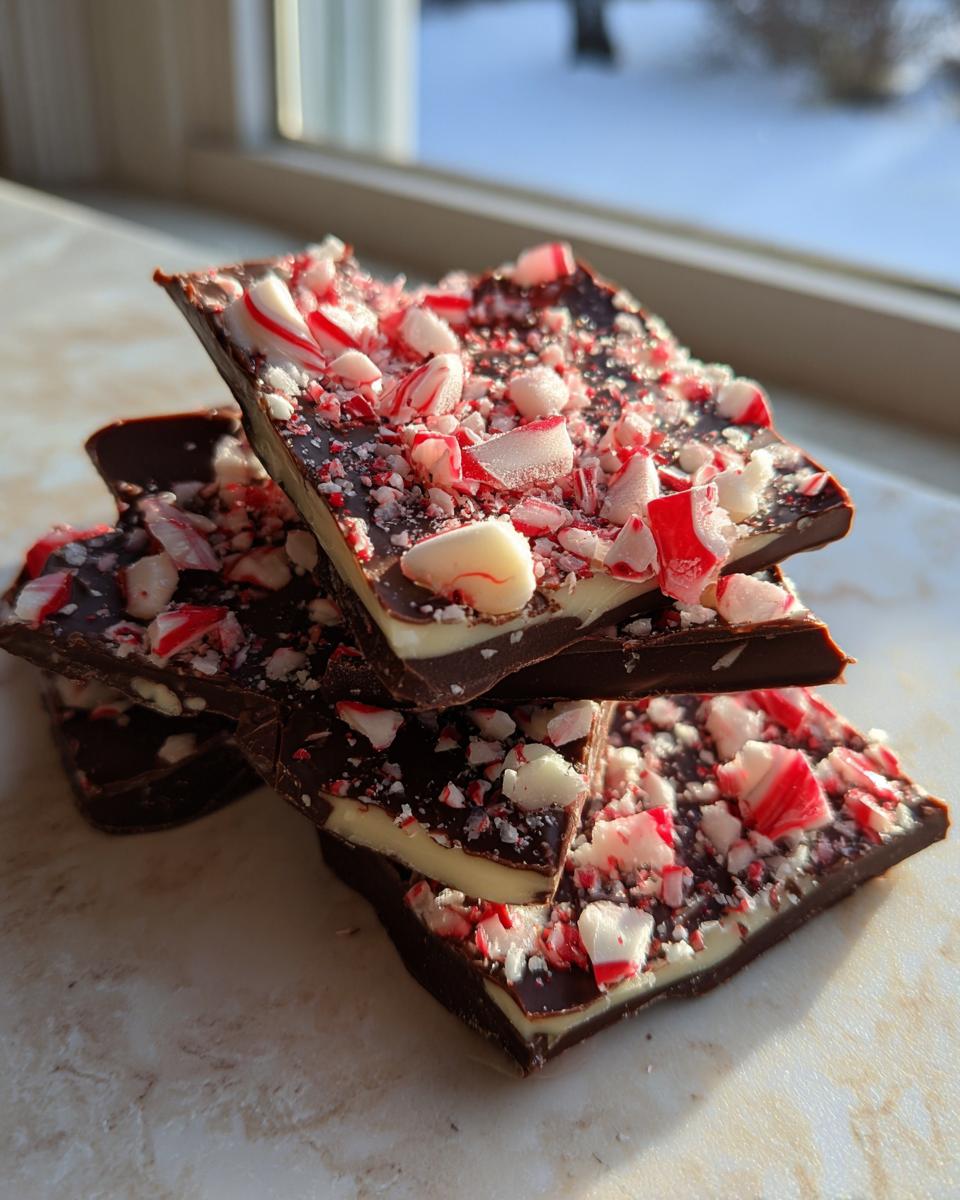
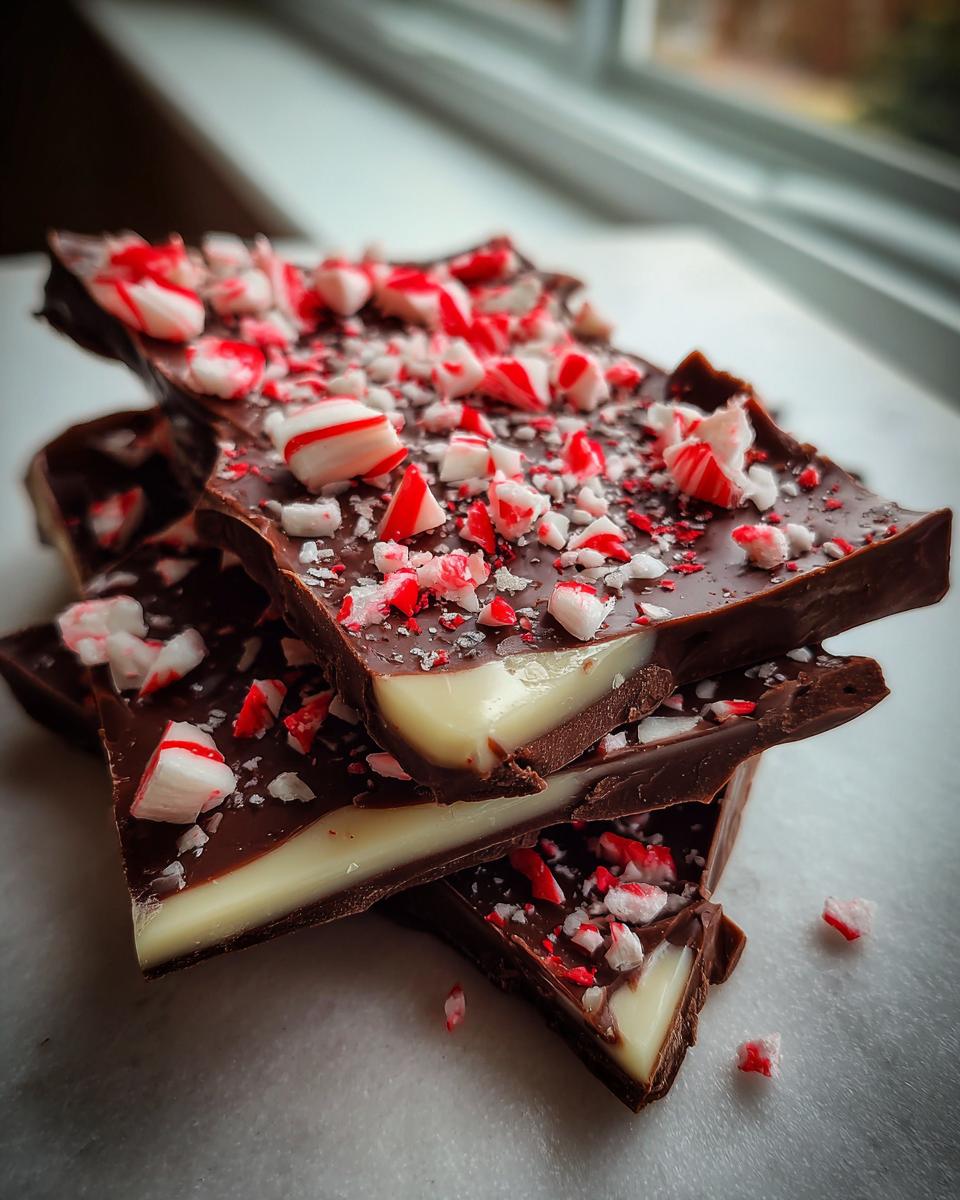
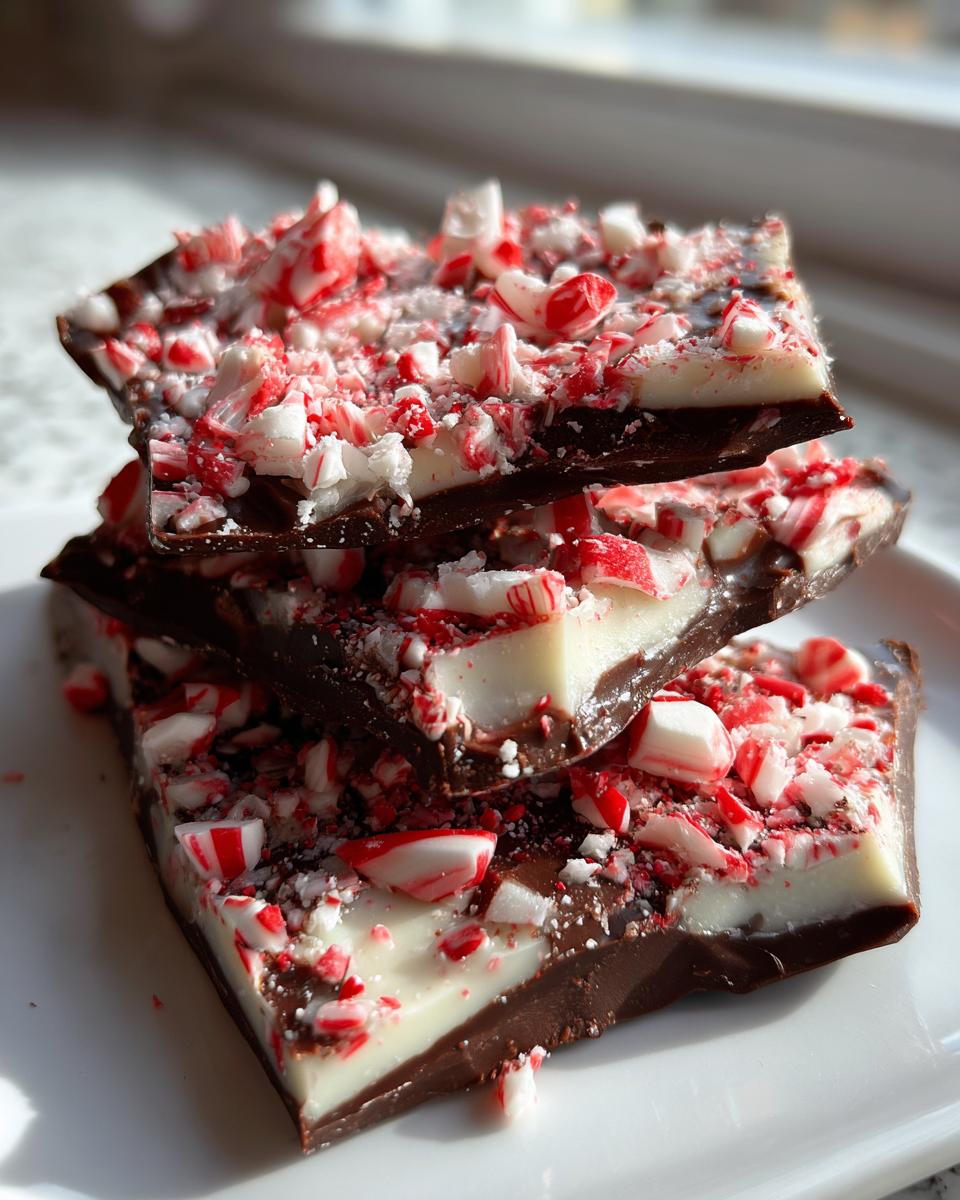
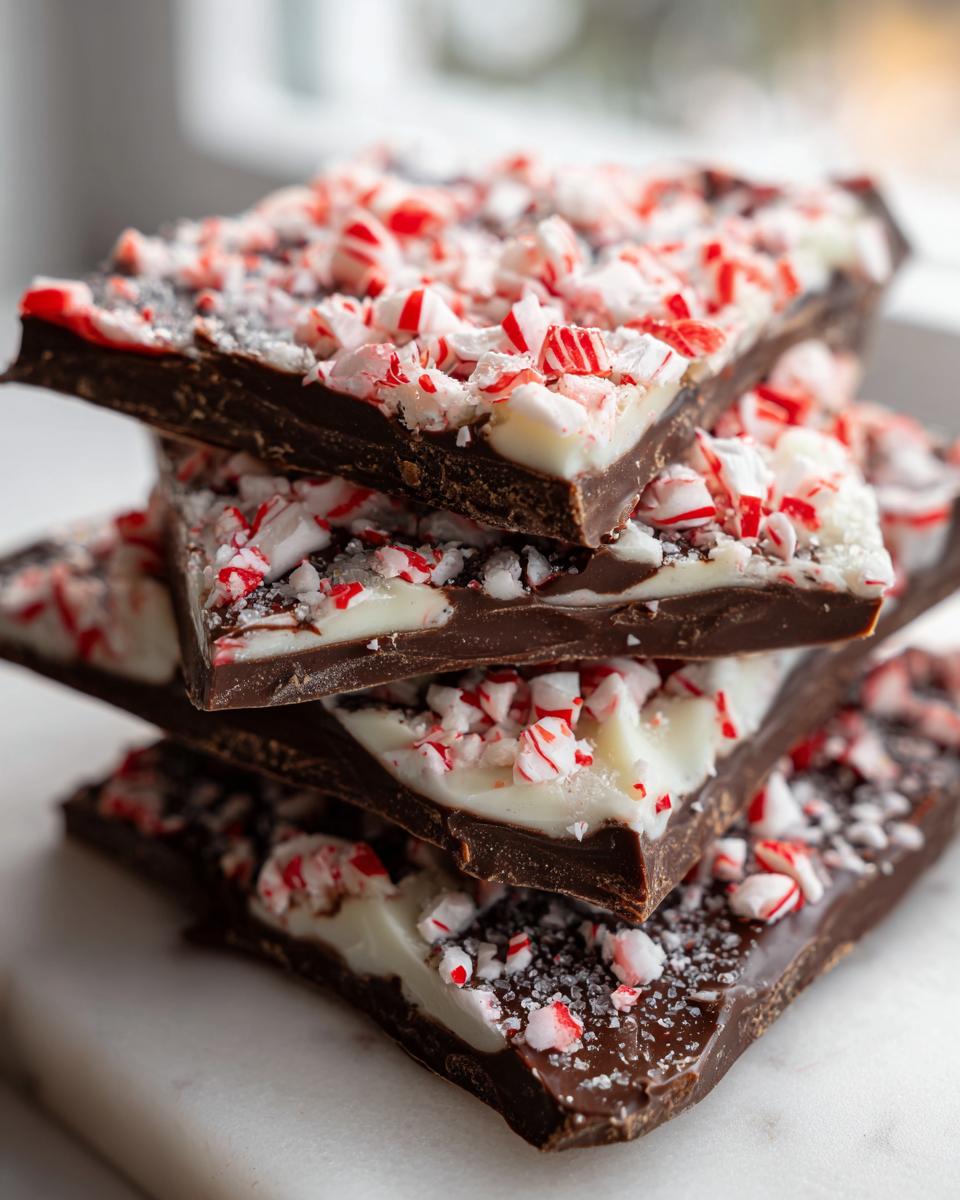
Next, melt your white chocolate, making sure to stir in that peppermint extract right when it’s smooth. Pour this over the chilled dark layer carefully. Top immediately with the rest of those crunchy candy canes. Back into the fridge it goes for at least 30 more minutes until it’s totally firm. Once it’s hard, just lift the paper and snap! That’s the satisfying sound of success for this easy peppermint bark recipe.
Mastering Chocolate Peppermint Layering Technique
The secret to those gorgeous layers isn’t just about waiting for the chocolate to chill; it’s about how you handle the spread. When you pour that initial dark chocolate layer, use an offset spatula to spread it thin—aim for uniformity, not thickness! If the layer is too thick, the middle won’t set correctly.
When you lay down the second, white chocolate layer, pour it gently, aiming for the center first and working your way out. Use your spatula to smooth it, but try not to scrape down too hard or poke through to the dark layer underneath. A gentle glide ensures that clean separation between your dark chocolate peppermint bark and the minty top coat.
Tips for Perfect Peppermint Bark Recipe Results
Look, even though this peppermint bark recipe is super simple, we still need to talk about technique, right? We want that perfect snap, not a melty mess! The biggest pitfall people hit is overheated chocolate. If you see streaks or grainy texture—that’s seizing. My trick is to always melt chocolate in short bursts, stopping *before* it looks completely smooth. The residual heat will finish the job while you stir. That’s how you get that beautiful, glossy finish for your Homemade chocolate bark.
Also, for the candy canes: don’t wait until the very end to sprinkle them on! My personal trick is pressing the first layer of candy canes into the dark chocolate while it’s still quite soft, *before* it goes into the fridge. This anchors them down. Then, when you pour the white chocolate over top, you only press the second batch lightly. They’ll stick perfectly without sinking too deep into the first layer!
Making Your Peppermint Bark Recipe Ideal for Quick Holiday Gifts
Once you snap apart those perfect pieces, you realize you’ve just created the most thoughtful of Quick holiday gifts! This peppermint bark recipe is so impressive, but you need to package it right so the recipient knows it’s homemade love, not store-bought filler.
I adore using small clear cellophane bags tied off with some festive plaid ribbon. It shows off those beautiful dark and white layers instantly. For neighbors or teachers, clear tins or even little brown paper bags tied with twine work just beautifully. Remember, since this is no-bake candy, keep it cool until gifting time!
You can also layer it artfully on a small decorative plate covered in plastic wrap—perfect for a last-minute contribution to a dessert board. Honestly, no one cares if it’s perfectly uniform; they just care that you took the time to make this incredible treat for them!
Storage and Keeping Your Peppermint Bark Recipe Fresh
This is one of the best parts about making your peppermint bark recipe: storage is super easy! Because there’s no cream or eggs, this keeps wonderfully. For the best crunch and snap, I usually store my pieces in a single layer in an airtight container at cool room temperature, away from any direct sunlight. It really stays perfect for about a week this way.
If your kitchen runs warm, or if you’re making this way ahead of time for Christmas, definitely move it to the refrigerator. Just remember to wrap it tightly so it doesn’t absorb any fridge odors. If it gets a little soft when you take it out, don’t panic! Just pop it back in the fridge for 15 minutes to firm up again. No reheating necessary since it’s already set!
Serving Suggestions for Festive Peppermint Sweets
Now that you have this phenomenal peppermint bark recipe done, it’s time to show it off! This is the kind of treat that elevates any dessert spread. When you’re putting together your Christmas treat platter, think about pairing these Festive peppermint sweets with contrasting textures and flavors.
I always place the sharp, bright pieces next to something soft, like fudgy brownies or perhaps some sweet, chewy shortbread. The deep color of the dark chocolate looks gorgeous against the bright white and red of the bark. It gives the whole table a really beautiful visual pop! Honestly, just arranging these haphazardly on a nice wooden board makes the whole presentation feel special, zero extra effort required.
Frequently Asked Questions About This Peppermint Bark Recipe
I totally get it; sometimes you get halfway through and realize you’re missing something or wondering if you can swap an ingredient. That’s why I put together this little FAQ so you feel totally confident making this peppermint bark recipe!
Can I use milk chocolate instead of dark chocolate for the base layer?
You absolutely can, but I recommend sticking with the dark or bittersweet chocolate for the base. Since this is one of our favorite Christmas candy recipes, the slightly bitter dark layer really balances the sweetness of the white chocolate and the sugary candy canes up top. Milk chocolate works, but the final result will be much sweeter!
Why is my white chocolate layer separating or becoming gritty?
Oh, that’s the dreaded seizing! It almost always happens with white chocolate if it gets a drop of water or if it overheats. Remember what I said about melting slowly? White chocolate is very sensitive. You must use short bursts (20 seconds!) and stir thoroughly between each one. If it starts looking oily or grainy, stop microwaving immediately. If you need to save it, stir in just a teaspoon of neutral oil until smooth.
Is peppermint extract necessary, or can I skip it?
While you *can* skip it, I wouldn’t recommend it if you want that classic holiday flavor! The extract is what transforms the white chocolate into that recognizable minty shell that makes this a true festive peppermint sweet. If you are out of extract, you can try crushing candy canes finer and mixing them into the white chocolate, but the flavor won’t be as pure.
How quickly do the candy canes need to go on after the white chocolate?
Quickly! That’s the main rule for getting those candy canes to stick. You typically aren’t waiting much longer than 30 seconds after you pour and spread that white chocolate. If you wait too long, the surface becomes tacky and the canes will slide around when you try to press them in—and we certainly don’t want that in our layered chocolate bark!
Estimated Nutritional Data for This Peppermint Bark Recipe
One of the best things about making your own peppermint bark recipe? You know exactly what went into it! Since we used good quality chocolate, it’s going to have a bit more fat than the store-bought version, but we control the sugar by sticking to my simple ratio.
Just remember, this data is an estimate based on standard ingredient counts used in this recipe. Since we aren’t using any complicated ingredients, the numbers stay pretty straightforward. Great for knowing what you’re serving up!
- Serving Size: 1 ounce piece
- Calories: 160
- Fat: 11g (with 7g Saturated Fat)
- Carbohydrates: 16g
- Sugar: 15g
- Protein: 2g
- Sodium: 25mg
See? A perfect, simple treat for your Christmas candy recipes list! Enjoy every last snap!
PrintEasiest Ever No-Bake Chocolate Peppermint Bark Recipe

Make this classic Christmas candy with just a few simple ingredients. This no-bake peppermint bark recipe layers dark and white chocolate with crushed candy canes for a festive treat perfect for gifting or holiday entertaining.
- Prep Time: 15 min
- Cook Time: 5 min
- Total Time: 50 min
- Yield: About 1 pound 1x
- Category: Dessert
- Method: No Bake
- Cuisine: American
- Diet: Vegetarian
Ingredients
- 8 ounces good quality dark chocolate, chopped
- 8 ounces good quality white chocolate, chopped
- 1 teaspoon peppermint extract (or to taste)
- 1 cup crushed candy canes (about 10–12 large canes)
Instructions
- Prepare a baking sheet by lining it with parchment paper. Set aside.
- Melt the dark chocolate: Place the chopped dark chocolate in a microwave-safe bowl. Microwave in 30-second intervals, stirring well after each interval, until the chocolate is smooth. Do not overheat.
- Spread the melted dark chocolate evenly onto the prepared baking sheet, creating a thin, uniform layer.
- Sprinkle half of the crushed candy canes over the melted dark chocolate layer. Press them lightly into the chocolate.
- Chill the dark chocolate layer in the refrigerator for about 10 minutes, or until it is set but still slightly tacky.
- Melt the white chocolate: Place the chopped white chocolate in a separate microwave-safe bowl. Microwave in 20-second intervals, stirring frequently, until smooth. Stir in the peppermint extract once melted.
- Carefully pour the melted white chocolate mixture over the chilled dark chocolate layer. Gently spread it to cover the entire surface.
- Immediately sprinkle the remaining crushed candy canes over the white chocolate layer. Gently press them into the chocolate.
- Return the baking sheet to the refrigerator and chill for at least 30 minutes, or until the bark is completely firm.
- Once firm, lift the parchment paper and break the peppermint bark into irregular pieces. Store in an airtight container at room temperature or in the refrigerator.
Notes
- For the smoothest chocolate, melt it slowly. If you are worried about seizing, you can melt the chocolate using a double boiler method over simmering water.
- If you want a stronger mint flavor, increase the peppermint extract in the white chocolate layer to 1.5 teaspoons.
- For a salted peppermint bark variation, sprinkle 1/2 teaspoon of flaky sea salt over the top layer of candy canes before chilling.
- Store this homemade candy in an airtight container for up to two weeks. Keep it cool to prevent melting.
Nutrition
- Serving Size: 1 ounce piece
- Calories: 160
- Sugar: 15
- Sodium: 25
- Fat: 11
- Saturated Fat: 7
- Unsaturated Fat: 4
- Trans Fat: 0
- Carbohydrates: 16
- Fiber: 1
- Protein: 2
- Cholesterol: 5